Create a Scheduled Search
This article outlines the process of creating a Scheduled Search, which is essentially a saved Log Search that you set to run at specified intervals and configure with alerts.
To run a Scheduled Search using receipt time, save the search with receipt time enabled.
Create a Scheduled Search
This section describes how to create a Scheduled Search at the time you save a search. You can also edit a saved search later to add a schedule.
Step 1. Initiate Creation
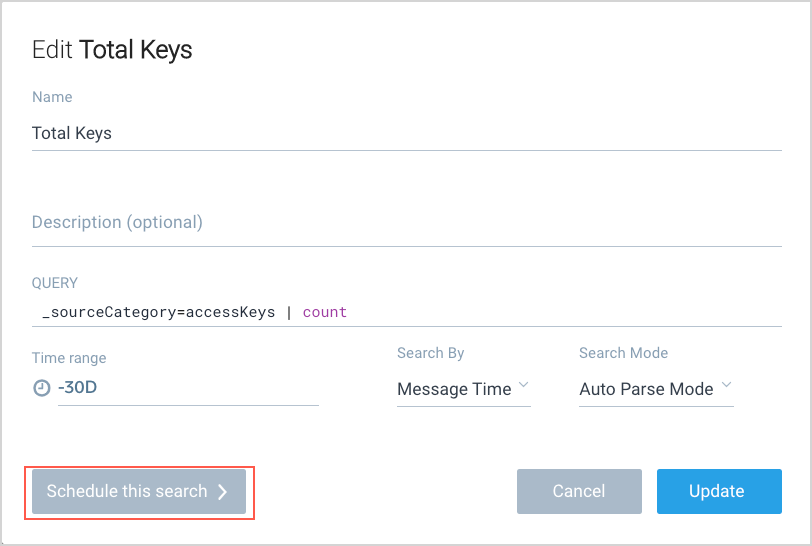
- Run a Log Search and click the save icon.
- In the popup, click Schedule this search.

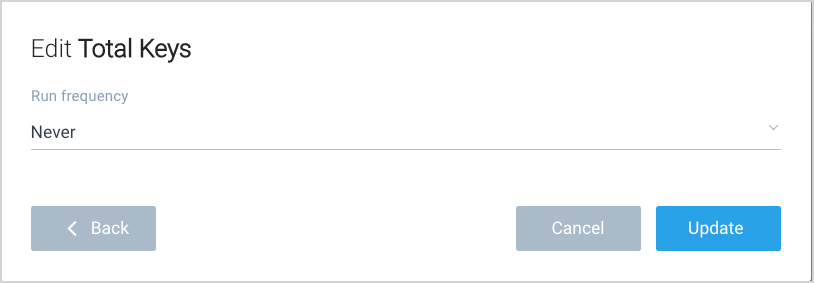
Step 2. Set Run Frequency

Choose the frequency with which the search should run from the available options:
- Never. Temporarily disables the scheduled search.
- Every 15 Minutes. Runs the search approximately every 15 minutes. There may be a delay of up to 5 minutes past the selected time or interval, but will maintain the 15-minute run frequency.
- Hourly. Executes the search every hour. We guarantee that hourly searches run every hour but not exactly at :00. May be delayed up to 10 minutes past the selected time or interval but will maintain the selected run frequency.
- Every 2, 4, 6, 8, or 12 Hours. Runs the search at intervals at the top of the hour you specify.
- Daily. Covers a 24-hour period. Be aware that a Scheduled Search will run according to the time zone set on your computer at the time you configure the search. For example, if you are in San Francisco and set a search to run at 7:00 AM, it will run at 7:00 AM PST. If you then fly to New York, and your computer resets to EST, when you schedule a new search at 7:00 AM, it will run at 7:00 AM EST. These two searches will run at different times.
- Weekly. Runs once a week, allowing you to select the day and time. Schedule may be delayed up to 10 minutes past the selected time or interval but will maintain the selected run frequency.
- Custom Cron. Enables you to enter a custom CRON expression. The run frequency for a CRON expression needs to be every 15 minutes or more. For details, see Cron Examples and Reference.
After you select a run frequency, allow the popup to refresh. 
Step 3. Time Range
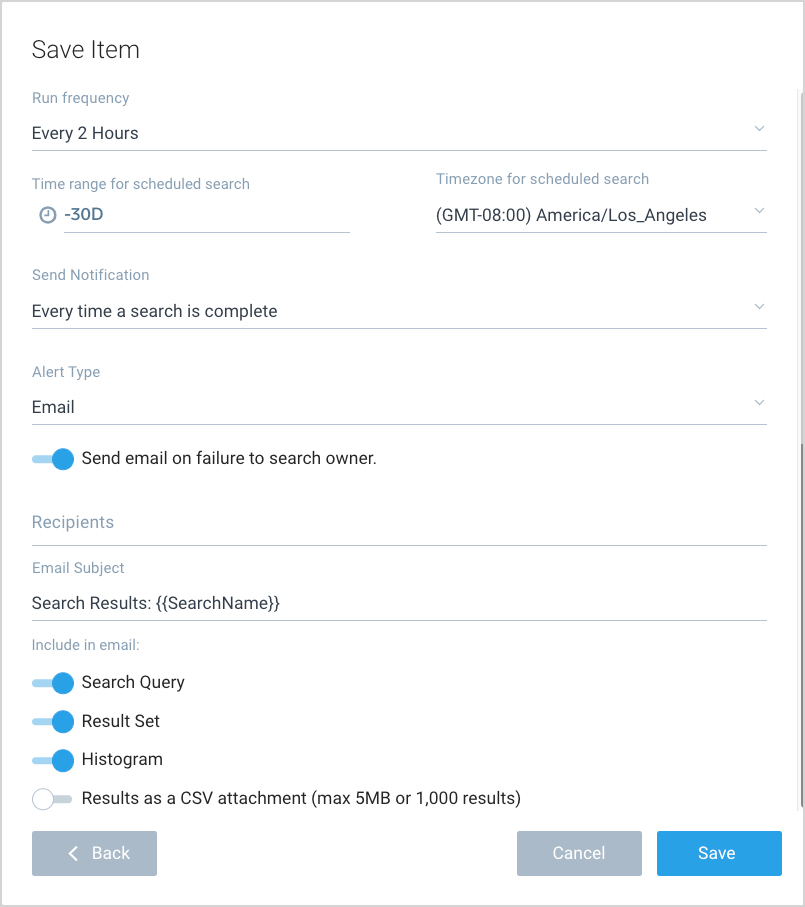
Under Time range for scheduled search, define the time range for your scheduled search. Choose Last 24 Hours for daily alerts or specify a custom time range. Note that absolute time ranges are not allowed.
The time range your query executes will impact the results generated by the query. Absolute time range (for example, 06/10/2023 1:00:00 PM to 06/10/2023 2:00:00 PM) is not allowed in Scheduled Searches and presents the message like this: Invalid query. Static time range is not allowed for scheduled searches.
This setting is different than the Time Range option configured for the Saved Search. The first time range is only used when you run the Saved Search from the Library. This Time Range applies to your Scheduled Search.
The time range limitations below apply to both parent queries and subqueries in your scheduled search.
Alternately, type a time range; for example, -15m to run the search against data generated in the past 15 minutes. A time range outside the maximum allowed range for a given frequency is not allowed and presents the message like this: Invalid query. Max allowed time range for 15 minutes frequency is 1 day.
The maximum allowed time range for different Scheduled Search frequencies is as below:
| Frequency | Max Allowed Time Range |
|---|---|
| 15 min | 1 Day |
| 15 min -1 hour | 7 Days |
| 1 hour - 3 hours | 15 Days |
| 3 hour - 12 hours | 30 Days |
| More than 12 hours | More than 30 days |
Consider adding an offset to your time range to ensure that all recent events are being indexed and scanned by the search. For example, a range of -20m -5m would represent a 15 minute time-range offset by 5 minutes.
If you're located in a timezone that is +/- 30 minutes, such as Indian Standard Time (IST), the minute is based on UTC. In this scenario, there will be a 30-minute offset; the search will start at :30 instead of :00.
Step 4. Timezone
Under Timezone for scheduled search, select the timezone for the scheduled search. This determines when the search runs, independent of the timezone of your data.
If you do not make a selection, the Scheduled Search will default to the time zone from your browser.
Step 5. Notification Settings
Under Send Notification, select the condition for when you want an alert to be sent.
- Every time a search is complete. Select this option if you want an email with search results every time the search is run (depending on the frequency, you could get an email every 15 minutes, every hour, or once a day).
- If the following condition is met. Select this option if you'd like to set up a Scheduled Search that alerts you to specific events.
- Number of results. Depending on the search, set a condition to receive an email by the number of results. If your saved search returns log messages, then the alert will use the number of messages you specify. If your query produces aggregate results, the alert will use the number of rows or aggregates (or groups) and will not trigger on the number of raw results. For more control of your query, you can build in a threshold (for example
| where _count\> 30) into the Search itself and set the alerts condition here to Greater than 0. That way the query will generate results if the expected condition is met.- Equal to. Choose if there is an exact number of records in a search result at which you want to be notified.
- Greater than. Choose if you want to be notified only if the search results include greater than the number of messages or groups you set in the text box.
- Greater than or equal to. Choose if you want to be notified only if the search results include greater than or equal to that number of messages or groups you set in the text box. For example, to ensure you're notified only when the specific query conditions are met, set the Number of results condition to greater than 0.
- Fewer than. Choose if you want to be notified only if the search results include fewer than the number of messages or groups you set in the text box.
- Fewer than or equal to. Choose if you want to be notified only if the search results include fewer than or equal to the number of messages or groups you set in the text box.
- Number of results. Depending on the search, set a condition to receive an email by the number of results. If your saved search returns log messages, then the alert will use the number of messages you specify. If your query produces aggregate results, the alert will use the number of rows or aggregates (or groups) and will not trigger on the number of raw results. For more control of your query, you can build in a threshold (for example
In the next section, we'll walk you through the available Scheduled Search alert types.
Step 6. Choose a Scheduled Search alert type
When creating a Scheduled Search, you can configure various alert types, including:
- Email. You can create a Scheduled Search to alert you via email when a set of conditions are satisfied. A maximum of 120 emails are sent per day per Scheduled Search.
- Script Action. Trigger actions based on search results, such as firing SNMP traps.
- ServiceNow Connection. Integrate Sumo Logic search results with ServiceNow for issue investigation.
- Webhook. Send Sumo Logic alerts to third-party applications that accept incoming webhooks. For example, once you set up a Webhook connection in Sumo Logic, and create a Scheduled Search, then you can send an alert from that Scheduled Search as a post to a Slack channel, or integrate with third-party systems.
- Save to Index. Save search results to an index for future retrieval. This way, your data can be searched at a later time using
_index=index_namewith increased search performance. - Save to Lookup. Save results to a Lookup Table and use the
lookupoperator for data enrichment. - Cloud SIEM Signal. Trigger the creation of a Cloud SIEM Signal, which are otherwise generated when the conditions of a Cloud SIEM rule are satisfied by a Record.
Troubleshooting
Learn how to address common issues with Scheduled Searches:
- Prevent timeouts. Scheduled searches cannot run indefinitely. At some point, the query will be timed out to protect the reliability of the service.
- Manage Email Quotas. Sumo Logic implements an email quota allowing 120 emails to be sent per day per Scheduled Search.
- Understand scheduled search suspension and failure reasons.
Fields are returned in lowercase in Scheduled Search results.