Legacy Cloud SOAR Global Functions Menu
This article only applies to organizations having a legacy Cloud SOAR instance URL matching the pattern *.soar.sumologic.com. If it doesn't, refer to Cloud SOAR Overview for documentation of our latest Cloud SOAR SaaS version.
Global Search
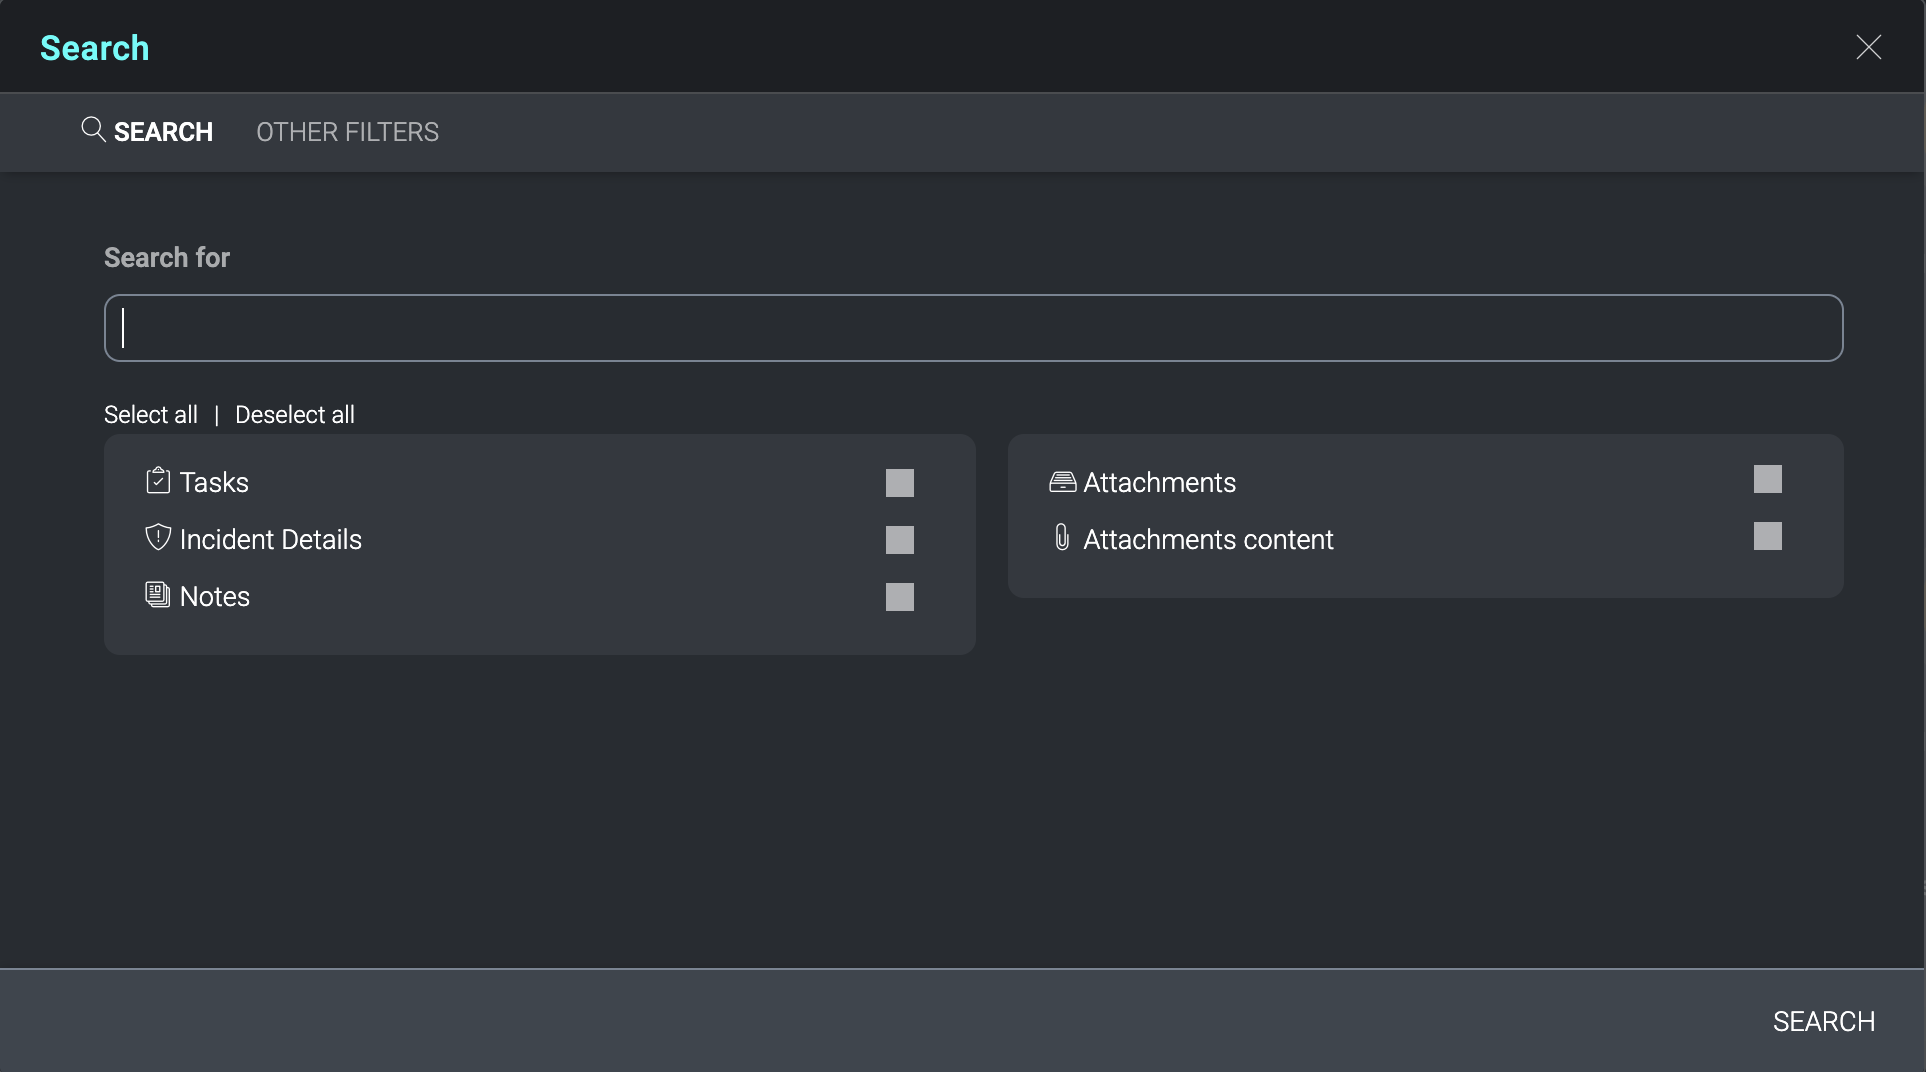
Global Search allows you, with the appropriate permissions, to perform exhaustive searches throughout the application modules and all recorded information.
All searchable Cloud SOAR sections are listed and individually selectable. To search, enter the search criteria in the search bar, then select the sections you wish to search and click Search.
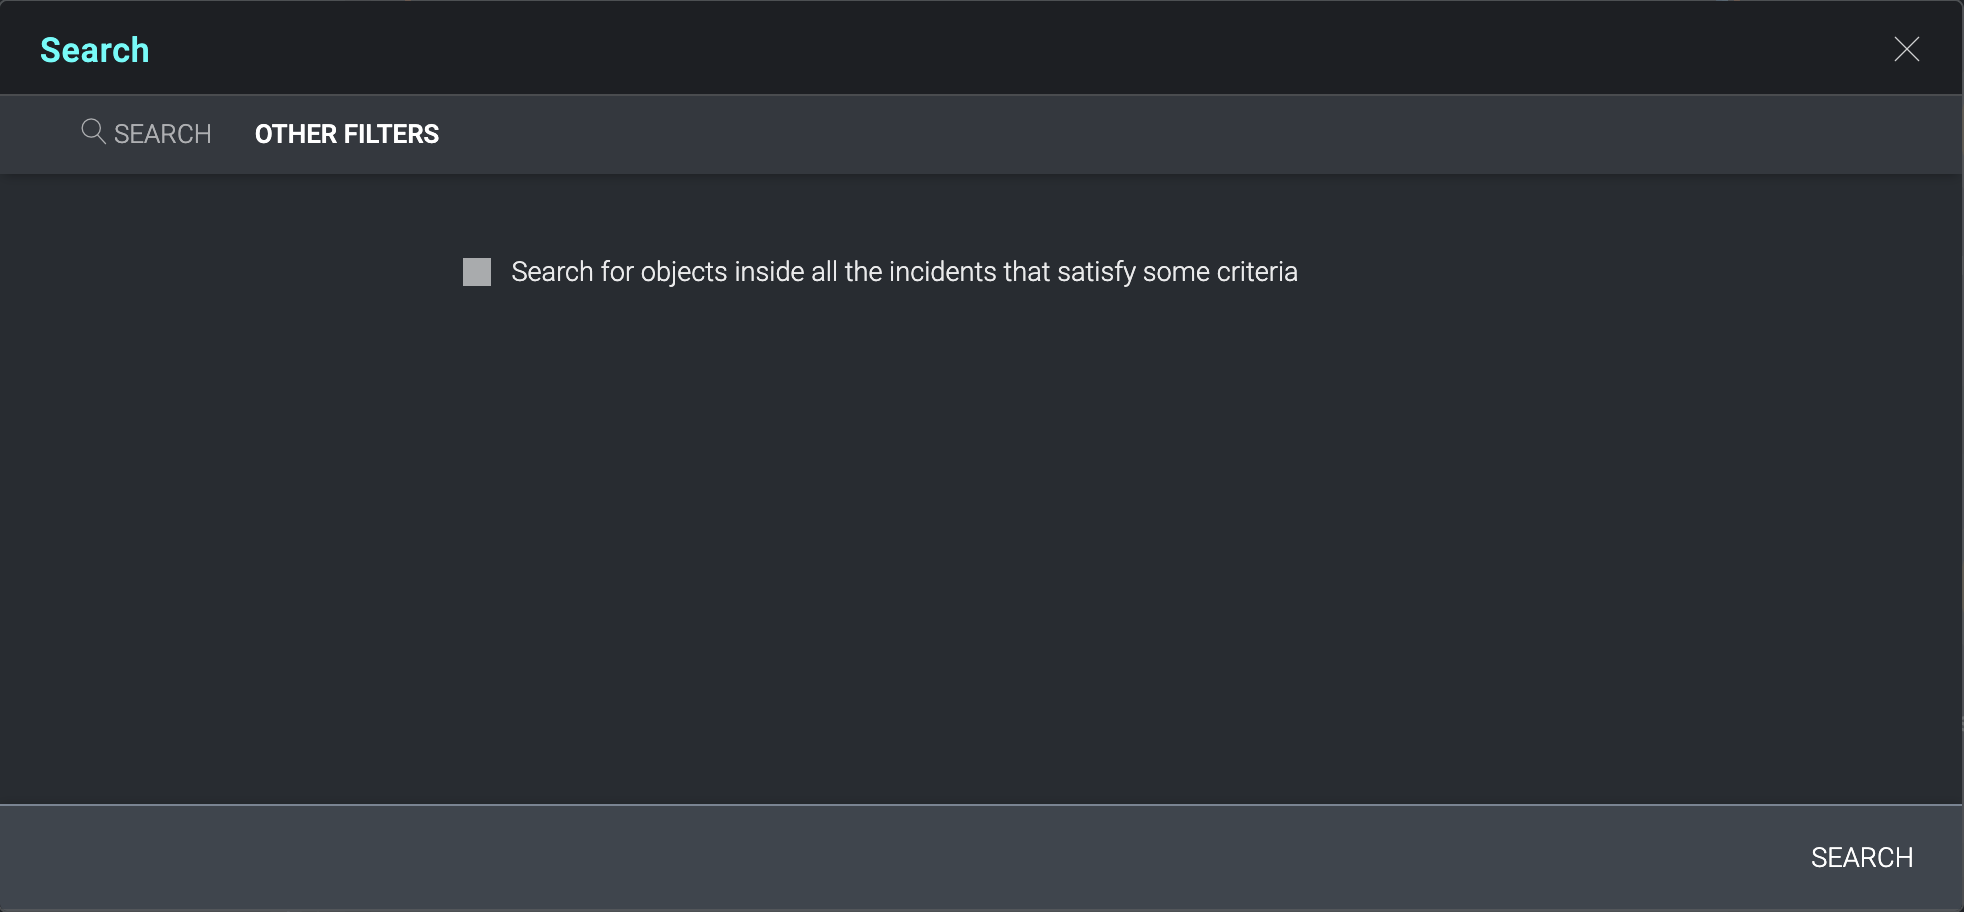
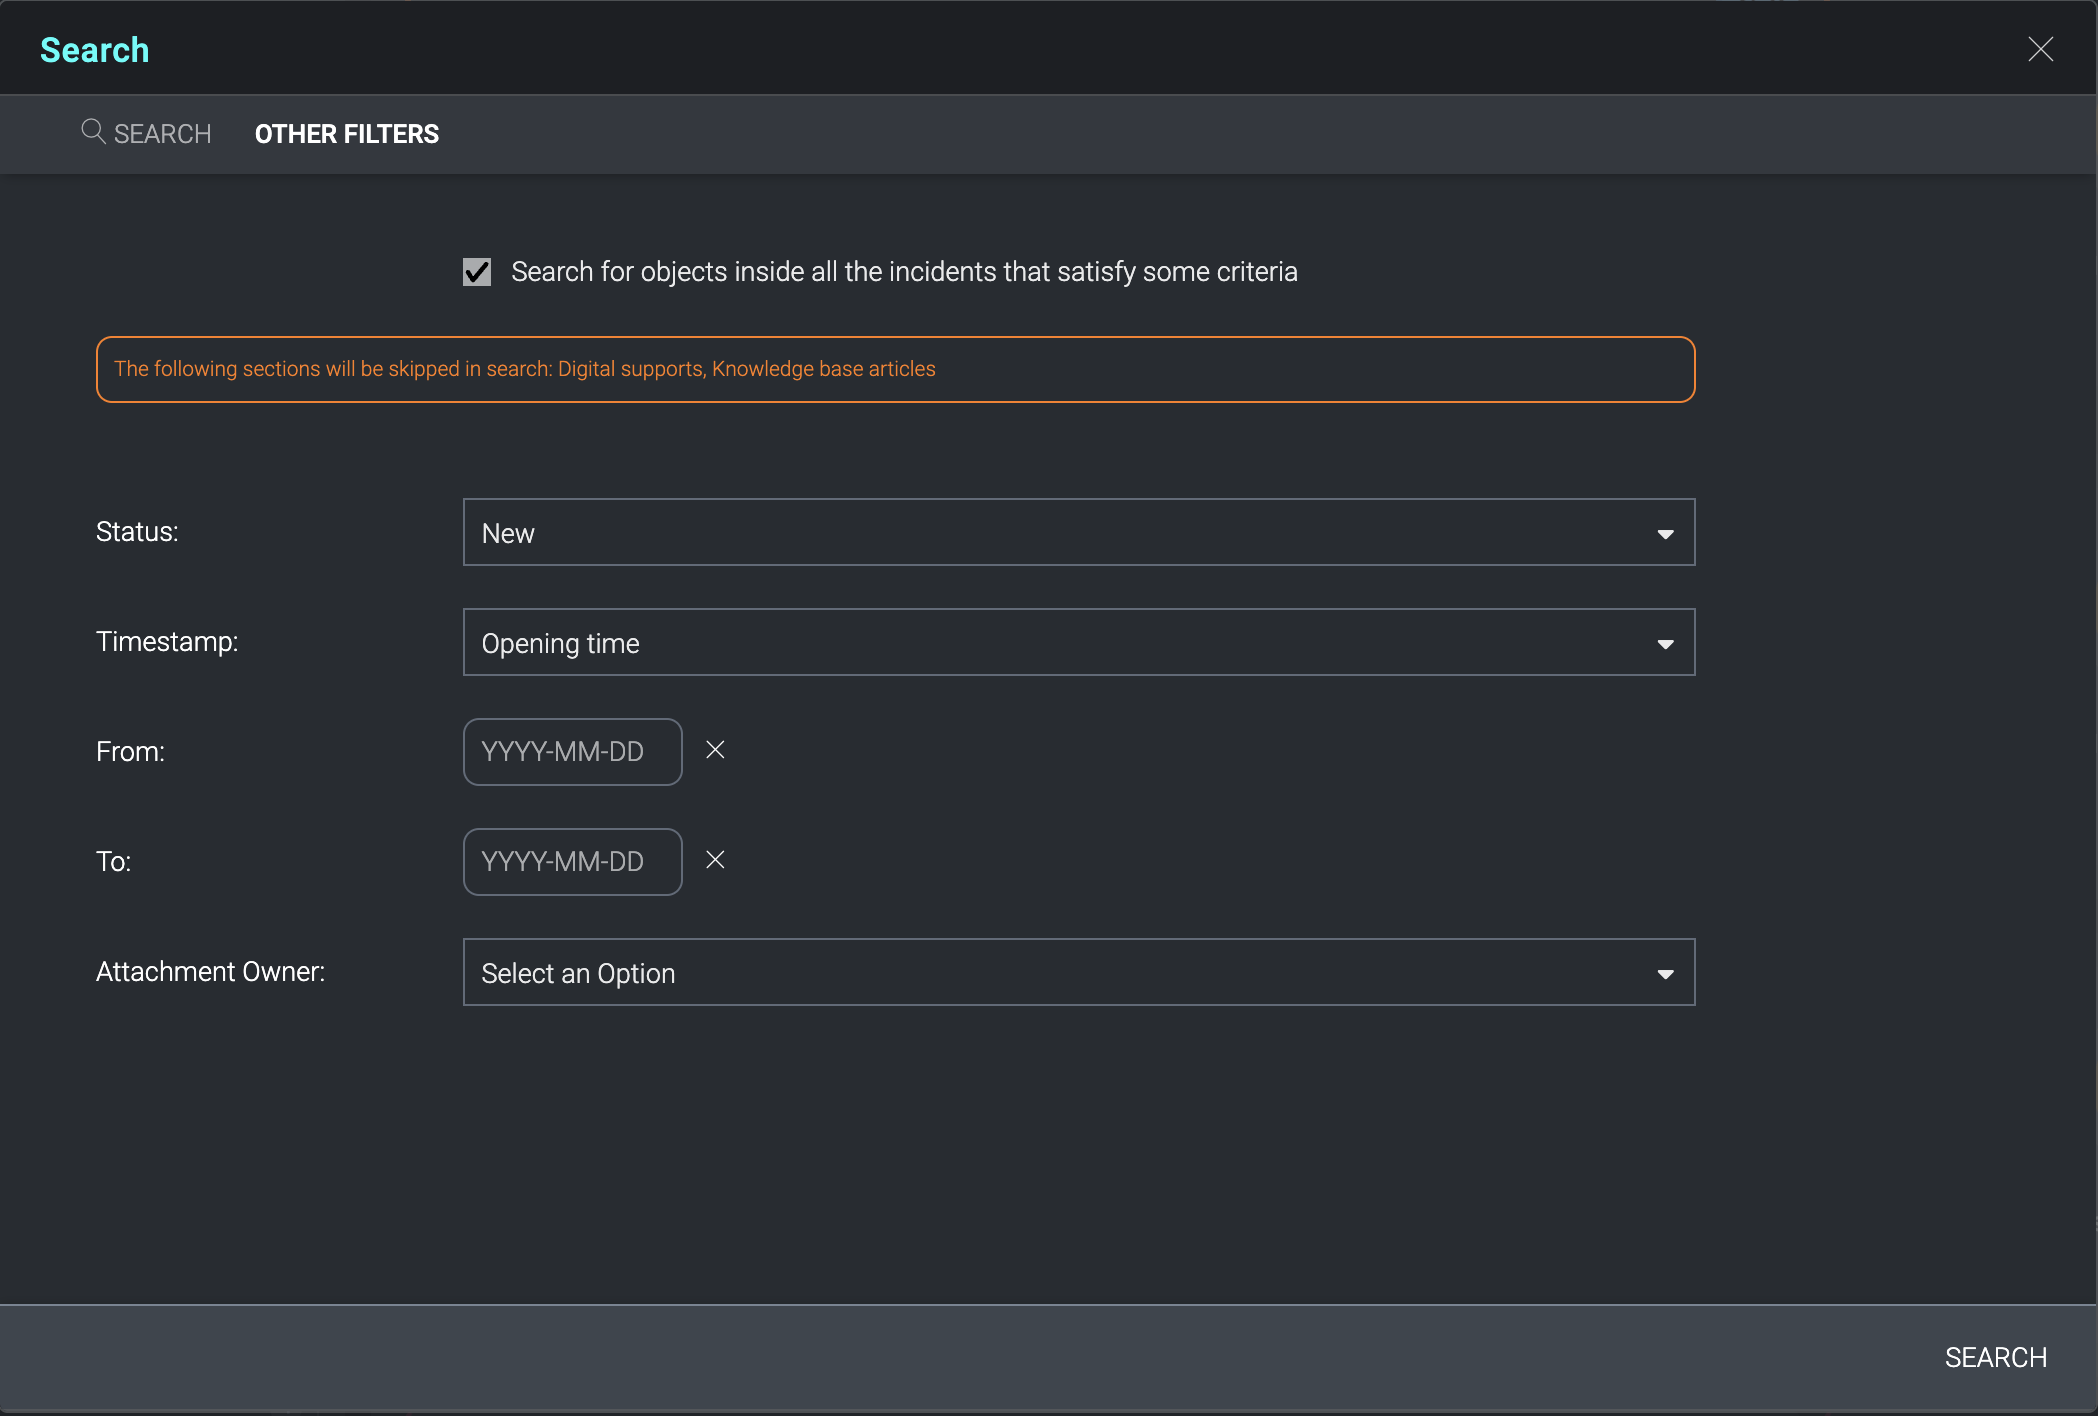
The Other Filters tab permits a more targeted selection of search criteria. Targeted searching does not extend to the data inside Digital Support or Knowledge Base articles.
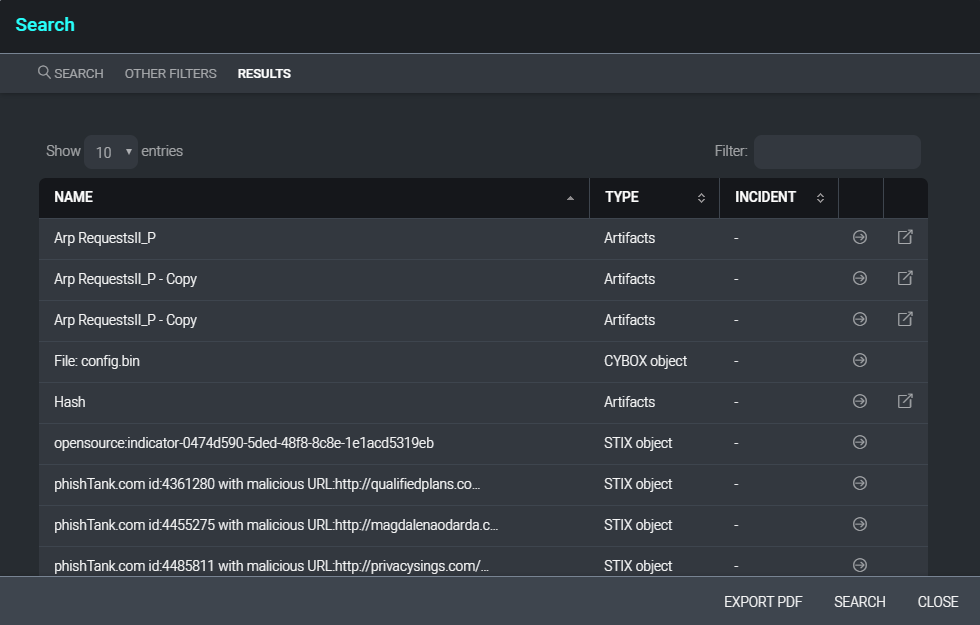
When a search result is located within an incident, the incident number will be displayed in the Incident column. Clicking on the incident number will open the incident in a new window. Clicking on the arrow at the end of each search result will display the details of the individual search result in the current window. Search results may also be exported to a PDF file by clicking on Export PDF at the bottom of the search results window.
Settings
General Settings
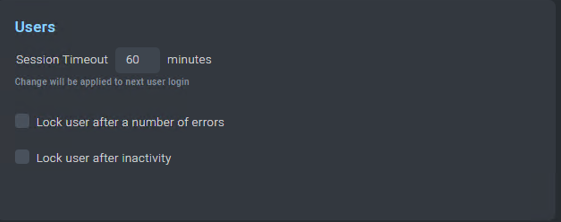
User Settings (Security)
- Lock users after a number of consecutive login errors
- Lock users after their inactivity.
- Possibility to change the password policies
User Management
When setting up Cloud SOAR, one of the first tasks an Administrator will want to accomplish is adding their user base. Just like Active Directory User and Group management, User Management allows you to create users, groups, and user profiles.
You can create granular role-based access control rules that dictate the permissions users have both within the Cloud SOAR platform and individual incidents. This section also allows administrators to configure Cloud SOAR to work with existing LDAP or Active Directory resources.
Profiles
The Profiles menu contains the different profiles: what a user can see and do within the Cloud SOAR platform and what a user can see and do from within an Incident.
By default, Cloud SOAR comes pre-loaded with Administrator and Read Only profiles. To create a new profile, click the + symbol in the top left corner of the screen.
A new configuration box containing all available permissions within the Cloud SOAR platform are displayed. These permissions are as follows:
- Incident refer to the Main Menu modules highlighted previously. Configuring these permissions will determine what access a user has to different areas of the Incident section.
- Settings refer to the Settings module located in the Global Functions menu. Configuring these permissions will determine what modules under Settings the user can view/modify.
- Search and Reporting refer to the Home section located in the Main Menu.
- Automation refers to the Automation Section in the settings menu. Configuring these permissions will determine for example, what integrations can be viewed or modified
- Entities refers to the Entities section located in the Global Functions menu. Configuring these permissions will determine what the user can view/modify within the entities module.
Users
Under the User Management dropdown choose Users and click + to begin adding the user's details.
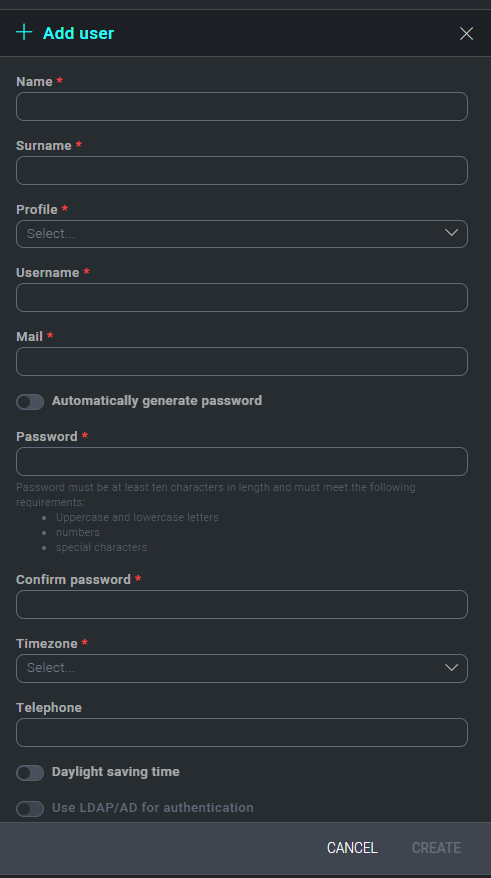
The General tab contains the usual user account attributes such as name, email, address, username, etc. Select the user's Profile from the dropdown list to apply their permissions.
If you'd like to utilize your current Active Directory structure to manage your Cloud SOAR user base via LDAP authentication, select Use LDAP/AD for Authentication.
LDAP/Active Directory Settings
If you'd like to utilize LDAP/AD authentication, you can configure this feature under the LDAP/AD dropdown. This feature links a client's AD/AD infrastructure to the Cloud SOAR platform, ensuring all authentication policies are replicated when signing on in Cloud SOAR.
To enable the LDAP/AD integration, check Enable LDAP/AD Server Integration at the top of the LDAP/AD screen.
Insert the Host and Port Information for the LDAP/AD Server.
Port 389 is typically used for a standard communication port and 636 for a secure port.
Next, configure your reference field. References fields will work from 2 bits of data; SAMAccountName for a username or the individuals email address.
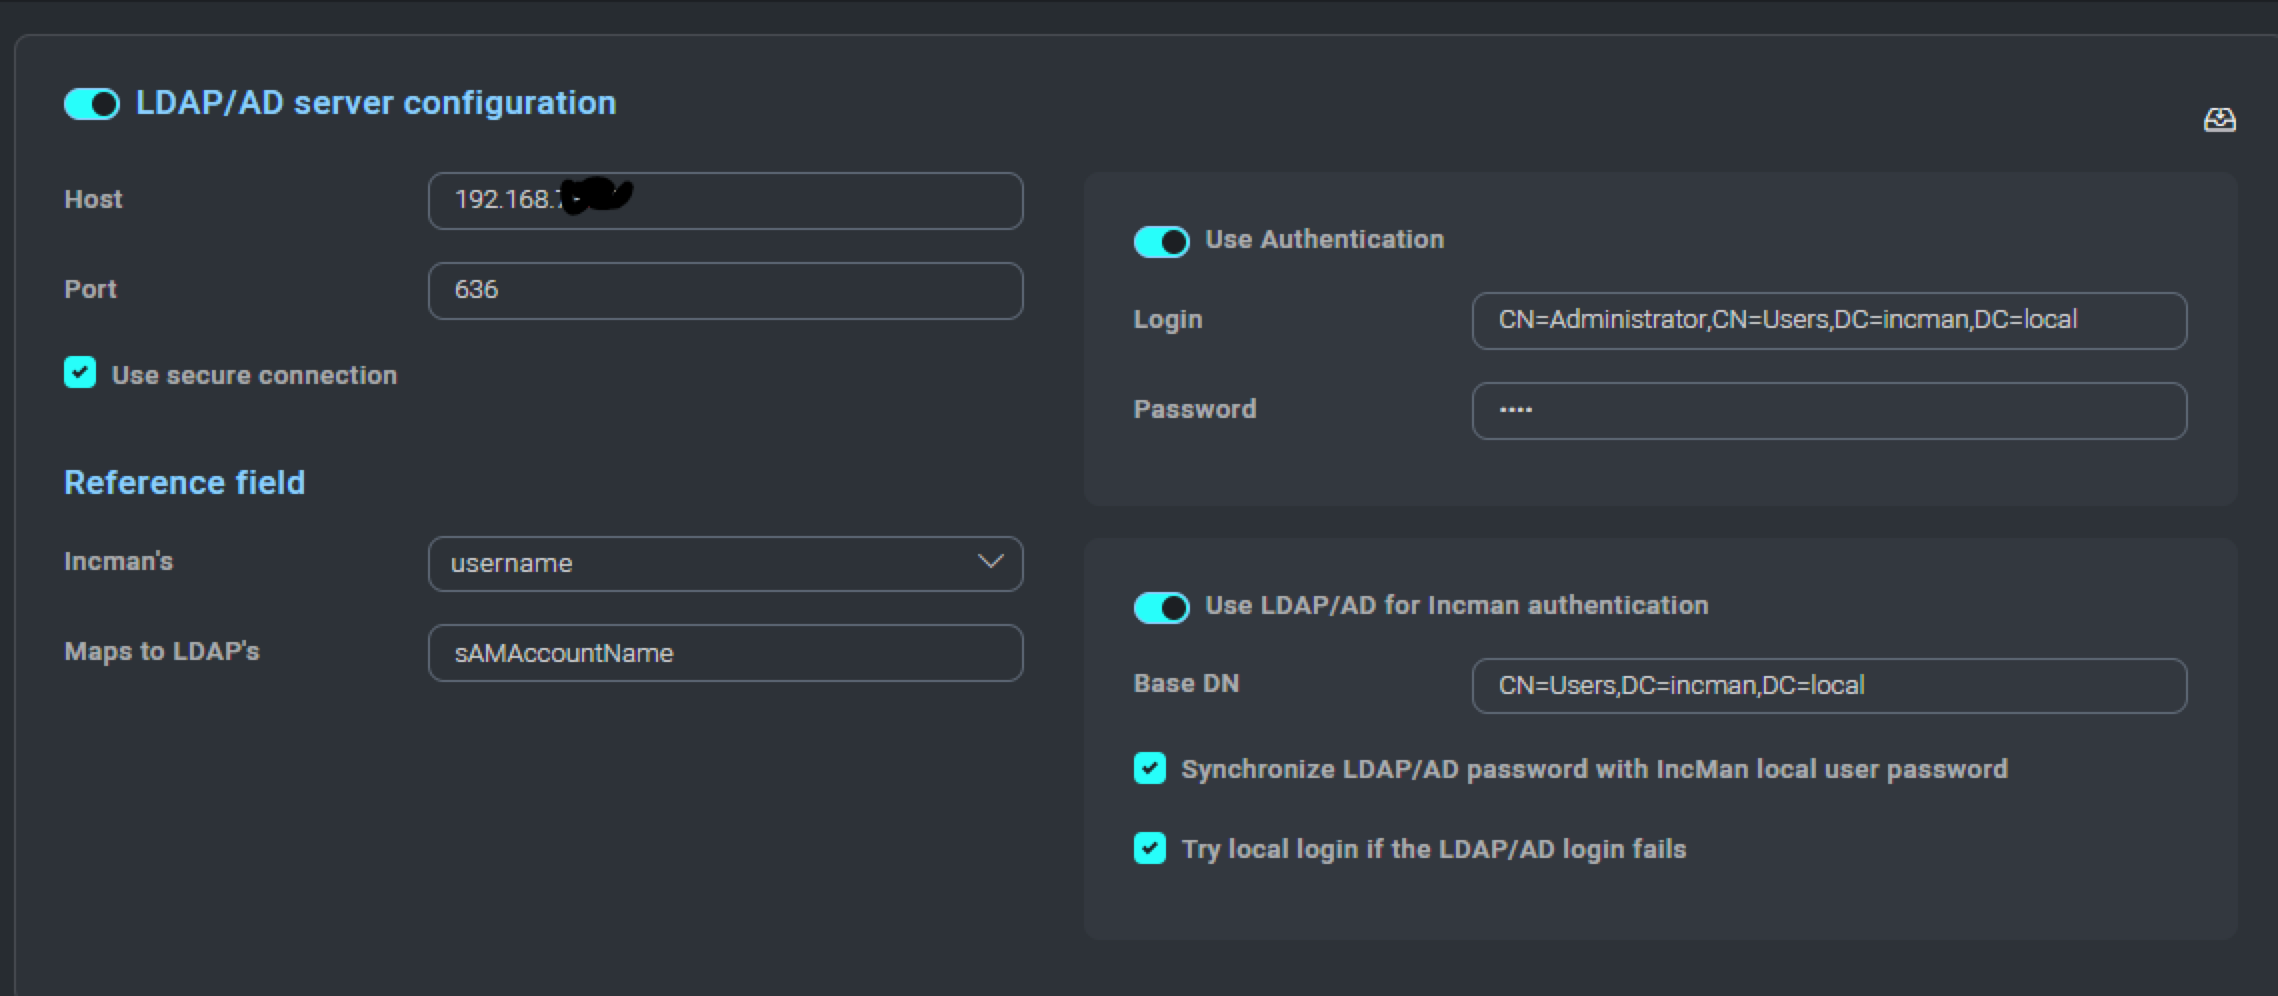
Authentication may or may not be required depending on user permissions on the AD/LDAP server. If your LDAP/AD server permissions require it, ensure that a user with the appropriate permission is used here.
Designate the domain component that we want Cloud SOAR to connect with when retrieving the authentication credentials. Configure which domain components will be accessed in the Base Distinguished Name (DN) field. You may also designate a failover local authentication if the LDAP/AD server would become unreachable. Be sure to include domain components that reflect the OU containing the user needing authentication.
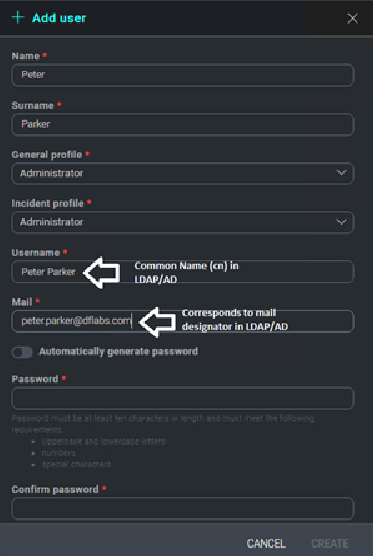
Configuring Cloud SOAR Users to Work with LDAP/AD
During user creation utilize the same naming/email schema that you have in your LDAP/AD Tree. In the example below The Cloud SOAR username, Peter Parker, would correspond to the CN for the user in your LDAP/AD tree.
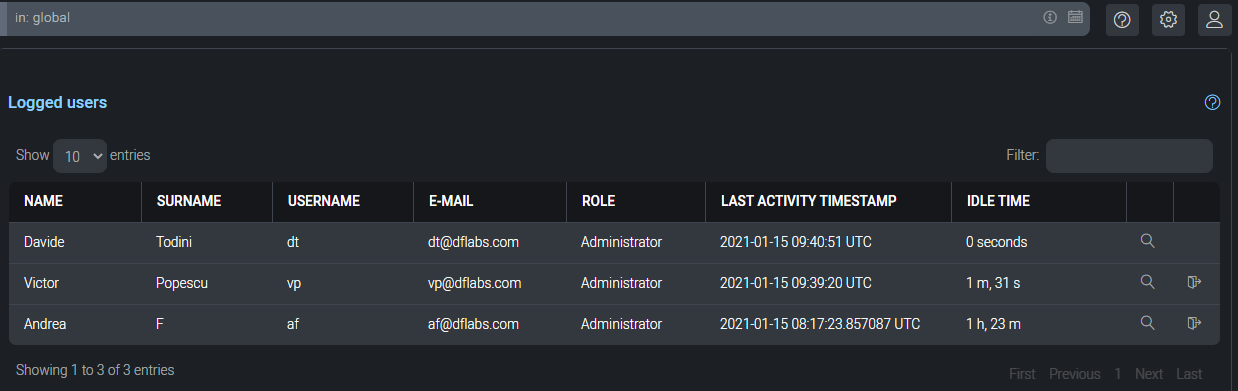
Logged Users
The Logged User section of the Cloud SOAR platform contains session information for the user who is currently logged on to the Cloud SOAR platform. For administrators of the Cloud SOAR platform, this section will show all authorized user session activity.
Audit and Information
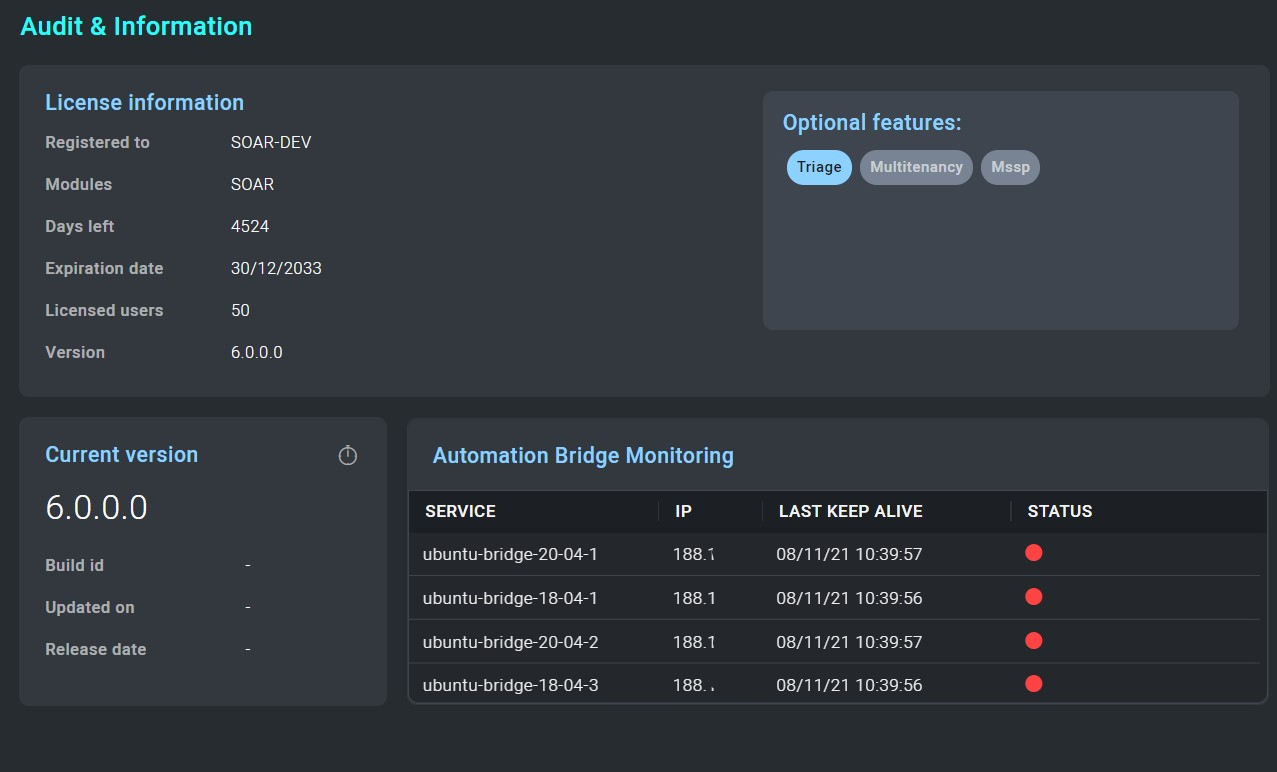
All audit and licensing information can be found under the Audit and Information tab.
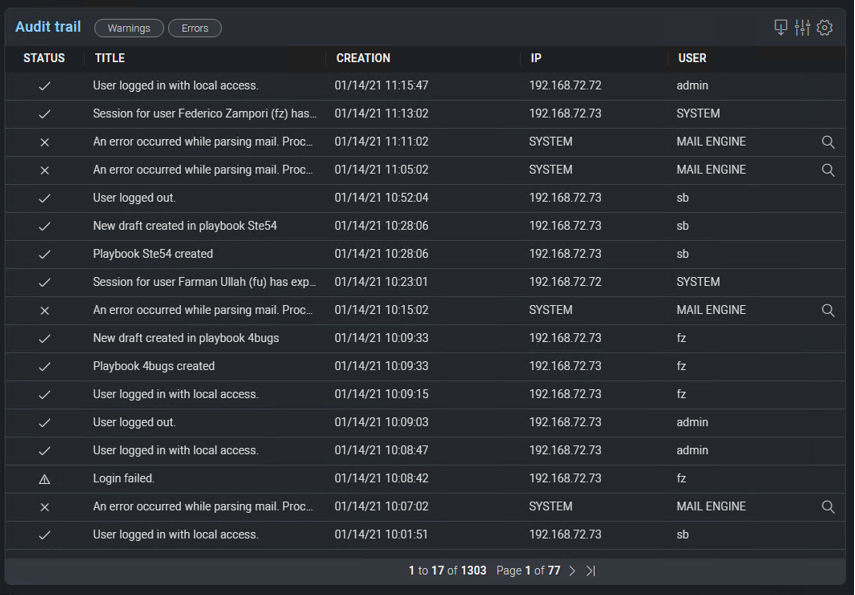
Cloud SOAR audit logs and activity can be reviewed under the Audit Trail section of the menu. You can filter through activity displaying only errors and warnings or build their own filters for review. Log rotation settings and the ability to export audit findings can be controlled from the Audit menu at the top of the screen.
The Automation Bridge Monitoring section displays the status of the automation bridges configured.
User Settings
The user icon in the upper right-hand corner allows you to view their profile and settings, as well as log out of the platform.
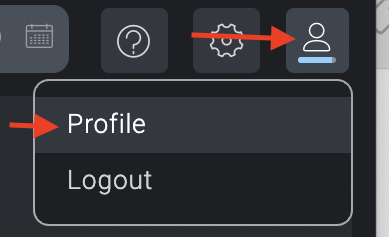
The Profile button will take you to the User Management section, where administrators can add and remove users, lock a user's account, force a user account to change their password or set its expiration period.