Cloud SOAR Settings
This article describes the various setup and configuration options for the Cloud SOAR platform. Although initial configuration can be performed in any order, the sections are presented in the suggested order for initial configuration.
General
New UI. To access general settings, in the main Sumo Logic menu select Cloud SOAR, and then under Cloud SOAR Settings select General. You can also click the Go To... menu at the top of the screen and select General.
Classic UI. To access general settings, click the gear icon ![]() in the top right and select Settings.
in the top right and select Settings.
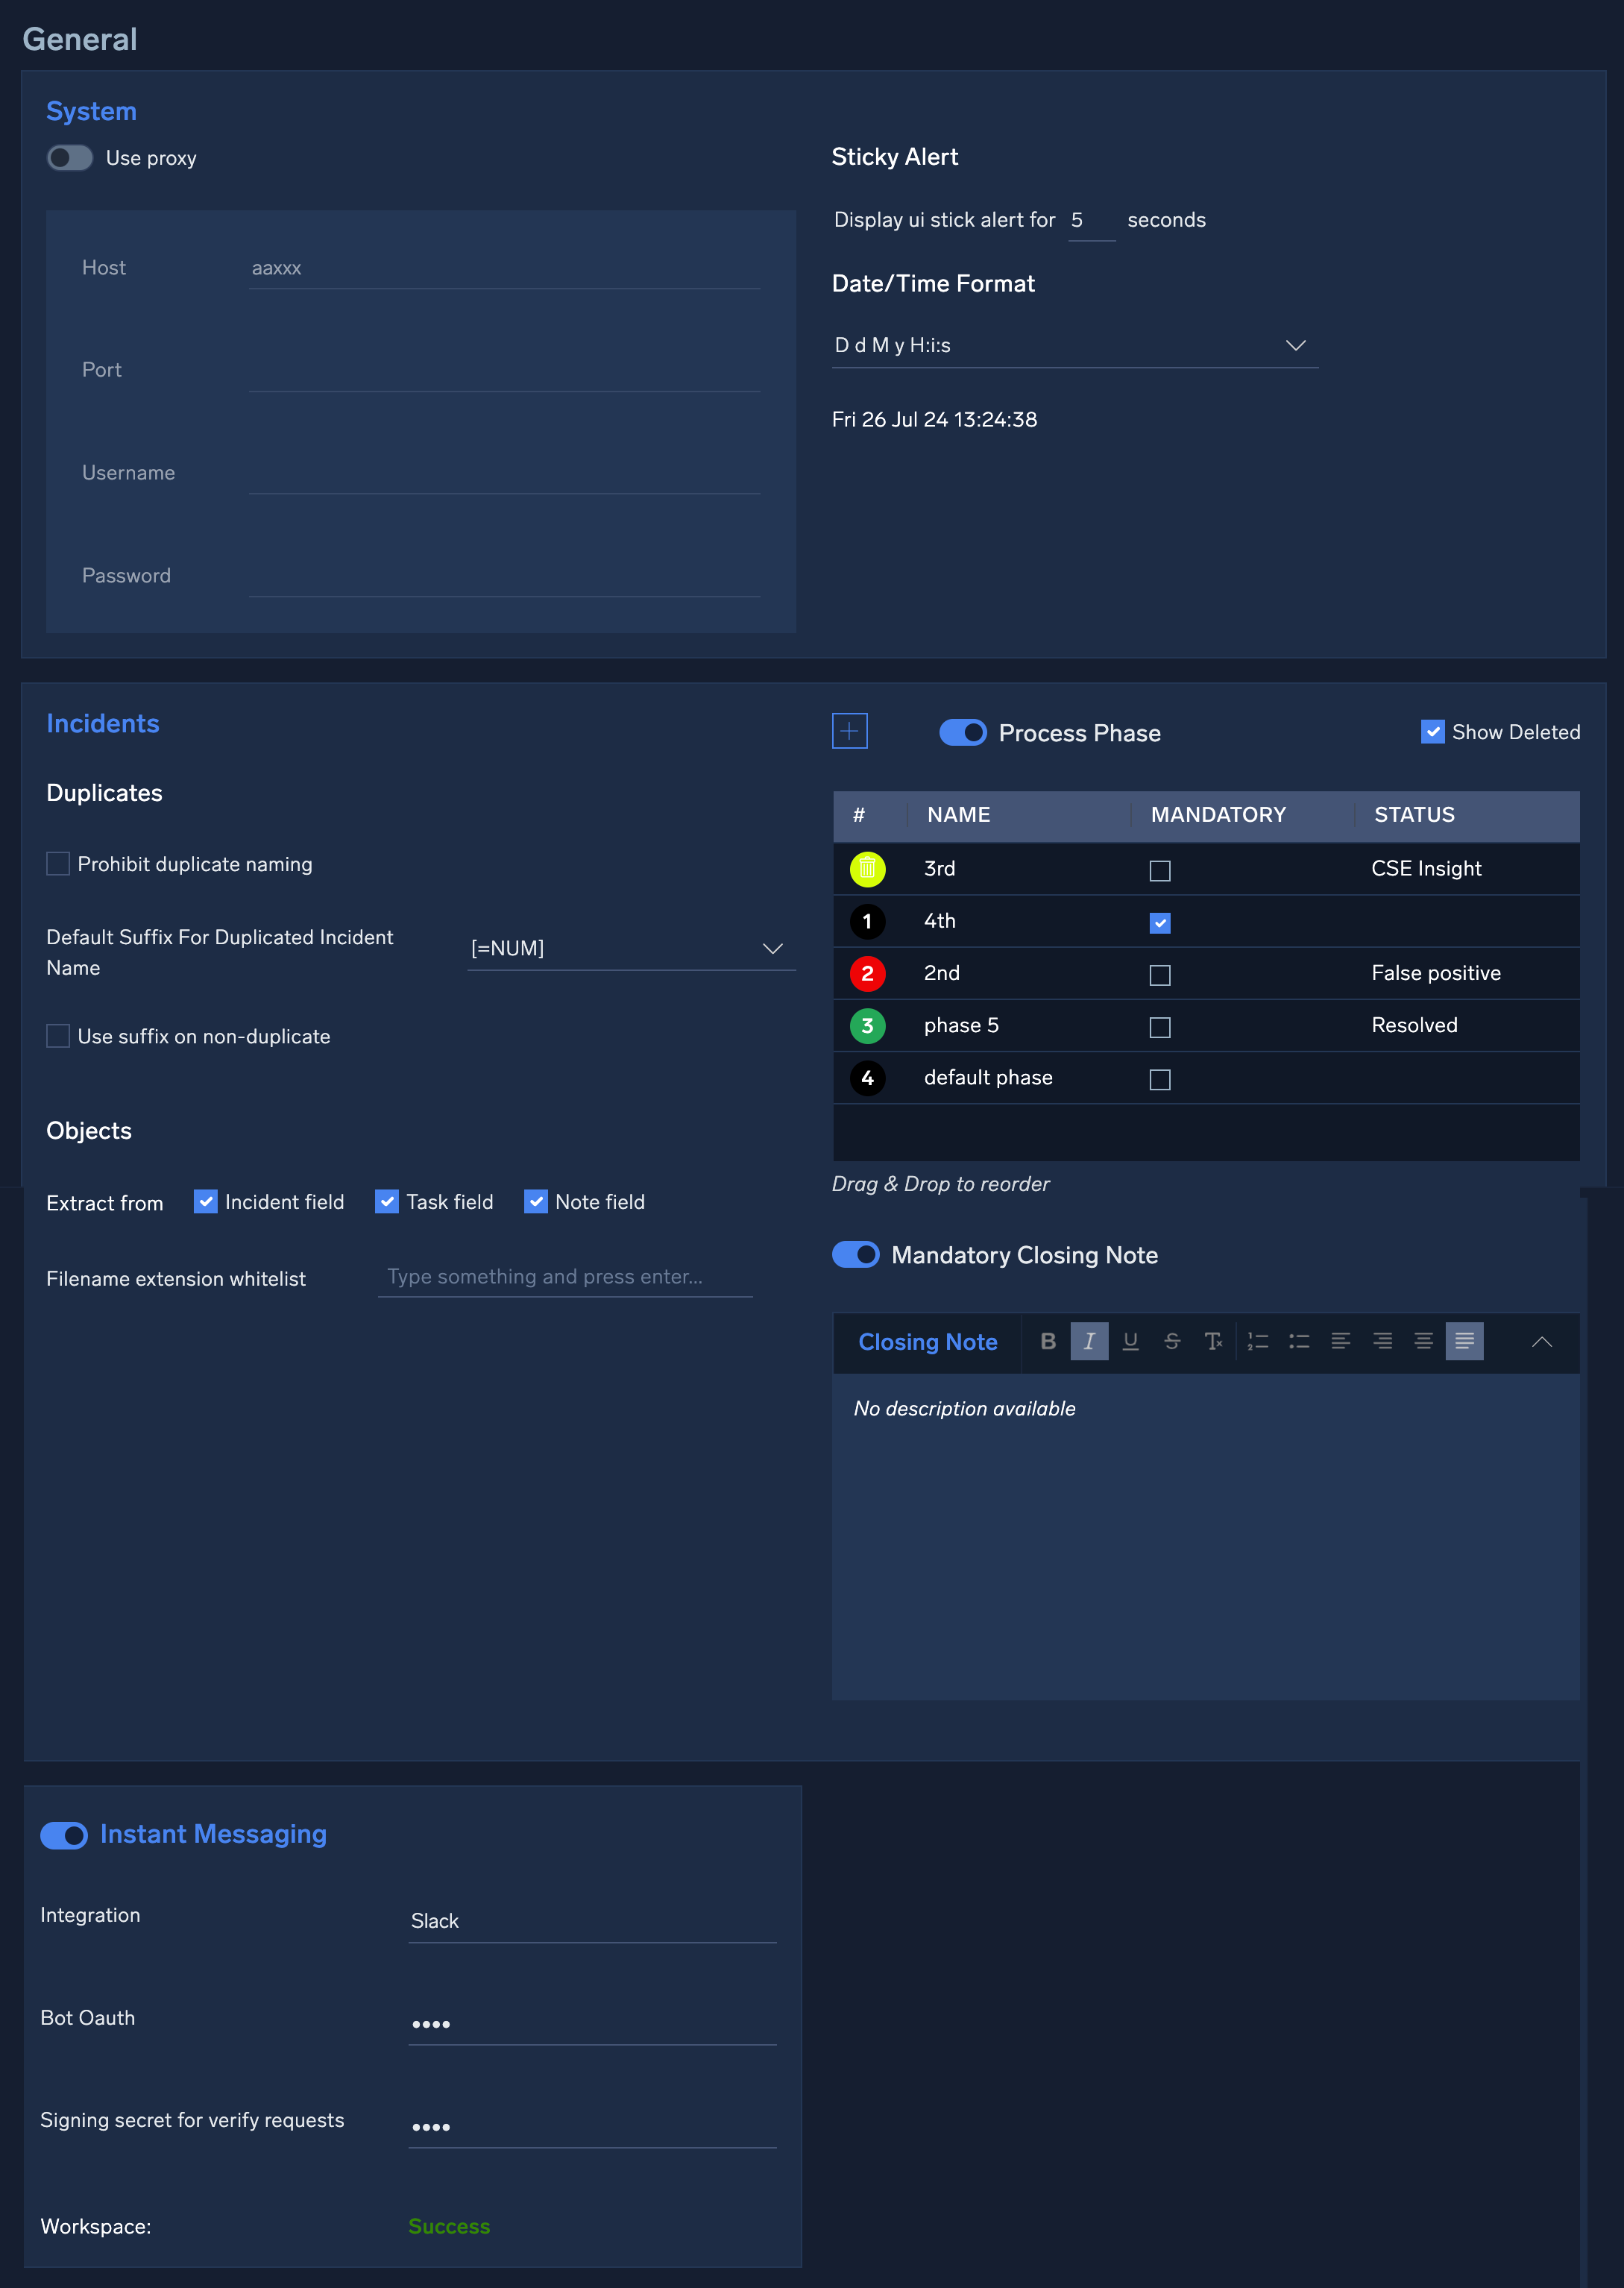
System
- Use Proxy. Enter settings if you need to use a proxy for Internet access.
- Sticky Alert. Set the number of seconds to display an alert in the Cloud SOAR UI when an incident generates an alert.
- Date/Time Format. Set the date and time format.
Incidents
Use these settings to configure how Cloud SOAR handles incidents.
- Duplicates.
- Prohibit duplicate naming. Select this checkbox to prevent incidents from being named identically.
- Default suffix for duplicated incident name. Select the suffix to add to the end of incident names to differentiate incidents that are named the same.
- Use suffix on non-duplicate. Use the selected suffix on all incidents, regardless of whether they are named the same.
- Objects. Gather objects, such as IP addresses, domains and email addresses, and add them to the appropriate object's section within the incident.
- Extract from:
- Incident field. Gather objects from the incident properties.
- Task field. Gather objects from the incident tasks.
- Note field. Gather objects from the the incident notes.
- Filename extension whitelist. Enter filename extensions to allow when gathering objects.
- Extract from:
- Process Phase. Configure phases for monitoring progress of incidents as they progress. Determine whether the phase is Mandatory, and the Status of the incident when the phase is reached. Select Show Deleted to show phases on deleted incidents.
- Mandatory Closing Note. Make a final incident note mandatory before the incident can be closed.
Instant Messaging
Use these settings to configure authentication for an instant messaging service such as Slack.
- Integration. Enter the name of the instant messaging service to integrate with Cloud SOAR.
- Bot Oauth. Enter the authorization token for the instant messaging service.
- Signing secret for verify requests. Enter the signing secret for the instant messaging service.
- Workspace. Displays success or failure of the workspace connection to Cloud SOAR.
For additional setup needed for Slack, see Configure Slack for Cloud SOAR.
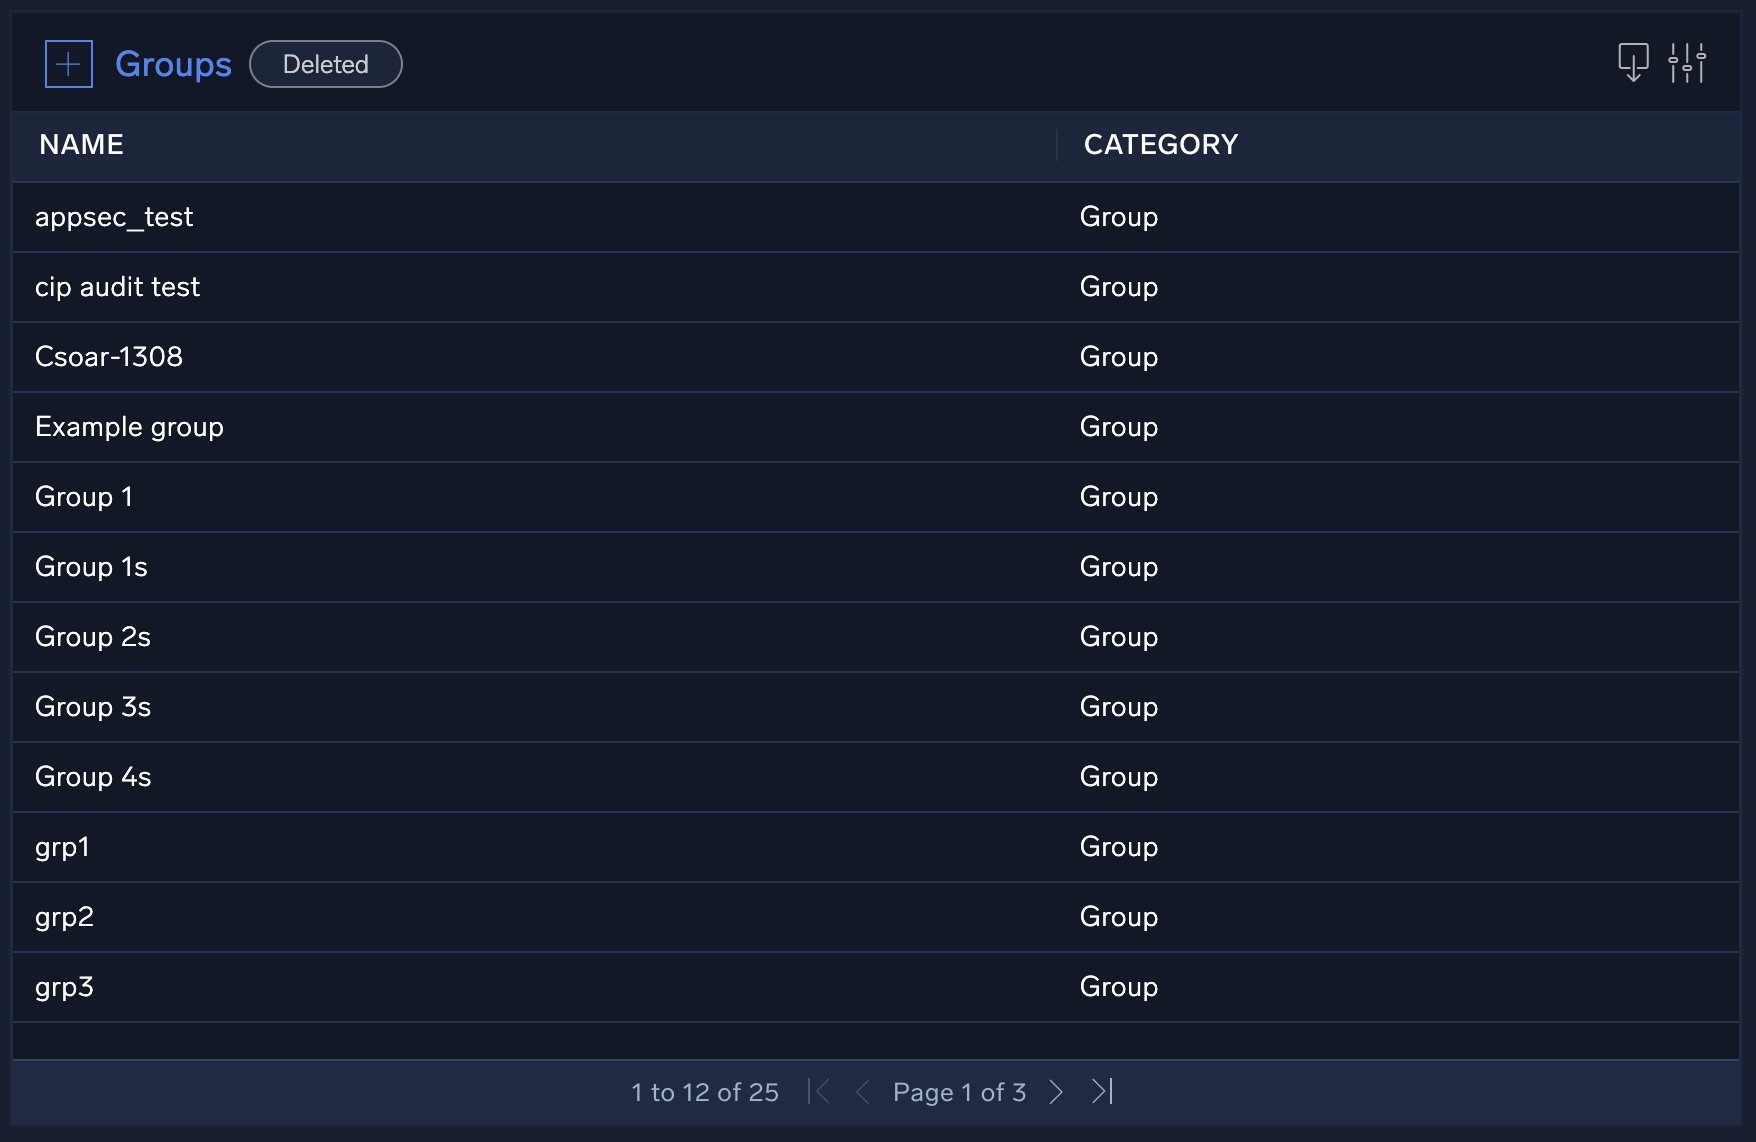
Groups
A group in Cloud SOAR is a collection of users that can be added as incident investigators. When you have a number of users to add as investigators, adding a group of users is faster and easier than adding each user individually. In addition, you can assign everyone in the group the same profile (role), limiting them as incident investigators to only the rights that the profile gives them.
For example, let's say that you have a team of SOC analysts that share responsibility for investigating incidents. You can add all the members of the team to a group and give its members the "Analyst" profile. Then when you need to add the SOC analysts as investigators to incidents, you can simply select the group as the investigator.
Create a group
- New UI. In the main Sumo Logic menu select Cloud SOAR, and then under Cloud SOAR Settings select Groups. You can also click the Go To... menu at the top of the screen and select Groups.
Classic UI. Click the gear icon in the top right, select Settings, and on the left menu select User Management > Groups.
 - The Groups dialog displays. Click the + icon next to Groups.
The Add Groups dialog is displayed.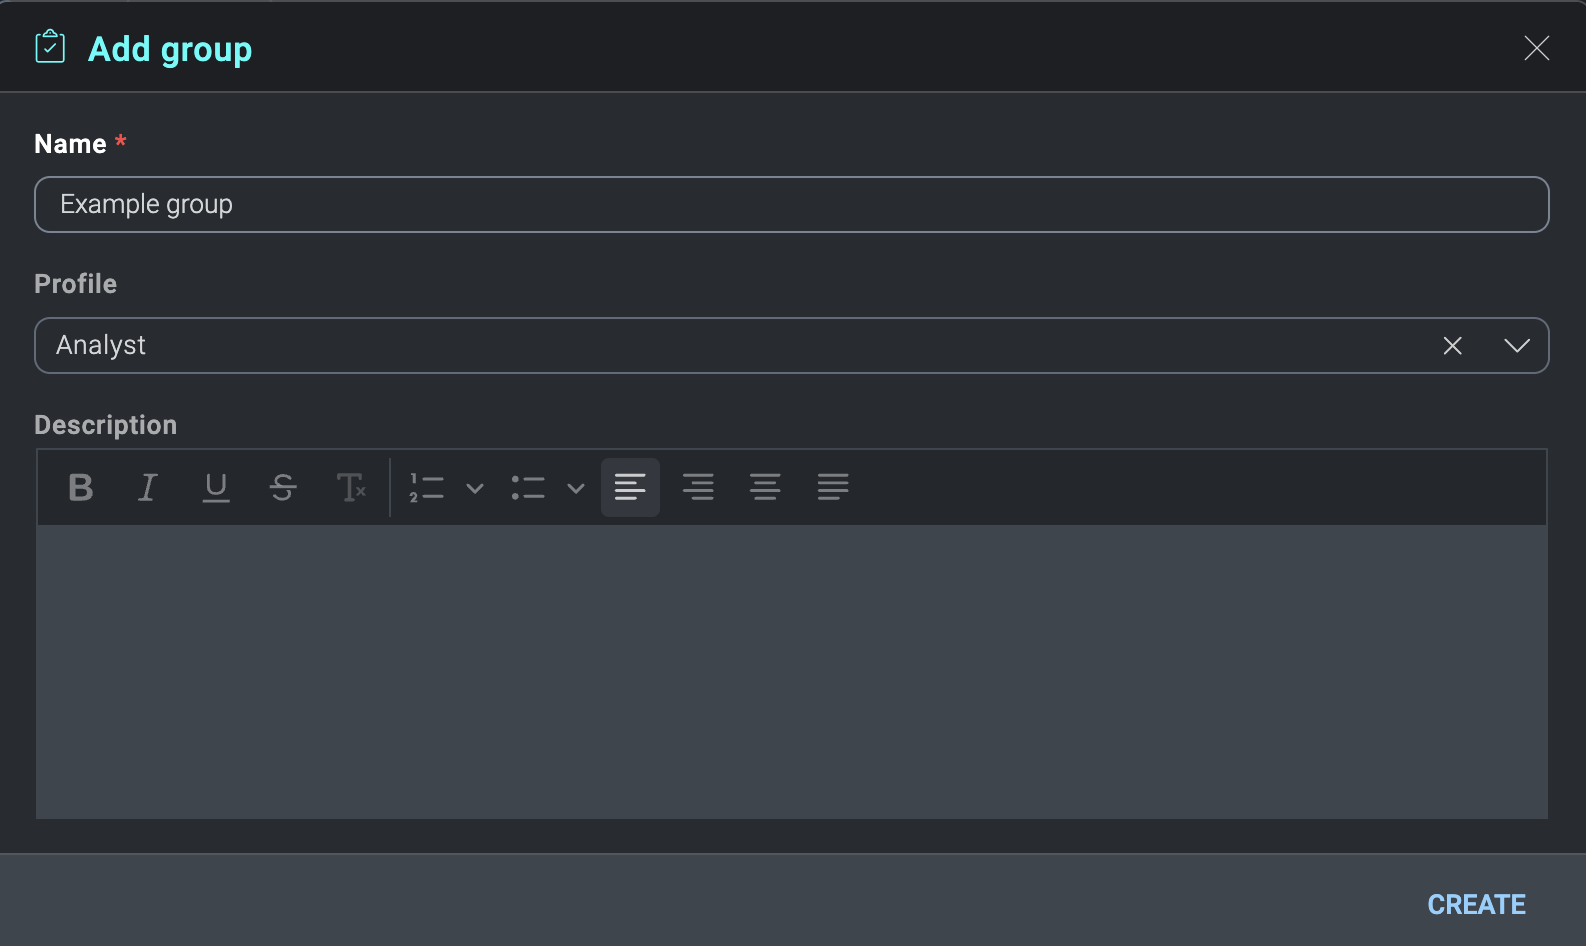
- In Name enter a name for the group.
- In Profile select the role to assign to members of the group. These are roles already created in the system.
- Click Create. The empty group is displayed.
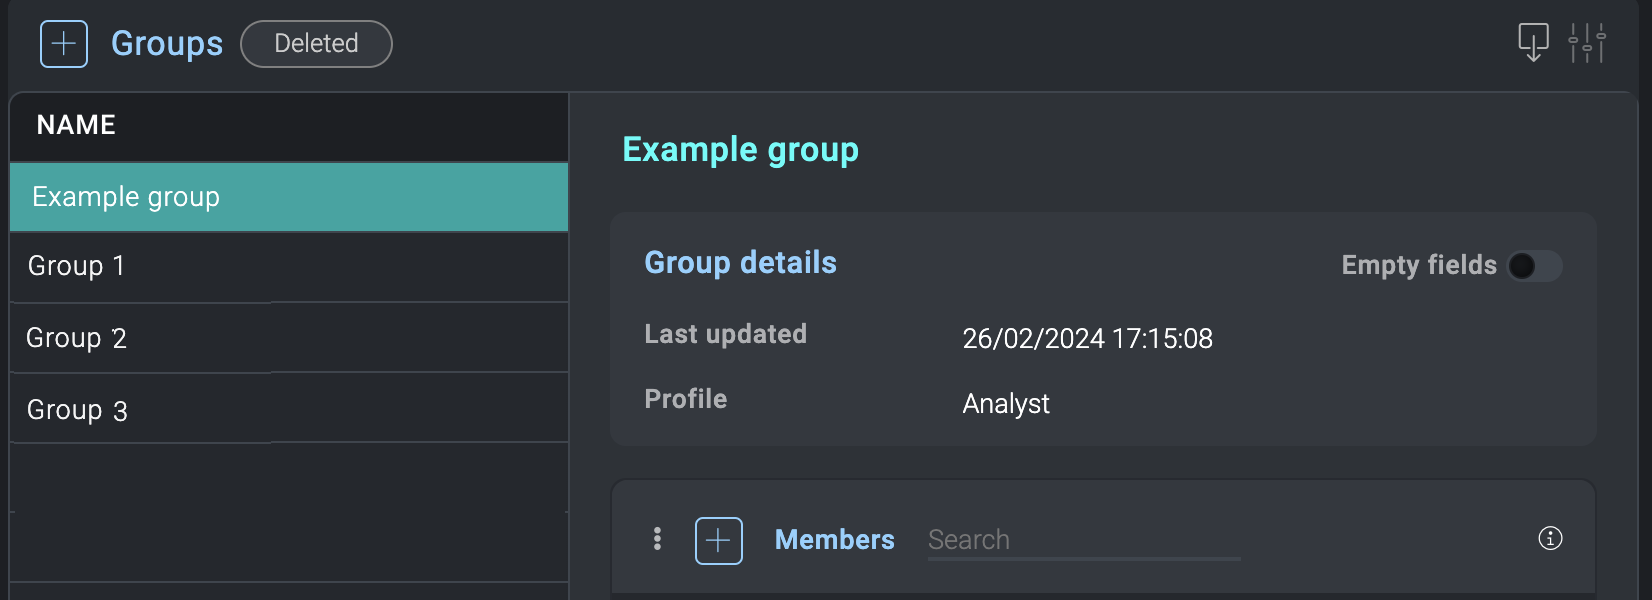
- Click the + icon next to Members.
- Select the users to add to the group.
- Click Apply.
Assign a group as an incident investigator
To add a group as an incident investigator, follow the same steps as described in Add investigators:
- New UI. In the main Sumo Logic menu, select Cloud SOAR > Incidents. You can also click the Go To... menu at the top of the screen and select Incidents.
Classic UI. At the top of the screen, click Incidents. - Check the incidents you want to add investigators to.
- Click the three-dot kebab menu in the upper left-hand corner of the screen.
- Select Add Investigator.
The Add Investigator screen is displayed.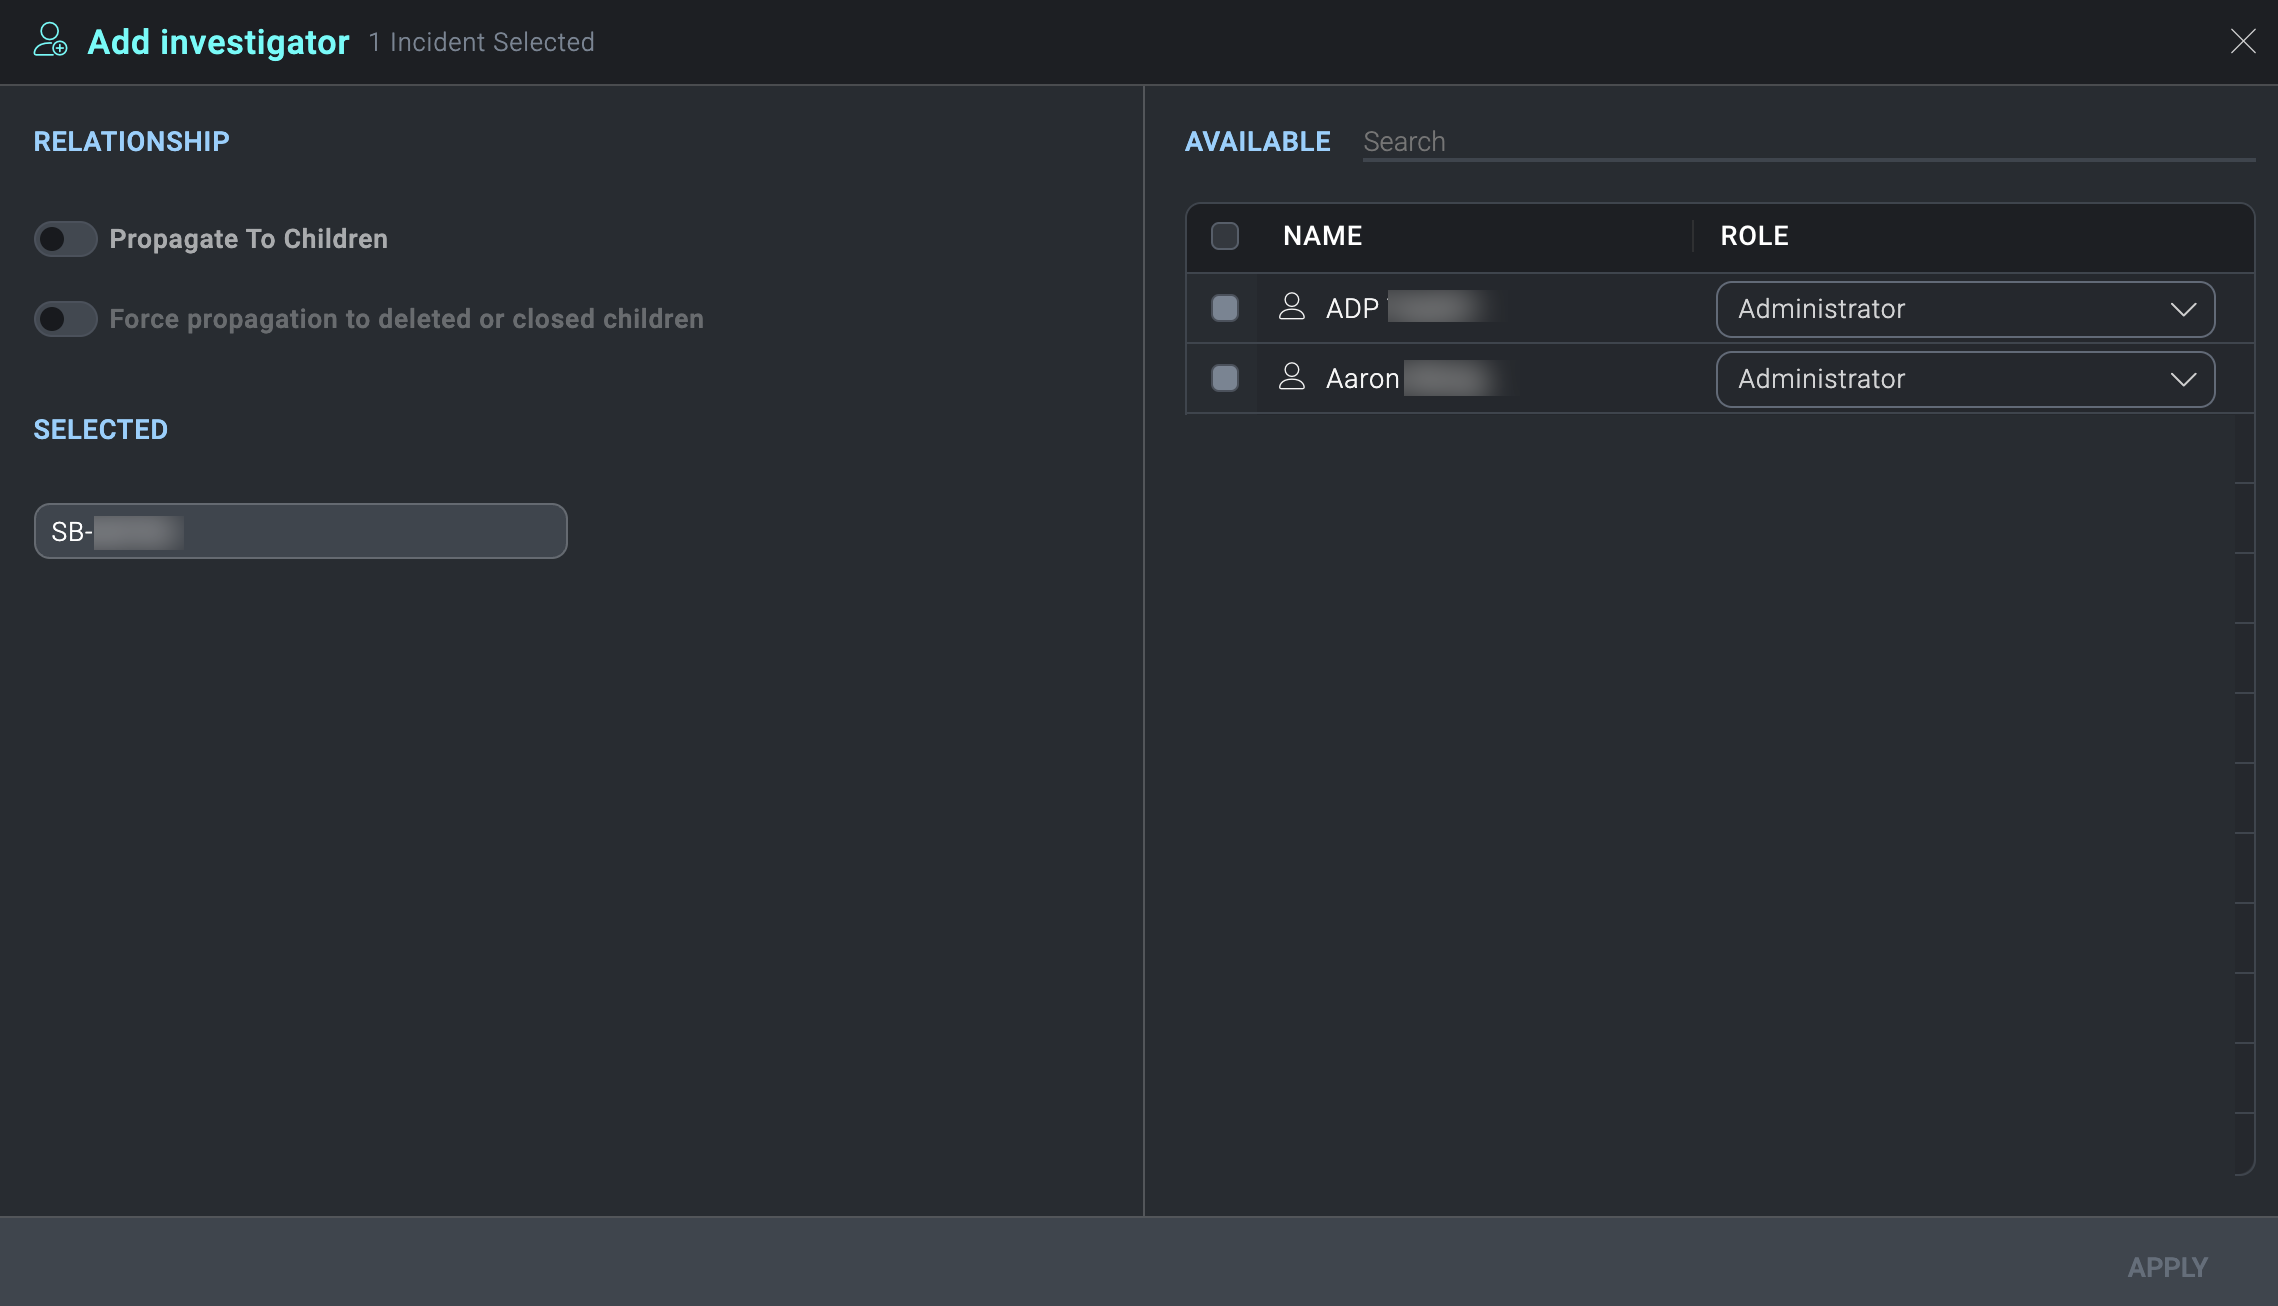
- Select the group to add as investigator of the selected incidents. For example, in the sample screen above, select SOC Team.
note
The Role column displays the profile assigned to the members of the group. You cannot change the group's assigned profile (role) here like you can for individual users. You can only change the group's assigned profile on the group itself.
- Click Apply. The group is added an investigator of the selected incidents. While investigating the incidents, members of the group have the rights given by the the role (profile) assigned to members of the group.
Group role assignments
The role specified in an assigned group profile supersedes the user's role assignments in the Sumo Logic Log Analytics Platform. The group permissions are persistent until the user leaves the group, the profile is removed from the group, or the group is deleted.
| User | Result |
|---|---|
| In a group | Has the assigned group role (profile) |
| In multiple groups | Has the sum of the roles (profiles) from all the groups it is a member of |
| Not in a group | Has role assignments as assigned in the core platform |
| In group without a role (profile) | Has role assignments as assigned in the core platform |
Notifications
New UI. To access notification settings, in the main Sumo Logic menu select Cloud SOAR, and then under Cloud SOAR Settings select Notifications. You can also click the Go To... menu at the top of the screen and select Notifications.
Classic UI. To access notification settings, click the gear icon ![]() in the top right, select Settings, and on the left menu select Notifications > Event Triggers.
in the top right, select Settings, and on the left menu select Notifications > Event Triggers.
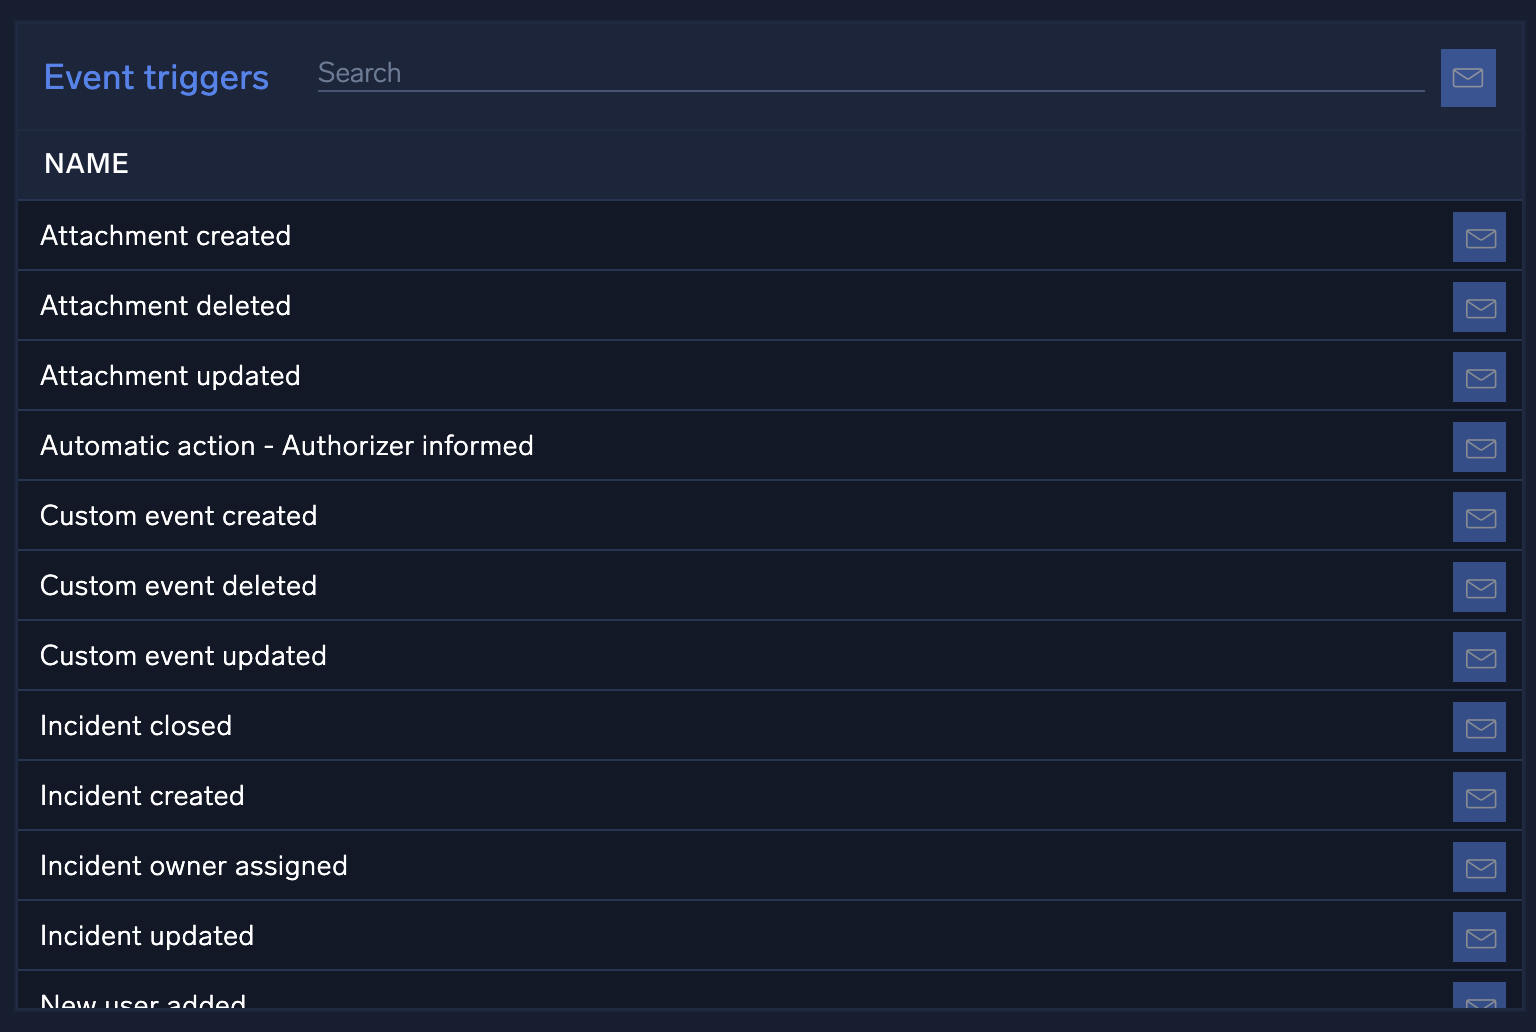
Select the icon to the right of an event to trigger a notification to be sent when that event occurs.
Custom fields
New UI. To access custom field settings, in the main Sumo Logic menu select Cloud SOAR, and then under Cloud SOAR Configurations select Fields.
Classic UI. To access custom fields settings, click the gear icon ![]() in the top right, select Settings, and on the left menu select Customization > Fields.
in the top right, select Settings, and on the left menu select Customization > Fields.
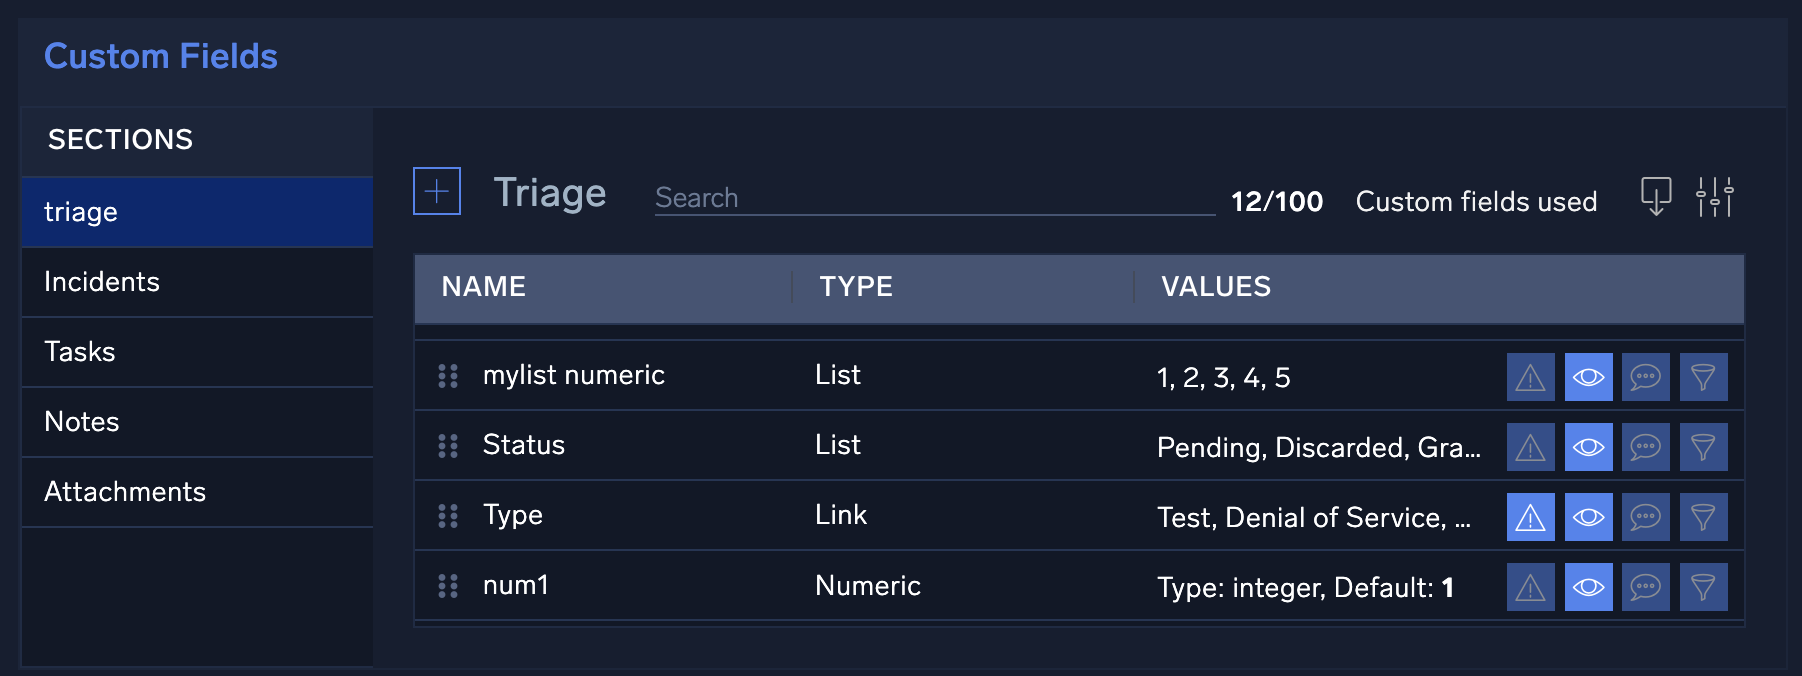
The Custom Fields page allows you to customize all fields within the Cloud SOAR platform to better suit your environment. All fields are pre-populated by default and can be revised with environment-specific variables by manually creating or updating the fields. To begin defining Cloud SOAR's custom fields, select a Cloud SOAR section from the list on the left-side of the screen to view all available fields. To edit an existing field, hover your mouse over the field and select the ![]() icon that appears next to the field. To add a new field, click the + button at the top of the panel.
icon that appears next to the field. To add a new field, click the + button at the top of the panel.
Tips for working with custom fields:
- For considerations when you create custom fields for triage, see Triage field settings.
- You can rename or delete custom fields that you add. However, you can only rename default fields; you cannot delete them. Although you may delete a custom field, it will not increase the number of custom fields available. Since the deleted field may contain data that was entered prior to the deletion of the field, the custom field remains reserved. You can rename internal values, but only personal values (denoted by having a trash can symbol next to the entry), can be deleted from the section's custom fields.
- For each field, a name and a type will always be required. The only attribute of an existing field that cannot be modified once the field is created is the field Type, such as Text or Date.
- Each section of Cloud SOAR supports different numbers of custom fields. The Incidents section, for example, supports up to 100 custom fields. The number of custom fields remaining will be displayed next to the section name at the top of the page.
- When you edit a field, the Additional info section allows you to provide additional information or context to the field, such as how the field should be used or where the data can be located.
- You can reorder fields in the Custom Fields section to change the order they appear on the Cloud SOAR screen. To change the order of the fields, click and hold on the six dots to the far left of the field name, then drag the field to its desired location.
A complete list of field types is listed below. Additional fields are required or optional depending on the type selected. For example, a text field allows an optional default value to be specified, while a list field provides many additional options.
Custom field types
| Field Type | Description |
|---|---|
| Calculation | Perform a calculation between two fields or between a field and a static value. |
| Checkbox | Checkbox. |
| Color Picker | Interactive color picker to select a color. |
| Date | Date only picker. |
| Date & Time | Date and time picker. |
| Email Address | Email address available to use in actions which require a email input. |
| Filename | Filename available to use in actions which require a filename input. |
| Hash | Hash value available to use in actions which require a hash input. |
| IP Address | IP address available to use in actions which require a IP address input. |
| List | Dropdown list. |
| Multi Select List | Multiselect list box. |
| Numeric Textbox | Accepting numeric values only. |
| Tags | One or more user defined tags. |
| Text | Free text. |
| Time Interval | Numeric time interval which can be used as a value in another calculated field. |
| Timezone | Timezone list dropdown. |
| URL | URL available to use in actions which require a URL input. |
| User Details | User details, such as a user name. Available to use in actions which require a user details input. |
Using custom fields for SLAs
Custom fields can be used to calculate any number of custom service level agreements (SLAs). This can be achieved using combinations of Date, Date & Time, and Time Interval type fields.
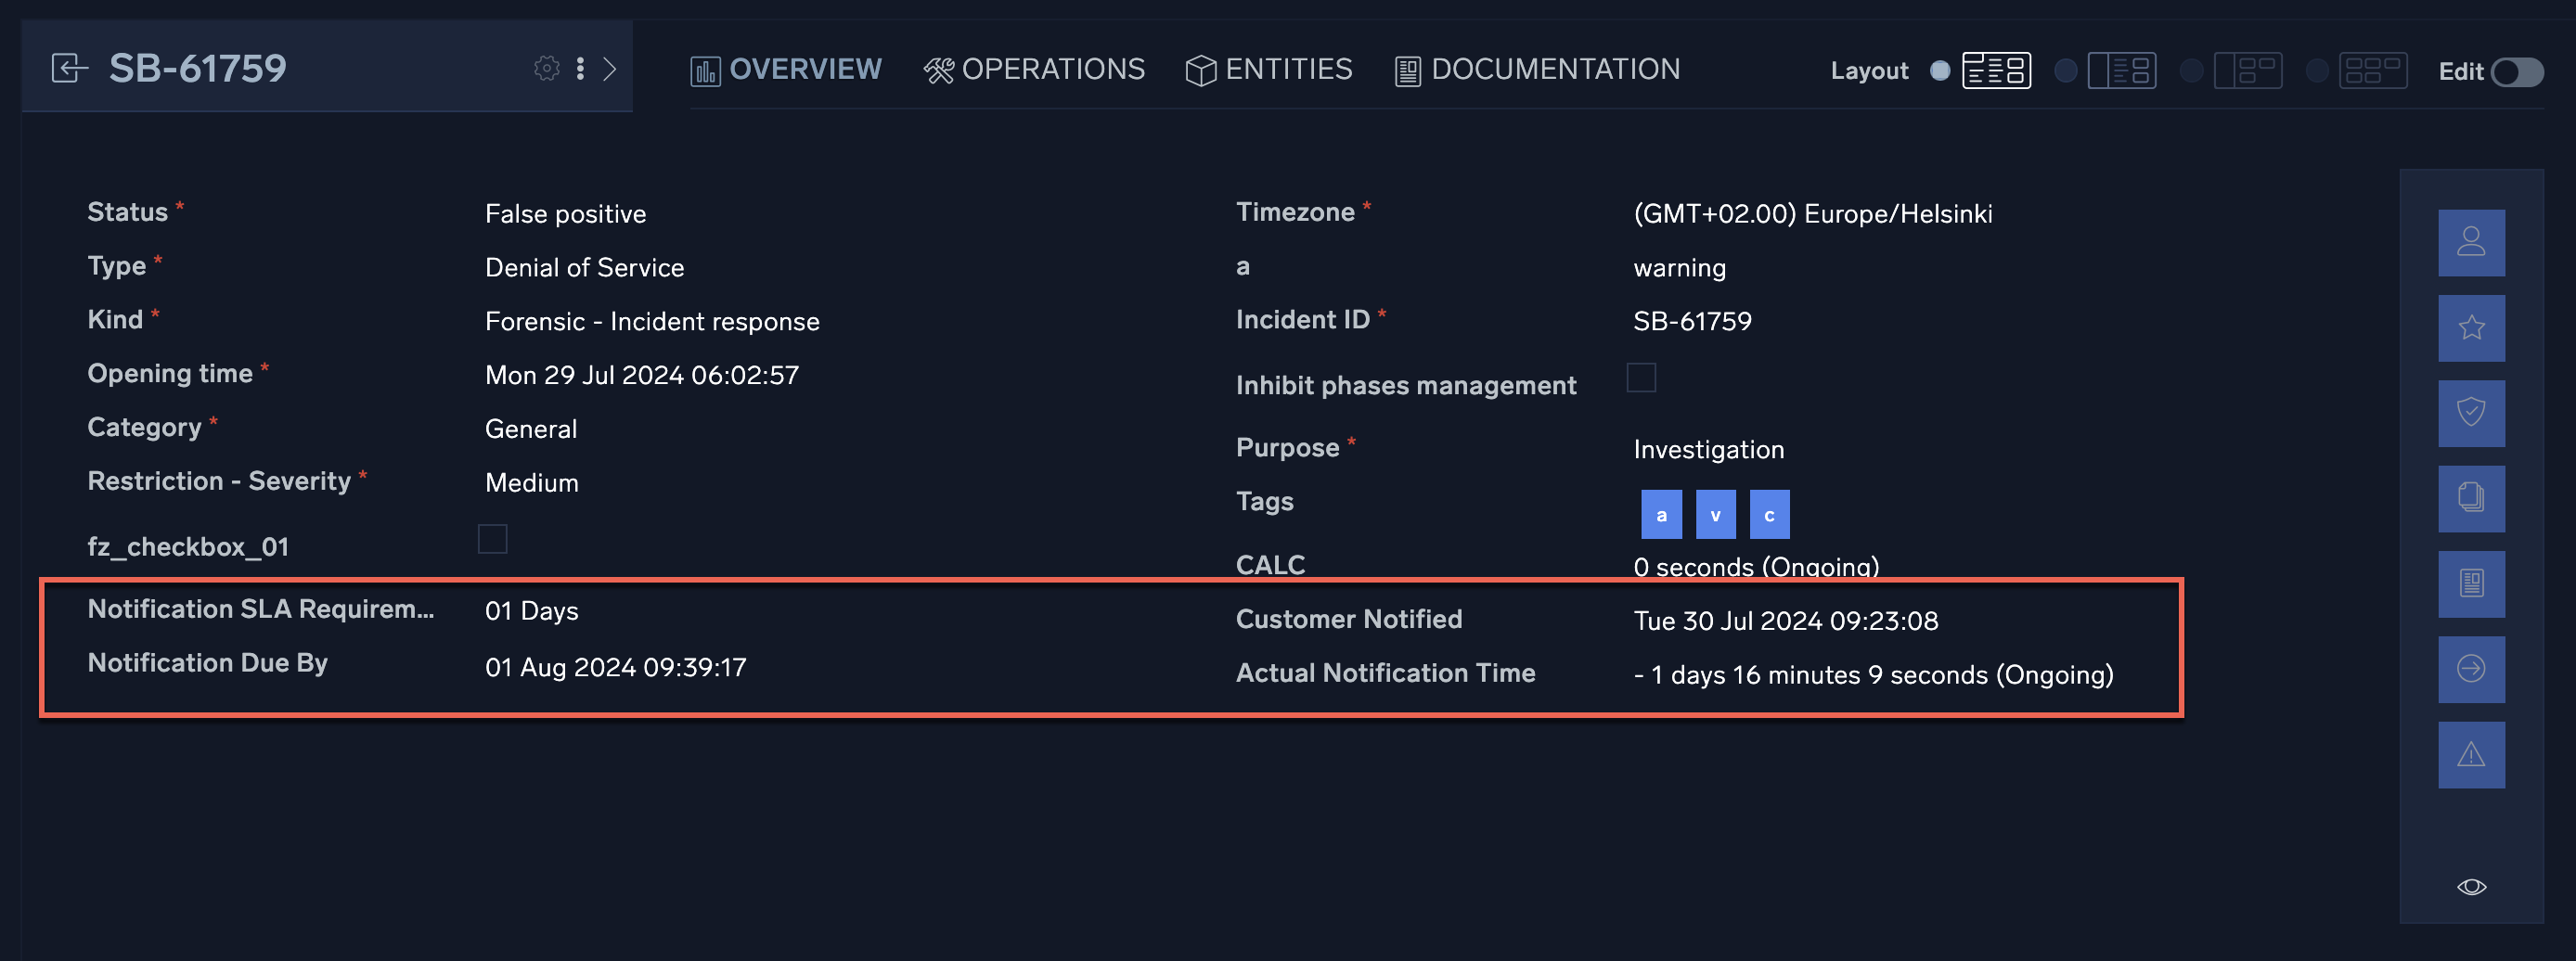
In the following example, custom fields provide information on the status of an organization's notification SLA. Two of the custom fields require user input:
- Notification SLA Requirement is used to store the SLA time interval, such as 30 minutes.
- Customer Notified allows you to enter the date and time the customer was notified.
The remaining custom fields require no user input and are calculation fields only:
- Notification Due By will calculate and display the date and time the notification must be conducted by adding the Notification SLA Requirement field to the start time.
- Actual Notification Time will calculate and display the actual time taken to notify the customer by subtracting the start time from the Customer Notified time.

These custom field settings will appear in the Cloud SOAR Incident screen as follows:
Incident labels
The Incident label page allows you to define labels for different types of incidents. When incidents are created by the system, incident labels are automatically applied to the incidents. You specify the incident label to be used for each incident type when you create incident templates and automation rules.
To create an incident label:
- New UI. In the main Sumo Logic menu select Cloud SOAR, and then under Cloud SOAR Configurations select Incident Labels.
- Click + to the left of Incident label.
Classic UI. Click the gear icon in the top right, select Settings, and on the left menu select Customization > Incident labels. 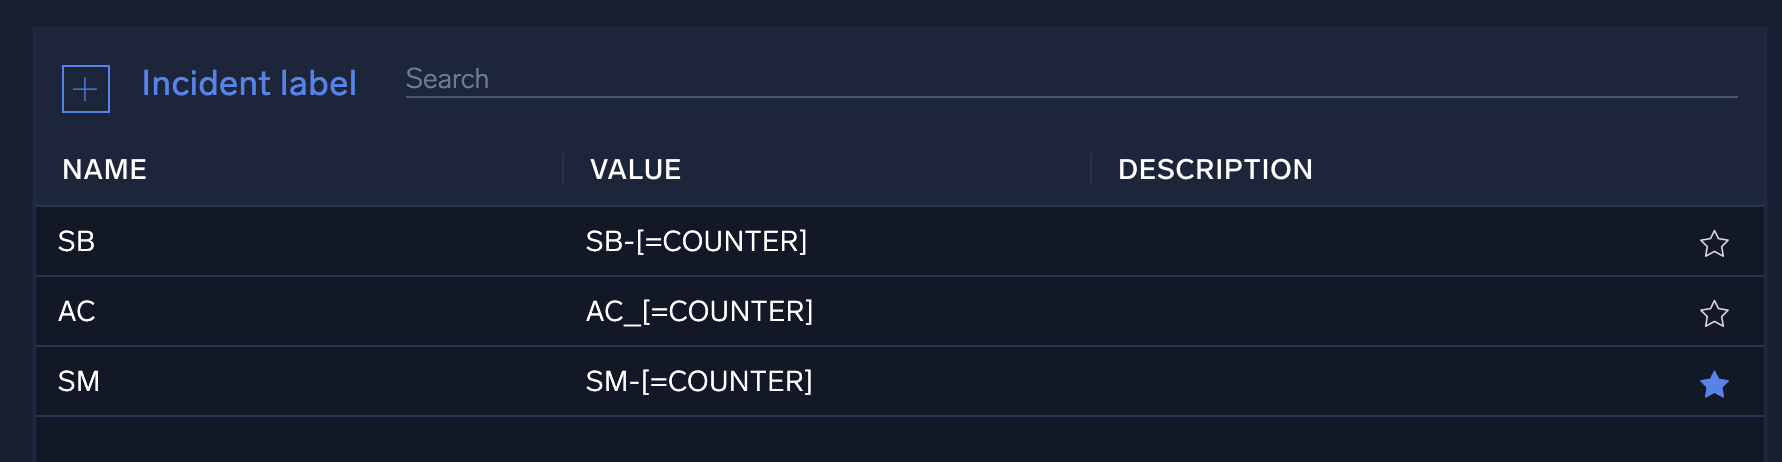
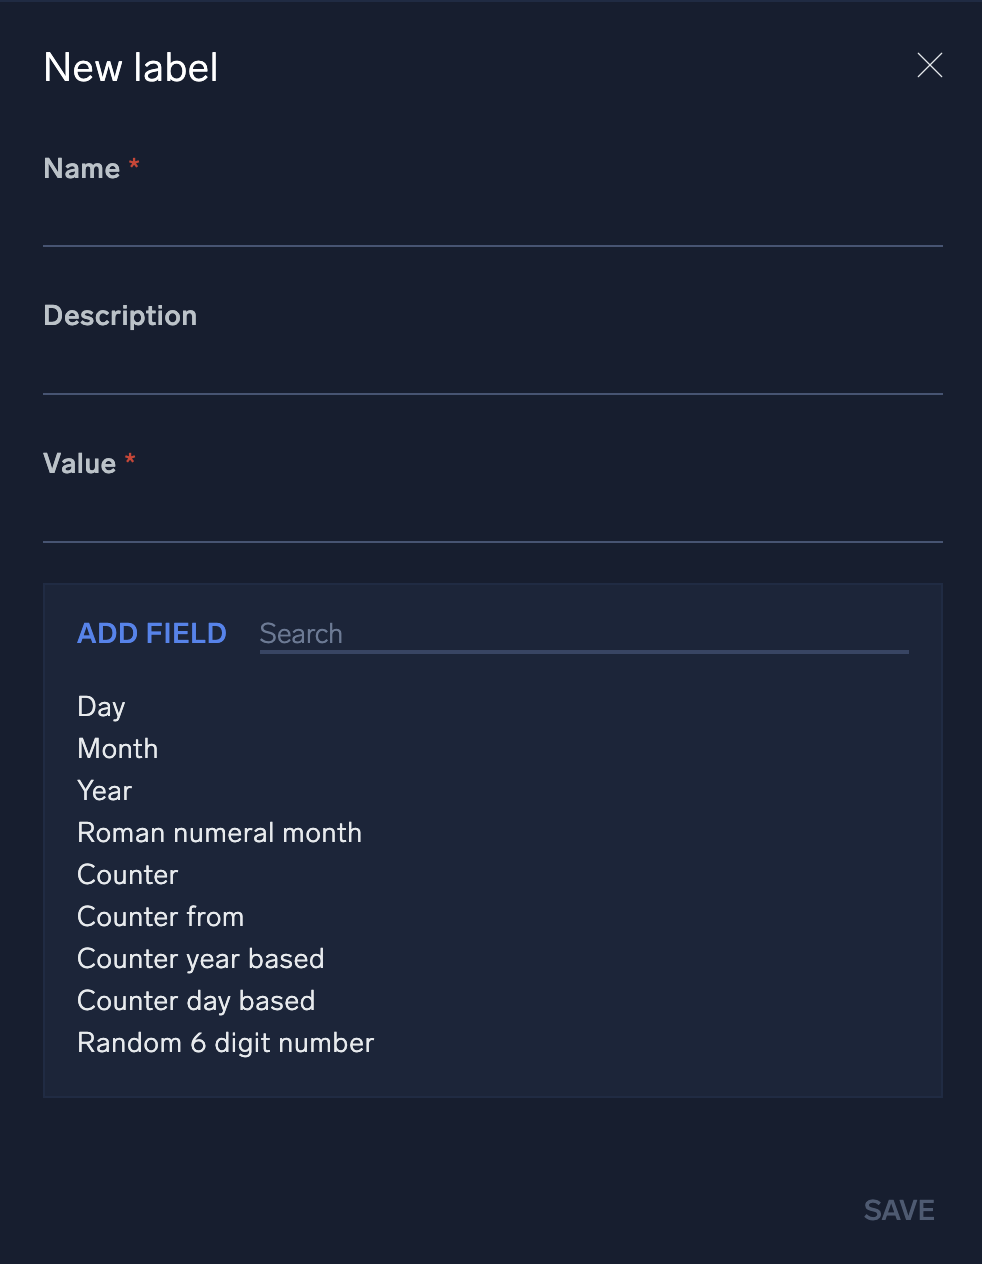
- Enter the following on the New label dialog:
- Name. Enter a name for the label. This name will not appear in the label itself.
- Description. Enter a description for what the label will be used for.
- Value. Enter a value for the label. The fields below will be appended to this label.
- ADD FIELD. Double-click the following fields you want to append to the label. They will automatically generate values:
- Day. The day of the month.
- Month. The month of the year.
- Year. The year.
- Roman numeral month. The month represented as Roman numerals. For example, I, II, III, IV, V, VI, VII, VIII, IX, X, XI, XII.
- Counter. A counter beginning at 1.
- Counter from. A counter beginning at the number you specify. Replace the
Xin the field with the number to start from. - Counter year based. A counter based on the year.
- Counter day based. A counter based on the day.
- Random six digit number. A randomly-generated number.
Triage
New UI. To access triage configuration settings, in the main Sumo Logic menu select Cloud SOAR, and then under Cloud SOAR Configurations select Triage.
Classic UI. To access triage configuration settings, click the gear icon ![]() in the top right, select Settings, and on the left menu select Customization > Triage.
in the top right, select Settings, and on the left menu select Customization > Triage.
Cloud SOAR's Triage module ingests events via the Cloud SOAR API and can be used to triage events which may be unverified or have a low confidence level before they are converted to incidents.
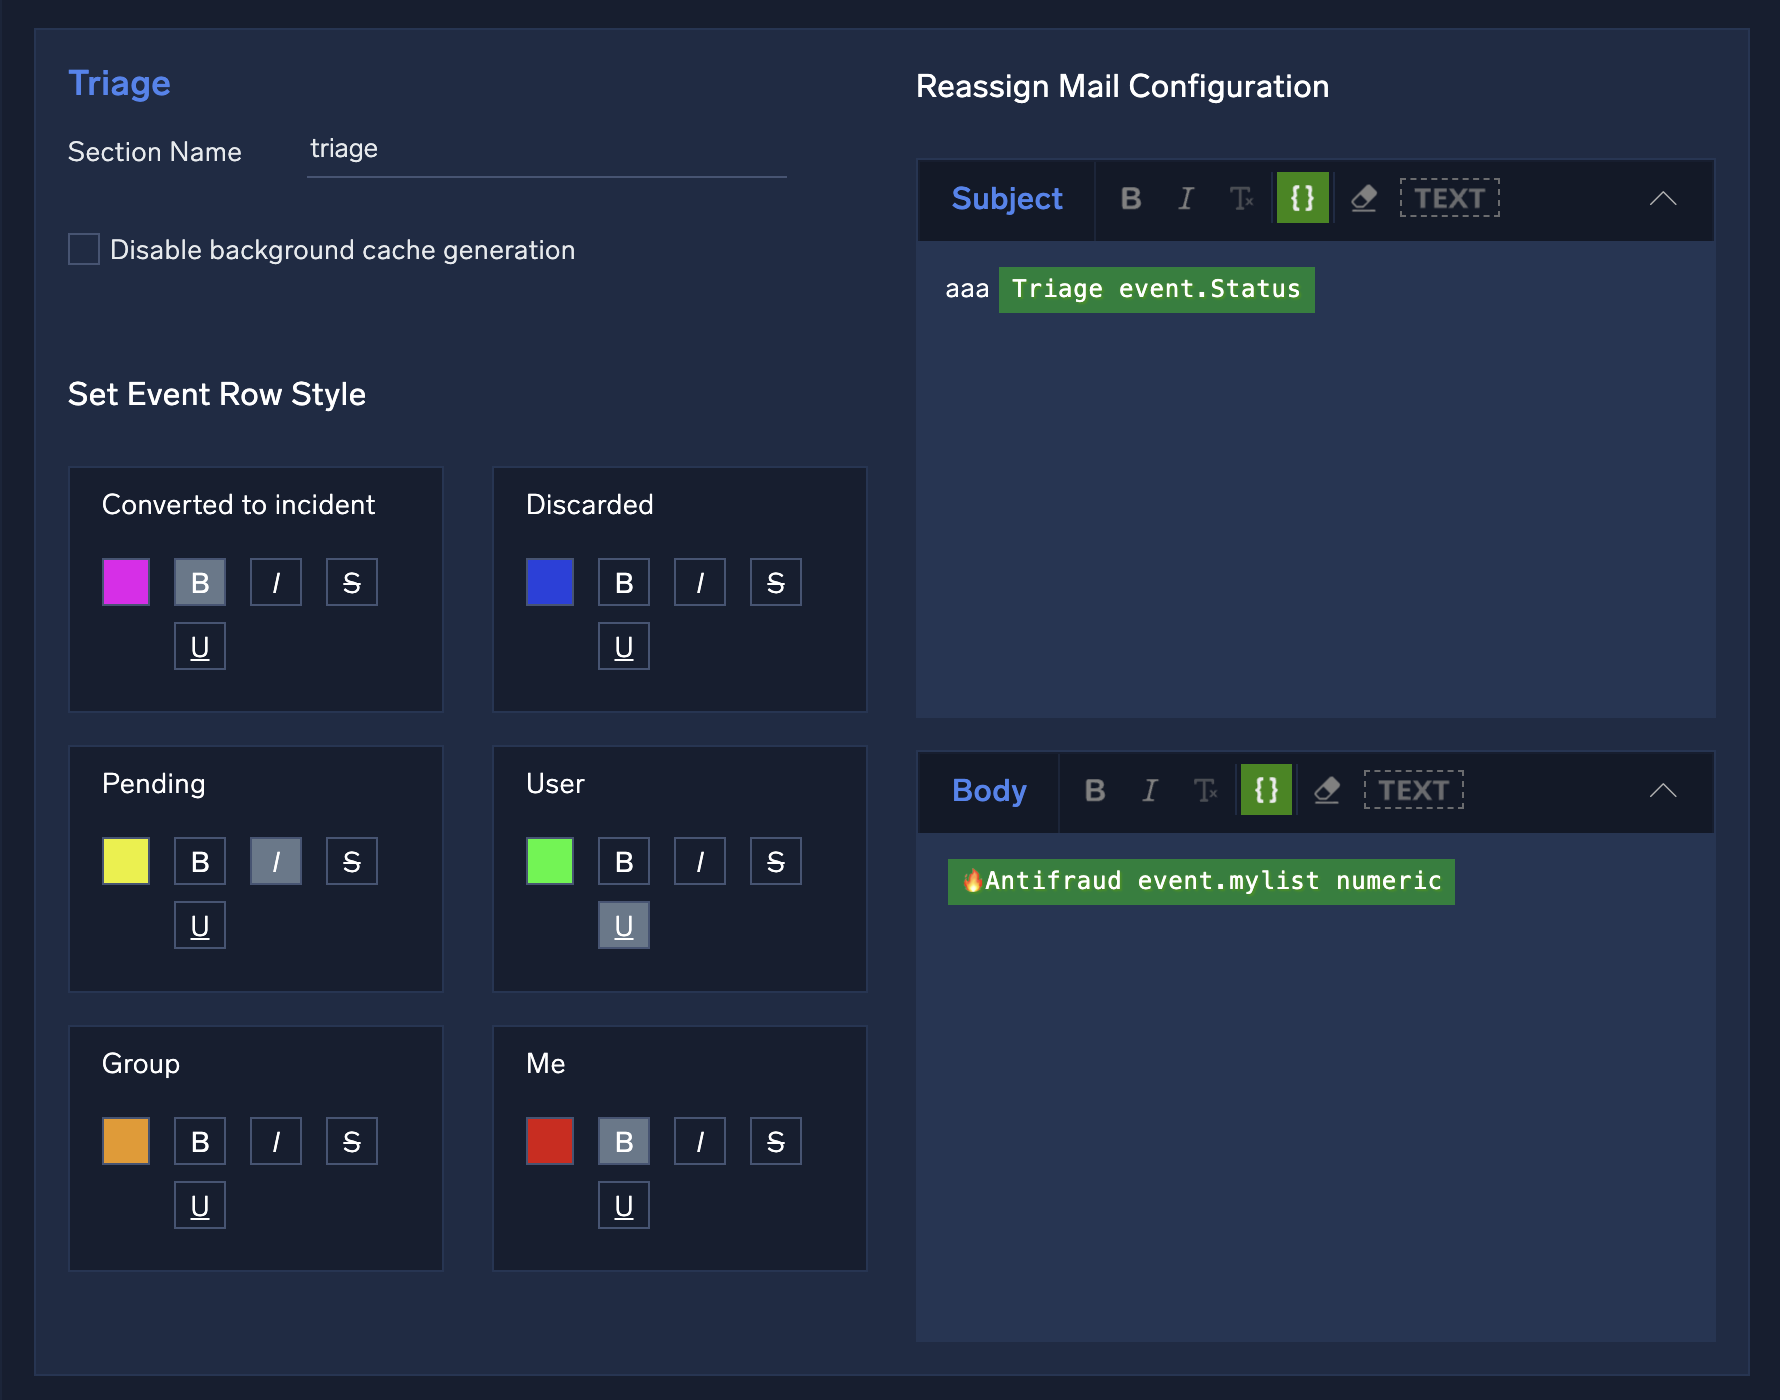
You can customize triage display preferences on the Triage configuration page. You can color-code triage events based on status to easily distinguish them from each other when viewing the list of triage events. You can also modify the name of the module from Triage to a name of your choosing. The new name will be displayed in all areas of Cloud SOAR, including the menu and logs.
- Section Name. The name you want to use for the Triage section of the user interface.
- Disable background cache generation. Prevent cache from being generated for triage events. Selecting this box may speed up page load, but slow triage event retrieval.
- Set event row style. Set the colors to display for triage events.
- Reassign Mail Configuration. Customize the content of emails sent to analysts when triage events are reassigned.
Data retention
Default retention periods by data type
Sumo Logic automatically deletes the following customer data according to the table retention period below, except for customers required to ensure HIPAA compliance (see second table).
| Data type | Retention period |
|---|---|
| Incidents | 2 years |
| Triage | 2 years |
| Entities | 2 years |
| Playbook and action executions | 2 years |
For HIPAA-compliant customers, we delete data following the retention periods below.
If you need to follow HIPAA compliance, it is important to explicitly communicate this when requesting Cloud SOAR activation.
| Data type | Retention period |
|---|---|
| Incidents | 7 years |
| Triage | 7 years |
| Entities | 7 years |
| Playbook and action executions | 7 years |
Custom retention periods
You can request retention period times different from those declared in the tables above, as long as the retention period requested is greater than 1 day yet less than 5000 days.
In order to do that, please open a Support ticket with your request.
Static IP addresses
The following table provides the static IP addresses used for Cloud SOAR by deployment. These are provided in case you want to explicitly allow the IP addresses on the integrations you install.
| Deployment | Static IP addresses |
|---|---|
| AU | 13.237.251.71 |
| CA | 15.222.181.69 |
| DE | 18.184.129.195 |
| EU | 63.34.175.126 |
| JP | 18.178.171.229 |
| KR | 43.202.239.158 |
| US1 | 3.220.183.150 |
| US2 | 44.241.8.12 |