Scheduled Report
The scheduled report feature enables you to receive an emailed copy of a dashboard (PDF or PNG format) at the frequency of your choice, allowing you to get your dashboard insights without logging into the Sumo Logic platform.
You can distribute the dashboard to people in your Sumo Logic organization who do not have access to the platform, enabling better information sharing. It is also useful for compliance management, as it automatically captures and archives the state of the dashboard.
- For PNG format export, you will receive both embedded and attached copy of the dashboard to your email.
- If a PDF and/or PNG export fails, you’ll receive an error notification by email.
Create a scheduled report
To schedule a dashboard email report, do the following:
- Navigate to the dashboard for which you want to create a schedule.
- If the dashboard supports template variables, select values, if desired.
- Click the kebab menu icon and select Scheduled Reports.
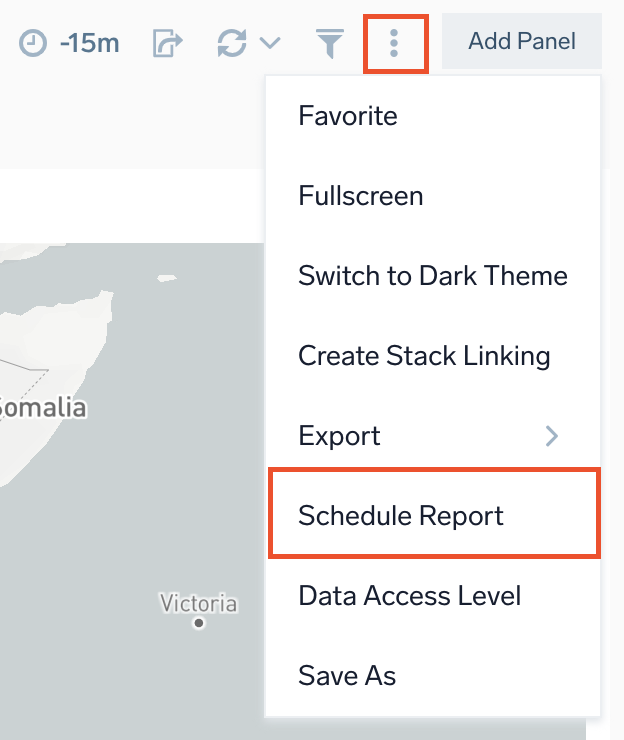
The Scheduled Reports option appears only if you have edit permissions for the dashboard. You have edit permissions for all dashboards you create, and any dashboards have been shared with you with edit permissions granted.
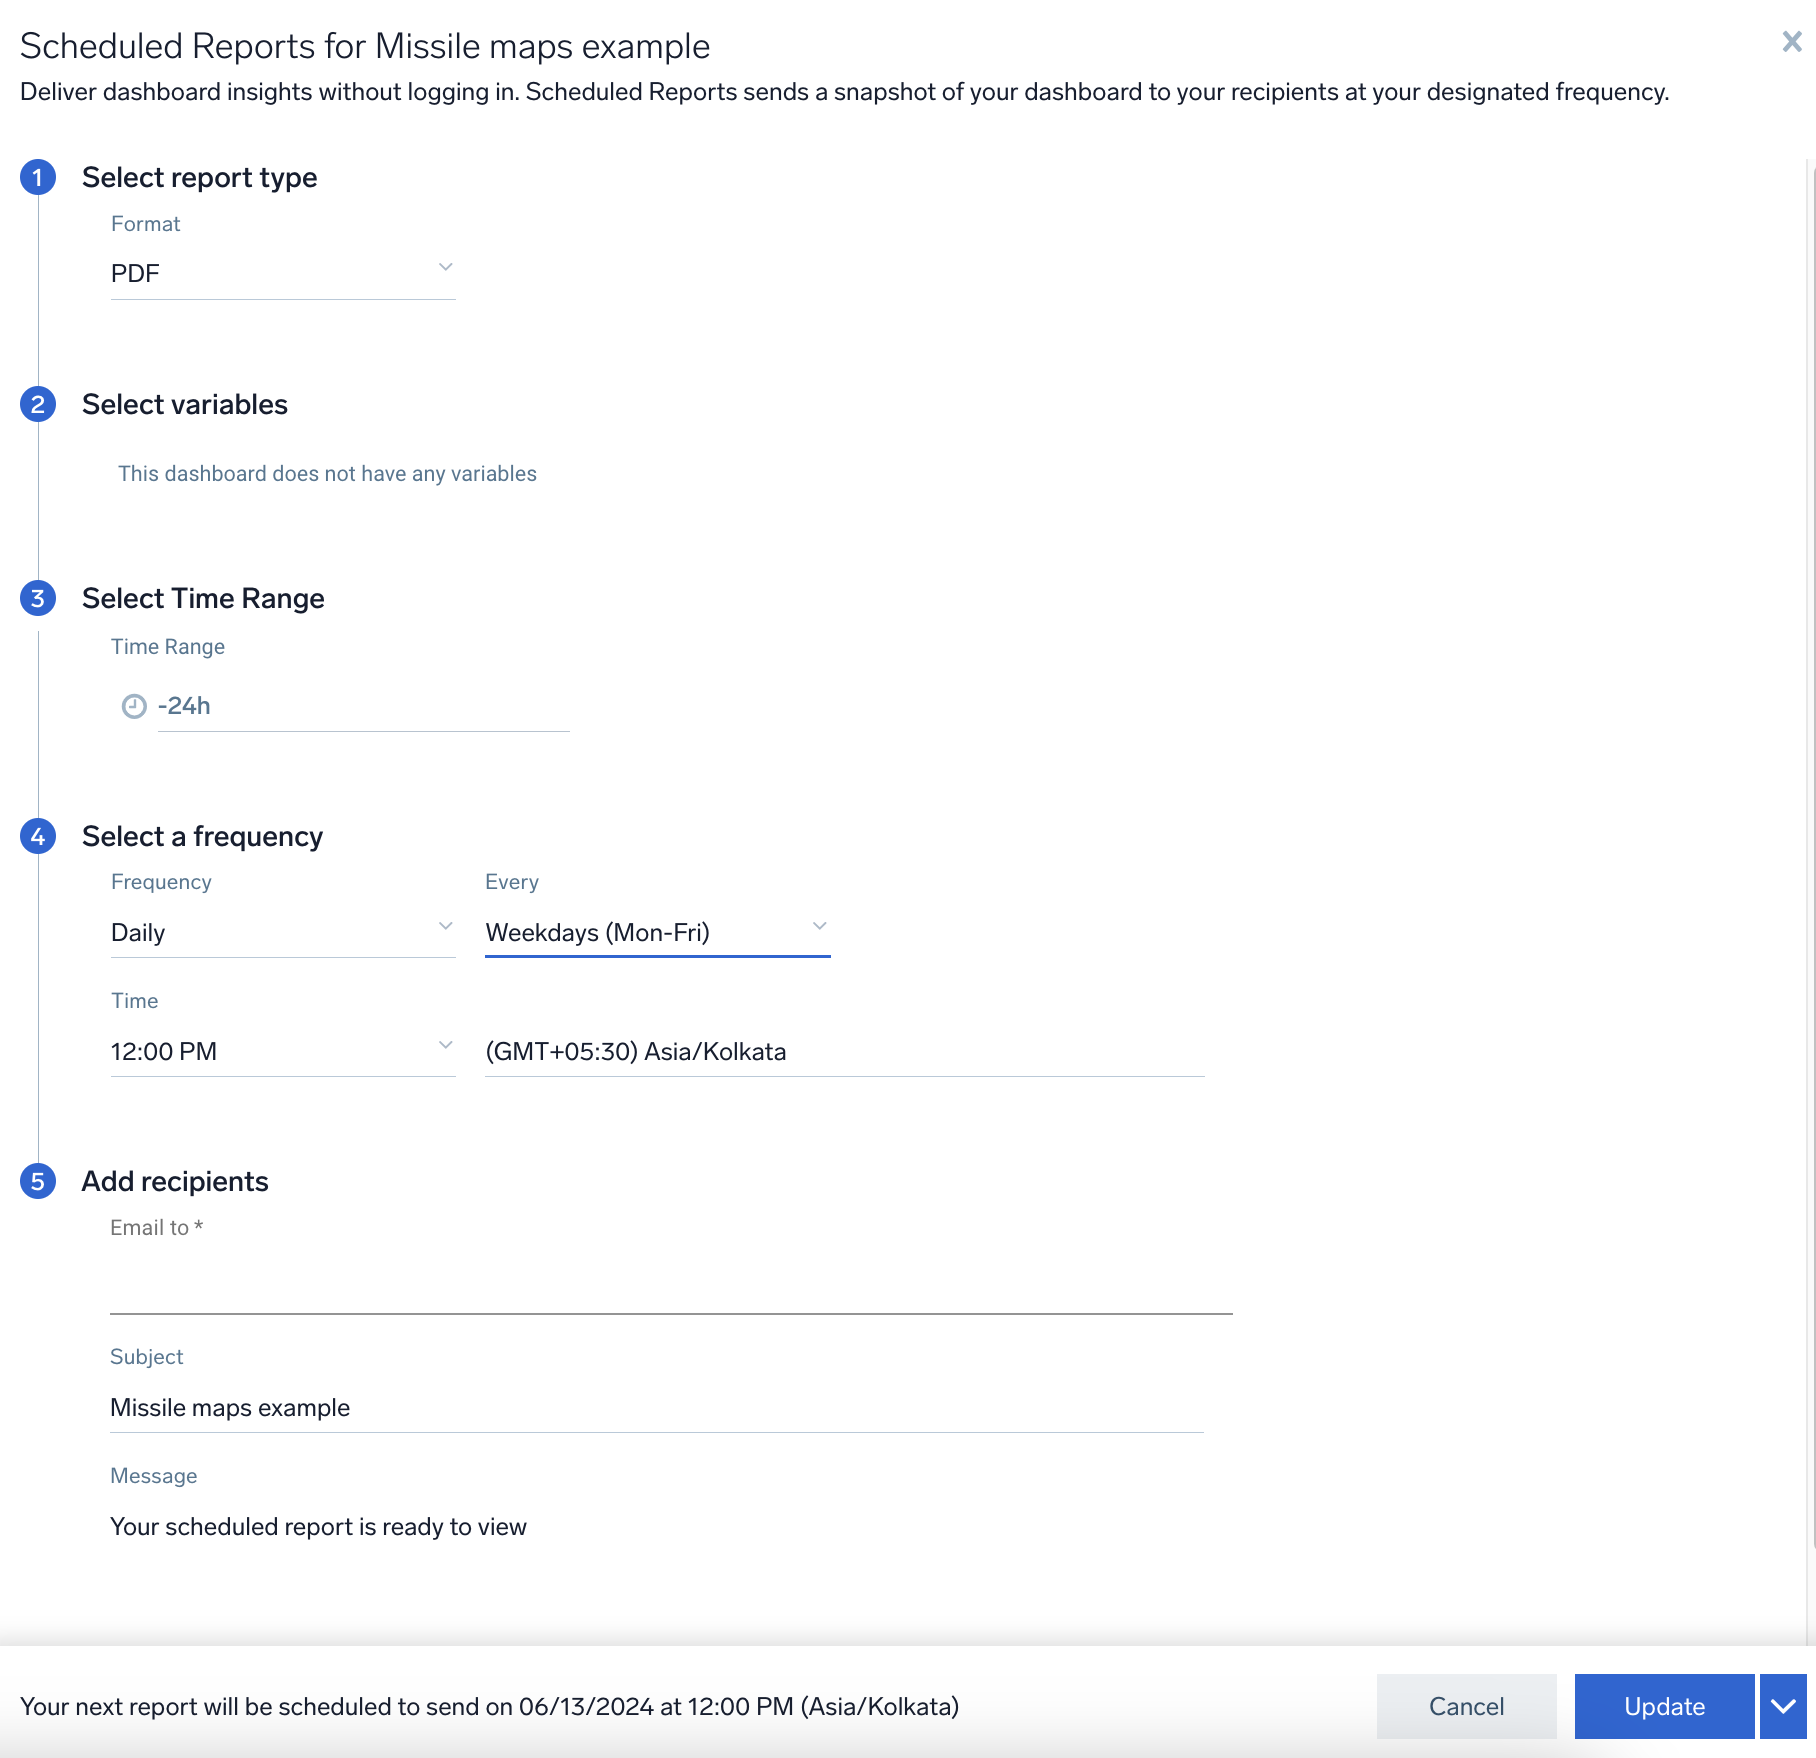
- Enter your preferences in the Scheduled Reports popup.
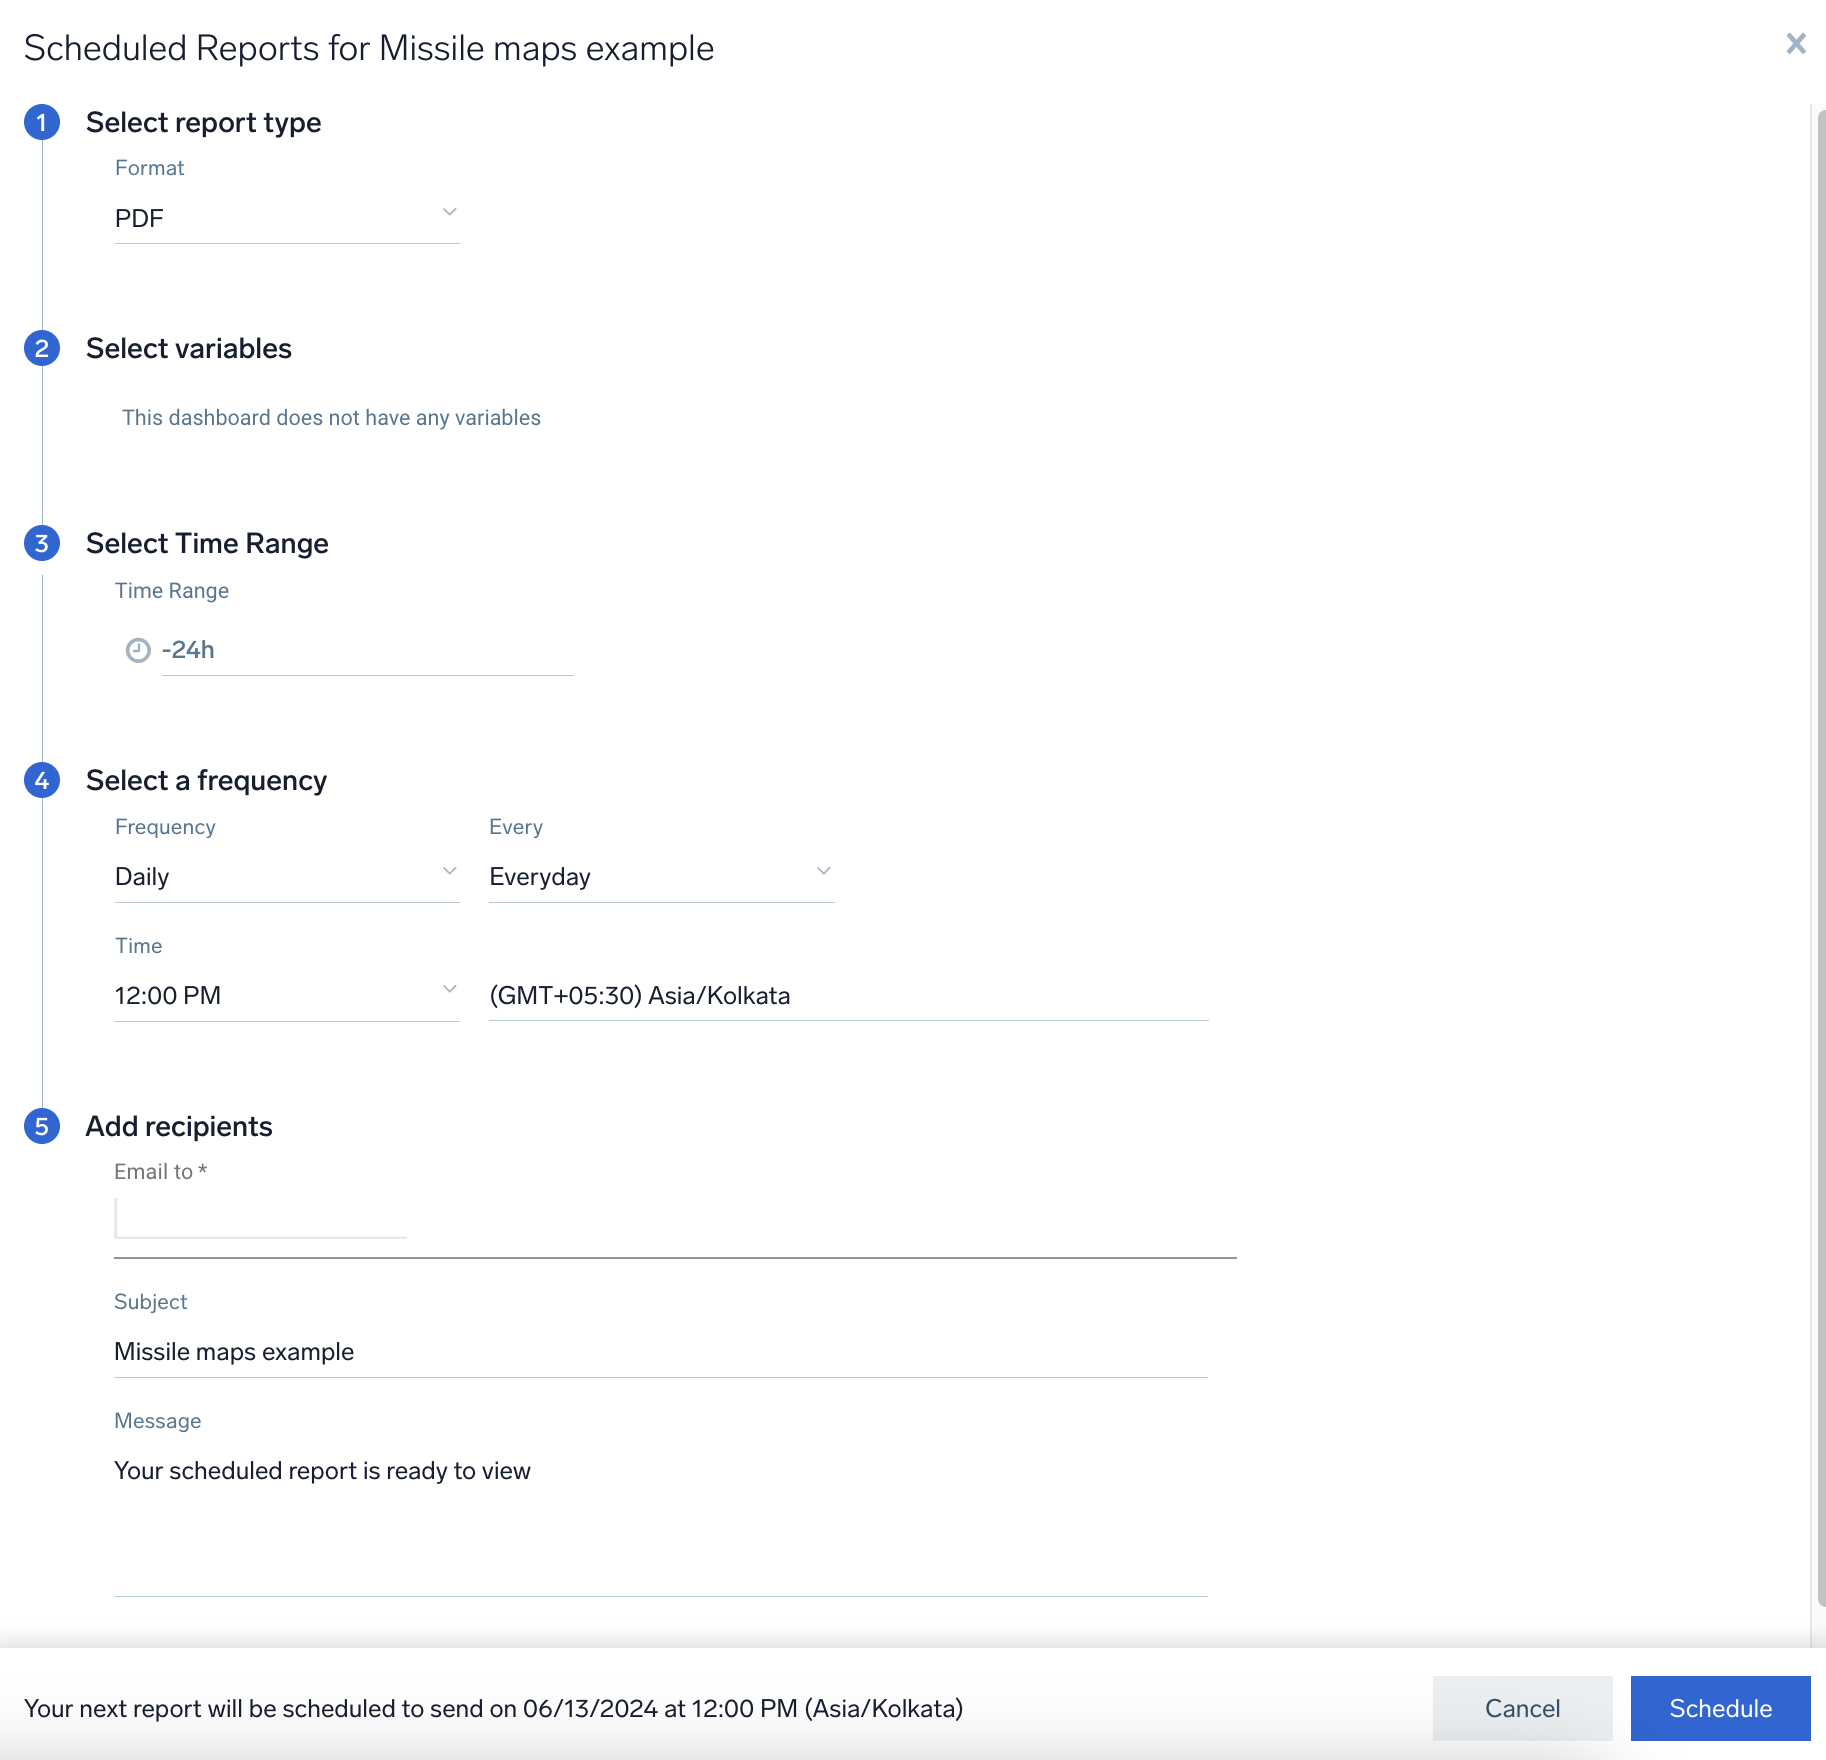
- Select report type. Choose the format in which you would like to see the report (PDF or PNG).
- Select variables. If the dashboard supports template variables, select the values which you need for the scheduled report for the dashboard.
- Select Time Range. Set the time range for the dashboard by selecting a predefined interval from a drop-down list or by choosing a recently used time range.
- Select a frequency. Choose the frequency settings for the scheduled dashboard report:
- Frequency. Choose the frequency Daily, Weekly, or Monthly.
- Every. The options depend on the Frequency you selected.
- Daily. Choose Every day, Weekdays, or Weekends.
- Weekly. Choose a particular day of the week.
- Monthly. Choose which day of which week of the month you want the report to be sent.
- Time. Choose the time of day you want the dashboard to be sent.
- Time Zone. Choose your time zone.
- Add recipients.
- Email to. Enter the email addresses where you want the dashboard to be sent.
- Subject. Enter a subject for the email.
- Message. Enter the body of the email.
- Click Schedule to schedule the report.
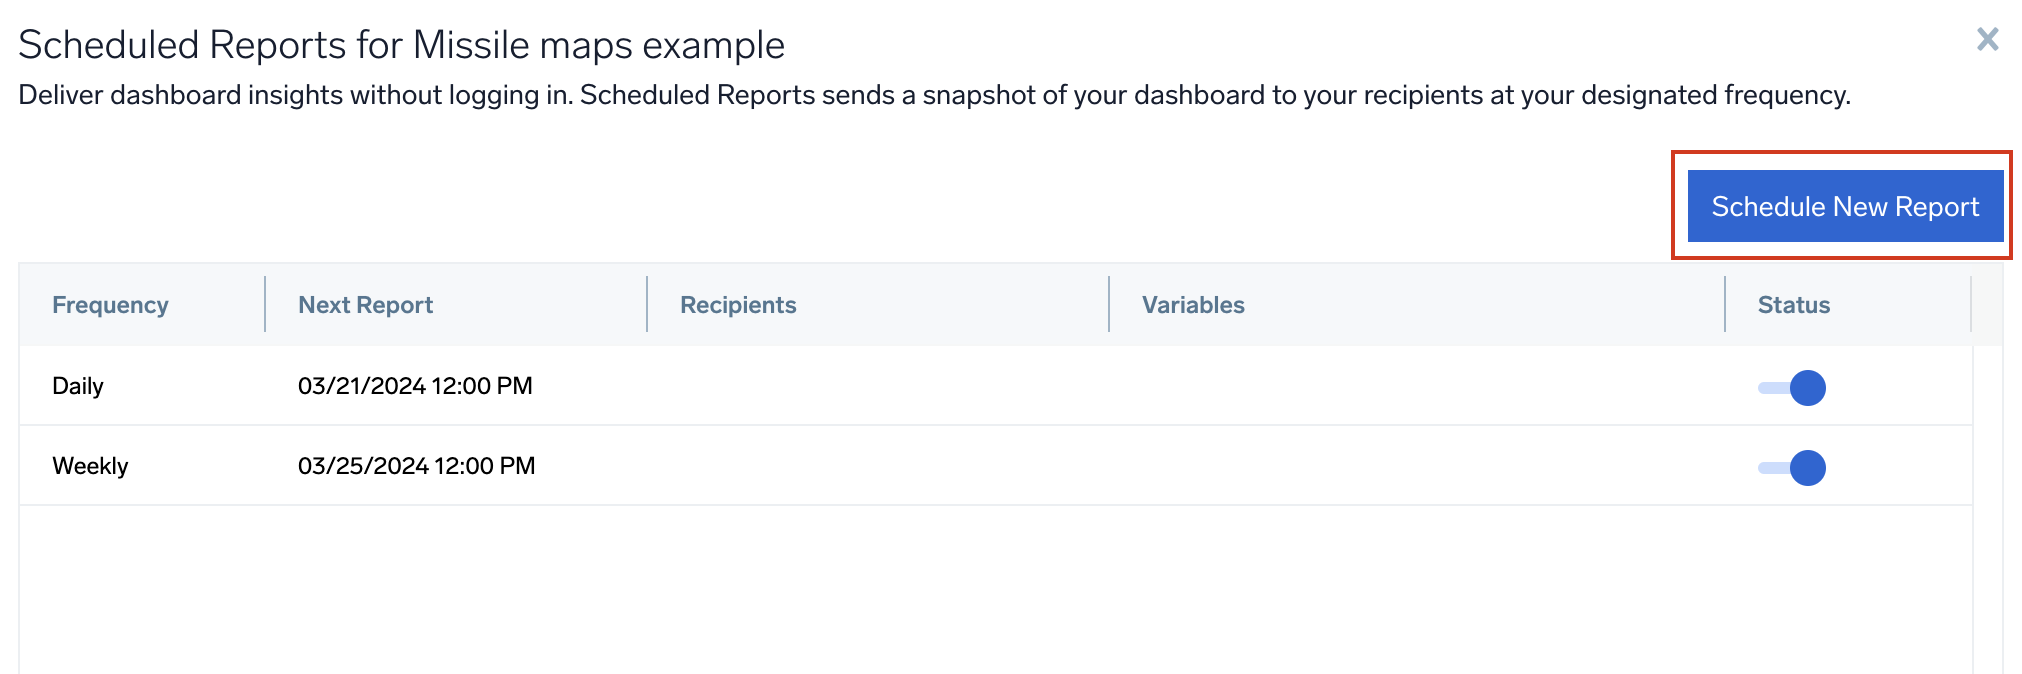
- (Optional) Click Schedule New Report to create multiple scheduled reports for the dashboard. By allowing multiple reports from a single dashboard, you can save time, reduce effort, and ensure the delivery of critical insights to your team members and stakeholders. With scheduled reports, you can keep everyone informed with daily updates for your operations team or monthly summaries for executive reviews.
Scheduled reports are allowed to run for a maximum of five minutes. Any panel that has not completed running its queries at this time will have partial or empty data in the panel with an error message in the report.
Limitations
- Altering the template variables in dashboard will not update the scheduled report.
- You can enter up to 10 email addresses to which you want to send the dashboard.
- You can create a maximum of 20 scheduled reports for a dashboard.
Edit a scheduled report
To update an existing a scheduled report dashboard email:
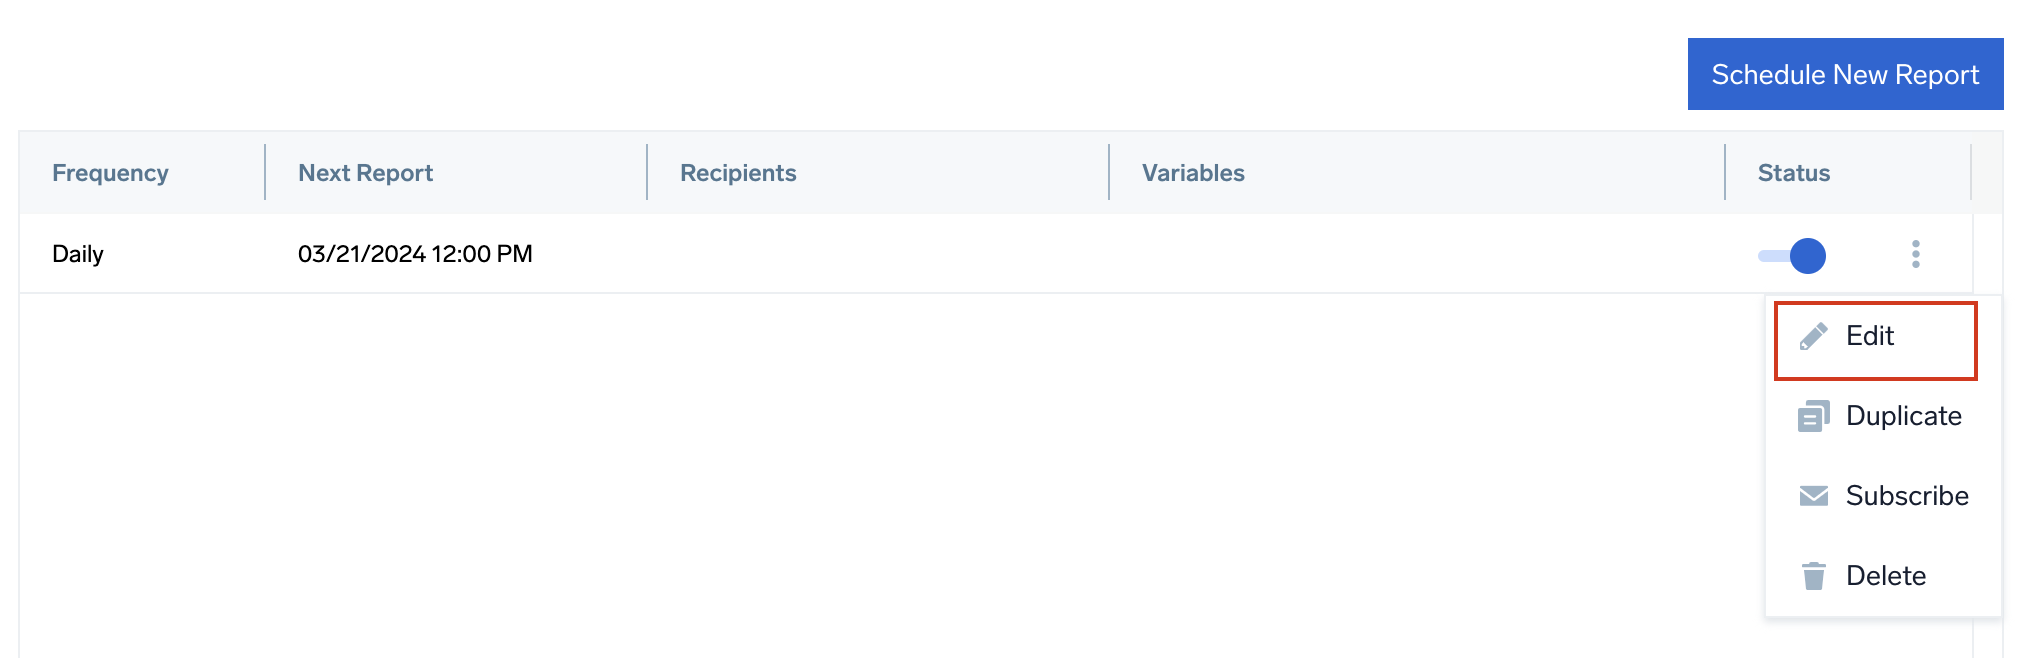
- Navigate to the dashboard, then click the kebab menu and select Scheduled Reports.
- Click the kebab menu and select Edit against the required report. Or, double click the selected scheduled report to edit report.
- Make your desired changes. When you're done, click Update.
Toggle ON or OFF the status button to activate or deactivate the scheduled report.
Delete a scheduled report
To cancel a scheduled report:
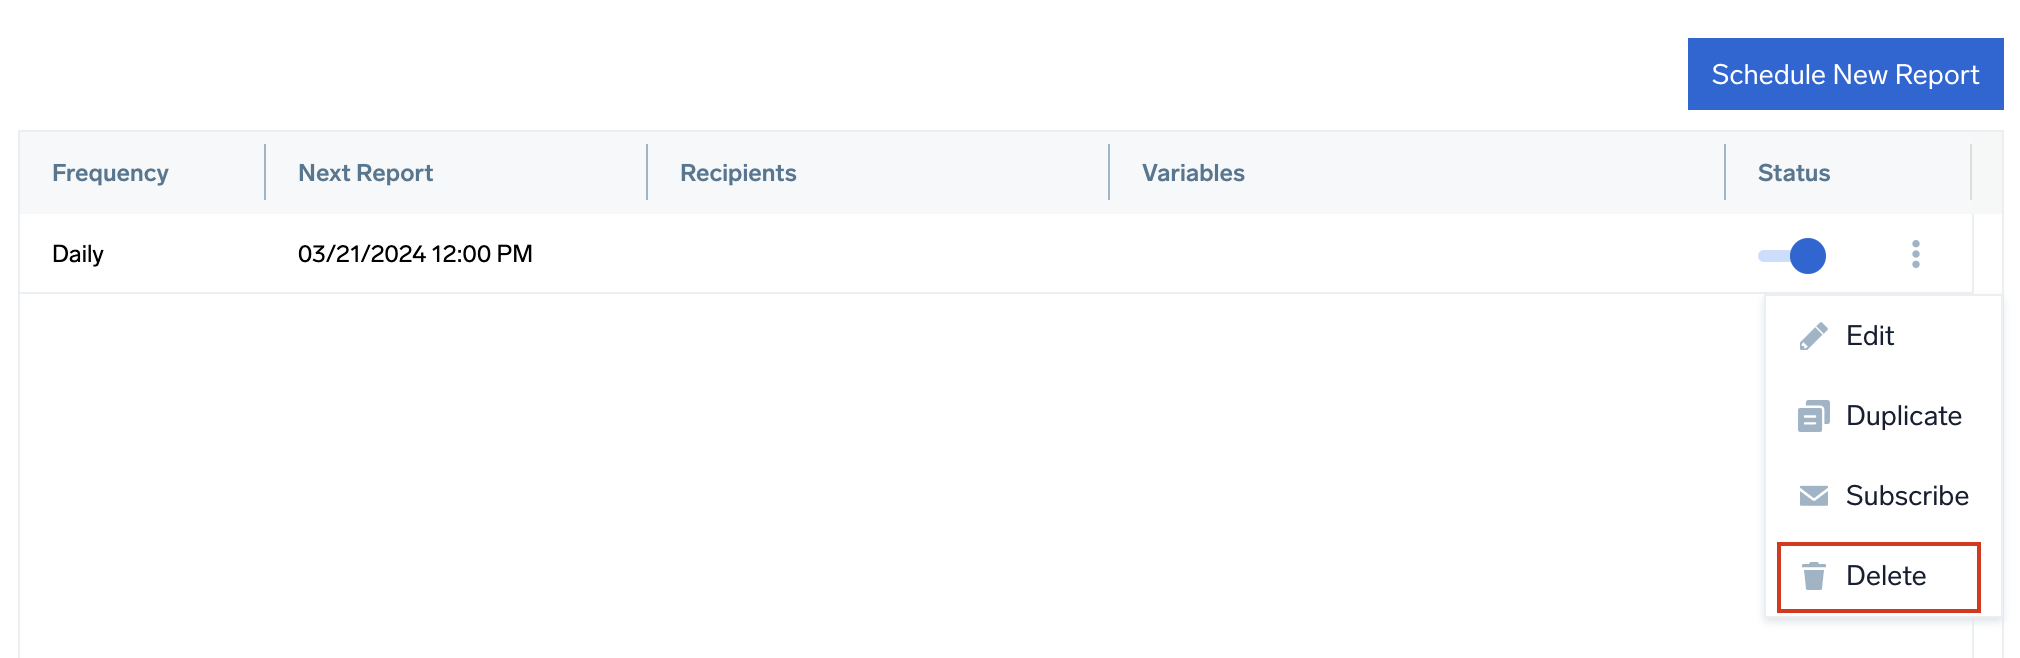
- Navigate to the dashboard, then click the kebab menu and select Scheduled Reports to open the scheduled reports list.
- Click the kebab menu and select Delete against the required report.
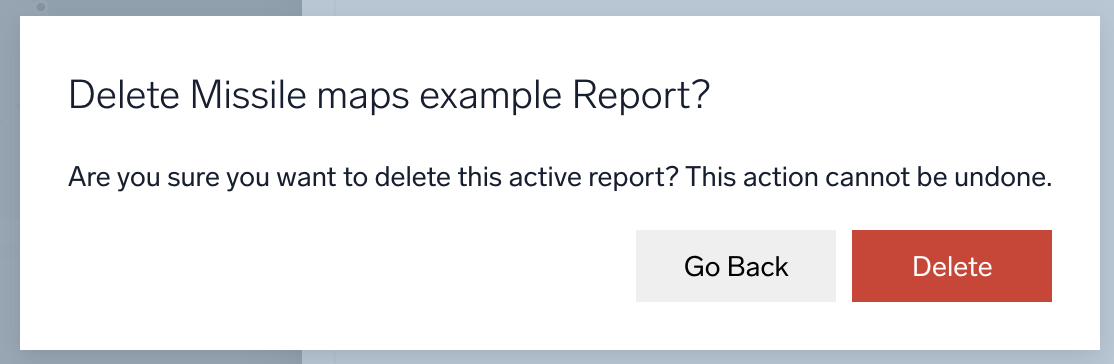
- In the popup window, click Delete.
Duplicate a Scheduled Report
To duplicate to an existing a Scheduled Report:
- Navigate to the dashboard, then click the kebab menu and select Scheduled Reports to open the scheduled reports list.
- Click the kebab menu and select Save As... against the required report.
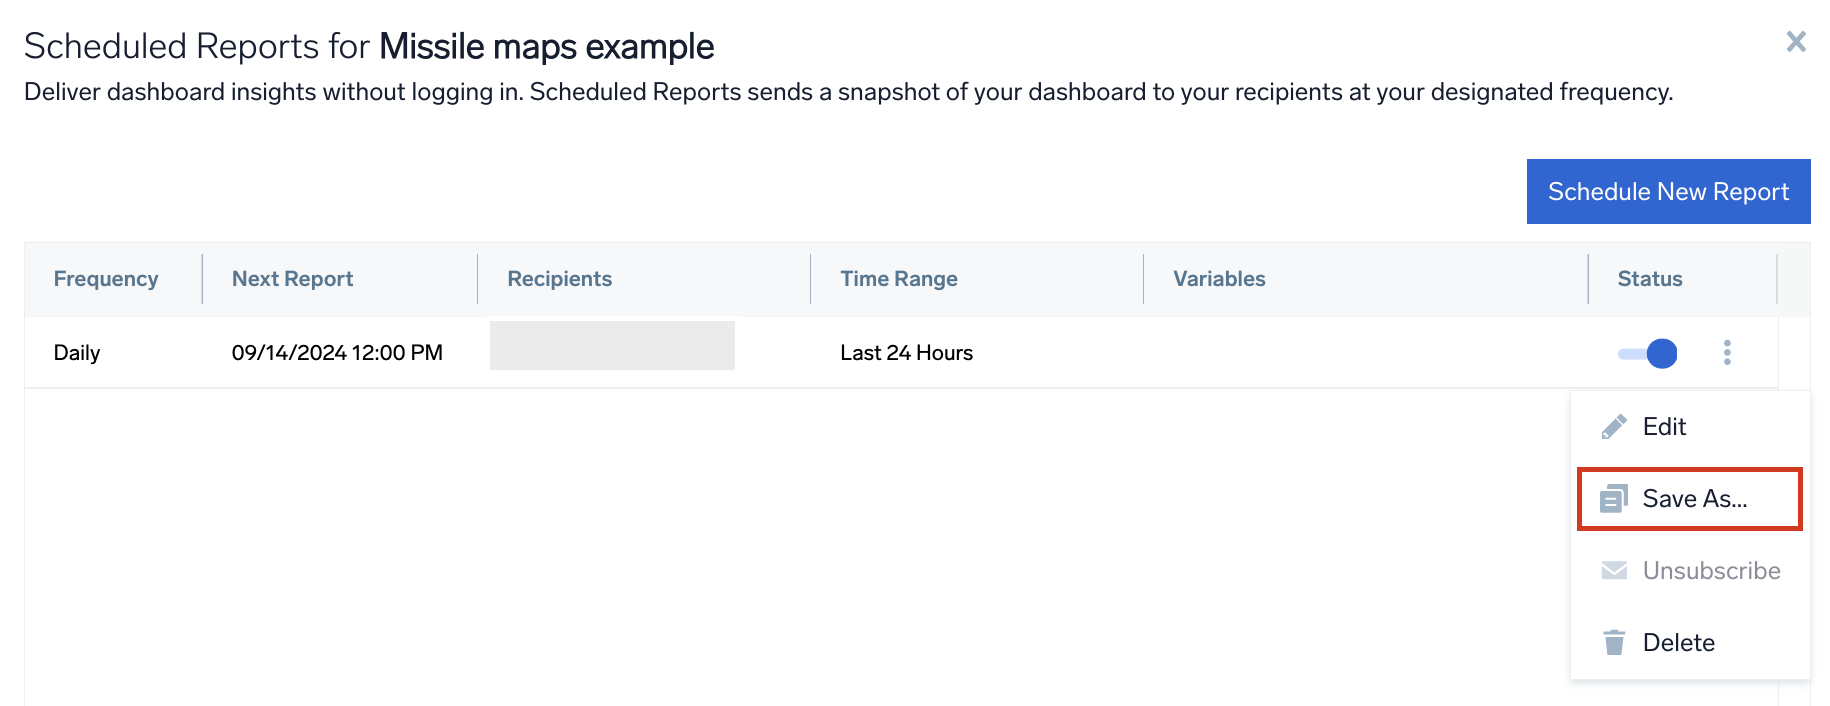
- Make your desired changes. When you're done, click Schedule.
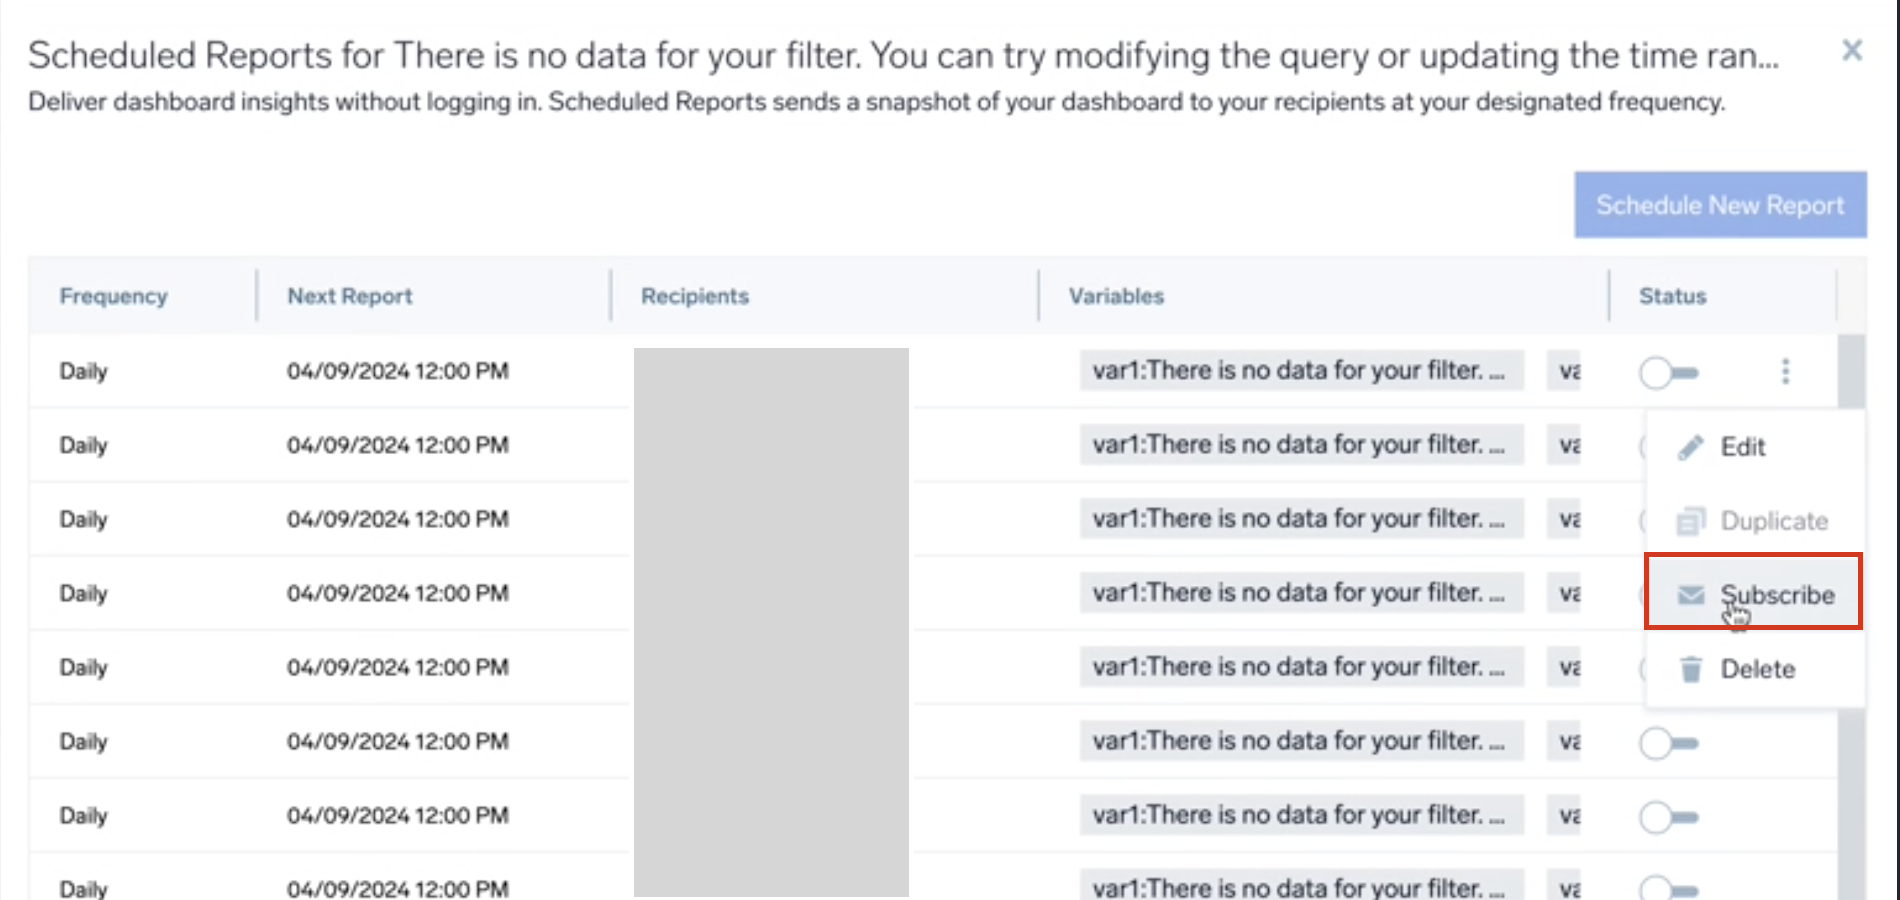
Subscribe/Unsubscribe to a Scheduled Report
You will not be able to unsubscribe if you are the only recipient.
To subscribe to an existing a Scheduled Report:
- Navigate to the dashboard, then click the kebab menu and select Scheduled Reports to open the scheduled reports list.
- Click the kebab menu and select Subscribe against the required report to automatically inject your user email into the list of recipients.