Installing Apps and Integrations
Sumo Logic apps give you pre-configured searches and dashboards customized with your source configurations and populated in a folder selected by you. In this doc, you'll learn how to install apps from the App Catalog to your Library and how to manage them in multiple environments.
Sumo Logic apps address these common use cases:
- Increase availability and performance. Sumo Logic enables issues to be identified before they impact the application and customer. Precise, proactive analytics quickly uncover hidden root causes across all layers of the application and infrastructure stack.
- Provide real-time insights. With Sumo Logic, enterprises can easily extract machine data insights to provide greater intelligence around their customers, products, and application usage. These insights provide a more accurate and complete analysis for business users.
- Accelerate Cloud deployment. Sumo Logic enables enterprises to automate and speed the development and deployment process for cloud-based applications. Companies can rapidly detect, identify and resolve application issues.
- Decrease app time to market. Sumo Logic facilitates a consistent release process, resulting in timely releases. It aids in quickly identifying application issues and configuration changes across development, testing, and deployment environments.
- Enforce compliance. Sumo Logic delivers a simple, proactive and automated process to audit and investigate operational, security and regulatory compliance incidents. All data is centralized, secured, and easily analyzed in real-time through a single, highly scalable solution.
To learn about the vendors and products that Sumo Logic integrates with, refer to the Product List.
Certified by Sumo Logic
Many of our apps are labeled with the Certified by Sumo Logic designation. Just look for the blue checkmark symbol:
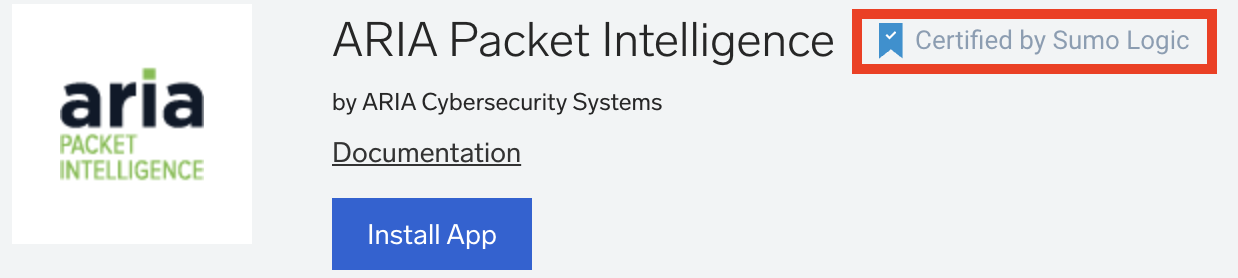
These apps have gone through code and functional review with the Sumo Logic app development team as part of the App Intelligence Partner Program. This process includes feedback and re-review as needed, and ensures that apps certified through this process meet the team's quality standards.
Prerequisites
| Account Type | Account Level |
|---|---|
| Cloud Flex | Trial, Professional, Enterprise |
| Credits | Trial, Essentials, Enterprise Operations, Enterprise Security, Enterprise Suite |
Certain apps have specific installation requirements. Be sure to check the instructions for your application for specific instructions.
Applications can be installed only by users with a Sumo Logic Professional or a Sumo Logic Enterprise account. Organizations with a Sumo Logic Free account currently cannot use Sumo Logic apps.
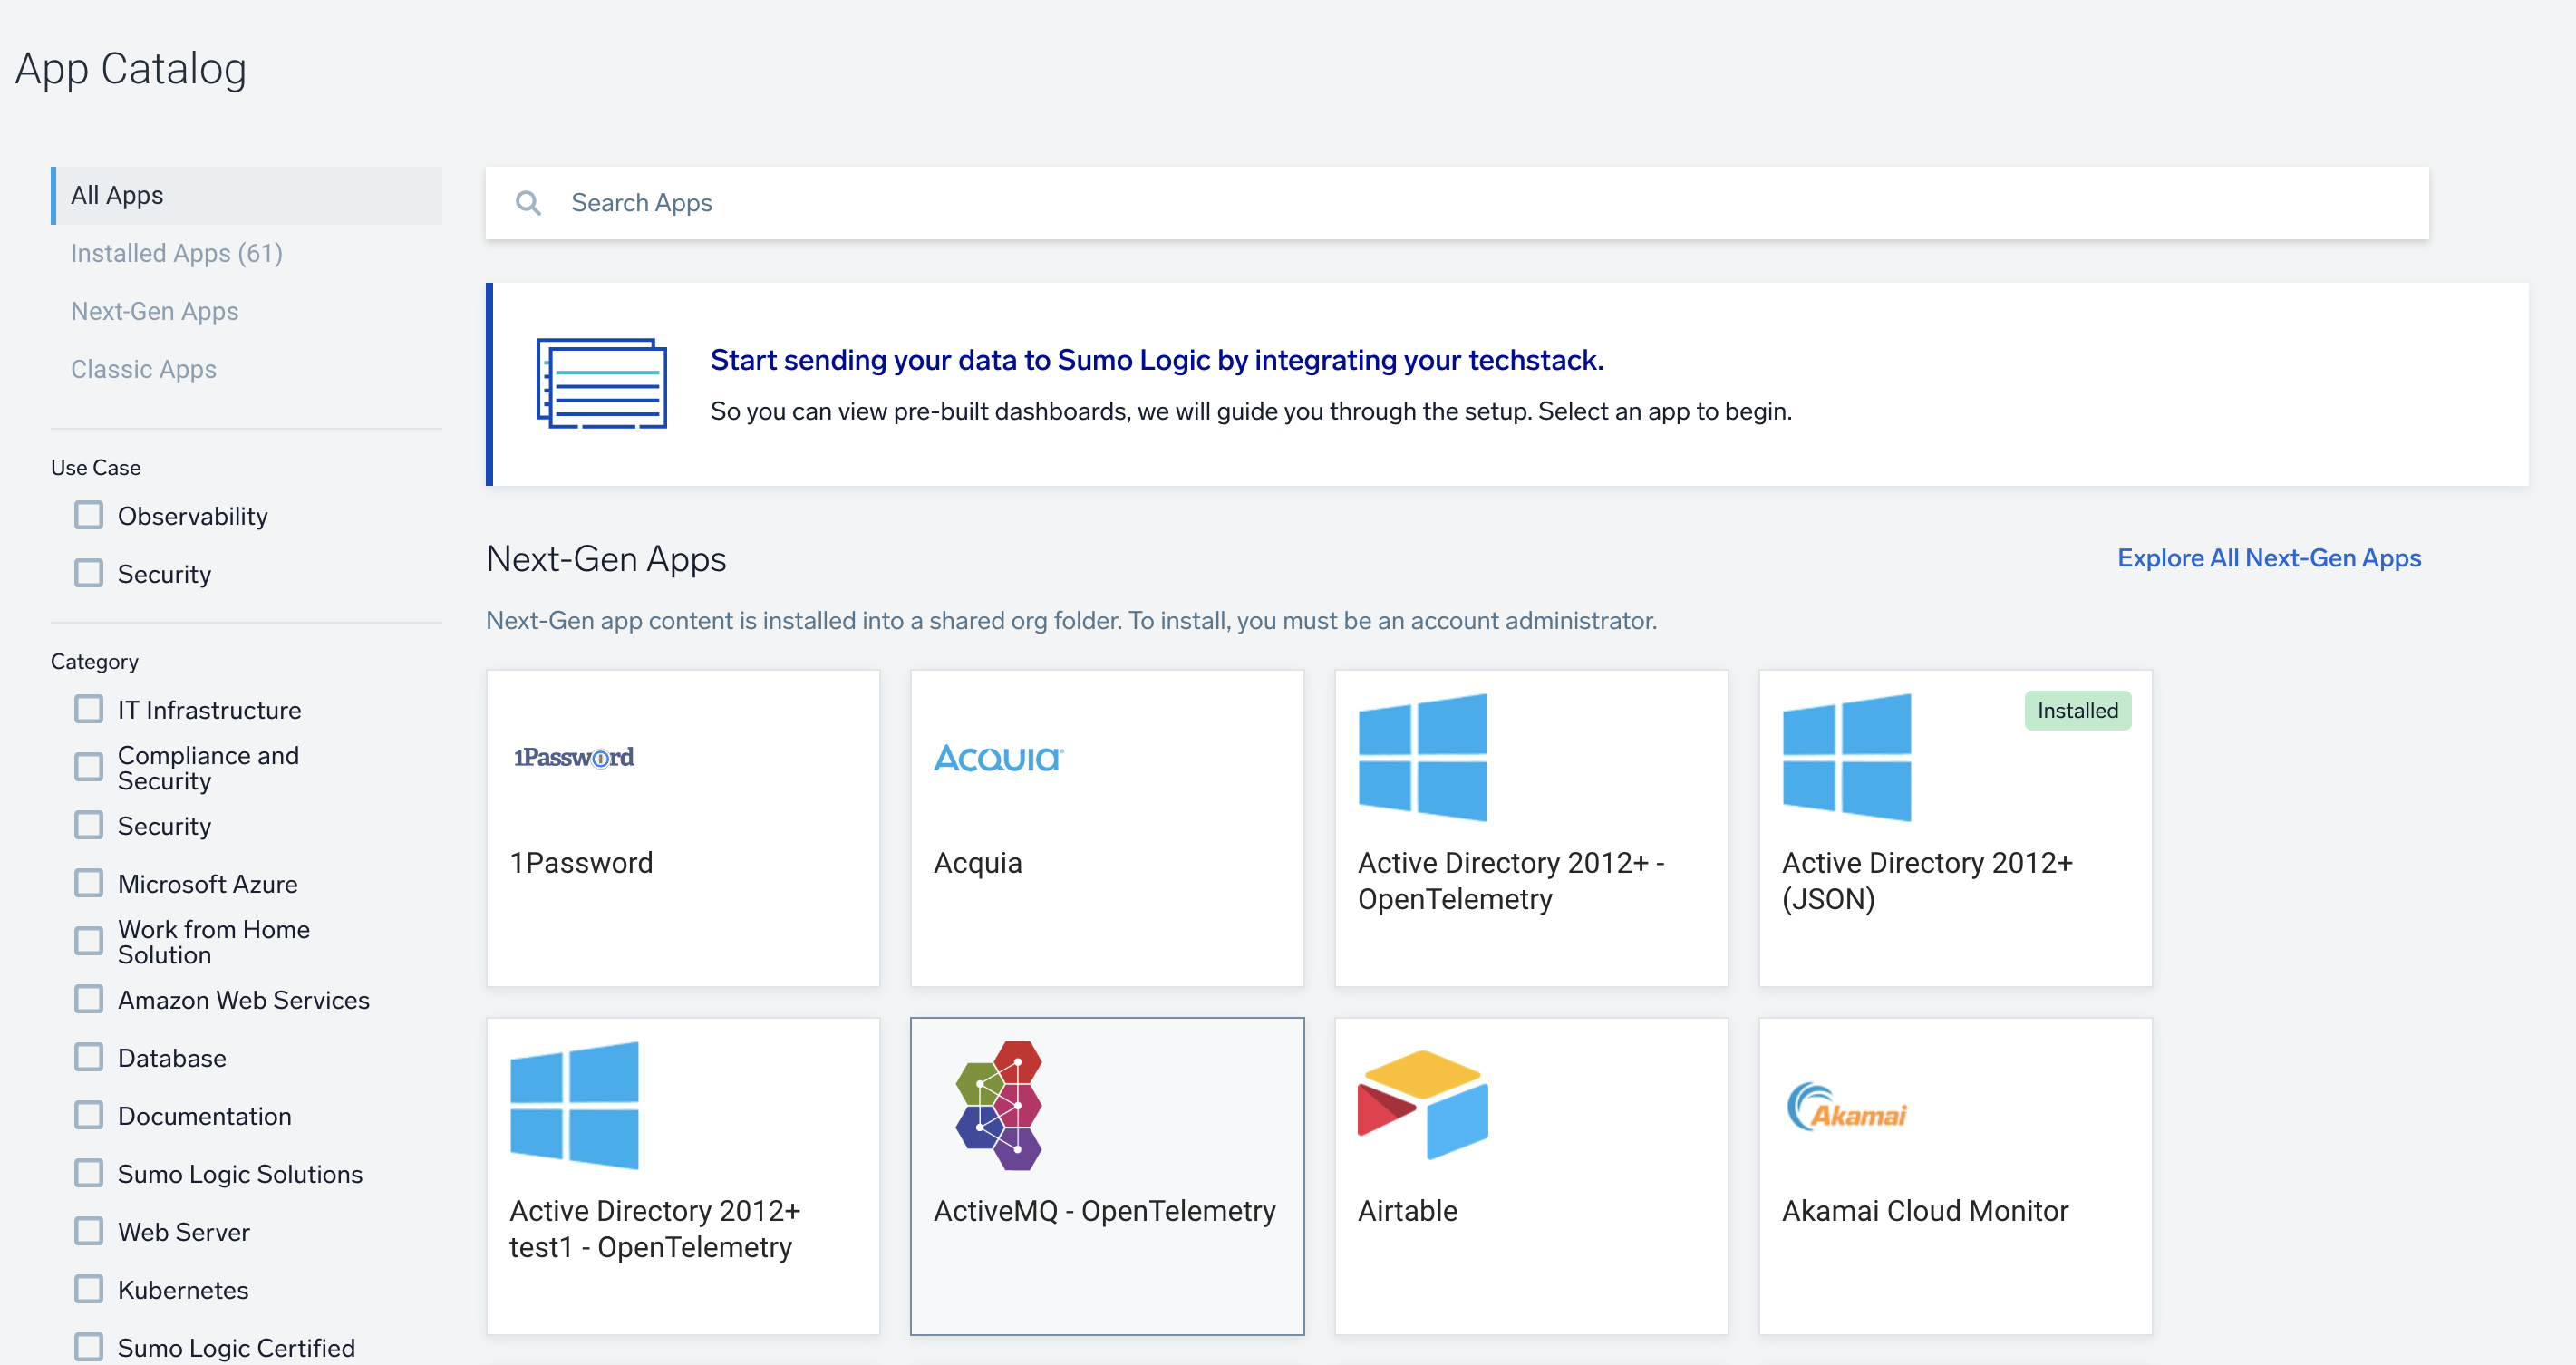
Next-Gen apps
Our Next-Gen apps, which simplify the management and maintenance of apps, are designed to help you get started using the Sumo Logic Distribution for OpenTelemetry Collector agent. For a limited time, you can still continue to send data through the Sumo Logic Installed Collector and Hosted Collector.
What makes Next-Gen different from Classic apps?
- Installation and updates must be performed by an administrator or a user with the Manage Apps role capability.
- App icons will display a badge indicating if it's been installed within your org.
- App icons will display a badge indicating if there's an app update available. The upgrade can then be applied with a single click.
- App uninstallation and removal can be completed directly in the App Catalog, making it easy to clean up apps you no longer use.
- Additional filter options make it easy to find your installed or upgradeable apps.
- Upon app installation, content is installed into a shared Installed Apps folder that's visible to your entire org, making it easier to locate and upgrade, when needed.
- Installed app content is immutable, which ensure that any apps upgrades do not overwrite any customizations you may apply. If you wish to customize the content, you'll need to first make a custom copy of the content.
How to install Next-Gen apps
To install the app, do the following:
Next-Gen App: To install or update the app, you must be an account administrator or a user with Manage Apps, Manage Monitors, Manage Fields, Manage Metric Rules, and Manage Collectors capabilities depending upon the different content types part of the app.
- Select App Catalog.
- In the 🔎 Search Apps field, run a search for your desired app, then select it.
- Click Install App.
note
Sometimes this button says Add Integration.
- Click Next in the Setup Data section.
- In the Configure section of your respective app, complete the following fields.
- Field Name. If you already have collectors and sources set up, select the configured metadata field name (eg _sourcecategory) or specify other custom metadata (eg: _collector) along with its metadata Field Value.
- Click Next. You will be redirected to the Preview & Done section.
Post-installation
Once your app is installed, it will appear in your Installed Apps folder, and dashboard panels will start to fill automatically.
Each panel slowly fills with data matching the time range query received since the panel was created. Results will not immediately be available but will be updated with full graphs and charts over time.
How to upgrade Next-Gen apps
See our Releases Notes to learn about app version updates.
To update the app, do the following:
Next-Gen App: To install or update the app, you must be an account administrator or a user with Manage Apps, Manage Monitors, Manage Fields, Manage Metric Rules, and Manage Collectors capabilities depending upon the different content types part of the app.
- Select App Catalog.
- In the Search Apps field, search for and then select your app.
Optionally, you can identify apps that can be upgraded in the Upgrade available section. - To upgrade the app, select Upgrade from the Manage dropdown.
- If the upgrade does not have any configuration or property changes, you will be redirected to the Preview & Done section.
- If the upgrade has any configuration or property changes, you will be redirected to the Setup Data page.
- In the Configure section of your respective app, complete the following fields.
- Field Name. If you already have collectors and sources set up, select the configured metadata field name (eg _sourcecategory) or specify other custom metadata (eg: _collector) along with its metadata Field Value.
- Click Next. You will be redirected to the Preview & Done section.
Post-update
Your upgraded app will be installed in the Installed Apps folder and dashboard panels will start to fill automatically.
See our Release Notes changelog for new updates in the app.
To revert the app to a previous version, do the following:
- Select App Catalog.
- In the Search Apps field, search for and then select your app.
- To version down the app, select Revert to < previous version of your app > from the Manage dropdown.
How to uninstall Next-Gen apps
To uninstall the app, do the following:
- Select App Catalog.
- In the 🔎 Search Apps field, run a search for your desired app, then select it.
- Click Uninstall.
Classic apps (Legacy)
All of our existing Classic apps will be converted to Next-Gen. In the meantime, our Classic apps will remain available to you within the Application Catalog.
How to install Classic apps
To install the app:
- Select App Catalog.
- In the 🔎 Search Apps field, run a search for your desired app, then select it.
- Click Install App.
note
Sometimes this button says Add Integration.
- On the next configuration page, under Select Data Source for your App, complete the following fields:
- Data Source. Select one of the following options:
- Choose Source Category and select a source category from the list; or
- Choose Enter a Custom Data Filter, and enter a custom source category beginning with an underscore. For example,
_sourceCategory=MyCategory.
- Folder Name. You can retain the existing name or enter a custom name of your choice for the app.
- All Folders (optional). The default location is the Personal folder in your Library. If desired, you can choose a different location and/or click New Folder to add it to a new folder.
- Data Source. Select one of the following options:
- Click Next.
- Look for the dialog confirming that your app was installed successfully.

Post-installation
Once your app is installed, it will appear in your Personal folder or the folder that you specified. From here, you can share it with other users in your organization. Dashboard panels will automatically start to fill with data matching the time range query received since you created the panel. Results won't be available immediately, but within about 20 minutes, you'll see completed graphs and maps.
How to install classic apps in multiple environments
If you have multiple environments generating data that you want to monitor using Sumo Logic apps — for example, environments for production, development, and testing — you’ll need to perform the following steps in each environment:
- Set up Sumo Logic Collectors and Sources for each environment. Make sure that Source Hosts and Source Categories are named correctly in order to clearly indicate the environment name to the apps when they are installed.
- Perform any prerequisites required for the particular Sumo Logic app in that environment. Each Sumo Logic app has unique requirements, so make sure to follow the specific instructions for that app.
- Install an instance of the Sumo Logic app for each environment, configure it to accept data from that environment, and rename the app to reflecting the deployed environment.
Your data comes in from each of your environments (like production, development, testing) into the corresponding installed Sumo Logic app. The environment data and its Sources are identified by Host Names and Source Categories as configured by you or your administrators.
Installation example
In this example, a company has three environments: qa, prod, and perf. You will configure the Sumo Logic Collectors and Sources to identify each environment correctly, perform any necessary prerequisites for the Sumo Logic app, then finally install an instance of the app for each of your environments.
Set up Sumo Logic Collectors and Sources
Before installing any applications, define your Collectors in each environment so that Source Host metadata indicates the deployment. For example, name them something like abc13-qa-cluster01, acb10-prof-cluster03, or abc01-prod-cluster12.
Optionally, you can set a Source Category to indicate these names as well, depending on how Sumo Logic is architected at your company.
Perform any Prerequisites required for the Sumo Logic app
Each Sumo Logic app has unique requirements, so make sure to follow the specific instructions for that app. For details, see Sumo Logic apps.
Install an Instance of the Sumo Logic app for each Environment
- Install an instance of the Sumo Logic app for the first environment, qa.
- If you have used Source Host to identify the environment, in the Install Application dialog, you can configure the app with a custom data filter using
_sourceHost=qa. - If you have used a Source Category to delineate the deployment, when installing the app, you could configure it using the Source Category
_sourceCategory=qa-abc. - Rename the title of the app to denote the environment it is configured for, for example, Windows-QA.
- If you have used Source Host to identify the environment, in the Install Application dialog, you can configure the app with a custom data filter using
- Next, install an instance of the Sumo Logic app for the prod environment.
- In the Install Application dialog, indicate the name of the environment in the Source Host, such as
_sourceHost=prod. - Rename the title of the app to denote the environment it is configured for, for example, Windows-Prod.
- In the Install Application dialog, indicate the name of the environment in the Source Host, such as
- Finally, install an instance of the Sumo Logic app for the perf environment.
- In the Install Application dialog, indicate the name of the environment in the Source Host, such as
_sourceHost=perf. - Rename the title of the app to denote the environment it is configured for, for example, Windows-Perf.
- In the Install Application dialog, indicate the name of the environment in the Source Host, such as
Troubleshooting
If you've installed a Sumo Logic app and no data appears in its Dashboards, you may have chosen the wrong Source Category.
Apps are dependent on the Source Category metadata associated with your logs. This metadata is established when Collectors and Sources are configured. Because each organization uses their own metadata methodology check with your Sumo Logic account's Administrator to get a better idea of which Source Category would be the best fit for a given app.
How can I change the Source Category associated with an app?
To change the Source Category used by an app, you can simply reinstall the same app. Currently, apps cannot be uninstalled or edited in any other way.
For more information, see Custom Data Filters.
Run Searches from Sumo Logic apps
Sumo Logic apps provide a host of pre-built saved searches for popular data Sources that you can run against your data without installing the app itself. This way, you can try the searches in a Sumo Logic app against your data before you decide to install it. Or you can run the searches to see how good example queries are written.
To run a saved search from a Sumo Logic app, just find the search you want to run in the Library, click it, and select a Source Category or a custom data filter to run the search against. The Search page opens and runs the search in a new tab automatically using the query's time range.
In order to run a search from an app, you would first need to have data ingested in your system that the search query would find. For example, before you can run a search from the Sumo Logic app for Apache, you must set up a Collector and Source to ingest your Apache data. If you do not have data that matches the requirements of the search query, or if you select the incorrect Source Category or data filter, you will either get no results, or bad results.
After the search has run, you can save the search to use it again in the future from the Library.
Searches from Enterprise apps, which require a paid Professional Services contract, are not included.
To run a search from a Sumo Logic app:
- Find the Sumo Logic app for the data Source you would like to search in the App Catalog. For example, we've picked Cloud Passage Halo's Outlier in Critical Issues.
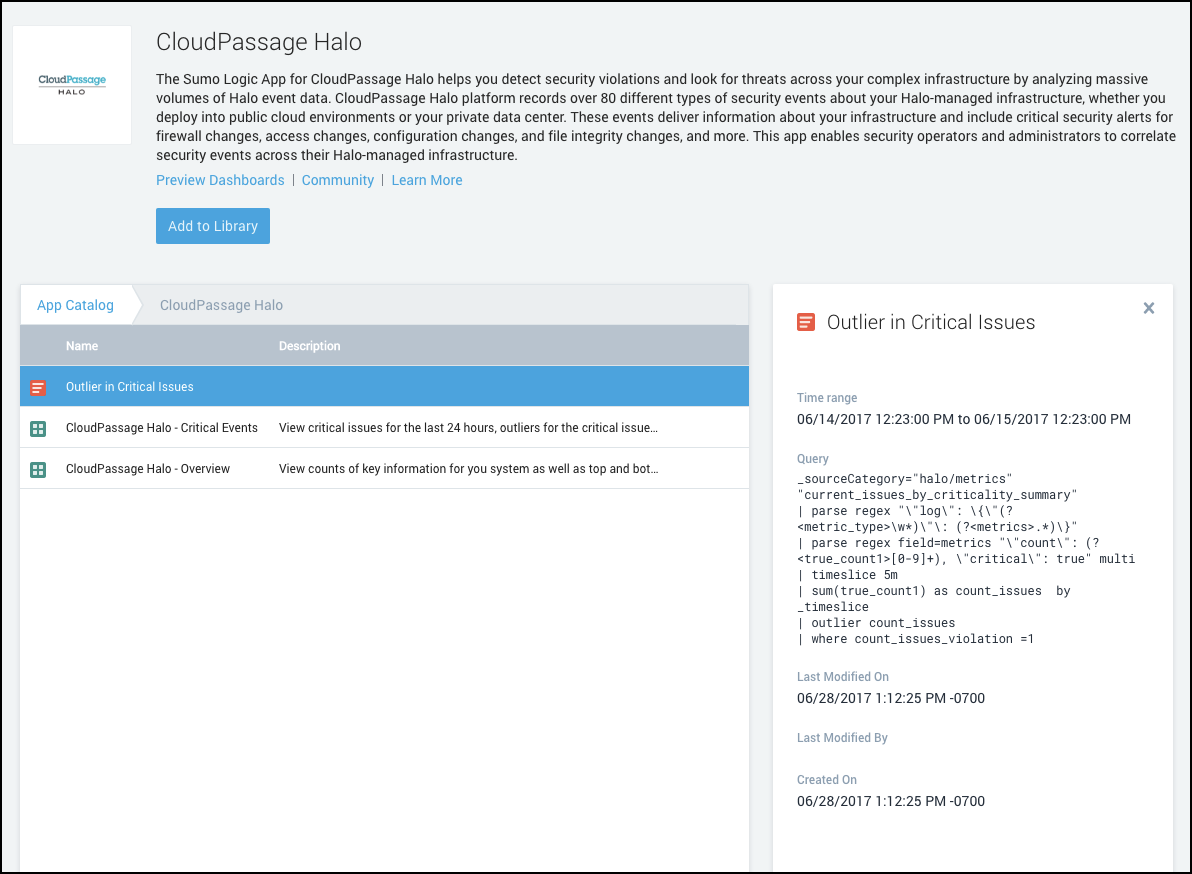
- Find the search you want to run and click it.
- In the Run Search dialog, select a Source Category or enter a Custom data filter to run the search against.
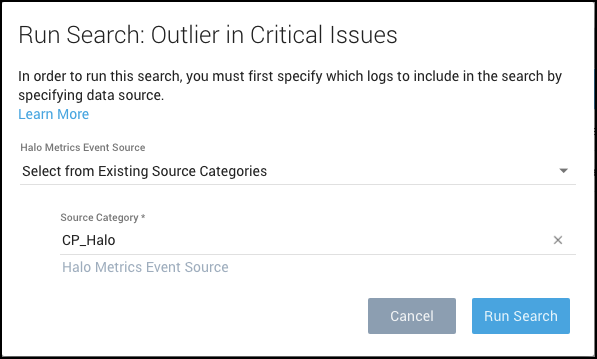
- Click Run Search.
The Search page opens, the search populates a new tab, and the search runs using the query's time range. If you would like to use a different time range, stop the search and reset it.
If you do not have data that matches the requirements of the search query, or if you select the incorrect Source Category or data filter, you will either get no results, or bad results.
Searches included with the Sumo Logic app for Data Volume do not require you to select a Source Category.
Custom data filters
When you install a Sumo Logic app, you tell Sumo what data to search and present in app dashboards.
Most typically, you specify the source category that was assigned to the logs or metrics source when data collection was set up for the app.
However, if you want to use multiple metadata fields as your filter criteria, for example, both source category and source host, you must define a custom data filter. The app will prefix its searches with your custom data filter.
Define a custom data filter
- In the App Catalog, select the application you want to install and click Add Integration.
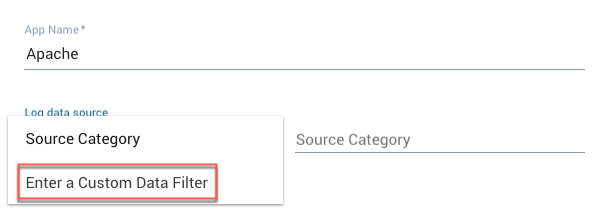
- Click the down arrow next to Source Category.

- A Custom Data Filter option appears. Click the option.
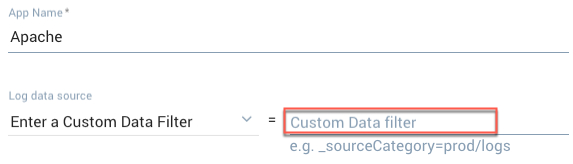
- Enter a filter expression in the Custom Data Filter field. For example filters, see Example custom data filters, below.
Example custom data filters
The table below has examples of custom data filters.
| Custom Data Filter | Description |
|---|---|
_sourceHost=stage-EMEA* AND _sourceCategory=Apache* | App searches will return data whose source host begins with the string stage-EMEA and whose source category begins with the string Apache. |
_sourceCategory=Apache* AND "dev-us" | App searches will return log data that contains the string dev-us whose source category begins with the string Apache. |
_sourceHost = "Jon Smith" | App searches will return data whose source host is Jon Smith. If a metadata field value contains spaces, you must use quotes. |
_sourceHost=stage-EMEA* AND (_source=Apache* or _source=DB) | App searches will return data whose source host begins with the string stage-EMEA and whose source either begins with Apache or is DB. We use parentheses to group the logic operations. |