Tour the Sumo Logic Classic UI
This page provides an overview of the Sumo Logic Classic UI, designed to help you navigate and utilize its features effectively.
The Classic UI will be retired in 2025 and will no longer receive updates. The exact date will be communicated closer to the transition. For the latest features, performance improvements, and future innovations, switch to the New UI as soon as possible.
Switching between the Classic and New UI
If you're using the New UI and need to navigate back to the Classic UI, click the Return to classic UI option in the left navigation menu. And to switch back to the New UI, follow the same steps, selecting Switch to New UI instead.
Using the left navigation bar
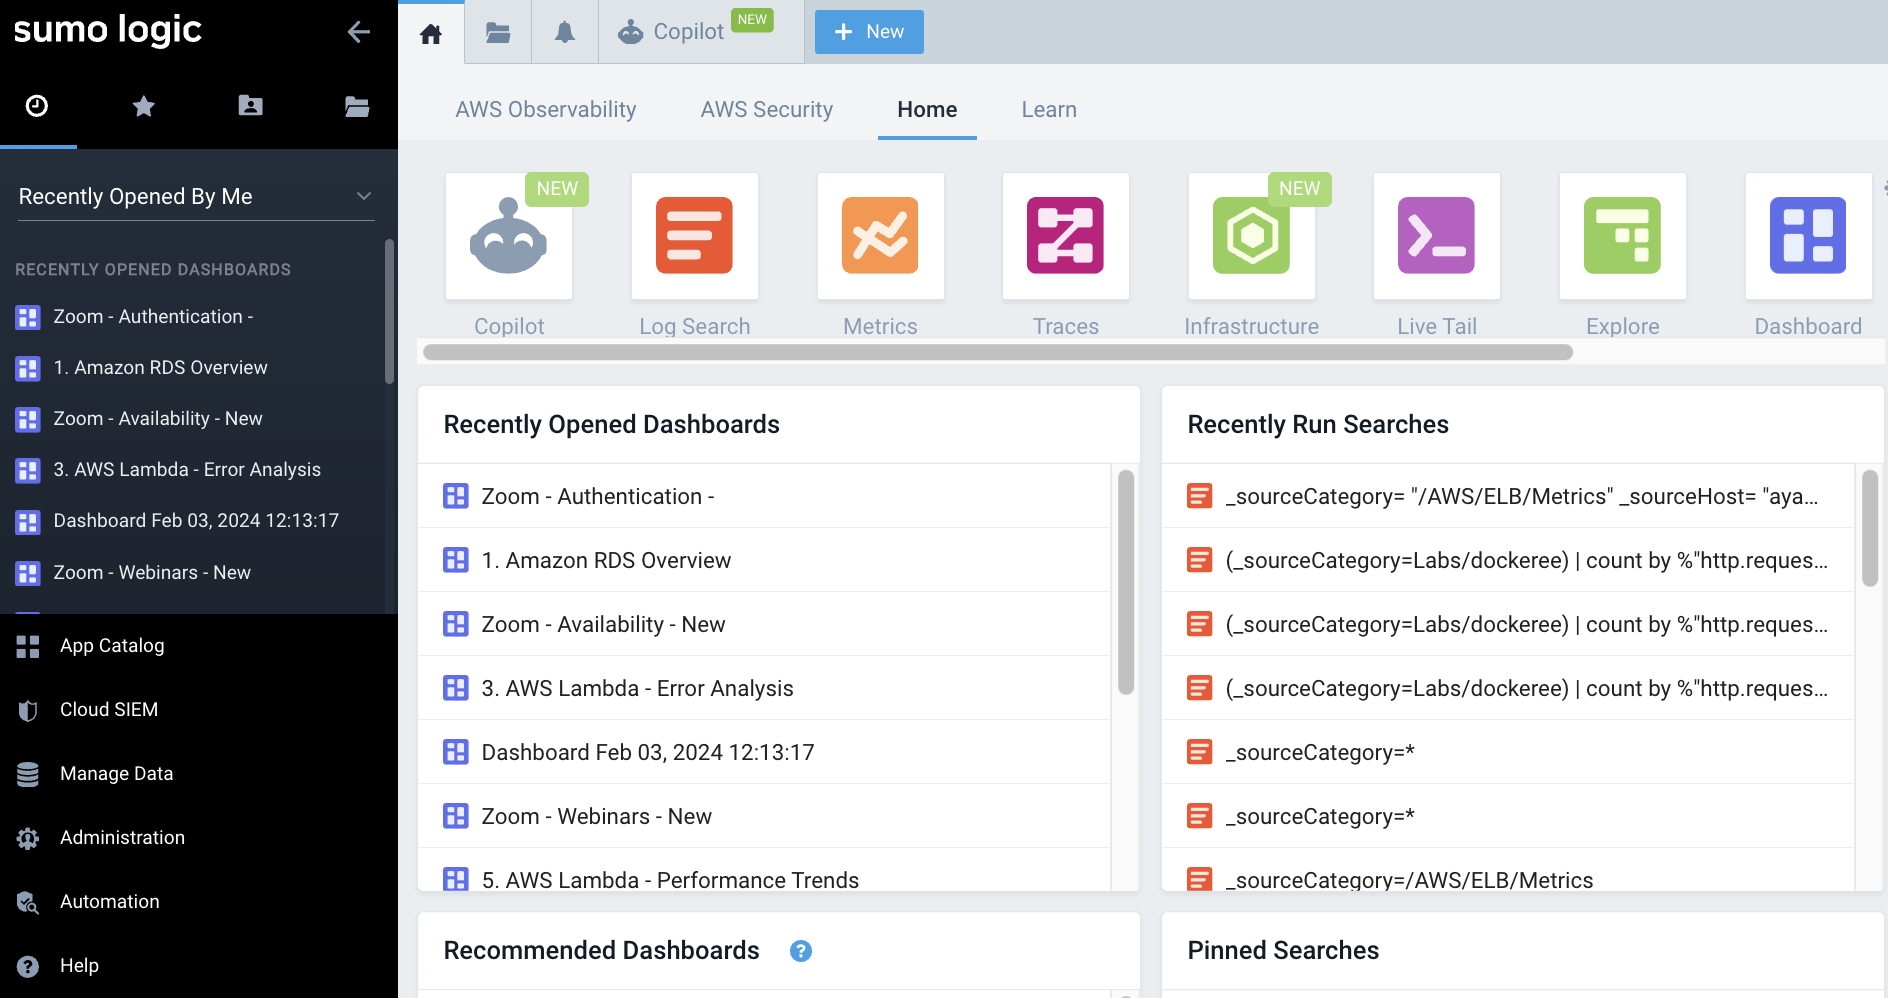
When you first log in, you'll land on the Sumo Logic Home page. The left nav menu bar is a one-stop location where you can access the following:
Access dashboards and searches
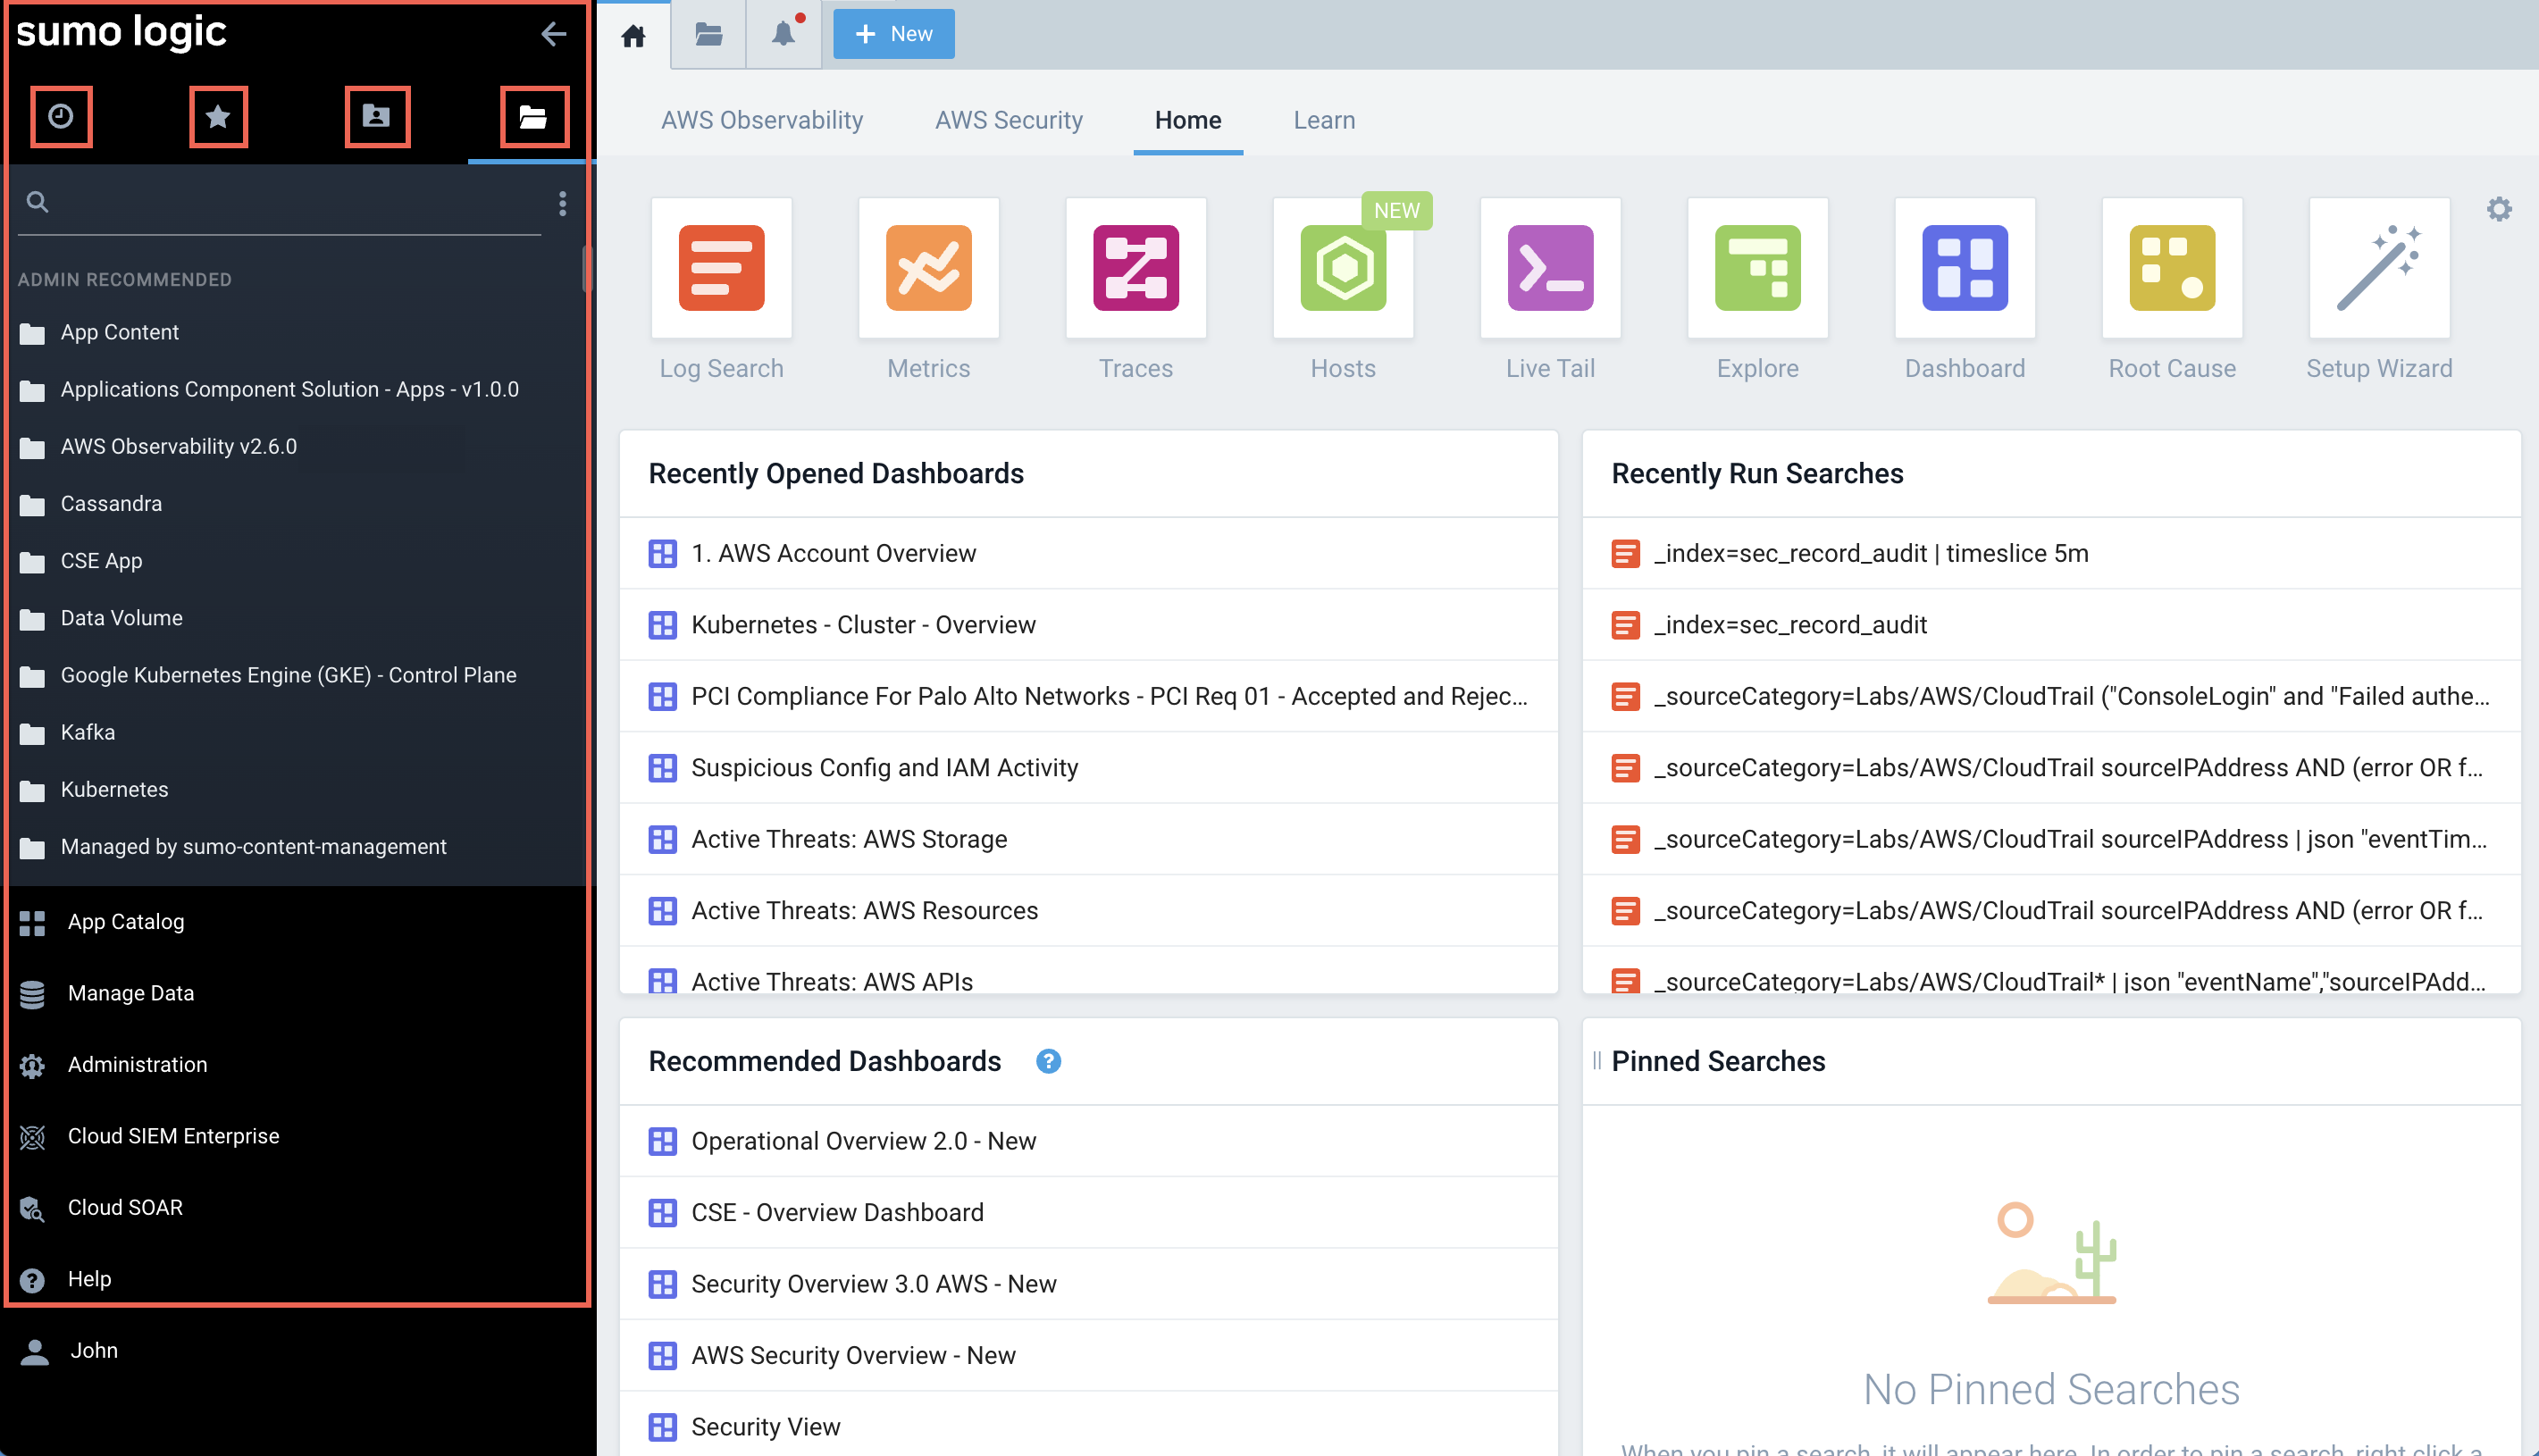
The left nav bar provides easy access to libraries, personal collections of dashboards, searches, and folders. Click the icons at the top of the Left Nav Bar (left to right) to view:
- Recent dashboards and searches
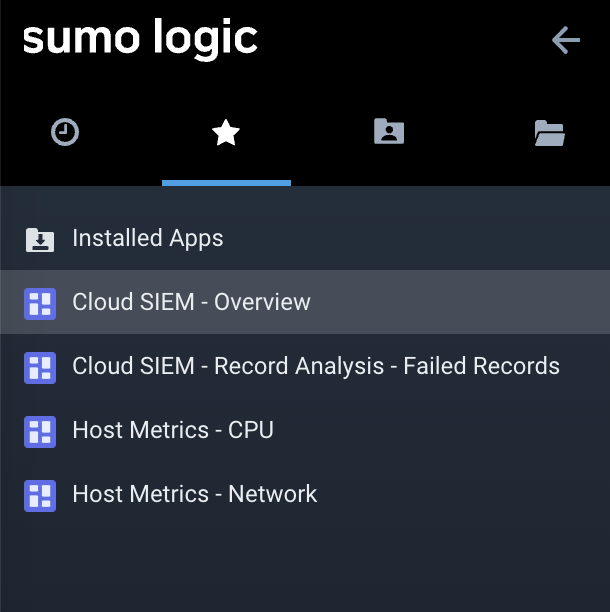
- A list of your Favorites (dashboards and searches)
- Your Personal library of dashboards and searches
- A Library of shared dashboards and searches (within your organization)
Search and switch browsing modes
The top of the left nav bar is where you can search for content and users and easily switch browsing modes.
- Searching—Enter text in the Search field to quickly find apps, dashboards, searches, and users.
- Switching browsing modes—Click the three-dot kebab icon and make a selection from the dropdown menu.

Hide and show the left nav bar
You can easily hide the left nav bar to enlarge the working area. Then, just as easily show it again.
- To hide the left nav bar, click the Arrow in the top right corner.

- To show a hidden left nav bar, click the Menu icon.

Access Apps, Admin features, and Help
In the lower section of the left nav bar, you can access the App Catalog, Manage Data and Administration features, access the Automation Service, and get help.
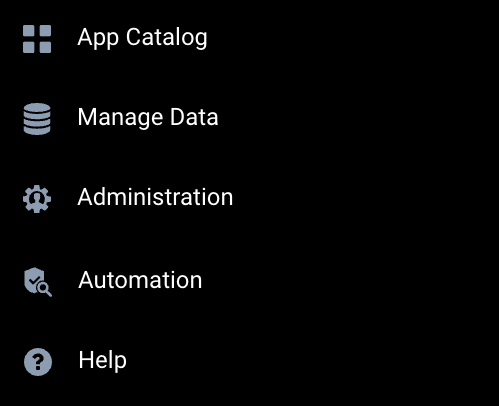
The Automation option is not available in the navigation menu if your organization has Cloud SOAR installed, as automation features are handled through Cloud SOAR. For more information, see Cloud SOAR Automation.
Working with tabs
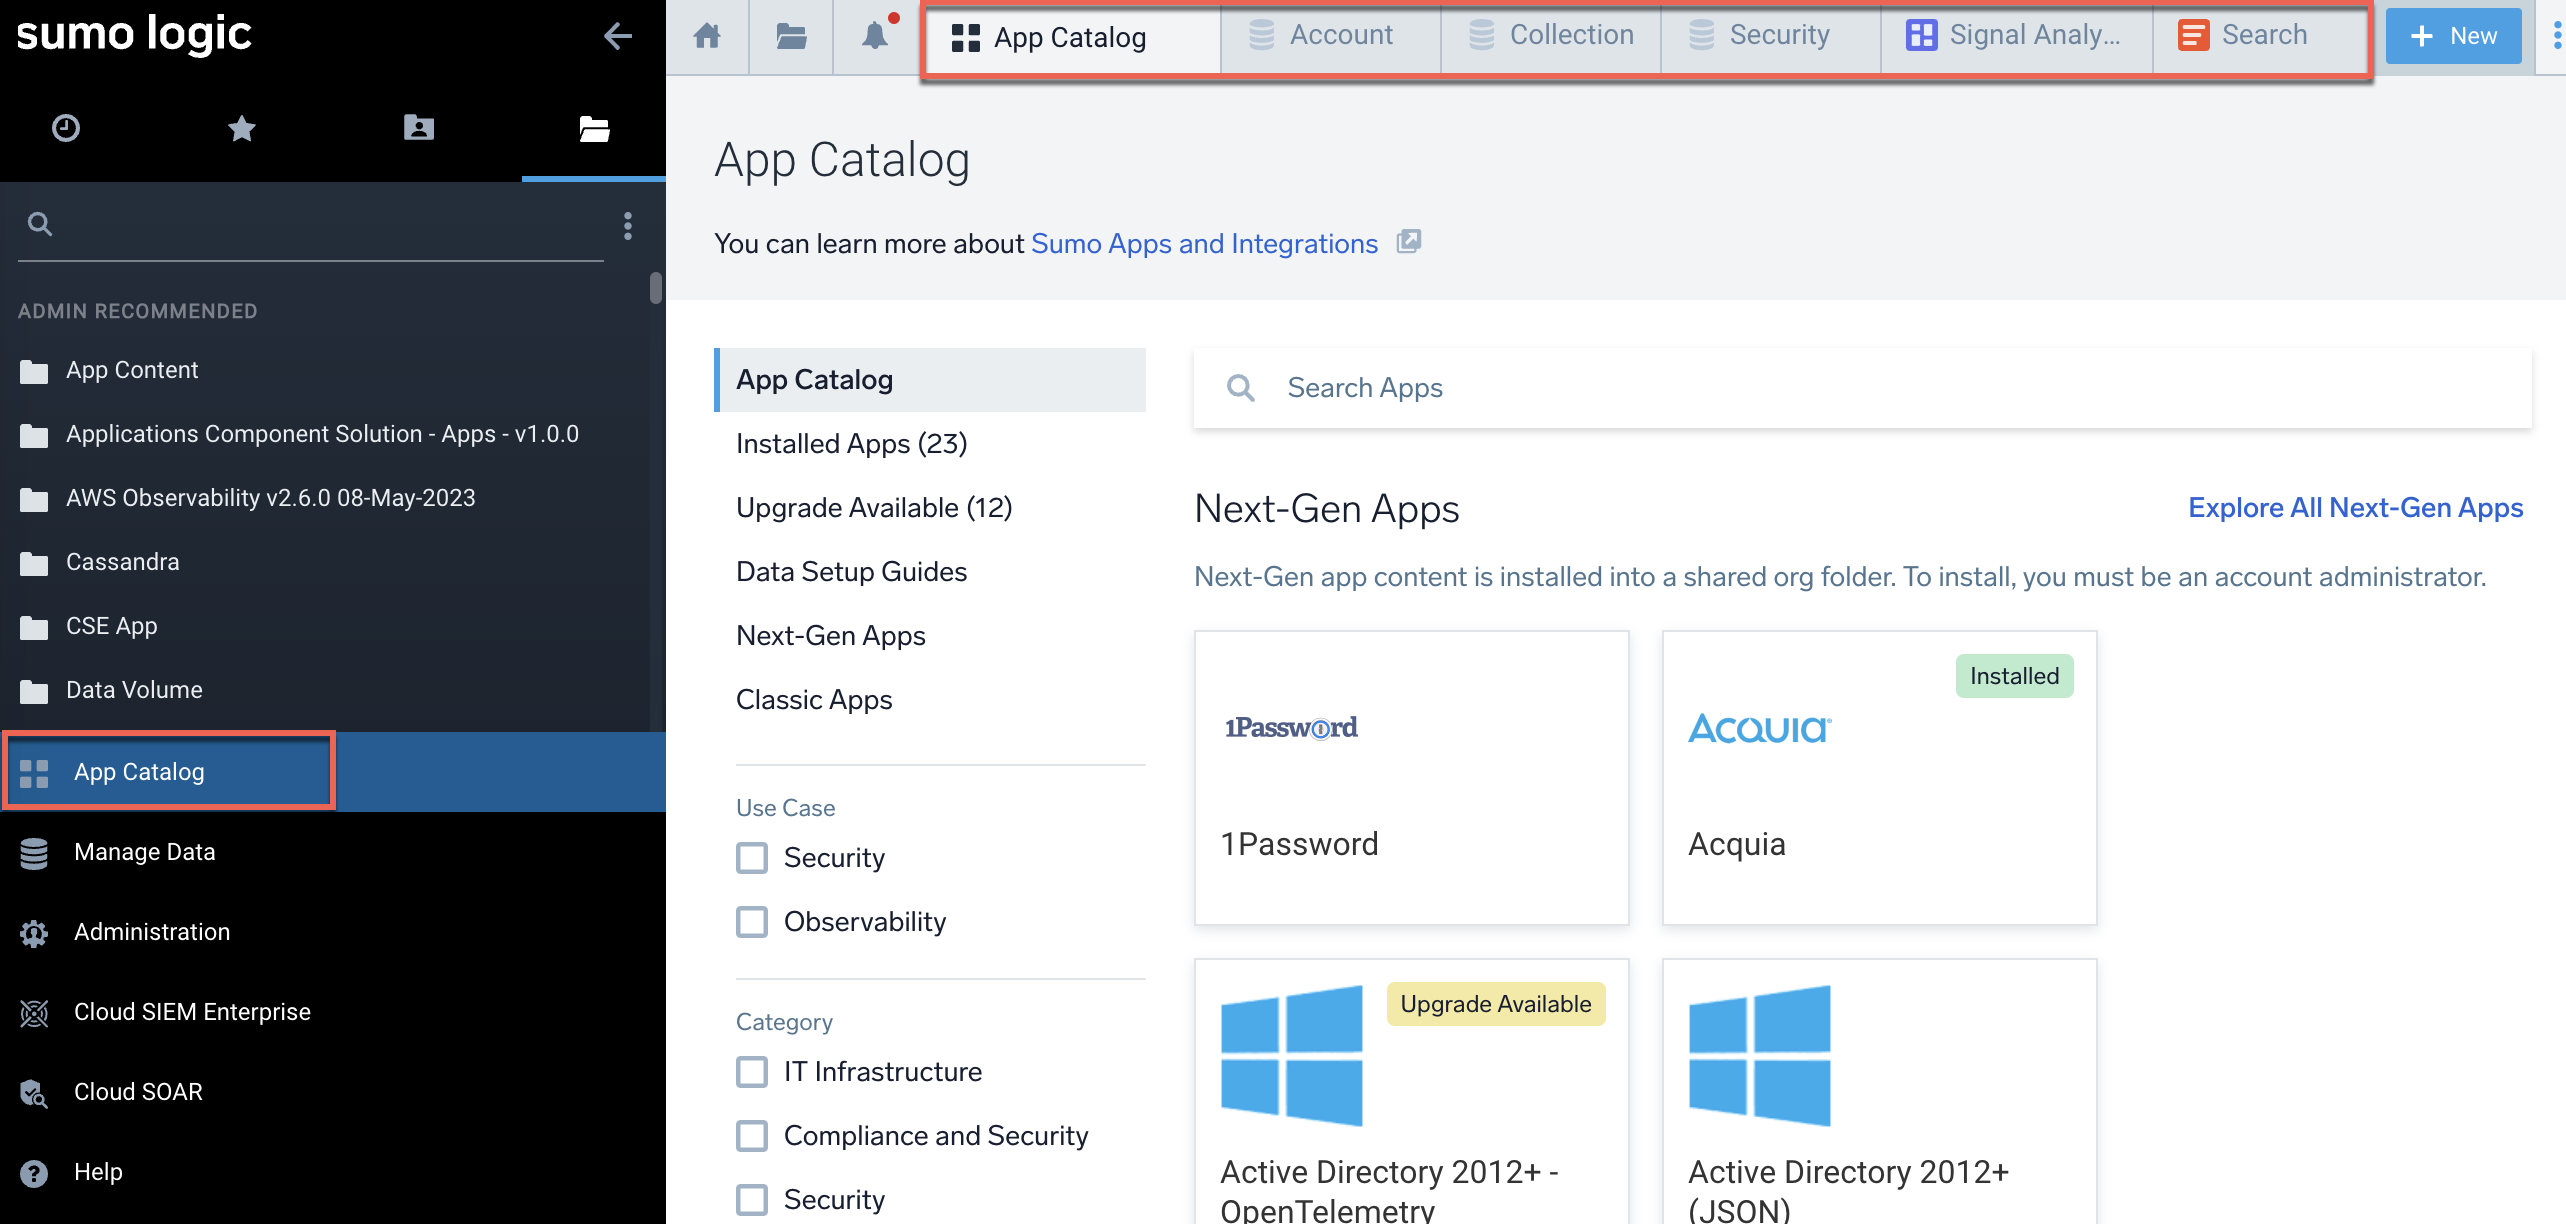
Every page you select opens in a new tab, and the tabs are shown at the top of the UI. You can have up to 50 tabs open at one time. Each of the following selections opens a new tab:
- Saved search
- Dashboard
- New log search, metrics visualization or Live Tail session
- App catalog
- Manage pages
- Account page
Rename or close a tab
You can customize tabs by renaming them, then close them when they are no longer relevant.
To rename or close a tab, do the following:
- To rename a tab, double-click the name field, enter the new name, and press Return.

- To close a tab, hover the cursor over the tab and click the X icon on the right.

Customize your environment with tab options
Log Search, Metrics, and Live Tail tabs have additional options you can use to customize your environment. The tabs even stay open when you sign out and sign back in again, so you can start where you left off. Clicking any of the following icons opens a tabbed window.
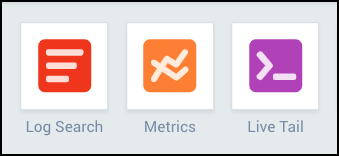
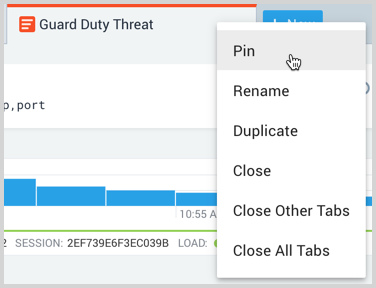
To access additional Log Search, Metrics, and Live Tail options, do the following:
- Hover the cursor over the three-dot kebab icon.

- Click the icon and choose an option from the dropdown menu.
- Use the left (
<) and right (>) arrows at each end of the Tab menu bar to move back and forth through the tabs.
The following table lists the options available for the Search, Metrics, and Live Tail tabs.
| Option | Search tab | Metrics tab | Live Tail tab |
|---|---|---|---|
| Pin | ✓ | — | — |
| Rename | ✓ | ✓ | ✓ |
| Duplicate | ✓ | ✓ | ✓ |
| Open a New Browser Tab | — | — | ✓ |
| Close | ✓ | ✓ | ✓ |
| Close Other Tabs | ✓ | ✓ | ✓ |
| Close All Tabs | ✓ | ✓ | ✓ |
| Close Tabs to the Right | ✓ | ✓ | ✓ |
Mastering everyday tasks
This section provides information on how to perform basic everyday tasks using the Sumo Logic UI.
All users:
- Launch log searches, metrics visualizations, and Live Tail sessions
- View recent dashboards and searches
- View Favorites and add dashboards and searches to the list
- Share a dashboard, search, or folder
- View content that is shared with you
- Pin and manage searches
- Manage your personal account preferences
- Get help: docs, community, and more
Sumo Logic Administrators:
- Admin: Manage data collection, data settings, and alerts
- Admin: Manage accounts, users, and security
Launch searches, metrics visualizations, and Live Tail sessions
This section shows you how to get started working with logs and metrics. The links provided direct you to more in-depth information.
To launch a search, metrics visualization, or live tail session, do the following:
- Go to the Sumo Logic Home page.
- Click one of the following Home page icons:

- Log Search. Open the Search page to search logs.
- Metrics. Open the Metrics page to create a metrics visualization.
- Traces. Monitor user activity, span analytics, service maps, and transaction traces between microservices.
- Live Tail. View a real-time live feed of log events associated with a Source or Collector.
- Explore. See an intuitive visual hierarchy of your environment.
- Dashboard. Analyze metrics and log data on the same dashboard, in a streamlined user experience.
View recent dashboards and searches
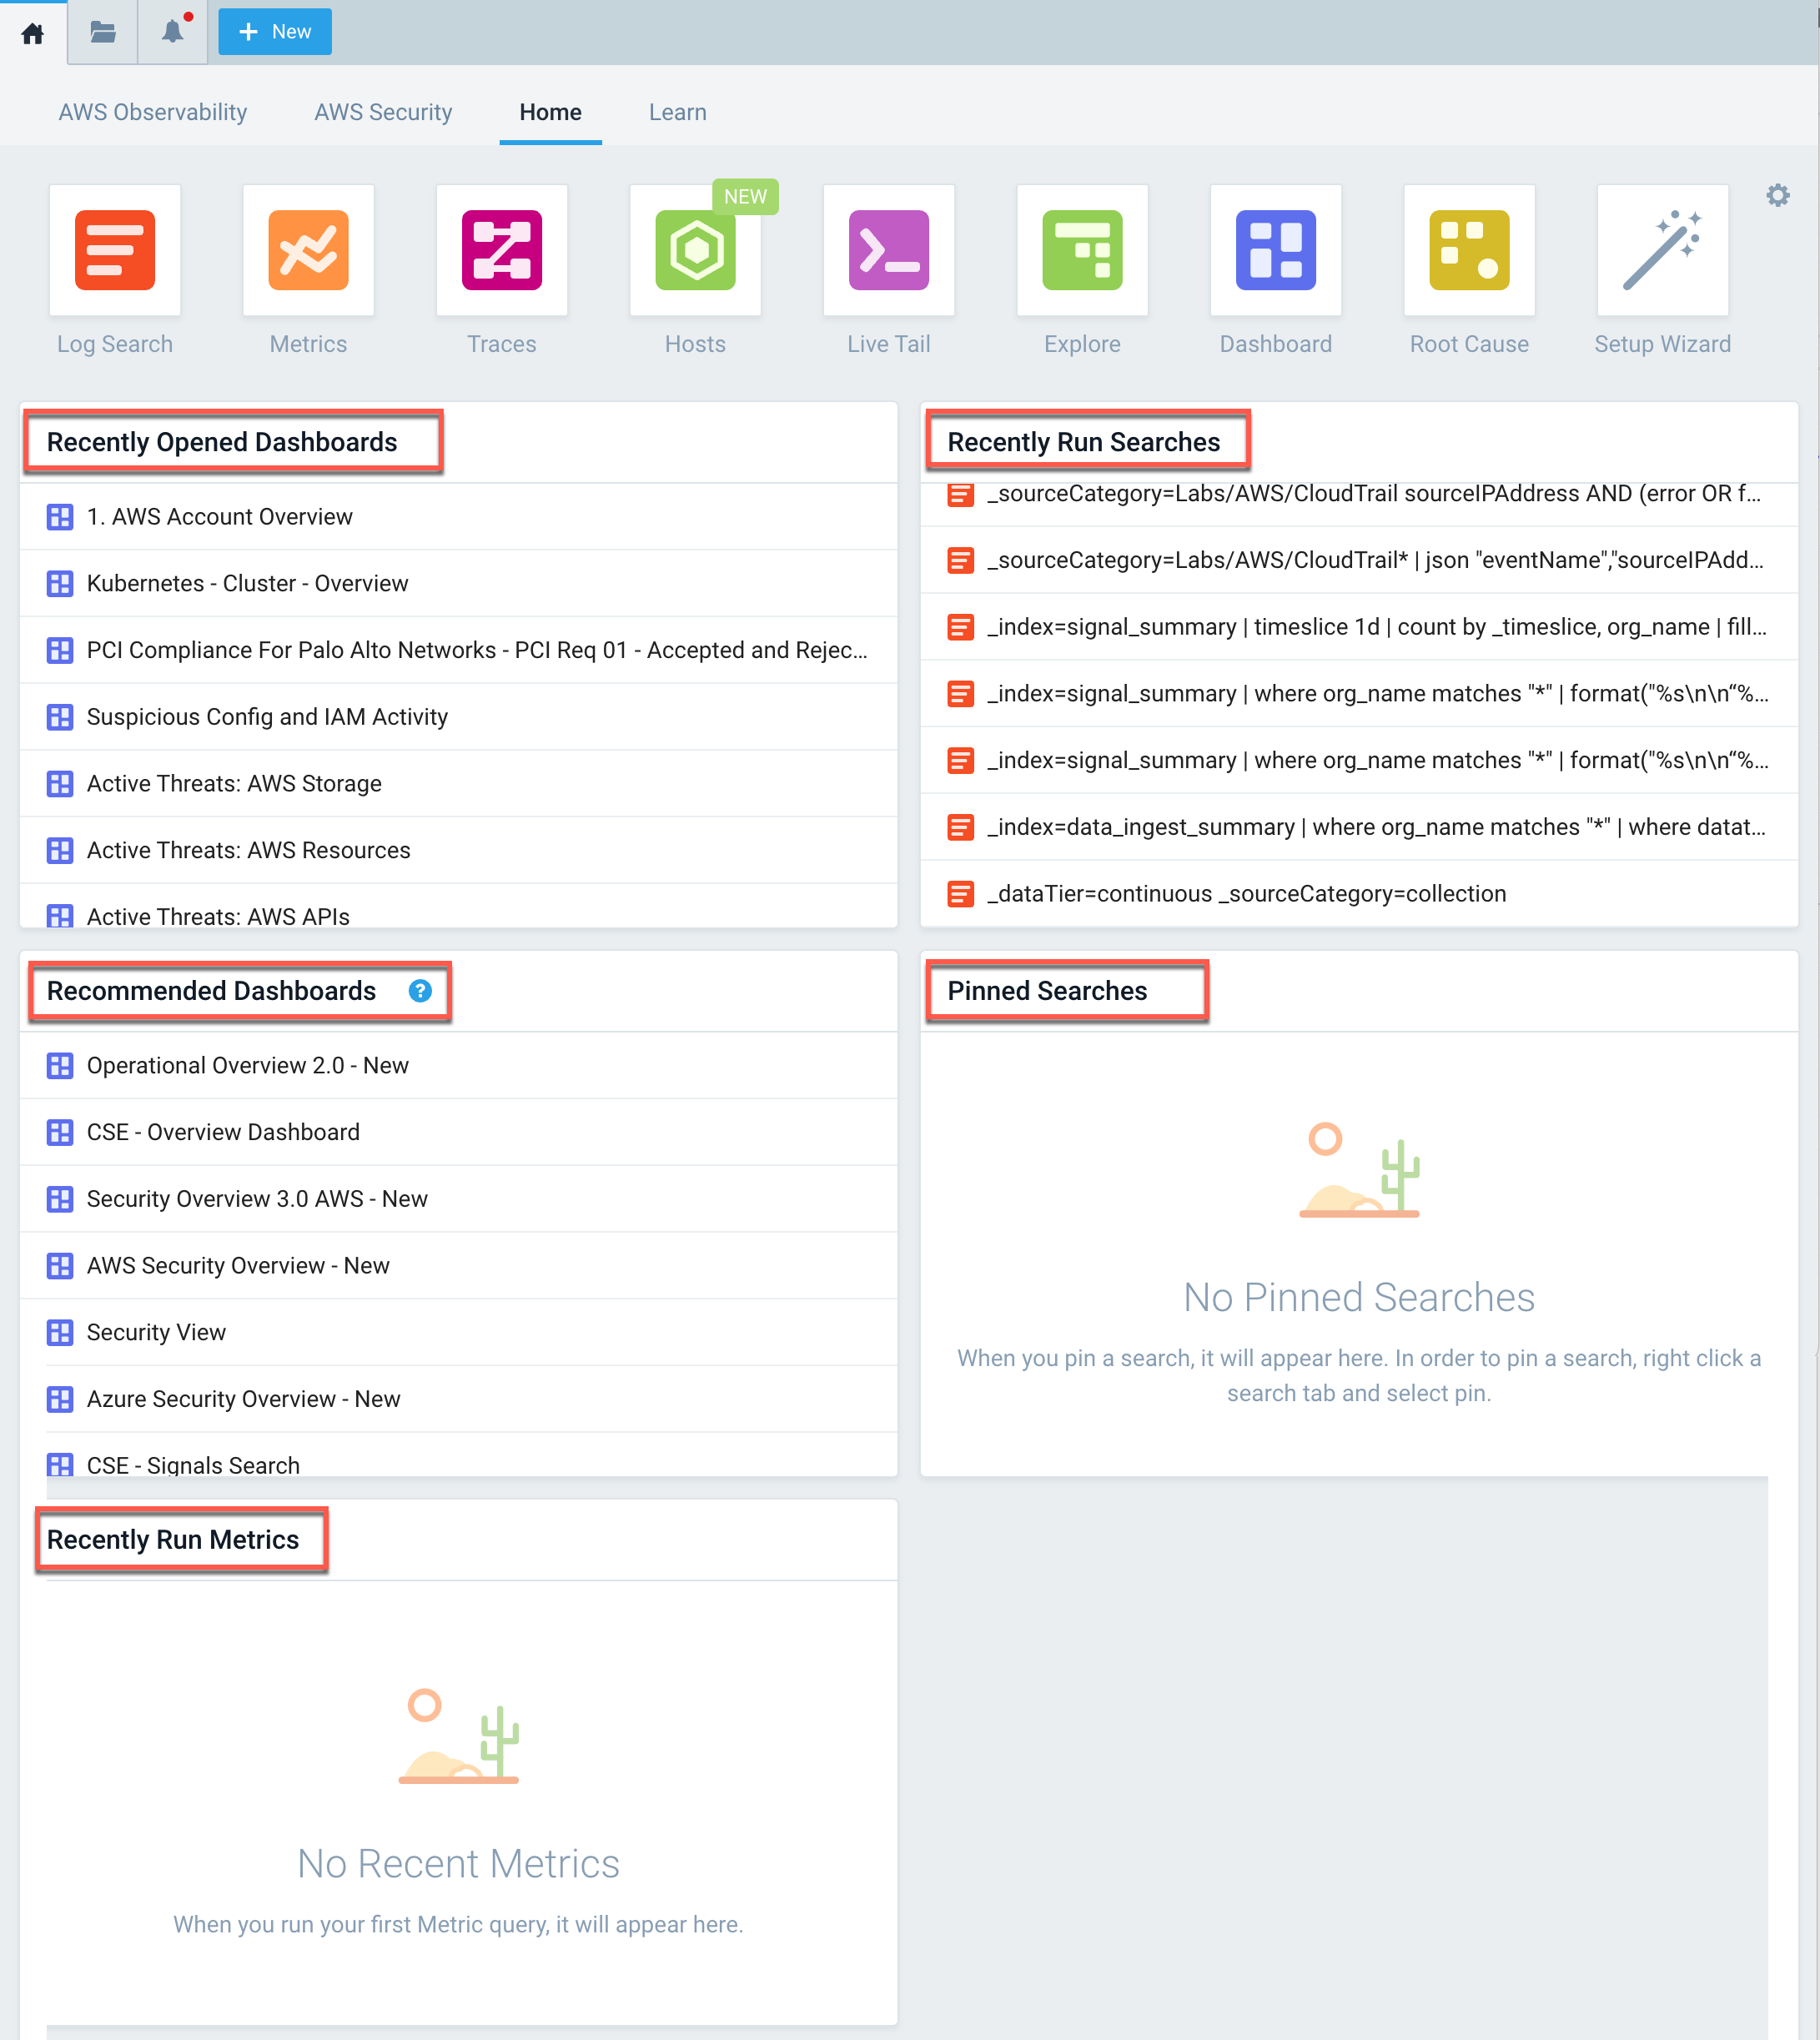
You see the Home landing page when you first sign in to Sumo Logic. The Home page provides an at-a-glance view of the following:
- Recently opened dashboards
- Recently run searches
- Recommended dashboards
- Pinned searches
- Recently run metrics
Click the Home icon at the far left of the Tab menu bar to return to the Home page at any time.
View Favorites and add dashboards and searches to the list
You can create a list of favorite dashboards and searches that appear in the left nav bar. Your Favorites list makes it easy to access your most frequently used dashboards and searches.
To view Favorites and add to the list, do the following:
- To view a list of current Favorites, click the Star icon at the top of the left nav bar. A list of Favorites is shown below.
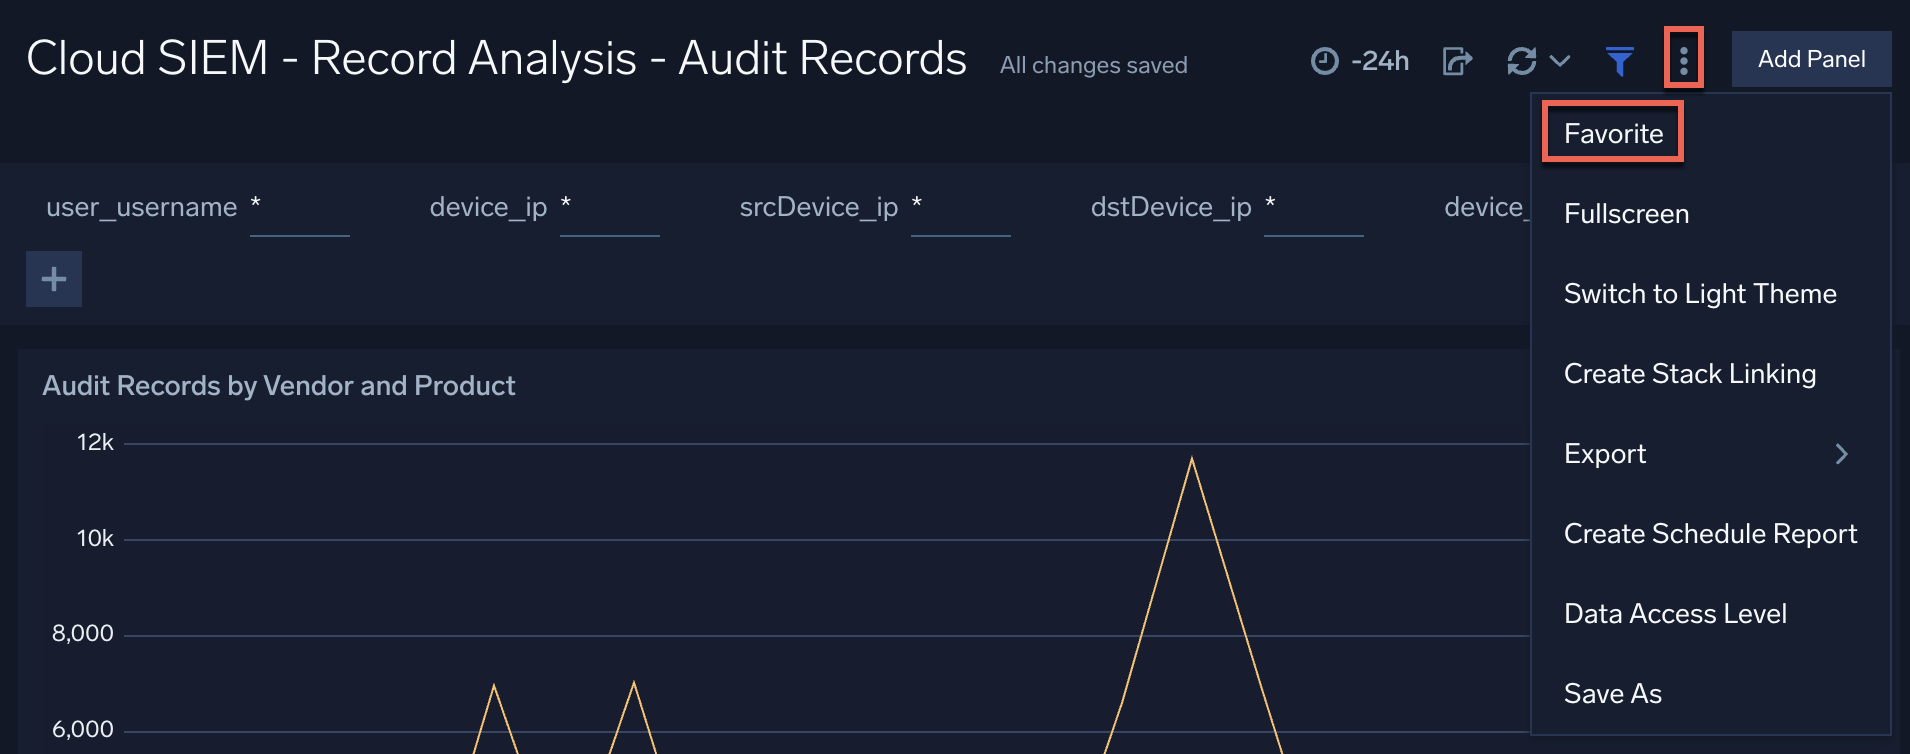
- To add a dashboard to the Favorites list, open the dashboard, select the three-dot kebab icon at the top right of the menu bar, and select Favorite from the dropdown list.
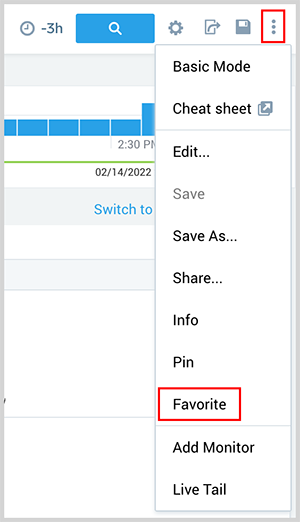
- To add a search to the Favorites list, do the following:
- Save the search (if not already saved) by clicking Save As, then in the Save Item dialog enter a name, description, and select a folder in which to save the search.
- Click Save.
- Click the three-dot kebab icon and click Favorite from the provided options.
Share a dashboard, search, or folder
You can share dashboards, searches, and folders with users and roles. You can edit the sharing permissions at any time and share or revoke permissions as needed. You can share content from the following locations:
- Left nav bar. Recommended when you are familiar with the content and need to quickly share with another user.
- Library. Recommended when you need a detailed view of the content, who created it, and when it was last modified.
For walkthrough instructions, go to the Share Content page.
View content that is shared with you
It's easy to view dashboards, searches, and folders that have been shared with you.
To see content that has been shared with you, do the following:
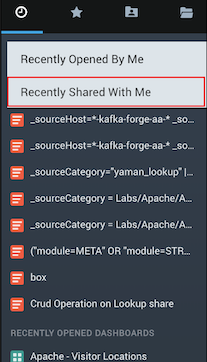
- Click the Clock icon at the top of the left nav bar.
- Toggle between Recently Opened By Me or Recently Shared With Me.
Pin and manage searches
After you start a search, you can “pin” it, and it will run in the background for up to 24 hours. If the search does not finish in that time frame, it is paused. You can restart the search at any time. Search results are available for three days.
There is a limit of ten pinned searches per user. Also, queries that use the save operator cannot be pinned.
You must start a search for the Pin option to appear. Once a search is pinned, it cannot be unpinned, but it can be removed from the Pinned Searches tab.
To pin a search, do the following:
- Open a Search page.
- Enter a query in the search box and click Start.
- Click the three-dot kebab icon and click Pin from the provided options.
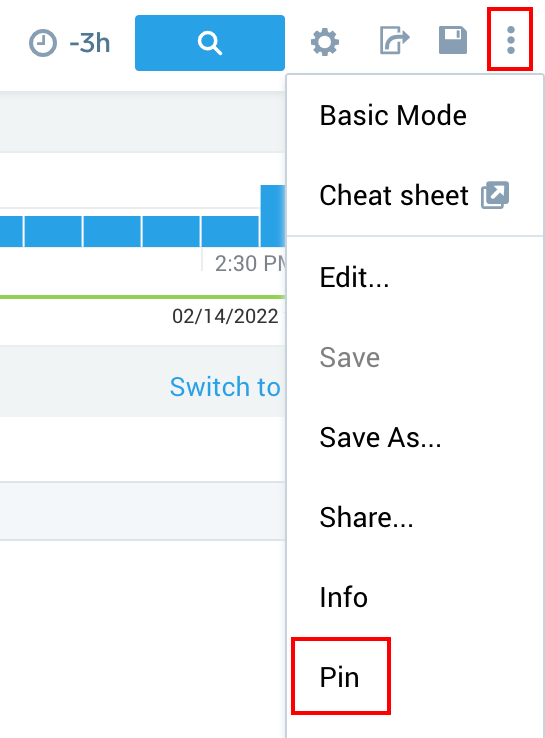
- A message appears telling you the location of your pinned search in the Library. The Pinned Search takes the name of the Search tab by default.
- To change the name of a Pinned Search, double-click the Search tab and enter a new name in the name field.
For information on how to manage pinned searches, see Pin a Search.
Manage your personal account preferences
You can manage your personal account settings from the Preferences page. These settings only apply to your account. Changes you make to your preferences take effect the next time you sign in, not during the current session.
To manage your personal Sumo Logic account preferences, do the following:
- At the very bottom of the Left Nav Bar, click your Account Name.
- In the pop-up dialog, select Preferences.
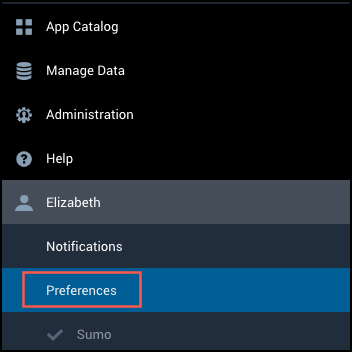
- In the Preferences page that appears on the right, you can modify settings in the following areas:
- My Profile: username and password
- My Security Settings: enable and disable 2-step verification
- My Preferences: your account session settings
For more information, see the Preferences Page.
Get help: docs, community, and more
Whenever you have a question, there are a number of ways in which you can get the answers you need:
- Check out our Release Notes:
- Search documentation
- Visit the Learn Page in the Sumo Logic UI
- Post a question on the Sumo Logic Community
- Contact Support
- Try our Customer Slack channel
See Getting Help and Contacts for full information.
Admin: Manage data collection, data settings, and alerts
Sumo Logic Administrators (Admins) are responsible for managing data collection, data settings, and alert monitoring for their organization. You must have Sumo Logic Admin role privileges to perform these tasks.
To manage data in Sumo Logic, do the following:
- Go to the left nav bar and click Manage Data.
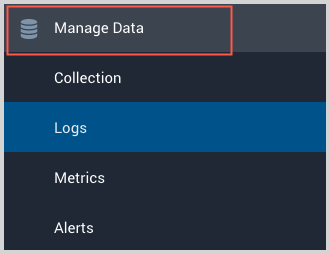
- Choose from the following, as needed:
- Collection. Manage collectors and sources.
- Logs. Manage fields, field extraction rules, partitions, scheduled views, connections, and data forwarding.
- Metrics. Manage metrics rules, logs-to-metrics, and metrics transformation rules.
- Monitoring. Monitors, connections, and health events.
Admin: Manage accounts, users, and security
Sumo Logic administrators (admins) manage user accounts, user roles, and security. You must have Sumo Logic Admin role privileges to perform these tasks.
To administer Sumo Logic accounts, users, and security, do the following:
- Go to the left nav bar and click Administration.
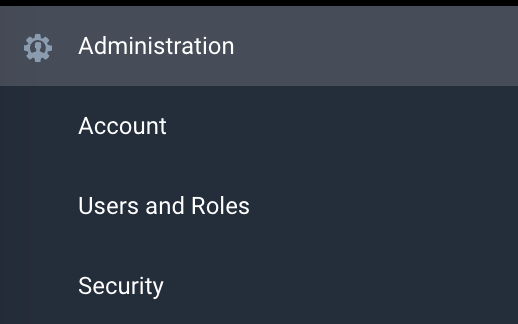
- Choose from the following, as needed:
- Account. View information about your organization's Sumo Logic subscription, enable and manage the data volume index, manage billing.
- Users and Roles. Manage users and roles.
- Security. Set password policy for your org, set up security whitelist, manage access keys, manage security polices (audit index, support account access, and dashboard sharing, and set up SAML authentication.
Become a Sumo Logic Pro user
Now that you're familiar with the layout and features in the Sumo Logic user interface (UI), you're ready to ramp up your Sumo Logic skills with self-paced training.
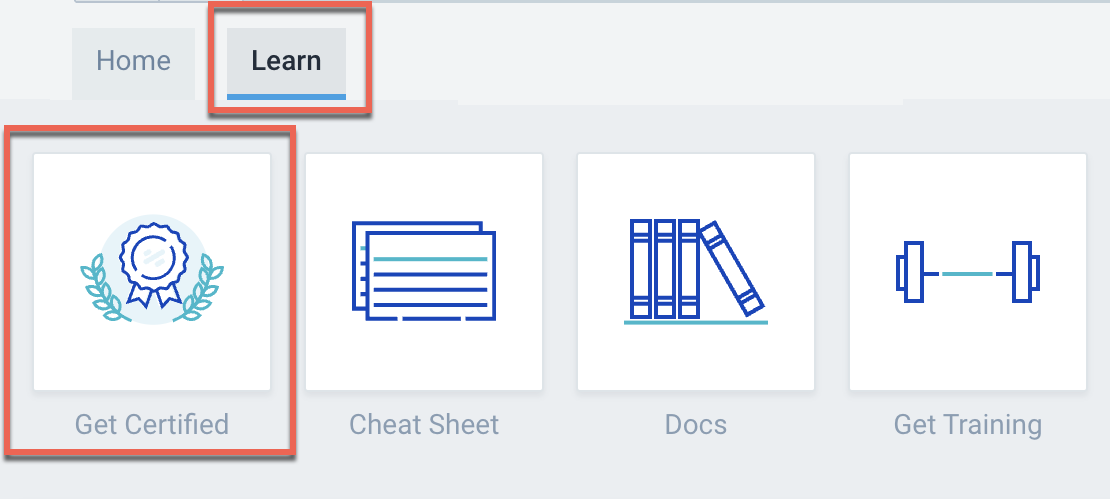
You do not have to stop there either. You can take the next step and become Sumo Logic Certified. For more information on the Sumo Logic Certification program courses, go to the Home page, click the Learn tab, and click Get Certified. See Certification FAQs for more information.
