Manage Organization Settings
Availability
| Account Type | Account Level |
|---|---|
| Cloud Flex | Professional, Enterprise |
| Cloud Flex Credits | Enterprise Operations, Enterprise Security, Enterprise Suite |
Change organization settings on the account
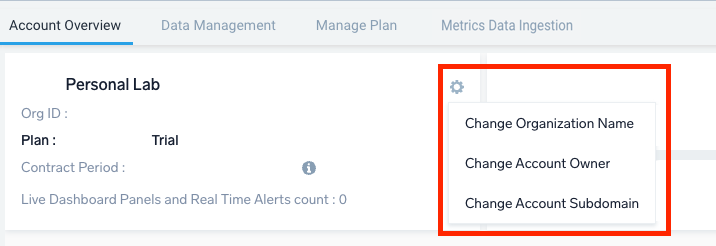
This section has information about the options available to your Sumo Logic account owner on the Account Overview tab. The options are at the top of the page under the details icon.
For Cloud Flex Credits:
For Cloud Flex:

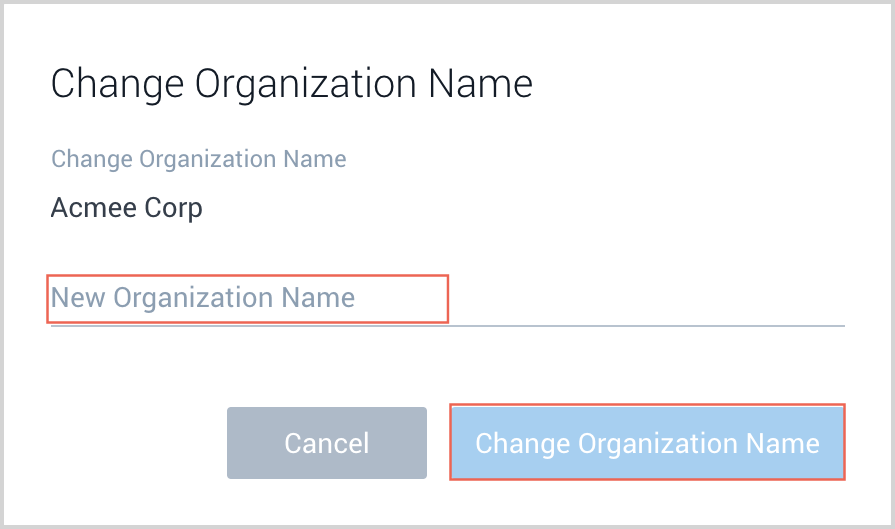
Change organization name
- New UI. In the main Sumo Logic menu select Administration, and then under Account select Account Overview. You can also click the Go To... menu at the top of the screen and select Account Overview.
Classic UI. In the main Sumo Logic menu, select Administration > Account > Account Overview. - Access the appropriate menu for your account type:
- Cloud Flex Credits: From the gear icon menu at the top, select Change Organization Name.
- Cloud Flex: At the top, select Manage Organization > Change Organization Name.
- At the prompt, enter a new organization name in the text field.
- Click Change Organization Name.
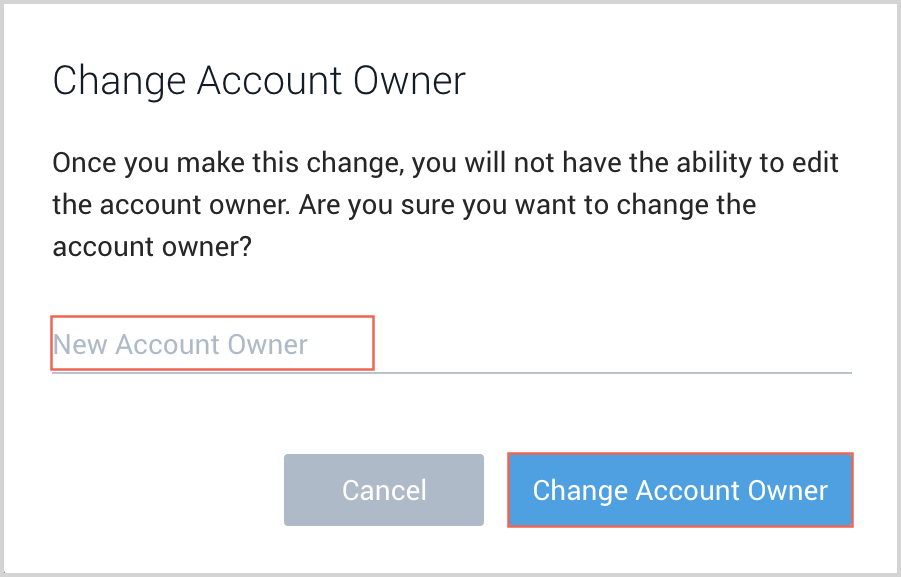
Change account owner
After you make this change, you will not be able to edit the account owner.
- New UI. In the main Sumo Logic menu select Administration, and then under Account select Account Overview. You can also click the Go To... menu at the top of the screen and select Account Overview.
Classic UI. In the main Sumo Logic menu, select Administration > Account > Account Overview. - Access the appropriate menu for your account type:
- Cloud Flex Credits: From the gear icon menu at the top, select Change Account Owner.
- Cloud Flex: At the top, select Manage Organization > Change Account Owner.
- In the prompt dialog, enter a new account owner in the text field.
- click Change Account Owner.
If the account owner leaves your organization and you cannot transfer the account ownership, please submit a support ticket to transfer the account ownership.
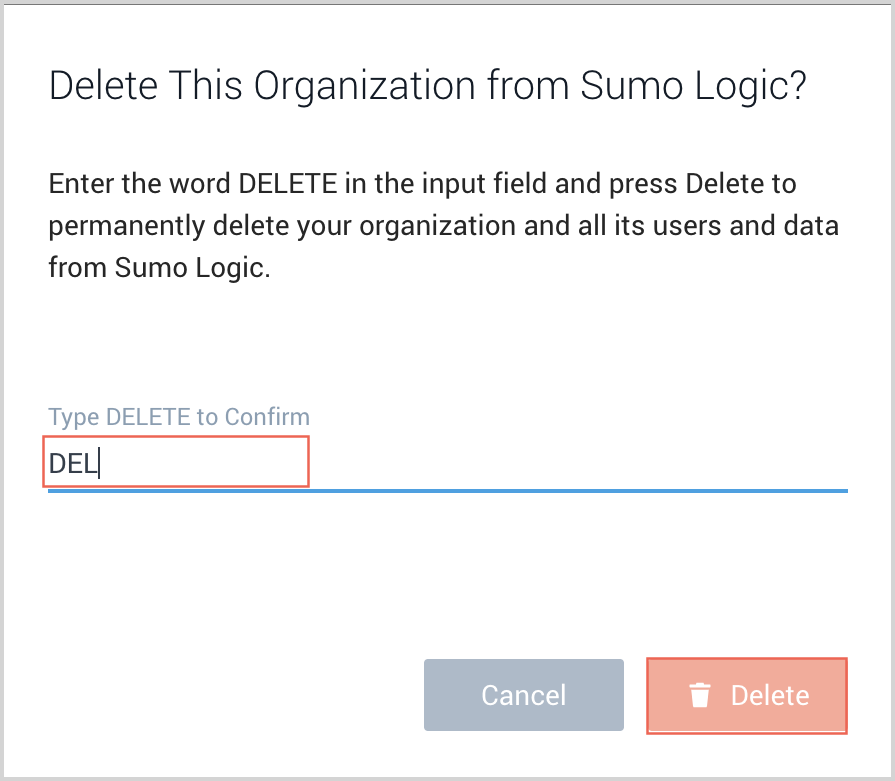
Delete an organization
You can only delete an organization for Free and Trial accounts.
- New UI. In the main Sumo Logic menu select Administration, and then under Account select Account Overview. You can also click the Go To... menu at the top of the screen and select Account Overview.
Classic UI. In the main Sumo Logic menu, select Administration > Account > Account Overview. - From the details icon at the top, click Delete Org.
- In the prompt dialog, enter DELETE in the text field to confirm the action.
- Click Delete.
Set up a custom subdomain
This section has instructions for setting up a custom subdomain for the URL you use to access Sumo Logic.
By default, your Sumo Logic account has a "service" subdomain. For example, service.sumologic.com.
If you have multiple Sumo Logic accounts, you may find it useful to configure a custom subdomain for each of your Sumo Logic accounts.
Custom subdomains can help ensure that requests are authenticated to the right account when links are received. Once configured by your account owner, your custom subdomain will be used in the links Sumo generates when you share queries or dashboards, or the links in alerts and other emails you may receive from your account. These subdomain-enabled links will direct the user to the specified account for authentication.
When you use custom subdomains in combination with SAML integrations configured with SP initiated login, your SAML authentication options will be provided within your subdomain-enabled Sumo Logic login page.
- While subdomains are the preferred method to provide access to multiple accounts, you can also use multi-account access.
- Custom subdomains are not currently available for Sumo Logic accounts created through third-party integrations that require authentication using those integrations, such as Heroku and Jfrog.
Key considerations
Before changing your account subdomain, consider the following:
- You are responsible for the subdomain name, including ensuring that use of the subdomain doesn’t violate the intellectual property rights of another party. Sumo Logic recommends that you use your corporate domain name, or a variation of it, as your Sumo Logic account subdomain.
- Sumo Logic reserves the right to deactivate, change, or require you to change your account subdomain.
- Shared URLs that contain a custom subdomain may no longer work after you change the subdomain. You’ll need to either manually edit the subdomain portion of out-of-date URLs or re-share the content after changing a subdomain name.
- When you set up a subdomain for the first time, the pre-existing URLS for accessing Sumo Logic will continue to work; however, users will be asked to authenticate via the default service domain. We suggest updating any saved/stored links with the new subdomain to prevent this issue.
- Once you update your subdomain to a new value, the previous subdomain will become immediately free for use by another account.
- After you update your subdomain, Sumo Logic users must re-authenticate using the new subdomain. Sumo Logic suggests you notify your users prior to changing your account subdomain.
- Subdomain must be unique across ALL accounts and deployments. You cannot use a subdomain name that is already in use, even if the accounts reside in different deployment regions. If you try to change an account subdomain to a value that is already in use, you’ll be prompted to supply a different name.
Change account subdomain
You must be the account owner of the Sumo Logic account to change the account subdomain.
- New UI. In the main Sumo Logic menu select Administration, and then under Account select Account Overview. You can also click the Go To... menu at the top of the screen and select Account Overview.
Classic UI. In the main Sumo Logic menu, select Administration > Account > Account Overview. - Select the details icon at the top.
- Access the appropriate menu for your account type:
- Cloud Flex Credits: From the gear icon menu at the top, select Change Account Subdomain.
- Cloud Flex: At the top, select Manage Organization > Change Account Owner.
- Enter a new subdomain name. The name must be between 4 and 63 characters in length at least four characters in length, and can contain lower case letters, numbers, and dashes only.
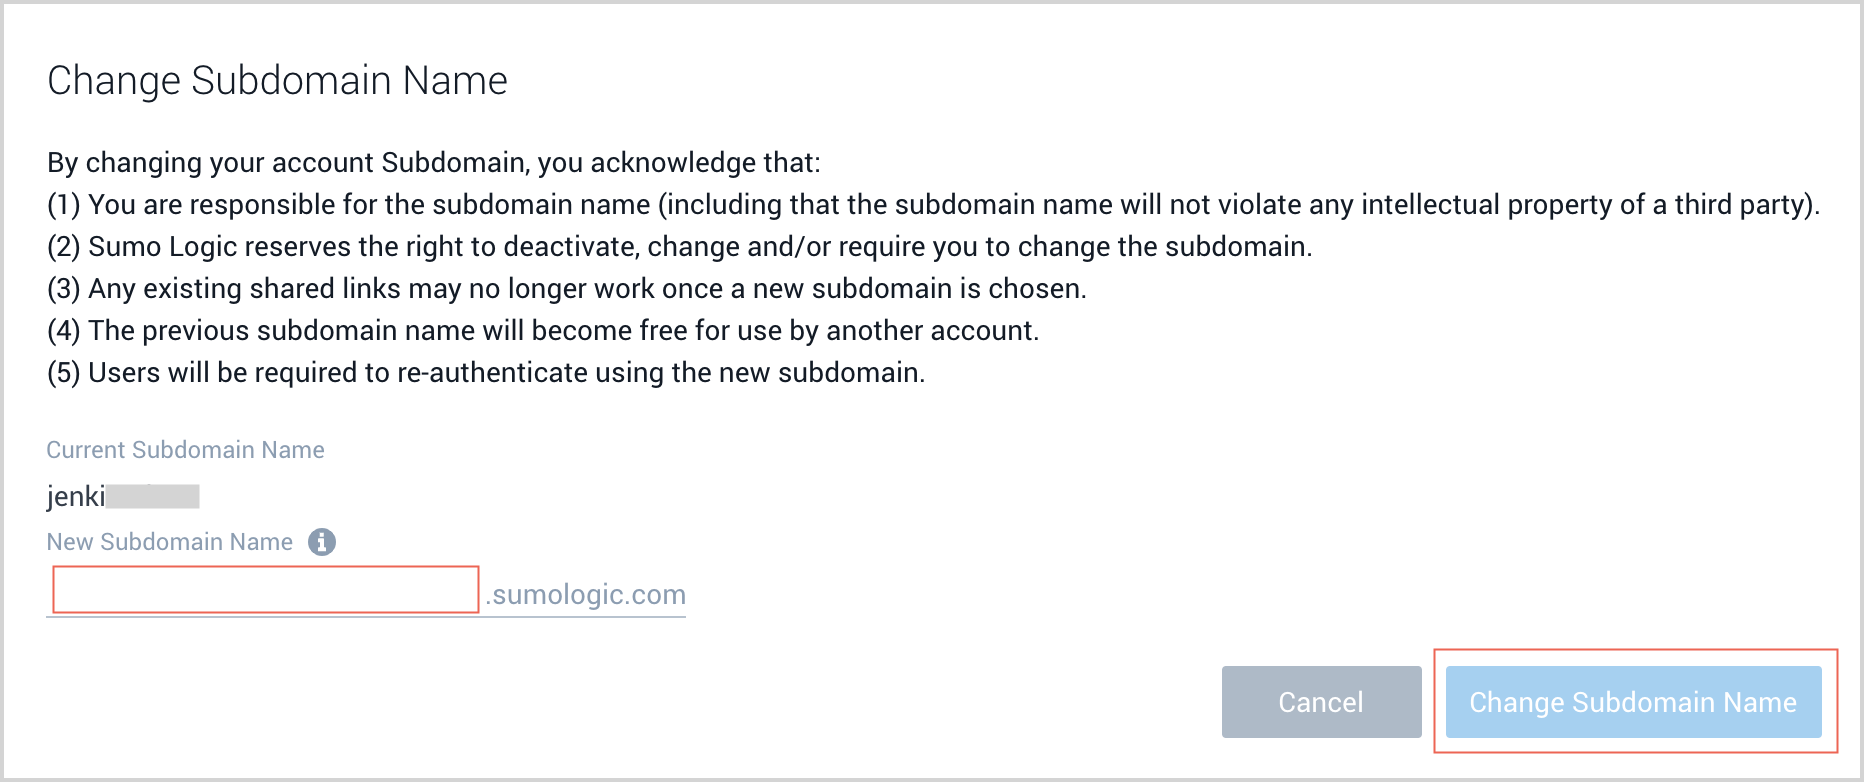
- Click Change Subdomain Name to update the name.
- You will be automatically logged out and redirected to the new subdomain login page.
Manage and view access to child org
This section has instructions for managing and viewing the access for the selected child org.
By default, if you are a user with Manage Organizations capability you will be able to see all the child orgs in your parent org and you can configure the users to view and SSO into child organizations. This helps you to define access on a per-child-org basis and precisely control over the sign in process.
But if you are user with only View Organizations capability you can see the child orgs with the default access and the child orgs that are assigned to you.
Manage access to child org
Follow the below steps to manage access to the child org:
- Classic UI. In the main Sumo Logic menu, select Administration > Organizations > Manage Account.
New UI. In the main Sumo Logic menu select Administration, and then under Organizations select Manage Account. You can also click the Go To... menu at the top of the screen and select Manage Account. - Click the child org for which you want to restrict the access.
- In the right hand pane, click on More Actions dropdown and select Manage Access.
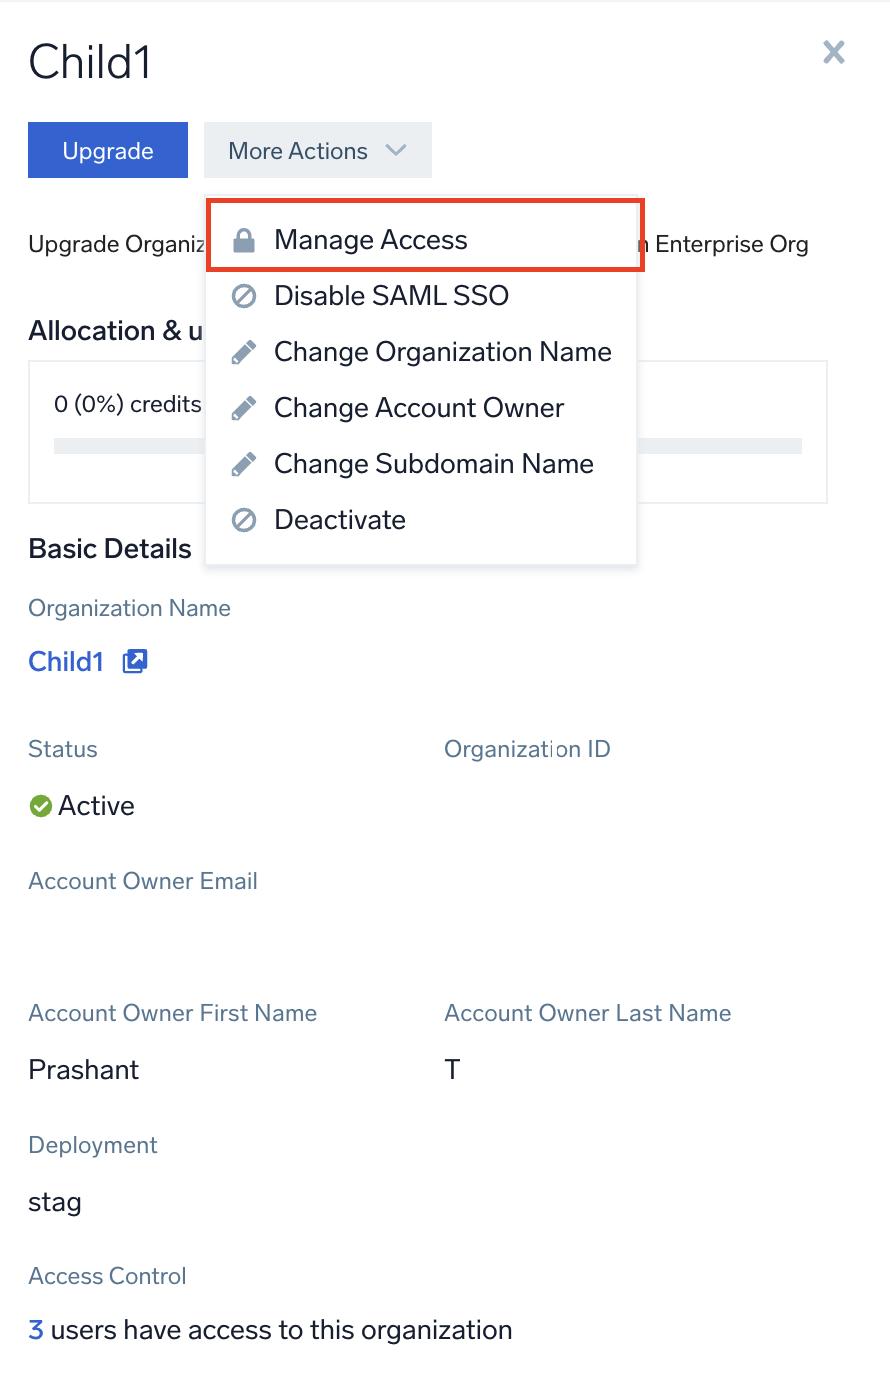
- On prompt, select any of the following:
- All Users with View Organization Capability. By default, users with View Organization capability can view the child orgs.
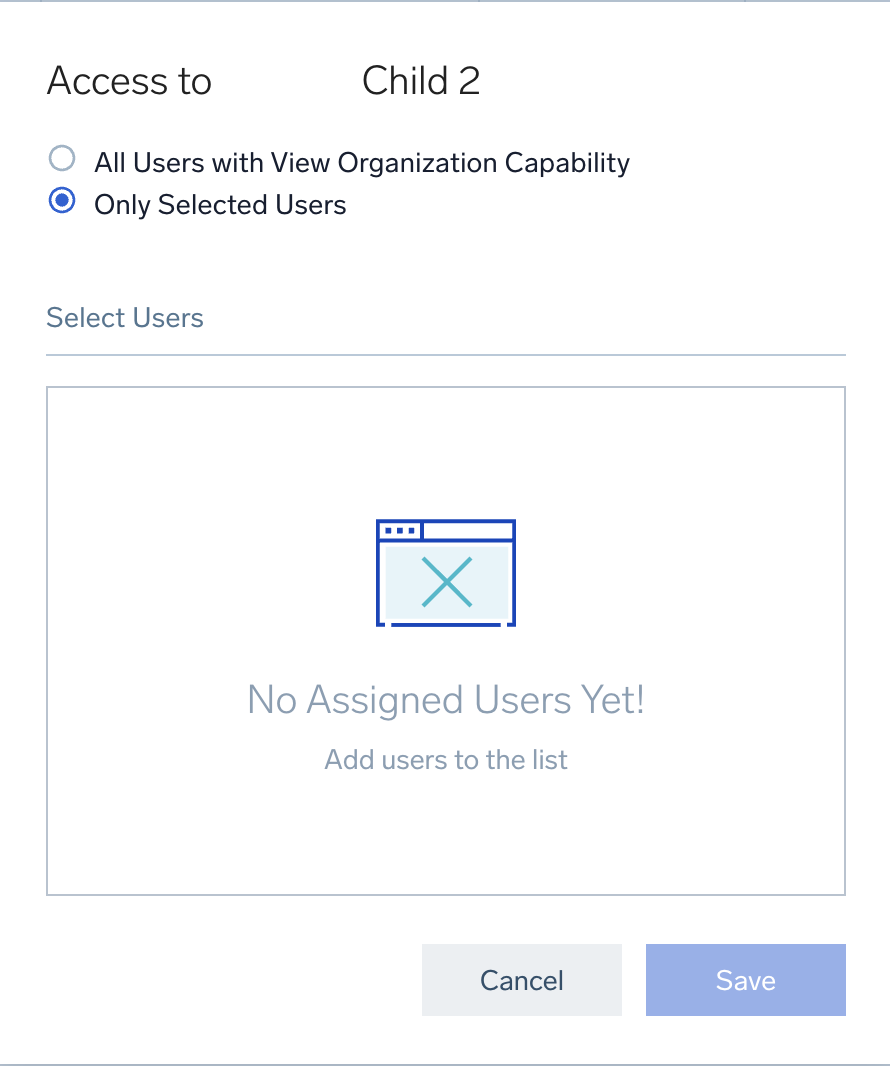
- Only Selected Users. Select this option if you want to restrict your child org to a selected number of users. On selecting this option, you will be prompted to select the list of users on the parent org for whom you need to provide the access.
View access to child org
Follow the below steps to view the child orgs access details:
- Classic UI. In the main Sumo Logic menu, select Administration > Organizations > Manage Account.
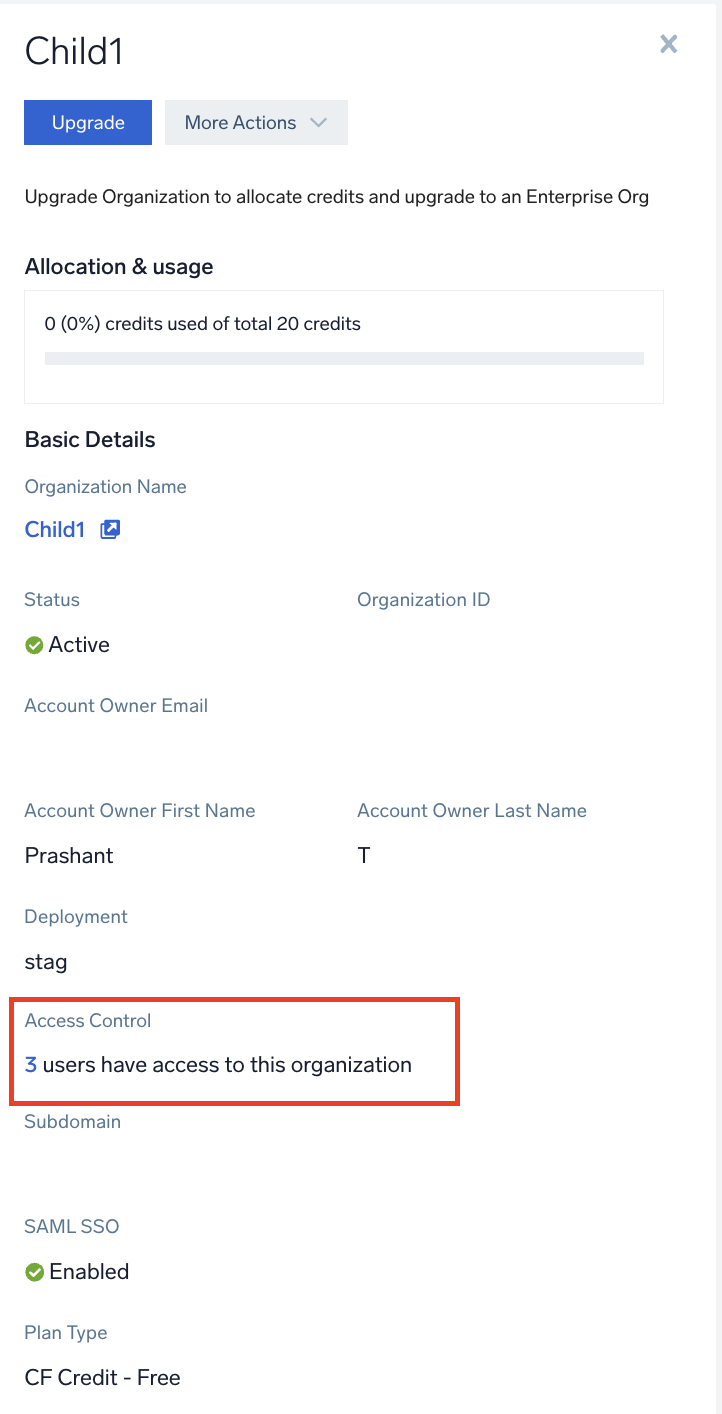
New UI. In the main Sumo Logic menu select Administration, and then under Organizations select Manage Account. You can also click the Go To... menu at the top of the screen and select Manage Account. - Click the child org for which you want to view the access details.
- Scroll down in the right pane to the Access Control section. You can see one among the following:
- All users with view organization capability. This will be displayed if the selected child org is configured with view for all users.
- [X] users have access to this organization. This will be displayed if the selected child org is configured only for selected number of users. X indicates the total number of users who have access to the selected child org. Click on this number to get a full list of users with access.
SSO for child organizations
When you create a new child organization, a subdomain is automatically created and single sign-on (SSO) is enabled, allowing you to sign in to the child organization without having to provide separate credentials. To use this feature you do not have to set up SAML for single sign-on for the child organization.
If you choose not to use this SSO feature, click Disable SSO on the child organizations. Then users log in with username and password, or you can manually set up SAML for single sign-on on the child organizations.
Role assignment
By default, the Administrator role is used for on-demand user provisioning in child organizations. So when a user from a parent organization signs in to a child organization using the SSO option, they are provisioned with Administrator access. If you want to use another role such as Analyst instead of Administrator for users logging in to child organizations, you can edit the SAML configuration on child organizations and specify the Analyst role in on-demand roles provisioning. See Configure on-demand roles provisioning.
If you have configured roles within your child organizations that match the roles within your parent, you can configure the SAML configuration to enable on-demand role provisioning.
Sign in to a child organization automatically
When you open the details of a child organization, a link to the child organization appears under Basic Details. When you click the link, you are automatically signed in to the child organization.

Automatic sign-in works because when the child organization was created, a subdomain was automatically added, and SSO was enabled by default. As a result, when you click the link to the child organization, you are provisioned as a user in the child organization and can access it at any time without needing to log in.
If you want to change the automatically-generated subdomain name to a preferred domain name, you can sign in to the child organization as an administrator and change the subdomain.
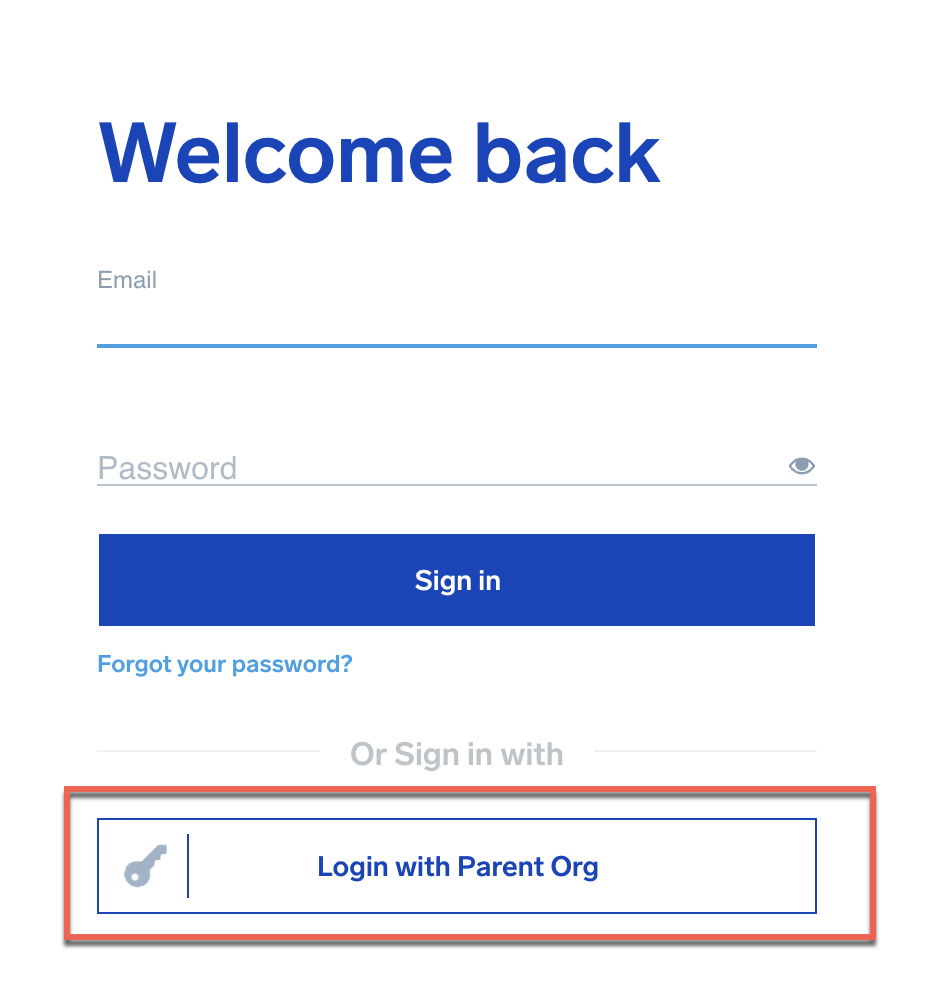
Sign back in with parent organization credentials
As an administrator, if you log out of a child organization with SSO enabled, the following screen appears. Click Login with Parent Org to sign back in automatically using your parent organization credentials.
Enabling or disabling SSO
Although anyone with the View Organizations role capability can access child organizations, only users with the Manage Organizations role capability can enable or disable the SSO option.
Enable SSO
If a subdomain exists, but SSO is disabled for the child organization, click Enable SSO: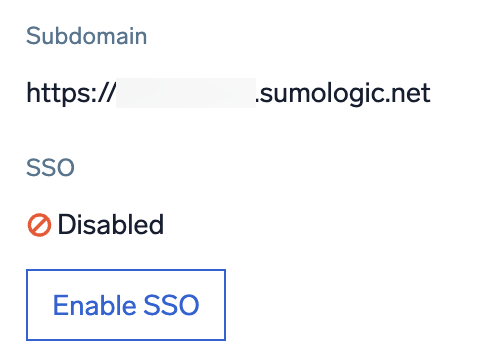
If there is no subdomain defined for a child organization, hovering your mouse over the Enable SSO button displays the message Set up custom subdomain before enabling SSO: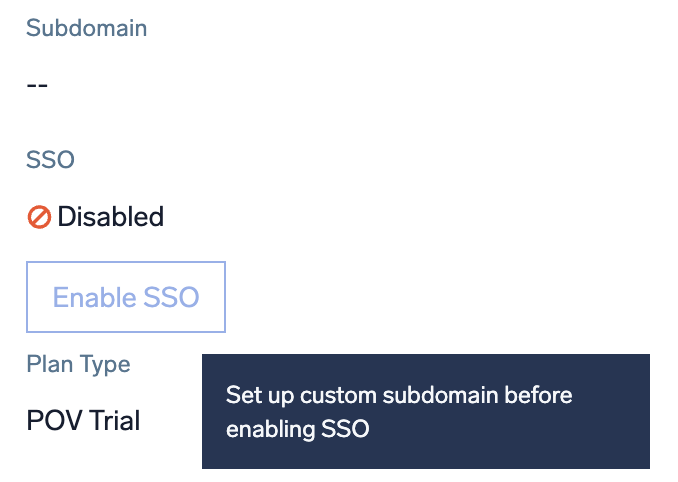
To set up a custom subdomain for the child organization, see Set up a custom subdomain above. Once you set up the subdomain, the subdomain's URL will appear and the Enable SSO button will be clickable.
Disable SSO
When a child organization has SSO enabled, the child organization's details display the subdomain URL in the Subdomain field, and the SSO field says Enabled: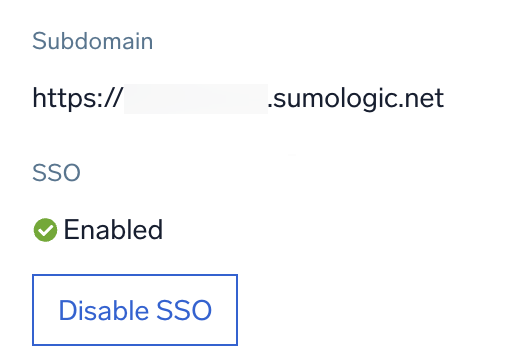
If you want to require administrators to enter credentials to sign in to the child organization, click Disable SSO to turn off single sign-on.