Integrate Sumo Logic with OneLogin
Availability
| Account Type | Account Level |
|---|---|
| Cloud Flex | Trial, Enterprise |
| Credits | Trial, Essentials, Enterprise Operations, Enterprise Security, Enterprise Suite |
This section has instructions for integrating OneLogin and Sumo Logic to allow Sumo Logic users to sign on to Sumo Logic using OneLogin SSO.
Before you start
Read the "Limitations section" on Set Up SAML for Single Sign-On.
Configure a SAML app in OneLogin
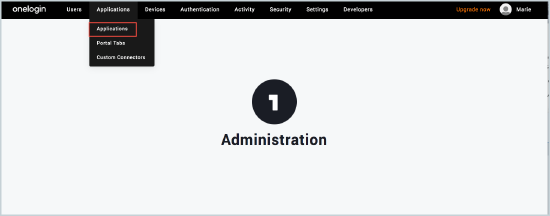
- In OneLogin, choose Applications from the Applications menu.
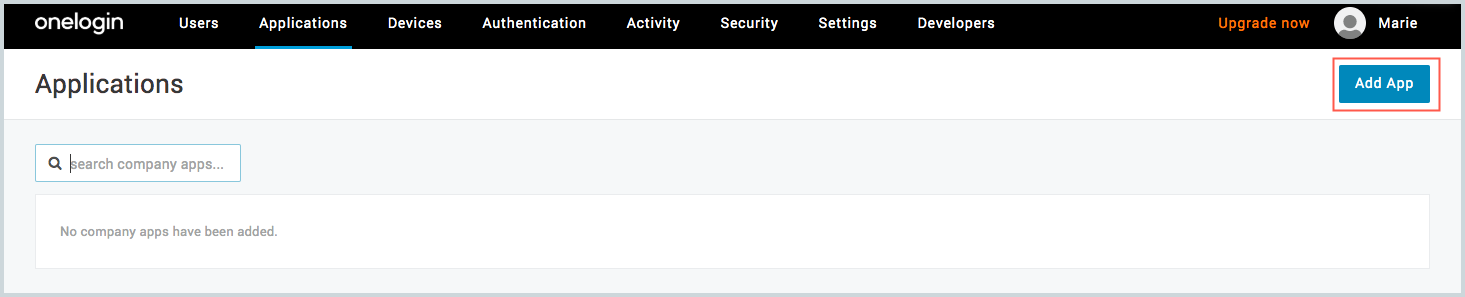
- On the Applications page, click Add App.
- On the Find Applications page, search for Sumo Logic and select the Sumo Logic SAML 2.0 app.

- On the Add Sumo Logic page:
- Display Name. This is the display name that will appear on your OneLogin portal page. Edit as desired
- Visible in portal. Toggle this option off if you do not want Sumo Logic to appear on your OneLogin portal page.
- Icons. (Optional) If desired, you can upload different icons to display on your OneLogin portal page.
- Description. (Optional) Provide a short description for this application.
- Click Save.

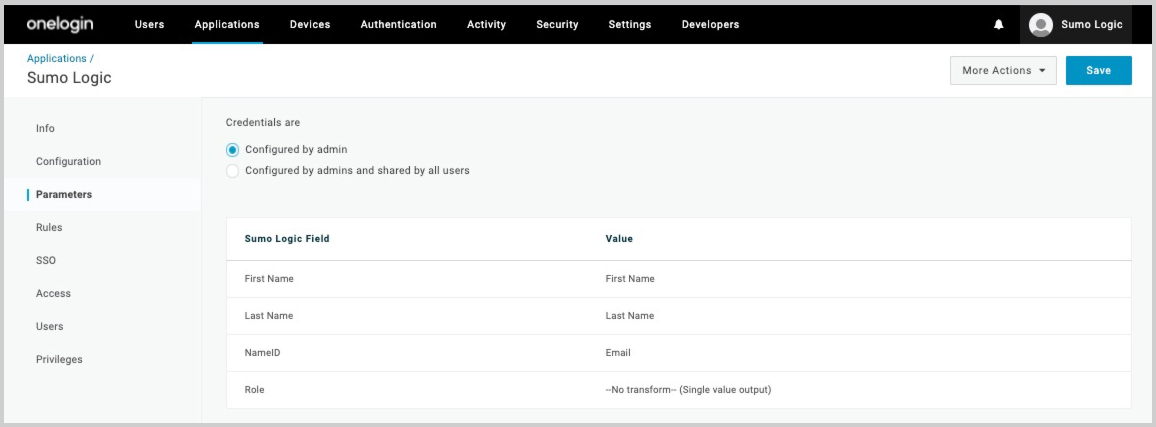
- Click Parameters in the left-nav.
- Credentials are. Set the credentials to "Configured by admin".
- First Name. Select “First Name”.
- Last Name. Select “Last Name”.
- NameID. Select "Email" or something equivalent to the users email to use as the Sumo Logic credential.
- Role. If you will be sending multiple OneLogin roles then change this to "Semicolon Delimited Input (multi-value output)".
- On the SSO tab:
- Copy the Issuer URL and the SAML 2.0 Endpoint to supply when you configure Sumo Logic in Step 2 below.
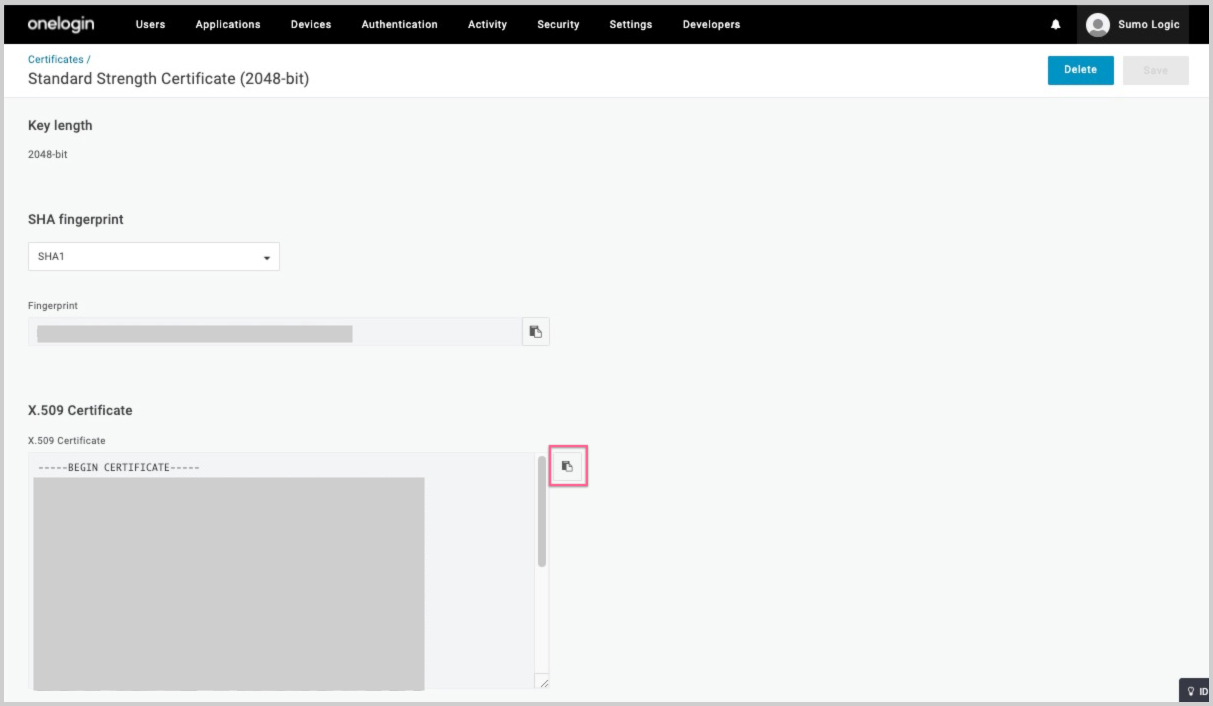
- Right-Click View Details for the X.509 Certificate and open in a new tab.
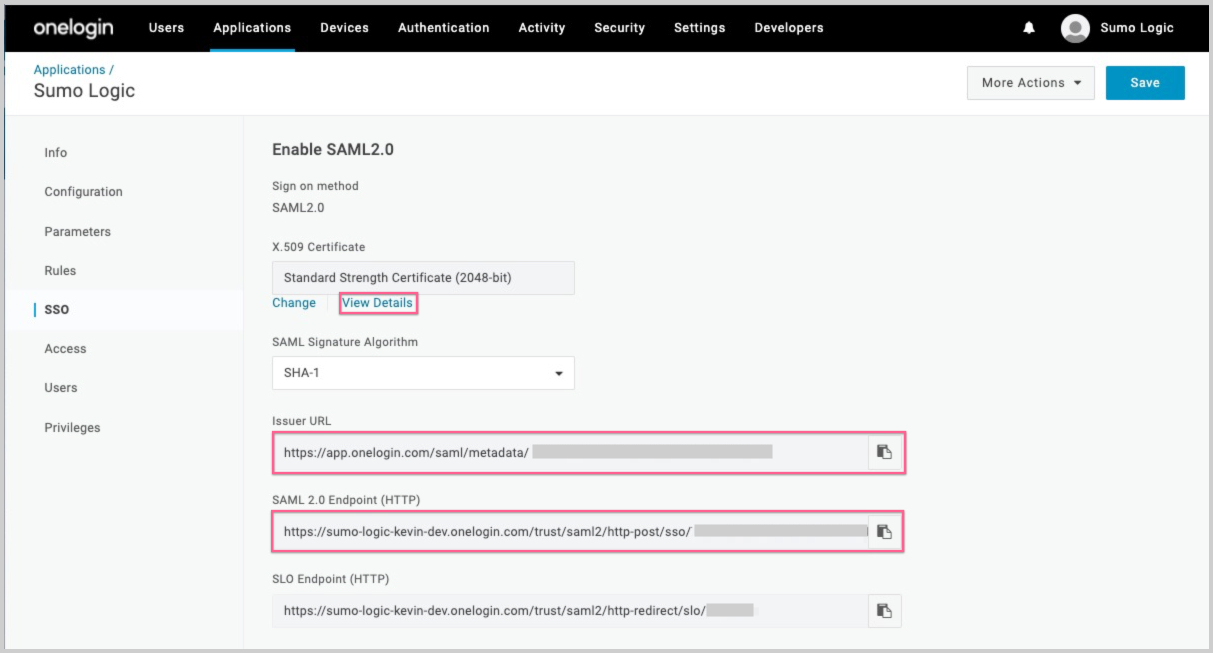
- On the Certificates page, copy the X.509 Certificate. You'll supply it when you configure Sumo Logic in the following section.
- On the Access tab, choose which roles will have access to Sumo Logic.
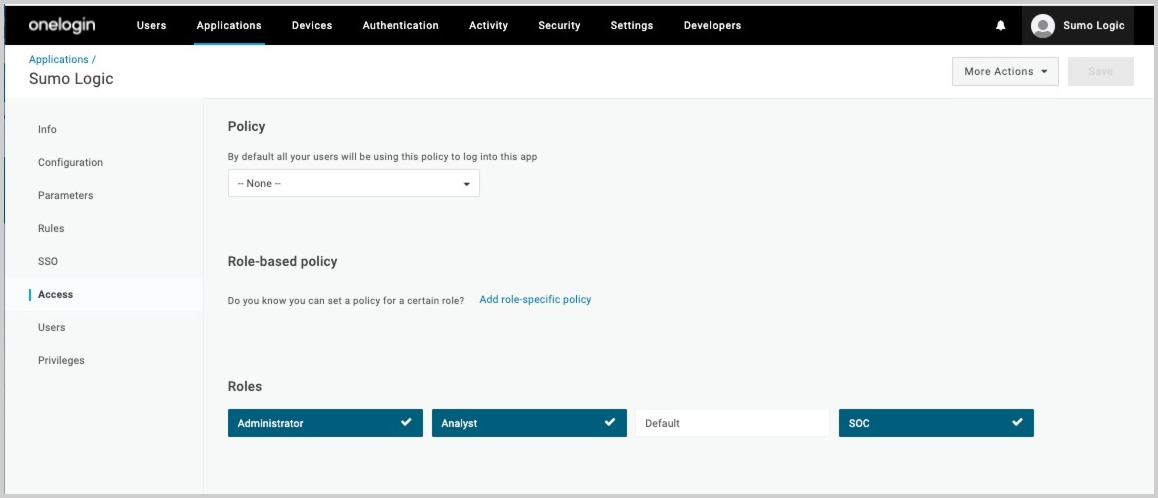
- Click Save.
Configure SAML in Sumo
This section has instructions for configuring SAML in Sumo Logic.
- Classic UI. In the main Sumo Logic menu, select Administration > Security > SAML.
New UI. In the top menu select Administration, and then under Account Security Settings select SAML. You can also click the Go To... menu at the top of the screen and select SAML. - Click + Add Configuration to create a new configuration.
- The Add Configuration page appears.
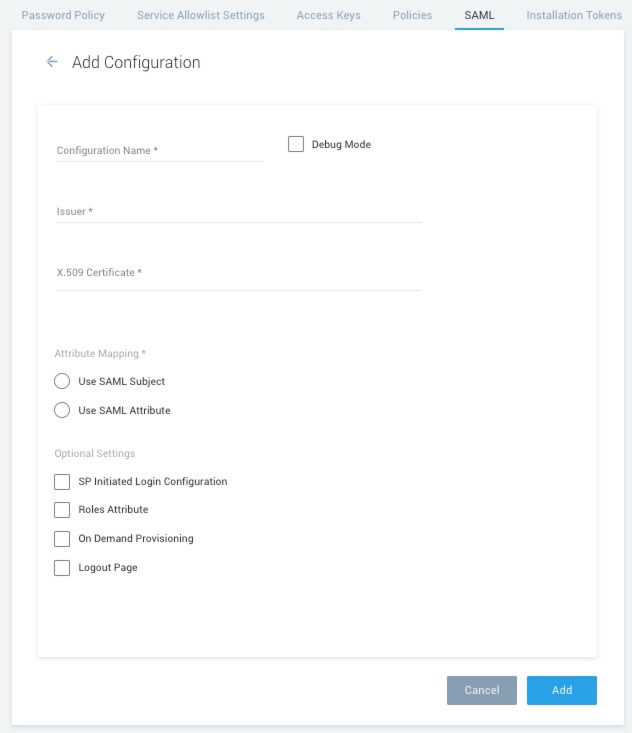
- Configuration Name. Enter a name to identify the SSO policy (or another name used internally to describe the policy).
- Debug Mode. Select this option if you'd like to view additional details if an error occurs when a user attempts to authenticate. For more information, see View SAML Debug Information.
- Issuer. Paste in the Issuer URL you copied from the OneLogin SSO page, as described above.
- X.509 Certificate. Paste in the certificate you downloaded from the OneLogin SSO page, as described above.
- Attribute mapping. Select "Use SAML subject".
- SP-initiated Login. (Optional) This configuration enables a Sumo user to initiate login from Sumo Logic. To configure this option, see Configure SP-initiated login.
- Roles Attribute. (Optional). To configure this option, see Configure on-demand role provisioning.
- On Demand Provisioning. (Optional). See Configure on demand provisioning below.
vLogout Page. When a Sumo user logs out of Sumo Logic or if the user’s session times out, they will be redirected to the page you specify. If you want users to be redirected to your OneLogin portal page, enter
https``://your-domain.onelogin.com/portal/whereyour-domainis your company's OneLogin domain. - Click Add.
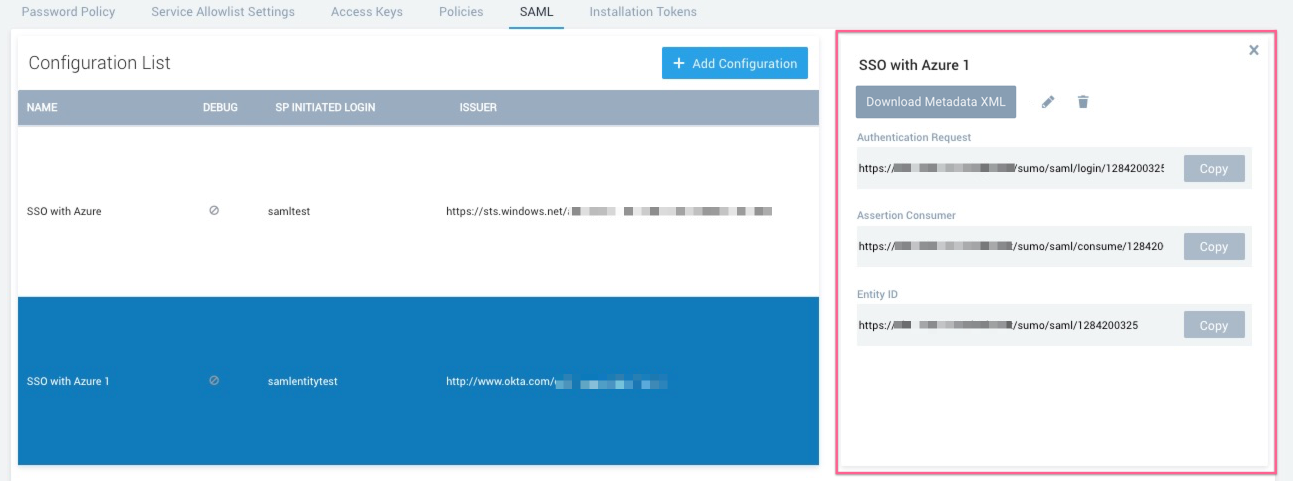
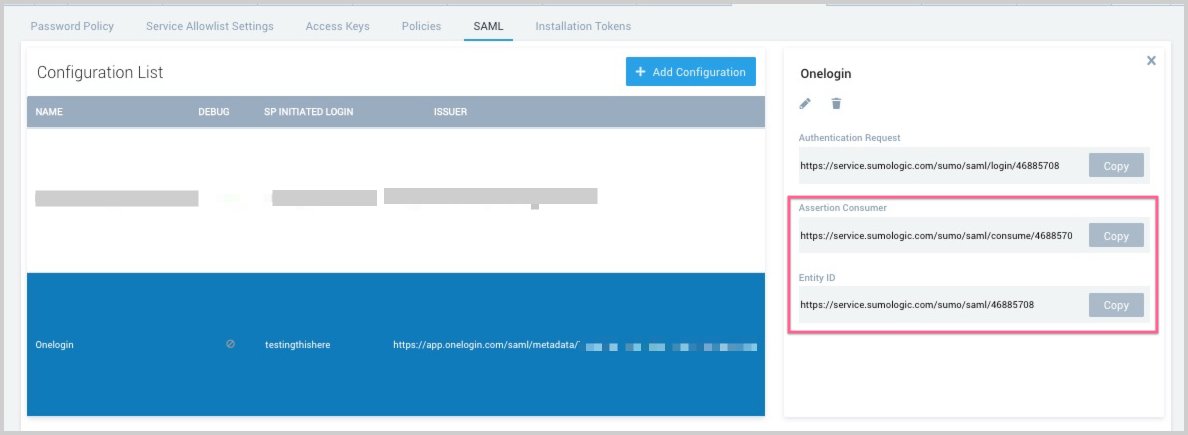
- To view the details of your configuration, select it the Configuration List.
- Copy the Assertion Consumer and Entity ID from the details pane. You'll paste these into the OneLogin Configuration page, as described in the following section.
Complete SAML configuration in OneLogin
- Return to OneLogin.
- Select the Sumo Logic SAML app.
- On the Configuration page, paste the Assertion Consumer and Entity ID values copied OneLogin above.
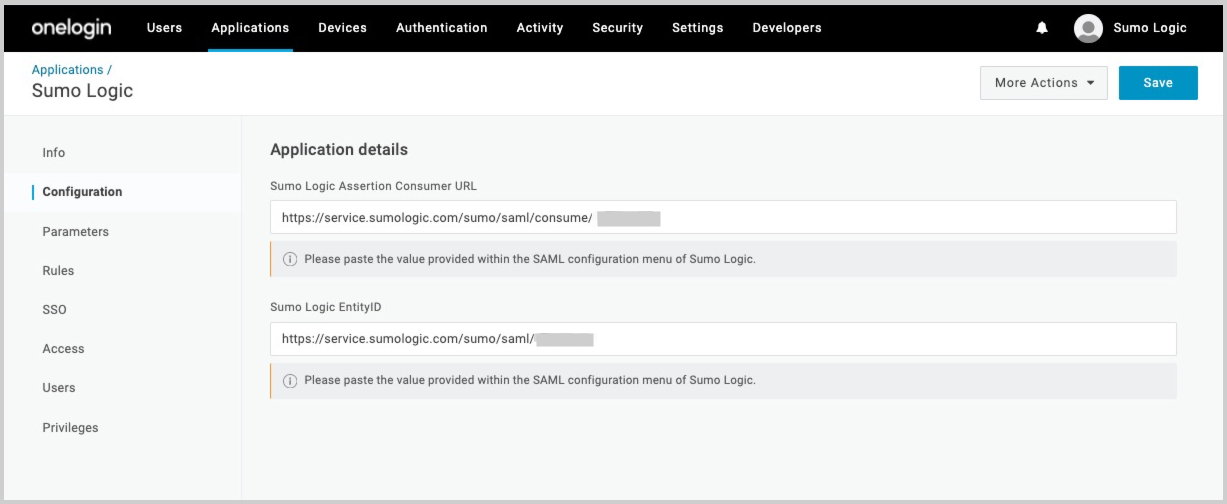
- Click Save.
Optional configurations
This section has instructions for configuring several optional SAML features.
Configure SP-initiated login
SP initiated login requires a custom Sumo Logic subdomain. If a custom subdomain has not yet been configured for your org, following the instructions in the Change account subdomain section of the Manage Organization topic.
This configuration enables a Sumo user to initiate login from Sumo Logic. Sumo redirects the user to OneLogin with a SAML AuthnRequest with the information that OneLogin needs to authenticate the user. OneLogin replies to Sumo with a SAML Assertion (SAMLResponse).
- Authn Request URL. Enter the SAML 2.0 Endpoint URL that you copied from the OneLogin SSO page, as described above.
- Disable Requested Authentication Context. (Optional). Leave unchecked.
- Sign Authn Request. (Optional). Leave unchecked.
Configure on-demand account provisioning
If you configure on-demand account provisioning, Sumo Logic automatically creates a user account the first time a user tries to access Sumo Logic from your OneLogin portal page. To configure this behavior, you update your OneLogin integration in Sumo Logic, providing the First Name and Last Name attributes One Login uses to identify users, and the role or roles you want to assign to the accounts when they are created.
In Sumo Logic, open your OneLogin integration application for editing.
- Click the On Demand Provisioning checkbox.
- First Name. Enter:
firstname - Last Name. Enter:
lastname - On Demand Provisioning Roles. Specify the Sumo RBAC roles you want to assign when user accounts are provisioned. The roles must already exist in Sumo Logic.
- Click Save to save the SAML configuration.
Configure on-demand role provisioning
If you configure on-demand role provisioning, Sumo Logic assigns roles to a user every time the user logs in. Roles are configured by your OneLogin administrator and assigned as part of the SAML assertion. Each role name that you want to assign to users must match roles that exist in Sumo Logic and in OneLogin.
- In Sumo Logic, open your OneLogin integration application for editing.
- Click the Roles Attribute checkbox. The Roles Attribute field appears.
- Roles Attribute. Enter:
role - Click Save.