Integrate Sumo with Azure AD
Availability
| Account Type | Account Level |
|---|---|
| Cloud Flex | Trial, Enterprise |
| Credits | Trial, Essentials, Enterprise Operations, Enterprise Security, Enterprise Suite |
Organizations with Enterprise accounts can provision Security Assertion Markup Language (SAML) 2.0 to enable Single Sign-On (SSO) for user access to Sumo Logic. This section has instructions for integrating Sumo with Azure AD.
Configure Sumo as an Enterprise App in Azure AD
In this step you set up Sumo as an Enterprise App in Azure AD.
The steps below are for the new Azure Management Console. For general steps for using the legacy GUI, see Configure single sign-on to applications that are not in the Azure Active Directory application gallery in Azure help.
- Go into the Microsoft Azure Management Console and select Azure Active Directory in the left-side navigation pane.
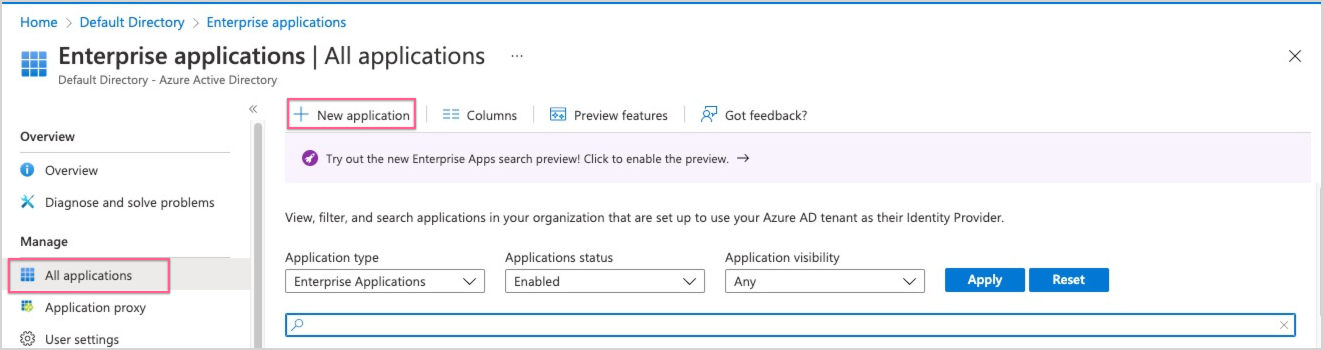
- Select Enterprise Applications.

- Select Manage > All Applications.
- Click New application at the top of the All applications blade.
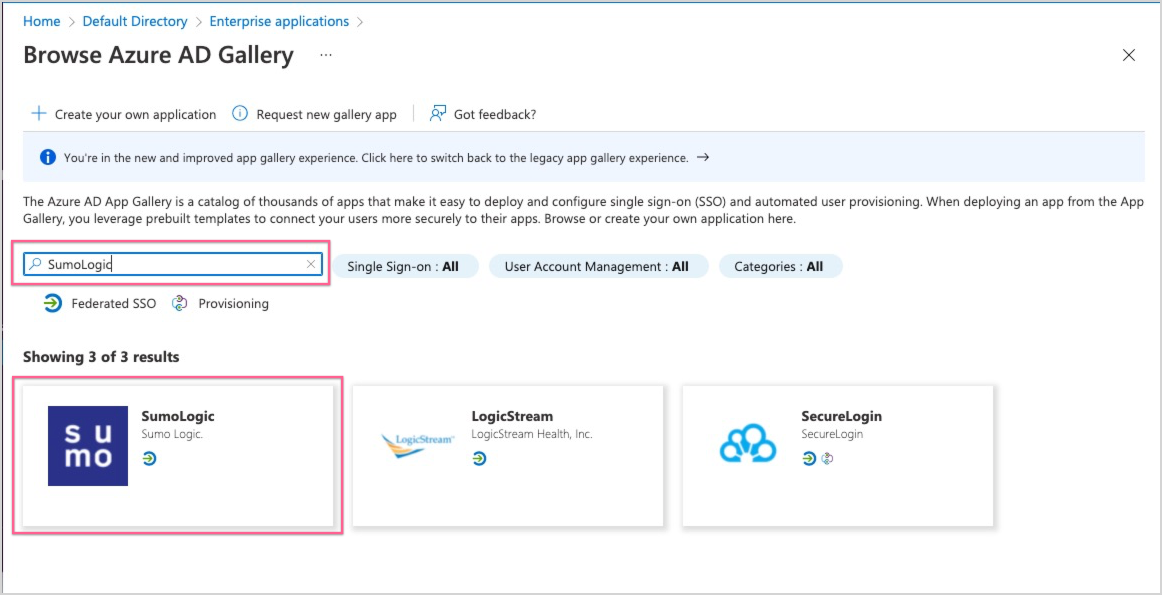
- Search for SumoLogic.
- Select the SumoLogic tile.
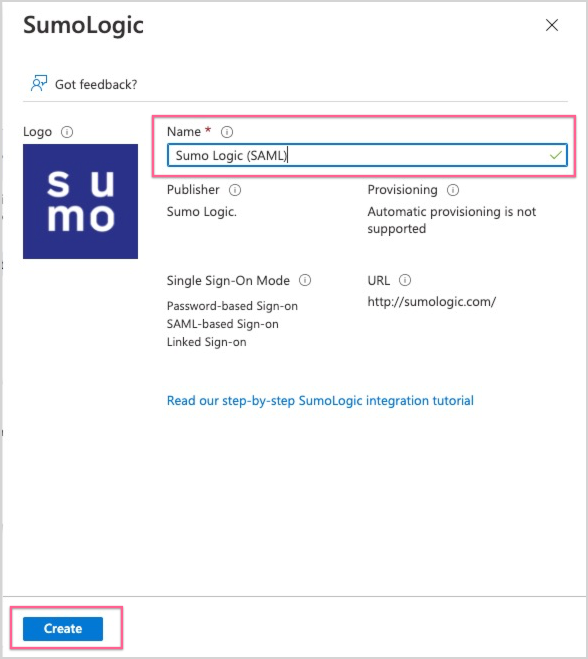
- Enter a name for your application and click Create. Throughout this procedure, we refer to the application name as <app-name>.
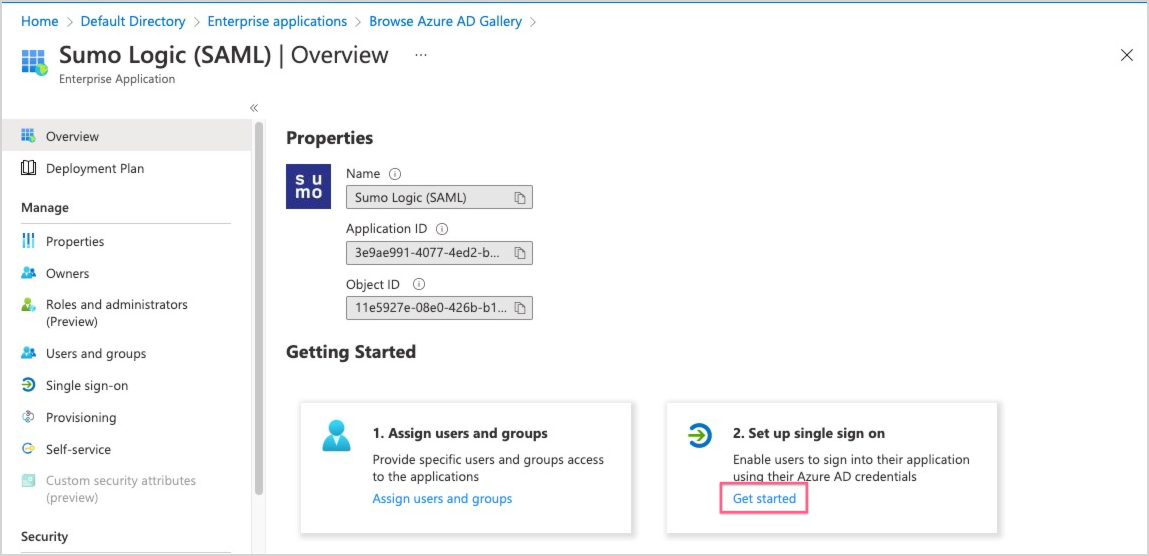
- From the Overview tab, click Get Started in the Set up single sign-on tile.
- Click the SAML tile on the Single sign-on page.

- Click Edit in the Basic SAML Configuration page.
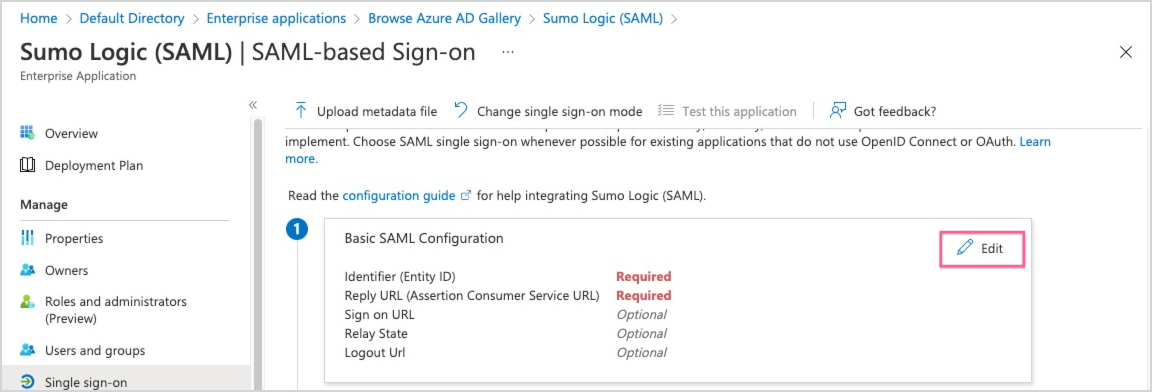
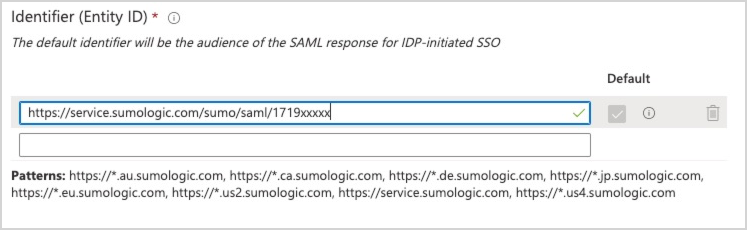
- In the Basic SAML Configuration pane:
- Select https://service.sumologic.com as the default Identifier (Entity ID) in the list. (You'll update this in a later step.)
- Enter https://service.sumologic.com as the Reply URL (Assertion Consumer Service URL). (You'll update this in a later step.)
- Click Save at the top of the pane, and then close the pane.
- In the SAML Signing Certificate tile, click the Download link for Certificate (Base64) to download the
<app-name>.cerfile.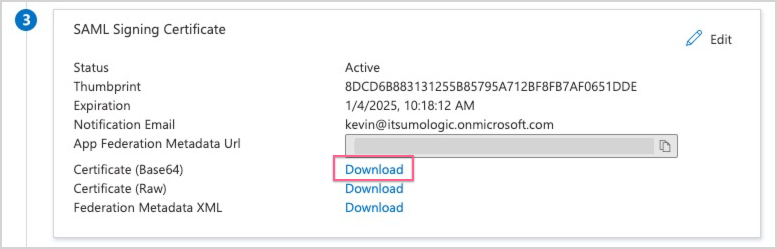
- In the SAML Signing Certificate tile, click the Download link for Federation Metadata XML to download the
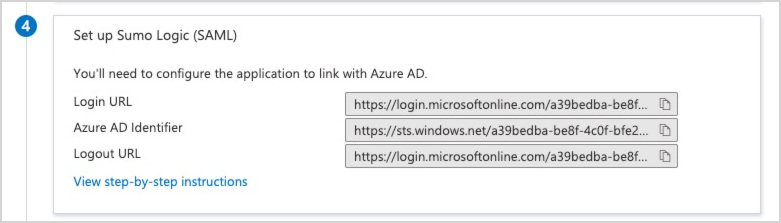
<app-name>.xmlfile. - In the Set Up
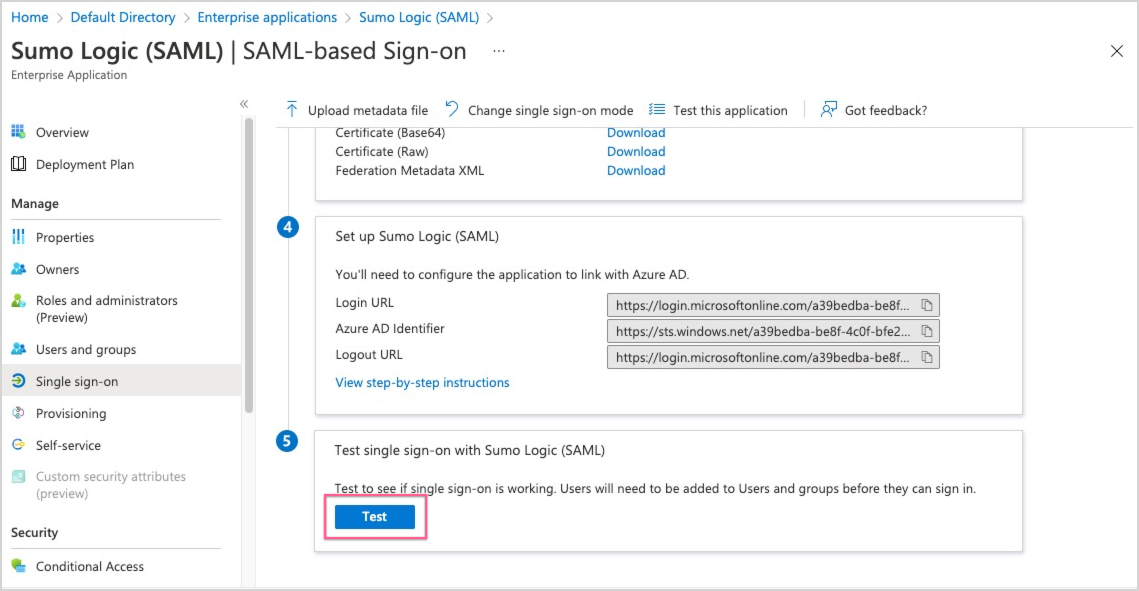
<app-name>section, copy and paste the contents of the following fields into a text document. You may need these values when in the next step.- Login URL
- Azure AD identifier
- Logout URL
Do not close the Setup Single Sign-On with SAML window, you will return later for additional configuration steps.
Configure SAML in Sumo Logic
- Classic UI. In the main Sumo Logic menu, select Administration > Security > SAML.
New UI. In the top menu select Administration, and then under Account Security Settings select SAML. You can also click the Go To... menu at the top of the screen and select SAML. - Select an existing configuration, or click Add Configuration to create a new configuration.
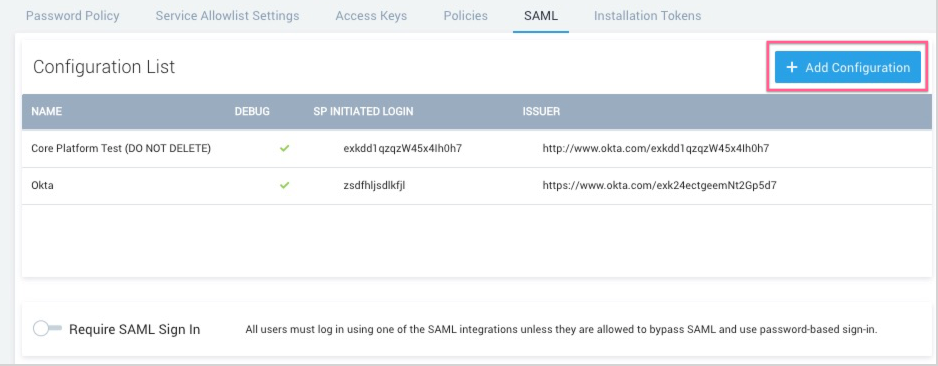
- The Add Configuration page appears.
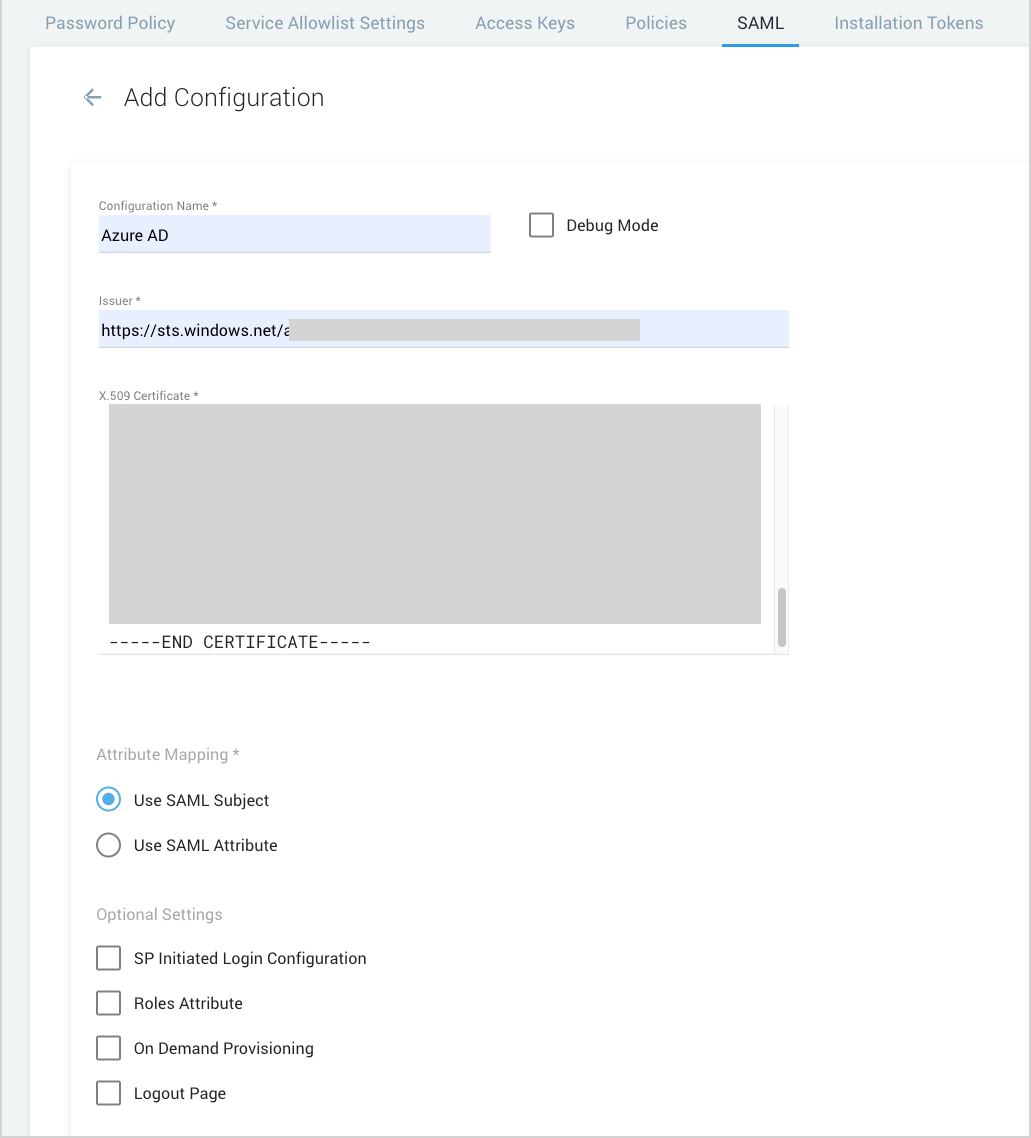
- Configuration Name. Enter a name to identify the SSO policy (or another name used internally to describe the policy).
- Debug Mode. Select this option if you'd like to view additional details if an error occurs when a user attempts to authenticate. For more information, see View SAML Debug Information.
- Click the Import Metadata XML button.
- Select Or Choose File from the Import Metadata XML prompt and select the XML file you downloaded in substep 13 of Configure Sumo as an Enterprise App in Azure AD.
- Click the Import button to import the Azure AD metadata .xml.
- Verify the Issuer and X.509 Certificate fields have been populated by the import. If these fields are not populated:
- Issuer. Enter the Azure AD Identifier that you noted in the substep 14 of Configure Sumo as an Enterprise App in Azure AD.
- X.509 Certificate. Use a text editor to open the certificate file you downloaded in substep 12 of Configure Sumo as an Enterprise App in Azure AD. Copy and paste the contents of the file into the field.
- Attribute Mapping. Select Use SAML subject.
- Configure SP-initiated Login. (Optional) This step has instructions for setting up SP-initiated login. When SP-initiated login has been enabled, your SAML configuration will appear as an additional authentication option within your subdomain-enabled account login page. SP initiated login requires a custom Sumo Logic subdomain. If a custom subdomain has not yet been configured for your org, following the instructions in the Change account subdomain section of the Manage Organization topic.
- Under the SAML configuration page > Optional Settings section, select SP Initiated Login Configuration. When you click this option, the following configurations will appear.
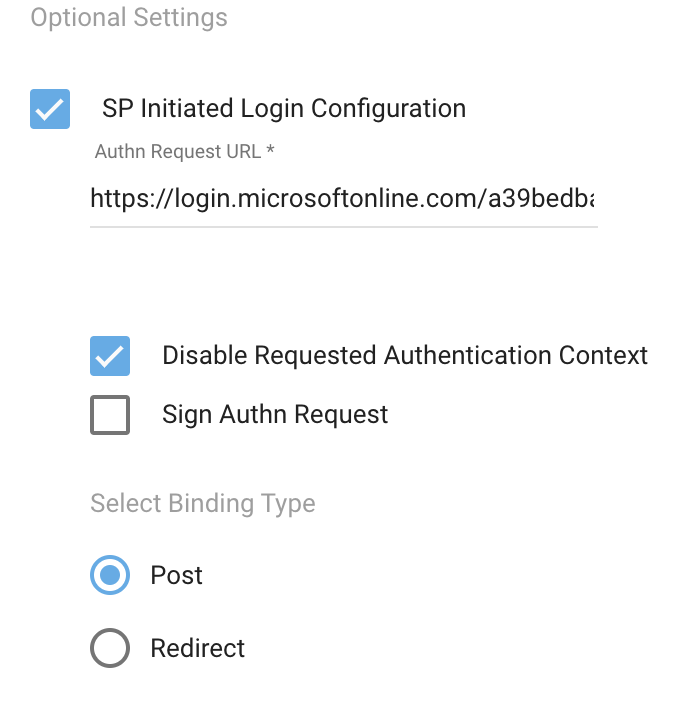
- Authn Request URL. Enter the Login URL that you noted in the substep 13 of Configure Sumo as an Enterprise App in Azure AD.
- Disable Requested Authn Context. Checkmark this option.
- Select Binding Type. Click Post.
- Sign Authn Request. Leave this option deselected.
- Under the SAML configuration page > Optional Settings section, select SP Initiated Login Configuration. When you click this option, the following configurations will appear.
- Configure on-demand provisioning. (Optional) If you configure on-demand provisioning, Sumo Logic automatically creates a user account the first time a user logs on to Sumo. To complete this procedure, you must supply the First Name and Last Name attributes Azure AD uses to identify users.
- Click the On Demand Provisioning checkbox.
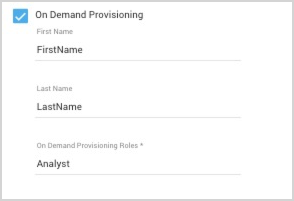
- First Name Attribute. You might need to provide the full attribute path, which can vary based on the ADFS version (the actual path can be seen in the SAML assertion). Here is an example:
http://schemas.microsoft.com/ws/2008/06/identity/claims/givenname - Last Name Attribute. You might need to provide the full attribute path, which can vary based on the ADFS version (the actual path can be seen in the SAML assertion). Here is an example:
http://schemas.microsoft.com/ws/2008/06/identity/claims/surname - On Demand Provisioning Roles. Specify the Sumo Logic roles you want to assign when user accounts are provisioned. (These roles must already exist in Sumo Logic.)
- Click the On Demand Provisioning checkbox.
- Configure logout page. (Optional) Configure a logout page if you would like to point all Sumo users to a particular URL after logging out of Sumo Logic or after their session has timed out. You could choose your company's intranet, for example, or any other site that you'd prefer users in your organization access.
- Click the Logout Page checkbox.
- Enter the URL of the page to which you want to direct users after logging of Sumo.
- Click Add to save the configuration
- Select the new configuration from the Configuration List.
- Copy the following field values and save them in a text file. You'll need them in the steps to follow.
- Assertion Consumer URL
- Entity ID
Complete Azure configuration
- In Section 1, Basic SAML Configuration, edit the configuration.
- Identifier (Entity ID). If you configured selected SP initiated login, replace https://service.sumologic.com with the Entity ID you copied in substep 14 of Configure SAML in Sumo Logic.
- Reply URL (Assertion Consumer URL). Replace https://service.sumologic.com with the Assertion Consumer URL you copied in substep 14 of Configure SAML in Sumo Logic.

- Click Save.
- Identifier (Entity ID). If you configured selected SP initiated login, replace https://service.sumologic.com with the Entity ID you copied in substep 14 of Configure SAML in Sumo Logic.
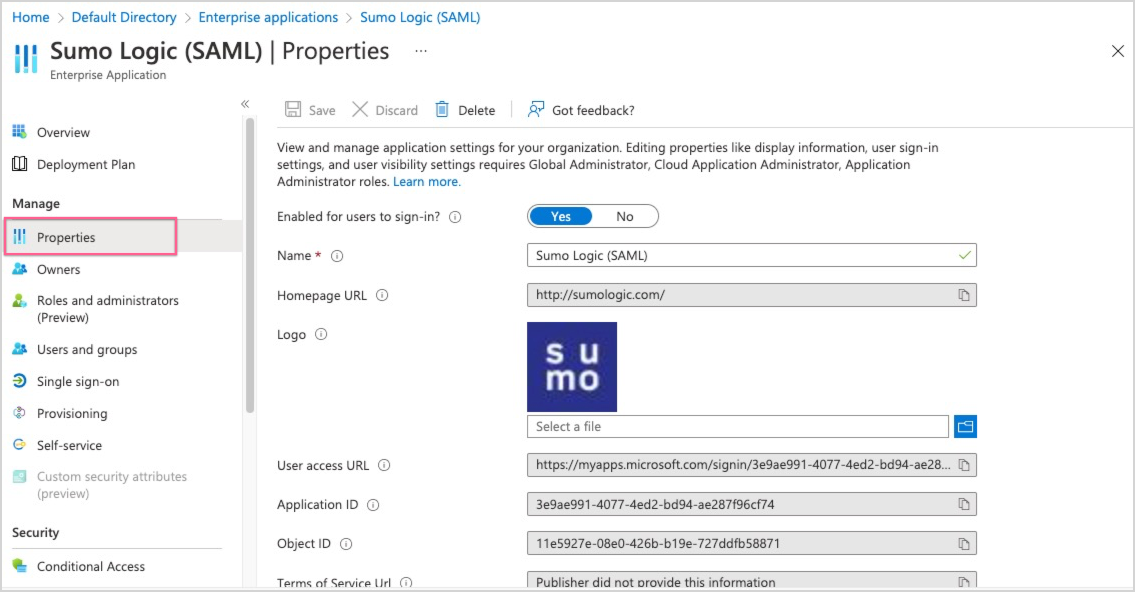
- In the left navigation pane, click Properties in the Manage section.
- Enabled for users to sign in? Enter Yes.
- User assignment required? Enter Yes. (This option controls whether a user must be assigned to this group or whether any user in the Azure AD tenant can use Sumo Logic. We recommend setting this to Yes as the Sumo environment has a finite number of users.
- Click Save.
- In the left navigation pane, click Users and Groups in the Manage section.
- Select Add user/group.
- Add the Users or Groups that should have access to sign in to Sumo Logic and then click Assign.
Configure Azure AD to send Group assignments to Sumo (Optional)
In this step, you configure Azure AD to send group membership information in the SAML assertions it sends, so that Sumo Logic can assign roles to a user at each logon. This allows you to manage Sumo role assignments via Azure AD. If you don’t want to manage Sumo roles via Azure AD, skip these steps and proceed to Test SAML Authentication below.
These instructions assume that:
- You have configured a set of groups on Azure AD whose names match the names of the roles defined in Sumo.
- You have assigned each user in Azure AD to the Azure AD groups that maps to the roles you want the user to have.
There are two sides to the configuration. You'll configure a Group Attribute Claim in Azure AD and set a Roles Attribute in Sumo Logic.
- Select the Single Sign On menu item of your Sumo Logic application in Azure AD.
- Click Edit under Attribute and Claims.
- Select Add a group claim
- Select Groups assigned to the application from the Group Claims pane.
- Select sAMAccountName from the Source Attribute drop down.
- Check the box for Emit group name for cloud-only groups.
- Under the Advanced options, check the box for Customize the name of the group claim.
- Check the box for Emit groups as role claims.
- Click Save to add the new group claim.
- Select the Roles Attribute checkbox within your Sumo Logic SAML configuration and enter the group claim name:
http://schemas.microsoft.com/ws/2008/06/identity/claims/role - Save the Sumo Logic configuration.
Test SAML Authentication
- On the Azure Single Sign-on page click Test.
- Click the Sign in as current user radio button and then Test sign in.
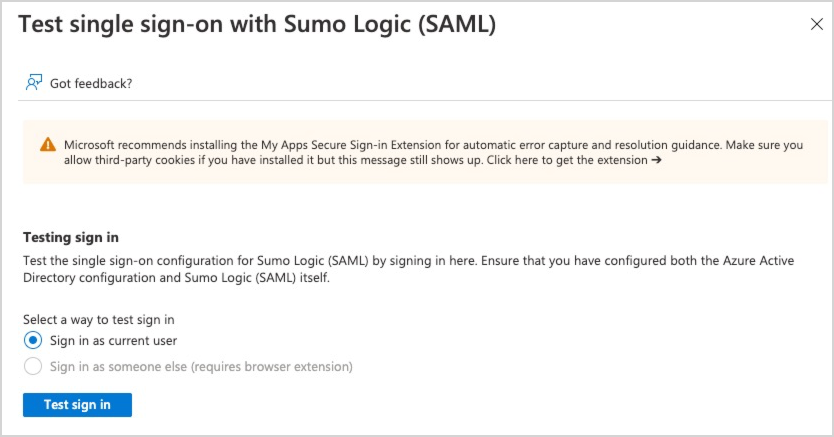
- You should be redirected and logged into your Sumo Logic account. If you have enabled SP Initiated Login, you can also go to your Sumo Logic account subdomain login page and select the new SAML login option that appears.