About SCIM Provisioning
You can utilize Sumo Logic SCIM User Management APIs to automatically provision and deprovision users in Sumo Logic when users are created or removed within your identity provider. Sumo Logic can be integrated with any identity provider that is SCIM 2 compliant.
Directions for specific providers
This article contains general guidance on setting up identity providers to provision with Sumo Logic.
See the following articles for directions to configure specific providers:
General process to configure provisioning for Sumo Logic
Although the process will differ depending on your provider, following are the general steps to configure your provider to provision with Sumo Logic.
Prerequisites
Create an access key
Before configuring a provider, create an access key. (We recommend using a service account to create the access key.) This access key will provide authorization to provision users from the provider into Sumo Logic.
When you create the access key, copy its access ID and access key values. You will enter these when you set up provisioning to use one of the following authorization methods:
- Basic authentication
- Username: Access ID
- Password: Access key
- Bearer token
Use Base64 encoding to Base64 encode<access ID>:<access key>.
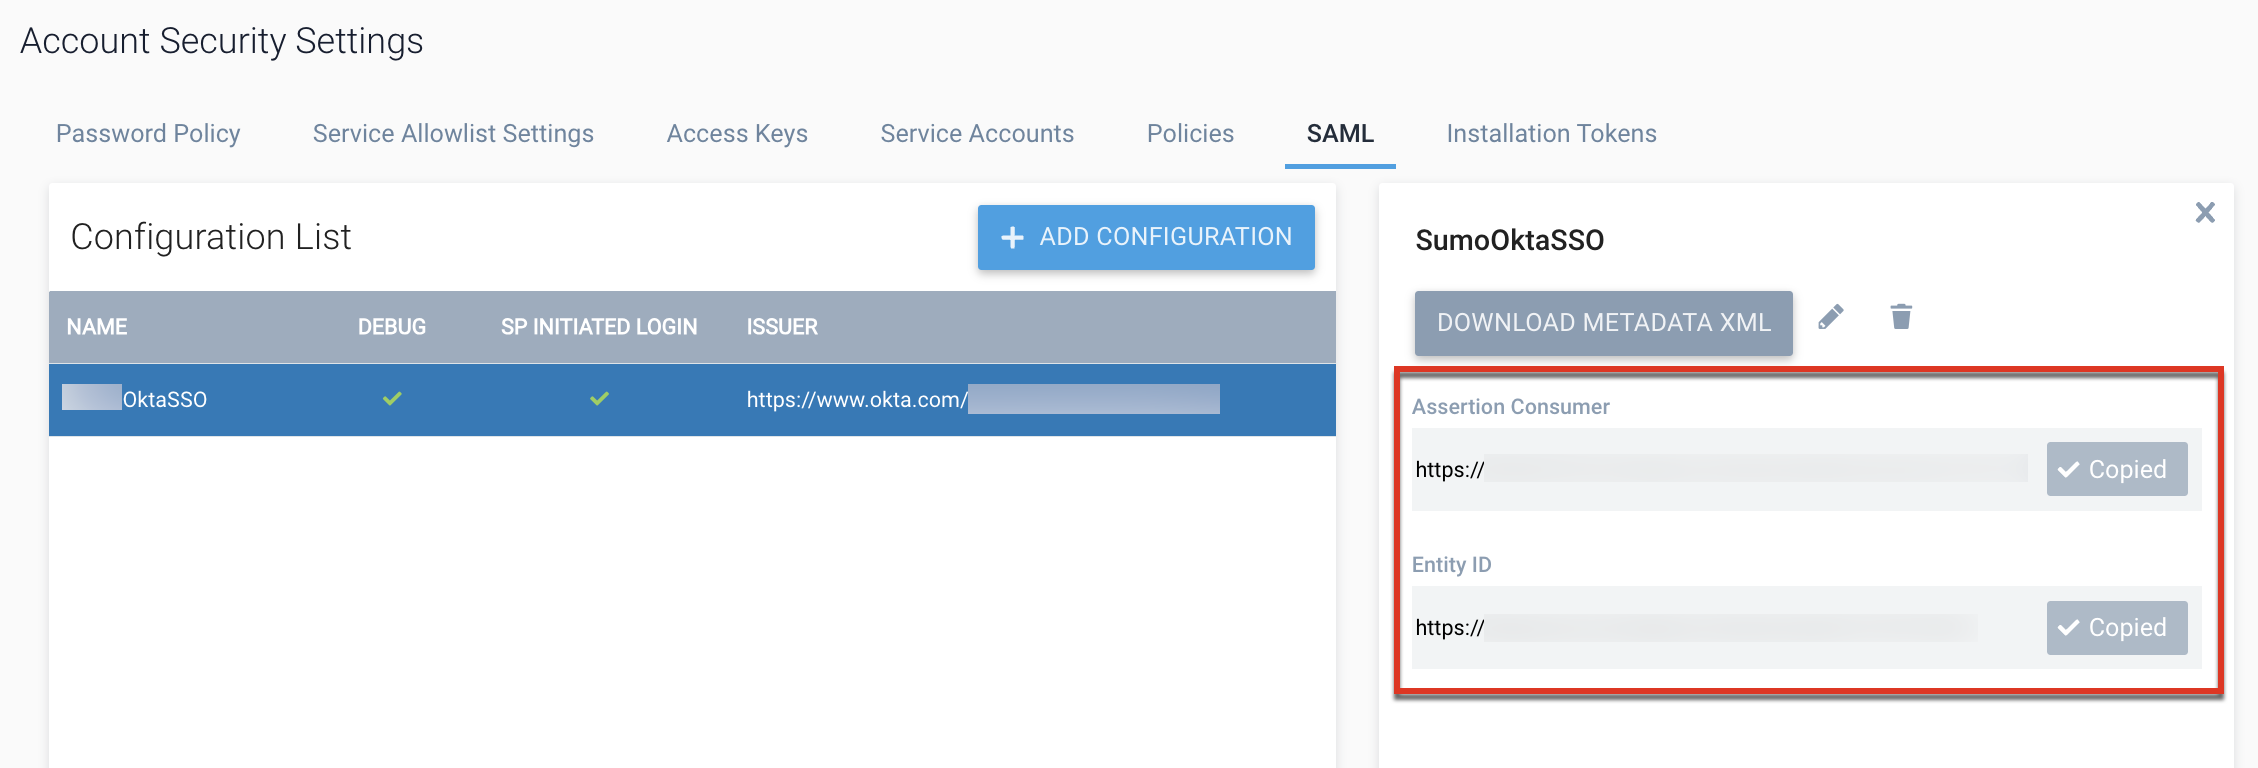
Set up SAML
Set up SAML for single sign-on in the Sumo Logic instance where you will provision users. This will allow connection to Sumo Logic for provisioning. Copy the single sign-on URL (Assertion Consumer URL) and entity ID from your Sumo Logic SAML configuration to set up single sign-on in your provider.
Step 1: Create an app
Create an application in your provider. You will configure this app in the following steps.
Step 2: Set up single sign-on
Set up single sign-on for the app to connect to Sumo Logic. Copy the Assertion Consumer URL and entity ID from the SAML configuration in Sumo Logic to use in the configuration. (See Set up SAML above.)
Step 3: Set up roles
Set up roles in your app to match roles in Sumo Logic (for example, Administrator and Analyst). When users assigned these roles in your app are provisioned, the roles are automatically assigned to the provisioned users in Sumo Logic.
Step 4: Assign users to your app
Assign users to your app. All users assigned to the app will be provisioned.
Step 5: Set up provisioning
When you set up provisioning for the app, provide a Sumo Logic access key to authorize access to Sumo Logic. (See Create an access key above.)
For the SCIM base URL, provide the Sumo Logic API endpoint for your deployment for the SCIM User Management APIs using the format <api-endpoint>/v1/scim/. For example, https://api.sumologic.com/api/v1/scim/.
Step 6: Verify provisioning
Test provisioning to ensure that users assigned to the app are provisioned correctly into Sumo Logic. Verify in your provider's logs and in the Sumo Logic UI.