Provision with Microsoft Entra ID
This article describes how to provision users in Sumo Logic with Microsoft Entra ID (formerly Azure Active Directory).
Prerequisites
Create an access key
Create an access key. (We recommend using a service account to create the access key.) This access key will provide authorization to provision users from Microsoft Entra ID into Sumo Logic.
When you create the access key, copy its access ID and access key values. You will enter these when you use Base64 encoding to Base64 encode <access ID>:<access key> to generate a token.
Configure provisioning with Microsoft Entra ID
Step 1: Create the app
- Log in to Microsoft Azure as an administrator.
- Navigate to Microsoft Entra ID. (You can use the search bar to locate it.)
- Navigate to Manage > Enterprise Applications.
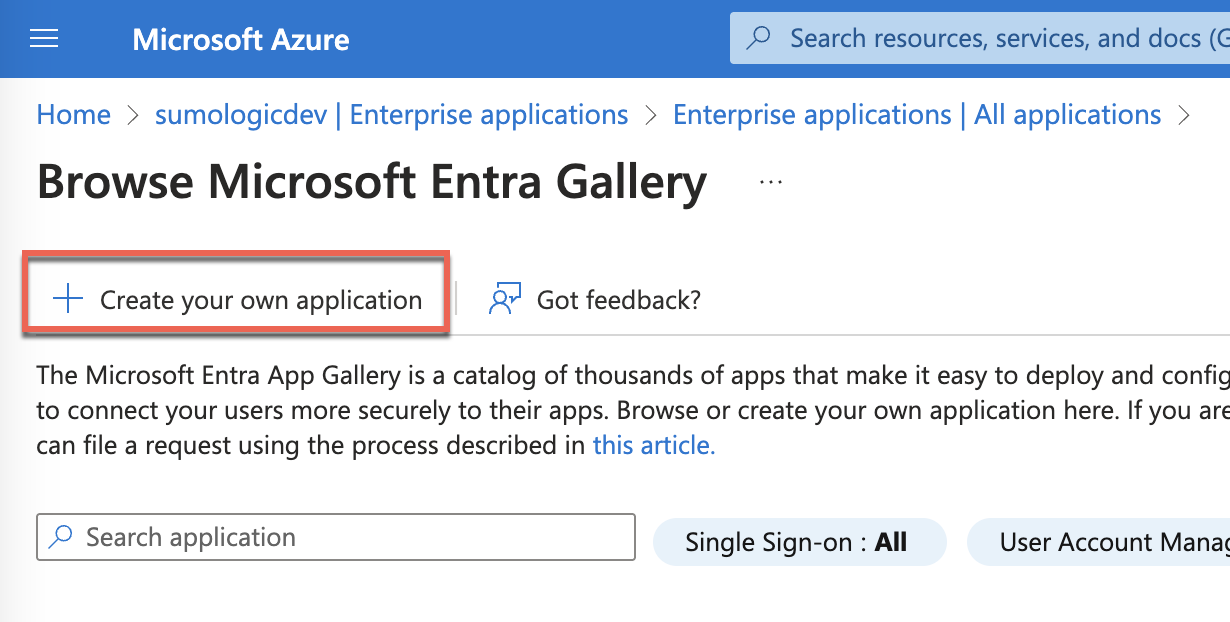
- Click New application.

- Click Create your own application.
- Enter a name for the app, select Integrate any other application you don't find in the gallery (Non-gallery).
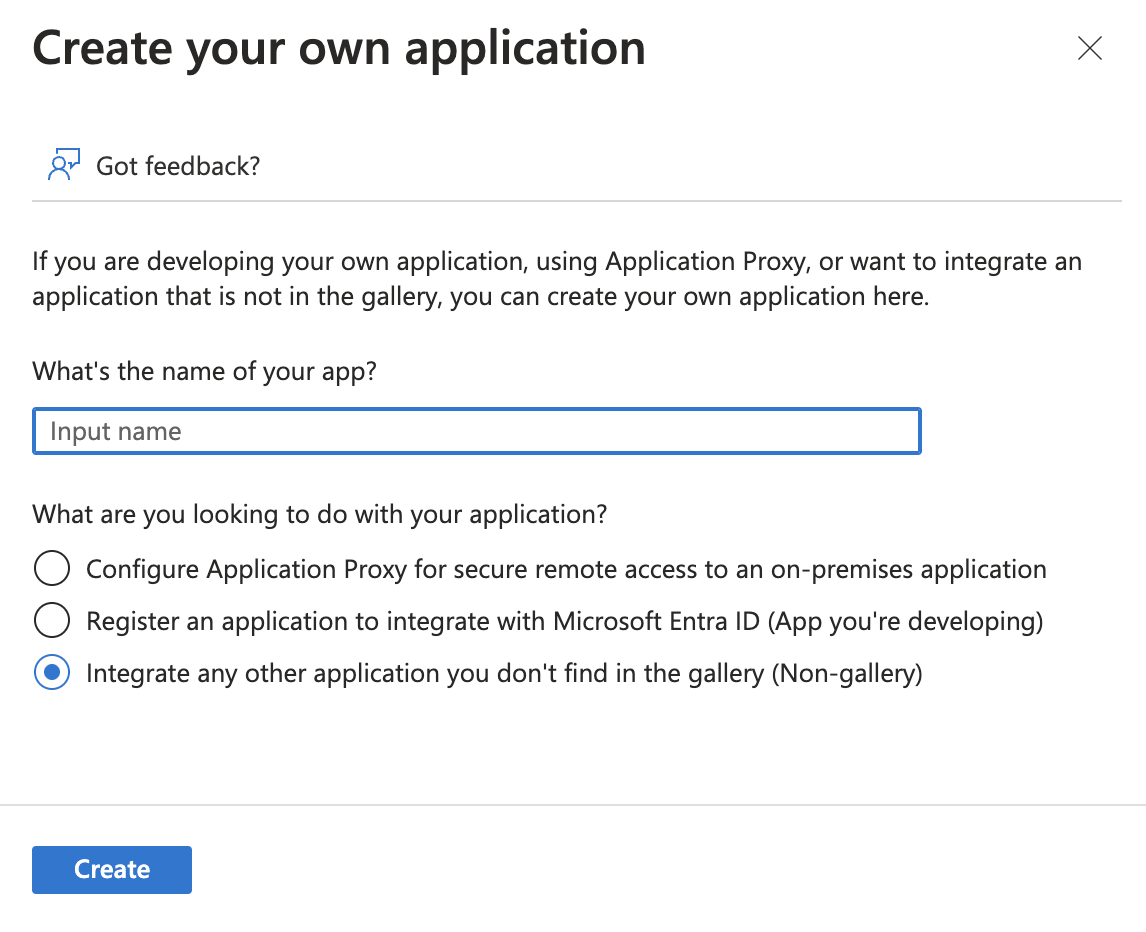
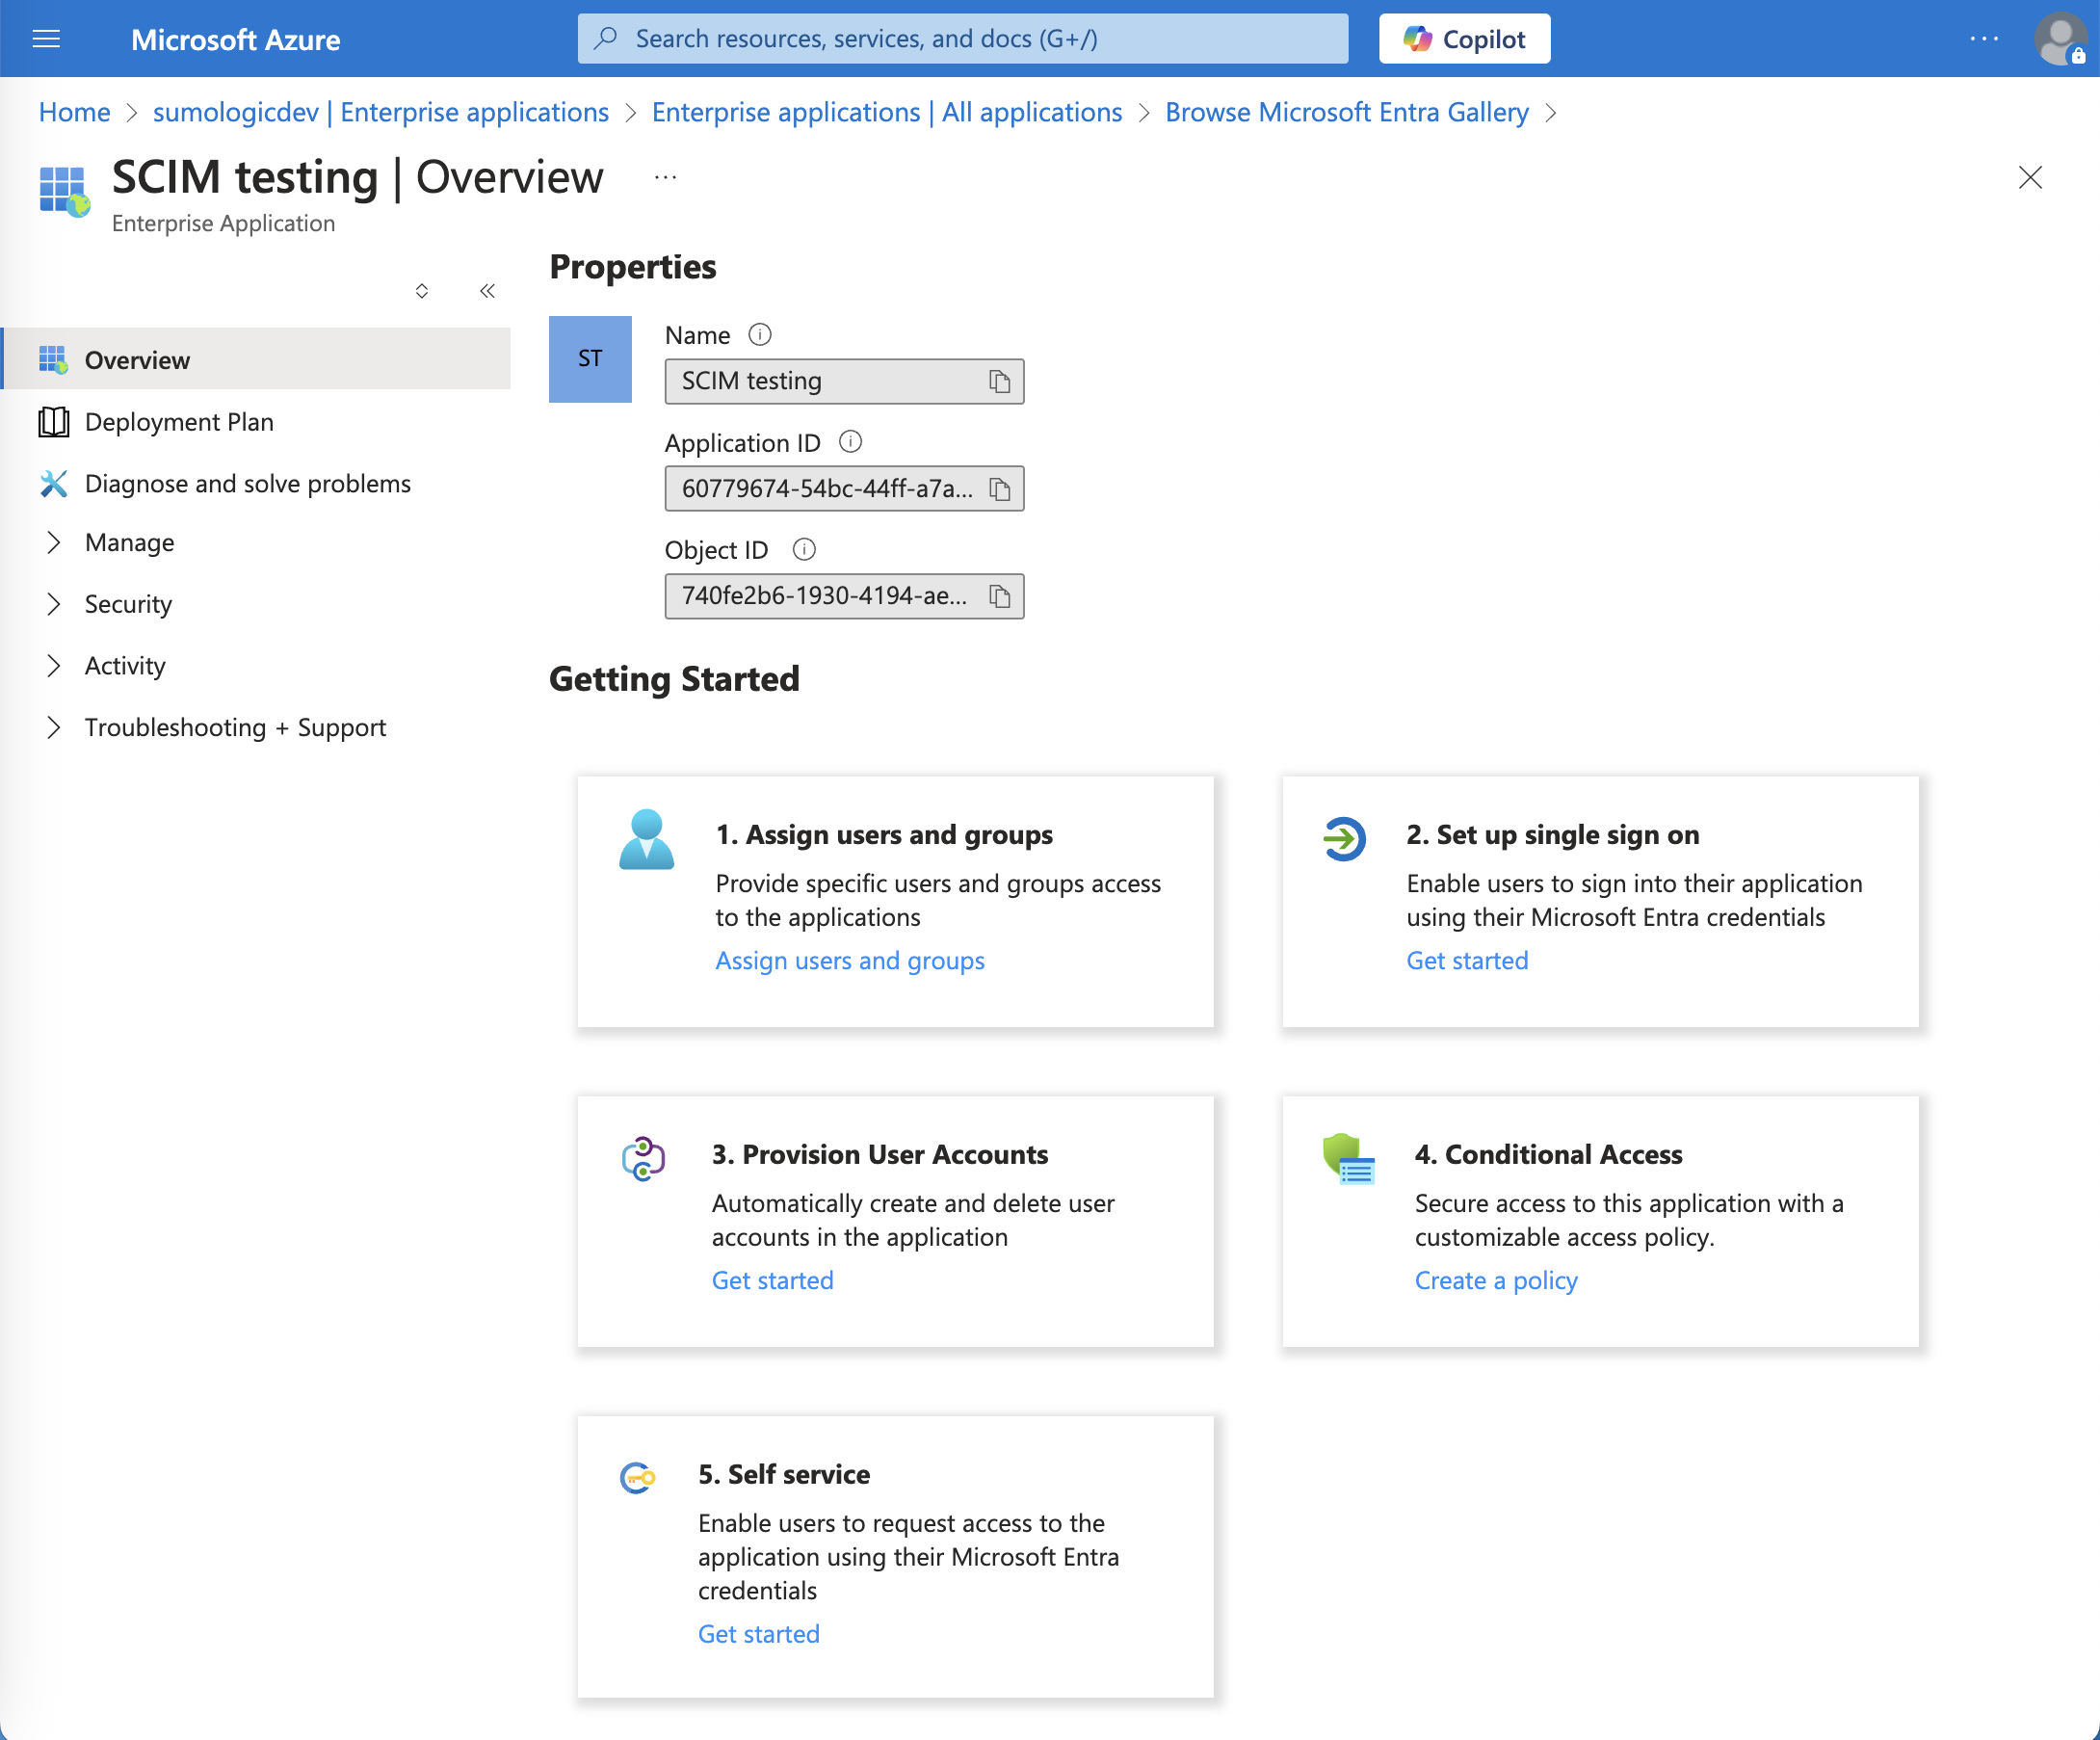
- Click Create. The app displays in Entra ID.
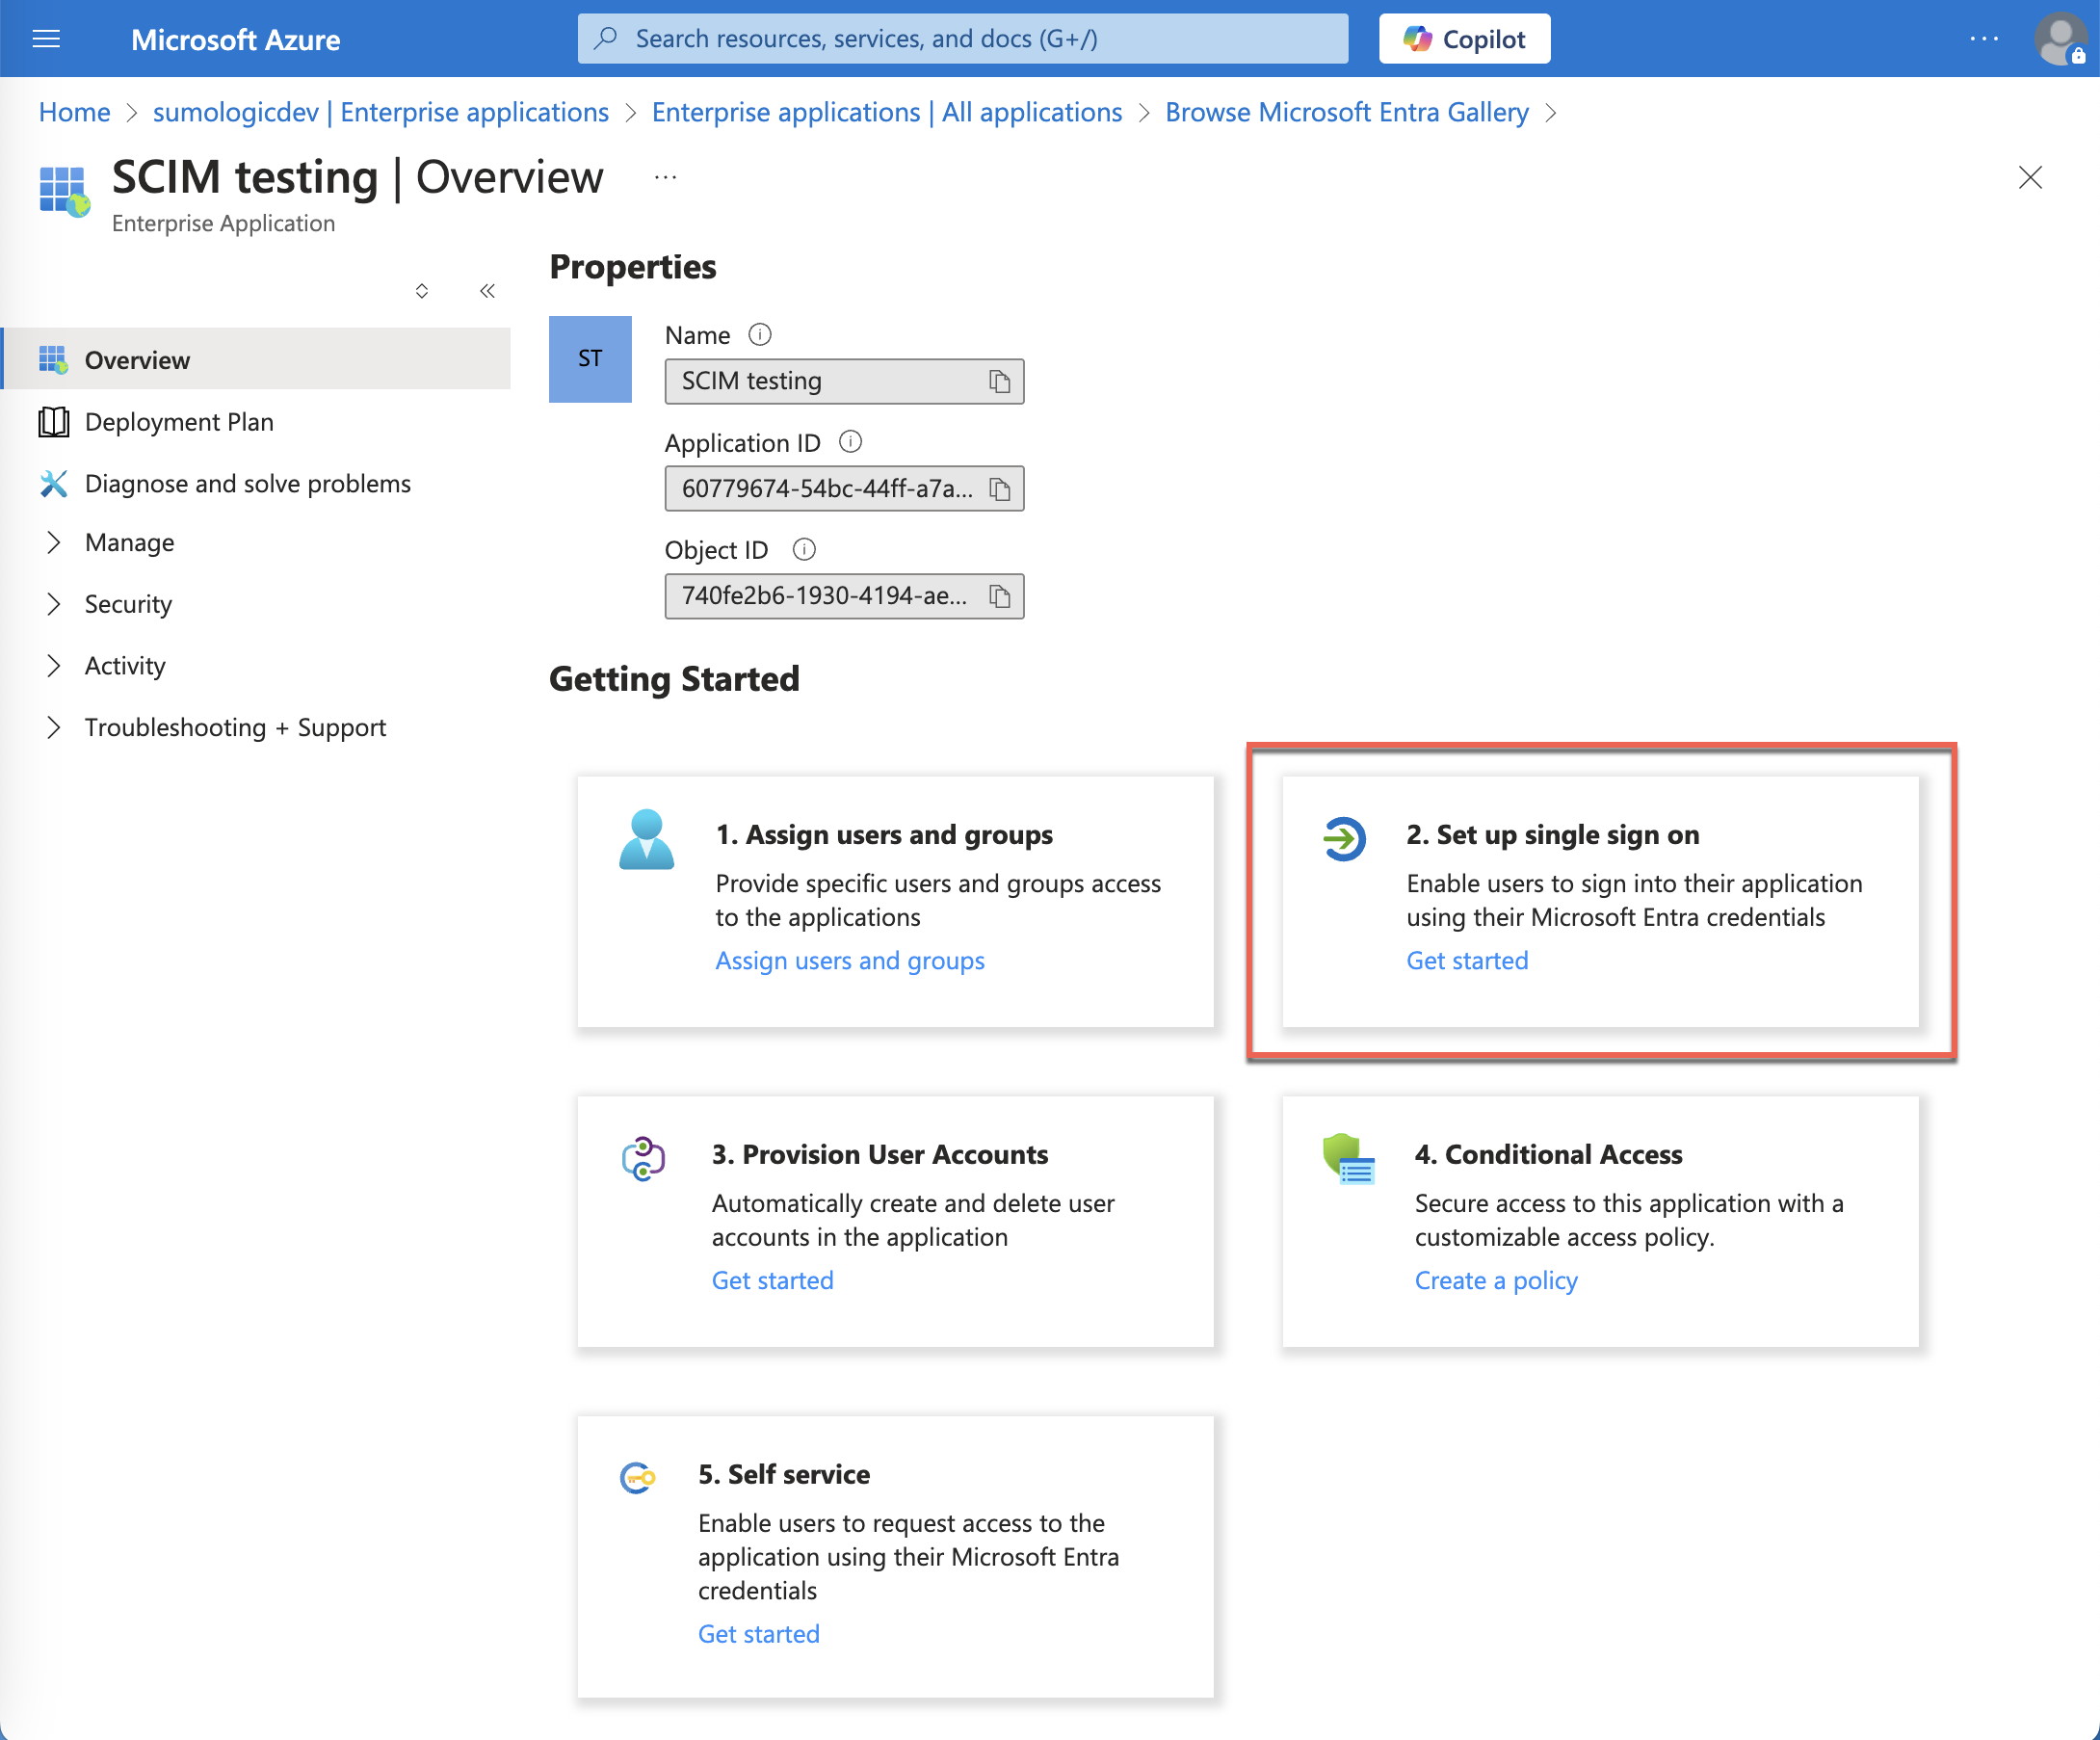
Step 2: Set up single sign-on
Follow the directions in Configure Sumo as an Enterprise App in Azure AD beginning with the step where you select Set up single sign on.
When you configure SAML in Sumo Logic:
- Select Disable Requested Authentication Context.
- Do not select the On Demand Provisioning checkbox. You will set up provisioning later.
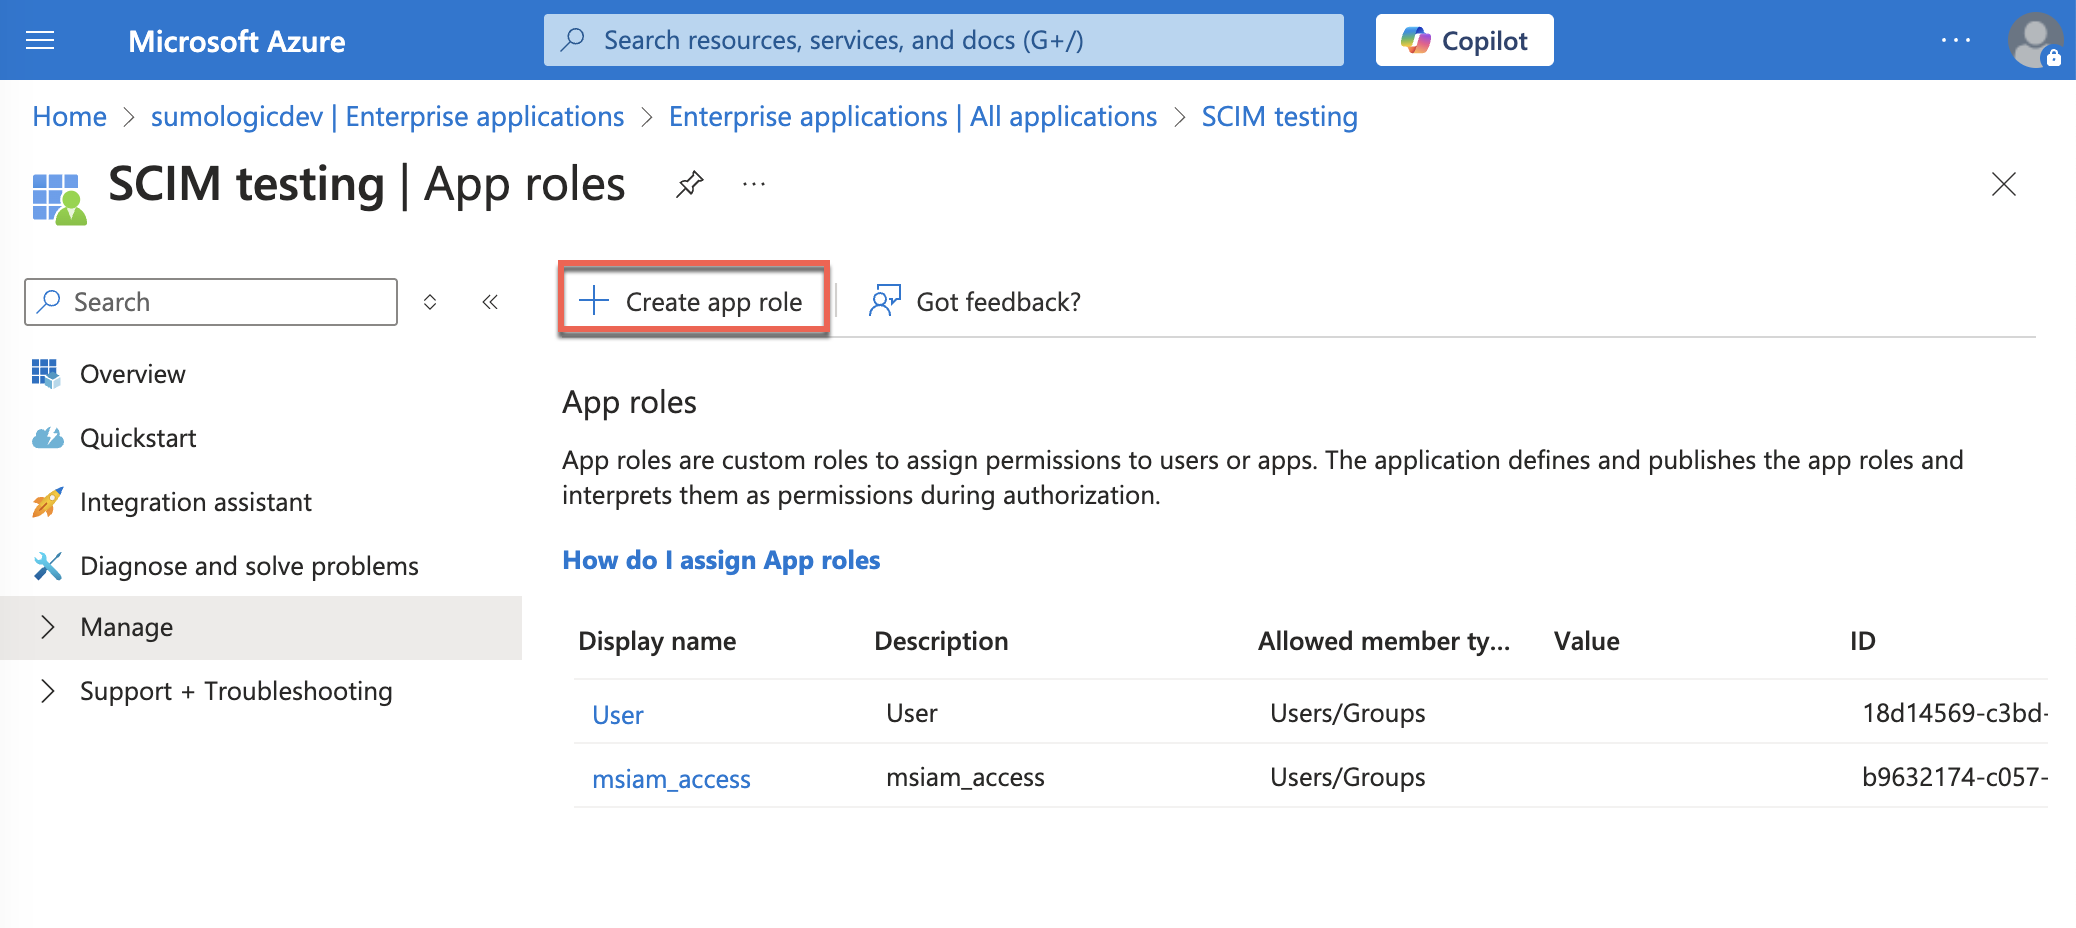
Step 3: Add roles
Create roles that the users will have in Sumo Logic (for example, Analyst and Administrator).
- In the app, select Manage > Users and groups.
- Select application registration.

- Click Create app role.
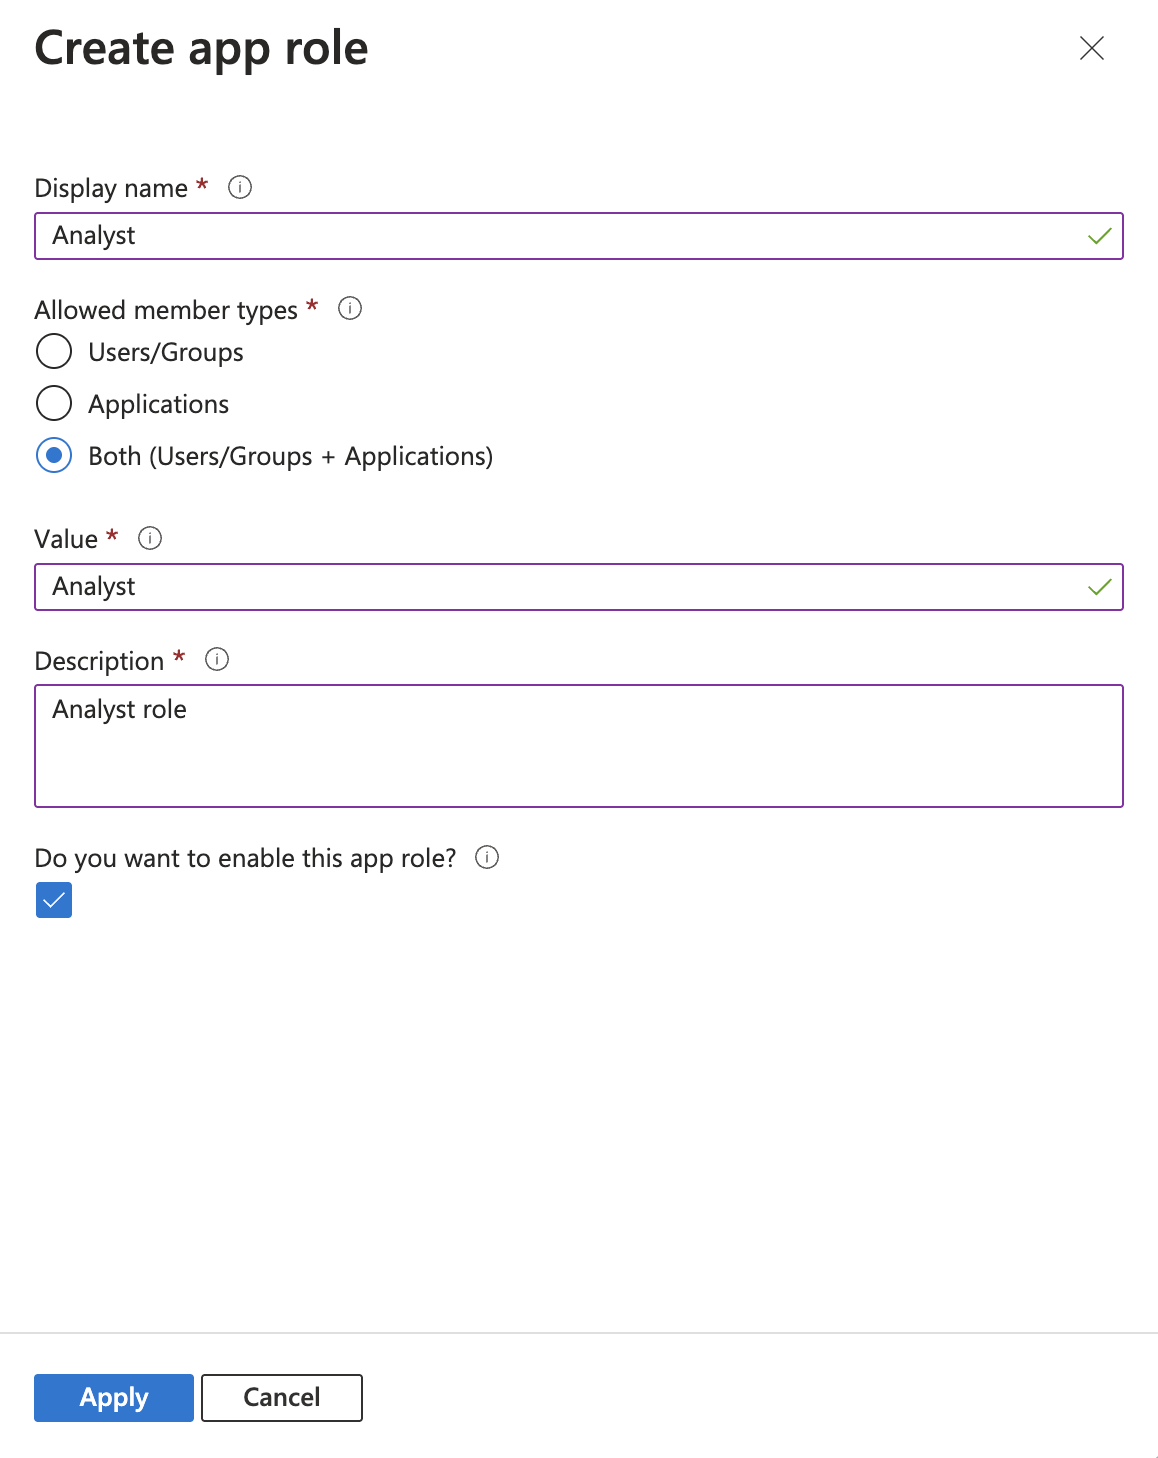
- Create the role:
- In Display name, enter the name to be displayed in the UI (for example,
Analyst). - For Allowed member types select Both.
- For Value enter the value of the role in Sumo Logic (for example,
Analyst). - For Description enter a description of the role.
- Click Apply.
- In Display name, enter the name to be displayed in the UI (for example,
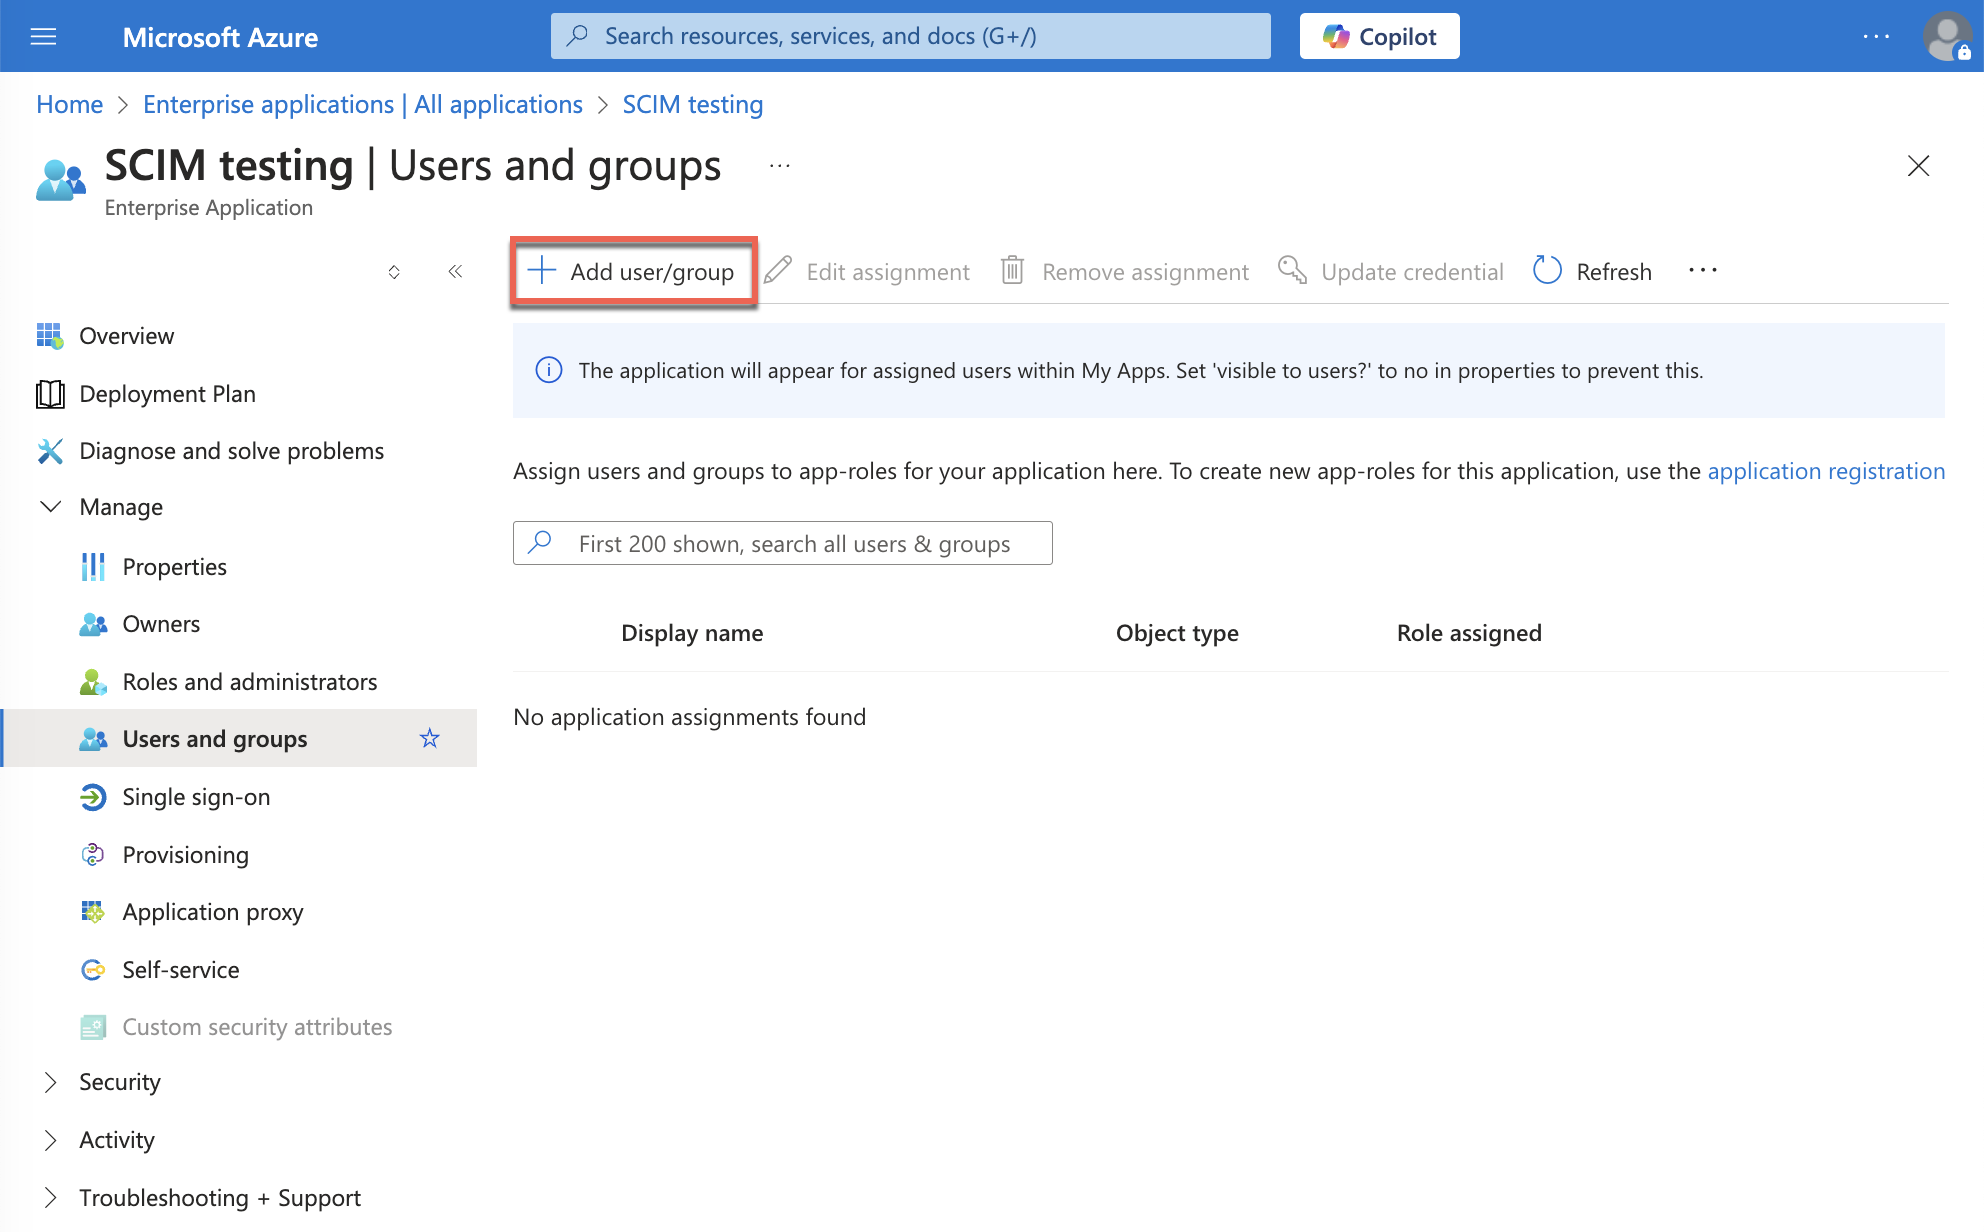
Step 4: Assign users to the app
- In the app, select Manage > Users and groups.
- Select Add user/group.
- Under Users, click None Selected.
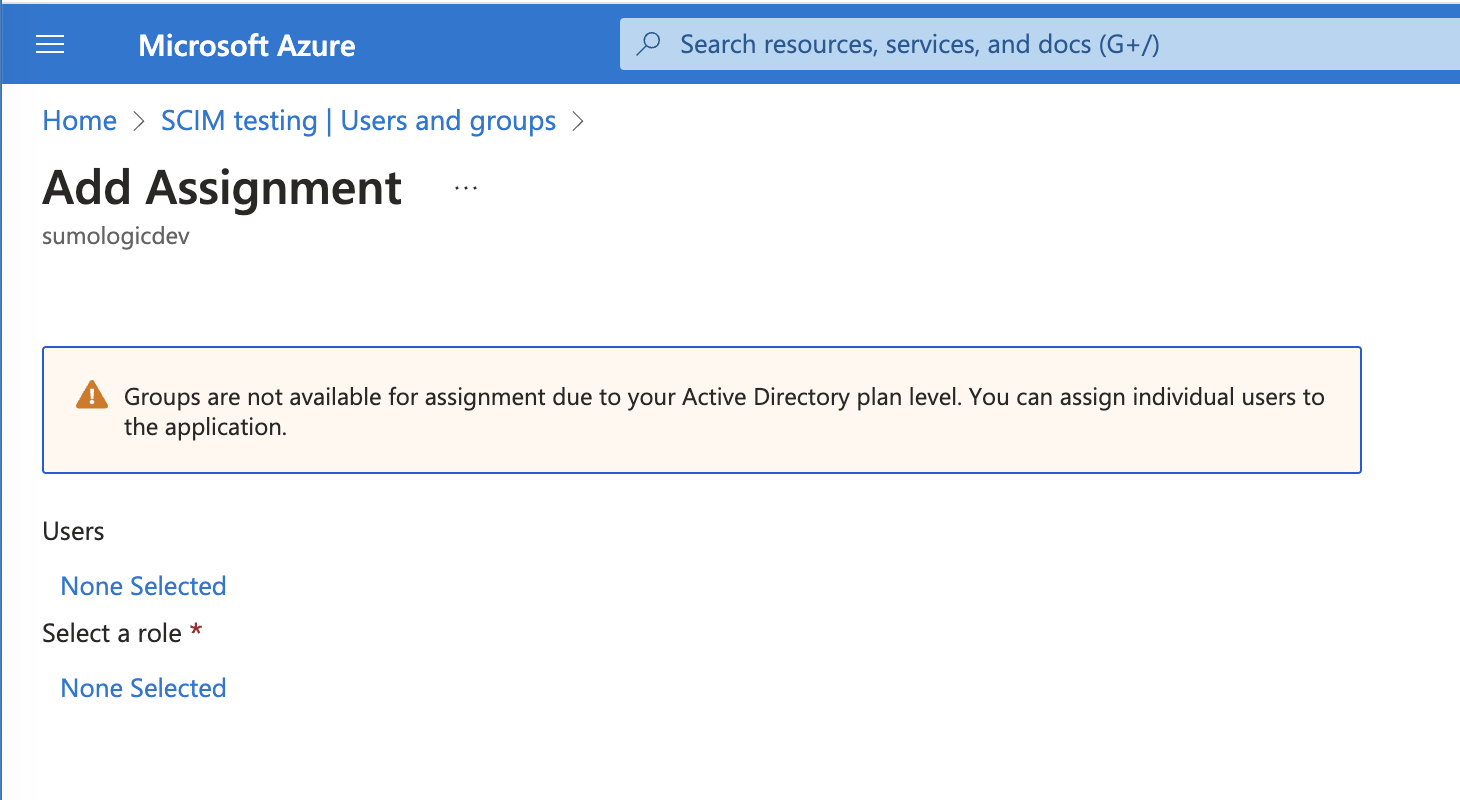
- From the list of available users, select users to add to the app and click Select.
- Under Select a role click None Selected.
- From the list of available roles, select a role (for example, Analyst).
- Click Assign.
Step 5: Set up provisioning
- In the app select Manage > Provisioning.
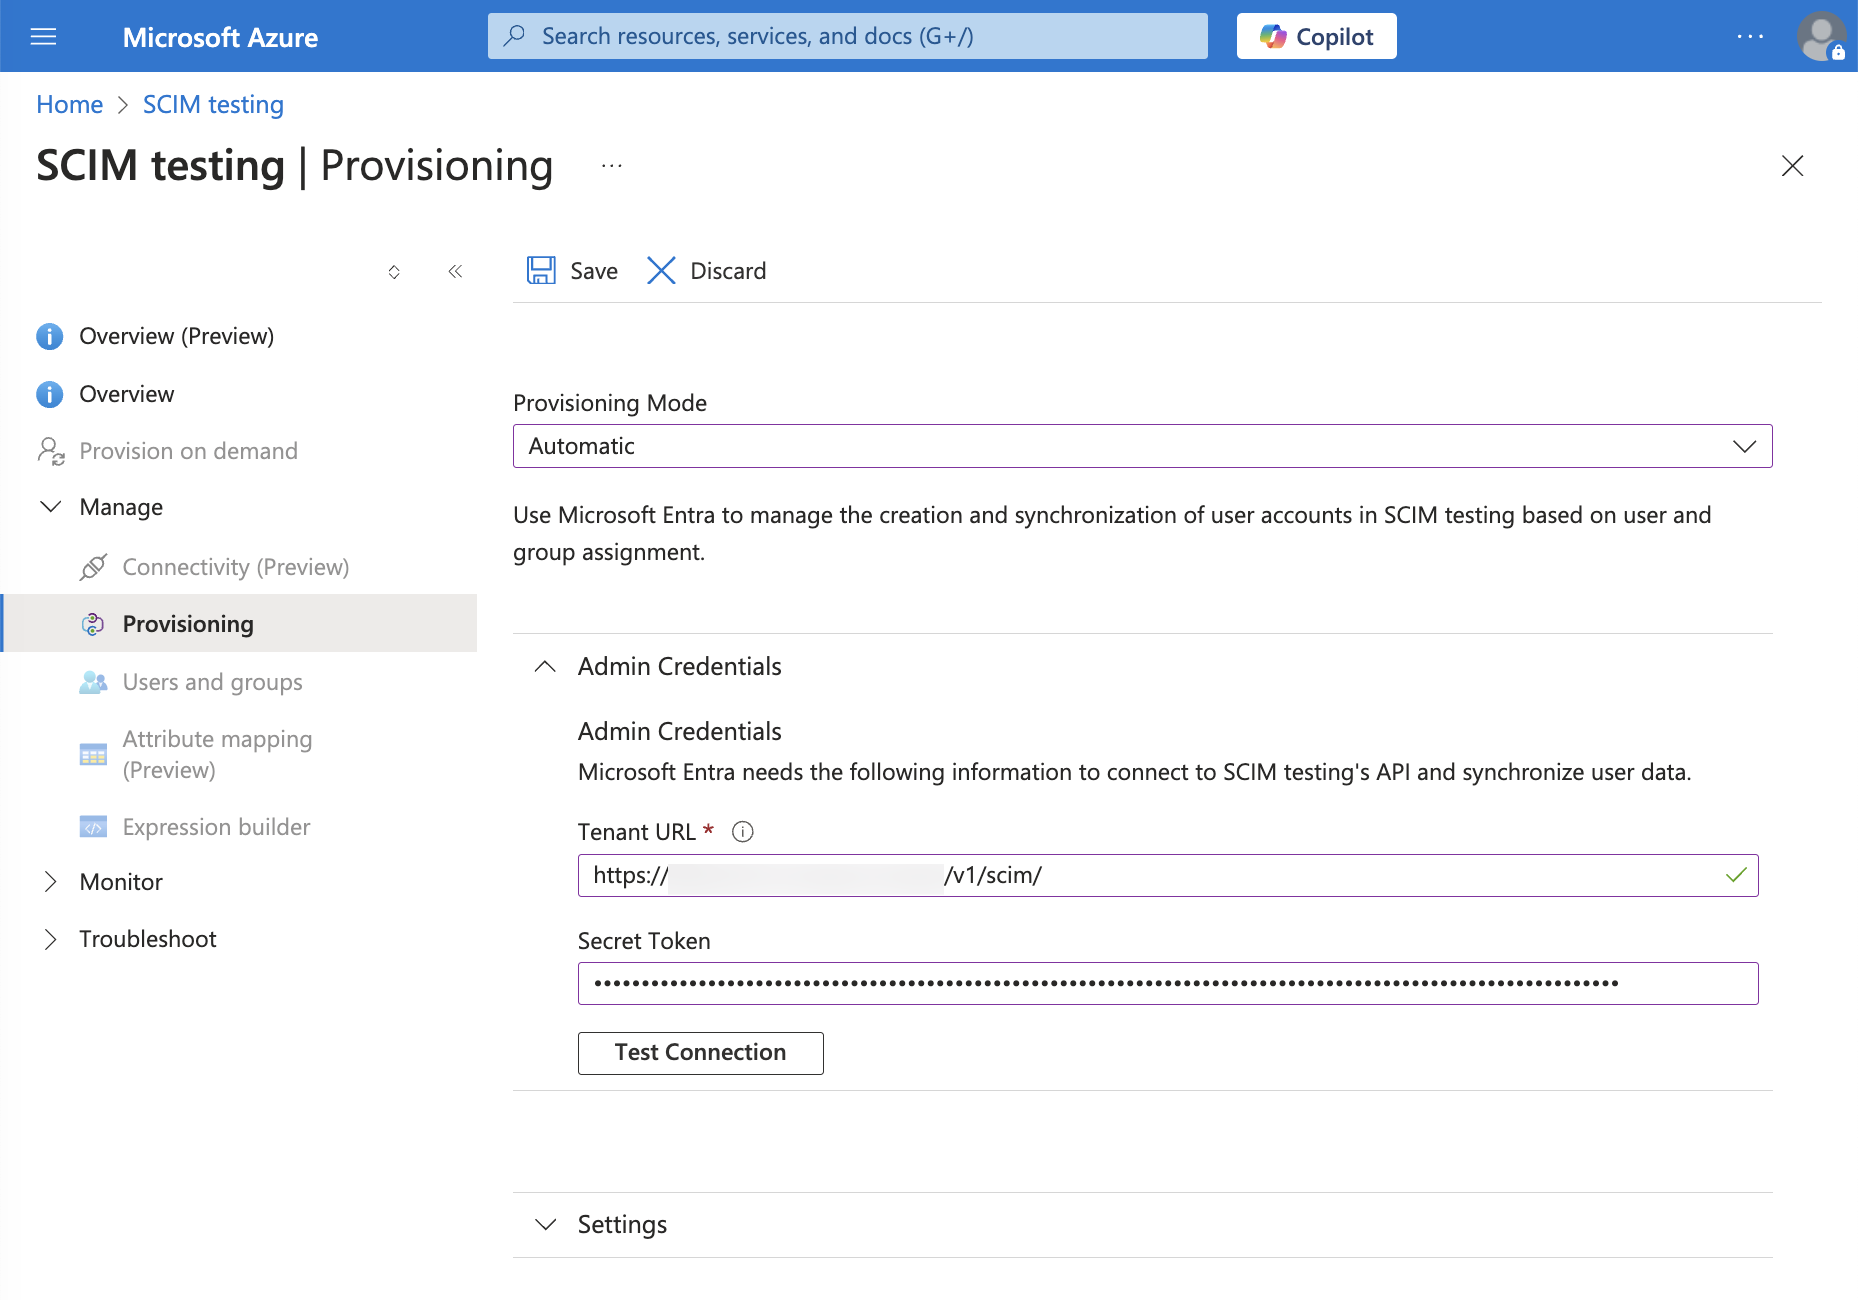
- For Provisioning Mode, select Automatic.
- Enter Admin Credentials:
- In Tenant URL, enter the API endpoint for your deployment for the SCIM User Management APIs using the format
<api-endpoint>/v1/scim/. For example,https://api.sumologic.com/api/v1/scim/. - For Secret Token, use Base64 encoding to encode
<access ID>:<access key>(see Prerequisites). Enter the resulting value into the Secret Token field. - Click Test Connection. If successful, a message like this appears: Testing connection to
<app name>. The supplied credentials are authorized to enable provisioning.
- In Tenant URL, enter the API endpoint for your deployment for the SCIM User Management APIs using the format
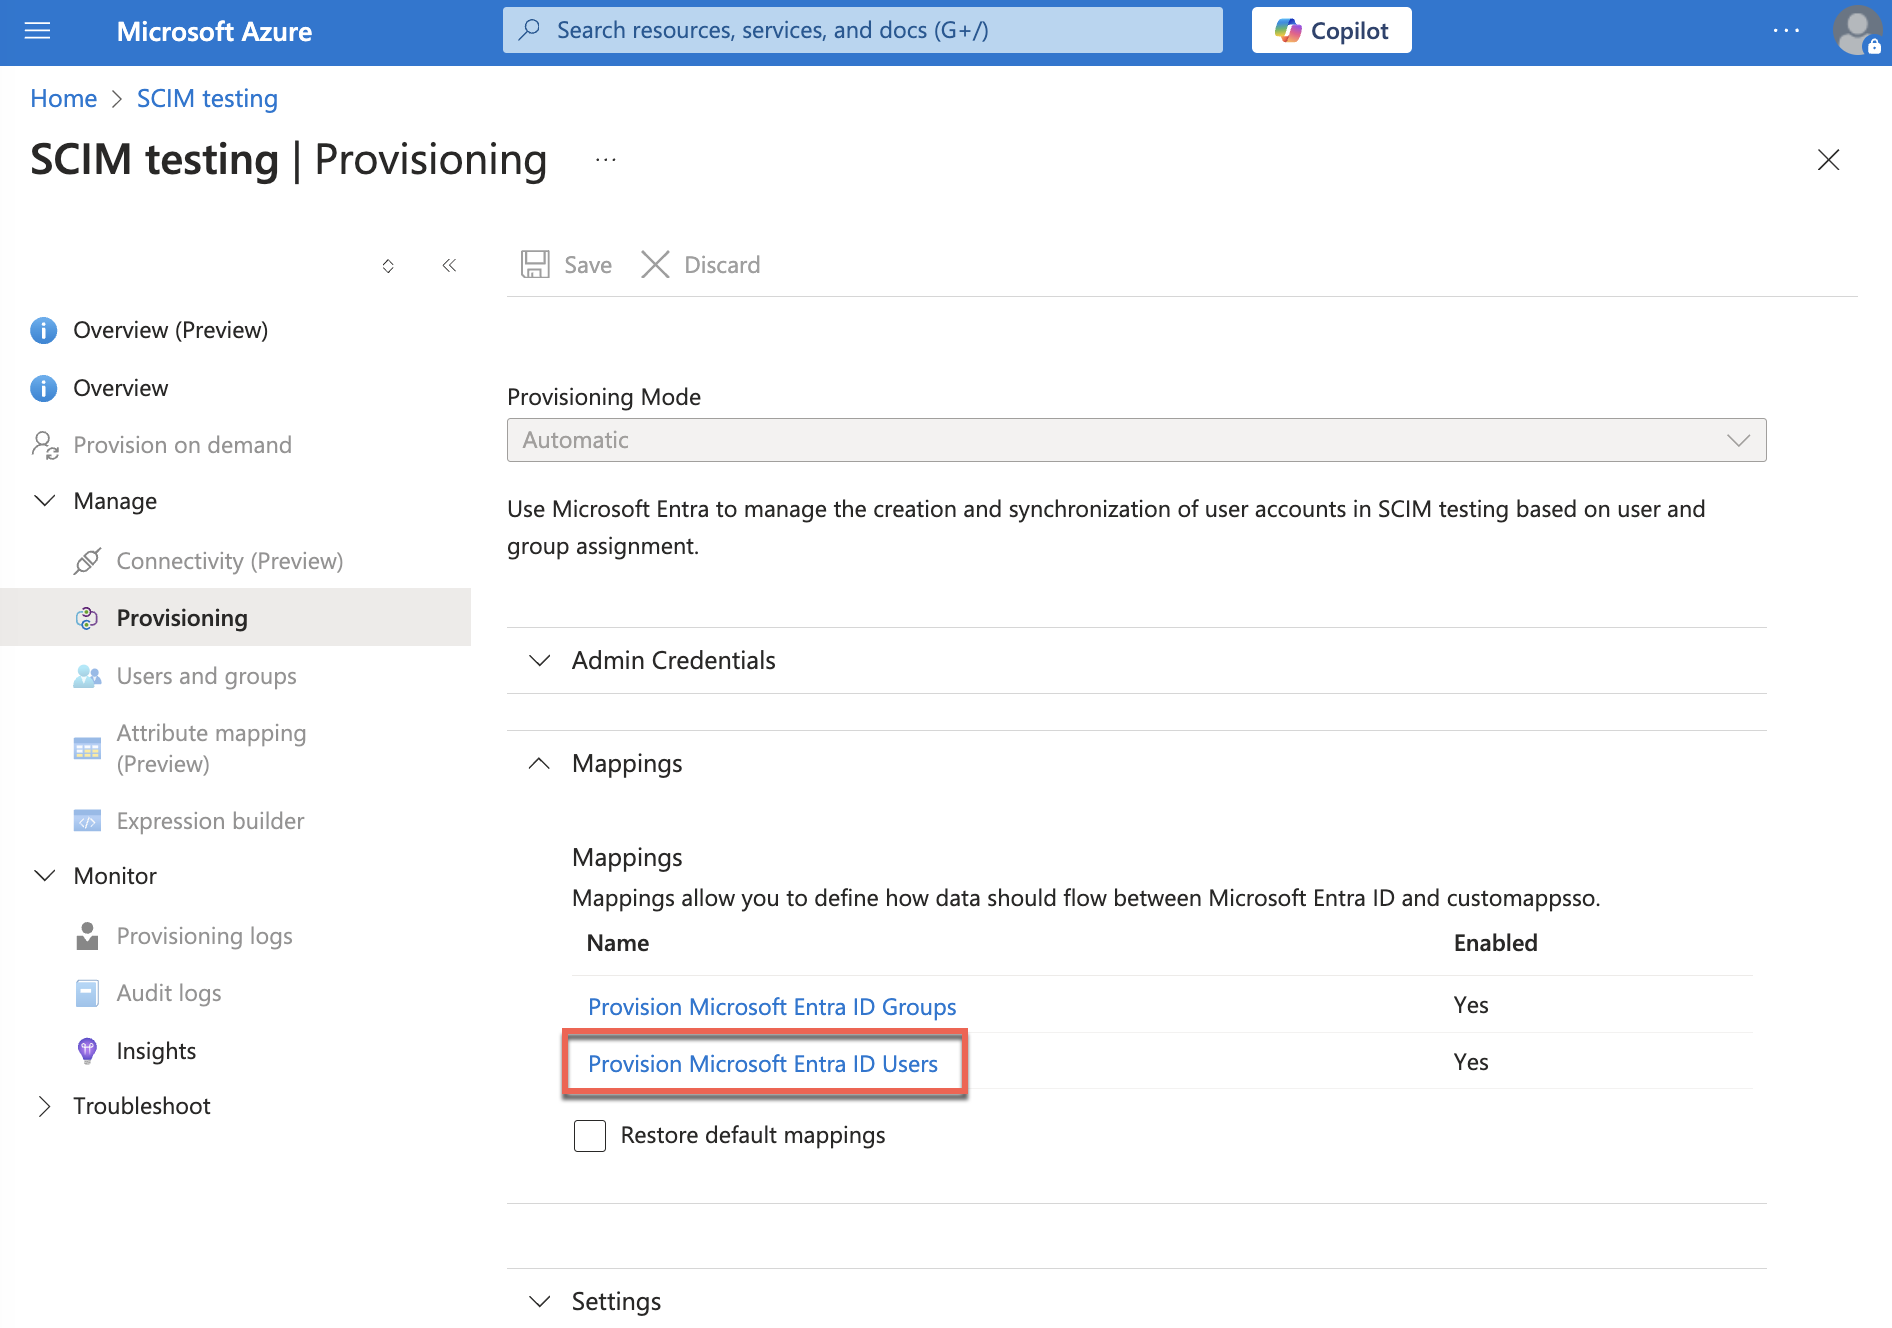
- Set up mappings:
- Select Mappings and Provision Microsoft Entra Users.
- Go to Attribute Mapping, select Show advanced options, and select Edit attribute list for customappsso.
- For the roles attribute select string for the Type, and select the Multi-Value? checkbox to allow users to have multiple roles.

- Click Save.
- For the roles attribute select string for the Type, and select the Multi-Value? checkbox to allow users to have multiple roles.
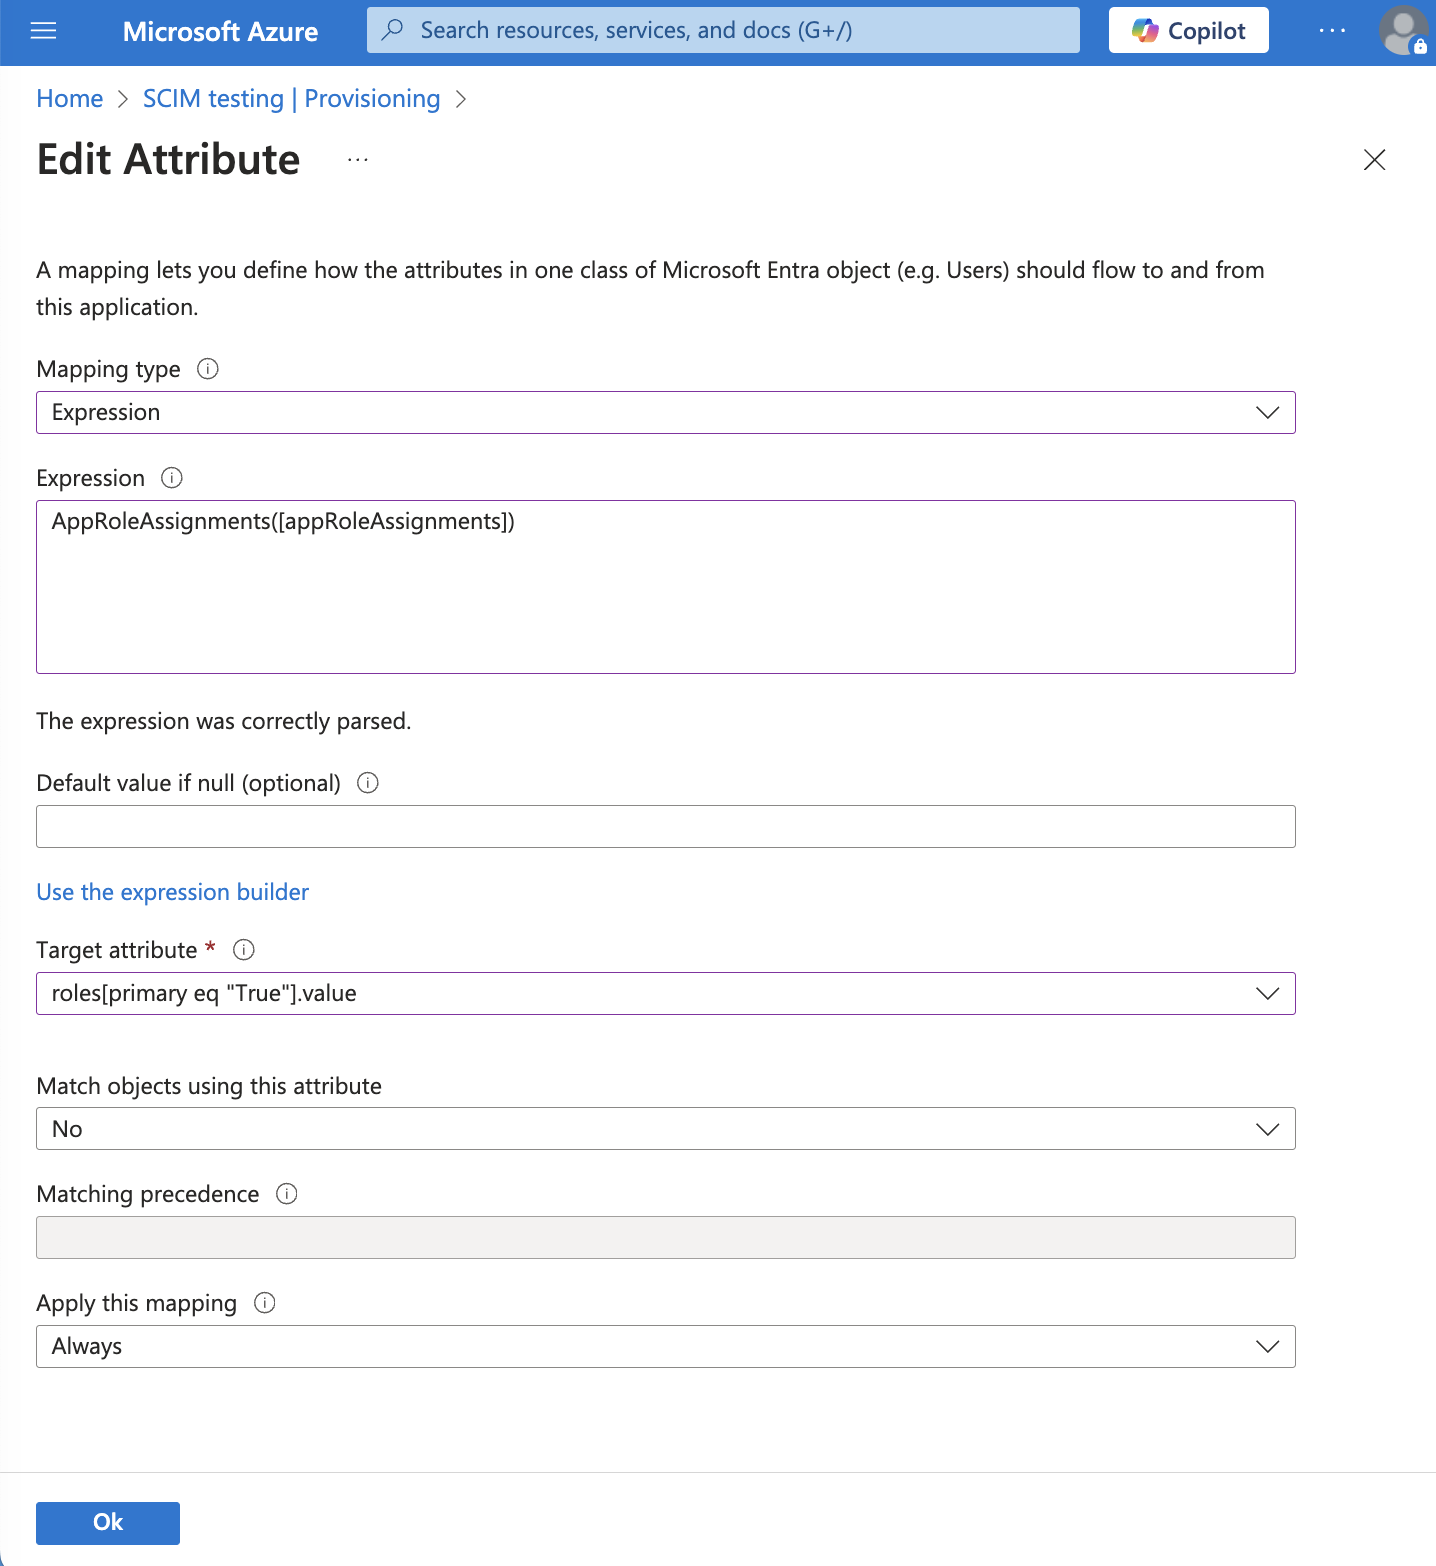
- At the bottom of the Attribute Mapping dialog, select Add New Mapping.
- Fill out the Edit Attribute dialog:
- For Mapping type select Expression.
- For Expression enter
AppRoleAssignmentsComplex([appRoleAssignments]). - For Target attribute select
roles. - Click OK.
- On the Attribute Mapping dialog, delete all the attributes except:
- userName
- active
- emails[type eq "work"].value
- name.givenName
- name.familyName
- roles
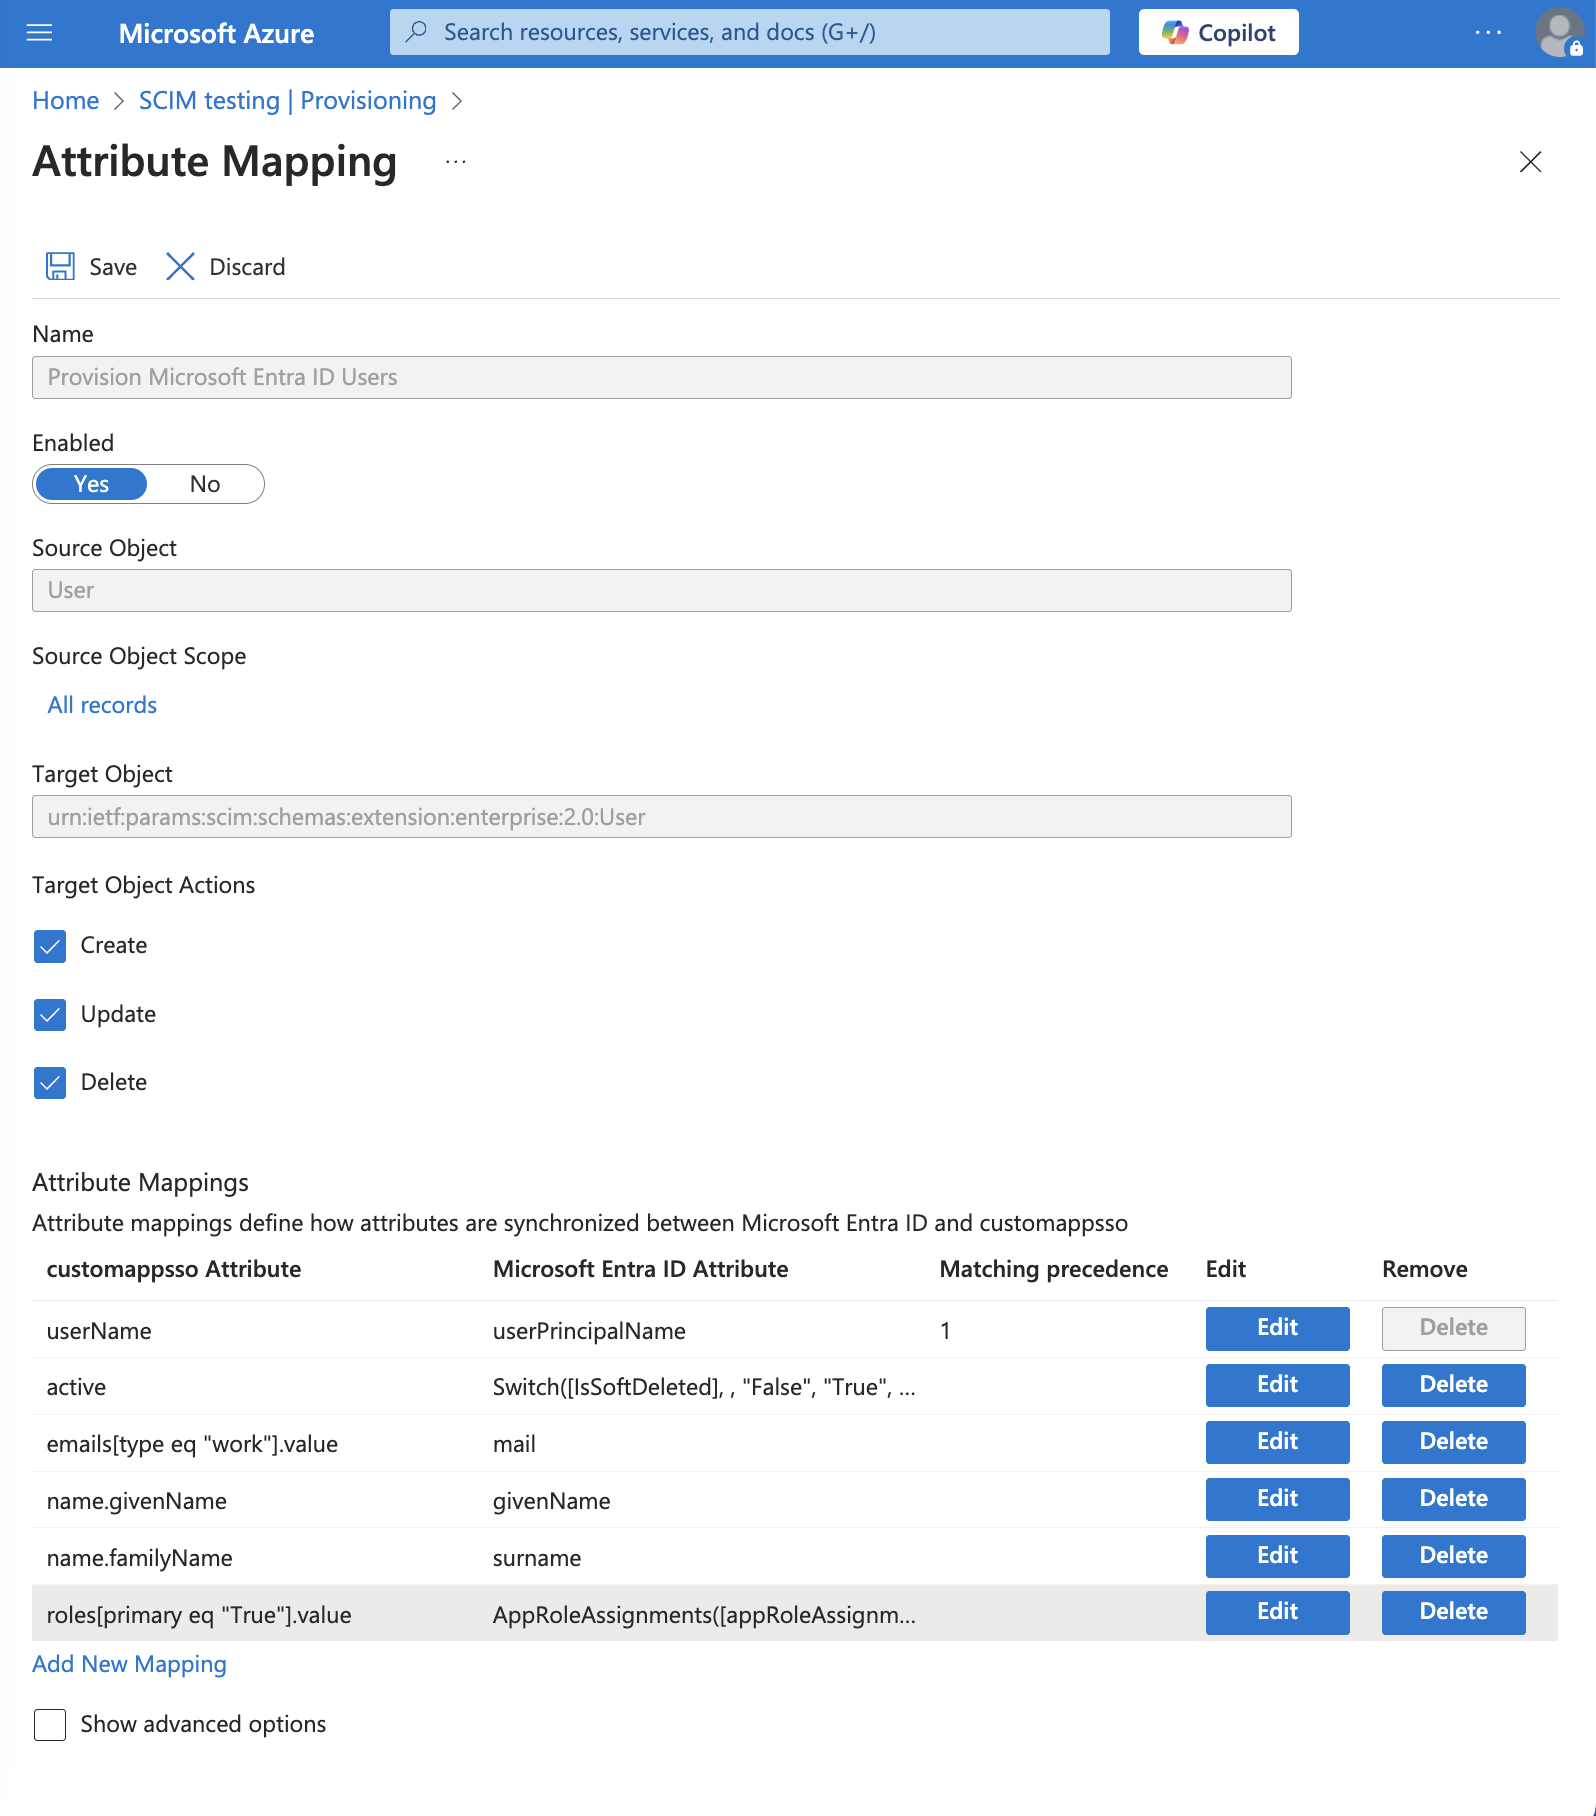
- Click Save.
- Select Mappings and Provision Microsoft Entra Users.
- Click the Home >
<app name>| Provisioning link in the top left corner of the screen. This returns you to the Provisioning tab. - Test provisioning:
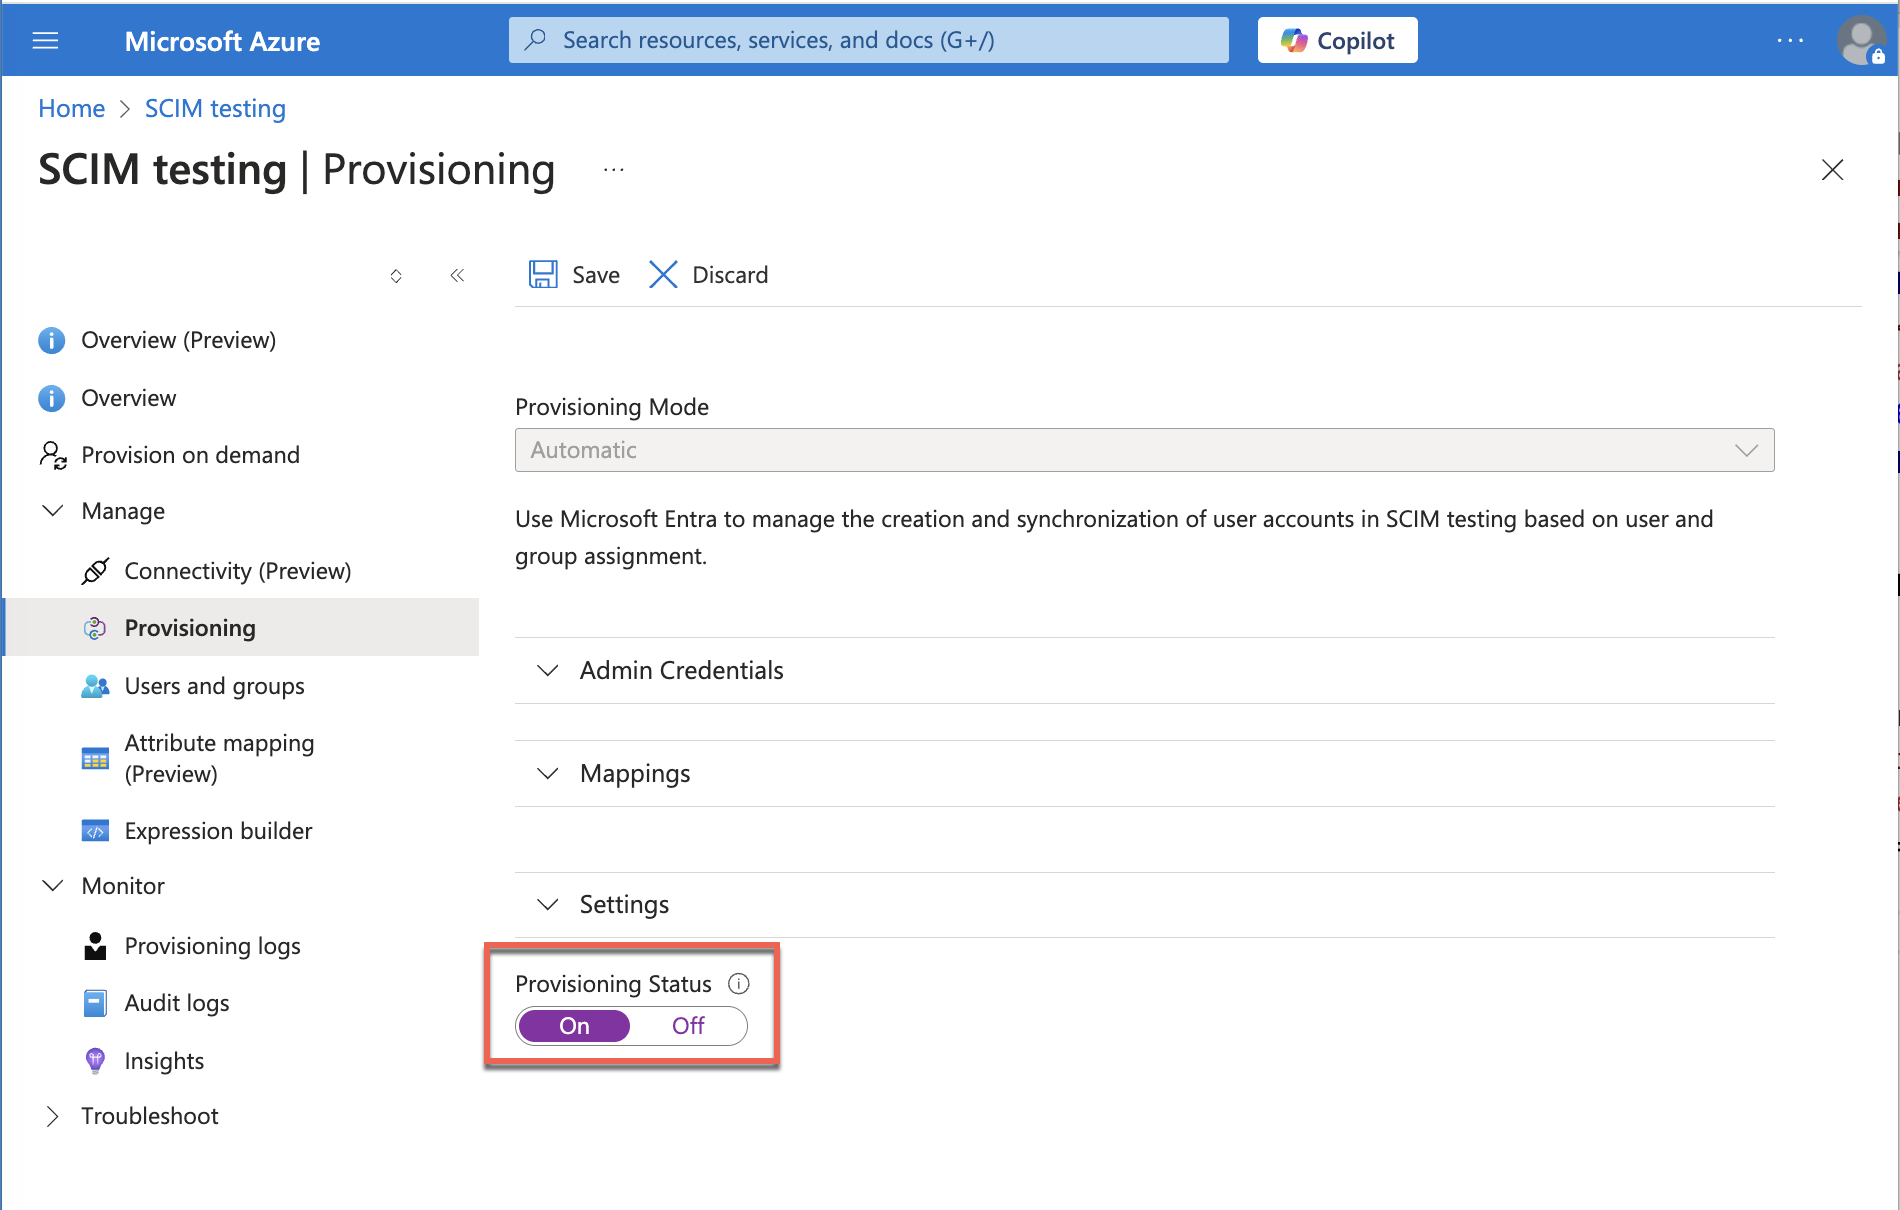
- In the app, select Manage > Provisioning.
- For Provisioning Status select On to enable provisioning.
- Click Save.
- Select Overview.
- Select Provision on demand.
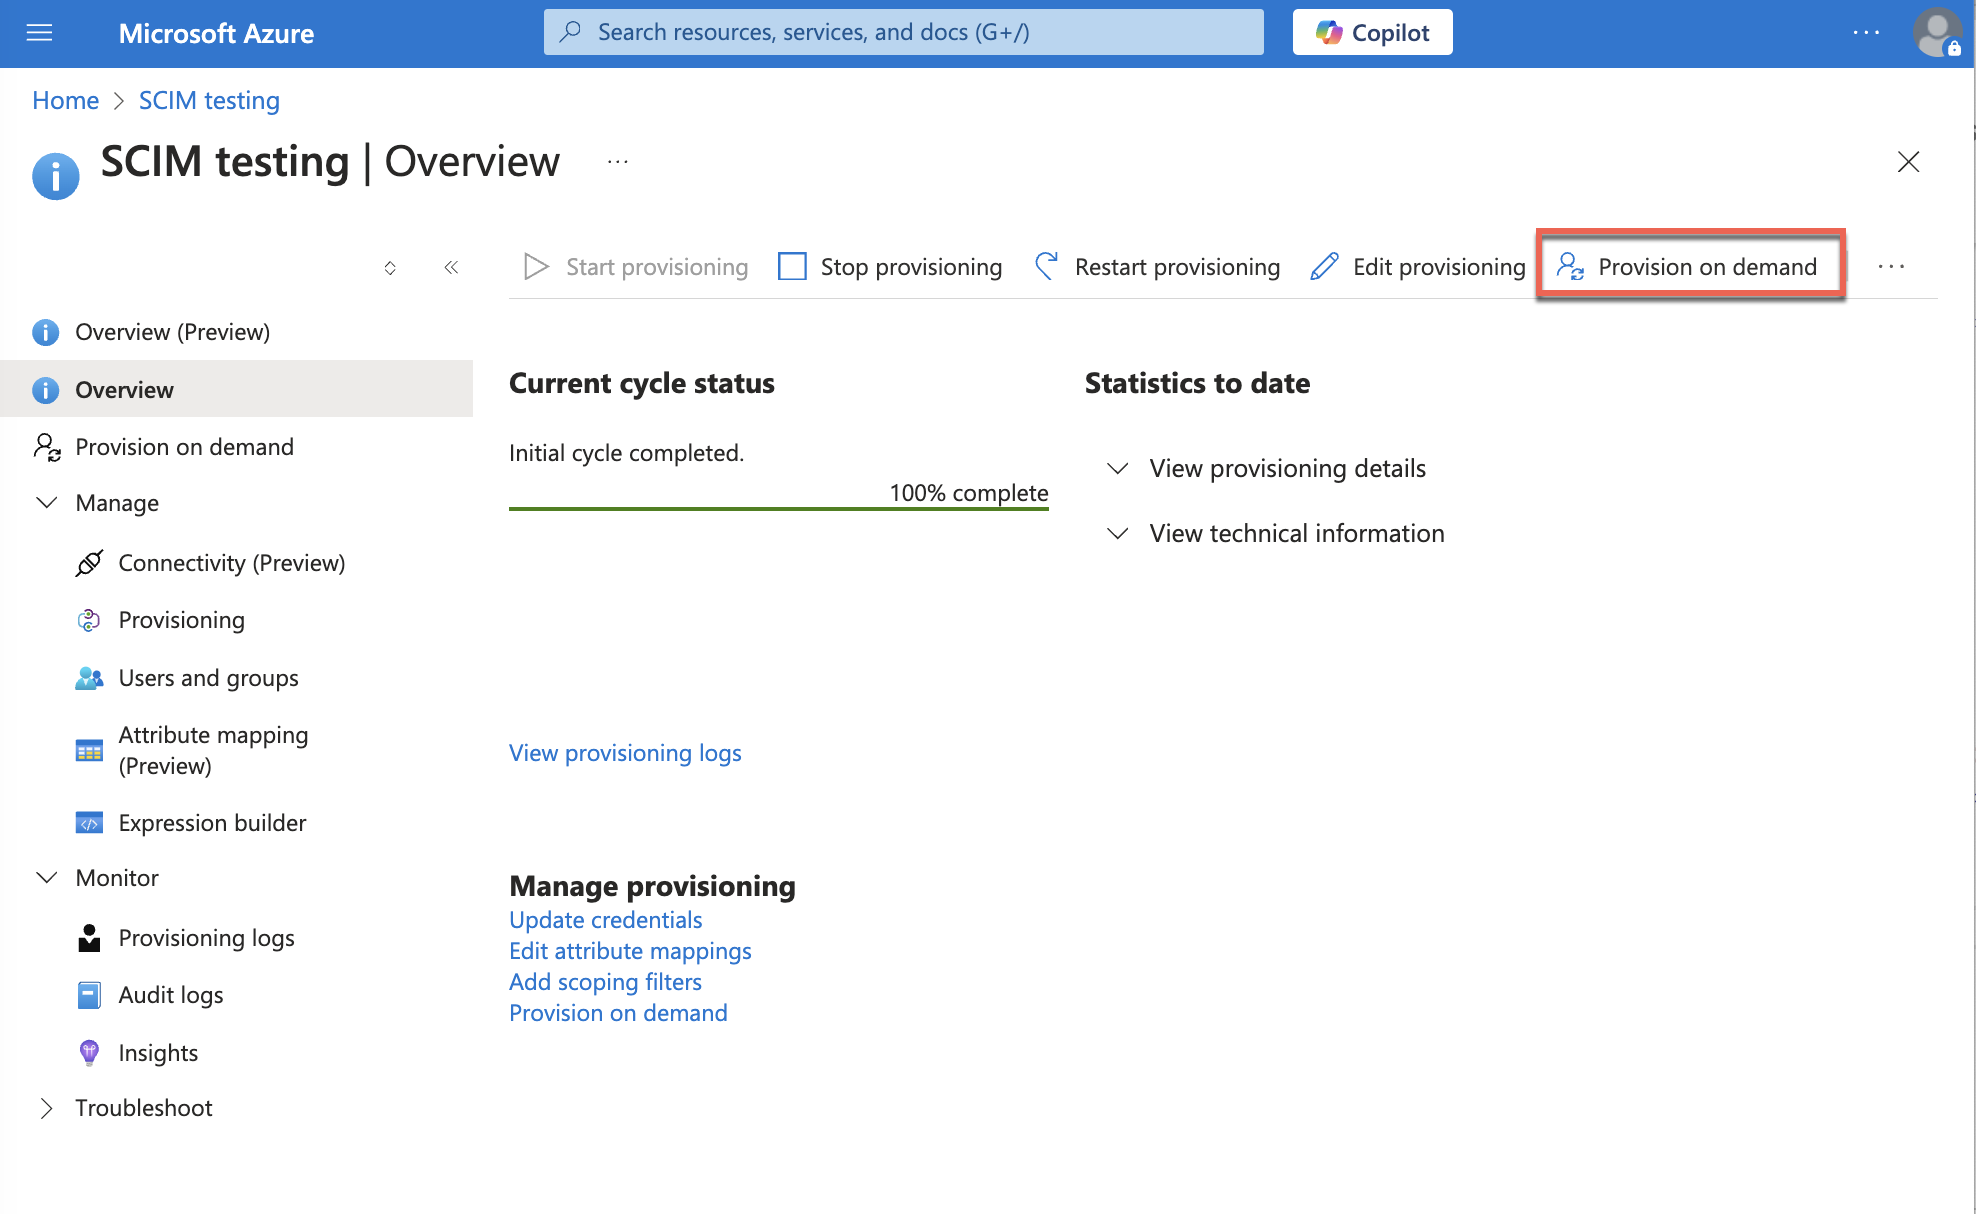
- Users assigned the app will be provisioned into Sumo Logic.
As long as the app's provisioning status is on, the app runs auto provisioning every 40 minutes.
Step 6: Verify provisioning
Users assigned to the app are provisioned into Sumo Logic.
- Verify in Microsoft Entra ID:
- In the app, select Provisioning and then select the Monitoring tab.
- The tab should show provisioning status. Click View Provisioning Logs for details.
- Verify in Sumo Logic:
- Log in to the Sumo Logic instance that you linked to the provisioning app in Step 2 when you provided the Assertion Consumer URL and entity ID.
- New UI. In the main Sumo Logic menu select Administration, and then under Users and Roles select Users. You can also click the Go To... menu at the top of the screen and select Users.
Classic UI. In the main Sumo Logic menu, select Administration > Users and Roles > Users. - Search for the users provisioned from Microsoft Entra ID.
- You should see the users listed, and with the role given to them when you assigned them to the app in Microsoft Entra ID.
Syncing between Microsoft Entra ID and Sumo Logic
When you modify the name, email, or role of a user assigned the app in Microsoft Entra ID, the changes will be synced to the corresponding user in Sumo Logic.
If you unassign a user from the app in Microsoft Entra ID, the corresponding user is deactivated in Sumo Logic. (If you later try to reassign that same user to the app, it will result in an error in Sumo Logic. You must delete the old user from Sumo Logic first so that the user can be provisioned once again from Microsoft Entra ID.)