Provision with Okta
This article describes how to provision users in Sumo Logic with Okta.
Prerequisites
Create an access key
Create an access key. (We recommend using a service account to create the access key.) This access key will provide authorization to provision users from Okta into Sumo Logic.
When you create the access key, copy its access ID and access key values. You will enter these when you set up provisioning to use one of the following authorization methods:
- Basic authentication
- Username: Access ID
- Password: Access key
- Bearer token
Use Base64 encoding to Base64 encode<access ID>:<access key>.
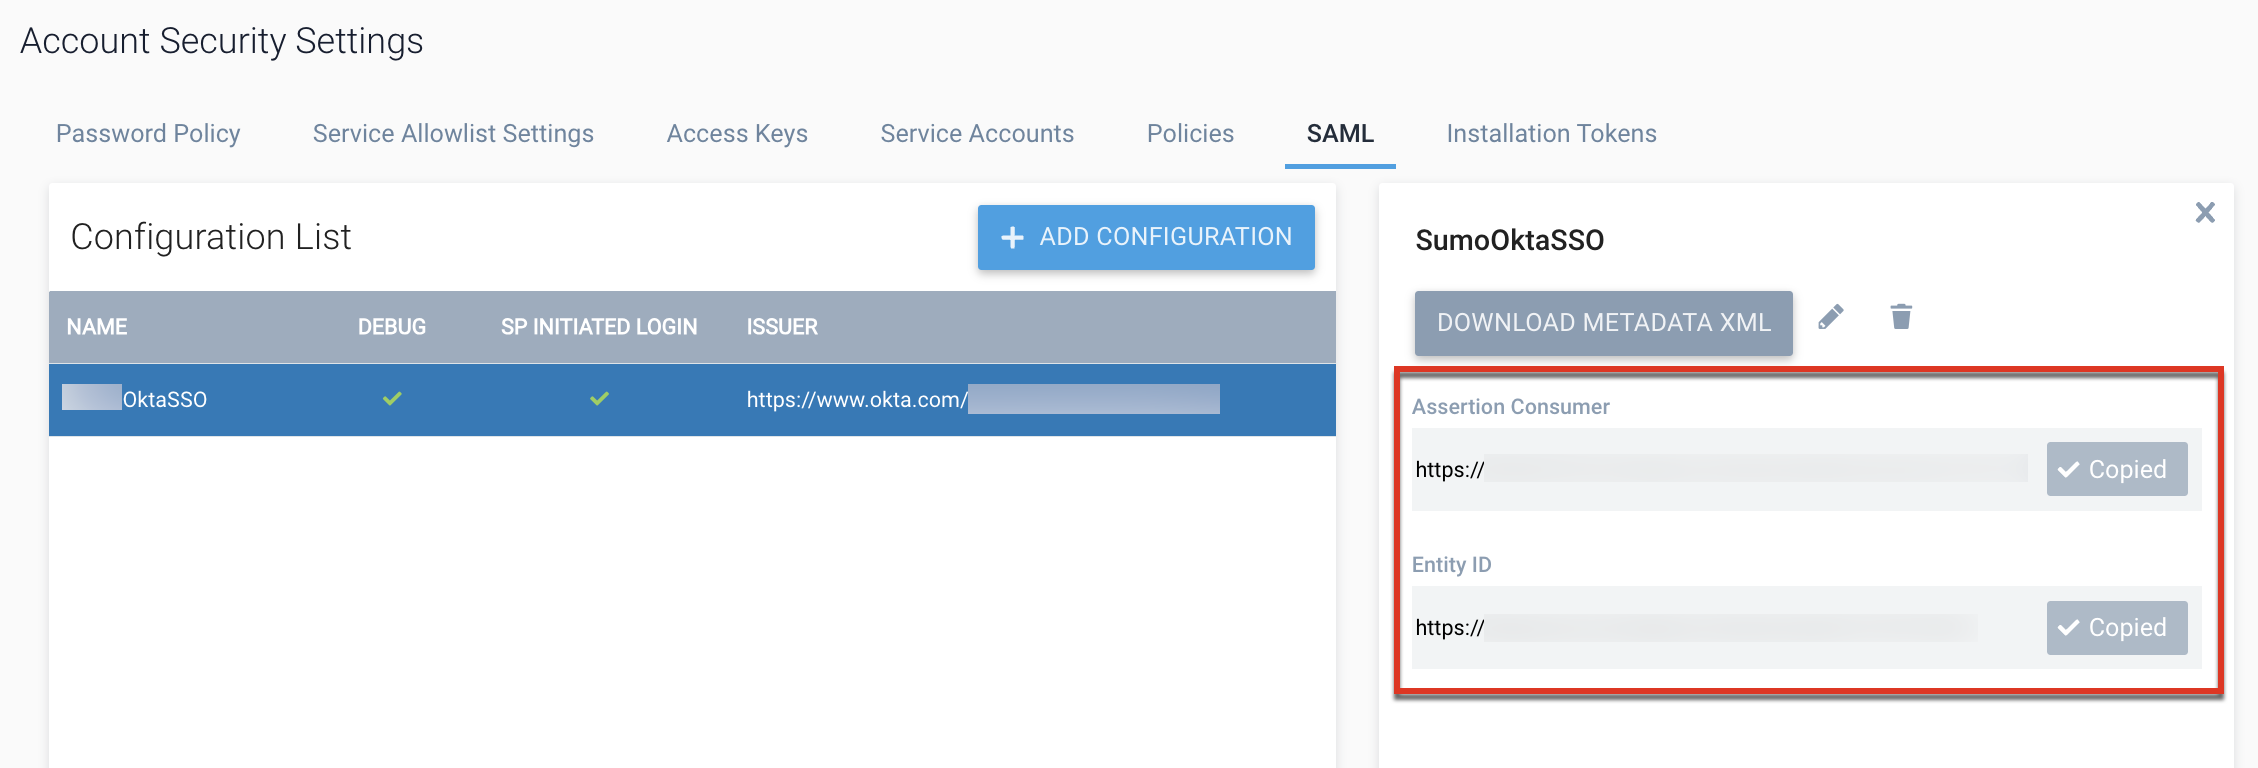
Set up SAML
If it is not already set up, set up SAML for single sign-on with Okta in the Sumo Logic instance where you will provision users. This will allow connection to Sumo Logic for provisioning. Copy the single sign-on URL (Assertion Consumer URL) and entity ID from your Sumo Logic SAML configuration. You will use them when you set up provisioning.
Configure provisioning with Okta
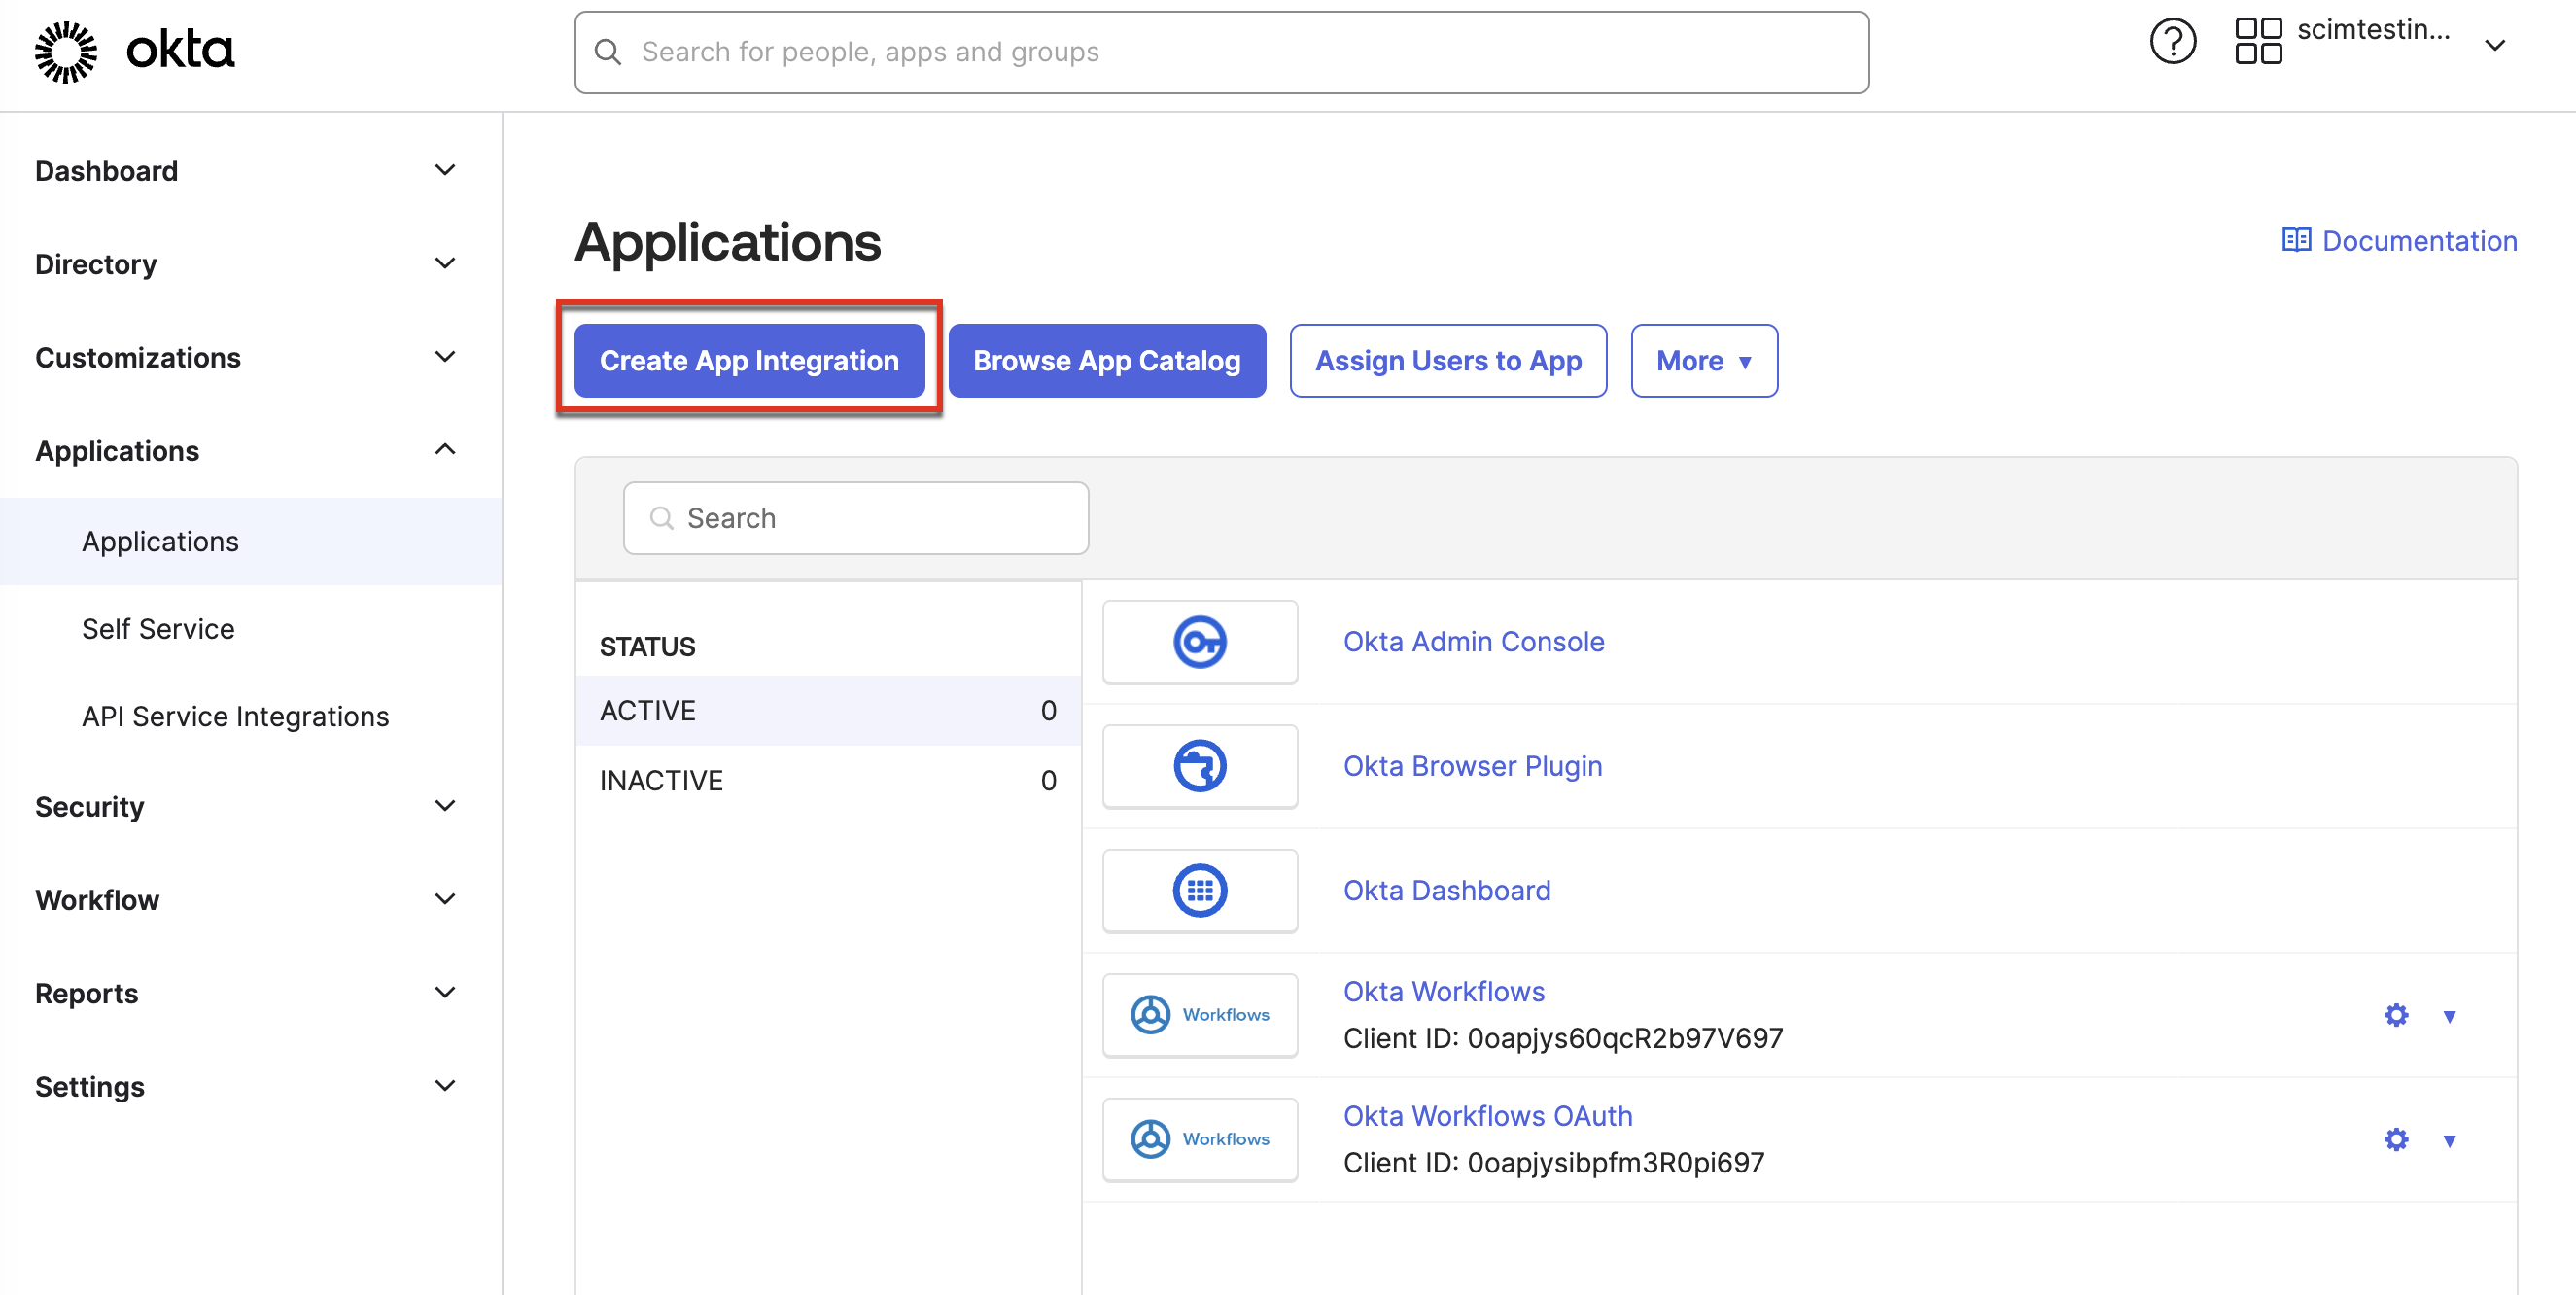
Step 1: Create the app
- Login to Okta as an administrator.
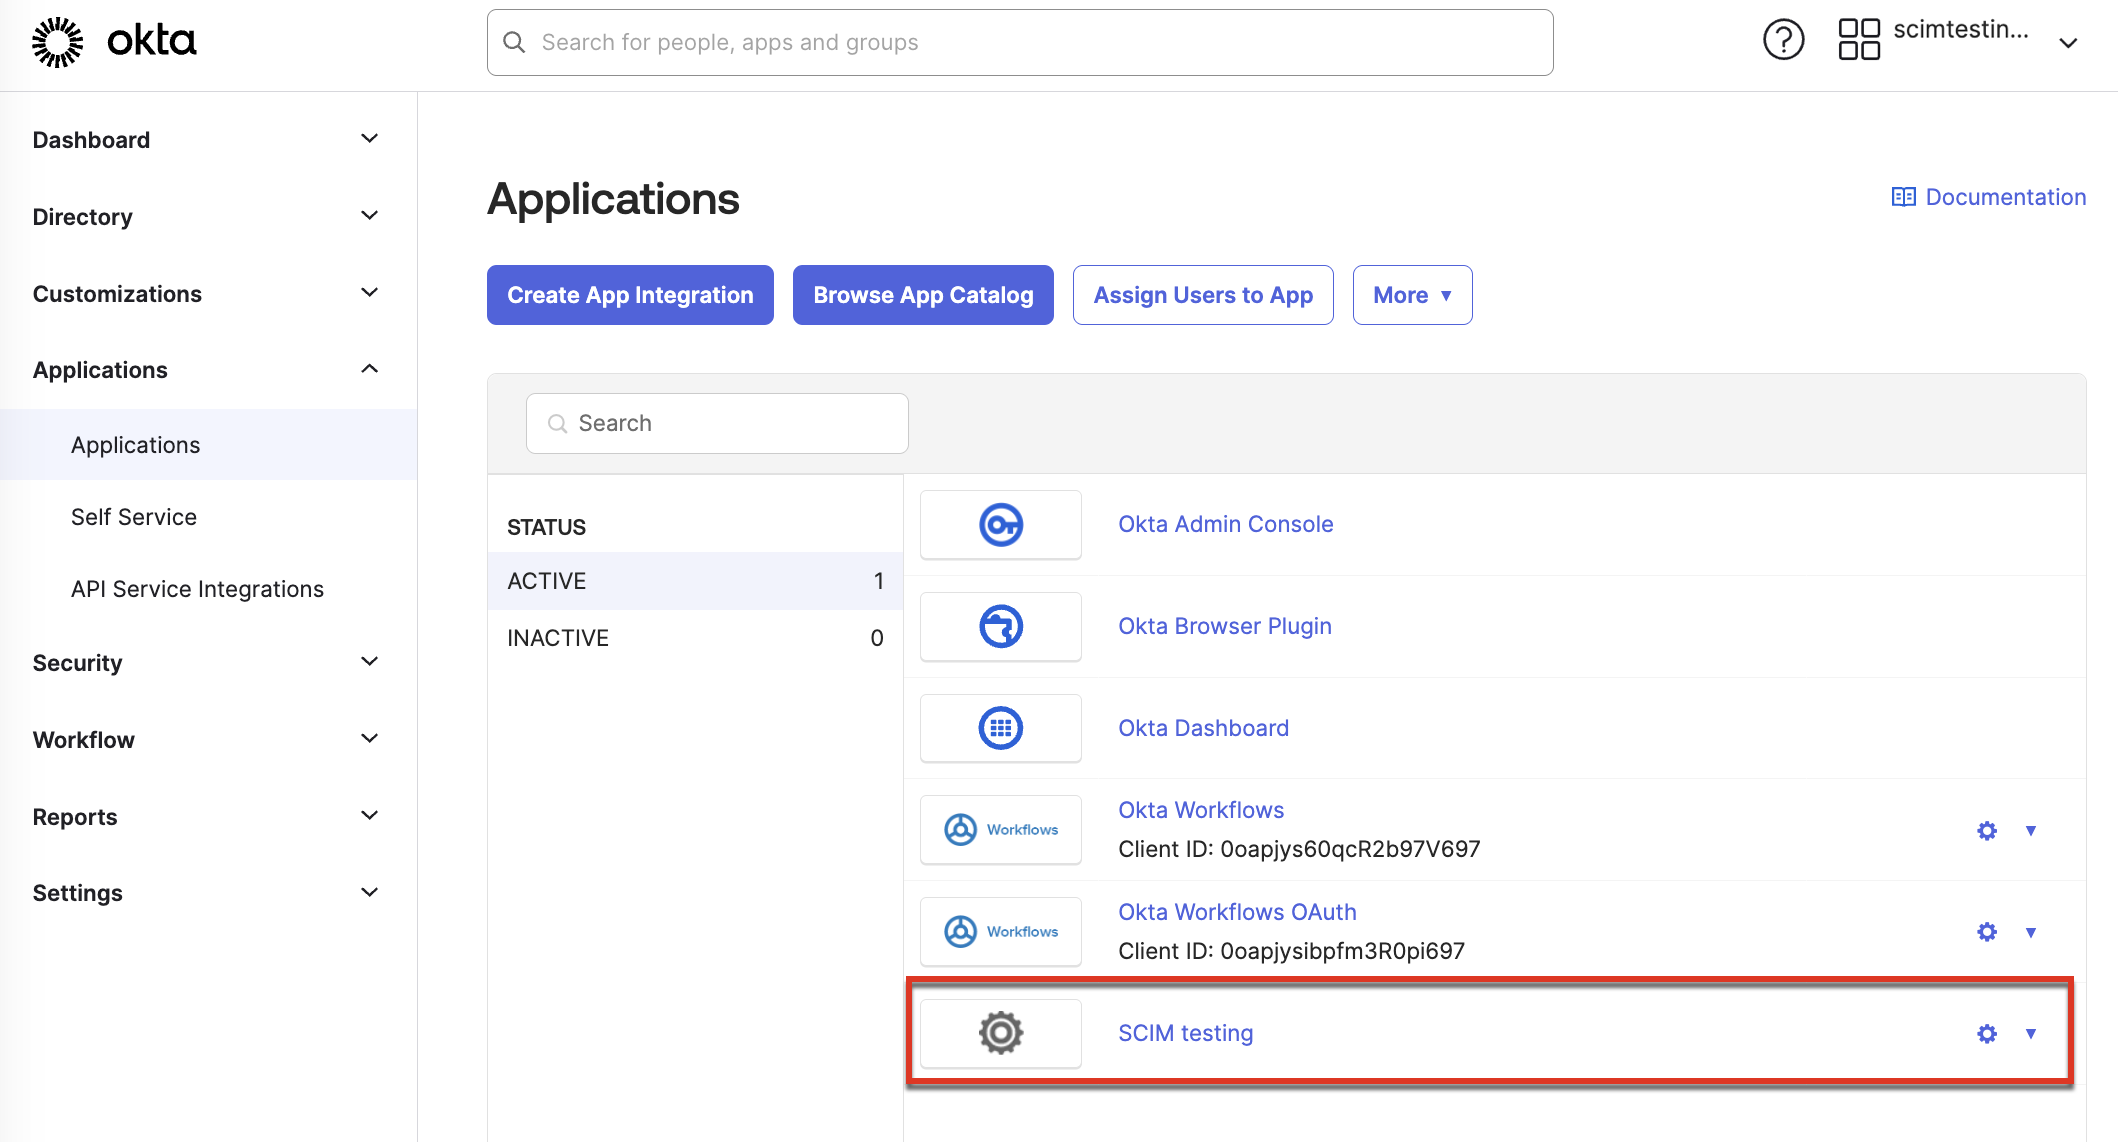
- Navigate to Applications > Applications and click Create App Integration.
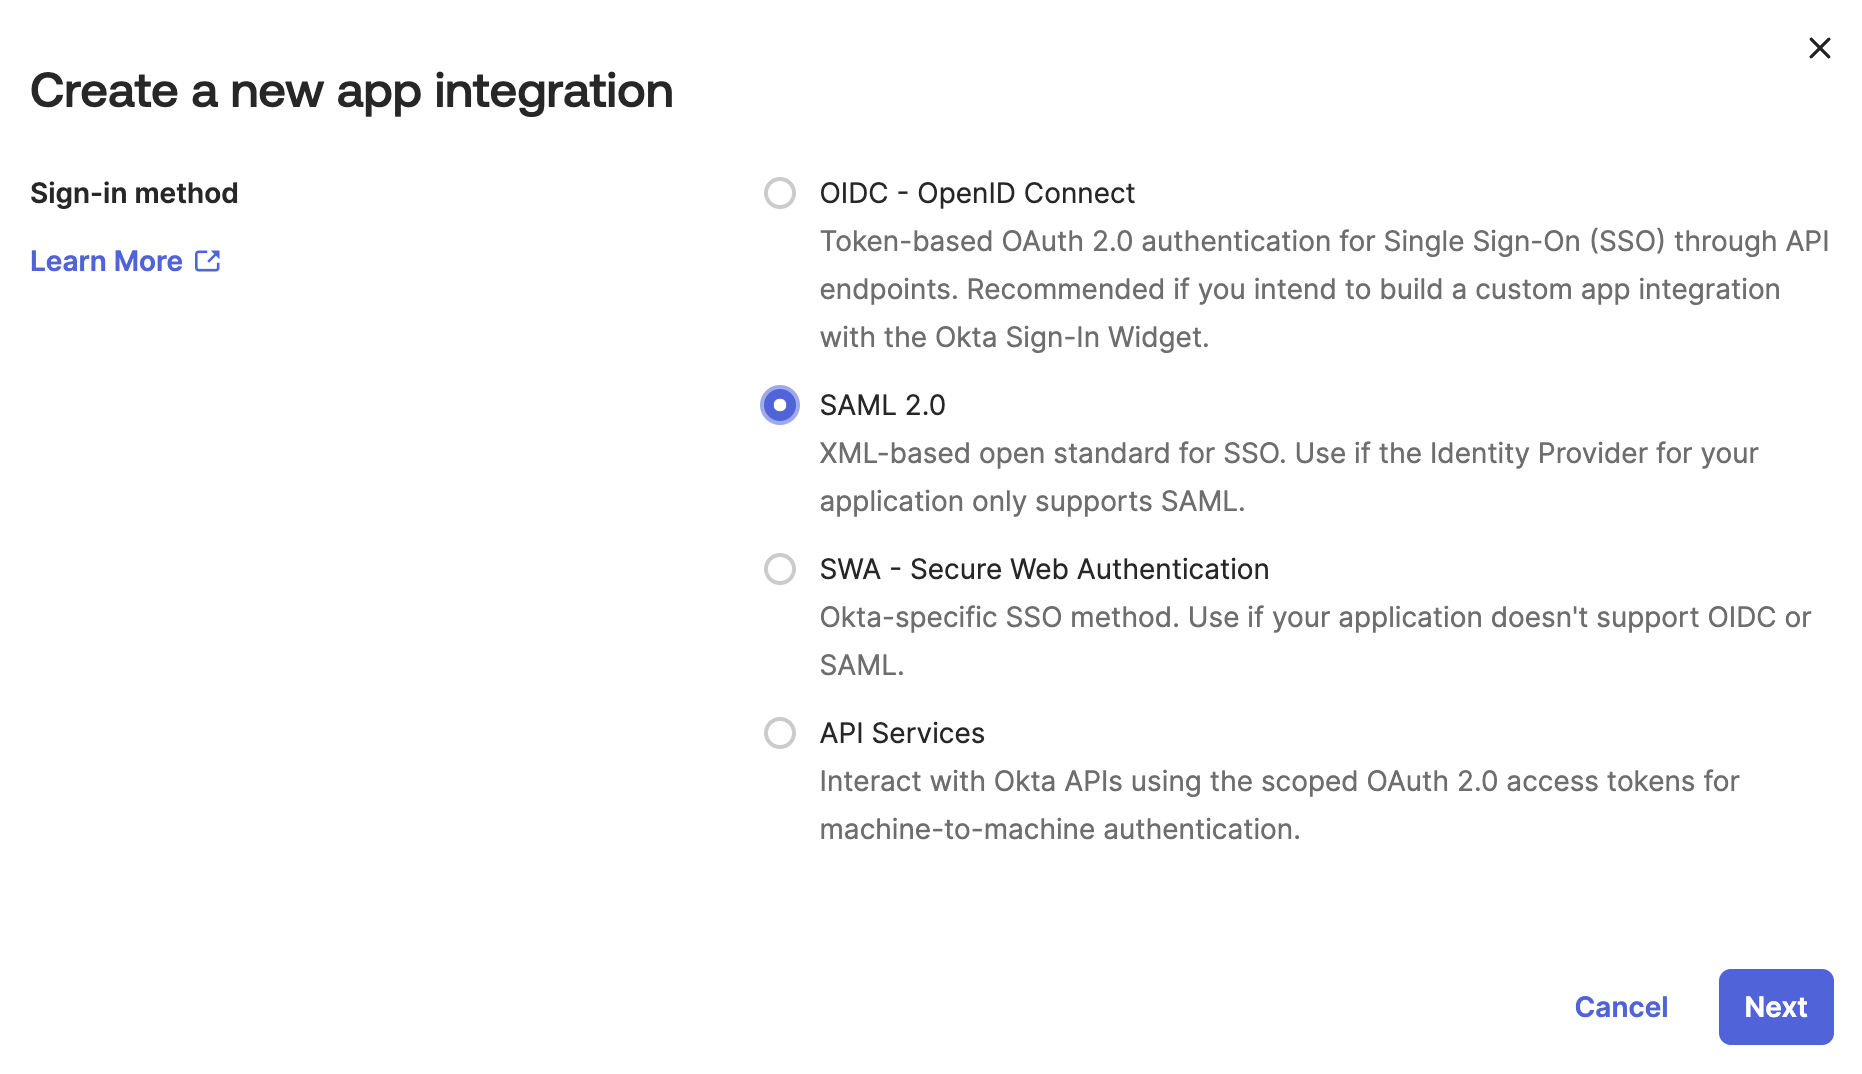
- Select SAML 2.0 and click Next.
- Provide a name in the App Name field and click Next.

- Enter the Single sign-on URL and Audience URI (SP Entity ID) for your Sumo Logic instance:
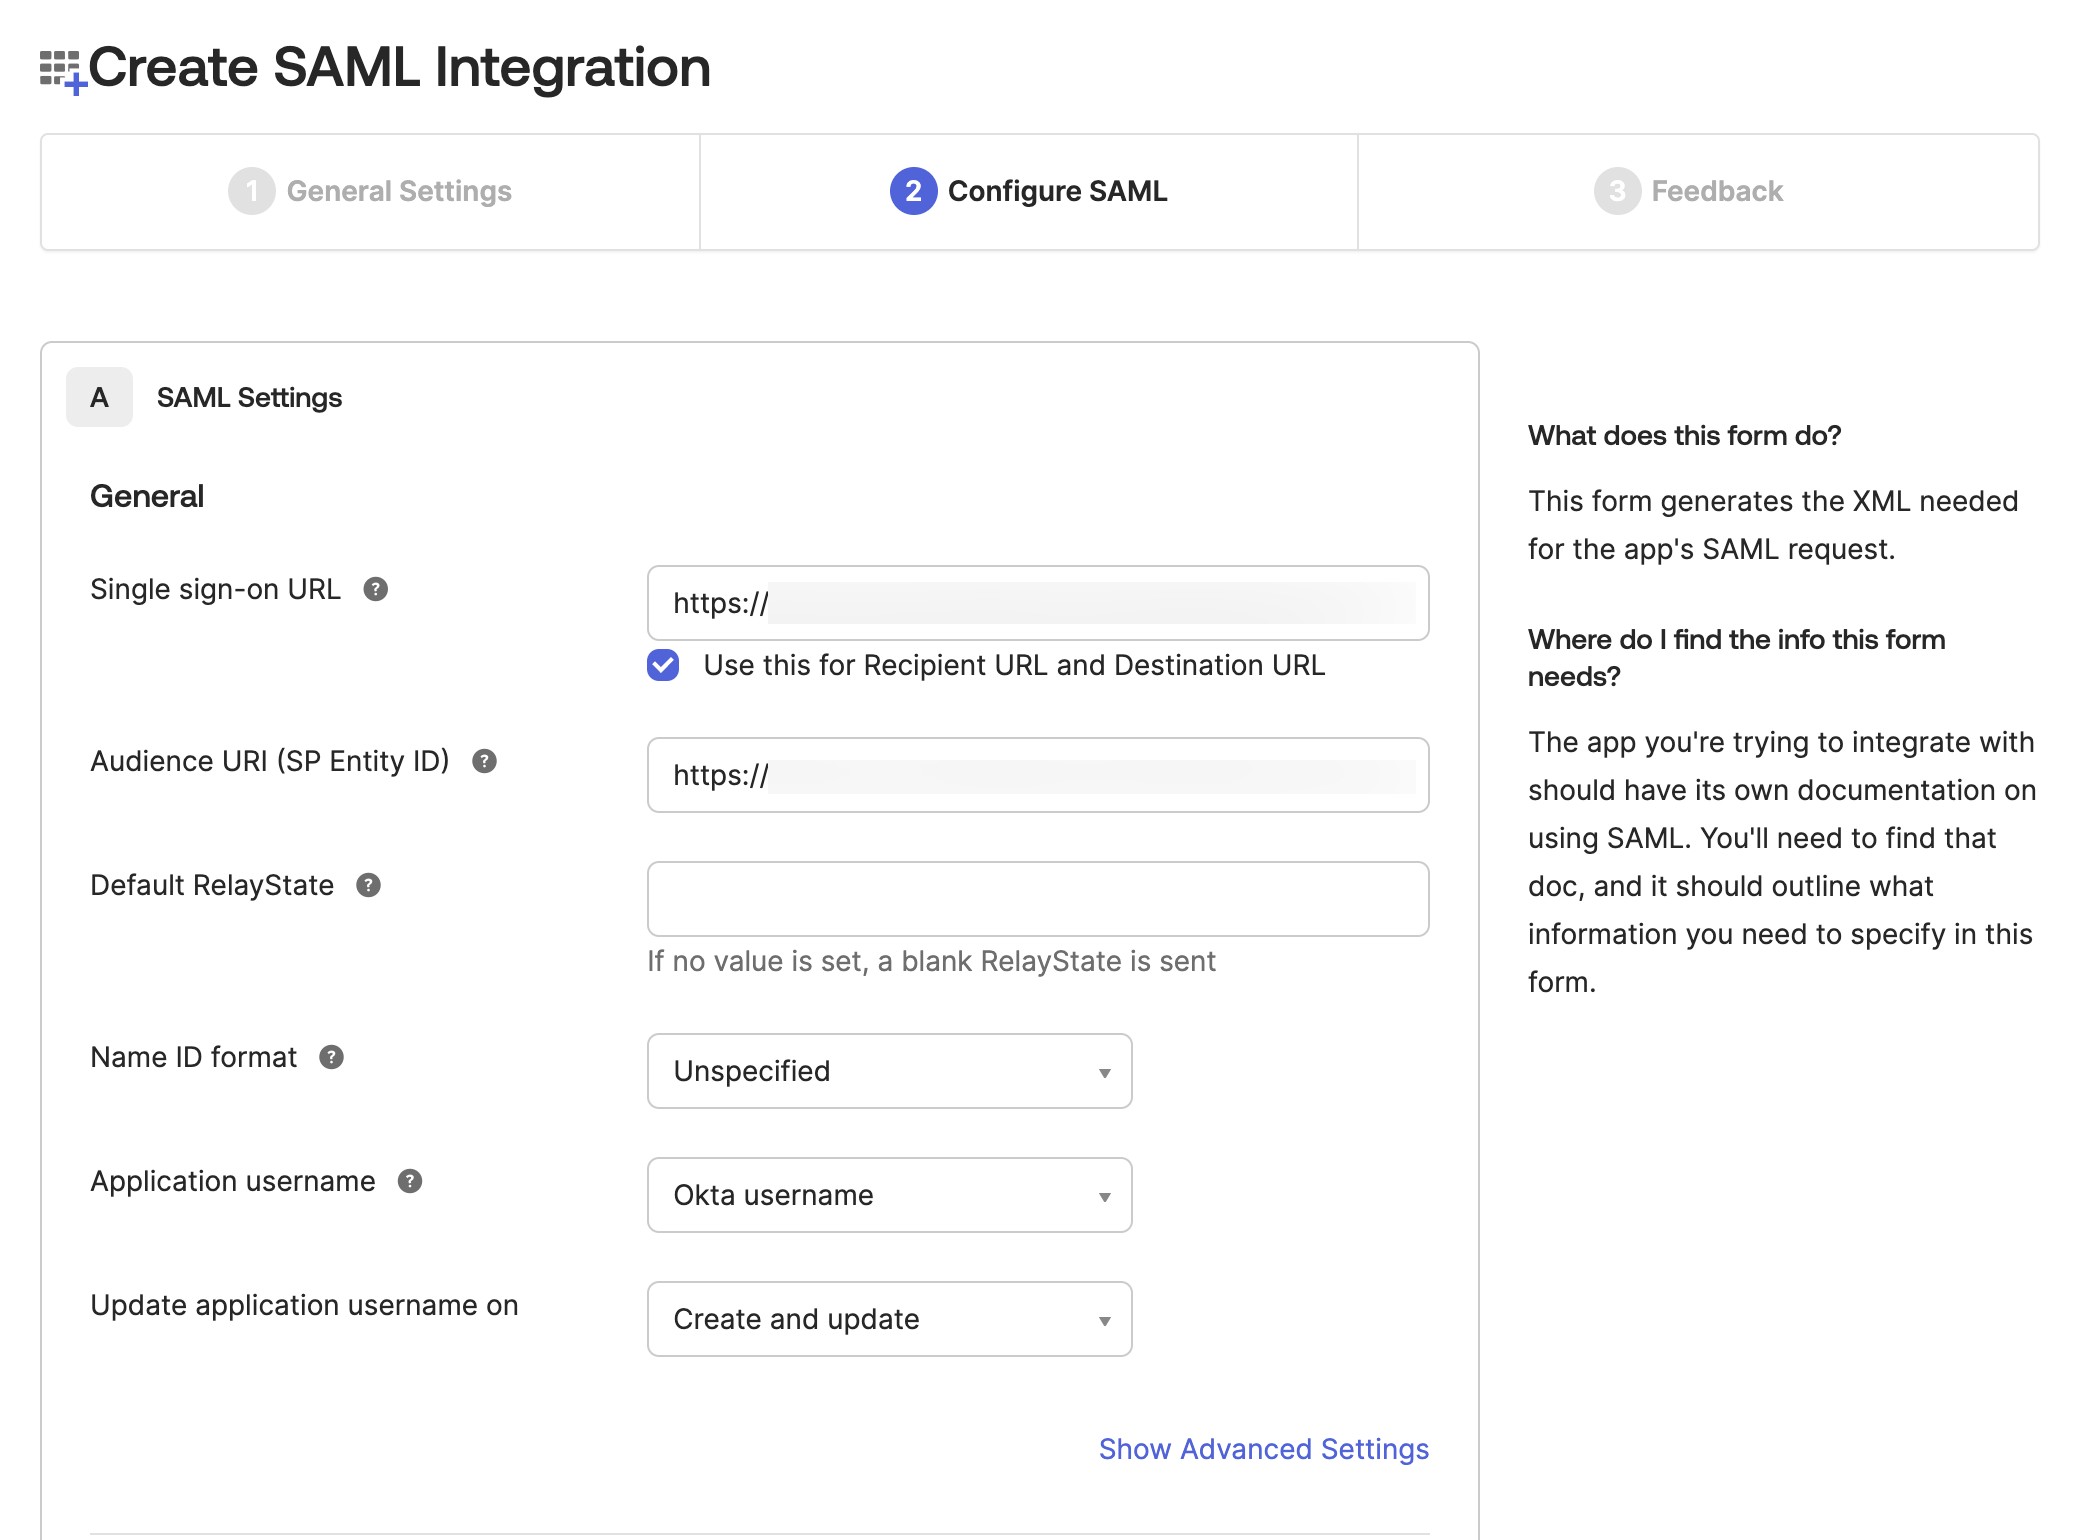
Obtain the single sign-on URL (Assertion Consumer URL) and entity ID from the SAML configuration of the Sumo Logic tenant where you will provision users (see Prerequisites). - Click Next and click Finish. The app displays in Okta.
Step 2: Set up provisioning
- Configure the general settings for the app:
- Click the General tab.
- Click Edit in the upper-right corner of the App Settings dialog for the app.
- For Provisioning, select SCIM.

- Click Save. A Provisioning tab appears for the app.
- Configure provisioning integration settings:
- Click the Provisioning tab.
- Click Integration in the left menu, and then click Edit.
- SCIM connector base URL. Enter the API endpoint for your deployment for the SCIM User Management APIs using the format
<api-endpoint>/v1/scim/. For example,https://api.sumologic.com/api/v1/scim/. - Unique identifier field for users. Enter
userName. - Supported provisioning actions. Select:
- Import New Users and Profile Updates
- Push New Users
- Push Profile Updates
- Authentication Mode. Select one of these authentication methods and enter your Sumo Logic access key credentials (see Prerequisites):
- Basic Auth. Basic authentication method. If you choose this method, enter your access key credentials in the fields that appear:
- Username. Enter your access ID.
- Password. Enter your access key.
- HTTP Header. HTTP authorization header method. If you choose this option, use Base64 encoding to encode
<access ID>:<access key>and enter the resulting value into the Authorization | Bearer Token field that appears.
- Basic Auth. Basic authentication method. If you choose this method, enter your access key credentials in the fields that appear:
- Click Test Connector Configuration. The results display:
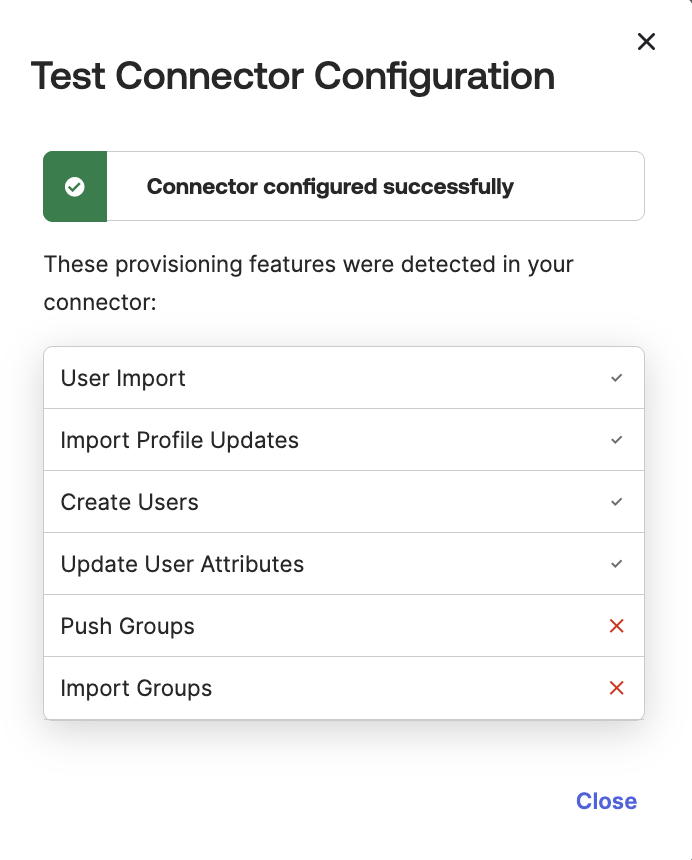
- Click Close on the Test Connector Configuration dialog.
- Click Save to save the app provisioning integration settings.
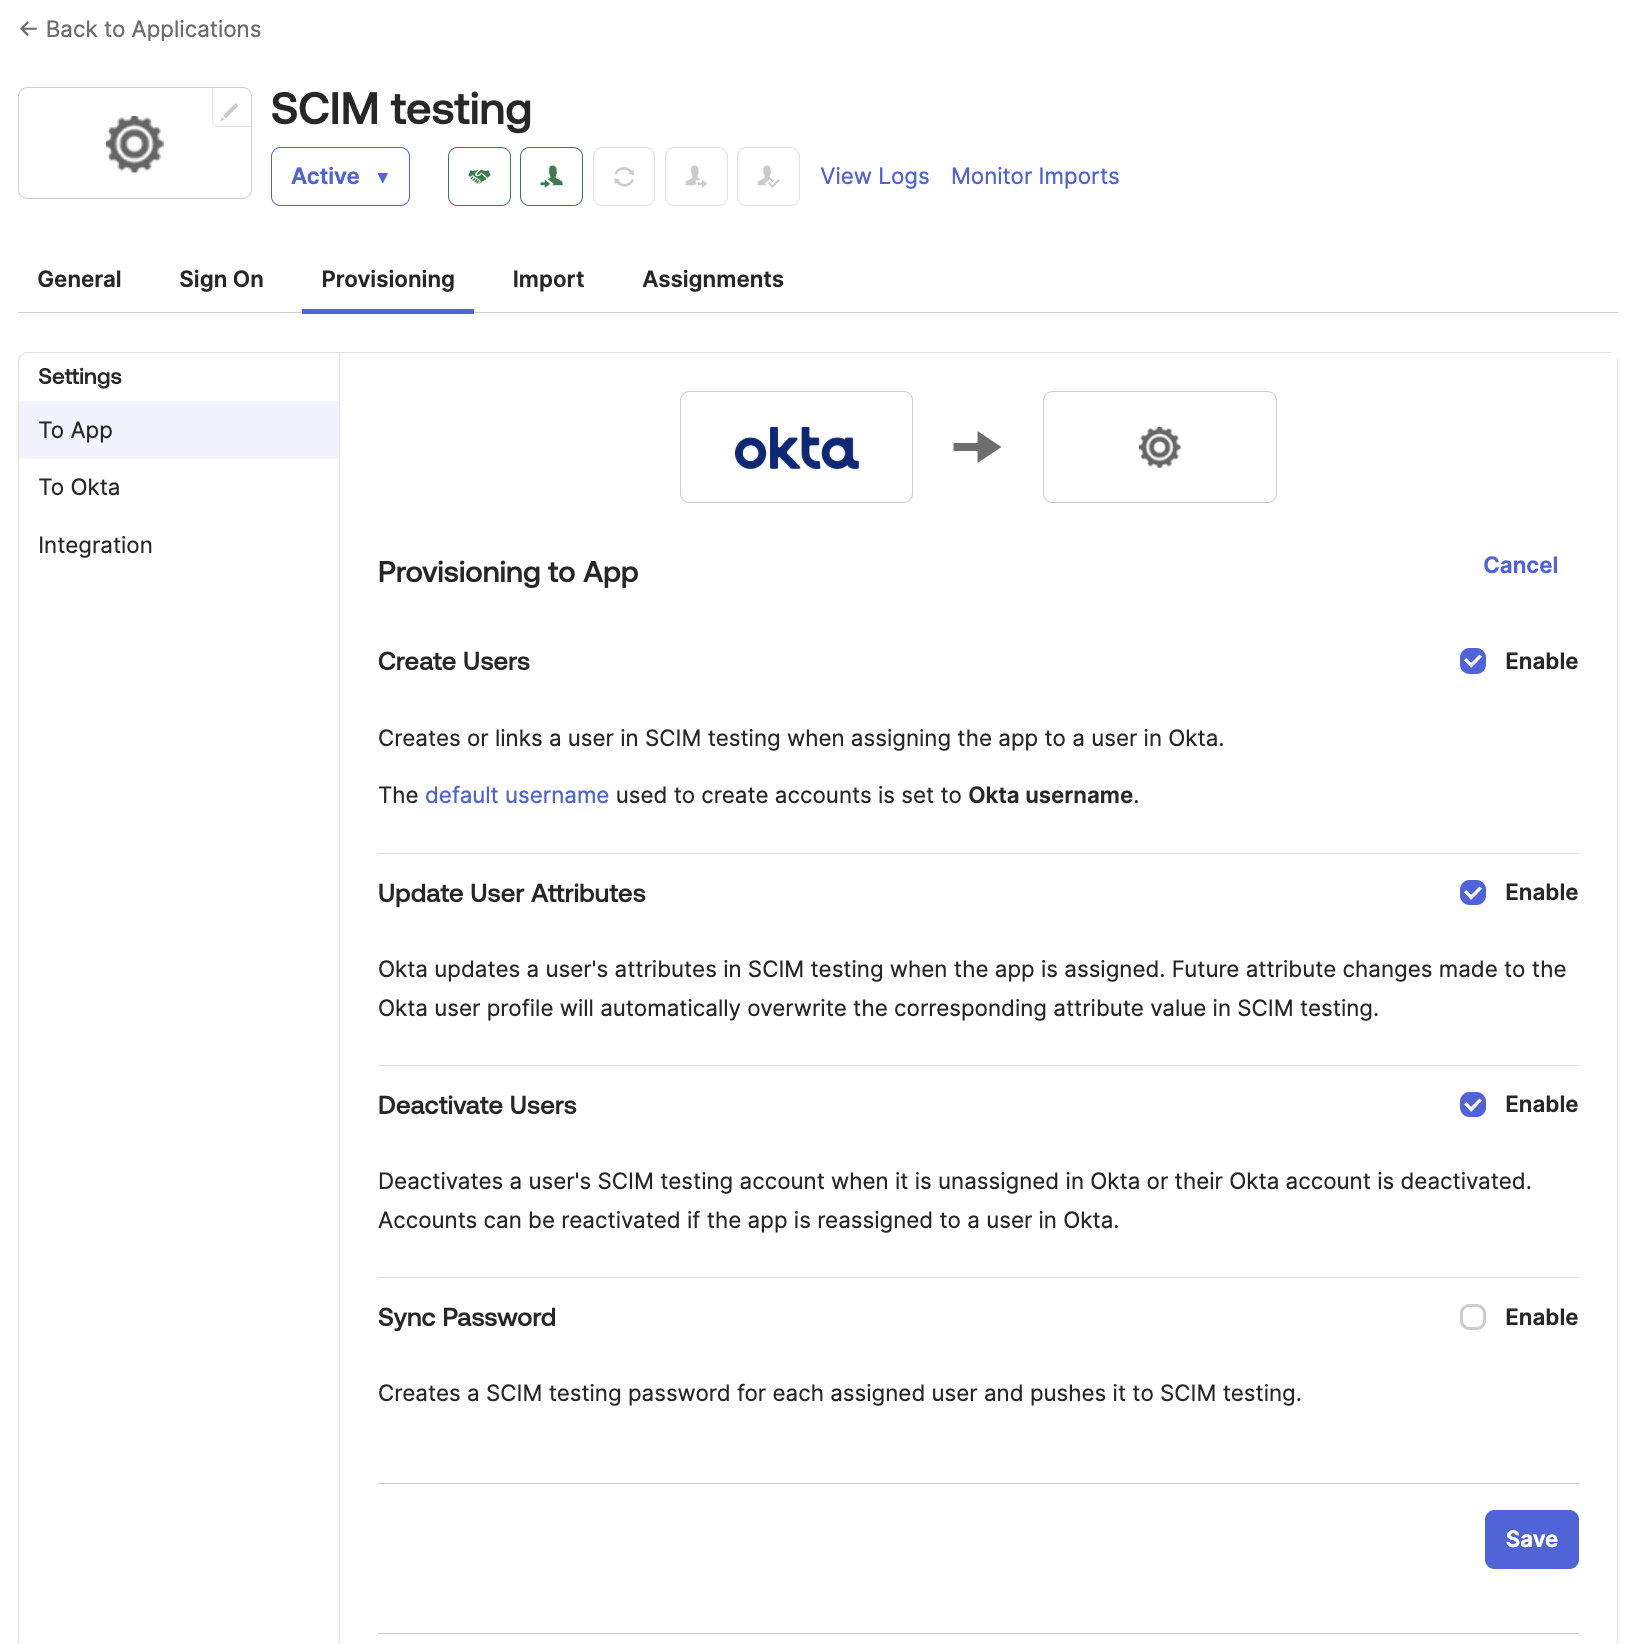
- Configure provisioning To App settings:
- Click the Provisioning tab.
- Click To App in the left menu, and then click Edit.
- Select Enable on:
- Create Users
- Update User Attributes
- Deactivate Users
- Click Save.
Step 3: Set up roles
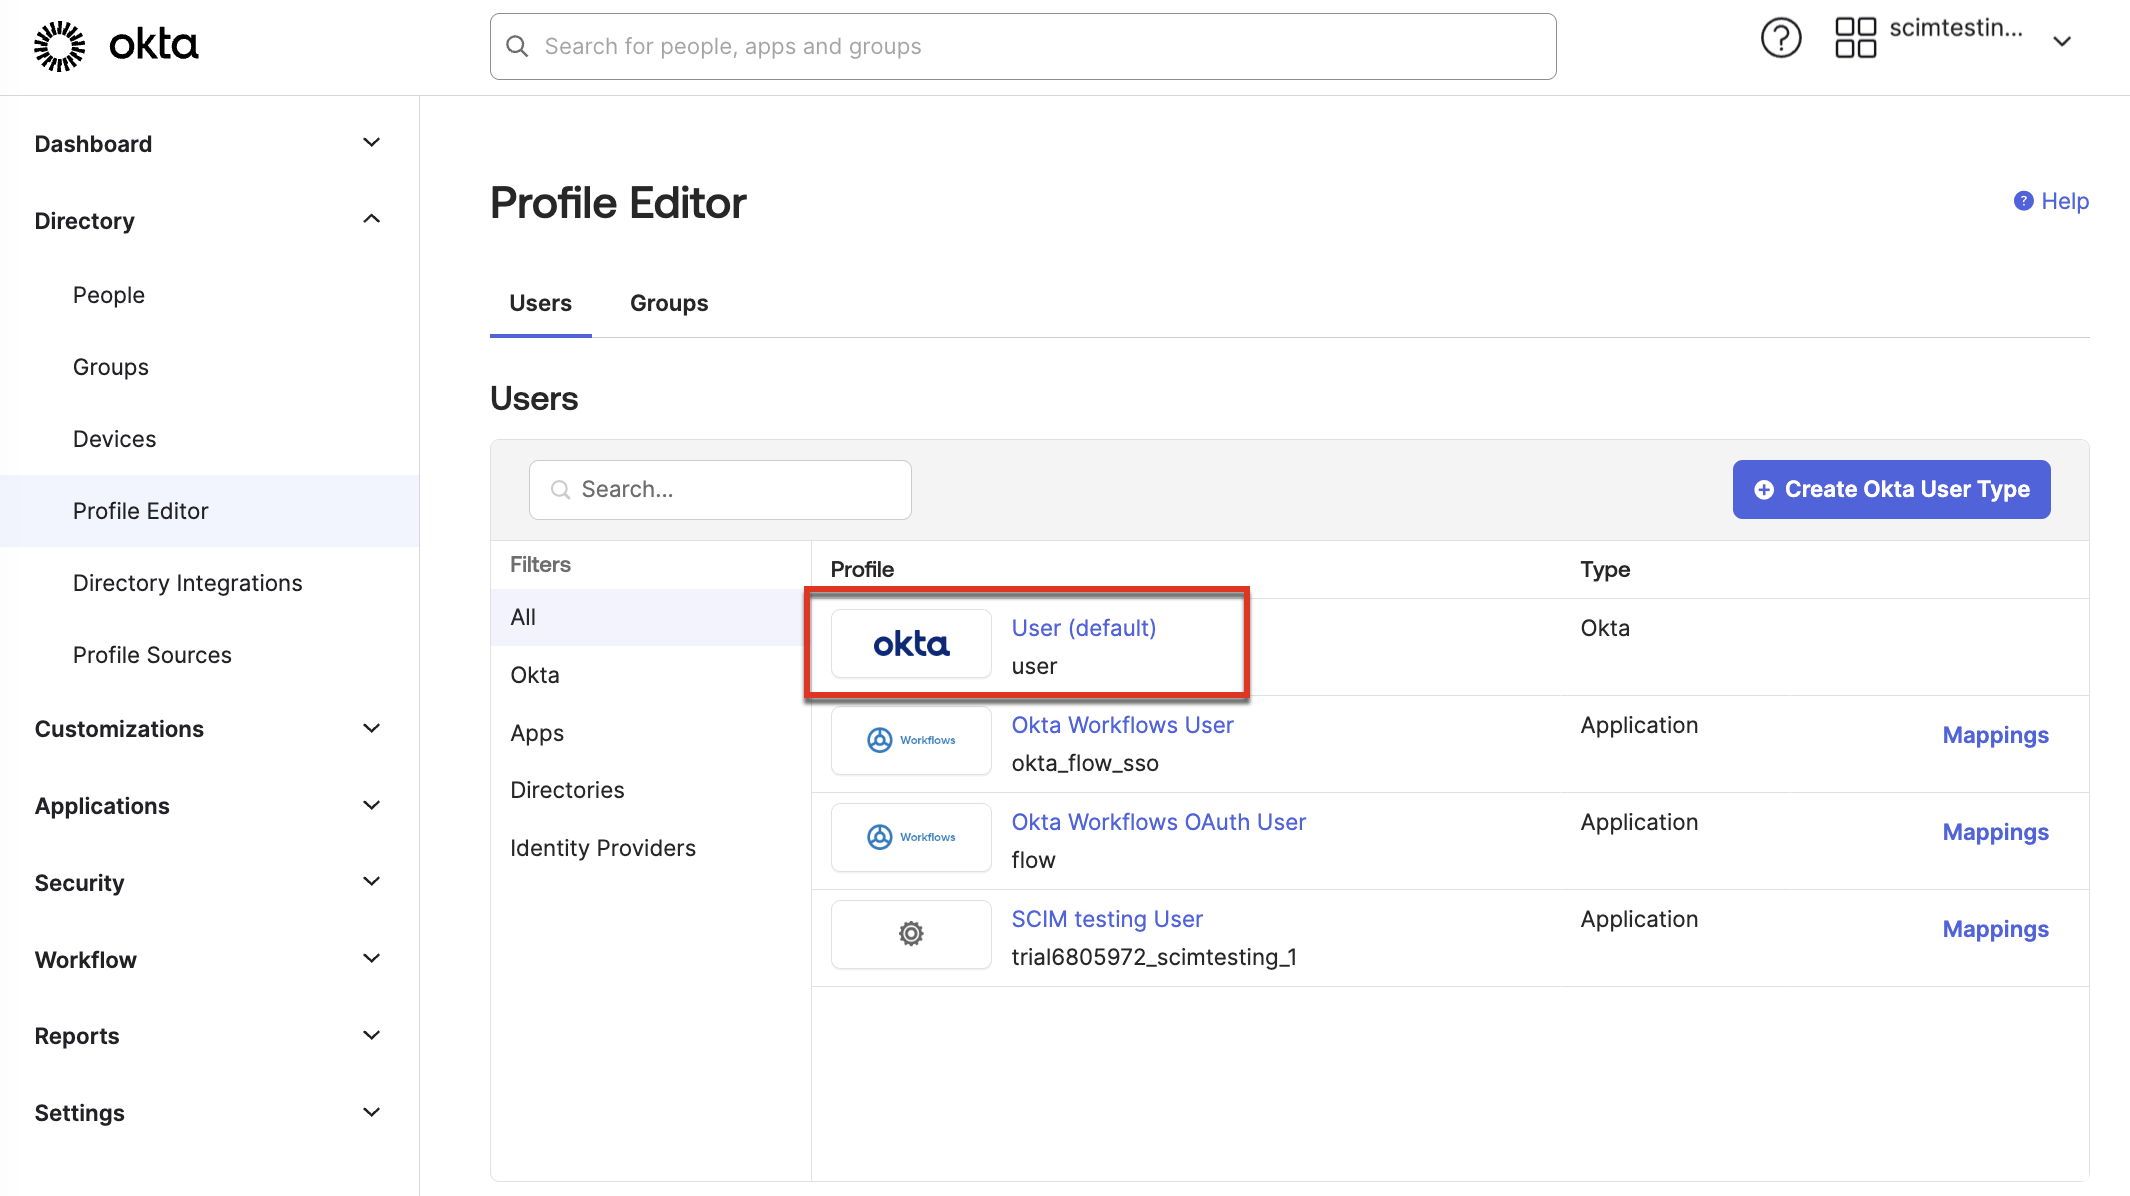
- Add the Roles attribute to the default Okta user profile:
- Navigate to Directory > Profile Editor and select Okta User (default).
- In the Profile Editor, click Add Attribute.

- Fill out the Add Attribute dialog:
- Data type. Select string.
- Display name. Enter
Roles. - Variable name. Enter
roles. - For Enum select Define enumerated list of values and enter the following:
Display name Value UseruserAdministratoradministratorAnalystanalyst - User permission. Select Read-Write.
- Click Save.

- Navigate to Directory > Profile Editor and select Okta User (default).
- Add the Roles attribute to the provisioning app user profile:
- Navigate to Directory > Profile Editor and select the user for the app you created in Step 1.
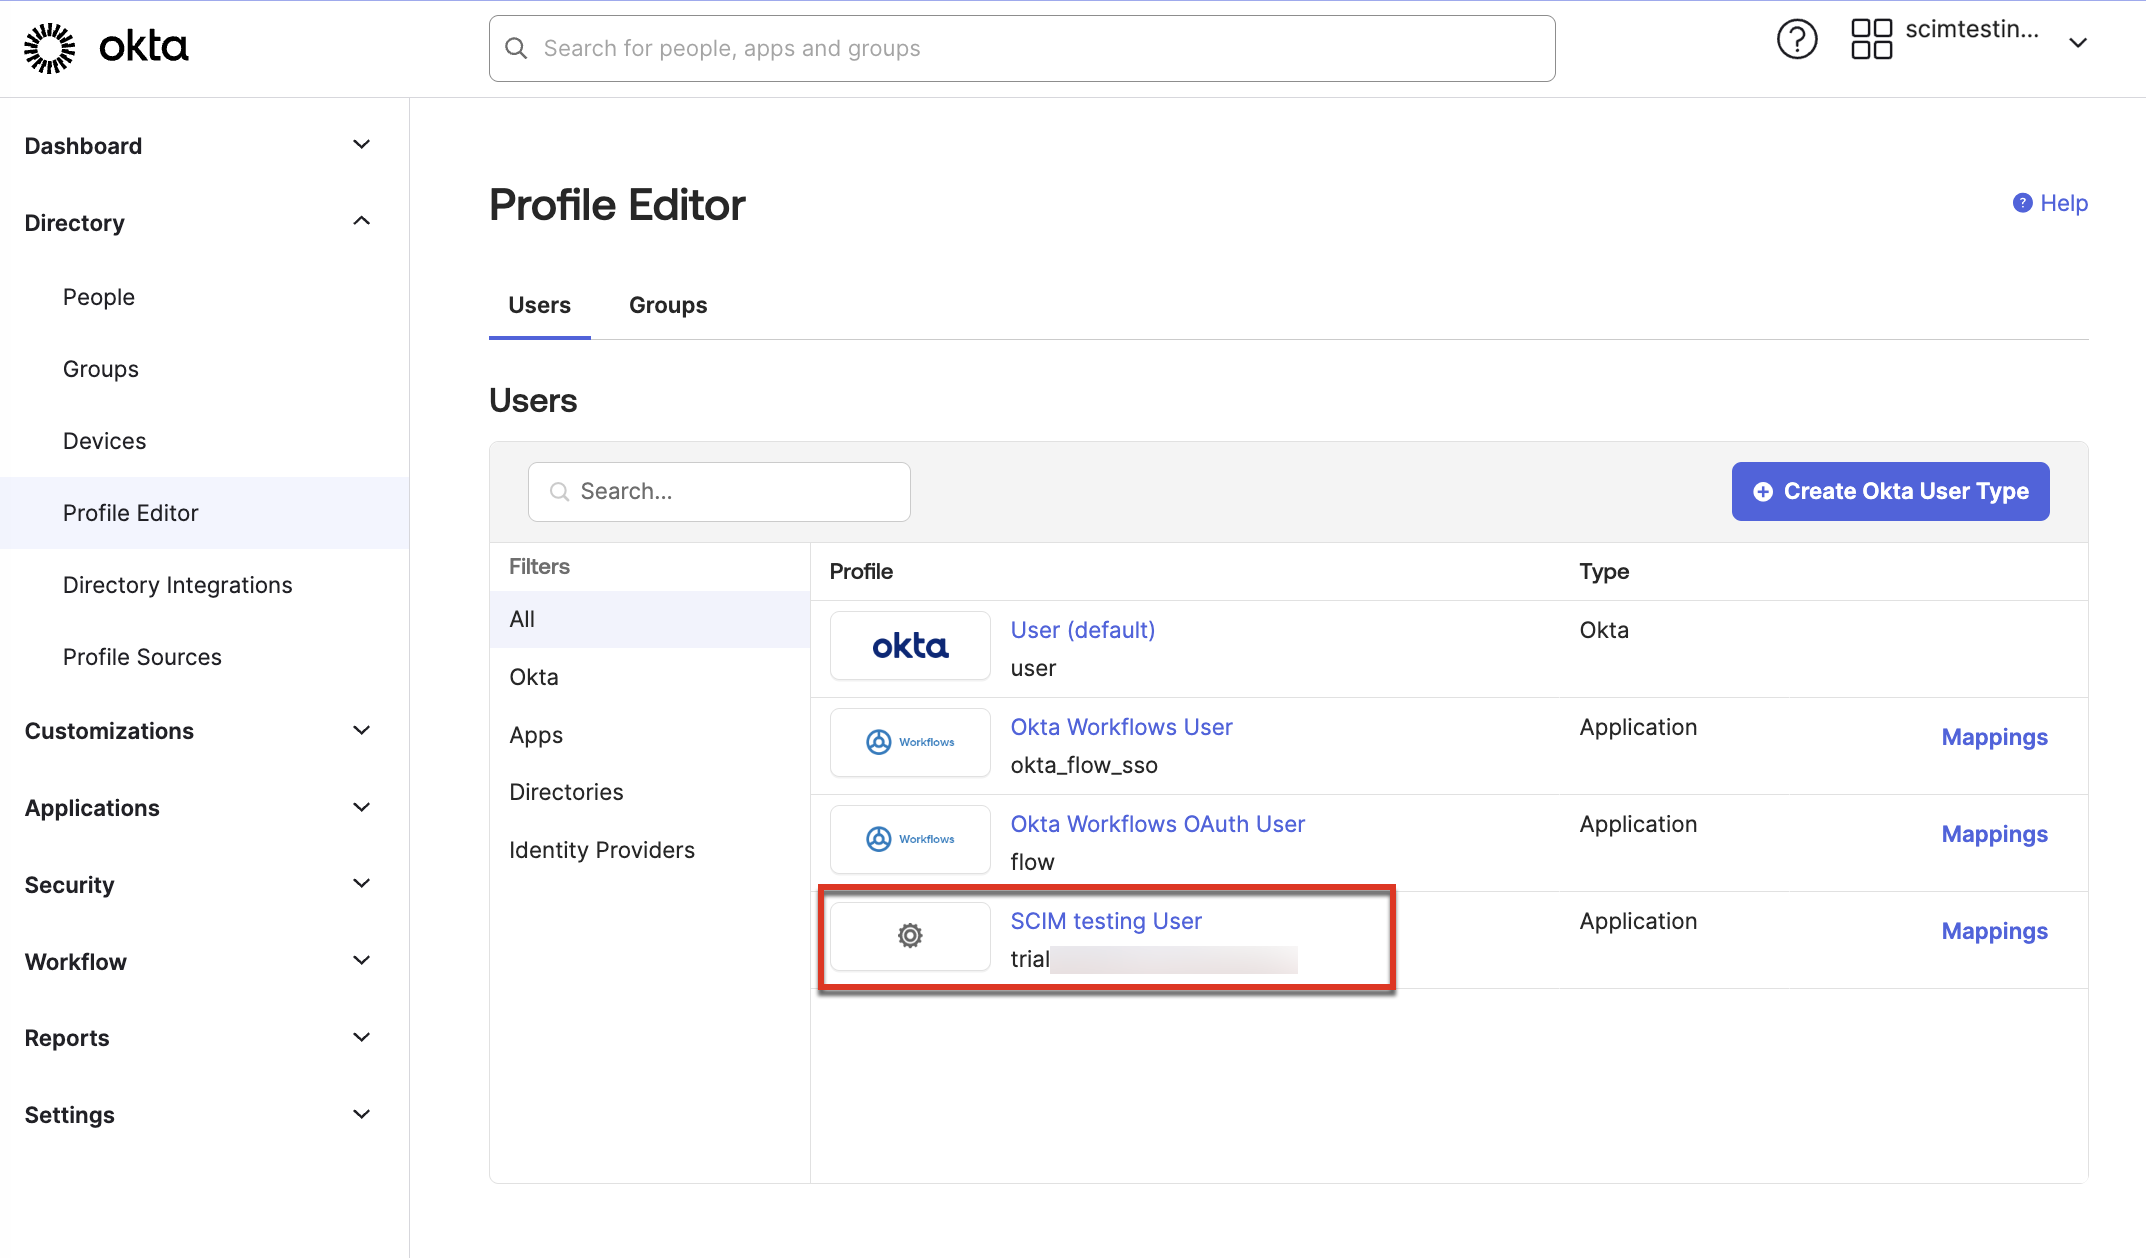
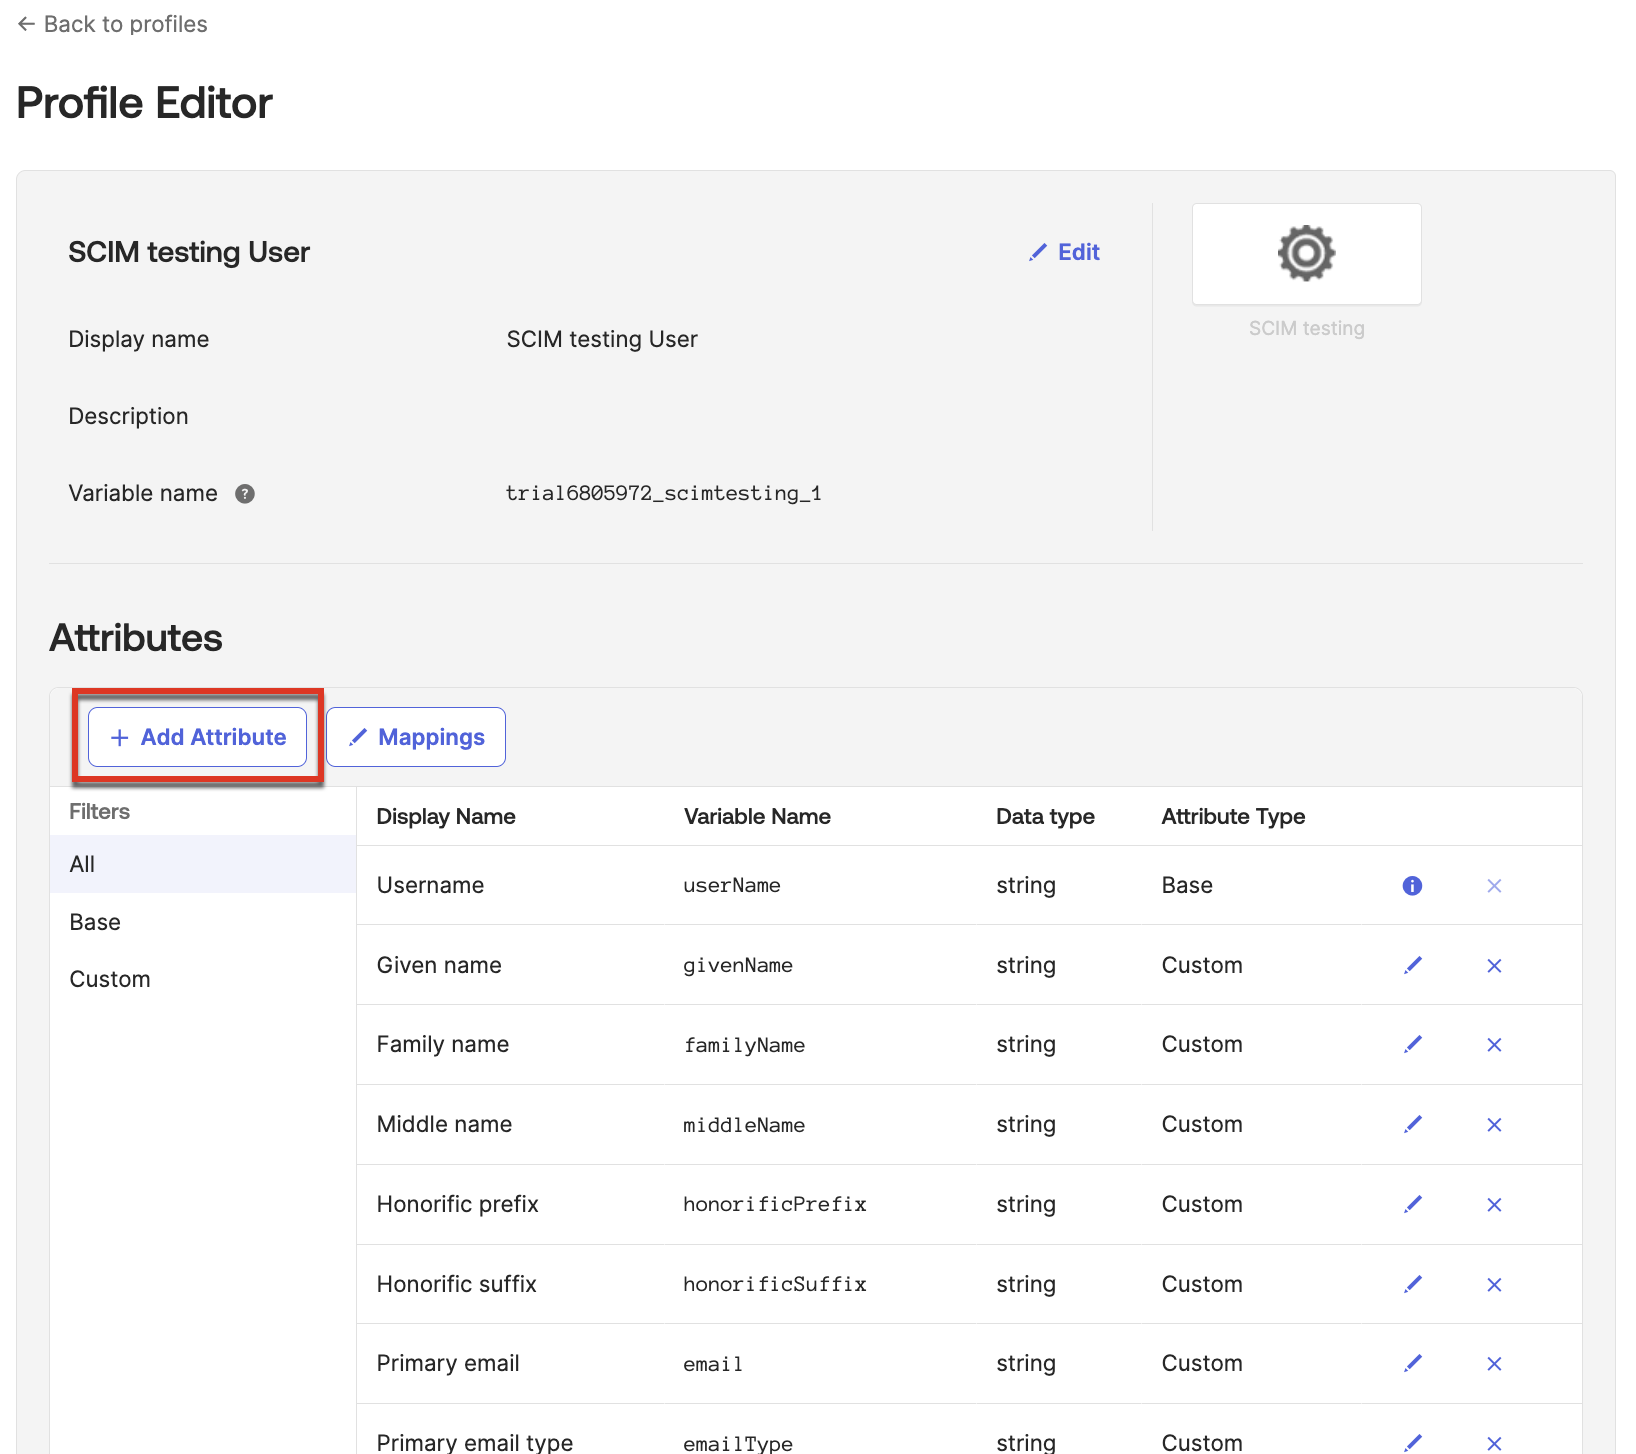
- In the Profile Editor, click Add Attribute.
- Navigate to Directory > Profile Editor and select the user for the app you created in Step 1.
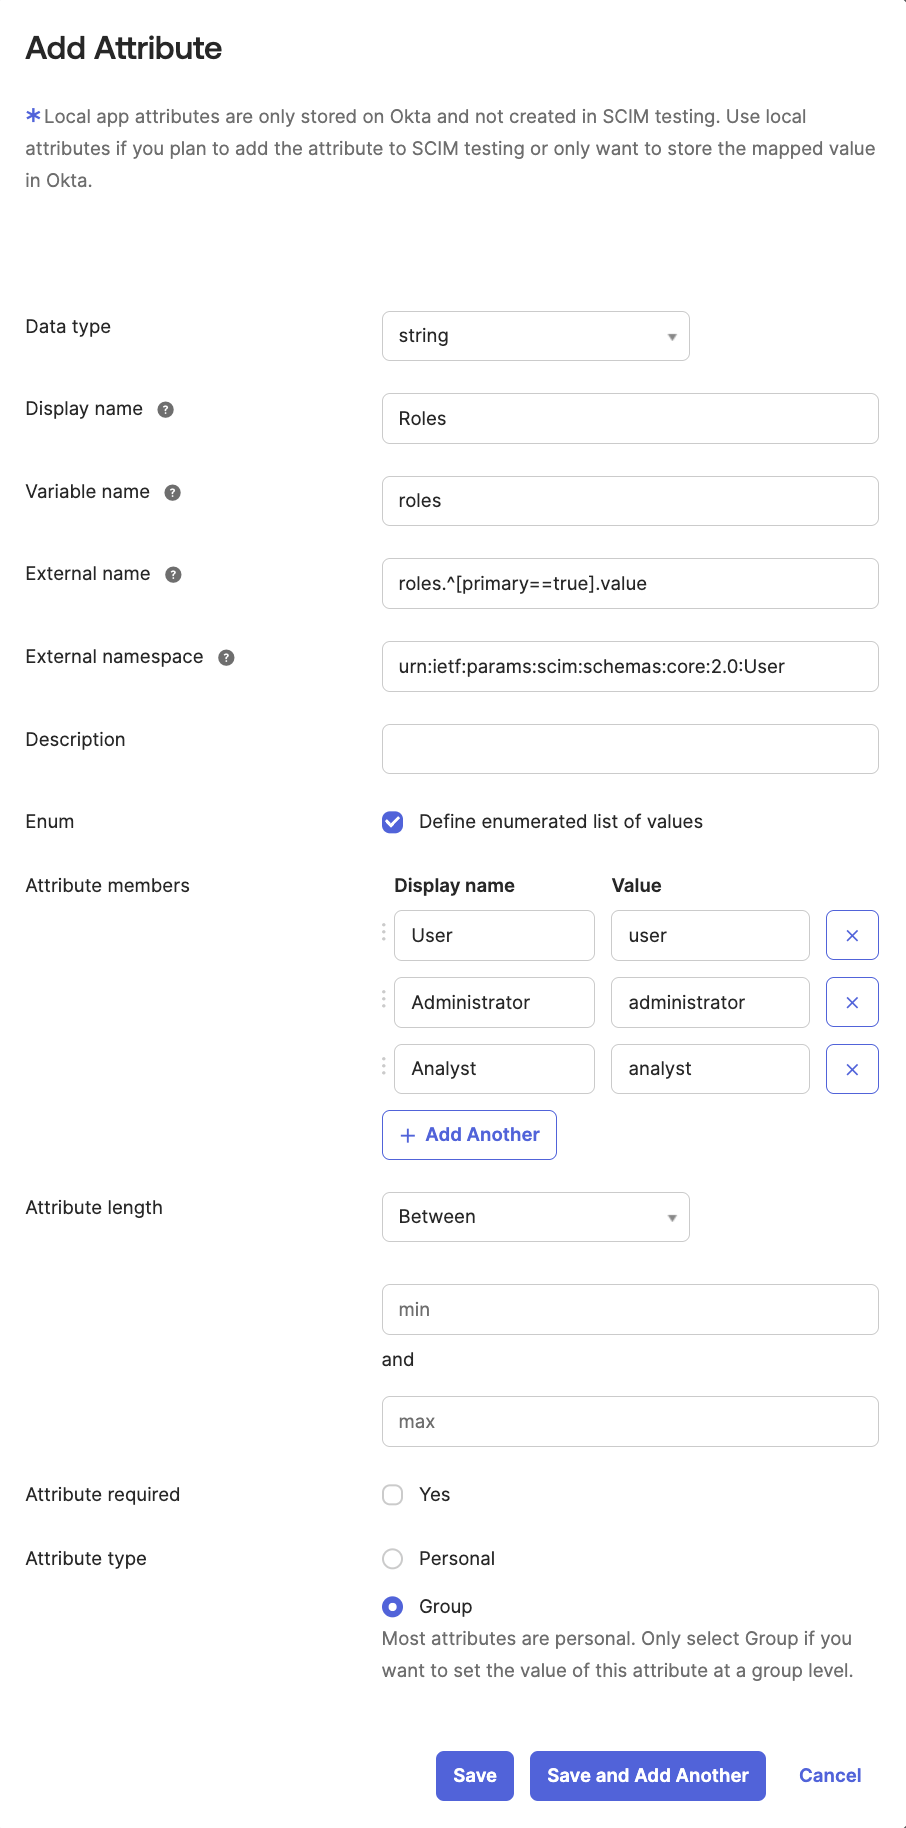
- Fill out the Add Attribute dialog:
- Data type. Select string.
- Display name. Enter
Roles. - Variable name. Enter
roles. - External name. Enter
roles.^[primary==true].value. - External namespace. Enter
urn:ietf:params:scim:schemas:core:2.0:User. - For Enum select Define enumerated list of values and enter the same roles you added to the Okta user above:
Display name Value UseruserAdministratoradministratorAnalystanalyst - Attribute type. Select Group.
- Click Save.
Step 4: Set up attribute mappings
- Navigate to Applications > Applications and select the app you created in Step 1.
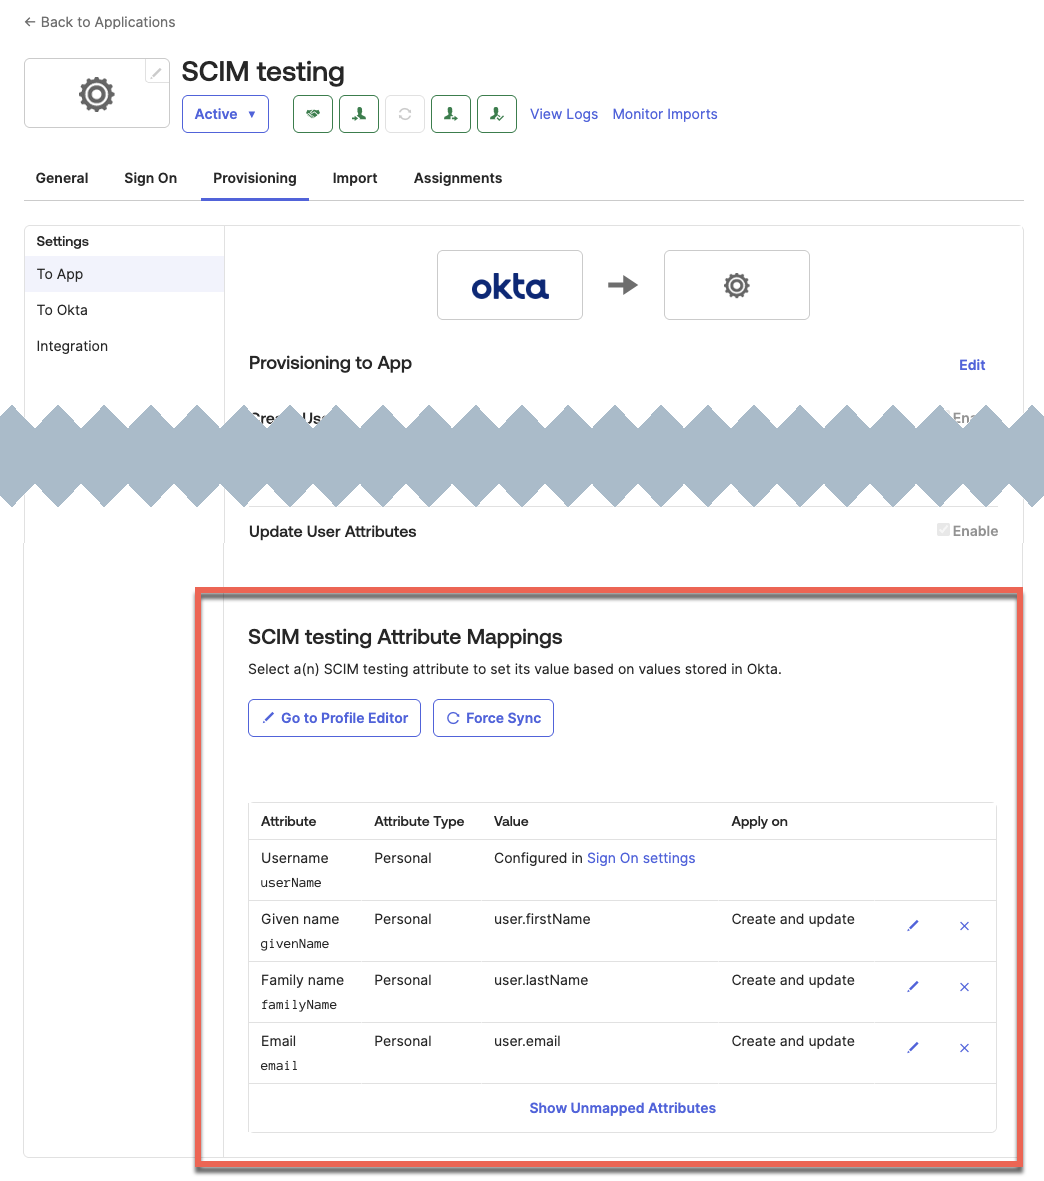
- Edit the attributes pushed from Okta to the provisioning app.
- Select To App.
- Select the Provisioning tab and scroll down to the
<App Name>Attribute Mappings section. - Delete all the attributes except:
- Username
- Given name
- Family name
- Email
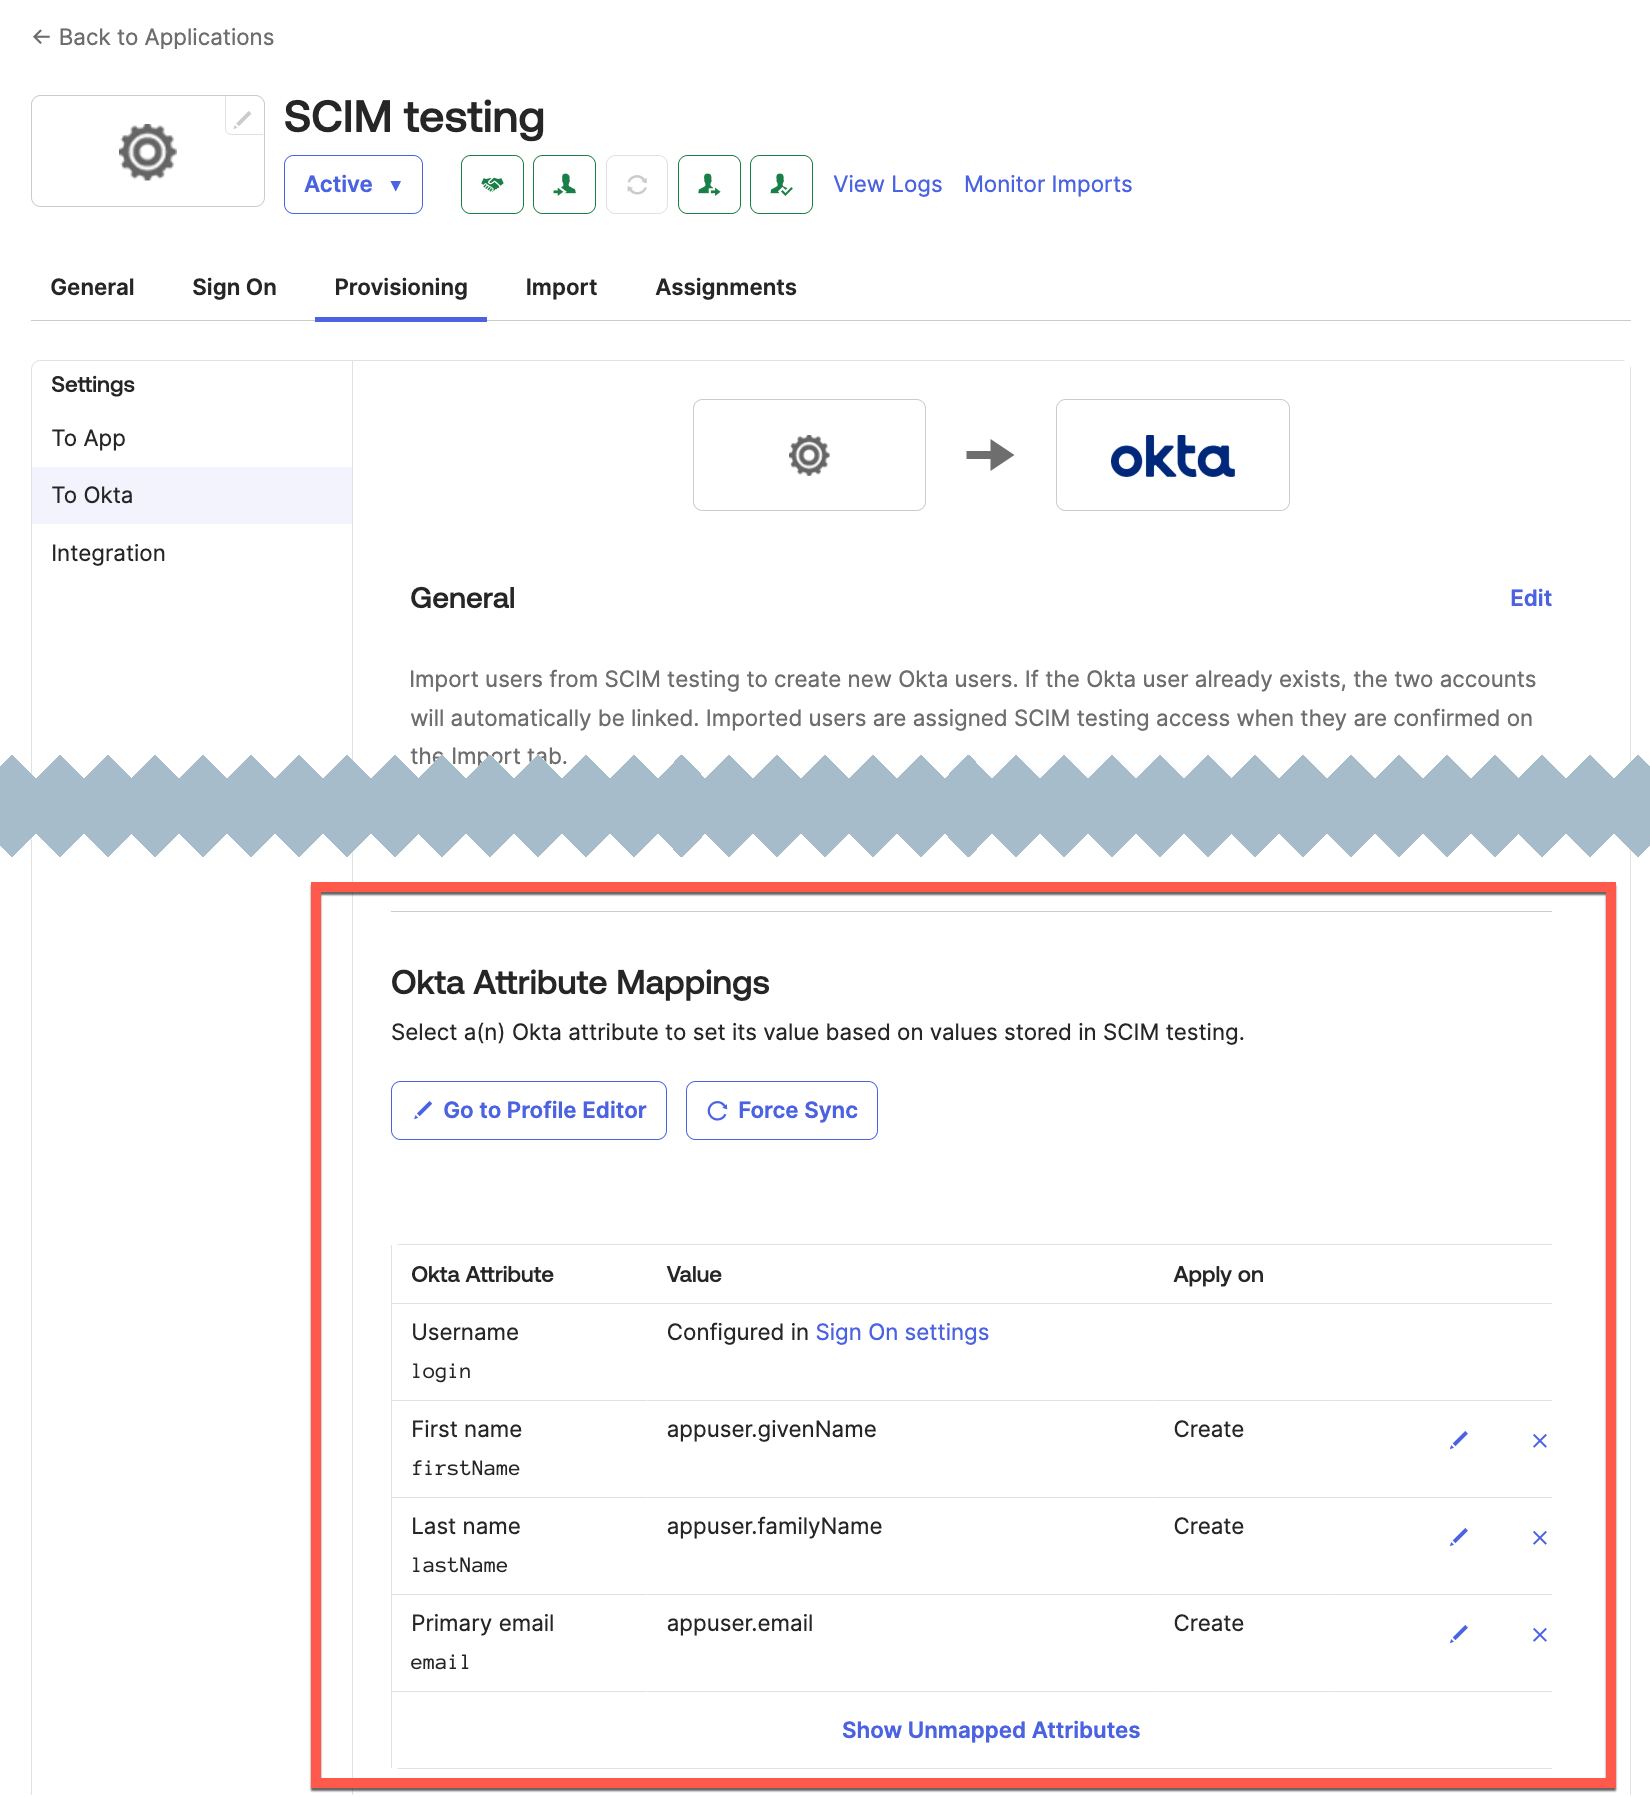
- Edit attributes that will be pushed from the provisioning app to Okta.
- Select To Okta.
- Select the Provisioning tab and scroll down to the Okta Attribute Mappings section.
- Delete all the attributes except:
- User name
- First name
- Last name
- Primary email
- Edit the attributes in the app profile.
- Navigate to Directory > Profile Editor and select the user for the app you created in Step 1.
- Delete all the attributes except:
- User name
- Given name
- Family name
- Primary email
- Roles

- Navigate to Directory > Profile Editor and select the user for the app you created in Step 1.
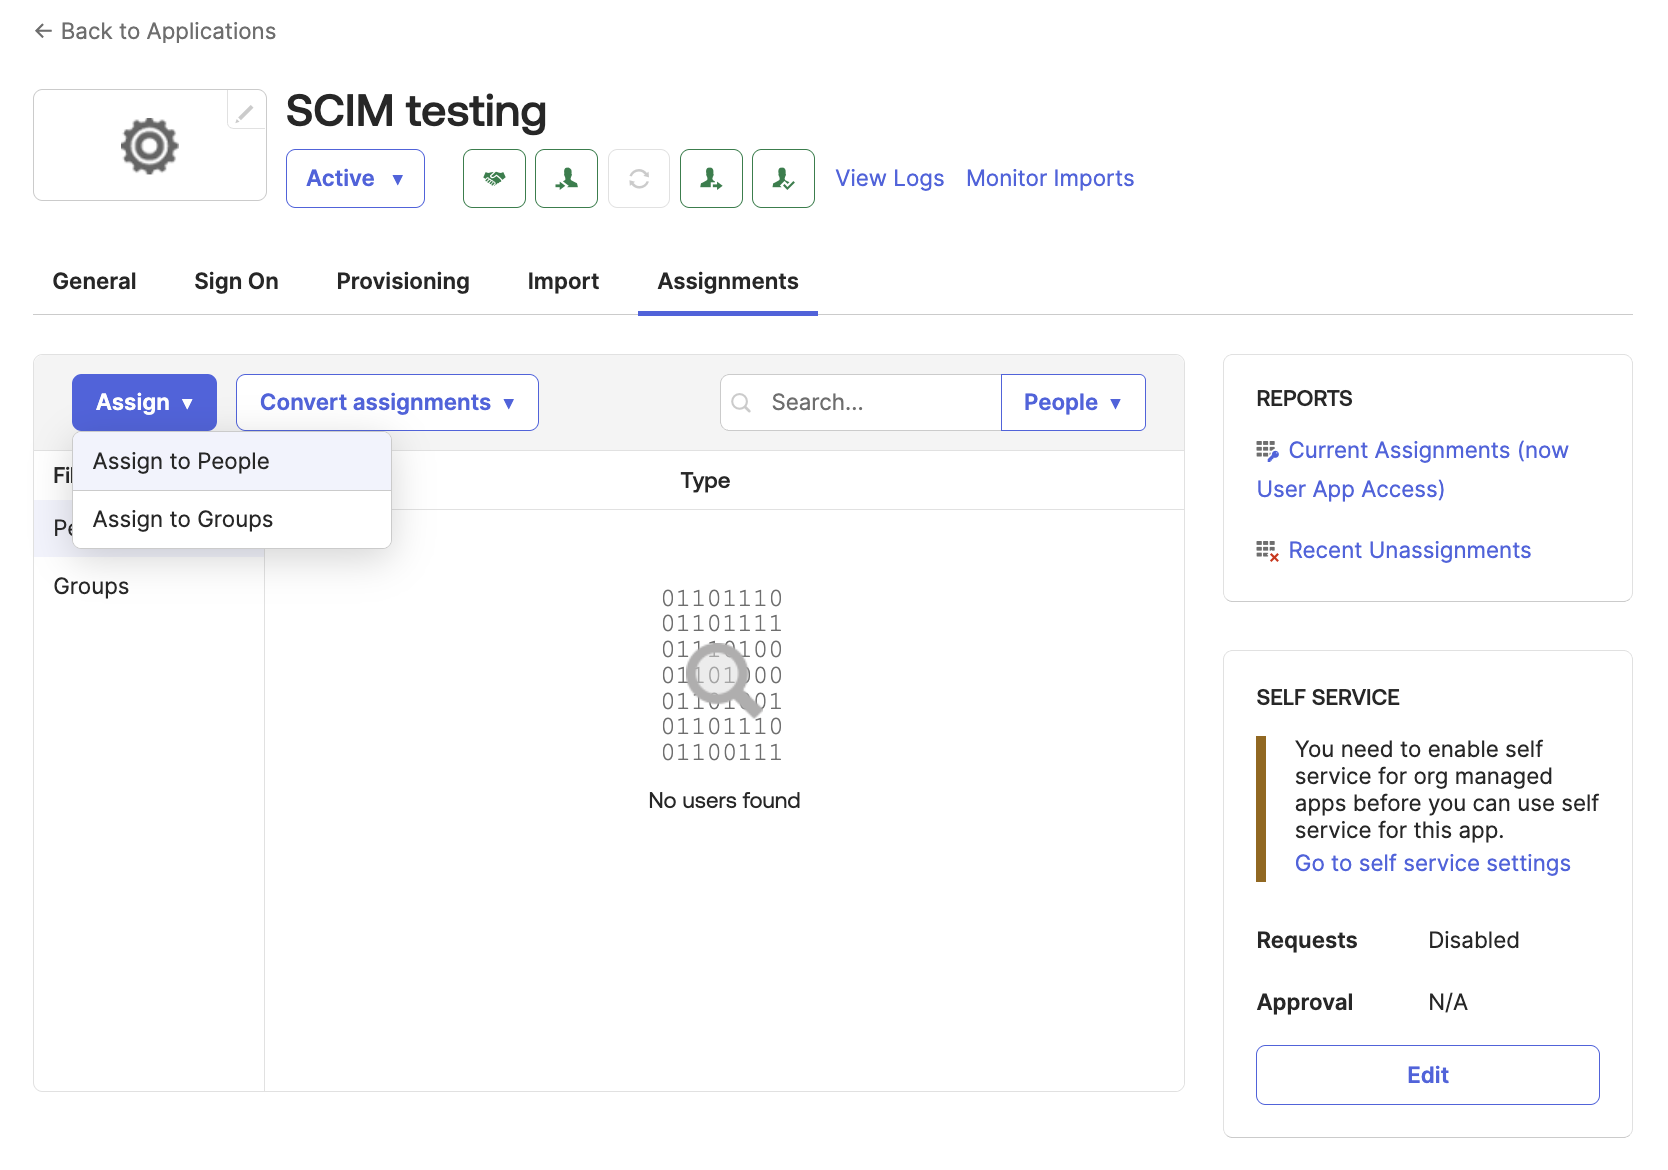
Step 5: Assign the app to people
- Select the app's Assignments tab.
- Select Assign > Assign to people.
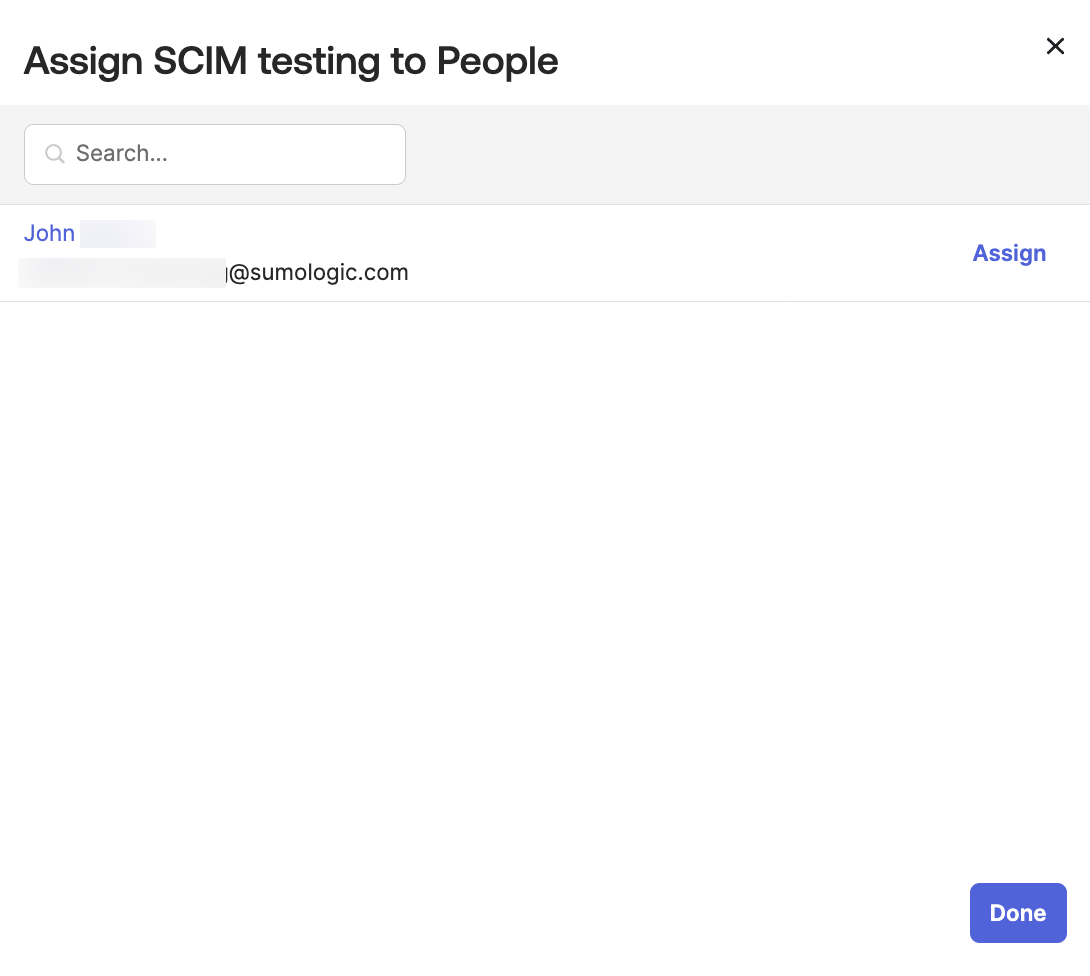
- Select a user and click Assign.
- Select a role for the user.
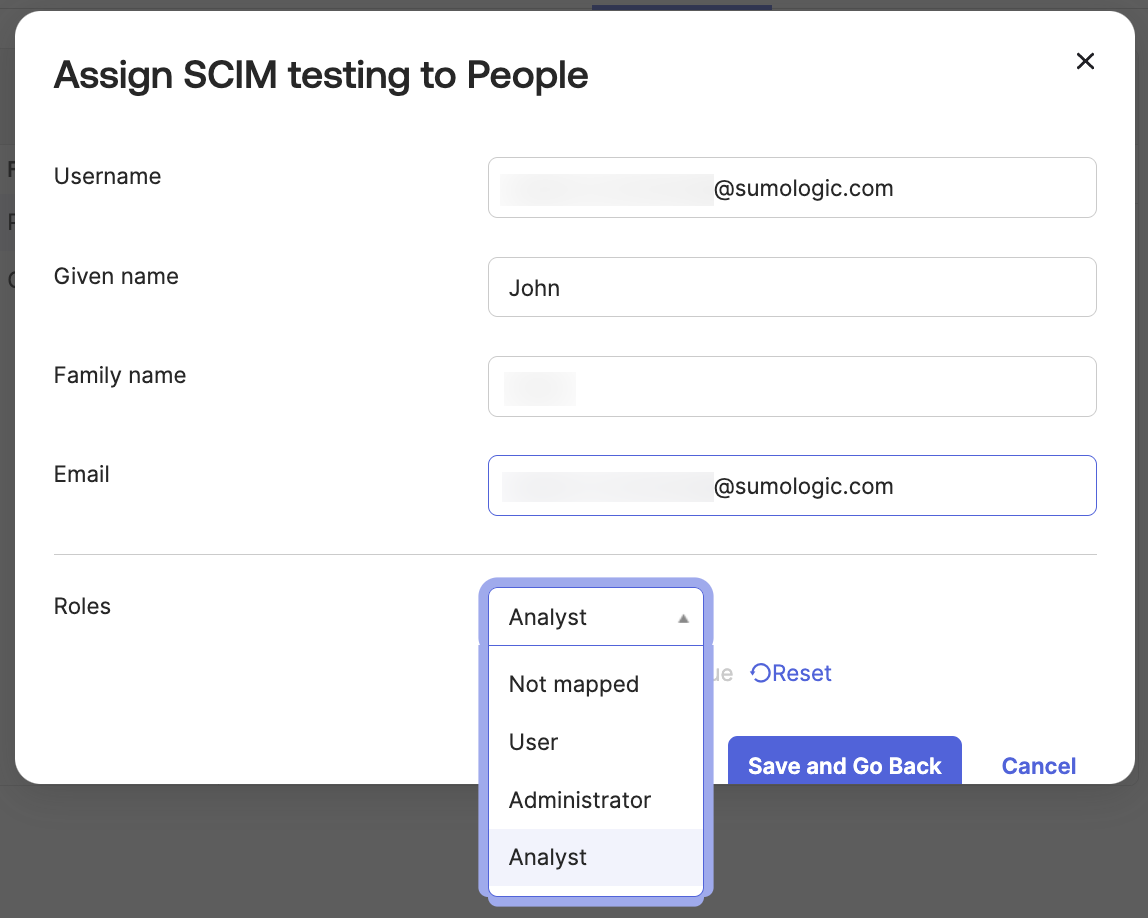
- Click Save and go back.
- Continue to assign users. When finished, click click Done.
- The assigned users are displayed in the Assignments tab.
Step 6: Verify provisioning
As soon as users are assigned to the app, they are provisioned into Sumo Logic.
- Verify in Okta:
- Navigate to Reports > System Log to see the log.
- The log should show that users you added to the app are pushed to Sumo Logic with an event info message like Push new user to external application SUCCESS.
- Verify in Sumo Logic:
- Log in to the Sumo Logic instance that you linked to the provisioning app in Step 2 when you provided the Assertion Consumer URL and entity ID.
- New UI. In the main Sumo Logic menu select Administration, and then under Users and Roles select Users. You can also click the Go To... menu at the top of the screen and select Users.
Classic UI. In the main Sumo Logic menu, select Administration > Users and Roles > Users. - Search for the users provisioned from Okta.
- You should see the users listed, and with the role given to when you assigned them to the app in Okta.
Syncing between Okta and Sumo Logic
When you modify the name, email, or role of a user assigned the app in Okta, the changes will be synced to the corresponding user in Sumo Logic.
If you unassign a user from the app in Okta, the corresponding user is deactivated in Sumo Logic. (If you later try to reassign that same user to the app, it will result in an error in Sumo Logic. You must delete the old user from Sumo Logic first so that the user can be provisioned once again from Okta.)