Active Directory V2

Version: 2.2
Updated: Dec 19, 2023
Utilize user, group, and system information from Active Directory.
Actions
- Get System Attributes (Enrichment) - Gather system attributes.
- Get User Attributes (Enrichment) - Gather user attributes.
- Group Attributes (Enrichment) - Gather group attributes.
- List Users Groups (Enrichment) - Gather user's groups.
- Create User (*Containment) - Create a new user.
- Reset Password (Containment) - Reset a user's password.
- Set Password (Containment) - Set a new password.
- Set User Attributes (Containment) - Set a system's attribute.
- Set User's Attributes (Containment) - Set a user's attributes.
- Change System OU (Containment) - Change a system's organizational unit (OU).
- Enable User (Containment) - Enable a user account.
- Disable User (Containment) - Disable a user's account.
- Remove Users From Groups (Containment) - Remove users from AD group.
- Get Groups Members (Containment) - Retrieve users from AD group.
- Add Users To Groups (Containment) - Add a user to a group.
Notes
Compatibility notice:
- LDAP over TLS only work on 636, 3269 (secure) ports but STARTTLS; only work with 389, 3268 (non-secure ports).
- LDAP over TLS required to have a CA Certificate of the active directory as Base64 encoded format.
External Libraries
Active Directory V2 configuration
Prerequisites
- An Automation Bridge installation.
- A Microsoft Windows Server with Active Directory Domain Services (AD DS) configured.
Setting up Microsoft Windows Server (optional)
If an existing Windows Server is not available, follow these steps to set up a new one in AWS:
- Create a Microsoft Windows Server 2019 Instance on AWS.
- Launch a new AWS EC2 instance.
- Choose Microsoft Windows Server 2019 Base as the AMI.
- Configure instance settings (for example, instance type, storage, security groups).
- Assign a key pair for secure access.
- Deploy the instance and wait for it to be fully initialized.
- Configure the Windows Server.
- Connect to the instance using Remote Desktop Protocol (RDP).
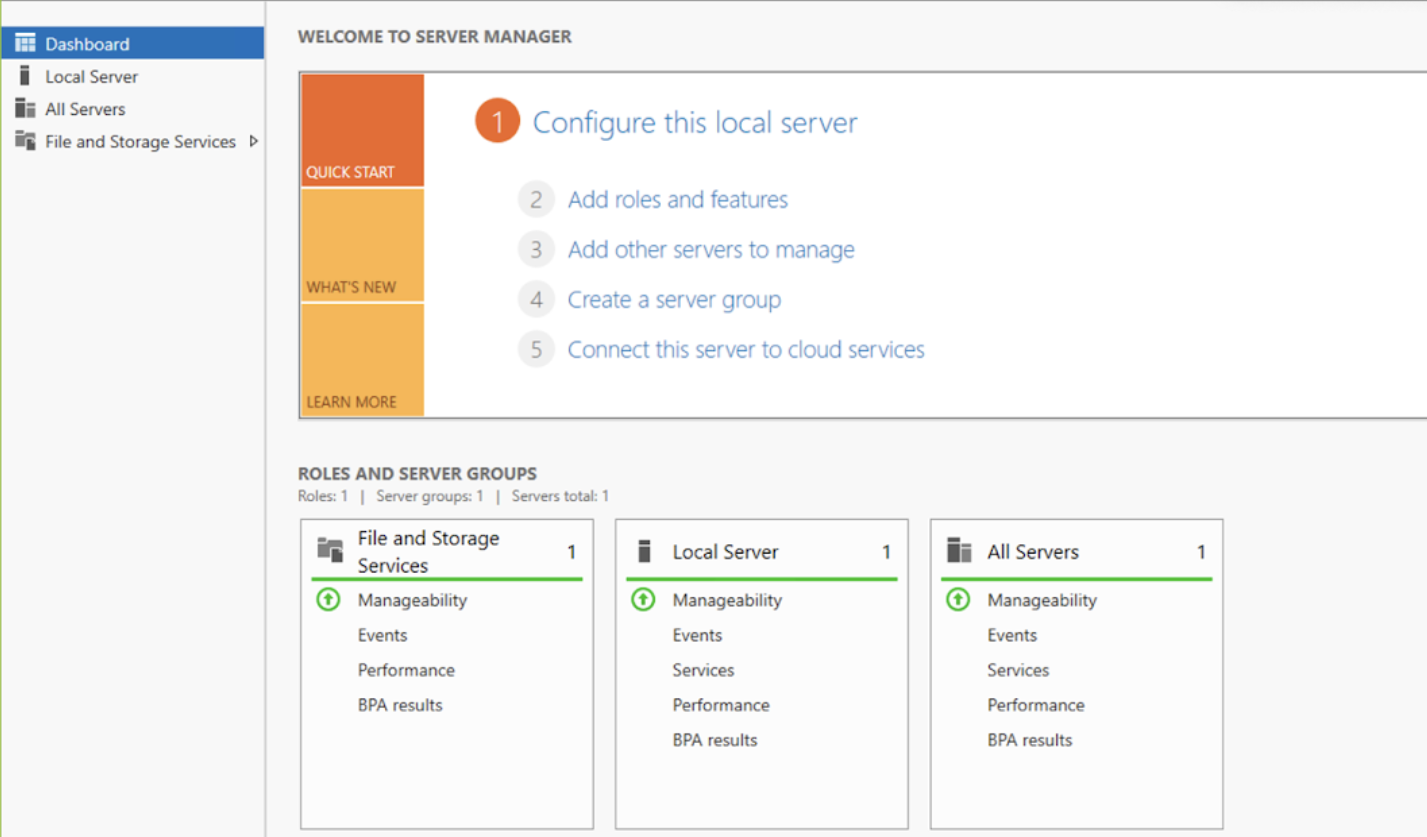
- Once logged in, open Server Manager.
- Install Active Directory Domain Services (AD DS).
- In Server Manager, select Add roles and features.
- Choose Role-based or feature-based installation.
- Select the Active Directory Domain Services (AD DS) role.
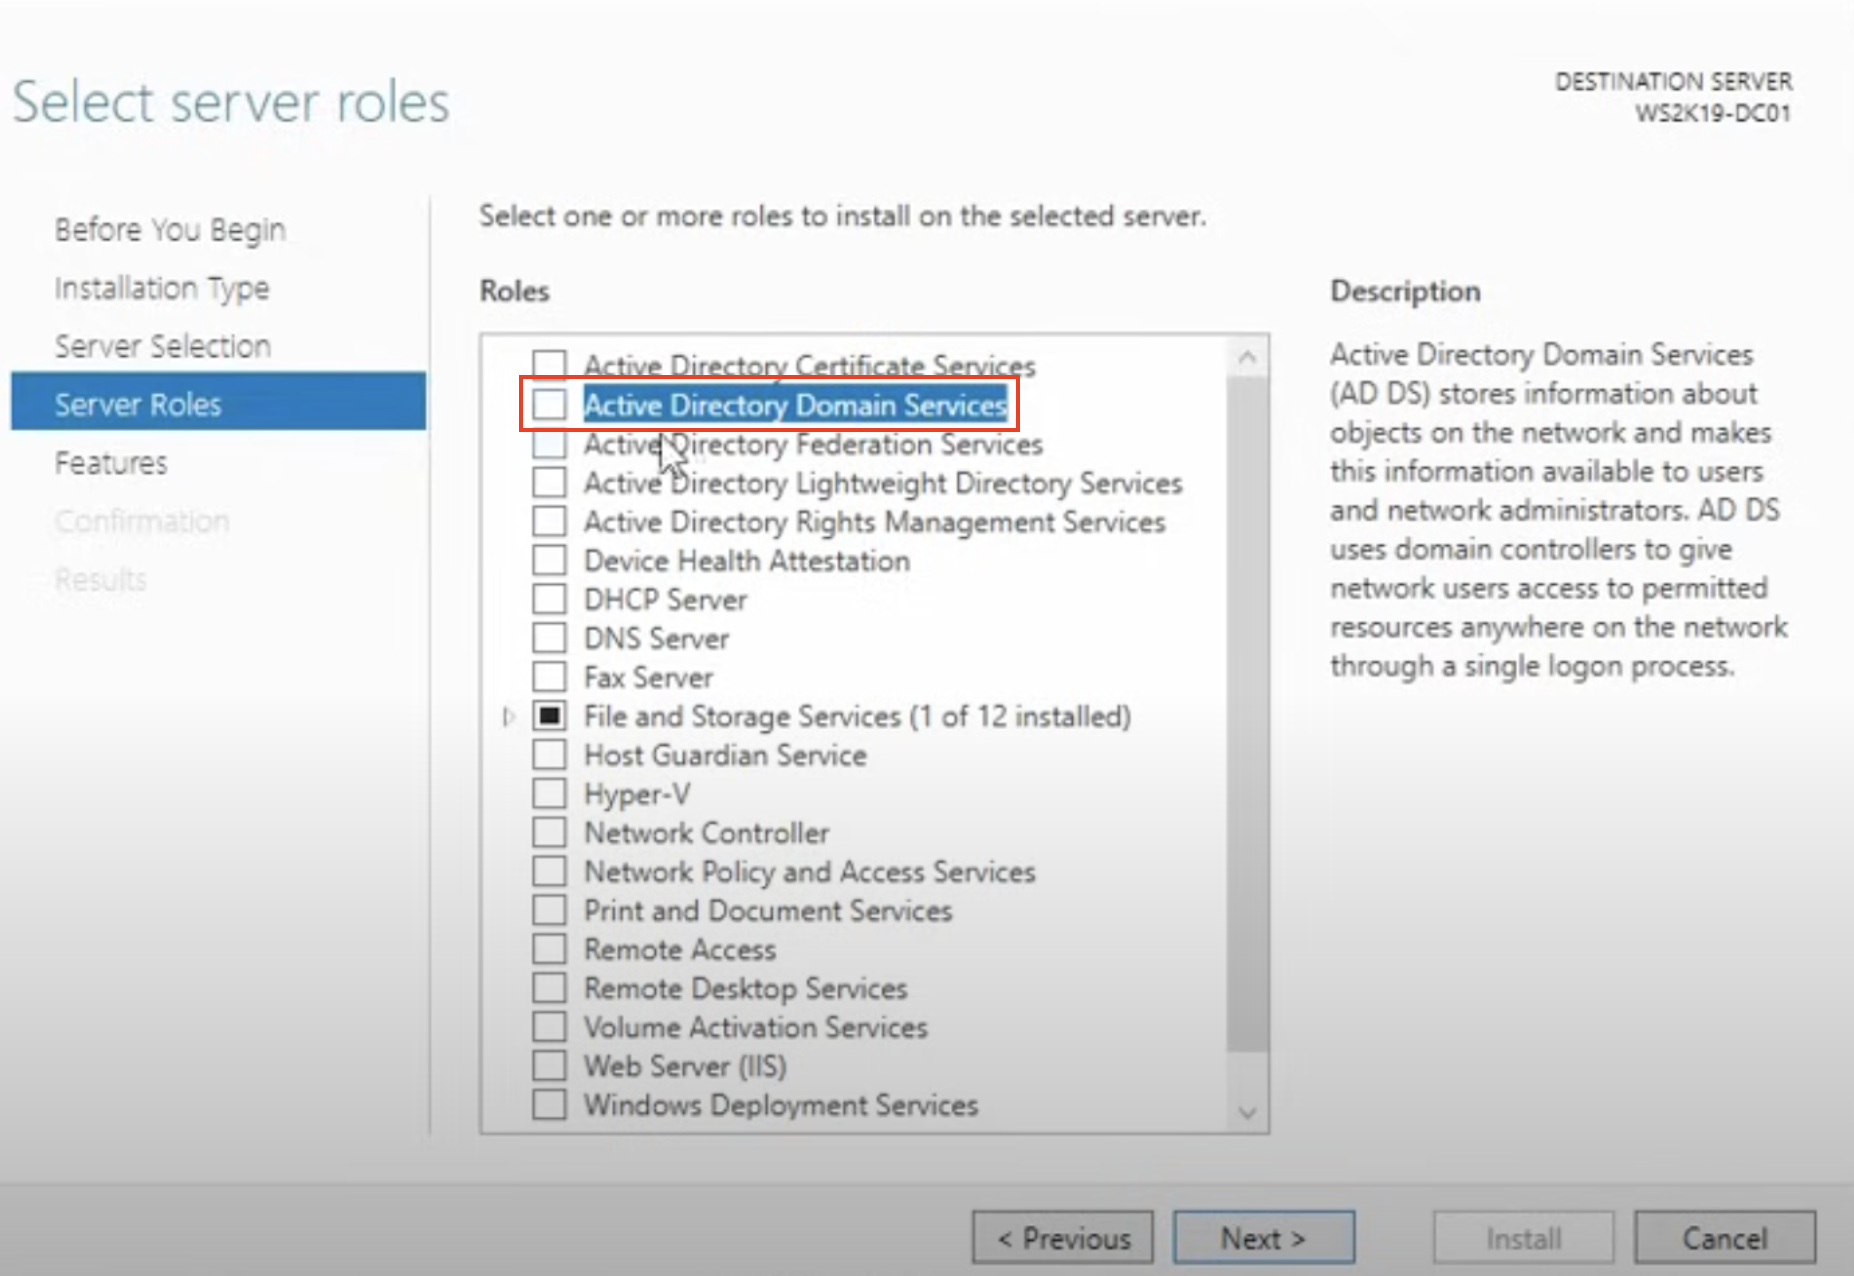
- Proceed with the installation and wait for it to complete.
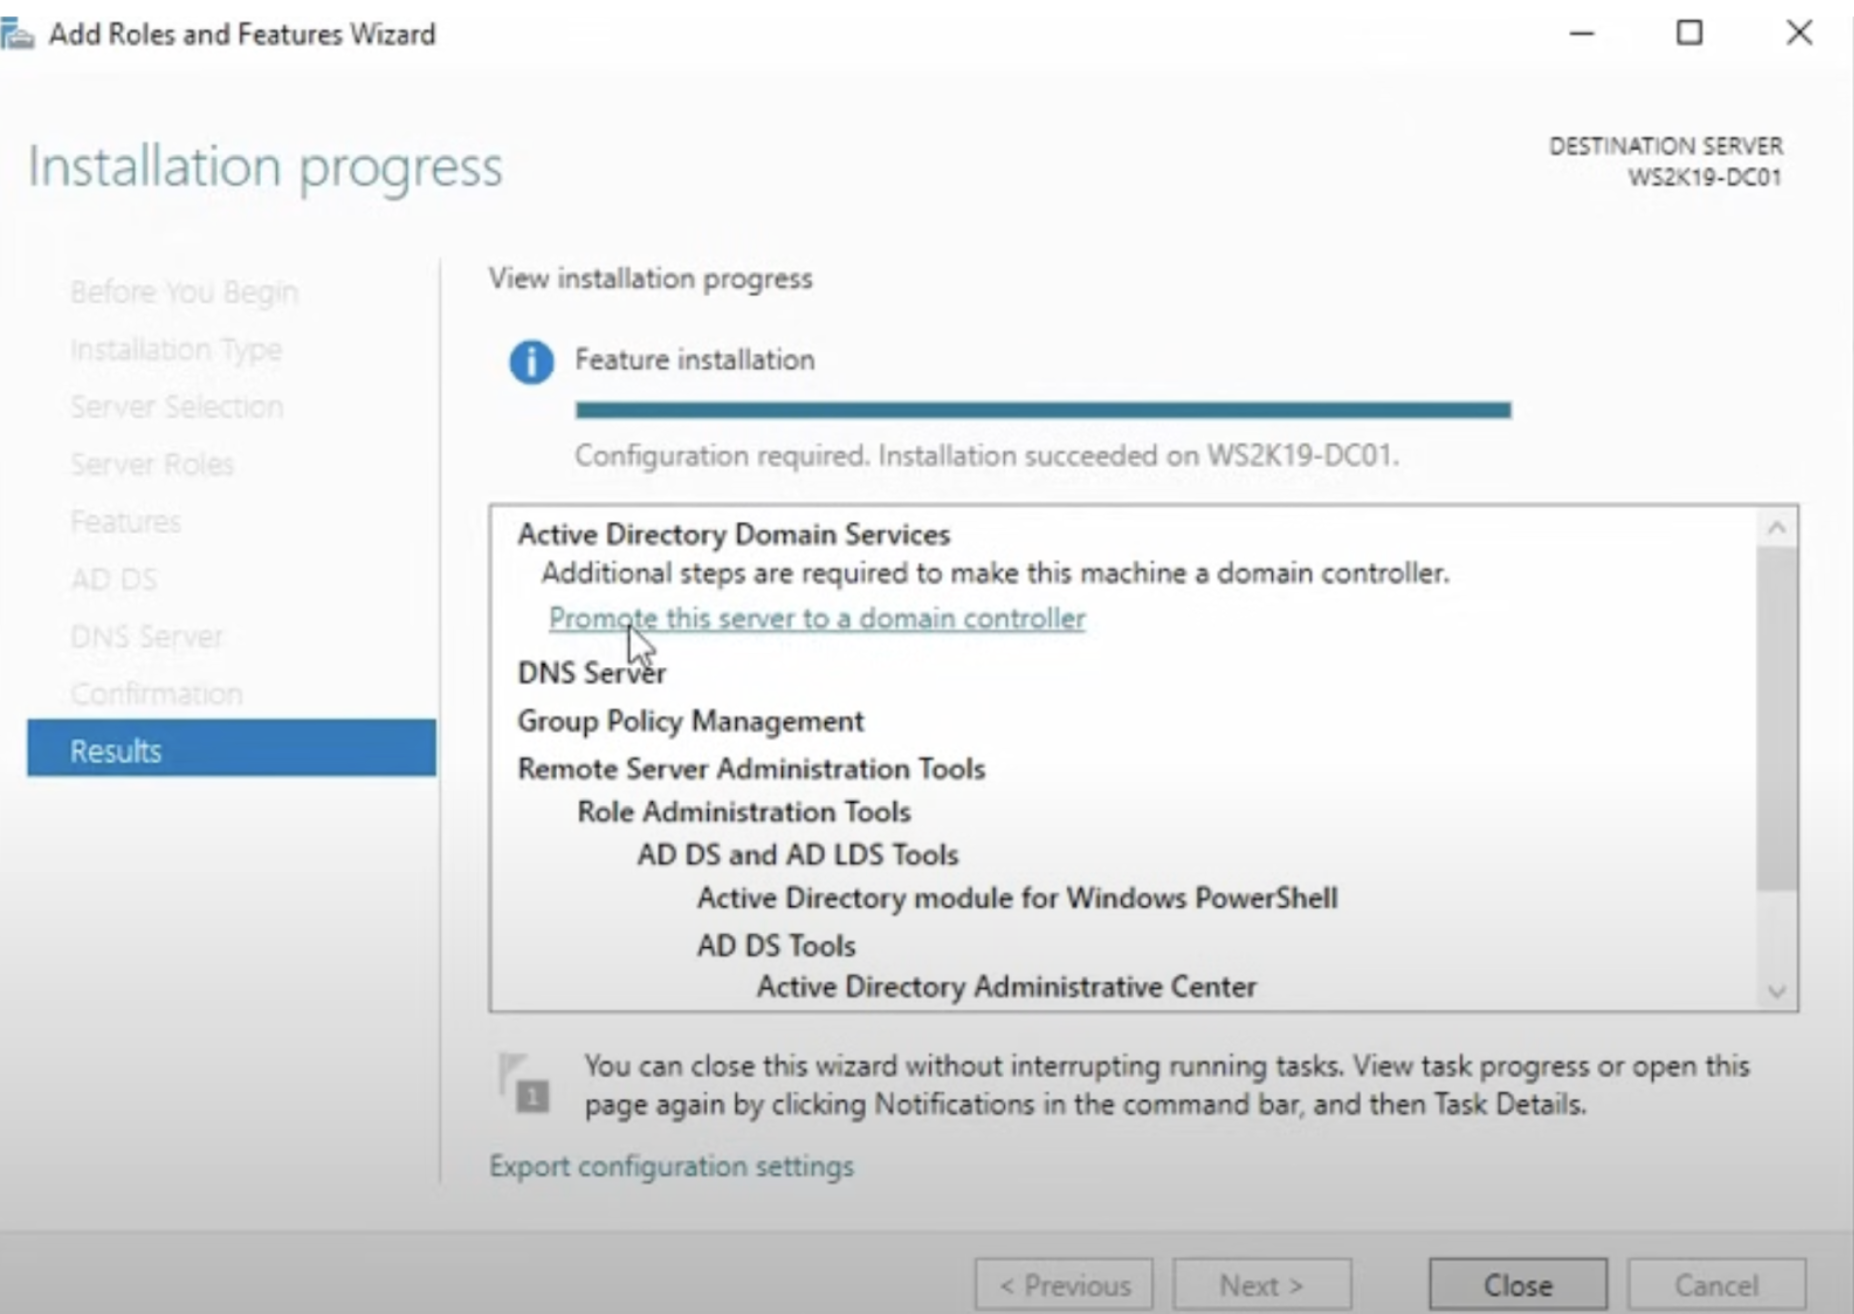
- In Server Manager, select Add roles and features.
- Promote the server to a domain controller.
- After installation, navigate to Server Manager > AD DS.
- Click on Promote this server to a domain controller.
- Choose Add a new forest and provide a root domain name (for example,
csoar.com).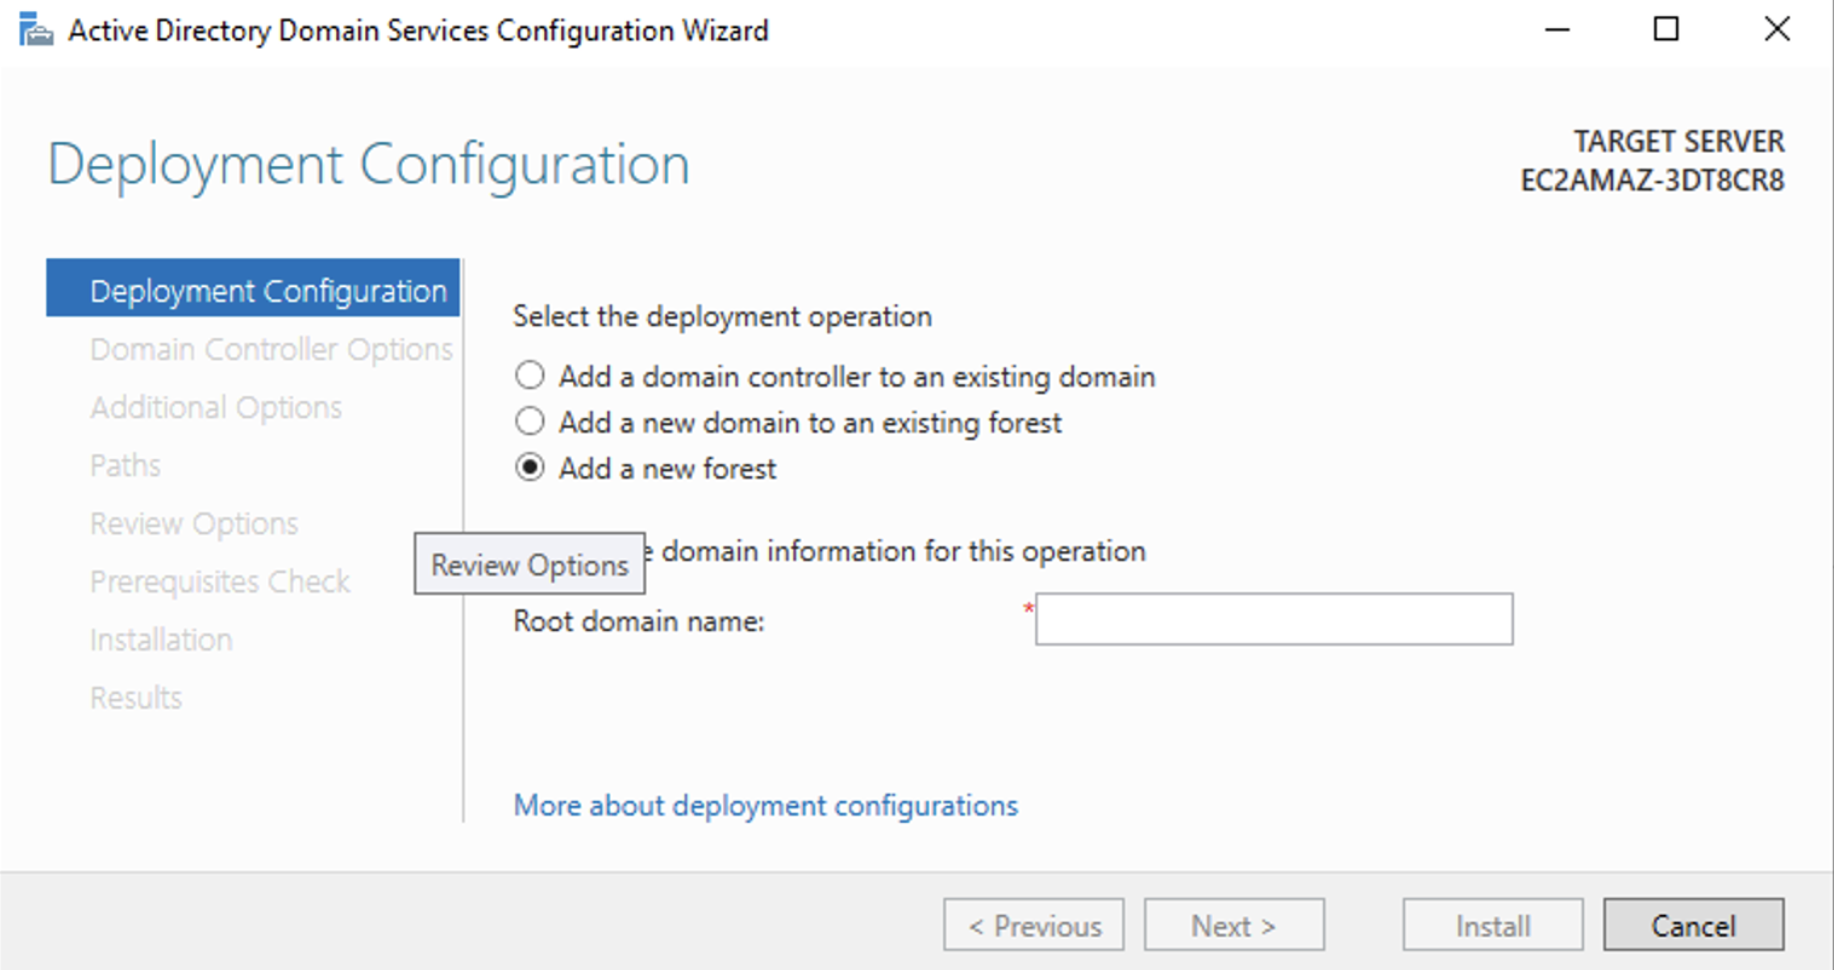
- Configure Domain Controller Options.

- Set a Directory Services Restore Mode (DSRM) password.
- Complete the installation and restart the server.
- Verify Active Directory setup.
- After rebooting, log back in and open Active Directory Users and Computers.
- Verify that the domain is properly configured.
Configure Active Directory V2 in Automation Service and Cloud SOAR
Before you can use this automation integration, you must configure its authentication settings so that the product you're integrating with can communicate with Sumo Logic. For general guidance, see Configure Authentication for Automation Integrations.
How to open the integration's configuration dialog
- Access App Central and install the integration. (You can configure at installation, or after installation with the following steps.)
- Go to the Integrations page.
Classic UI. In the main Sumo Logic menu, select Automation and then select Integrations in the left nav bar.
New UI. In the main Sumo Logic menu, select Automation > Integrations. You can also click the Go To... menu at the top of the screen and select Integrations. - Select the installed integration.
- Hover over the resource name and click the Edit button that appears.
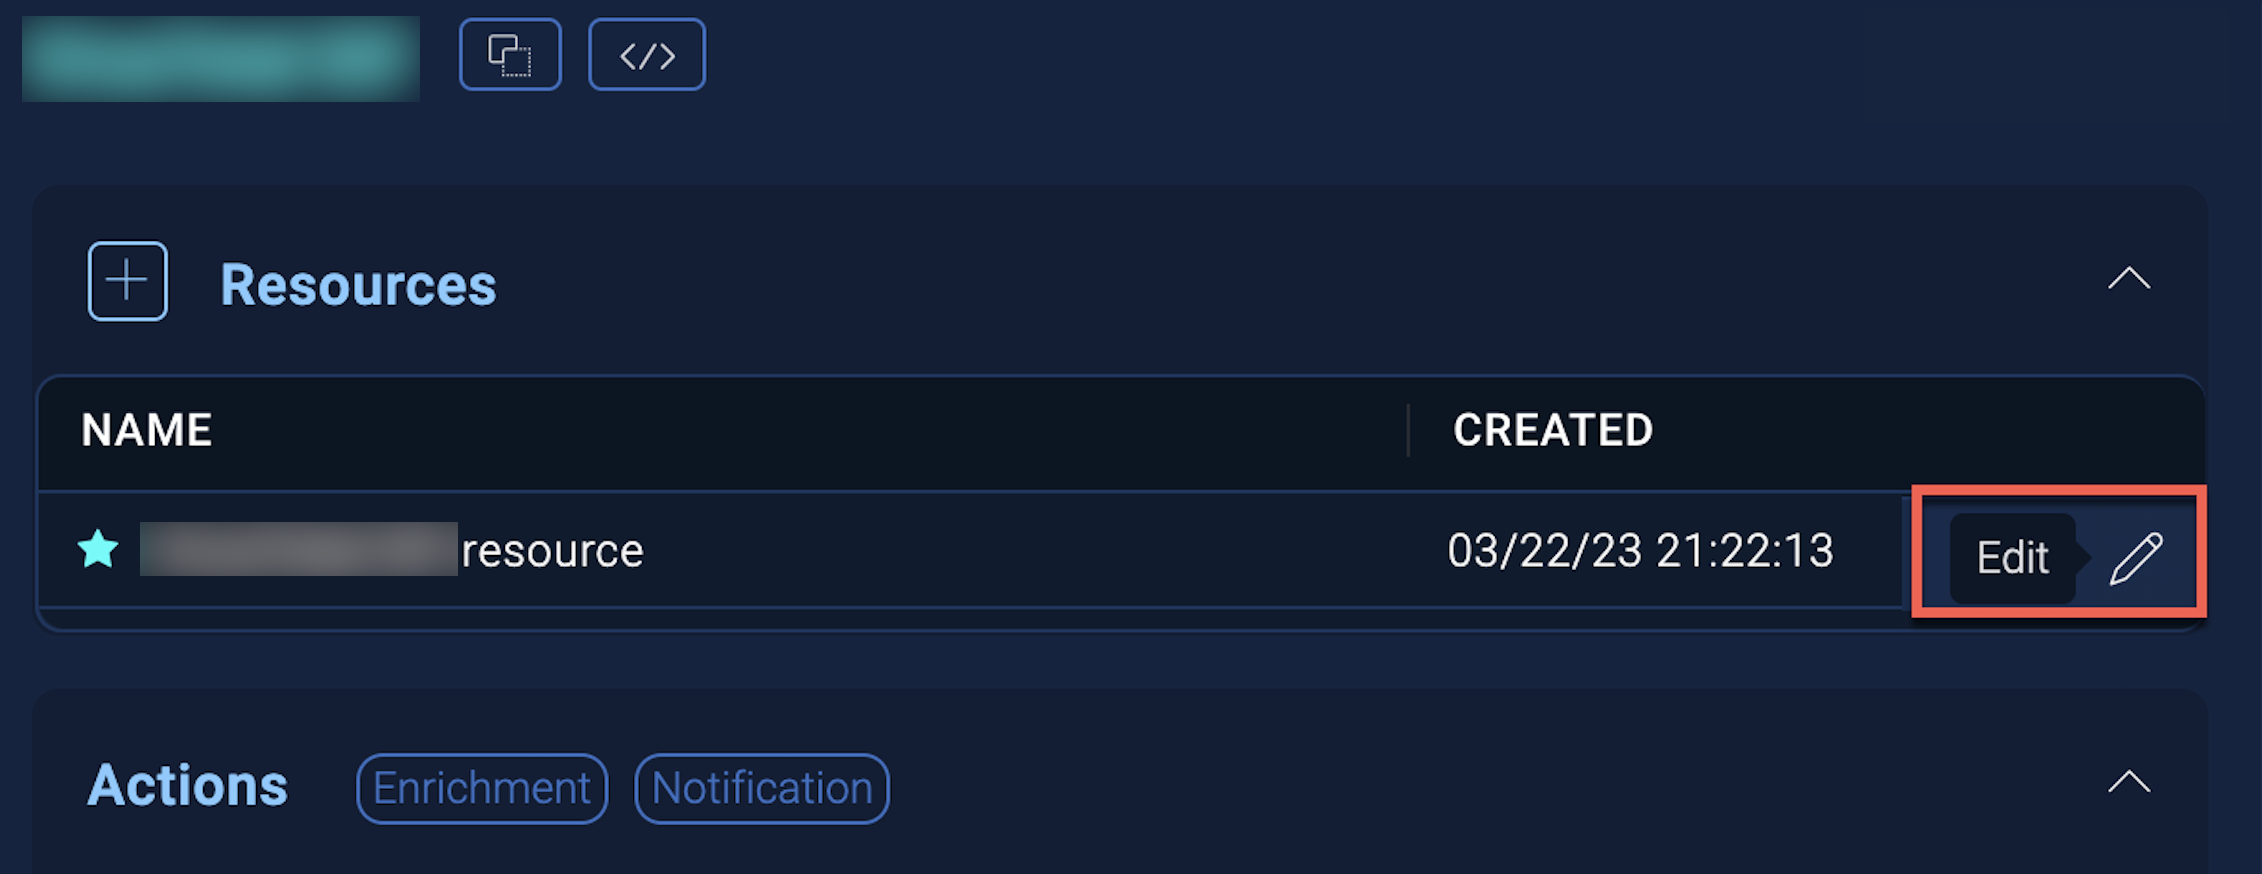
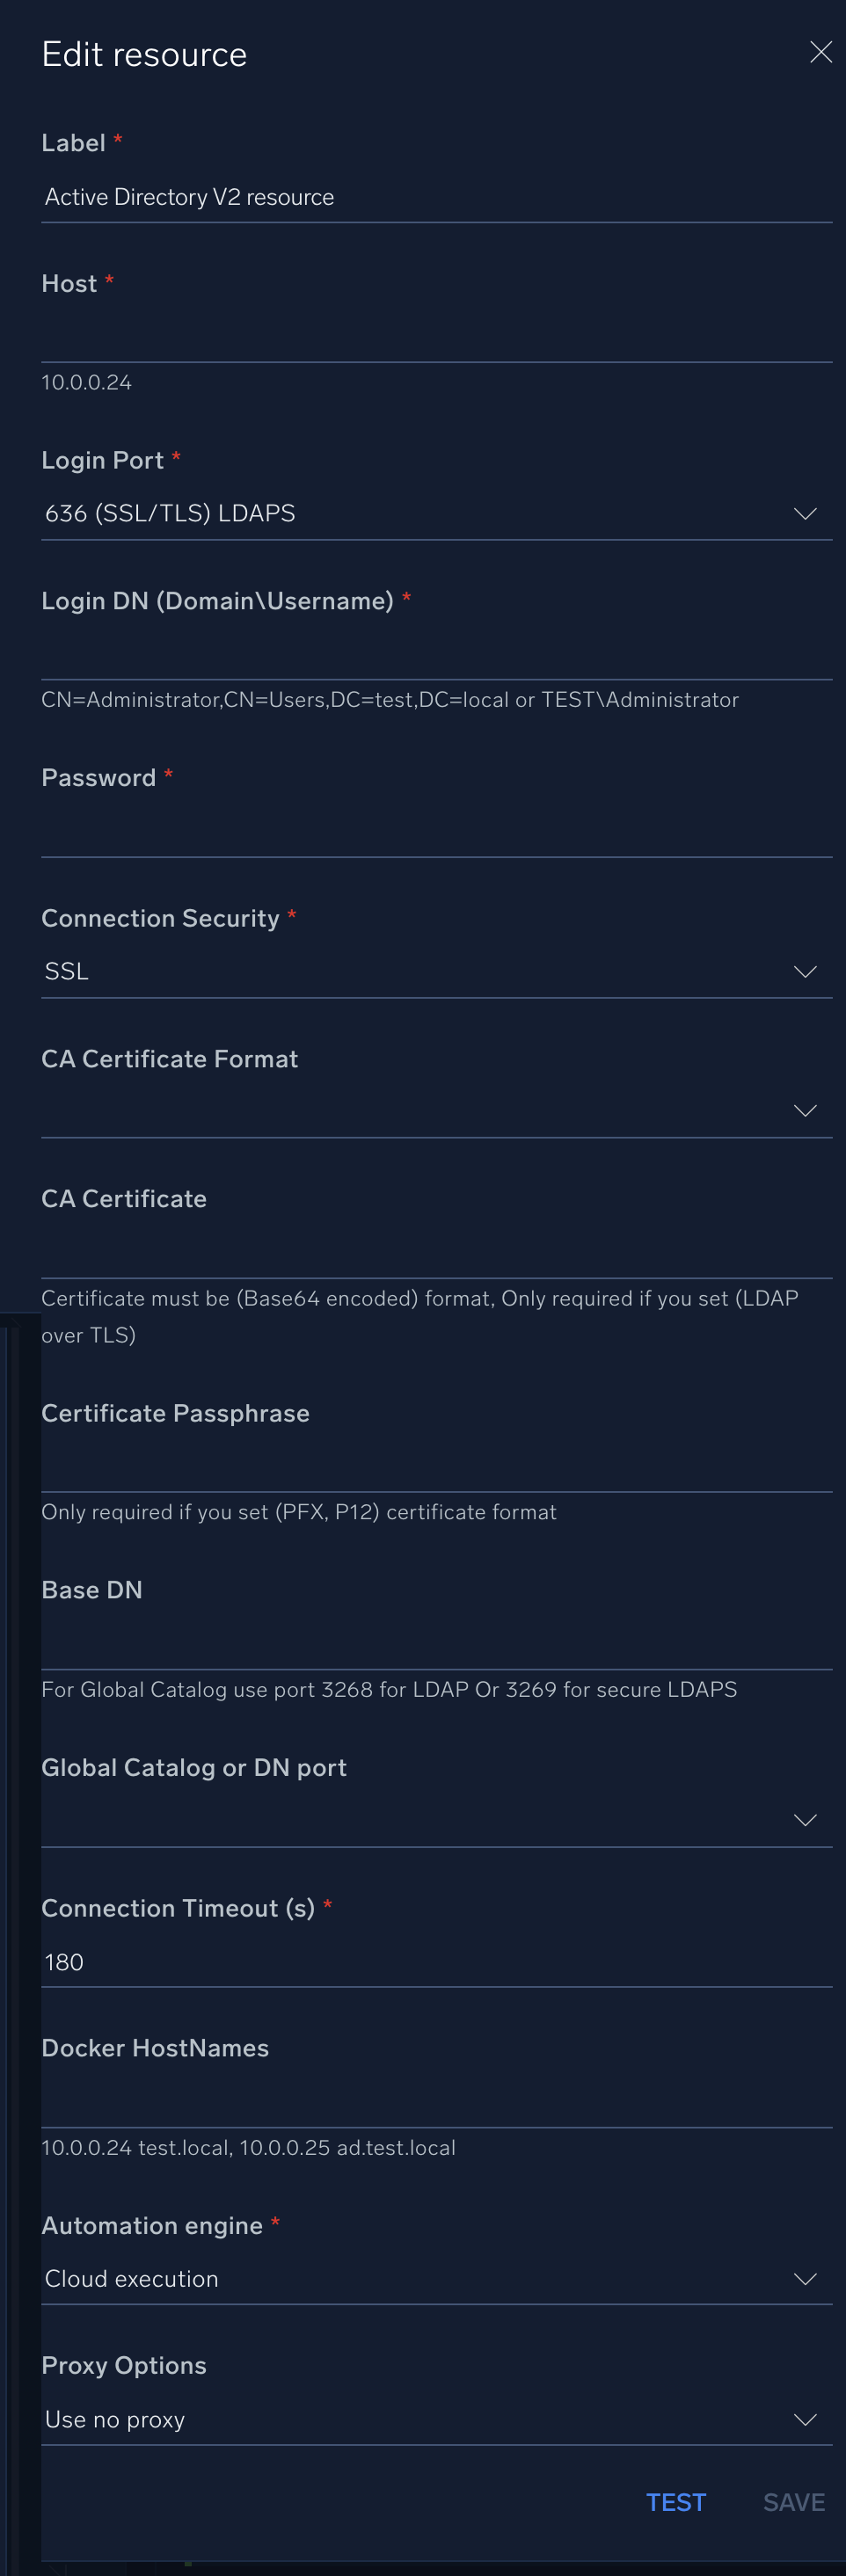
In the configuration dialog, enter information from the product you're integrating with. When done, click TEST to test the configuration, and click SAVE to save the configuration:
-
Label. Enter the name you want to use for the resource.
-
Host. The hostname or IP address of the AD server.
-
Login Port. The port used for LDAP authentication. The default is
389for LDAP and636for LDAPS. -
Login DN (Distinguished Name). Enter the distinguished name format (for example,
CN=Administrator,CN=Users,DC=csoar,DC=com). See the following sections for information about how to get the login DN. -
Password. The corresponding password for the provided username.
-
Connection Security. Select the type of security to use for communication (SSL, NonSSL, StartTLS, or LDAP over TLS).
-
CA Certificate Format. Select the format (PFX, P12 or PEM).
-
CA Certificate. Enter the certificate. Only required if you selected LDAP over TLS. The certificate must be in Base64 encoded format.
-
Certificate Passphrase. Enter the passphrase. Only required if you selected the PFX, P12 certificate format.
-
Base DN. Enter the Base Distinguished Name.
-
Global Catalog or DN Port. Select the catalog or port. For global catalog, select port 3268 for LDAP or 3269 for secure LDAP.
-
Connection Timeout (s). Set the maximum amount of time the integration will wait for a server's response before terminating the connection. Enter the connection timeout time in seconds (for example,
180). -
Docker Hostnames. Enter the container's hostname.
-
Verify Server Certificate. Select to validate the server’s SSL certificate.
-
Automation Engine. Select Cloud execution for this certified integration. Select a bridge option only for a custom integration. See Cloud or Bridge execution.
-
Proxy Options. Select whether to use a proxy. (Applies only if the automation engine uses a bridge instead of cloud execution.)
- Use no proxy. Communication runs on the bridge and does not use a proxy.
- Use default proxy. Use the default proxy for the bridge set up as described in Using a proxy.
- Use different proxy. Use your own proxy service. Provide the proxy URL and port number.
For information about Microsoft Entra Connect V2 (formerly Active Directory V2), see Microsoft Entra Connect V2 documentation.
How to get login DN with a local account
Method 1: Using PowerShell (Get-ADUser)
- Open PowerShell as an administrator.
- Run the following command:
Get-ADUser -Identity Administrator | Select-Object DistinguishedName - Example output:
DistinguishedName
-----------------
CN=Administrator,CN=Users,DC=csoar,DC=com
The DistinguishedName field contains the full LDAP path.
Method 2: Using Active Directory Users and Computers (GUI)
- Open Active Directory Users and Computers (ADUC) (dsa.msc).
- Enable "Advanced Features" by selecting View > Advanced Features.
- Navigate to the user account (for example, Administrator).
- Right-click the user and select Properties.
- Go to the Attribute Editor tab.
- Find the
distinguishedNameattribute. The value will be like:CN=Administrator,CN=Users,DC=csoar,DC=com. This is your Login DN.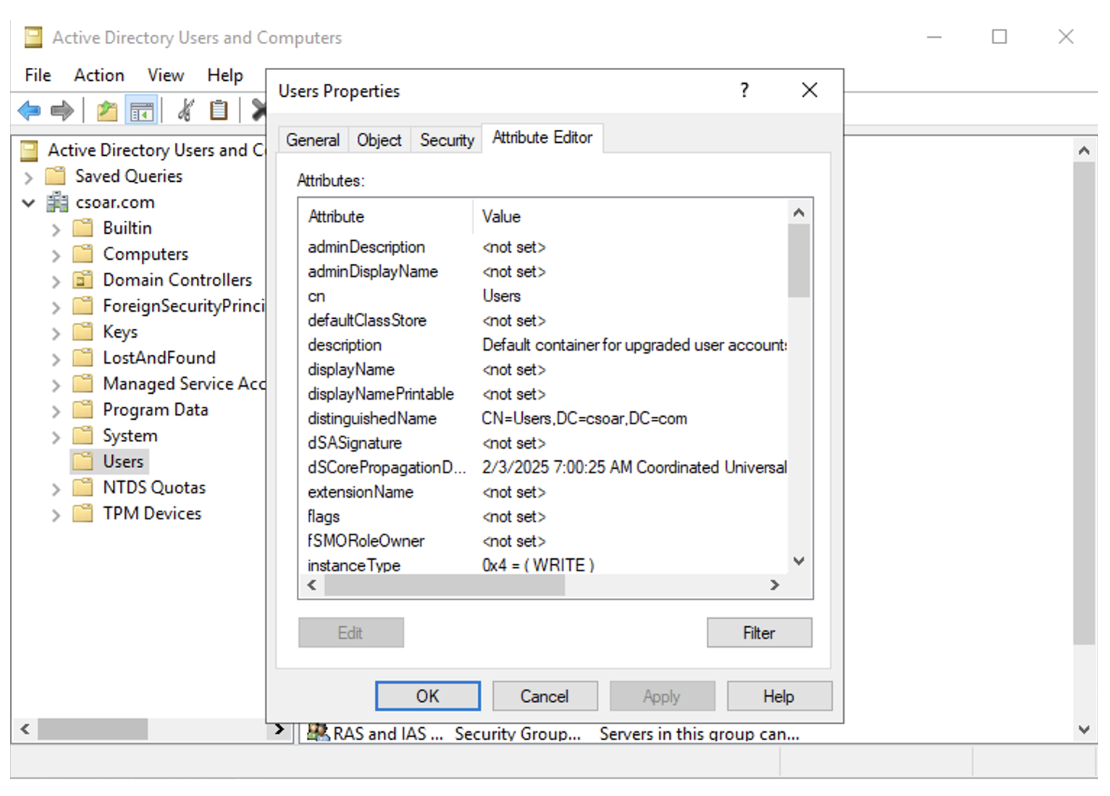
How to get login DN with a service account
Once the service account is created in the Organization Unit:
- Open PowerShell as an administrator.
- Run the following command:
Get-ADUser -Identity <service-account-name> - To view all the service accounts inside AD:
Get-ADUser -Filter * | Select-Object Name, SamAccountName, DistinguishedName - Example output:

- Below is the example path:
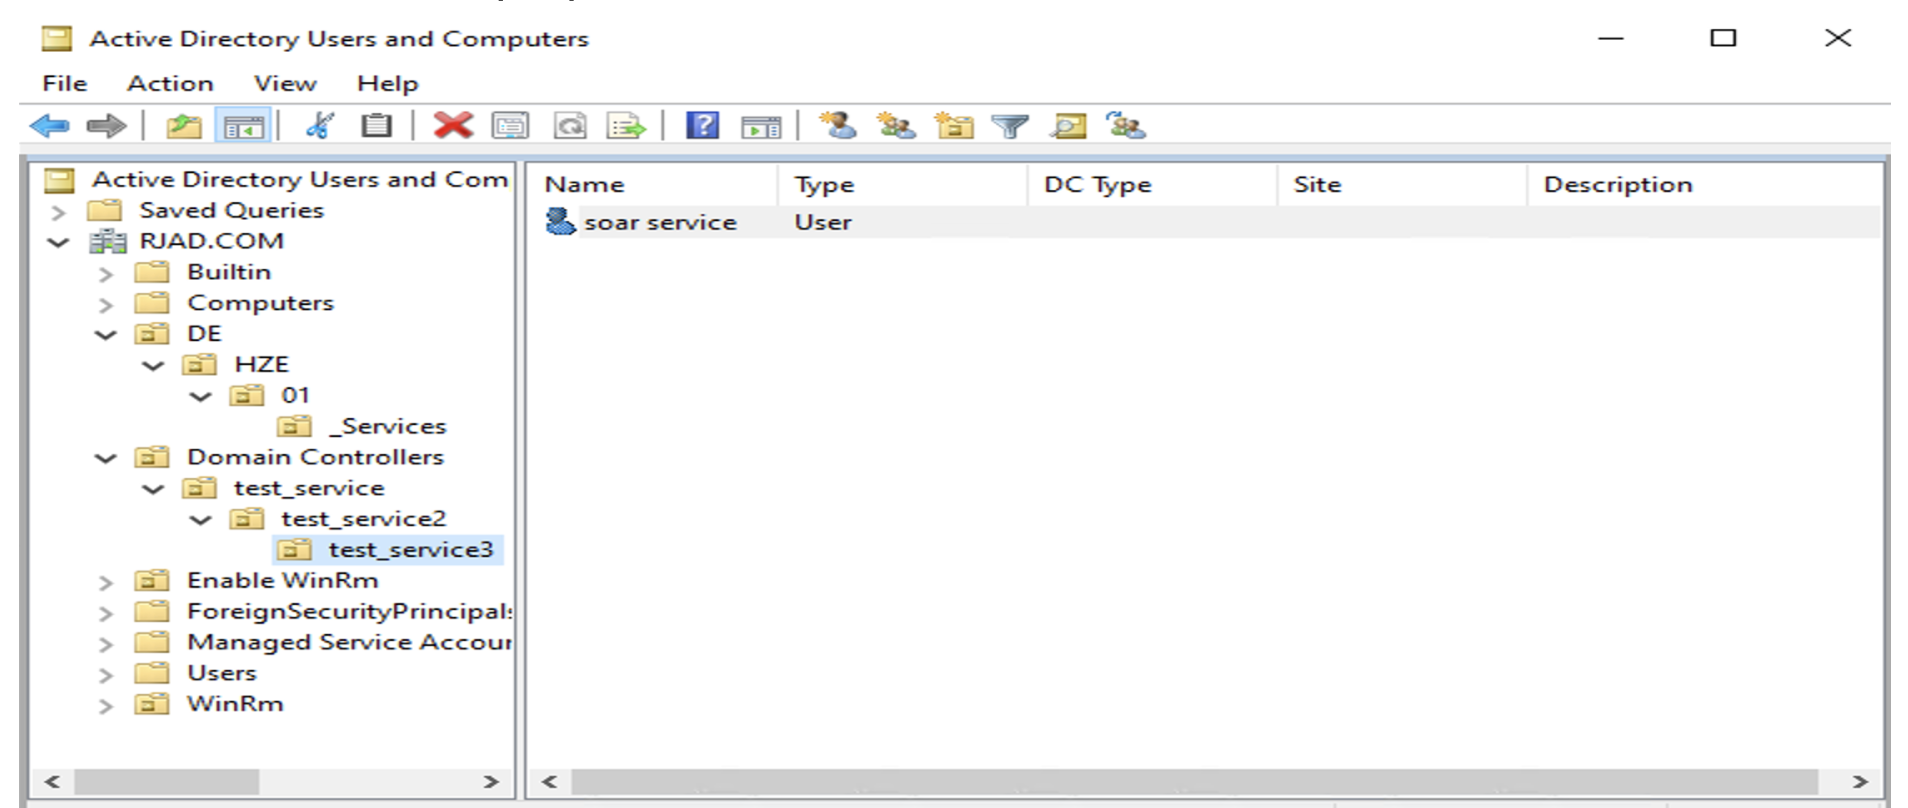
- Add the
distinguishedNameas the Login DN and correct the password of the service account.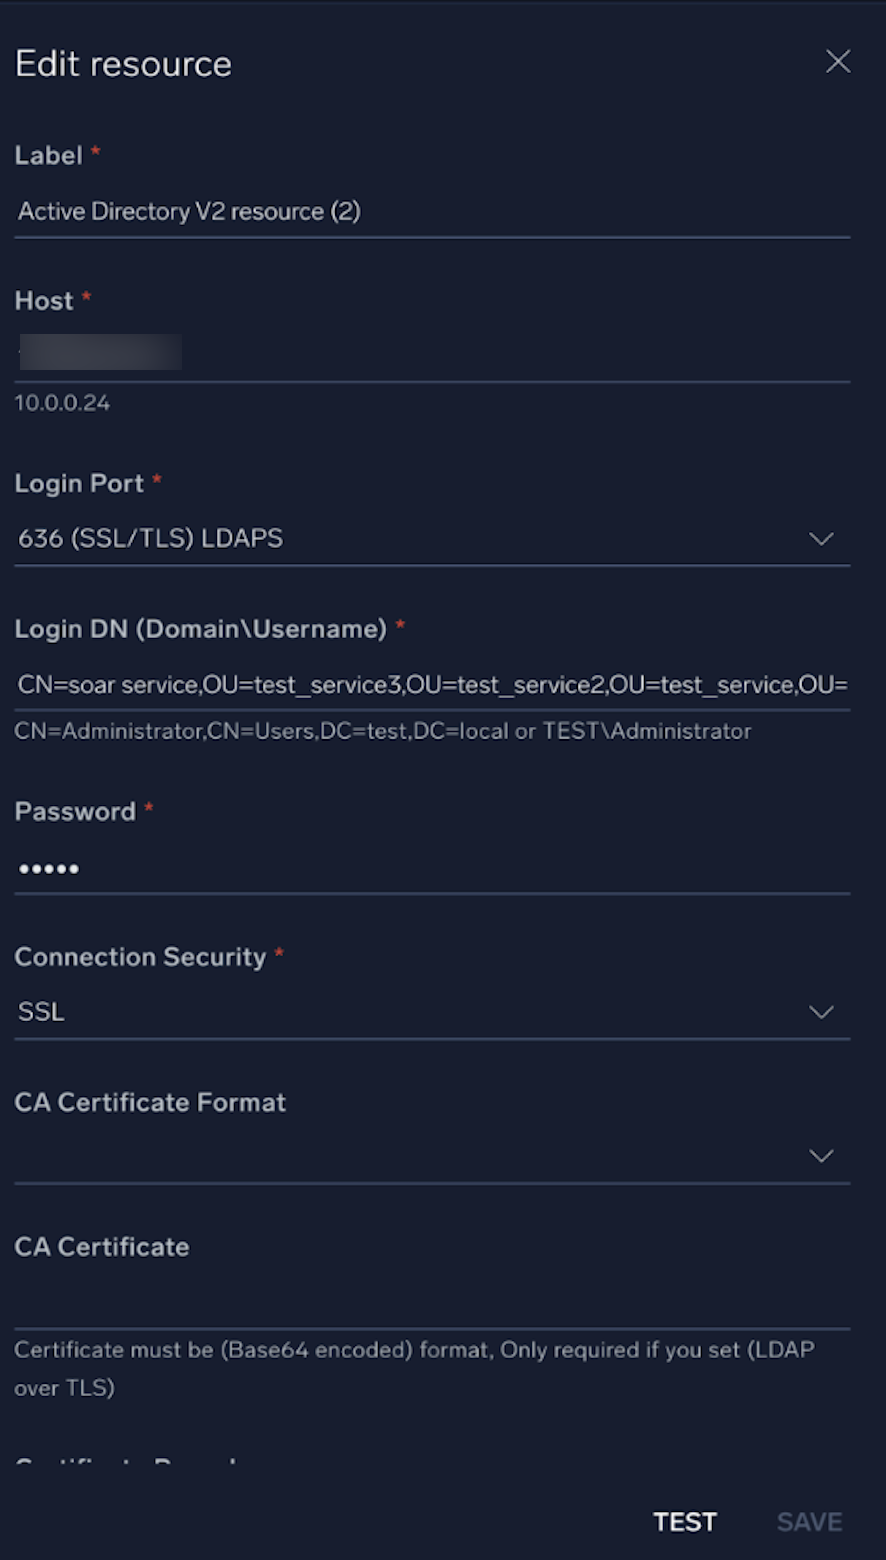
Below is the full form of each term: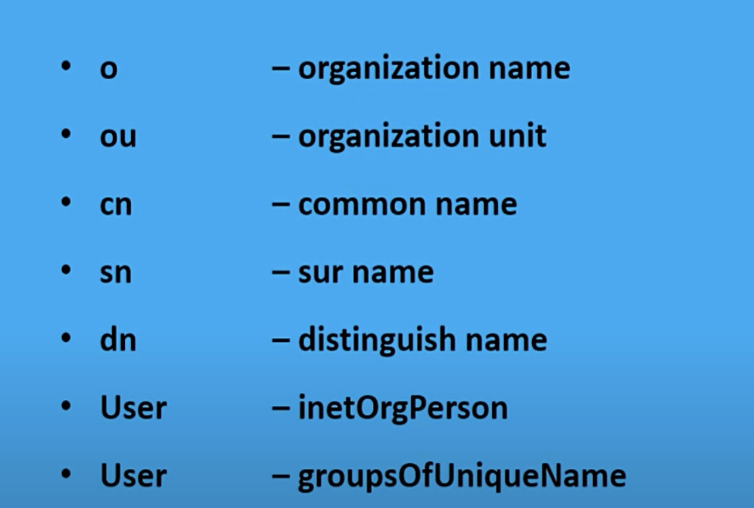
Change Log
- March 25, 2021 - First upload
- March 11, 2022 - Logo
- June 21, 2023 (v2.1) - Updated the integration with Environmental Variables
- December 19, 2023 (v2.2)
- Updated action: User Attributes
- Now, with the User Attributes Action, users can be filtered based on their distinguishedName (DN)
- Updated action: User Attributes