Automox

Version: 1.1
Updated: Jul 03, 2023
Automox is a cloud-native patching platform that automates patch management across Windows, macOS, Linux, and third-party software including Adobe, Java, Firefox, Chrome, and Windows.
Actions
- List Devices (Enrichment) - Retrieve a detailed list of all devices for the authenticated user.
- List Organizations (Enrichment) - Retrieve a detailed list of all organizations for the authenticated user.
- List Users (Enrichment) - Retrieve a list of all users with access to an organization.
- List Server Groups (Enrichment) - Retrieve all server group objects for the authenticated user.
- List Tasks (Enrichment) - List all tasks for an organization, with the ability to filter and sort results.
- Run Command (Containment) - Force a device to Scan, Patch, or Reboot for immediate execution.
- Submit CSV File (Containment) - Upload a vulnerability report to Automox.
- Submit CSV File (Containment) - Upload a vulnerability report to Automox.
- Update Task (Containment) - Change the state of a task.
Automox configuration
Follow these steps to get your API key from Automox:
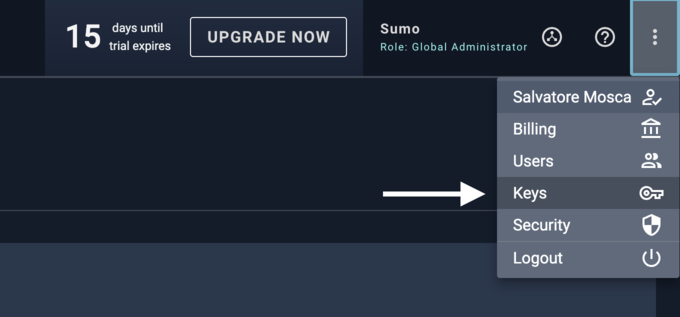
- Select Keys from the menu.
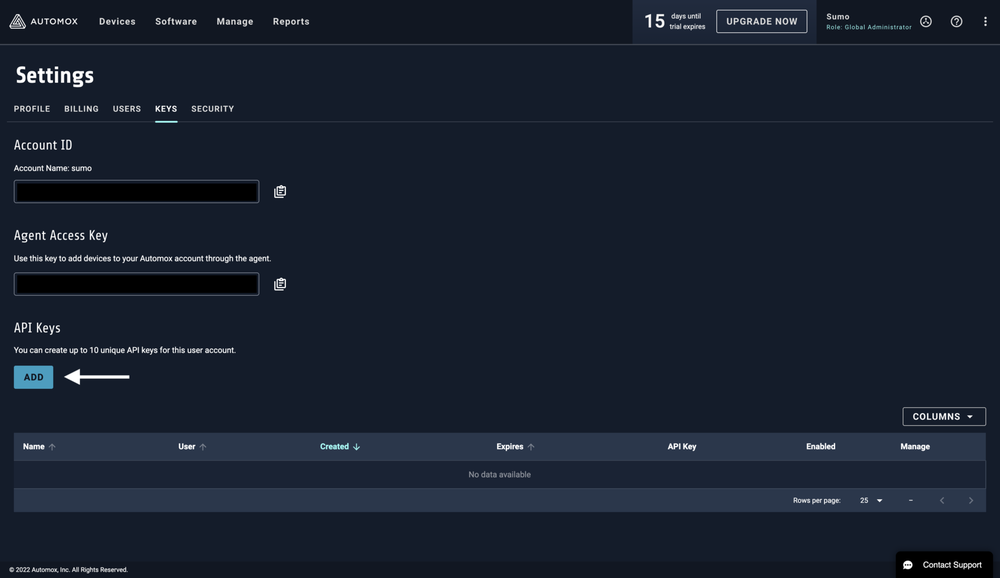
- Click the ADD button to add a new API key.
- Choose a name for this key and then click the button to generate the new key.
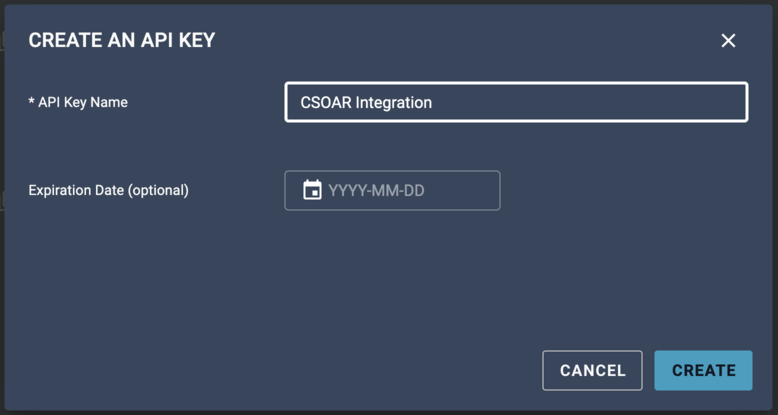
- Copy the API key.

Configure Automox in Automation Service and Cloud SOAR
Before you can use this automation integration, you must configure its authentication settings so that the product you're integrating with can communicate with Sumo Logic. For general guidance, see Configure Authentication for Automation Integrations.
How to open the integration's configuration dialog
- Access App Central and install the integration. (You can configure at installation, or after installation with the following steps.)
- Go to the Integrations page.
Classic UI. In the main Sumo Logic menu, select Automation and then select Integrations in the left nav bar.
New UI. In the main Sumo Logic menu, select Automation > Integrations. You can also click the Go To... menu at the top of the screen and select Integrations. - Select the installed integration.
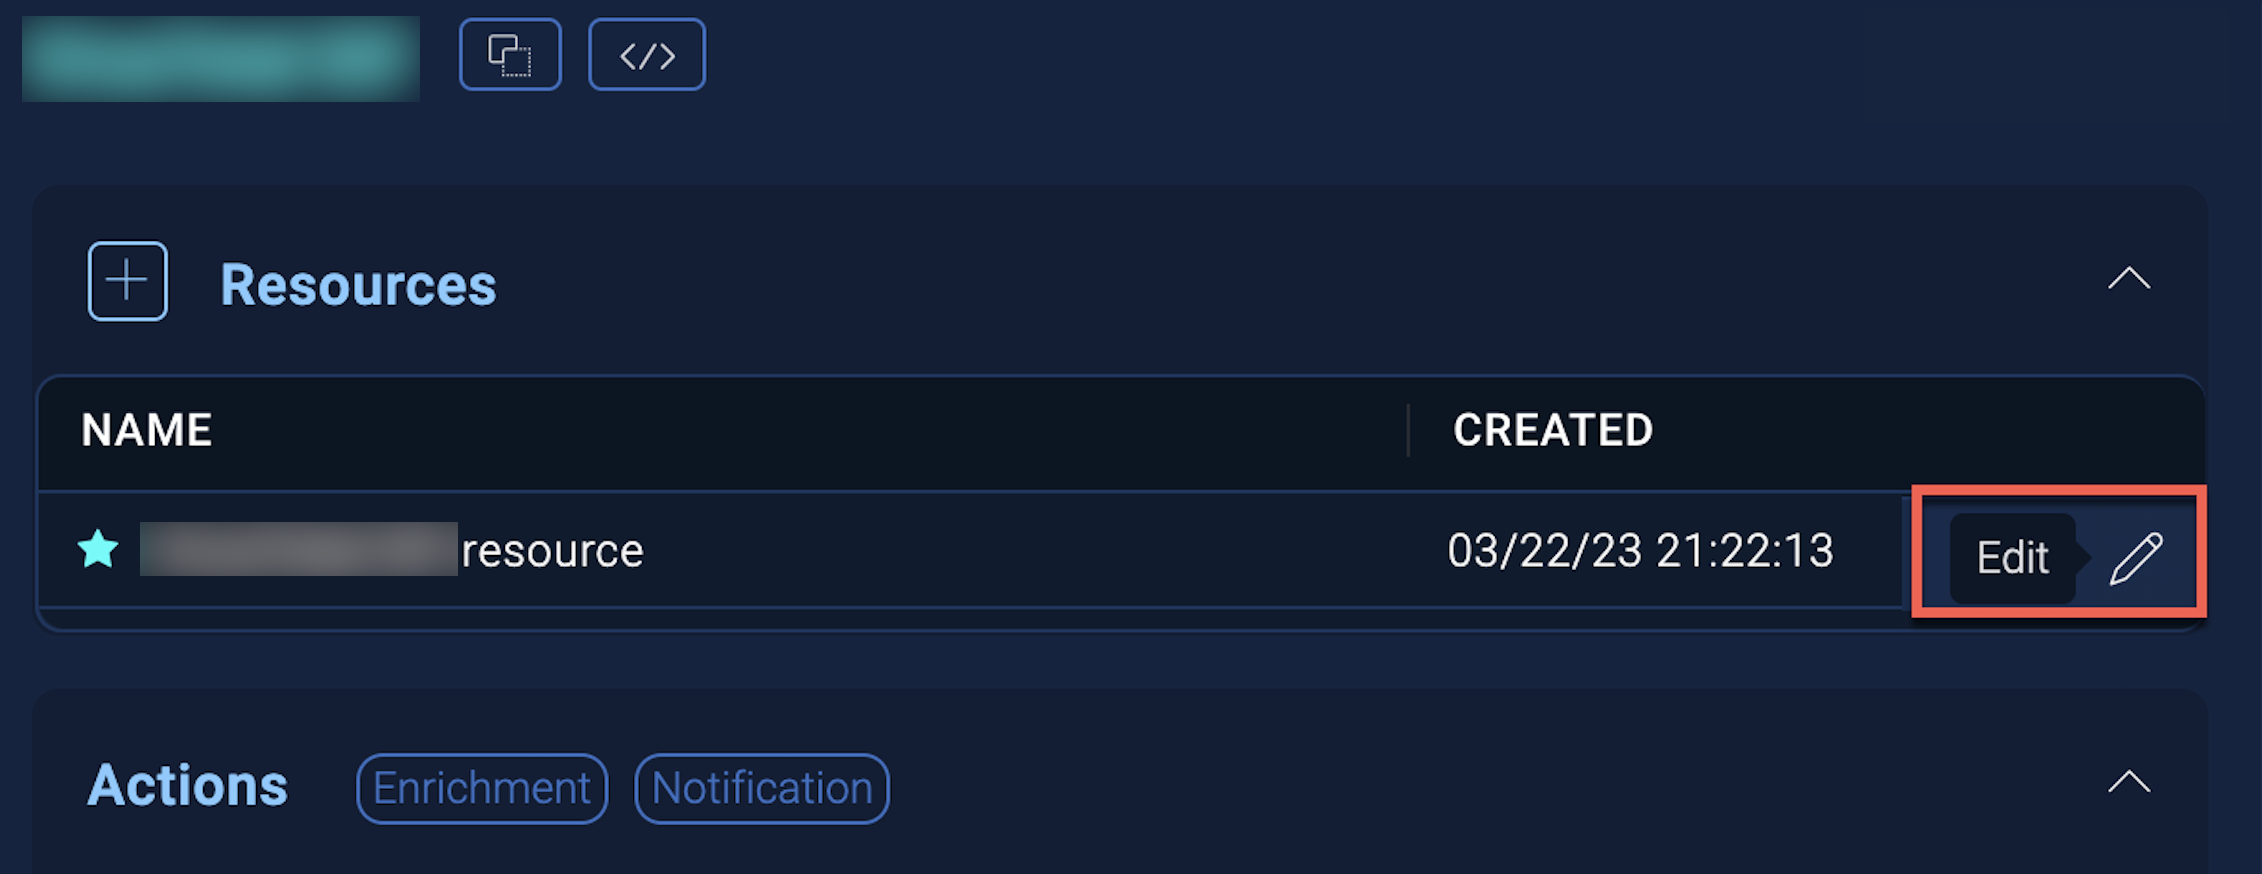
- Hover over the resource name and click the Edit button that appears.
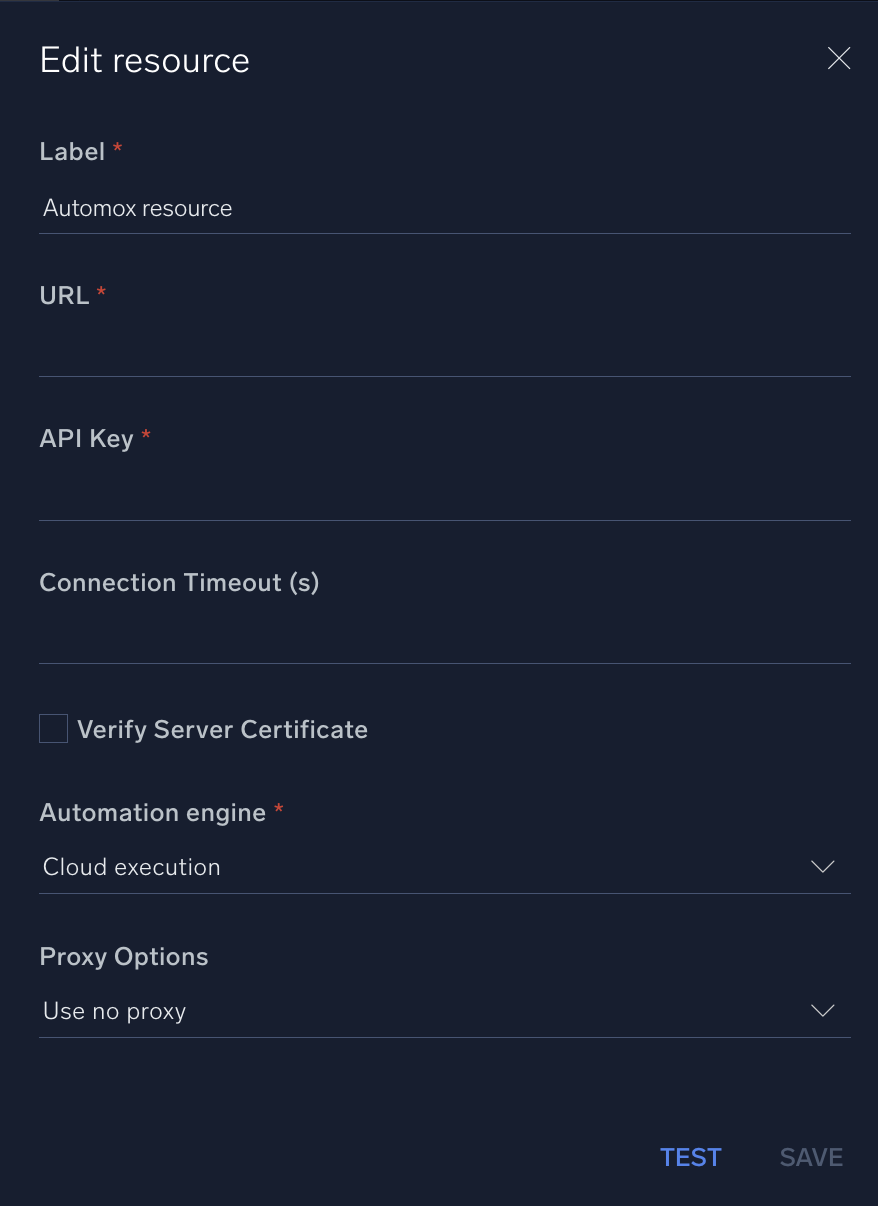
In the configuration dialog, enter information from the product you're integrating with. When done, click TEST to test the configuration, and click SAVE to save the configuration:
-
Label. Enter the name you want to use for the resource.
-
URL. Enter your Automox site URL. The default value is
https://console.automox.com -
API Key. Enter the API key you copied earlier.
-
Connection Timeout (s). Set the maximum amount of time the integration will wait for a server's response before terminating the connection. Enter the connection timeout time in seconds (for example,
180). -
Verify Server Certificate. Select to validate the server’s SSL certificate.
-
Automation Engine. Select Cloud execution for this certified integration. Select a bridge option only for a custom integration. See Cloud or Bridge execution.
-
Proxy Options. Select whether to use a proxy. (Applies only if the automation engine uses a bridge instead of cloud execution.)
- Use no proxy. Communication runs on the bridge and does not use a proxy.
- Use default proxy. Use the default proxy for the bridge set up as described in Using a proxy.
- Use different proxy. Use your own proxy service. Provide the proxy URL and port number.
For information about Automox, see Automox documentation.
Change Log
- July 7, 2022 - First upload
- July 3, 2023 (v1.1) - Updated the integration with Environmental Variables