Gmail Multiple Mailbox

Version: 1.1
Updated: Aug 18, 2023
Interact with multiple Gmail mailboxes.
Actions
- Add Filter (Enrichment) - Add a new filter.
- Get Filters (Enrichment) - Get all filters.
- Get Mails (Enrichment) - Get a specific email message by message ID.
- Get Role Assignments (Enrichment) - Get all role assignments.
- Get Threads (Enrichment) - Get all threads.
- Get User (Enrichment) - Get information on a specific user.
- Get Labels (Enrichment) - Get all labels.
- Get Roles (Enrichment) - Get all roles.
- List Users (Enrichment) - Get All users.
- Search Into All Mailboxes (Enrichment) - Search into all mailboxes.
- Search Into Mailboxes (Enrichment) - Search into a specific mailbox.
- Get Attachments (Enrichment) - Get attachments from a specific email.
- Delete Mails (Containment) - Delete a specific email message by message ID.
- Delete Role Assignment (Containment) - Delete all role assignments for a specific role ID.
- Delete Filter (Containment) - Delete a specific filter.
- Move Mails (Containment) - Move emails.
Gmail Multiple Mailbox configuration
- Create/view a project in the developers console.
- Access your Google service account.
- In the IAM & Admin section select Service accounts.
- In the Service accounts section, click Create Service Account.
- During the service account creation, you will see Create key. In the Create key section, click CREATE KEY.
- Select Key type JSON and click CREATE.
- A JSON is generated and automatically downloads.
- From the Service accounts page you have to copy your client ID. It will need domain-wide delegation.
- From the Service accounts details page you must Enable the G Suite Domain-wide Delegation.
- At this link http://admin.google.com/ac/owl/domainwidedelegation, you have to add the following xcopes:
https://mail.google.com/https://www.googleapis.com/auth/gmail.settings.basichttps://www.googleapis.com/auth/admin.directory.user.readonlyhttps://www.googleapis.com/auth/admin.directory.rolemanagement.readonlyhttps://www.googleapis.com/auth/admin.directory.rolemanagement
- In the last stage, you have to activate the API at this link: https://console.developers.google.com/apis/library/admin.googleapis.com
- You have also to enable the Gmail API: https://console.developers.google.com/apis/api/gmail.googleapis.com/overview
If the API has been recently enabled, wait a few minutes for the action to propagate to the system and retry.
Configure Gmail Multiple Mailbox in Automation Service and Cloud SOAR
Before you can use this automation integration, you must configure its authentication settings so that the product you're integrating with can communicate with Sumo Logic. For general guidance, see Configure Authentication for Automation Integrations.
How to open the integration's configuration dialog
- Access App Central and install the integration. (You can configure at installation, or after installation with the following steps.)
- Go to the Integrations page.
Classic UI. In the main Sumo Logic menu, select Automation and then select Integrations in the left nav bar.
New UI. In the main Sumo Logic menu, select Automation > Integrations. You can also click the Go To... menu at the top of the screen and select Integrations. - Select the installed integration.
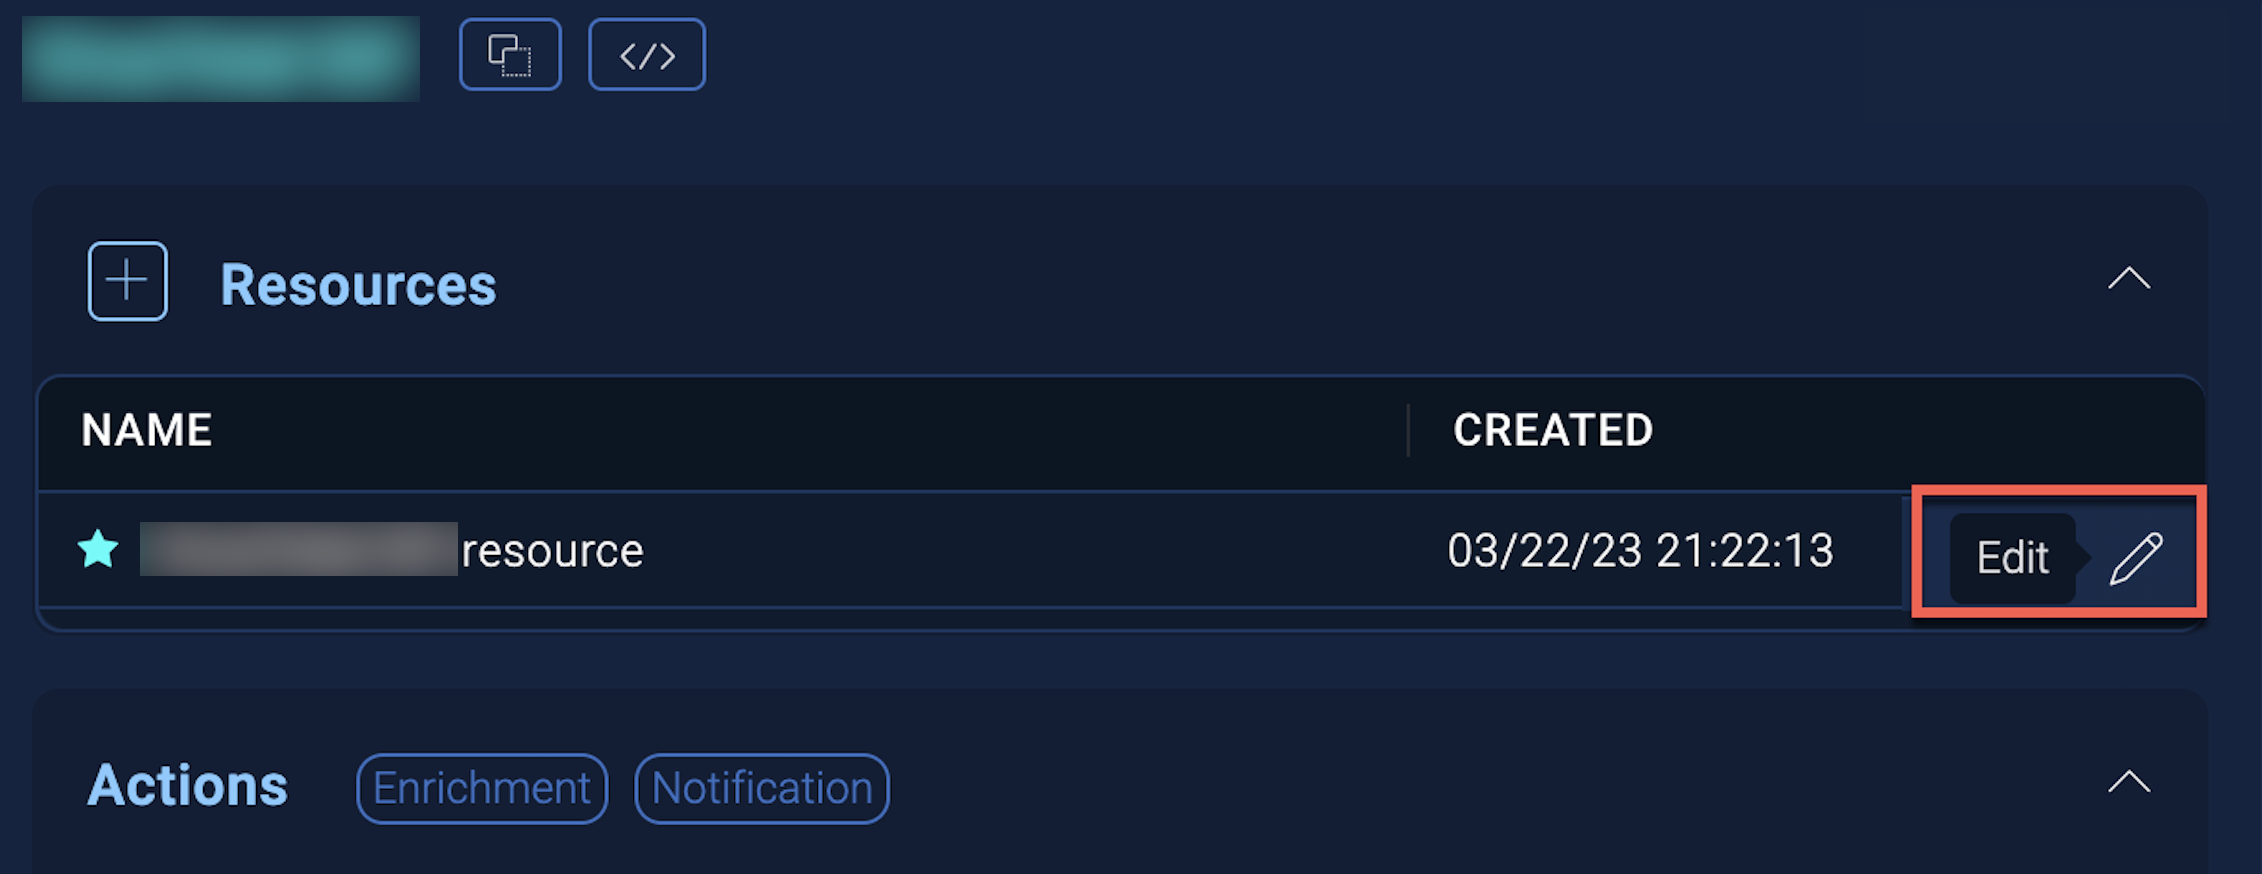
- Hover over the resource name and click the Edit button that appears.

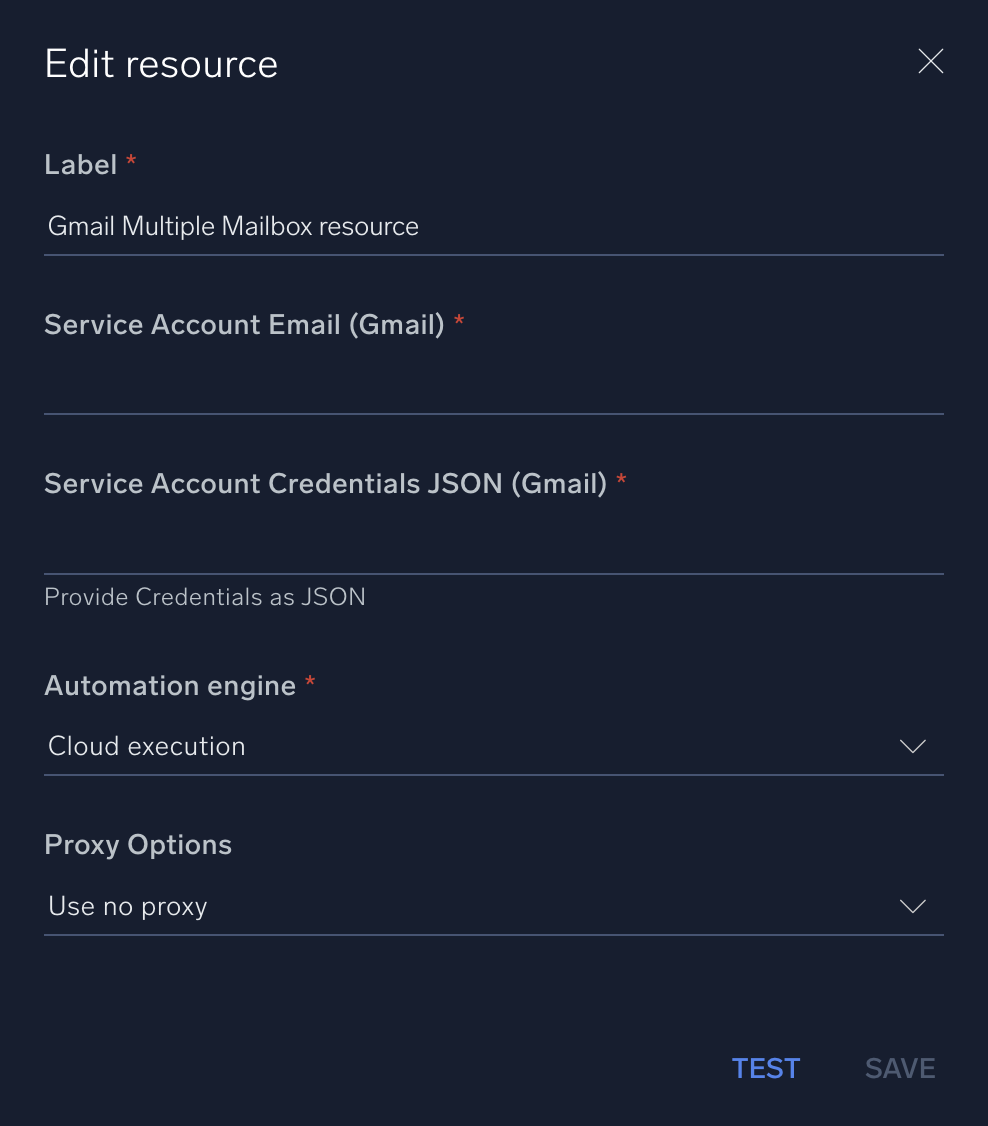
In the configuration dialog, enter information from the product you're integrating with. When done, click TEST to test the configuration, and click SAVE to save the configuration:
-
Label. Enter the name you want to use for the resource.
-
Service Account Email (Gmail). Enter your service account email.
-
Service Account Credentials JSON (Gmail). Enter your service account credentials JSON that you obtained earlier.
-
Automation Engine. Select Cloud execution for this certified integration. Select a bridge option only for a custom integration. See Cloud or Bridge execution.
-
Proxy Options. Select whether to use a proxy. (Applies only if the automation engine uses a bridge instead of cloud execution.)
- Use no proxy. Communication runs on the bridge and does not use a proxy.
- Use default proxy. Use the default proxy for the bridge set up as described in Using a proxy.
- Use different proxy. Use your own proxy service. Provide the proxy URL and port number.

For information about the Gmail API, see Gmail API documentation.
Change Log
- June 19, 2020 - First upload
- August 18, 2023 (v1.1) - Integration refactored