Google Chat

Version: 2.1
Updated: Dec 06, 2024
Google Chat is an intelligent and secure communication and collaboration tool, built for teams.
To send rich text messages, use the Create Message action with Disable HTML in the message body. Follow the directions in the Google Chat documentation.
Actions
- Create Message (Notification) - Send messages privately to a specific Chat user.
- Delete Message (Containment) - Delete a message that the Chat app sent.
- Get Member (Enrichment) - Get details about a membership in a space.
- Get Message (Enrichment) - Get details about a message.
- Get Space (Enrichment) - Get details about a space.
- List Members (Enrichment) - Lists memberships in spaces that the Chat app has access to.
- List Spaces (Enrichment) - Lists spaces that the Chat app has access to.
- Update Message (Containment) - Update the message.
Google Chat configuration
To create service account credentials in Google Workspace needed to configure the Google Chat app integration, follow these steps:
- Log in to the Google Cloud portal.
- Select a Google Cloud project (or create a new one).
- Go to the API&Services > Credentials page.
- In the same page click on ENABLES API AND SERVICES and search for Google Chat and enable it.
- Click CREATE CREDENTIALS and select Service Account.
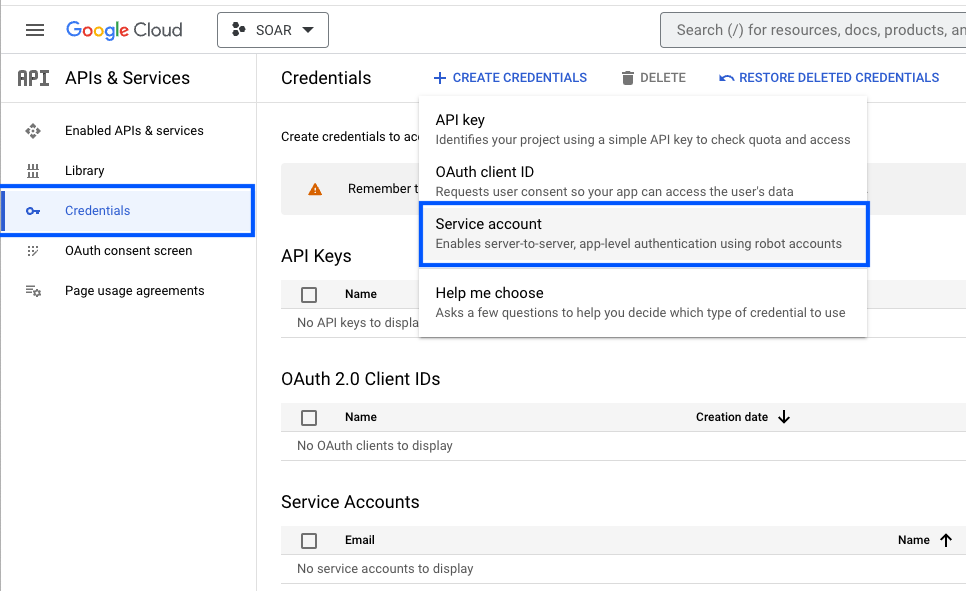
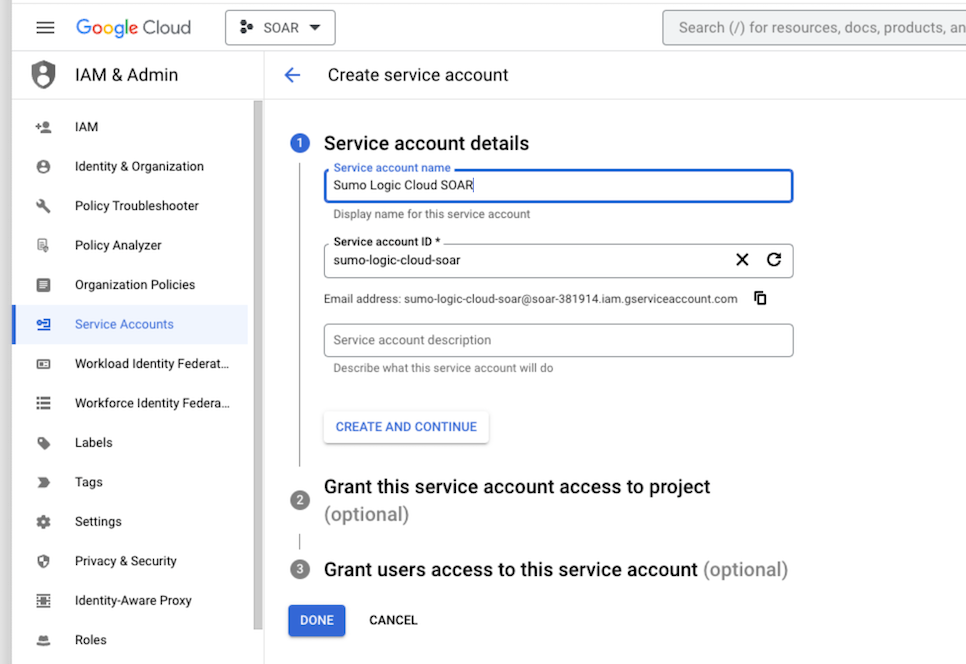
- Enter a service account name to display in the Google Cloud console. The Google Cloud console generates a service account ID based on this name.
- (Optional) Enter a description of the service account.
- Skip two optional grant permissions steps and click Done to complete the service account creation.
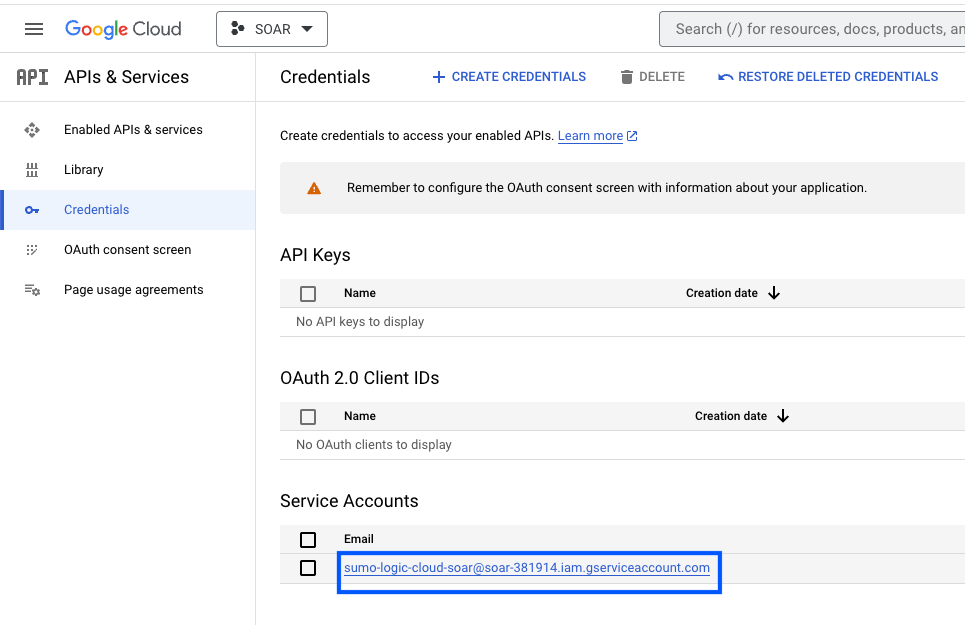
- Click on the generated service account to open the details.
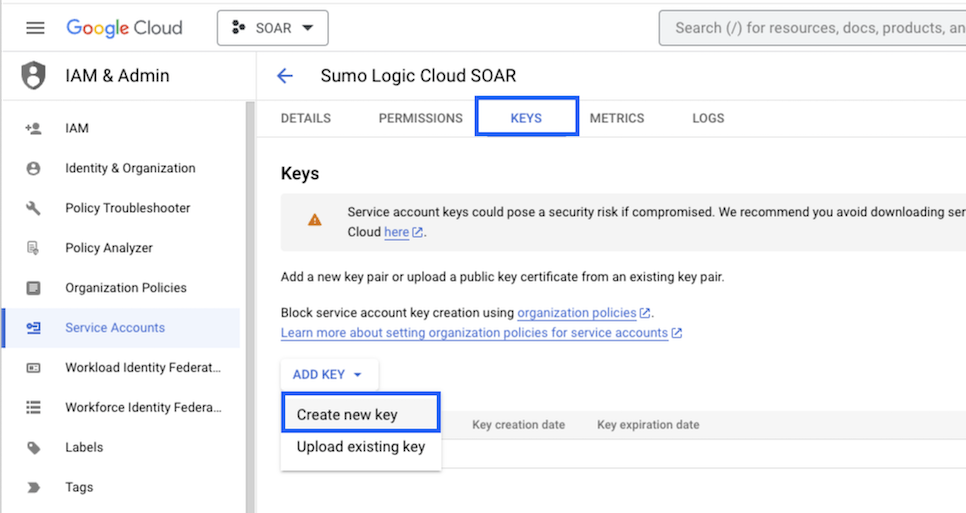
- Under the KEYS tab, click ADD KEY and choose Create new key.
- Click on CREATE (make sure JSON is selected).
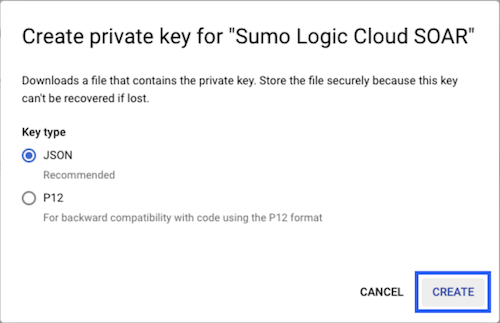
- The JSON file is downloaded. Make sure you save it in a safe place.
- To configure the app in Google Chat API, go to APIs & Services, select Google Chat API, and in CONFIGURATION provide the details and click on SAVE.
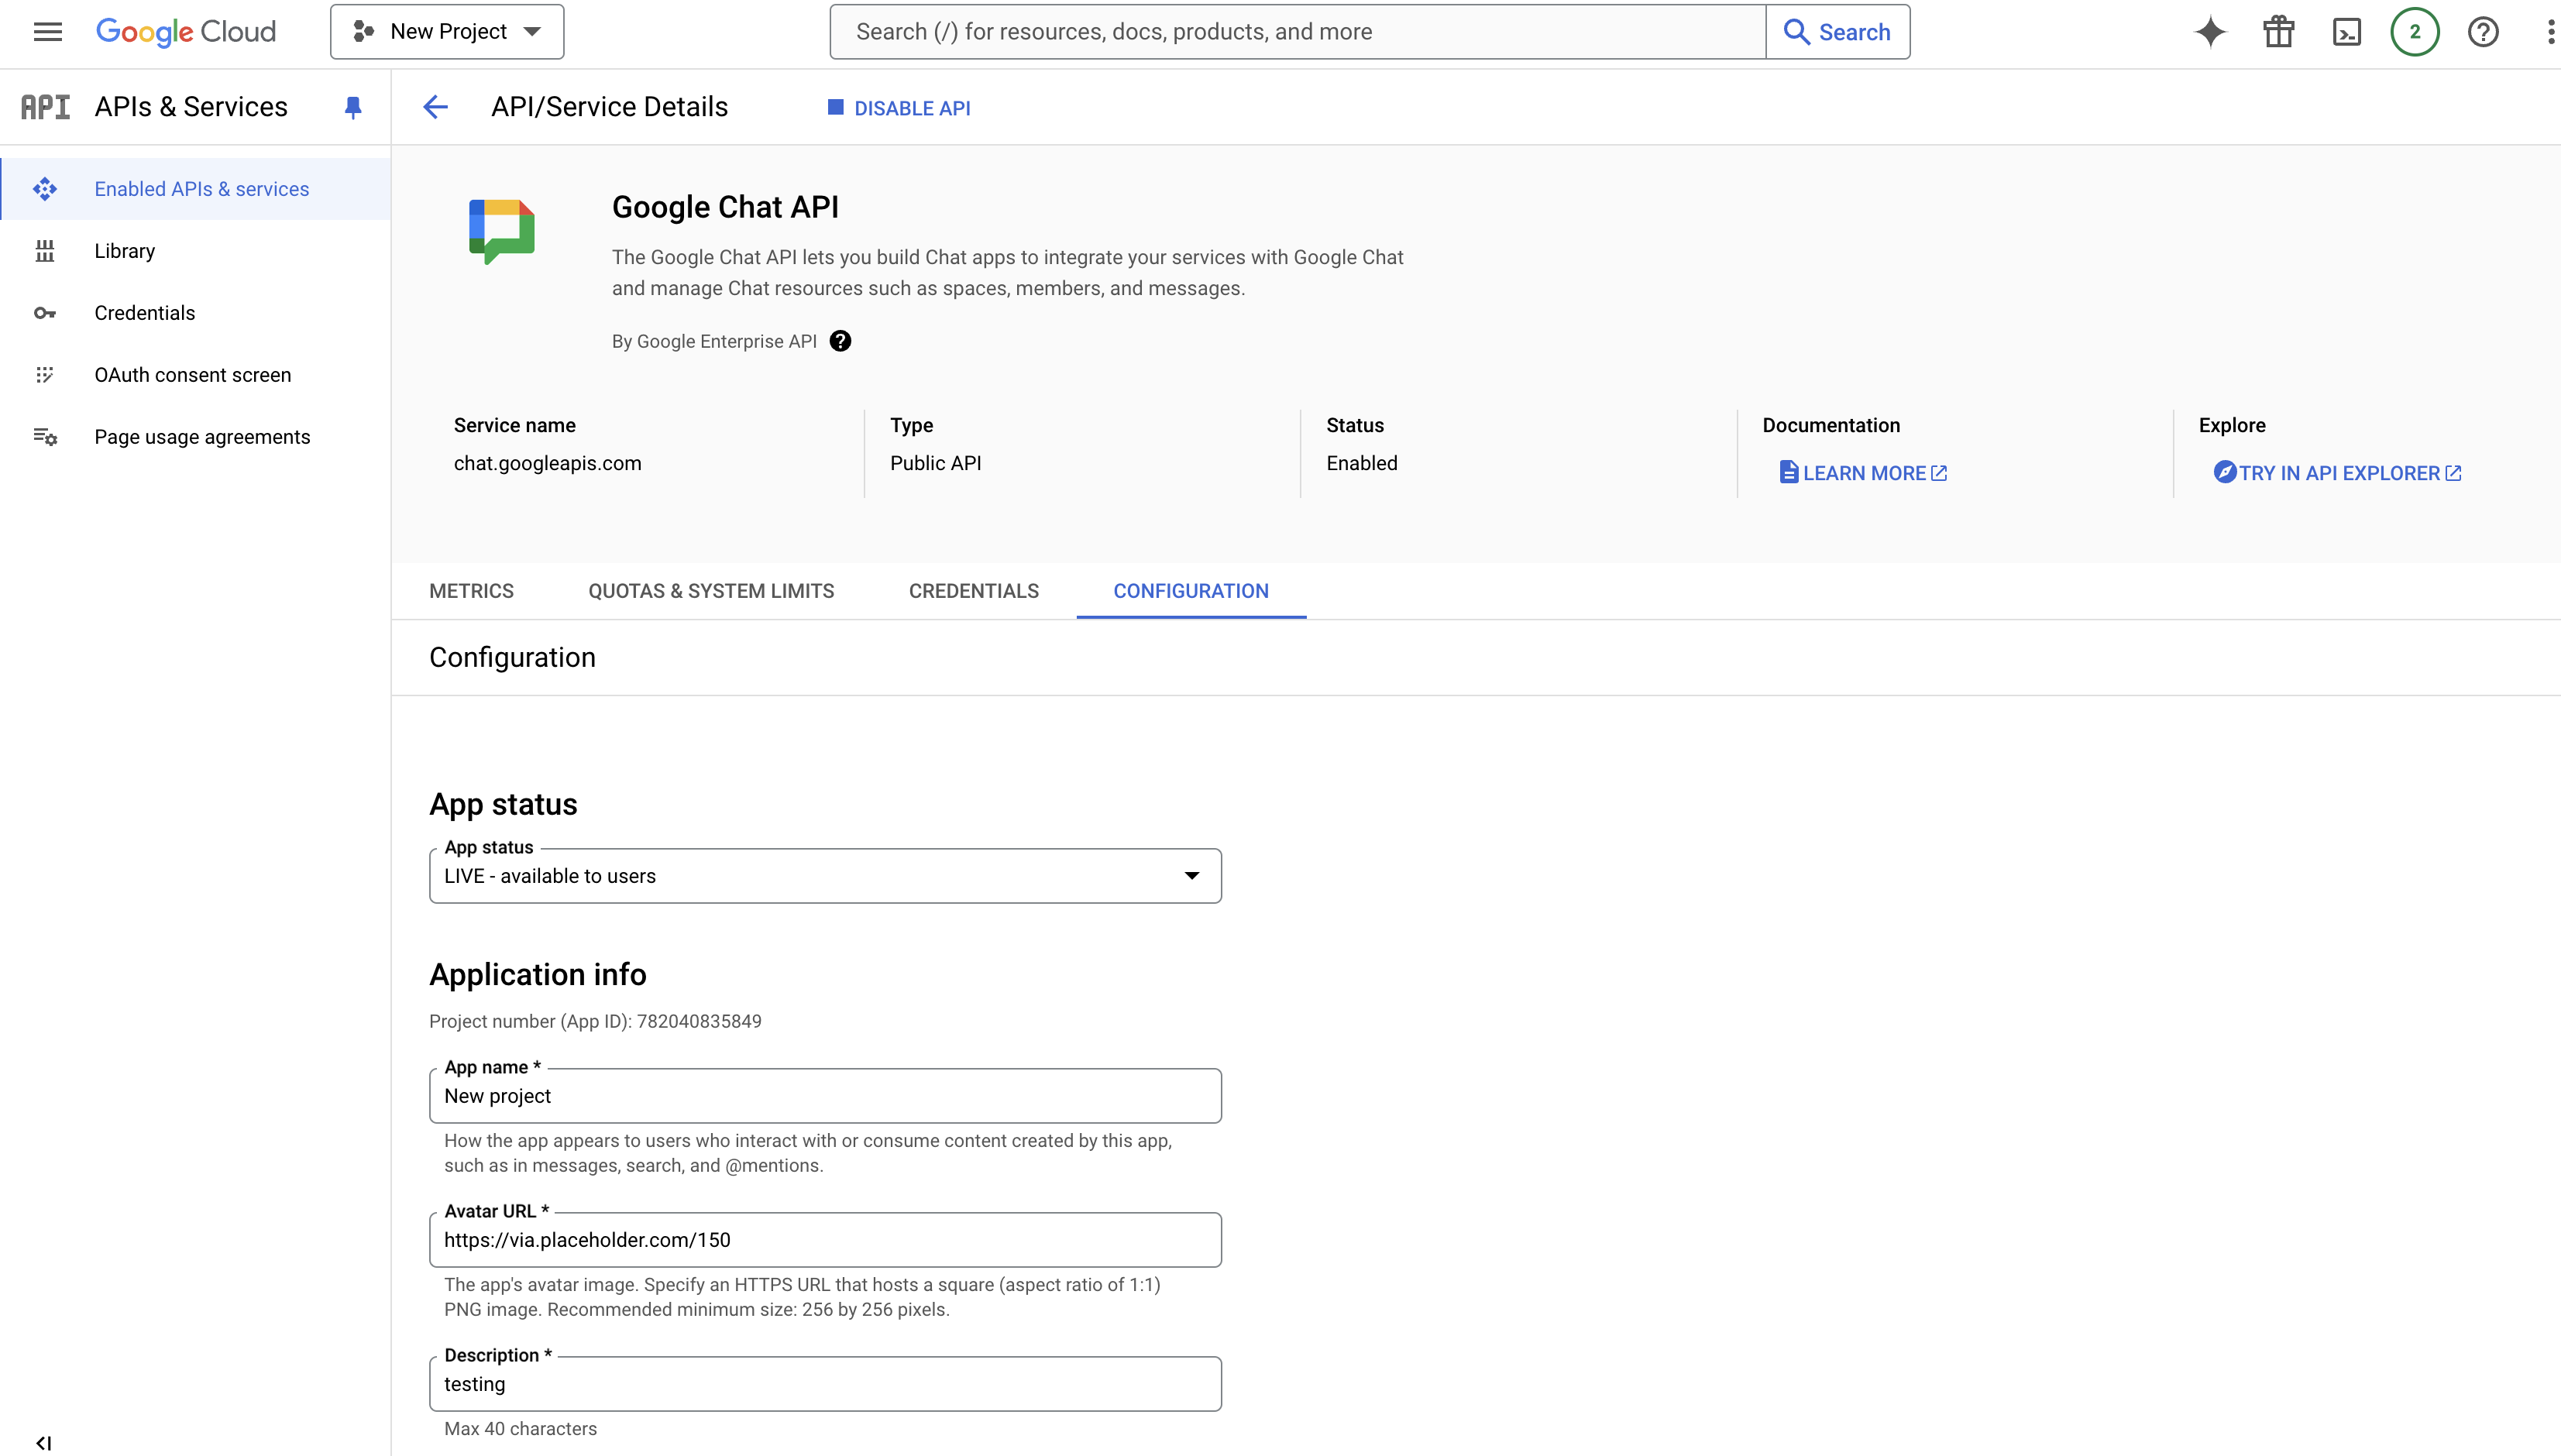
- Go to the Google Chat App and add the above app in that. Also, to add above app in space, go to space and in Apps & integration add the app.
Configure Google Chat in Automation Service and Cloud SOAR
Before you can use this automation integration, you must configure its authentication settings so that the product you're integrating with can communicate with Sumo Logic. For general guidance, see Configure Authentication for Automation Integrations.
How to open the integration's configuration dialog
- Access App Central and install the integration. (You can configure at installation, or after installation with the following steps.)
- Go to the Integrations page.
Classic UI. In the main Sumo Logic menu, select Automation and then select Integrations in the left nav bar.
New UI. In the main Sumo Logic menu, select Automation > Integrations. You can also click the Go To... menu at the top of the screen and select Integrations. - Select the installed integration.
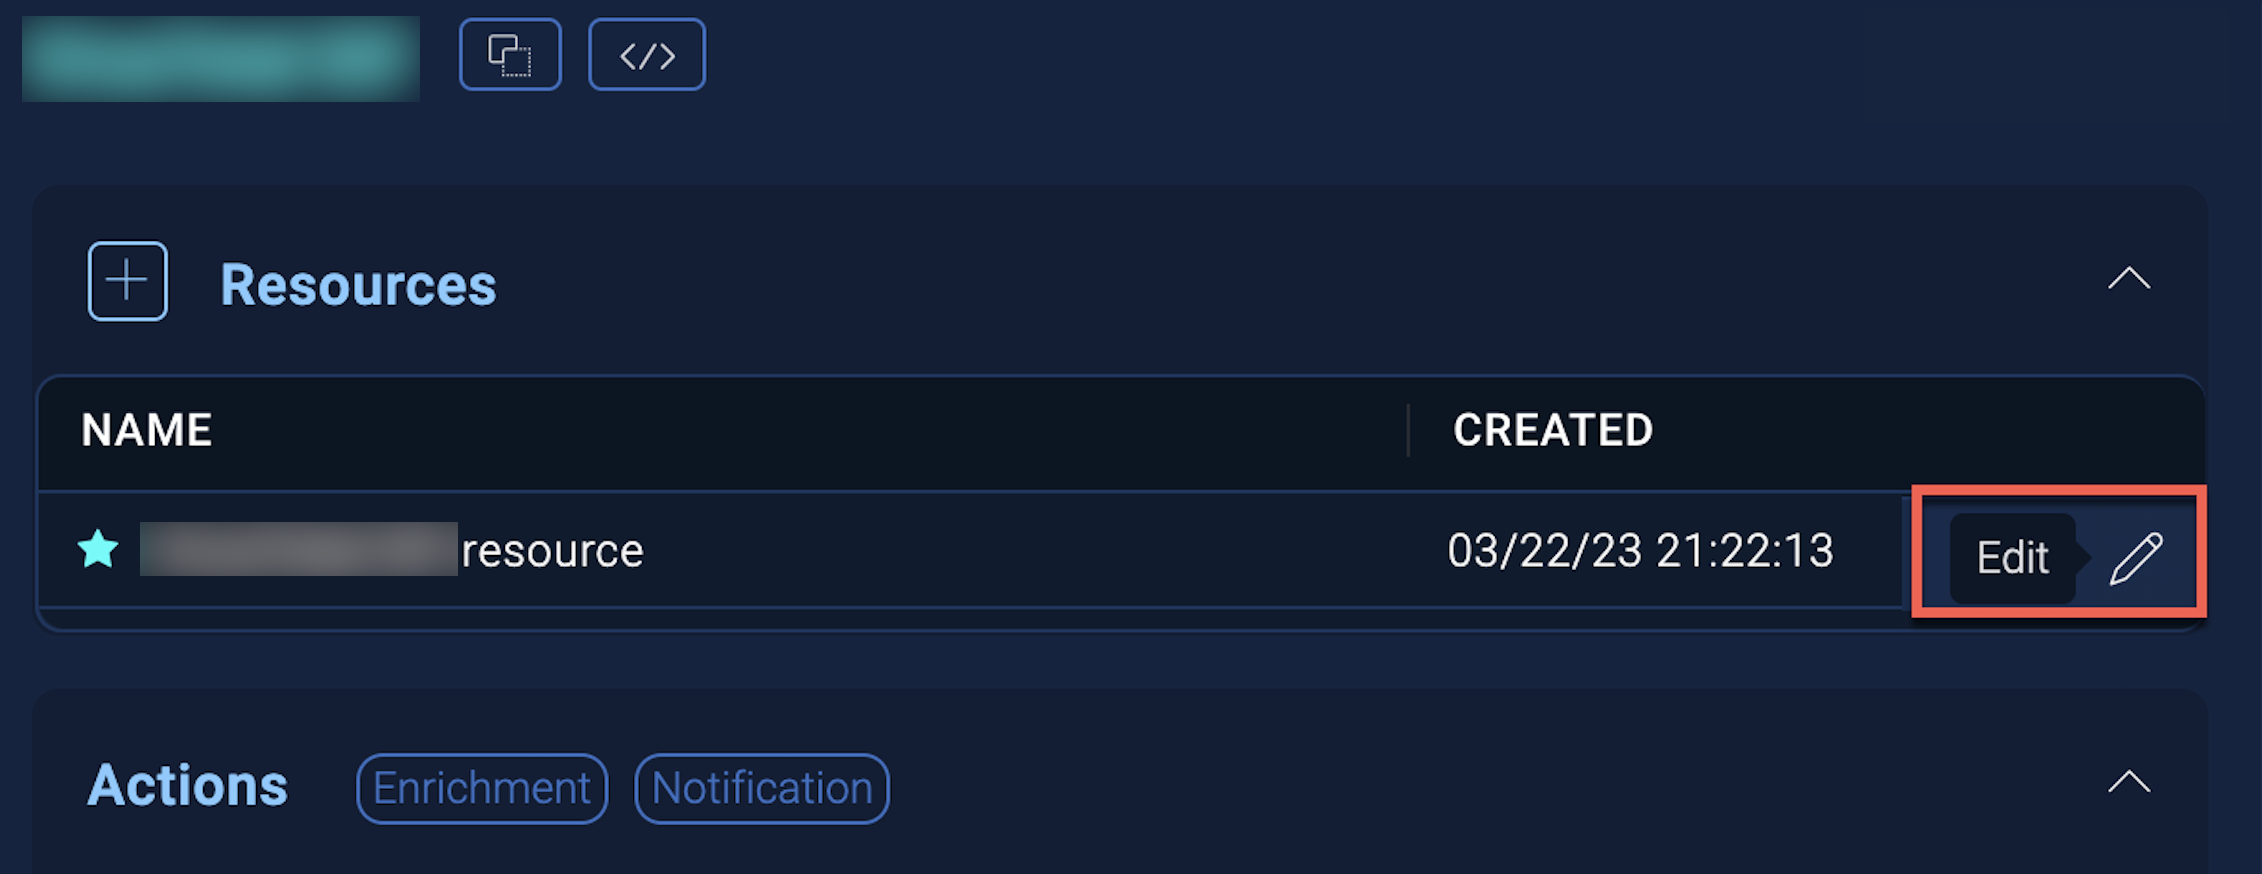
- Hover over the resource name and click the Edit button that appears.
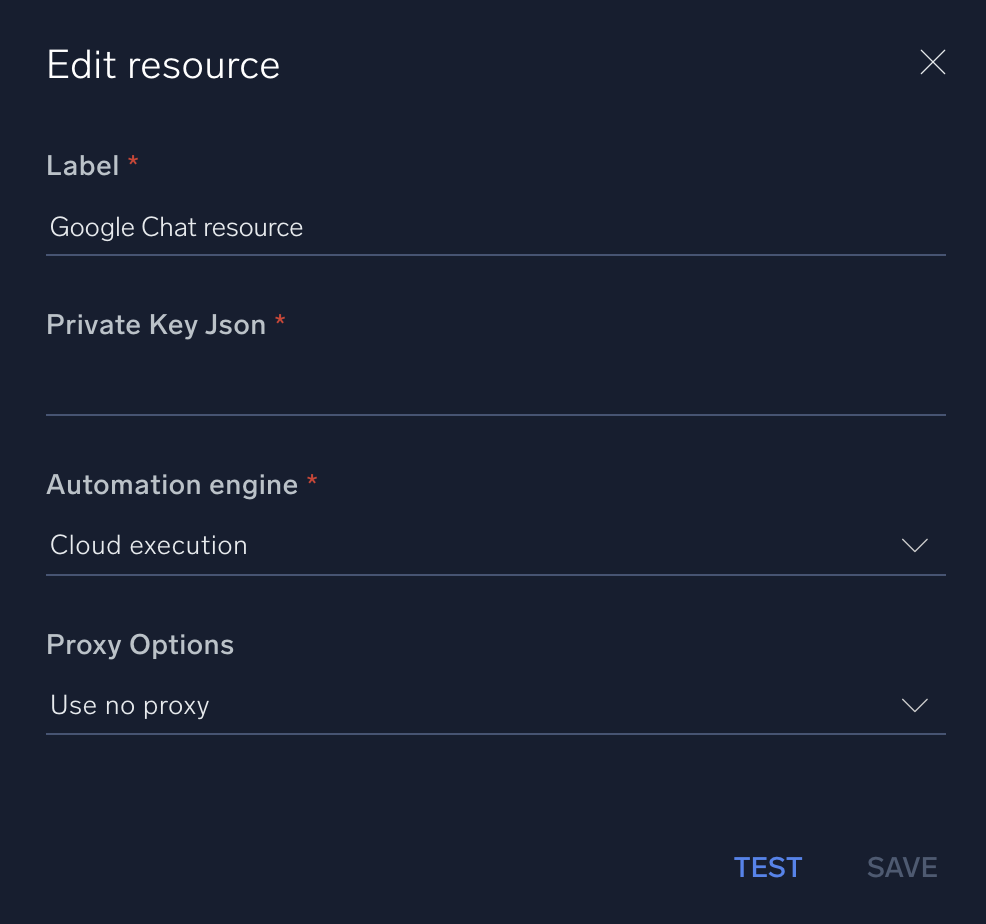
In the configuration dialog, enter information from the product you're integrating with. When done, click TEST to test the configuration, and click SAVE to save the configuration:
-
Label. Enter the name you want to use for the resource.
- Private Key Json. Provide the content of the JSON file generated above. Open the file and copy-paste the whole content in the field.
-
Automation Engine. Select Cloud execution for this certified integration. Select a bridge option only for a custom integration. See Cloud or Bridge execution.
-
Proxy Options. Select whether to use a proxy. (Applies only if the automation engine uses a bridge instead of cloud execution.)
- Use no proxy. Communication runs on the bridge and does not use a proxy.
- Use default proxy. Use the default proxy for the bridge set up as described in Using a proxy.
- Use different proxy. Use your own proxy service. Provide the proxy URL and port number.
For information about Google Chat, see Google Chat documentation.
Use cases for sending messages
Disable HTML
Send plain text messages with HTML formatting disabled. 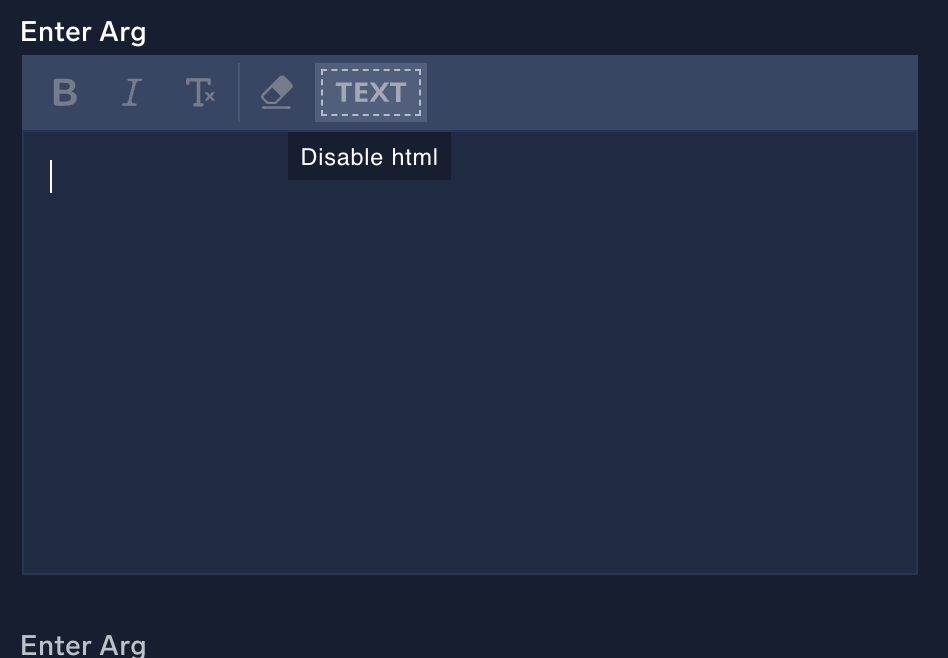
Compose rich text messages
Format your messages with rich text using Google Chat Rich Text Message. This allows you to enhance message readability with structured formatting options. 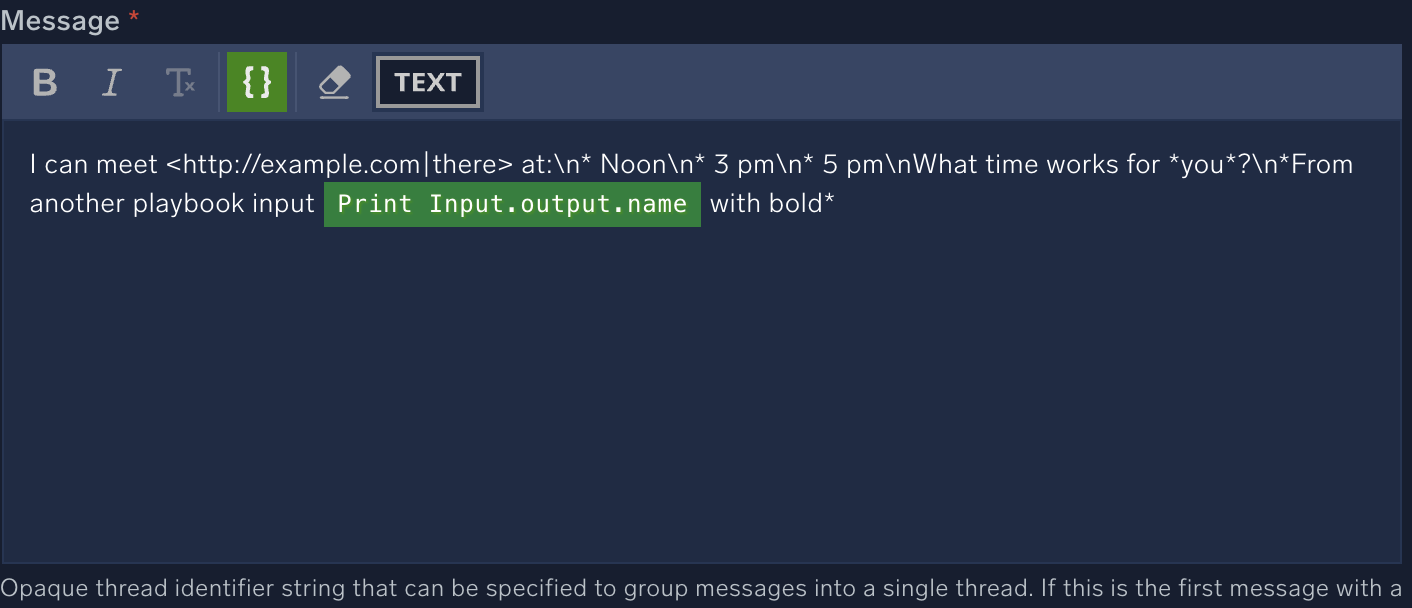
Receive notifications
Use Google Chat to receive notifications, ensuring you promptly get important updates or alerts. Notifications will be displayed in a well-formatted text, making them easy to read and understand in Google Chat. 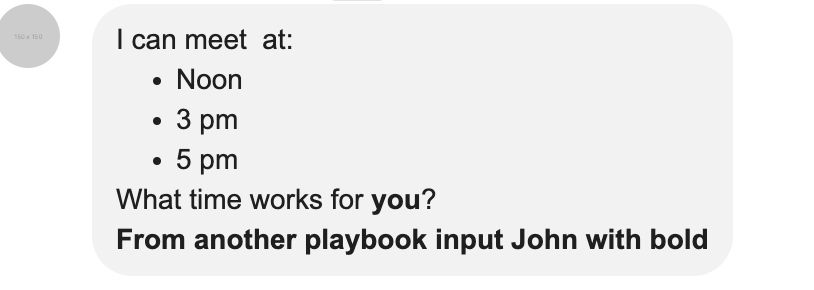
Change Log
- August 27, 2024 (v2.0) - First upload
- October 29, 2024 (v2.0) - Updated the docs
- December 06, 2024 (v2.1) - Added the Rich Text Message support in the Create Message action