IMAP

Version: 1.3
Updated: Mar 4, 2024
This integration is only for Cloud SOAR.
Allows you to connect your mailbox with Cloud SOAR and receive mail via IMAP protocol.
Actions
- Incoming Mail Daemon (Daemon) - Automatically get emails using IMAP and save emails.
Get Access Key and Access ID
Create a Sumo Logic access key and copy the resulting Access ID and Access Key. Store the ID and access key (temporally) into a text editor.
The ID and key won't be available again once you close the confirmation screen.
Configure IMAP in Cloud SOAR
Before you can use this automation integration, you must configure its authentication settings so that the product you're integrating with can communicate with Sumo Logic. For general guidance, see Configure Authentication for Automation Integrations.
How to open the integration's configuration dialog
- Access App Central and install the integration. (You can configure at installation, or after installation with the following steps.)
- Go to the Integrations page.
Classic UI. In the main Sumo Logic menu, select Automation and then select Integrations in the left nav bar.
New UI. In the main Sumo Logic menu, select Automation > Integrations. You can also click the Go To... menu at the top of the screen and select Integrations. - Select the installed integration.
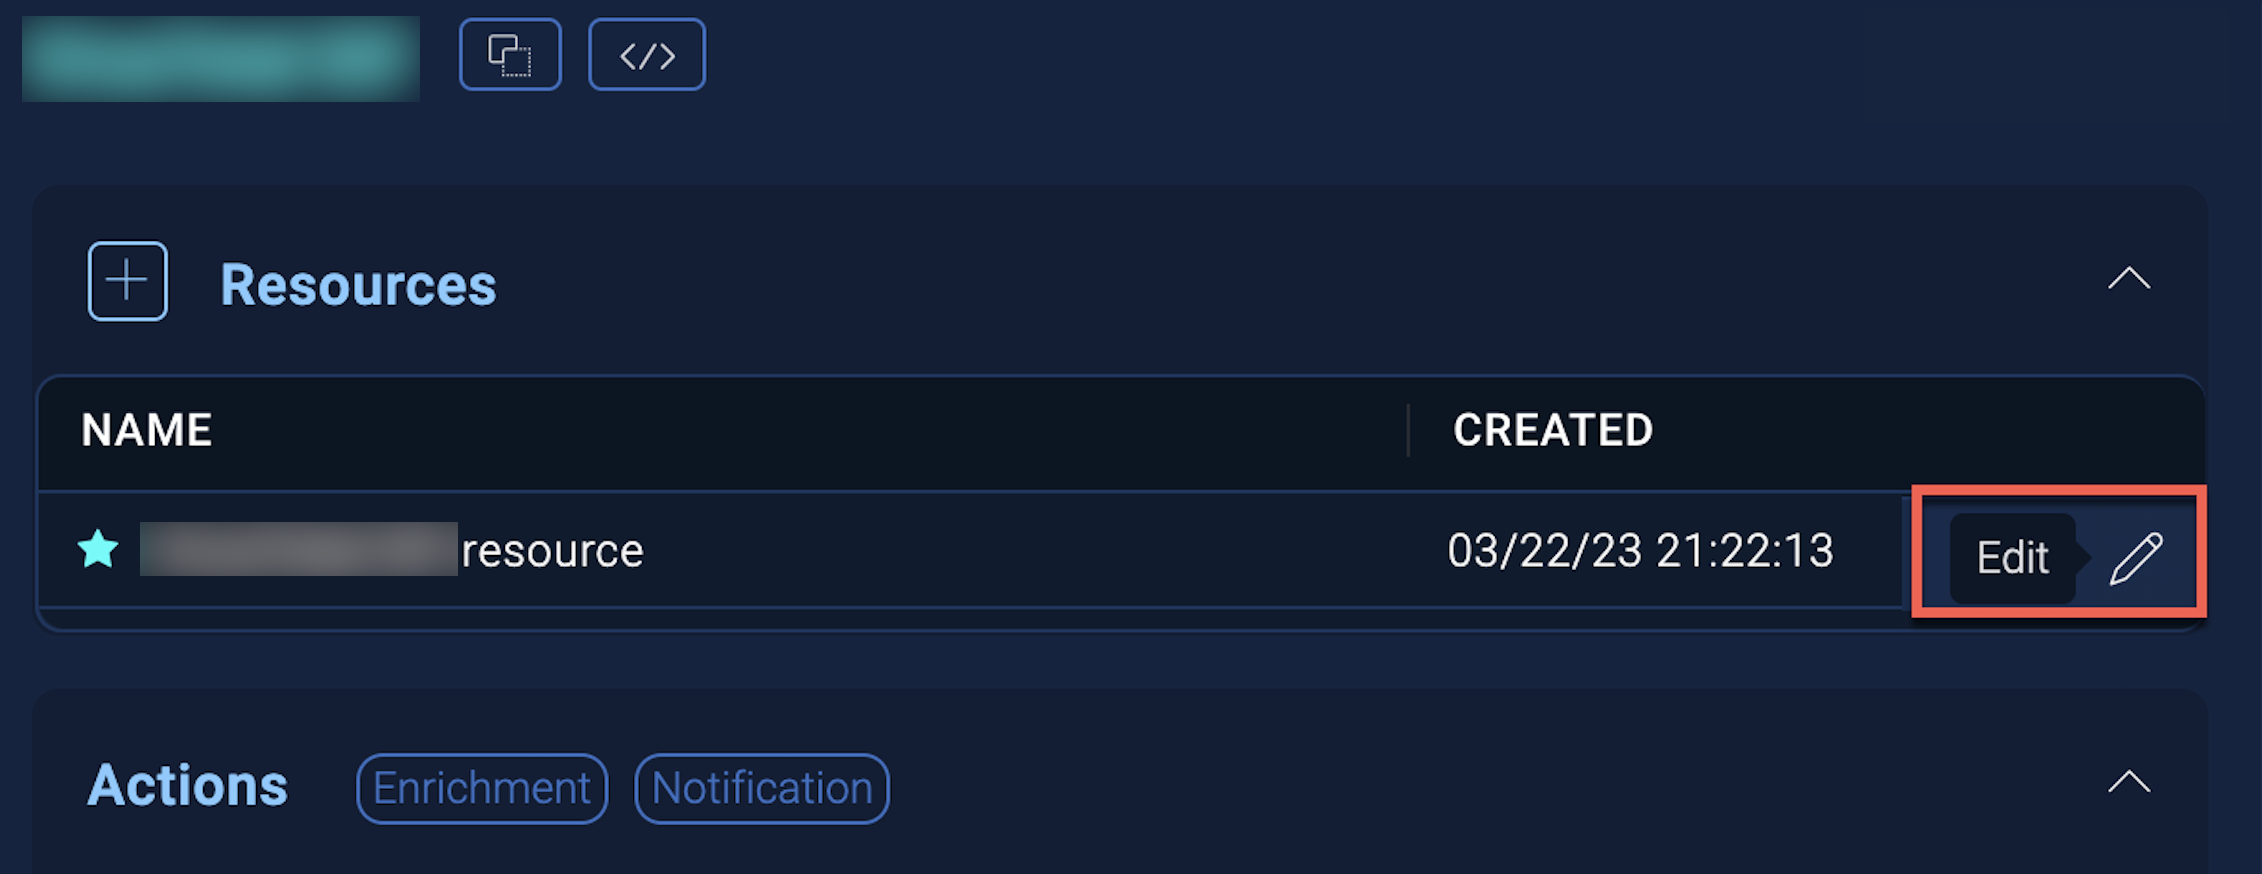
- Hover over the resource name and click the Edit button that appears.
In the configuration dialog, enter information from the product you're integrating with. When done, click TEST to test the configuration, and click SAVE to save the configuration:
-
Label. Enter the name you want to use for the resource.
-
IMAP Server. Enter the IMAP server URL, for example,
Imap.gmail.com,Outlook.office365.com,Imap.mail.yahoo.com -
Port. Select the IMAP port, either
993 SSL/TLSor143 -
Username. Enter the username of an admin user authorized to provide authentication for the integration.
-
Password. Enter the password for the admin user.
-
Connection Security. Select
SSL/TLSorSTARTTLS -
Connection Timeout (s). Set the maximum amount of time the integration will wait for a server's response before terminating the connection. Enter the connection timeout time in seconds (for example,
180). -
Do not allow trusted certificates. Select to allow untrusted certificates.
-
Mailbox Account. Enter the mailbox account. Only required if the username isn't already an email address (for example, when for username
adminthe mailbox account isadmin@test.com). -
Cloud SOAR API URL. Enter your Sumo Logic API URL (for example,
https://api.us2.sumologic.com). Enter the API endpoint URL for your region. -
Access ID. Enter the access ID for your Sumo Logic access key. Select Default as the scope when generating access keys.
-
Access Key. Enter the access key corresponding to your Sumo Logic access ID.
-
Email Fetch Type (Daemon). Select either:
- Unseen/Unread. Only fetch the mails which are currently UNSEEN or UNREAD.
- Fetch From Latest CSOAR Mail. Fetch all mails from the mail server which are not yet stored on Cloud SOAR. For the first time it will fetch UNSEEN mails for the second run/execution. Pre-Filtering options can be used to pre-filter emails in the mail server. Only pre-filtered emails are imported and analyzed by Cloud SOAR. See Email fetch (daemon) below.
-
Automation Engine. Select Cloud execution for this certified integration. Select a bridge option only for a custom integration. See Cloud or Bridge execution.
-
Proxy Options. Select whether to use a proxy. (Applies only if the automation engine uses a bridge instead of cloud execution.)
- Use no proxy. Communication runs on the bridge and does not use a proxy.
- Use default proxy. Use the default proxy for the bridge set up as described in Using a proxy.
- Use different proxy. Use your own proxy service. Provide the proxy URL and port number.

Email fetch (daemon)
Email Fetch Type and other filters below will be combined with the AND operator. Pre-filtered options:
- From. You can filter email using From or you can use the full domain name. For example,
sumologic.com, sales@sumologic.com. Based on this example, only the mails coming from Sumo Logic domain orsales@sumologic.comwill be fetched. This field accepts multiple values separated by a comma. Multiple values will be combined with the OR operator. - To. Indicate the receiver of the mail. This filter works the same as the From filter. This field accepts multiple values separated by a comma. Multiple values will be combined with the OR operator.
- Subject. Fetch emails based on the subject. This field accepts multiple values separated by a comma. Multiple values will be combined with the OR operator.
- Text Body. Fetch emails based on a text search inside the body. It also works for attachment names. This field accepts multiple values separated by a comma. Multiple values will be combined with the OR operator.
- Header. Header string to be searched based on the filter below.
- Header Field Name To Search in Header. A list from which you can choose a header element where to search the provided value in the previous field.
Pre-filtered options are also available to filter as NOT condition:
- Not From
- Not To
- Not Subject
- Not Text Body
- Not Header
- Header Field Name To Search in Header
Behaves similarly to the other pre-filter, but the email elements matching the provided conditions will not be fetched.
As specified, all filters will be combined with AND operator.
Additional configuration
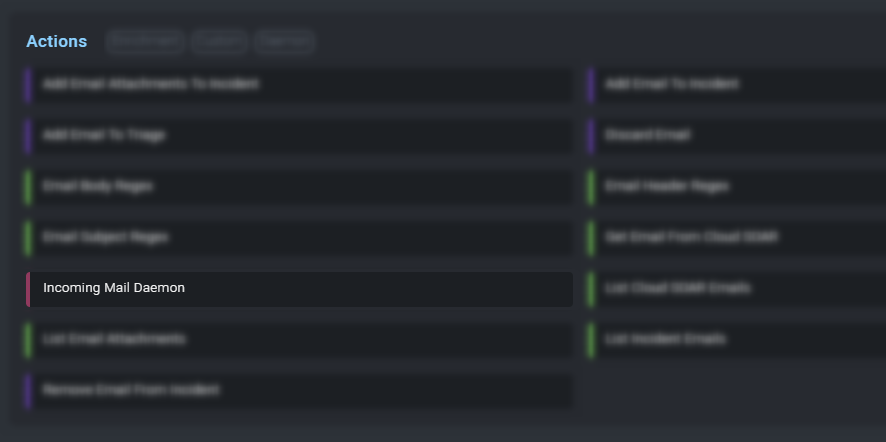
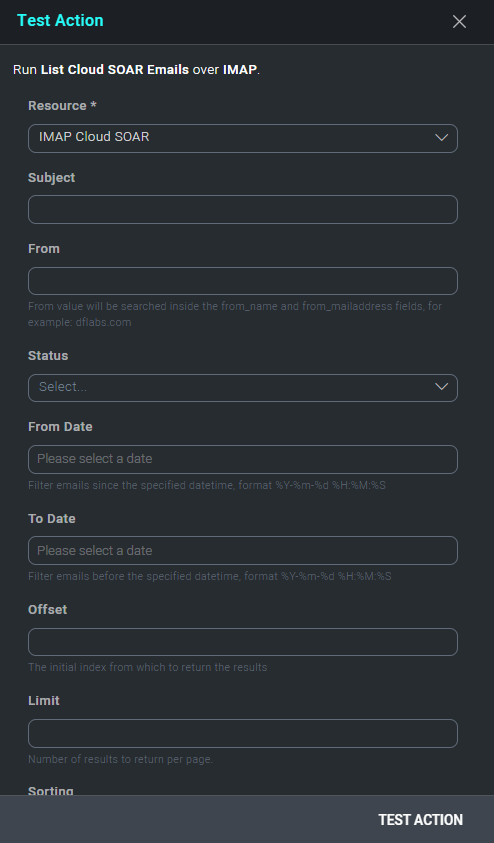
Testing incoming mail daemon
It is recommended to test this action before proceeding.
- Click the action name.
- Click TEST ACTION.
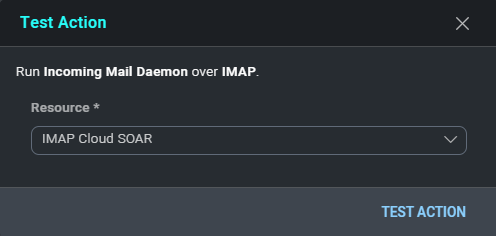
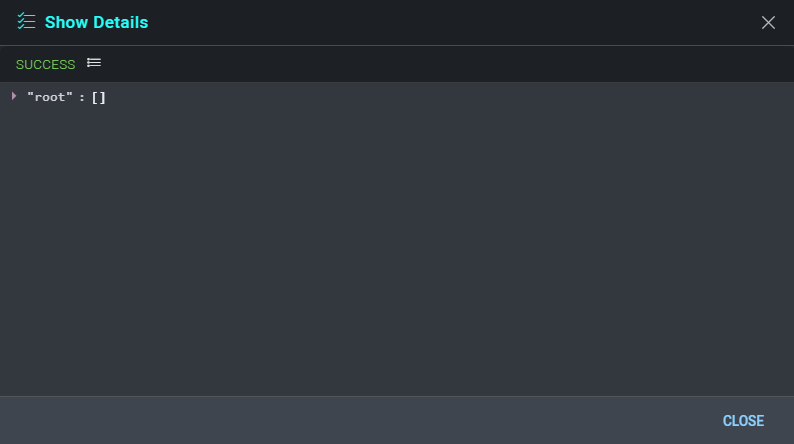
- This test action returns results based on the configuration. Once you get the results, then your IMAP configuration and mail daemon are working correctly.
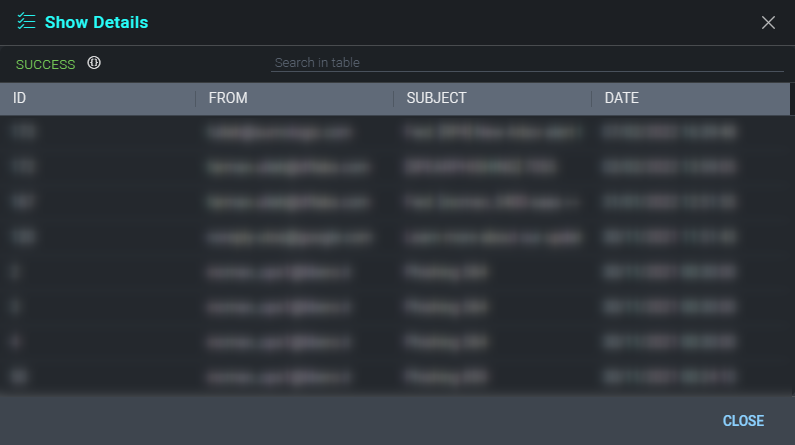
List Cloud SOAR emails
You can use the List Cloud SOAR Emails action directly from the Mail Tools integration page:
- Click the action.
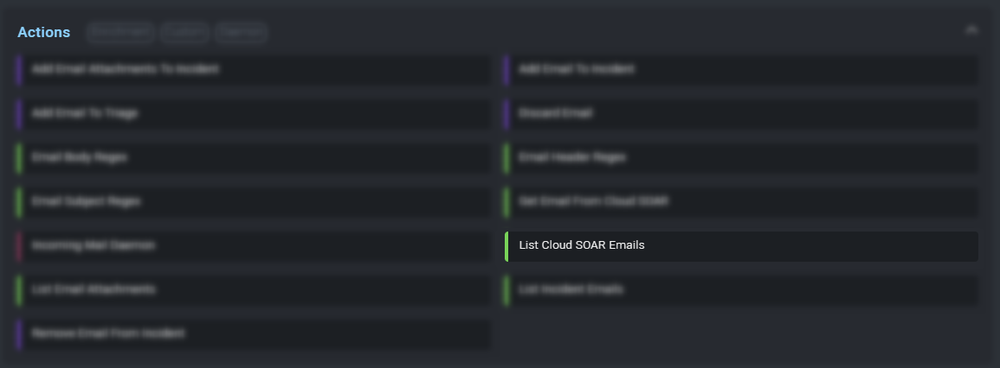
- Click TEST ACTION.
- After a moment you should receive the results.
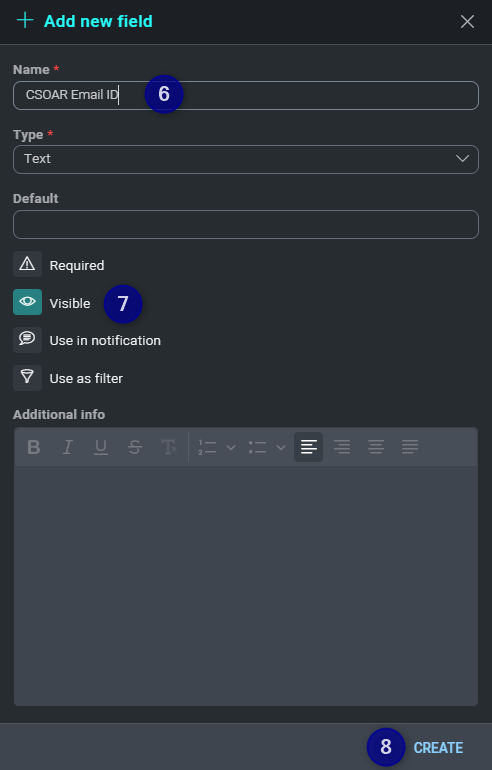
Create custom fields
Now you have to create two Custom Fields, one for Incident and the other for Triage. We will need this custom Field in playbook and incoming events automation rule mapping.
Follow these steps:
- Expand the configuration menu in the top right corner by hovering over the gear icon and click Settings.
- On the left menu expand Customization options.
- Then click on Fields.
- Make sure the Triage section is selected.
- Click on the button to add a new field.
- Enter the name (for example:
CSOAR Email ID). - Make sure the Visible option is selected.
- Click CREATE.
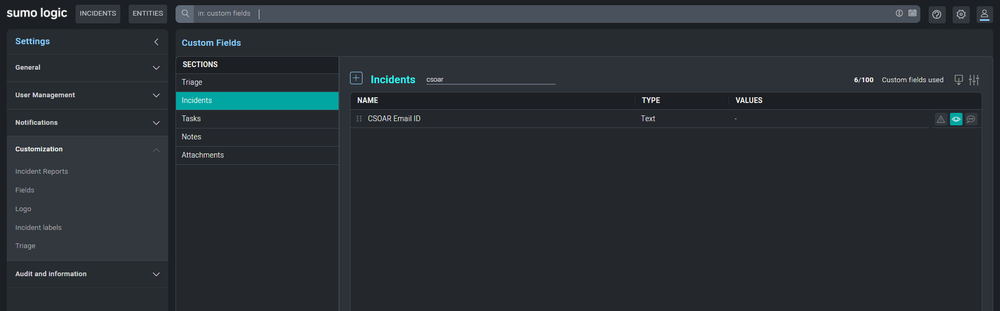
- Now you should see the new field in the table.
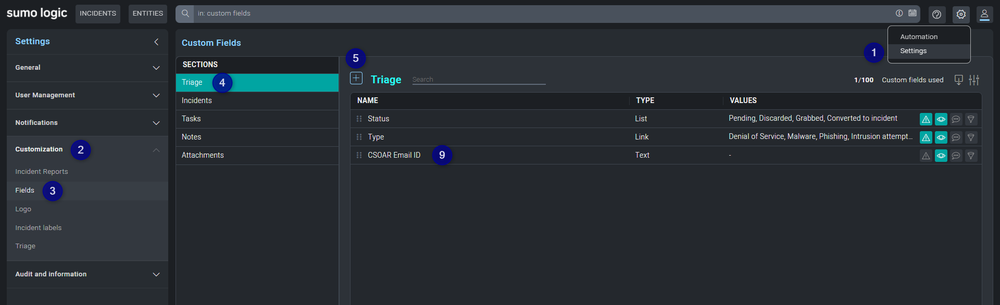
- Repeat the same steps from 5 to 9 for the Incidents section.
Create an Incident associated with mail
Once IMAP is configured you have the possibility to create an Incident associated with mail.
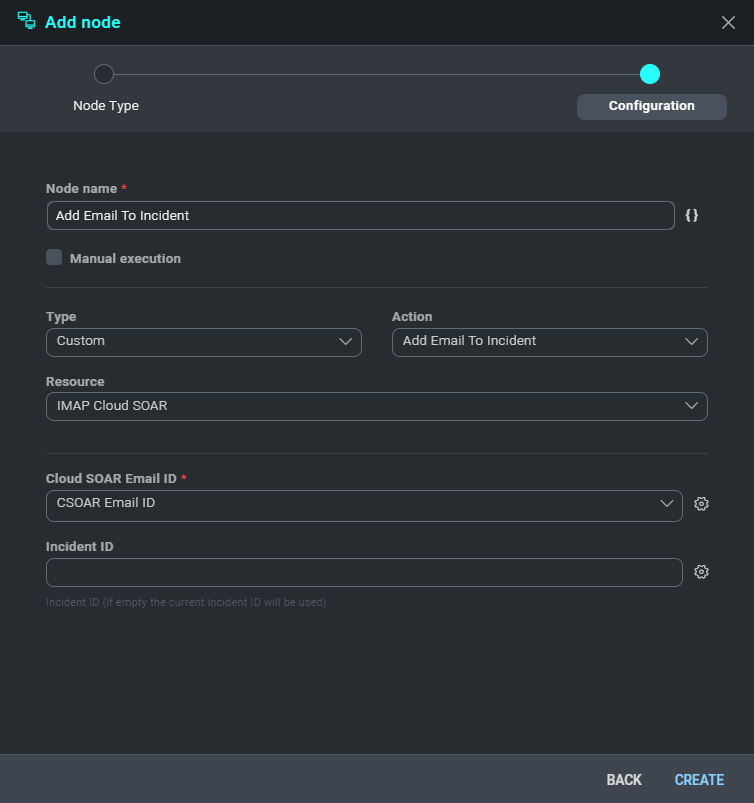
- Create a new playbook or you can update the existing playbook.
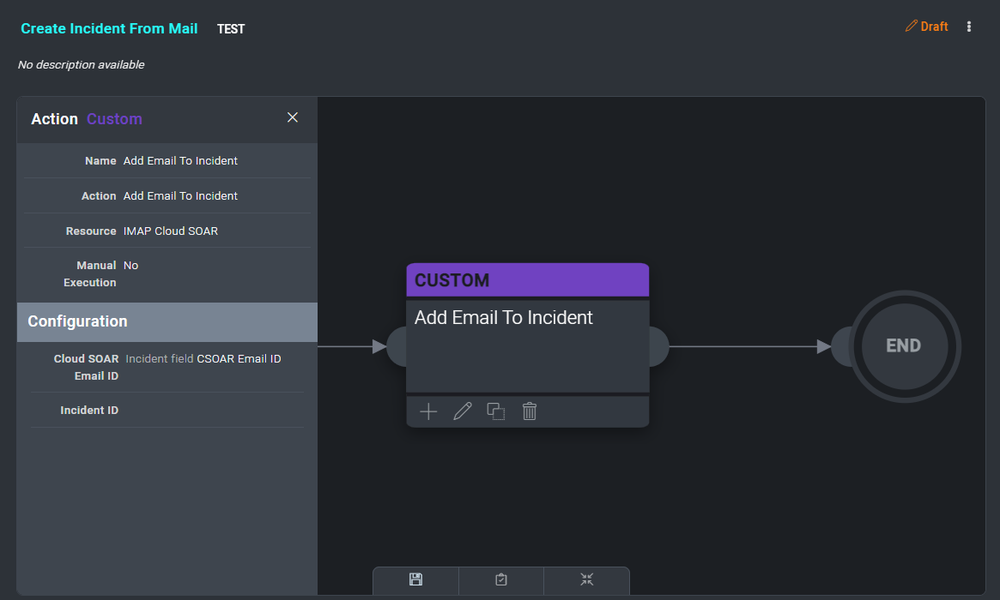
- Select the Add Email To Incident action for the node name.
For Cloud SOAR Email ID choose the ID that you created earlier (for example, CSOAR Email ID from Incident fields).
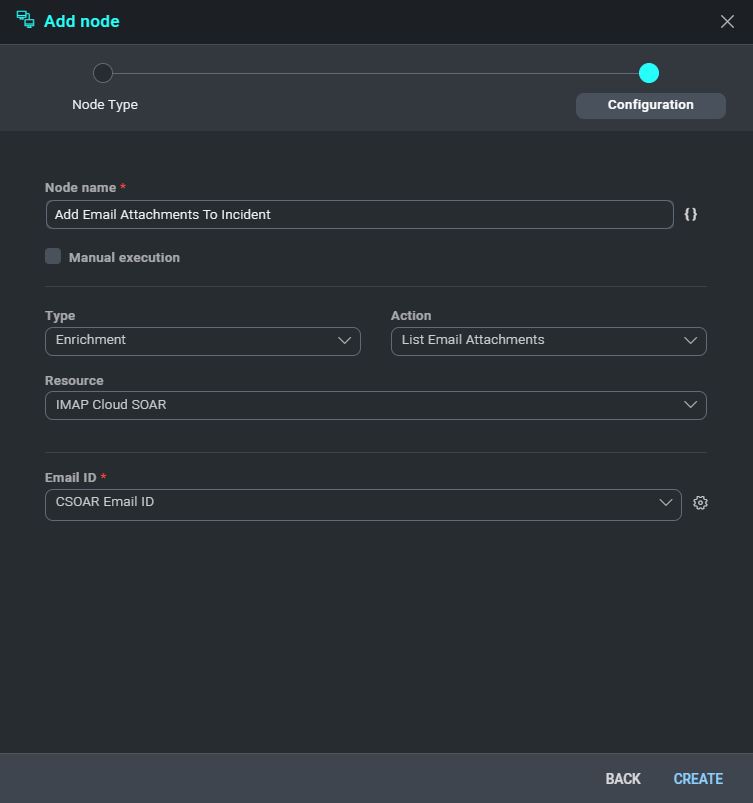
- Now let's expand the playbook by adding the ability to save attachments in the incident. Create a new node of type action and set the fields as you can see in the following picture.
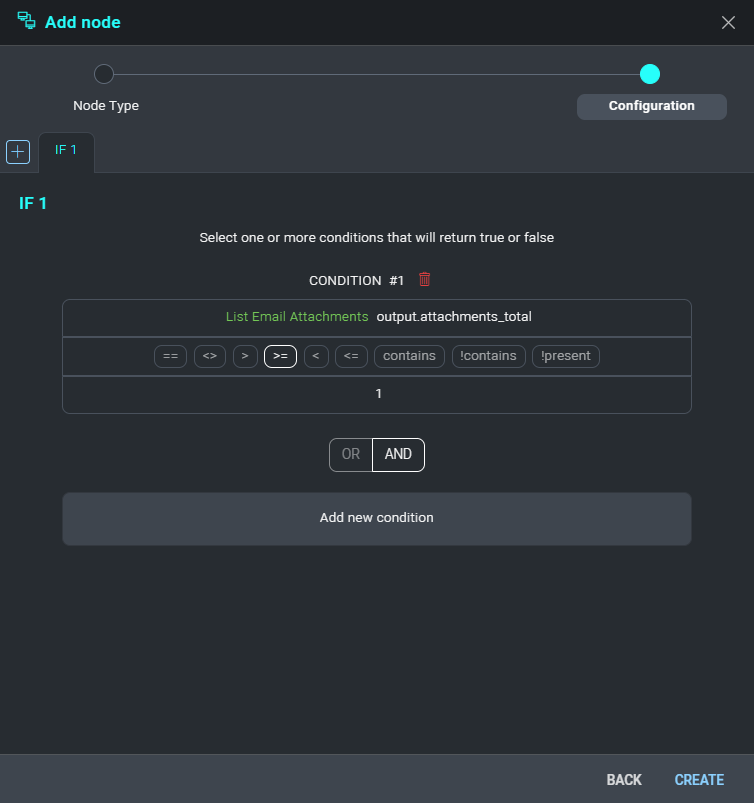
- Now we need a new node of type Condition.
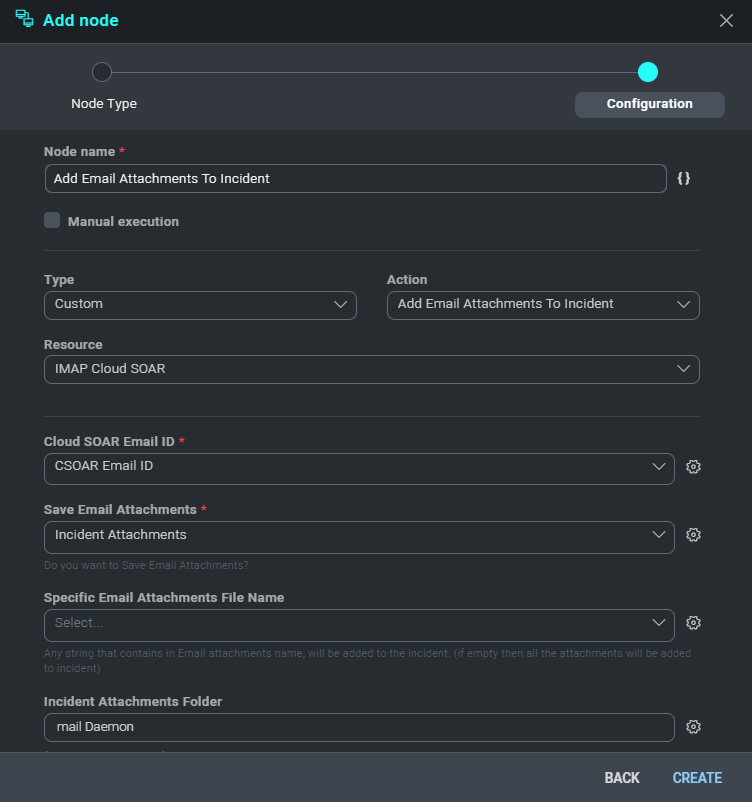
- Finally add another action as you can see.
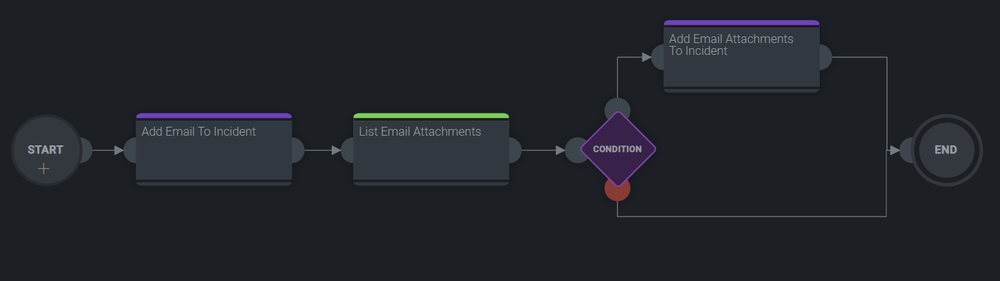
- Below you can see the final playbook.
- Another scenario that could be used with the IMAP mail daemon is to analyze an EML or MSG attachment that is contained in the mail without saving the attachment in the incident. Users can just extract the email with a given email ID.
The following example demonstrates that in an incident:
- Use the same action Add Email to Incident as seen before. This action is used to attach the email to the current incident.
- Then create Analyze EML MSG action (Mail Tools) .
- Select what should be parsed from the EML or MSG attachments.

- Below you can see the final playbook.

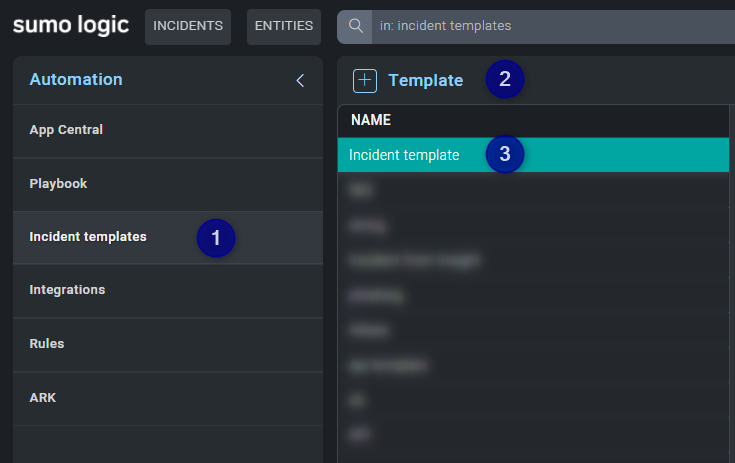
Create an Incident Template
Once the playbook is ready, then you can create an Incident Template.
- In the Automation section click on Incident templates.
- Click the button to create a new Template or jump to step 3 if you already have one.
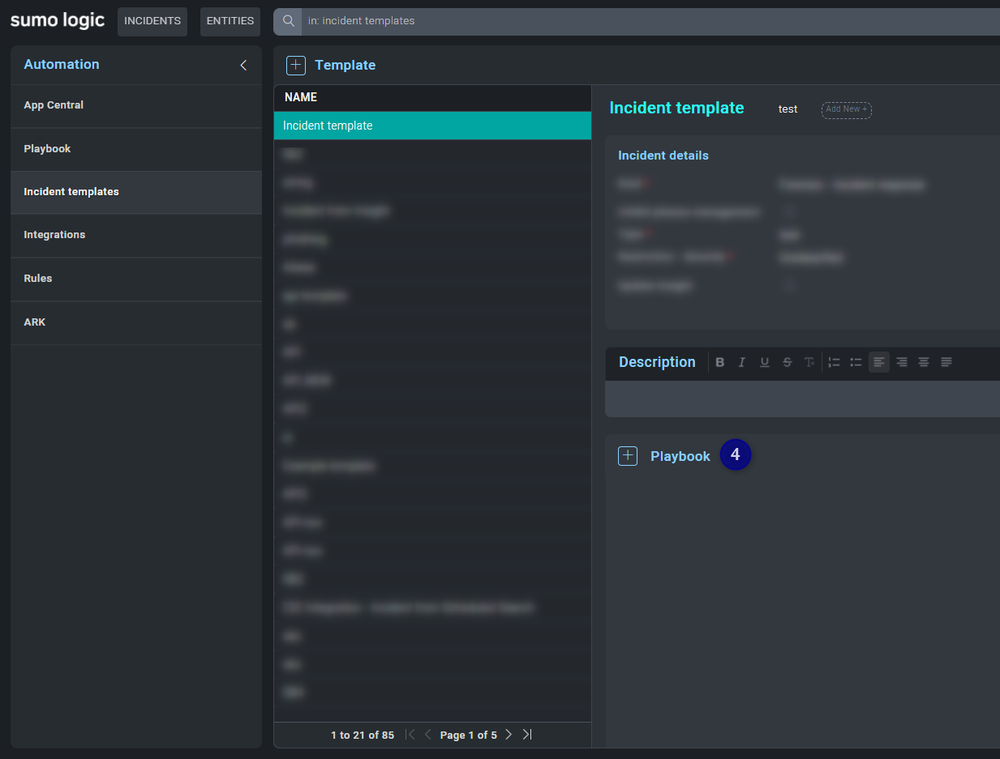
- Select the template.
- Click the button to add a new playbook (more than one playbook can added).
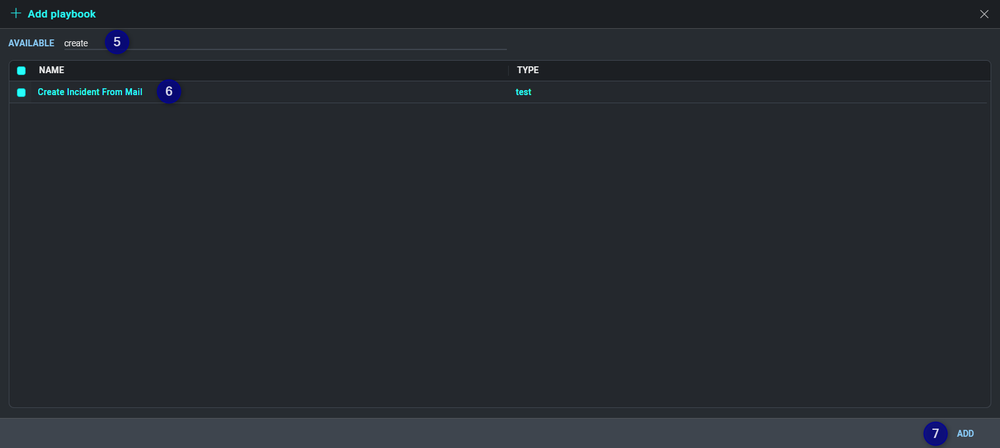
- Search your playbook.
- Select the playbook(s) you want to add.
- Click Add.
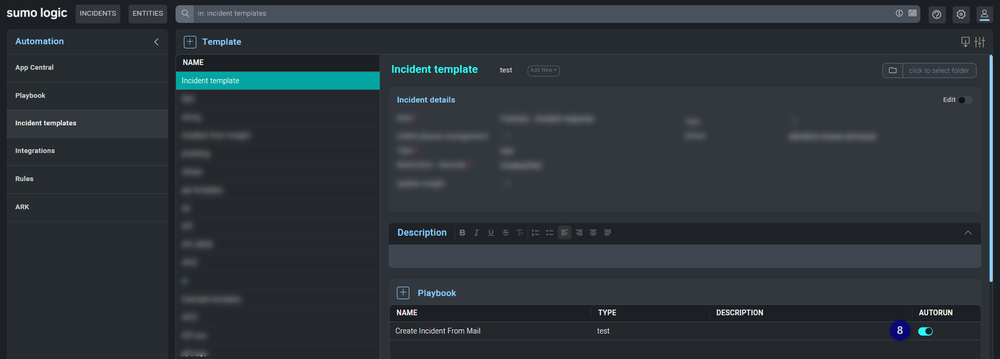
- Enable AUTORUN.
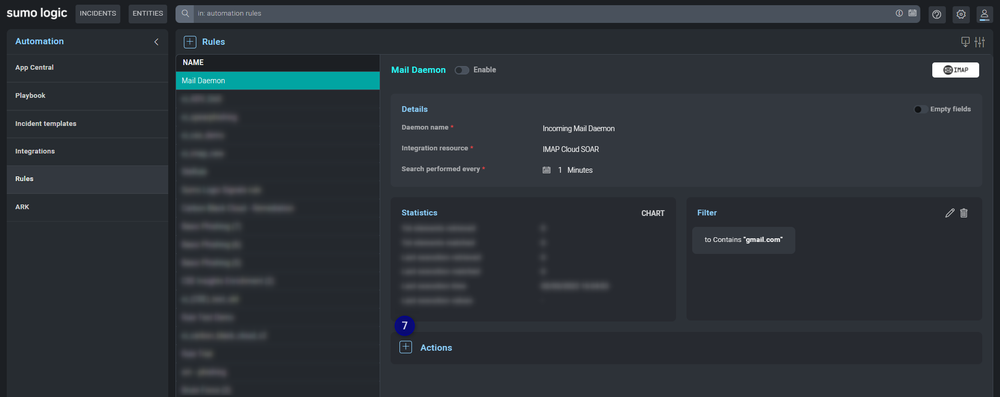
Create a new Rule
At this point you have to create a Daemon Rule.
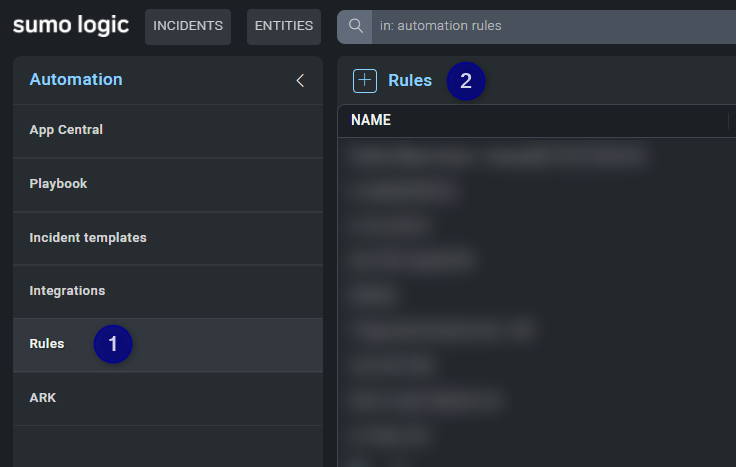
- In the Automation section click on Rules.
- Click the button to create a new rule.
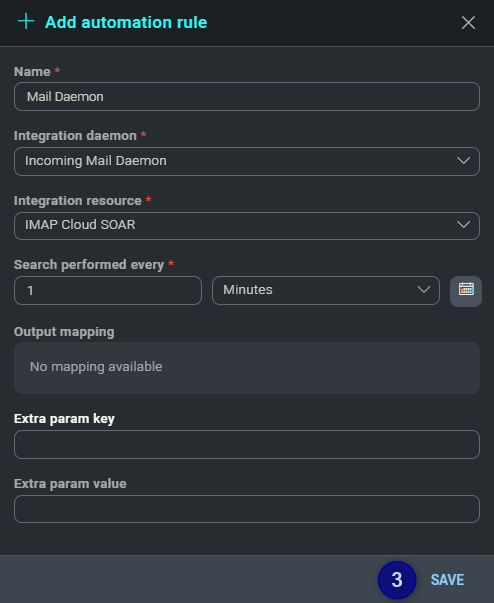
- Fill in all the required fields and click SAVE.
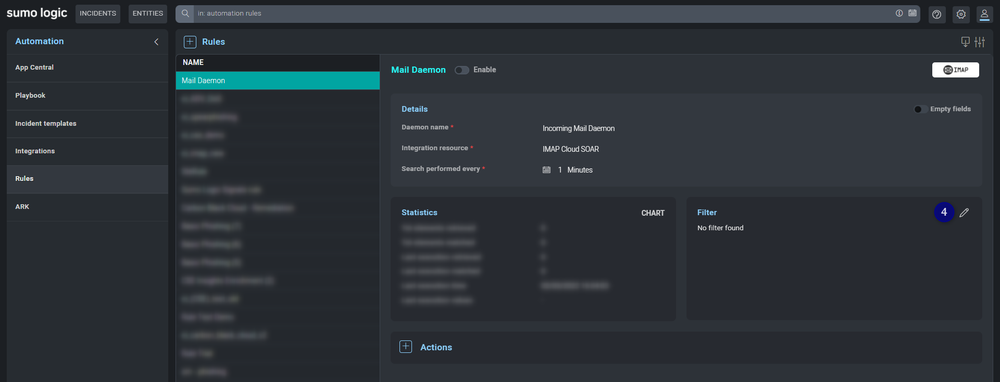
- Next we will create a filter.
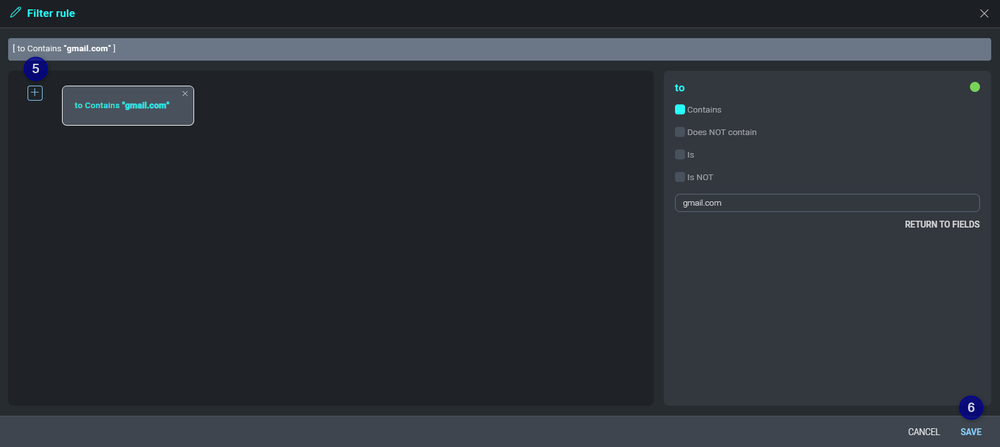
- Click the button to add a filter.
- After you created the filter click SAVE.
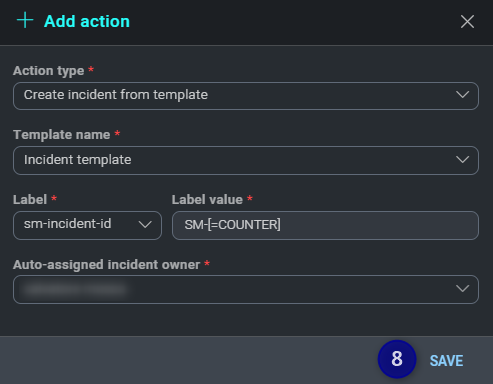
- Click the button to add a new action.
- Fill in all the required fields and click SAVE.
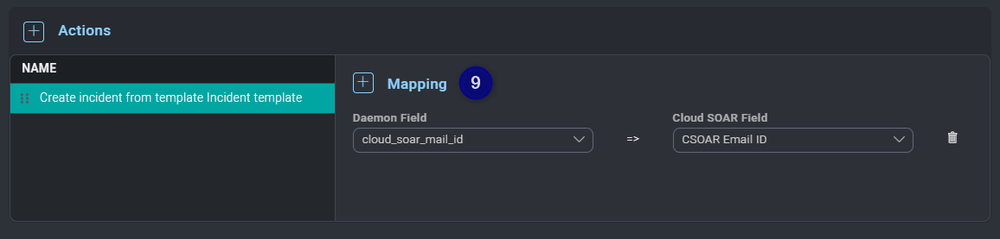
- Click the button and create a new mapping. Daemon Field must be cloud_soar_mail_id and Cloud SOAR Field must be set to a custom field.
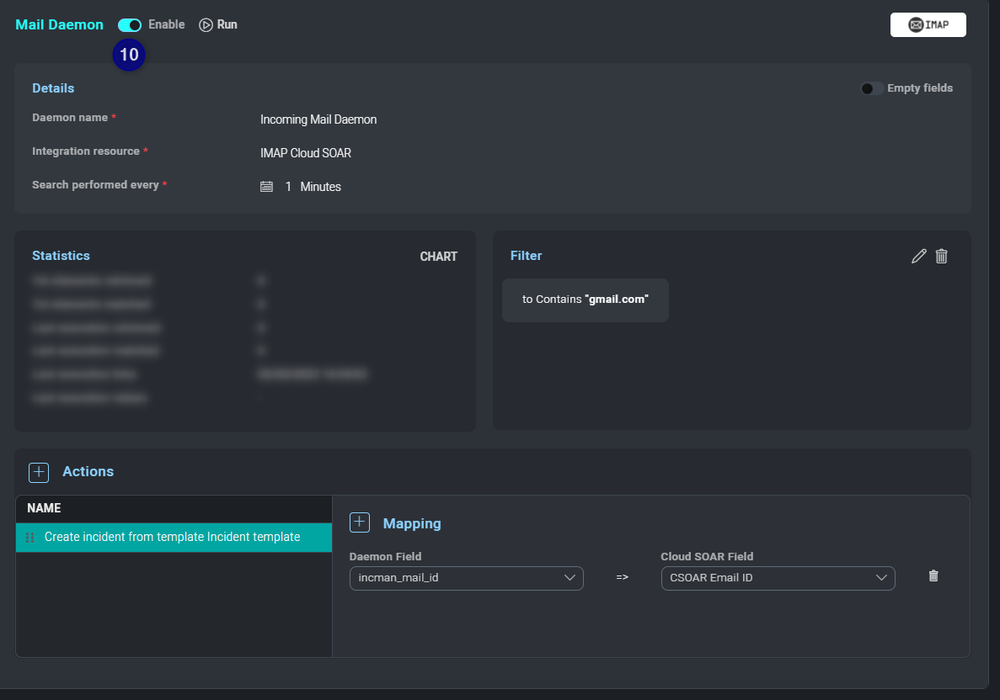
- Finally enable the Rule.
Email Body Regex
This action allows you to fetch the desired information from the email body using regular expression.
In the following example we add a new node in our playbook giving the following information.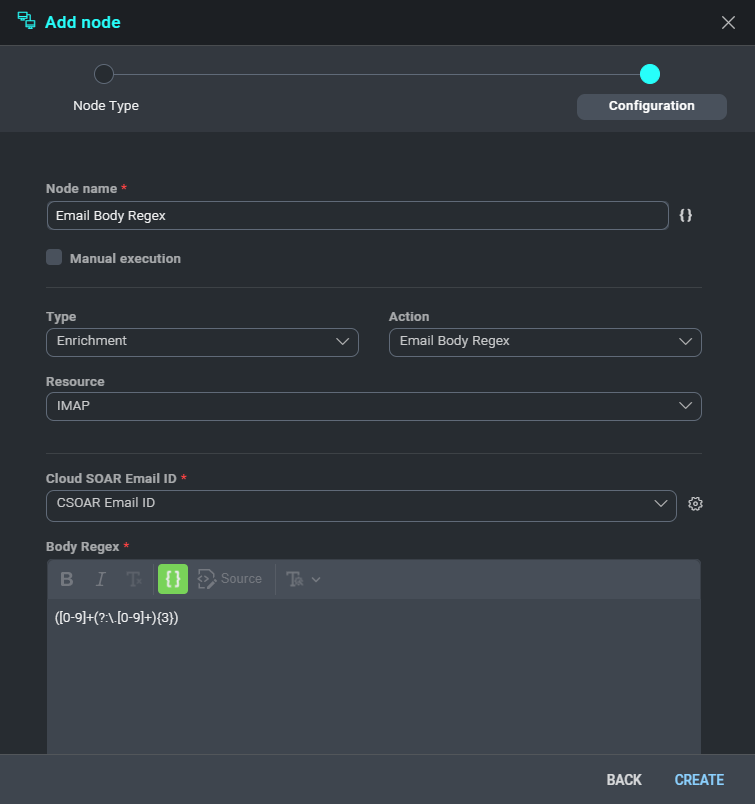
The final playbook looks like this:
Regex actions
- IP: ([0-9]+(?:.[0-9]+)3)
- Email: [\w.-]+@[\w.-]+
- URL:
(?i)(?:(?:https?|ftp):\/\/|www\.|ftp\.)(?:\([-A-Z0-9+&@#\/%=~\_|$?!:,.]\*\)|[-A-Z0-9+&@#\/%=~\_|$?!:,.])\*(?:\([-A-Z0-9+&@#\/%=~\_|$?!:,.]\*\)|[A-Z0-9+&@#\/%=~\_|$]) - Domain:
(?:[a-zA-Z0-9](?:[a-zA-Z0-9\-]{,61}[a-zA-Z0-9])?\.)\*[a-zA-Z]{2,6}(?:[a-zA-Z0-9](?:[a-zA-Z0-9\-]{0,61}[a-zA-Z0-9])?\.)+[a-zA-Z]{2,6} - MD5: \b[0-9a-fA-F]32\b
- SHA1: \b[0-9a-fA-F]40\b
- SHA256: \b[0-9a-fA-F]64\b
- DateTime Regex Example (2021-01-28 11:21:04): \d4-\d2-\d2 \d2:\d2:\d2
- Email Attachments Filename (Email Header Regex Action): filename: (.*?),,
- Common credit card vendor Regex:
- MasterCard: (?:5[1-5][0-9]14|2(?:22[1-9][0-9]12|2[3-9][0-9]13|[3-6][0-9]14|7[0-1][0-9]13|720[0-9]12))
- Visa Mastercard: (?:4[0-9]12(?:[0-9]3)?|5[1-5][0-9]14)
- Amex Card: 3[47][0-9]13
- BCGlobal: (6541|6556)[0-9]12
- Carte Blanche Card: 389[0-9]11
- Diners Club Card: 3(?:0[0-5]|[68][0-9])[0-9]11
- Discover Card: 65[4-9][0-9]13|64[4-9][0-9]13|6011[0-9]12|(622(?:12[6-9]|1[3-9][0-9]|[2-8][0-9][0-9]|9[01][0-9]|92[0-5])[0-9]10)
- Insta Payment Card: 63[7-9][0-9]13
- JCB Card: (?:2131|1800|35\d3)\d11
- KoreanLocalCard: 9[0-9]15
- Laser Card: (6304|6706|6709|6771)[0-9]15
- Maestro Card: (5018|5020|5038|6304|6759|6761|6763)[0-9]15
- Solo Card: (6334|6767)[0-9]12|(6334|6767)[0-9]14|(6334|6767)[0-9]15
- Switch Card: (4903|4905|4911|4936|6333|6759)[0-9]12|(4903|4905|4911|4936|6333|6759)[0-9]14|(4903|4905|4911|4936|6333|6759)[0-9]15|564182[0-9]10|564182[0-9]12|564182[0-9]13|633110[0-9]10|633110[0-9]12|633110[0-9]13
- Union Pay Card: (62[0-9]17)
- Visa Card: 4[0-9]12(?:[0-9]3)?
Change Log
- May 7, 2019 - First upload
- February 8, 2021 - Updated actions
- March 8, 2022 - Description, Guide
- May 5, 2022 - Added new filter options for Incoming Mail Daemon
- October 2, 2023 (v1.2) - Integration Updated
- March 4, 2024 (v1.3) - Updated code for compatibility with Python 3.12