Proofpoint TAP

Version: 1.2
Updated: Mar 31, 2023
Proofpoint Targeted Attack Protection (TAP) integration which protects against and provides additional visibility into phishing and other malicious attacks.
Actions
- List Campaigns (Enrichment) - Gets details for a given campaign.
- Get Campaign (Enrichment) - Gets a list of IDs of campaigns active in a specified time period.
- Get Most Attacked Users (Enrichment) - Gets a list of the most attacked users in the organization.
- Get Top Clickers (Enrichment) - Gets a list of the top clickers in the organization for a specified time period.
- Get Threat (Enrichment) - A string containing a unique identifier associated with the threat in TAP Dashboard.
- List Issues (Enrichment) - Get events for clicks to malicious URLs permitted and messages delivered containing a known attachment threat within the specified time period.
- Blocked Messages (Enrichment) - Fetch events for messages blocked in the specified time period which contained a known threat.
- Blocked Clicks (Enrichment) - Fetch events for clicks to malicious URLs blocked in the specified time period.
- Decode URL (Containment) - The URL Decoder allows users to decode URLs which have been rewritten by TAP to their original, target URL.
Configure Proofpoint TAP in Automation Service and Cloud SOAR
Before you can use this automation integration, you must configure its authentication settings so that the product you're integrating with can communicate with Sumo Logic. For general guidance, see Configure Authentication for Automation Integrations.
How to open the integration's configuration dialog
- Access App Central and install the integration. (You can configure at installation, or after installation with the following steps.)
- Go to the Integrations page.
Classic UI. In the main Sumo Logic menu, select Automation and then select Integrations in the left nav bar.
New UI. In the main Sumo Logic menu, select Automation > Integrations. You can also click the Go To... menu at the top of the screen and select Integrations. - Select the installed integration.
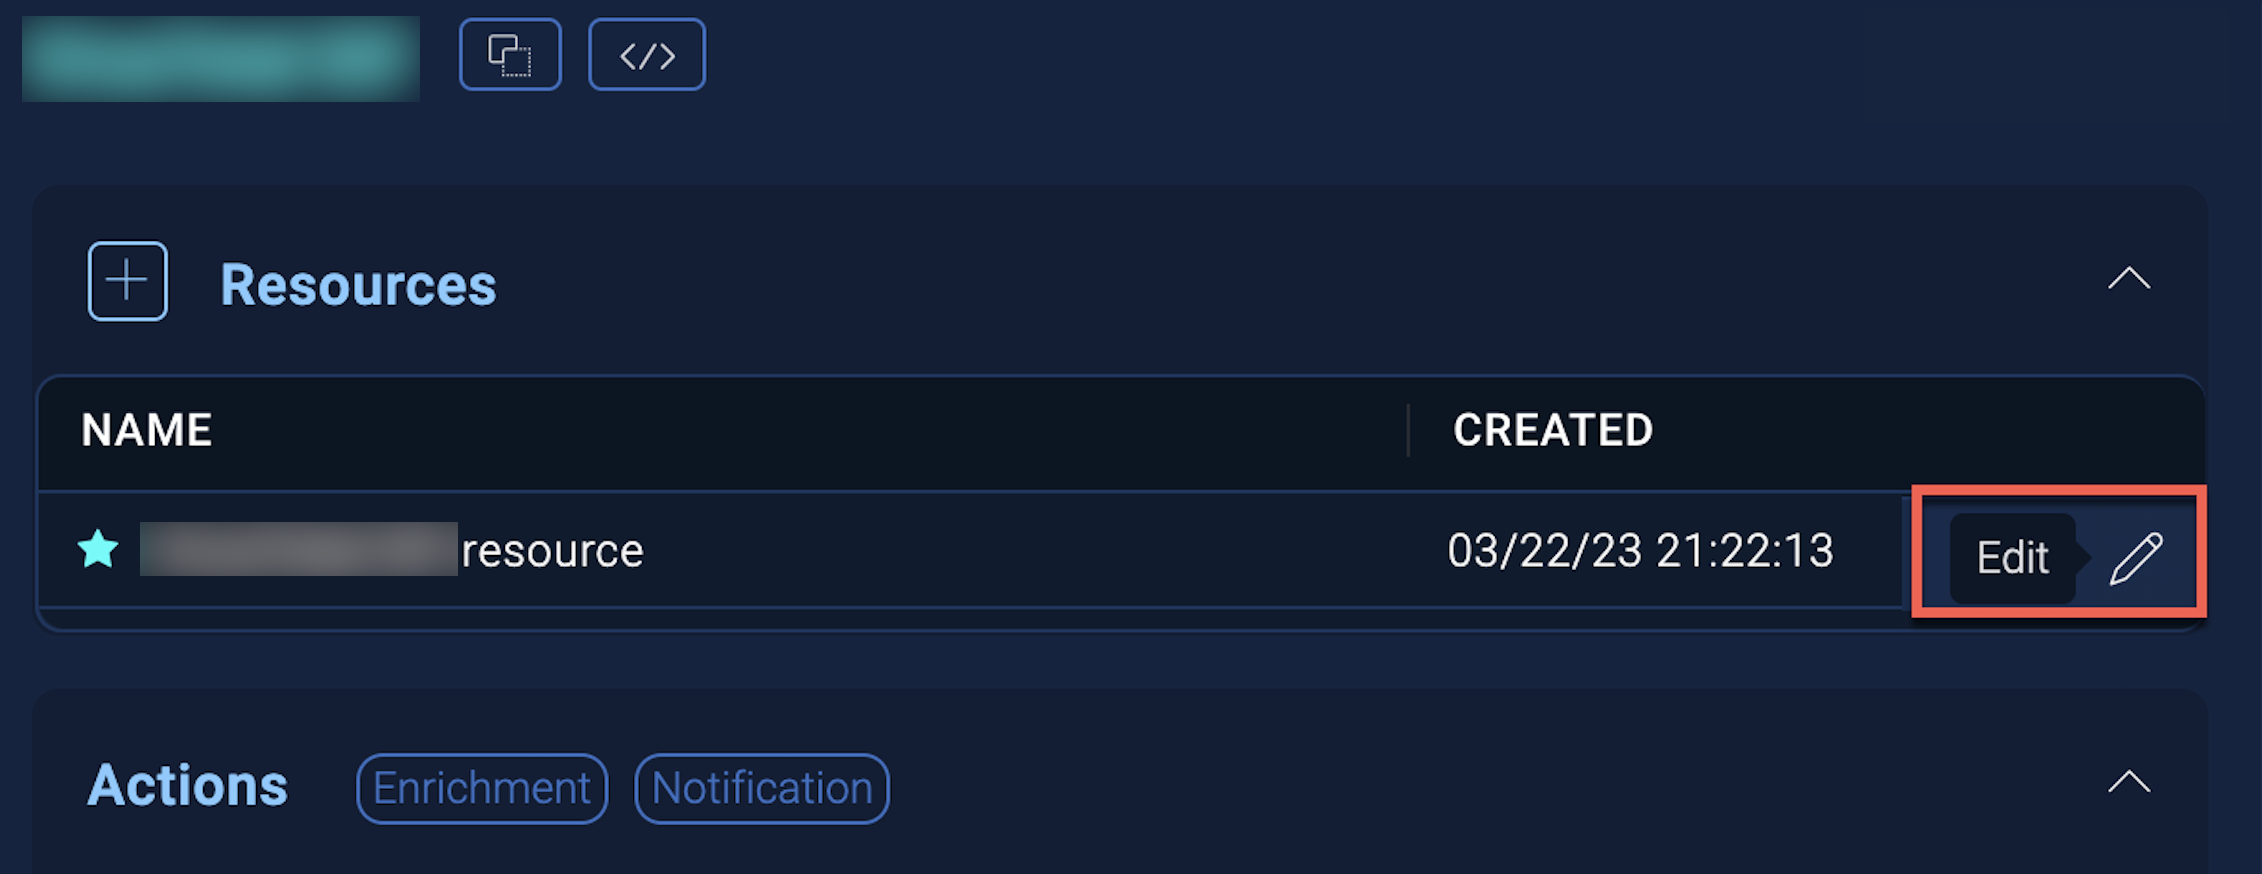
- Hover over the resource name and click the Edit button that appears.

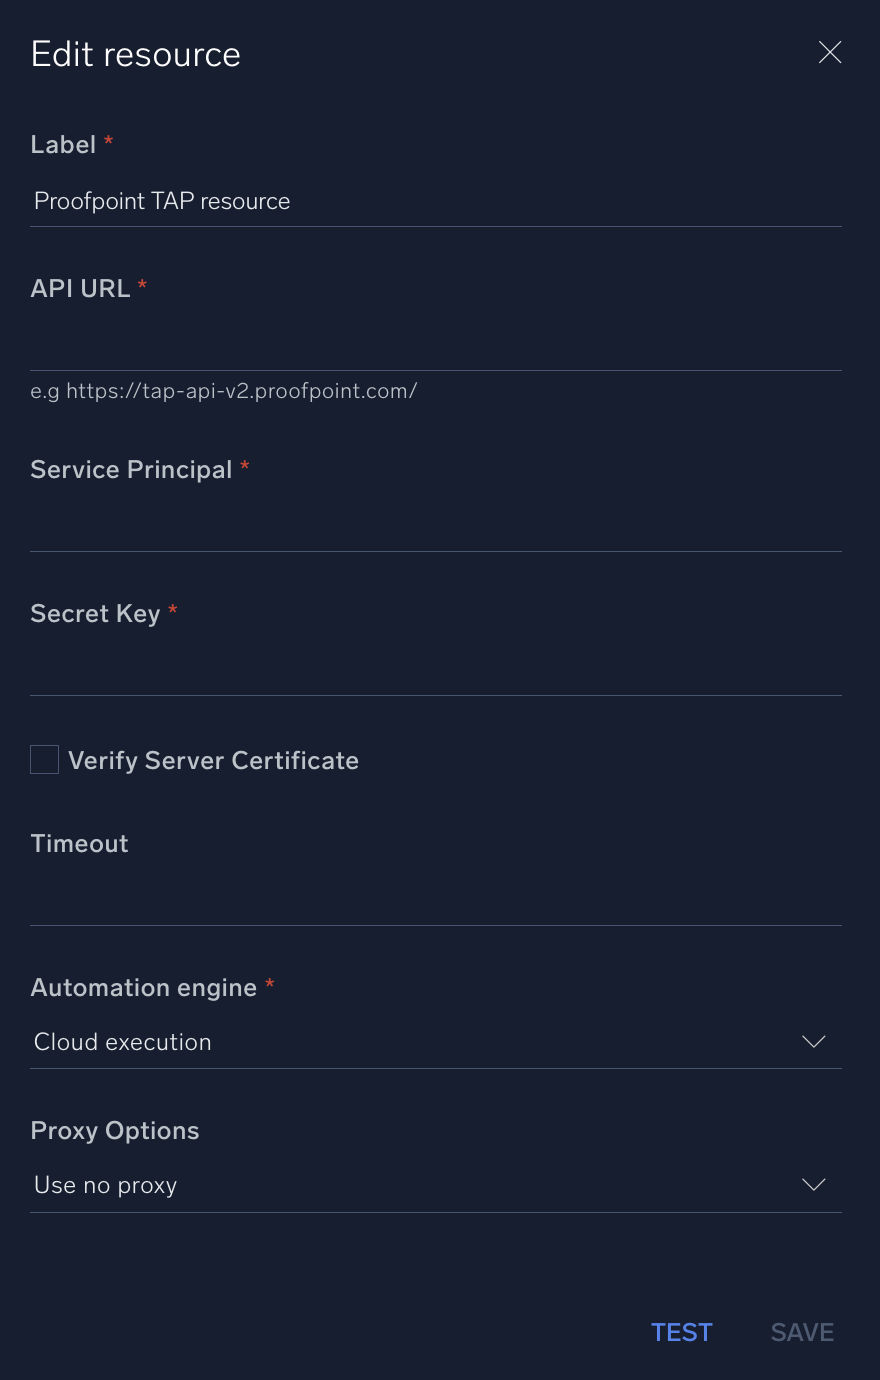
In the configuration dialog, enter information from the product you're integrating with. When done, click TEST to test the configuration, and click SAVE to save the configuration:
-
Label. Enter the name you want to use for the resource.
-
URL. Enter your Proofpoint TAP API URL. The default is
https://tap-api-v2.proofpoint.com -
Service Principal. Enter your Proofpoint TAP service principal.
-
Secret Key. Enter the secret key for the service principal.
-
Verify Server Certificate. Select to validate the server’s SSL certificate.
-
Connection Timeout (s). Set the maximum amount of time the integration will wait for a server's response before terminating the connection. Enter the connection timeout time in seconds (for example,
180). -
Automation Engine. Select Cloud execution for this certified integration. Select a bridge option only for a custom integration. See Cloud or Bridge execution.
-
Proxy Options. Select whether to use a proxy. (Applies only if the automation engine uses a bridge instead of cloud execution.)
- Use no proxy. Communication runs on the bridge and does not use a proxy.
- Use default proxy. Use the default proxy for the bridge set up as described in Using a proxy.
- Use different proxy. Use your own proxy service. Provide the proxy URL and port number.

For information about Proofpoint, see the Proofpoint website.
Change Log
- February 4, 2022 - First upload
- March 31, 2023 (v1.1 and v1.2) - Integration refined.