Sophos Central V3

Version: 3.3
Updated: Mar 4, 2024
Utilize Sophos Central enrichment data during incident investigations.
Actions
- Get Alerts (Enrichment) - Gather Sophos Central alerts.
- Get Alerts Sophos Daemon (Daemon) - Get Sophos Central alerts on a time interval.
- Get Endpoints (Enrichment) - Gather all endpoints.
- Isolate an Endpoint (Containment) - Isolate a single endpoint.
- Isolate Endpoints (Containment) - Isolate multiple endpoints.
Sophos Central V3 configuration
The following steps show how to create new API credentials to work with Cloud SOAR.
- Log in to the Sophos Central Partner platform.
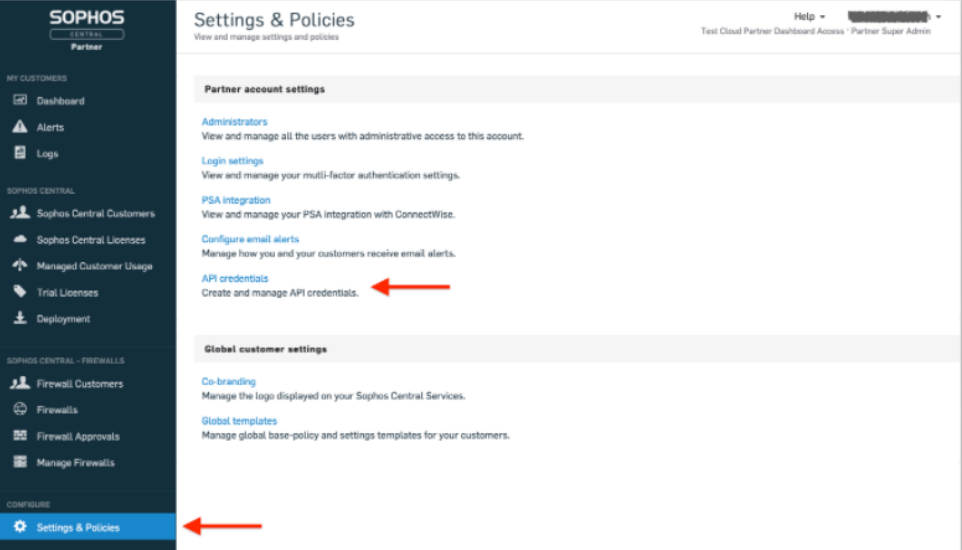
- On the left click on Settings & Policies and then click the API credentials.
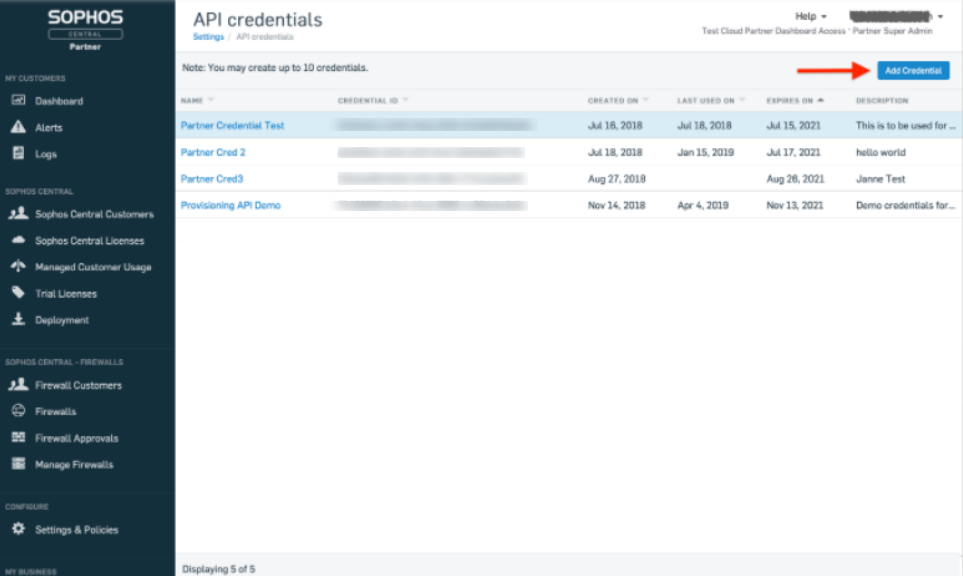
- Click on Add Credential.
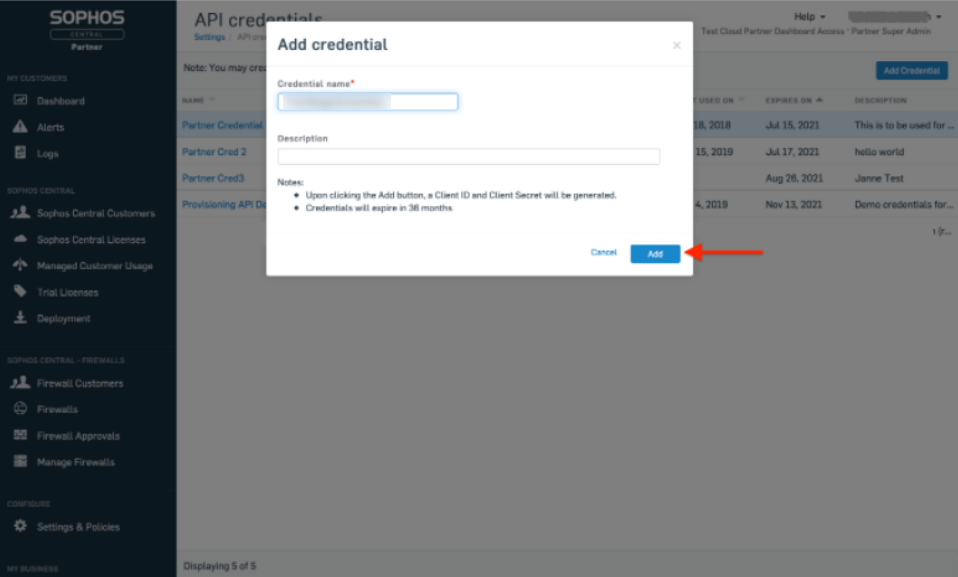
- Enter Credential name (required) and the description if you want.
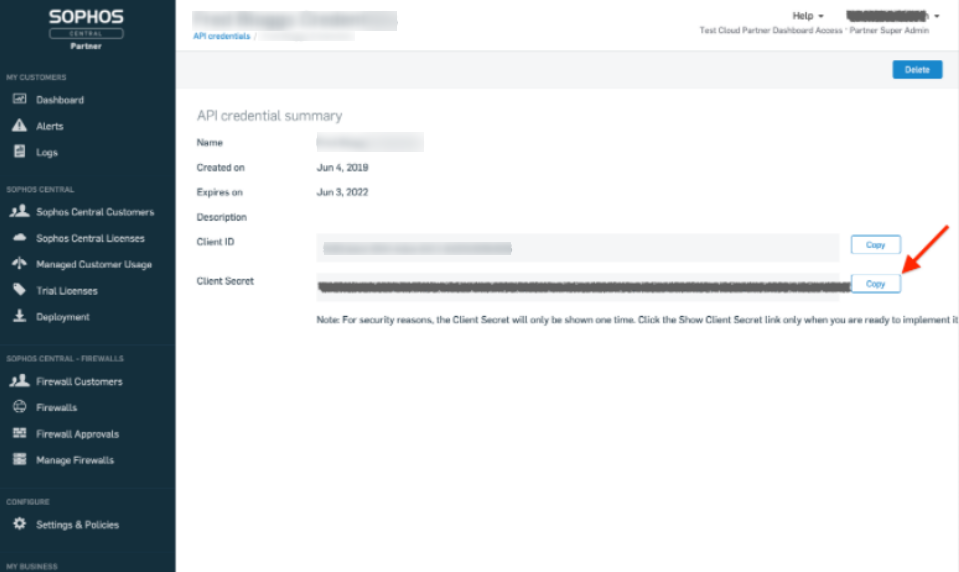
- Click the Copy button on the Client ID and paste it temporally in a text editor.
- Click Show Client Secret.
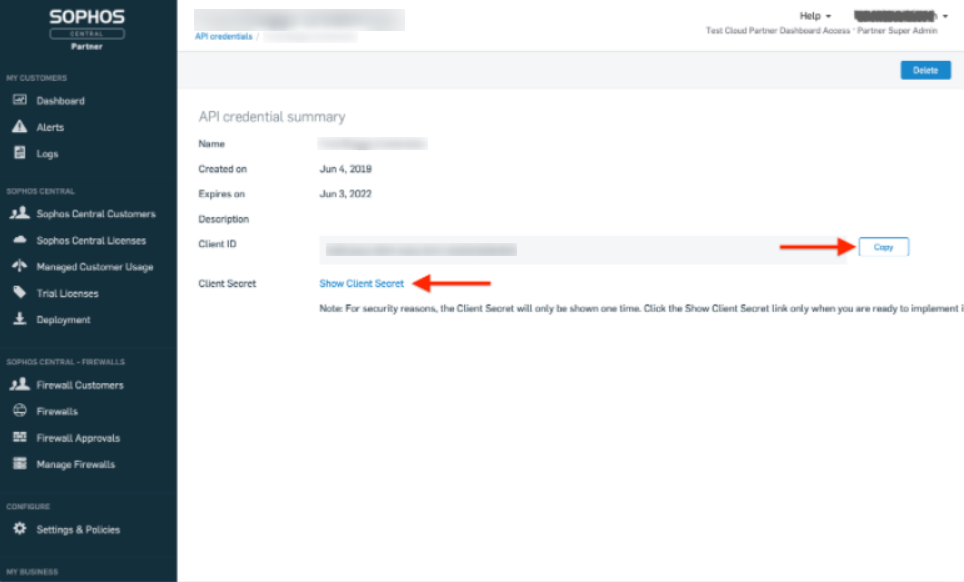
- Now you can copy the key as shown.
Configure Sophos Central V3 in Automation Service and Cloud SOAR
Before you can use this automation integration, you must configure its authentication settings so that the product you're integrating with can communicate with Sumo Logic. For general guidance, see Configure Authentication for Automation Integrations.
How to open the integration's configuration dialog
- Access App Central and install the integration. (You can configure at installation, or after installation with the following steps.)
- Go to the Integrations page.
Classic UI. In the main Sumo Logic menu, select Automation and then select Integrations in the left nav bar.
New UI. In the main Sumo Logic menu, select Automation > Integrations. You can also click the Go To... menu at the top of the screen and select Integrations. - Select the installed integration.
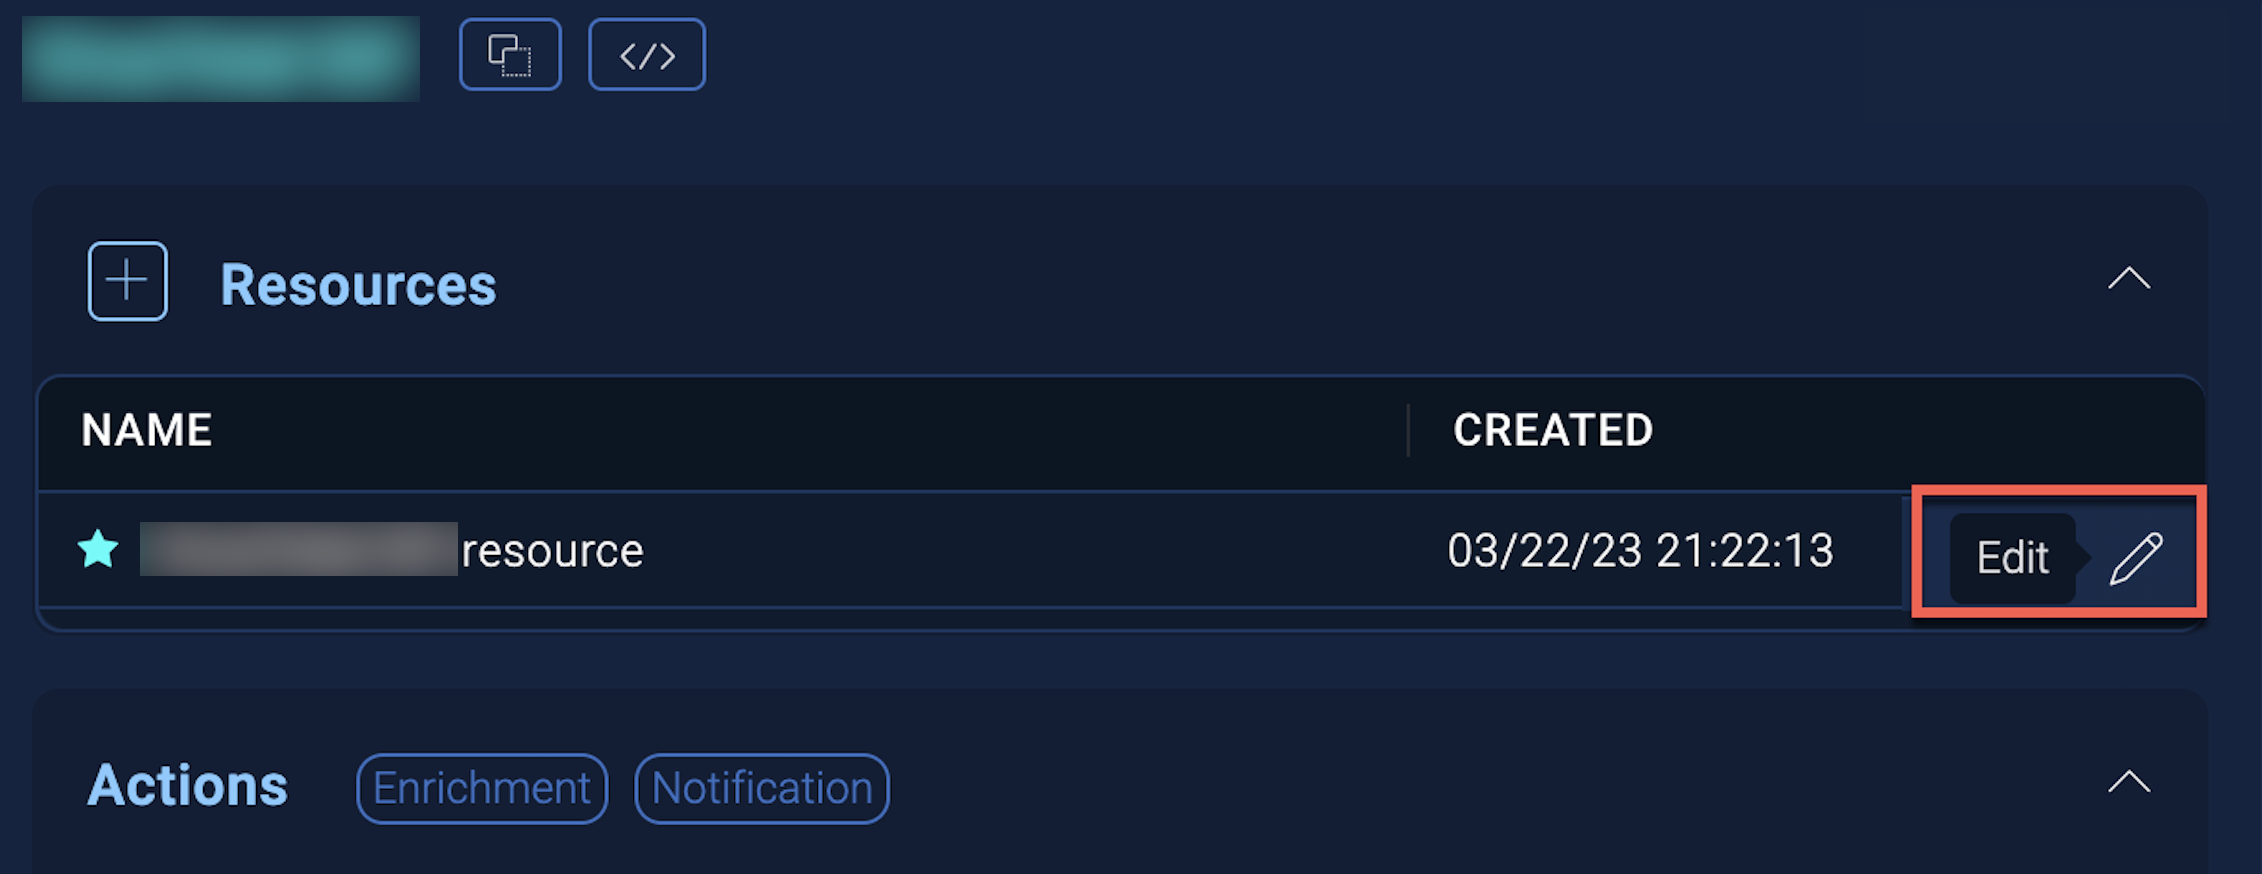
- Hover over the resource name and click the Edit button that appears.
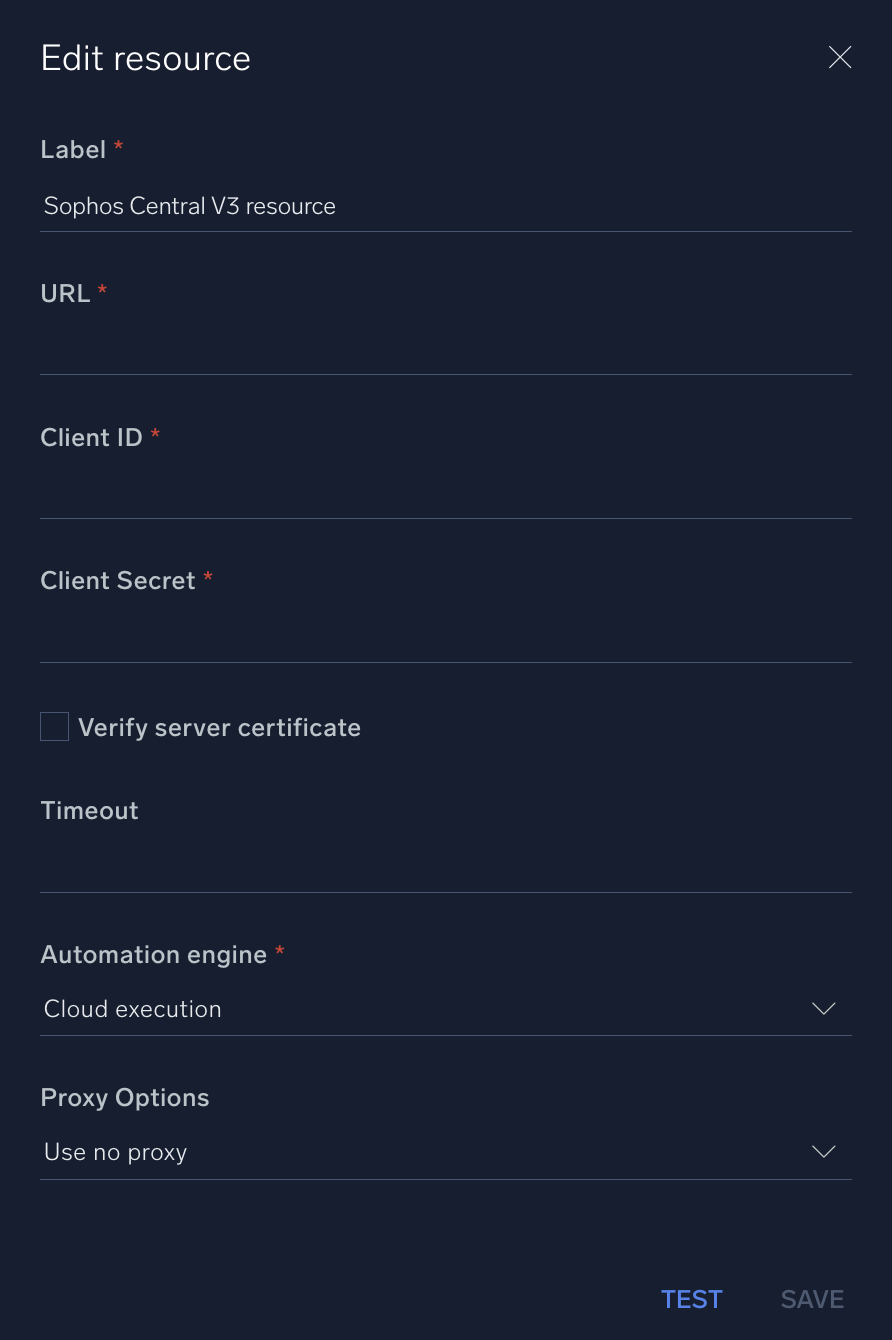
In the configuration dialog, enter information from the product you're integrating with. When done, click TEST to test the configuration, and click SAVE to save the configuration:
-
Label. Enter the name you want to use for the resource.
-
URL. Enter your Sophos API URL, for example,
https://api.central.sophos.com. -
Client ID. Enter the client ID you obtained earlier.
-
Client Secret. Enter the secret for the client ID.
-
Verify Server Certificate. Select to validate the server’s SSL certificate.
-
Connection Timeout (s). Set the maximum amount of time the integration will wait for a server's response before terminating the connection. Enter the connection timeout time in seconds (for example,
180). -
Automation Engine. Select Cloud execution for this certified integration. Select a bridge option only for a custom integration. See Cloud or Bridge execution.
-
Proxy Options. Select whether to use a proxy. (Applies only if the automation engine uses a bridge instead of cloud execution.)
- Use no proxy. Communication runs on the bridge and does not use a proxy.
- Use default proxy. Use the default proxy for the bridge set up as described in Using a proxy.
- Use different proxy. Use your own proxy service. Provide the proxy URL and port number.
For information about Sophos Central, see Sophos Central documentation.
Change Log
- December 28, 2021 - First upload
- January 24, 2022 - New actions added
- July 11, 2023 (v3.2)
- Updated the integration with Environmental Variables
- Integration renamed from Sophos Central 3.0 to Sophos Central V3
- March 4, 2024 (v3.3) - Updated code for compatibility with Python 3.12