ThreatDown OneView
Version: 1.0
Updated: Mar 7, 2025
Malwarebytes ThreatDown OneView (MBOV) provides your business with a powerful and affordable security management platform that gives security teams maximum control. OneView streamlines endpoint security management by providing out-of-the-box security policies, scans, and remediation.
Actions
- Create Exclusion (Containment) - Create Exclusion.
- Create Policy (Containment) - Create policy.
- Delete Exclusion (Containment) - Delete exclusion by ID.
- Delete Policy (Containment) - Delete policy by ID.
- Get Account Info (Enrichment) - Retrieve Account Info.
- Get Endpoint (Enrichment) - Retrieve a single ID by its universally unique identifier.
- Get Endpoint Status (Enrichment) - Get the status of an endpoint.
- Get Exclusion (Enrichment) - Get exclusion by ID.
- Get Job Status (Enrichment) - Get details about an issued job by ID.
- Get Policy (Enrichment) - Get policy by ID.
- Get Suspicious Activity (Enrichment) - Fetch suspicious activity of an endpoint.
- Issue Job (Containment) - Issue a job (scan endpoint, restart endpoint, check for updates).
- List Detections (Enrichment) - Search detections.
- List Policies (Enrichment) - Retrieve a list of policies.
- List Sites (Enrichment) - Retrieves a list of all sites associated with the account.
- List Vulnerabilities (Enrichment) - Search CVE grouped by a specific field.
- Remediate Activity (Containment) - Remediate suspicious activity of an endpoint.
- Search Endpoints (Enrichment) - Search all endpoints, or search either the alias or the host name of a fully qualified host name.
- Update Exclusion (Containment) - Update Exclusion by ID.
- Update Policy (Containment) - Update policy.
Category
Threat Intelligence Reputation
ThreatDown OneView configuration
Generate API credentials
Create API credentials from your Malwarebytes account:
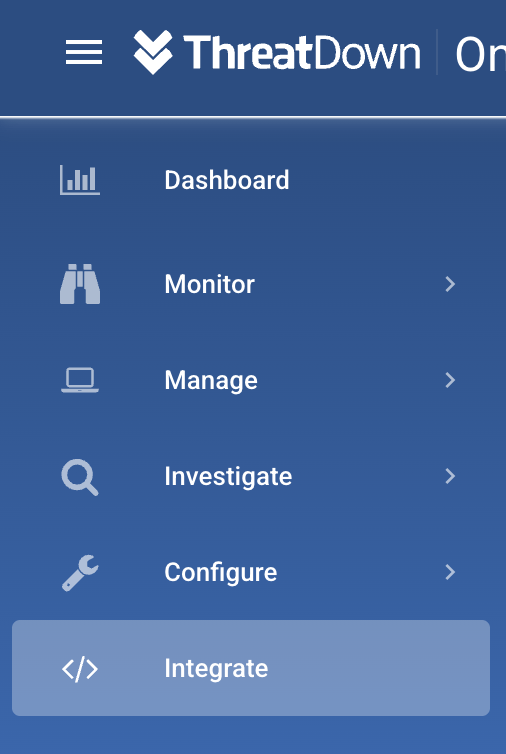
- Sign in to Malwarebytes with your Malwarebytes account.
- Click Integrate.
- Click "+" to create credentials.
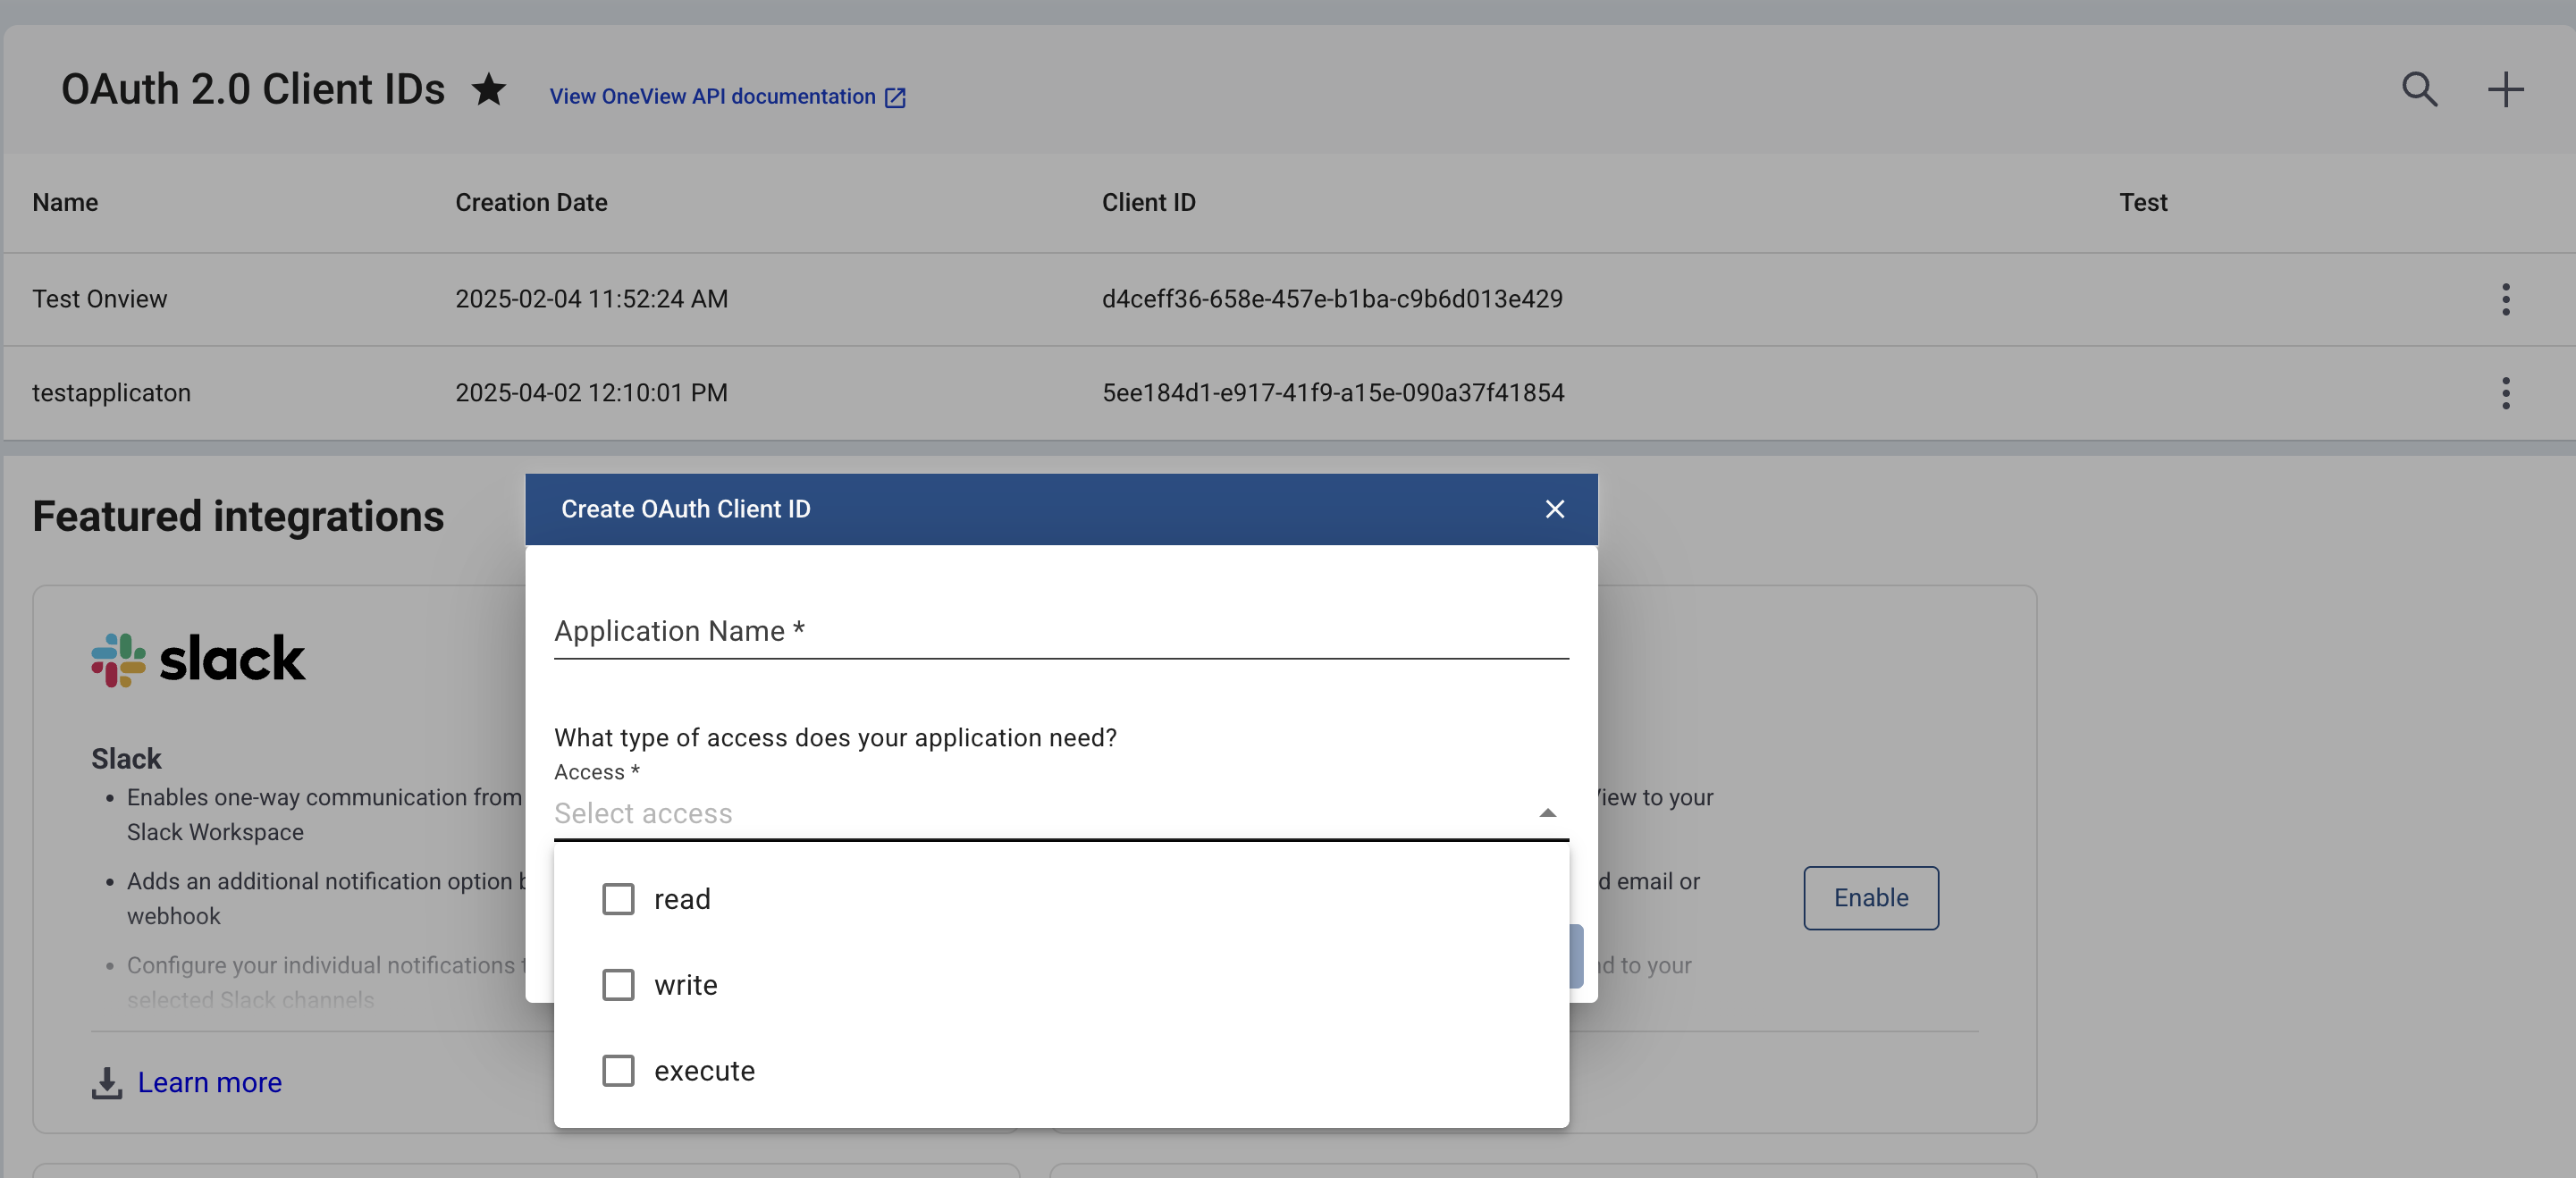
- Give a name to the application.
- Select the required access.
When configuring credentials for the integration, permissions can be set to Read, Write, and Execute. While it's possible to grant only the required permissions based on your use case, we recommend assigning all three permissions during credential creation. This ensures full compatibility with all available actions in the integration and avoids permission-related failures in the future.
The minimum required permissions vary based on the type of actions being performed:- Enrichment actions
- These actions only retrieve data.
- Required Permission: Read
- Containment actions
- These actions perform changes or take action on endpoints.
- Required Permissions: Write and Execute
- Enrichment actions
- After this you will get an Client ID and Client Secret. Copy the Client ID and Client Secret.
Configure ThreatDown OneView in Automation Service and Cloud SOAR
Before you can use this automation integration, you must configure its authentication settings so that the product you're integrating with can communicate with Sumo Logic. For general guidance, see Configure Authentication for Automation Integrations.
How to open the integration's configuration dialog
- Access App Central and install the integration. (You can configure at installation, or after installation with the following steps.)
- Go to the Integrations page.
Classic UI. In the main Sumo Logic menu, select Automation and then select Integrations in the left nav bar.
New UI. In the main Sumo Logic menu, select Automation > Integrations. You can also click the Go To... menu at the top of the screen and select Integrations. - Select the installed integration.
- Hover over the resource name and click the Edit button that appears.
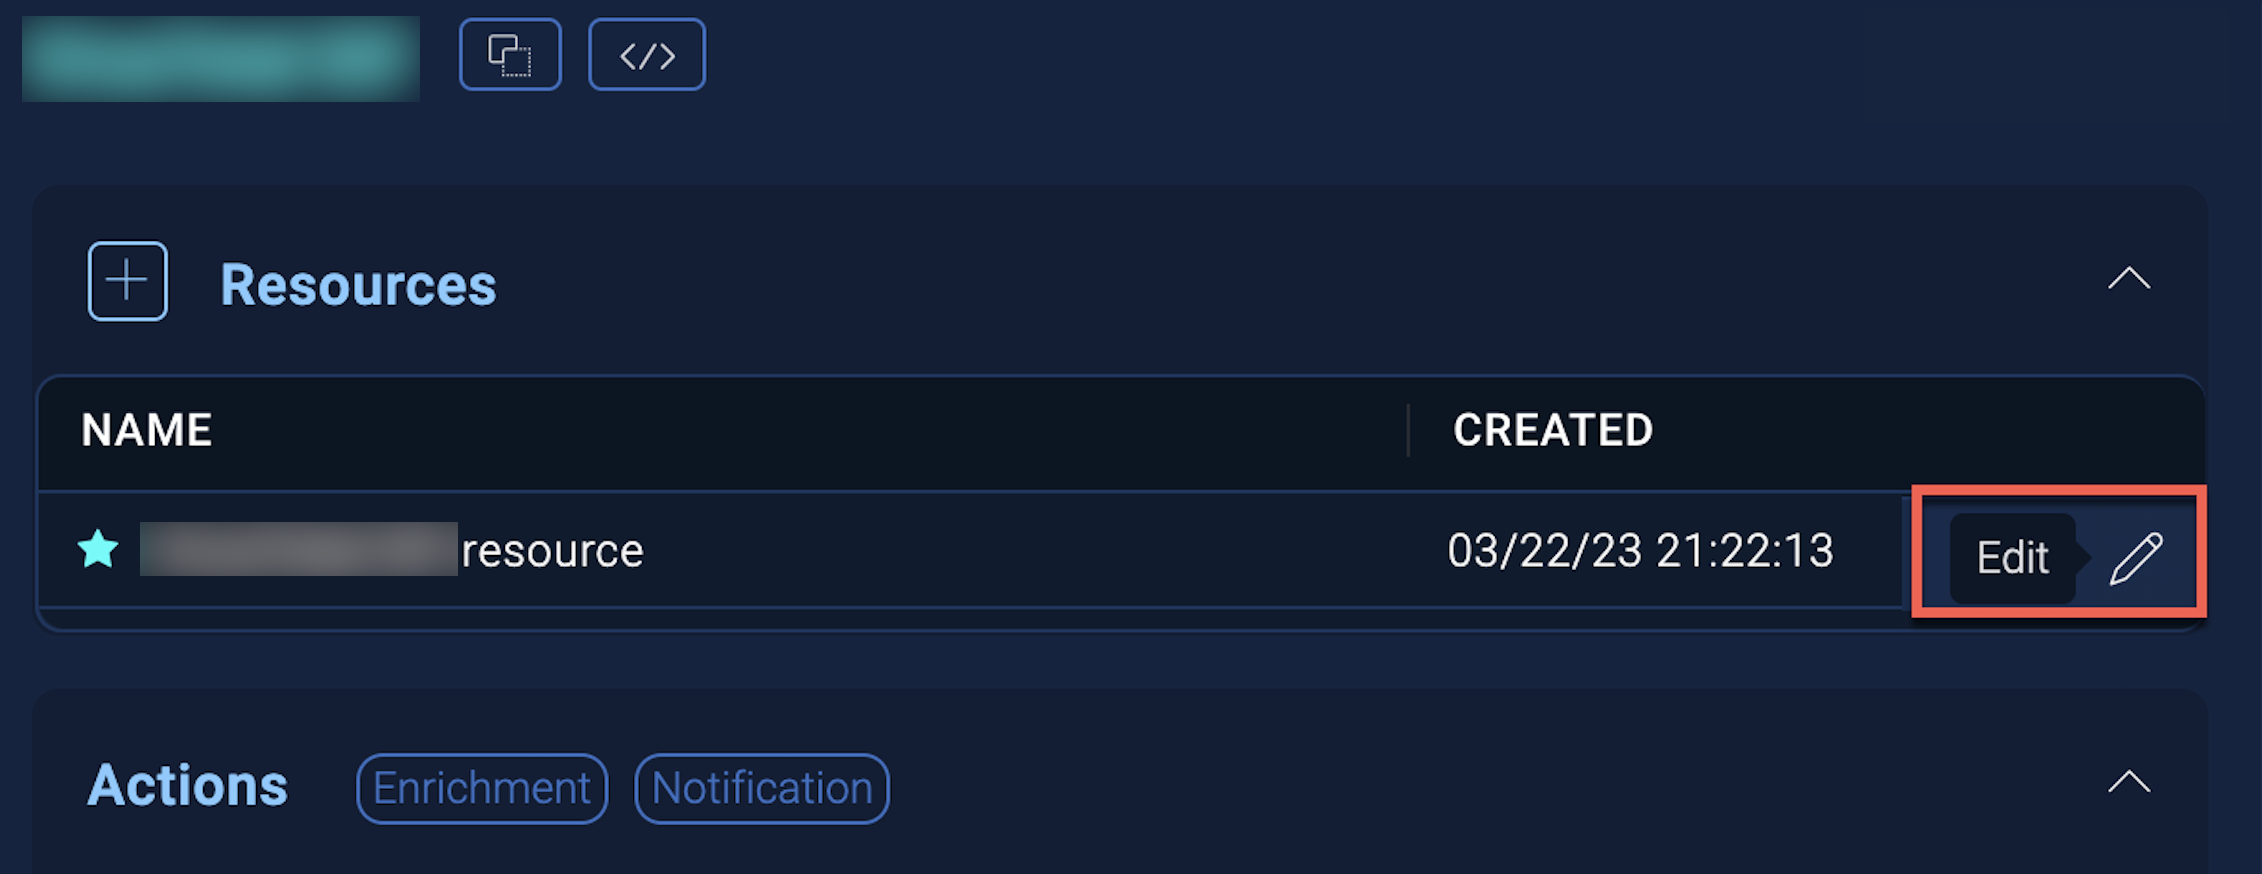
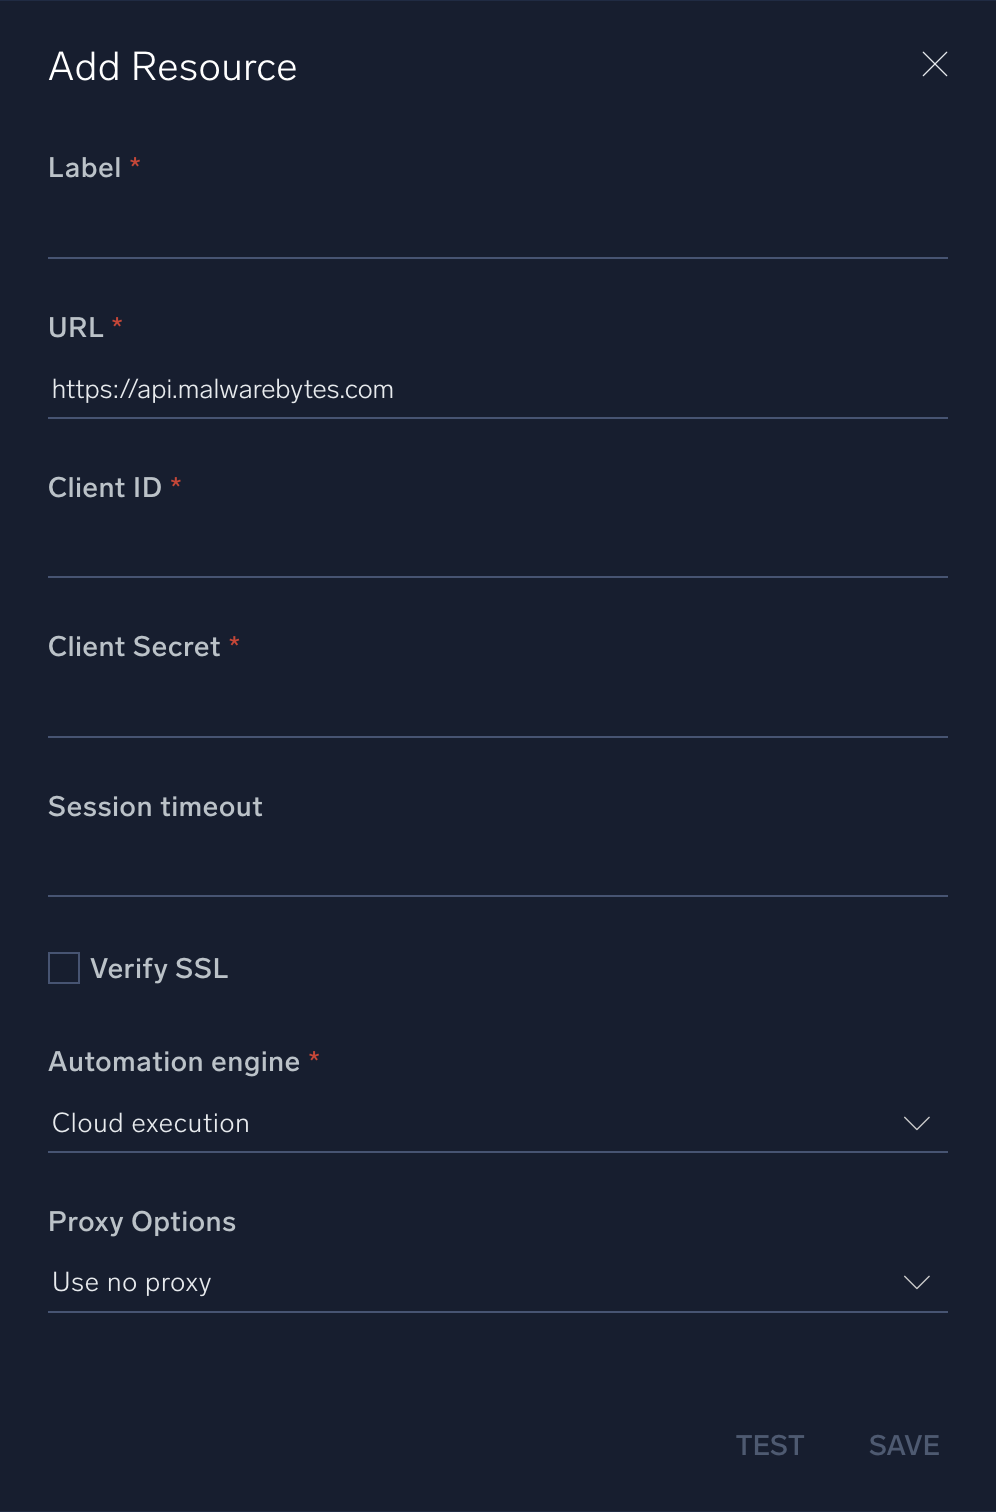
In the configuration dialog, enter information from the product you're integrating with. When done, click TEST to test the configuration, and click SAVE to save the configuration:
-
Label. Enter the name you want to use for the resource.
-
URL. Enter your ThreatDown OneView site URL, for example,
https://api.malwarebytes.com. -
Client ID. Enter your ThreatDown OneView client ID.
-
Client Secret. Enter the secret for your client ID.
-
Connection Timeout (s). Set the maximum amount of time the integration will wait for a server's response before terminating the connection. Enter the connection timeout time in seconds (for example,
180). -
Verify Server Certificate. Select to validate the server’s SSL certificate.
-
Automation Engine. Select Cloud execution for this certified integration. Select a bridge option only for a custom integration. See Cloud or Bridge execution.
-
Proxy Options. Select whether to use a proxy. (Applies only if the automation engine uses a bridge instead of cloud execution.)
- Use no proxy. Communication runs on the bridge and does not use a proxy.
- Use default proxy. Use the default proxy for the bridge set up as described in Using a proxy.
- Use different proxy. Use your own proxy service. Provide the proxy URL and port number.
For information about ThreatDown OneView, see ThreatDown OneView documentation.
Change Log
- March 7, 2025 - First upload