Automation Bridge
You can only run custom actions or integrations outside of the Sumo Logic cloud in an "on-premise" environment. For on-premise environments, you need to install a bridge as described below.
Version
The current version of the Automation Bridge is 3.10.
Versions 2.1.1 and earlier are no longer supported.
Requirements
Hardware requirements
- OS:
- Ubuntu 18.04, 20.04, or 24.04
- CentOS 7 or 8
- RedHat 8
- RAM: 8GB
- CPU: 4 Core
- DISK: 160GB
- Network card: 1
Network requirements
The Bridge has to be able to resolve DNS hostnames and needs to reach the below destinations
| DESTINATION | PROTOCOL | PORT |
|---|---|---|
| sumo-logic-api-url | TCP | 443 |
| siem-cloud-url | TCP | 443 |
| 926226587429.dkr.ecr.us-west-2.amazonaws.com | TCP | 443 |
| 926226587429.dkr.ecr.us-east-1.amazonaws.com | TCP | 443 |
| 926226587429.dkr.ecr.ap-southeast-2.amazonaws.com | TCP | 443 |
| 926226587429.dkr.ecr.eu-central-1.amazonaws.com | TCP | 443 |
| 926226587429.dkr.ecr.ap-south-1.amazonaws.com | TCP | 443 |
| 926226587429.dkr.ecr.ap-northeast-1.amazonaws.com | TCP | 443 |
| 926226587429.dkr.ecr.ca-central-1.amazonaws.com | TCP | 443 |
| 926226587429.dkr.ecr.eu-west-1.amazonaws.com | TCP | 443 |
| index.docker.io* | TCP | 443 |
| registry-1.docker.io* | TCP | 443 |
| auth.docker.io* | TCP | 443 |
| production.cloudflare.docker.com* | TCP | 443 |
| long-endpoint1-events.sumologic.net | TCP | 443 |
* Needed only to connect to Docker hub.
Install Docker
- Install Docker-CE following the installation instructions in Docker Docs. Install at least version 20.10 (do not use nightly build).
- As soon as the Docker daemon is installed, start it with:
systemctl start docker - Enable it on boot:
systemctl enable docker
Using a proxy
- If Docker has to use a proxy to pull images, follow the below instructions:
mkdir -p /etc/systemd/system/docker.service.d - Create a file named
/etc/systemd/system/docker.service.d/http-proxy.conf, and add:[Service]
Environment="HTTP_PROXY=http://proxy.example.com:8080"
Environment="HTTPS_PROXY=http://proxy.example.com:8080" - Reload the systemd daemon with:
systemctl daemon-reload - And restart Docker service with:
systemctl restart docker
Get installation token
Sign in to Sumo Logic and create a new installation token with name prefix csoar-bridge-token.
You must prefix your installation token with csoar-bridge-token in order for the Automation Bridge to connect to your CloudSOAR instance.

Automation bridge installation
Ubuntu
- New UI. In the main Sumo Logic menu, select Automation > Bridge. You can also click the Go To... menu at the top of the screen and select Bridge.
Classic UI. In the main Sumo Logic menu, select Automation and then click the ? icon in the top right. - In the Automation Bridge Manual box, click UBUNTU.
- Click Download to download the
automation-bridge-X.X.debfile. - Copy the file to the bridge virtual machine.
- To install the package run from ssh:
sudo dpkg -i automation-bridge-X.X.deb
CentOS/RedHat
- New UI. In the main Sumo Logic menu, select Automation > Bridge. You can also click the Go To... menu at the top of the screen and select Bridge.
Classic UI.. In the main Sumo Logic menu, select Automation and then click the ? icon in the top right. - In the Automation Bridge Manual box, click CENTOS/REDHAT.
- Click Download to download the
automation-bridge-X.X.rpmfile. - Copy the file to the bridge virtual machine.
- To install the package run from ssh:
sudo yum install automation-bridge-X.X.rpm
Installation configuration
- Verify that the prefix name of the generated token respects the requirements (see Get installation token).
- Edit the file
/opt/automation-bridge/etc/user-configuration.confand set the below mandatory parameters:SOAR_URLSOAR_TOKEN
- To determine which is the correct SOAR_URL, see Sumo Logic Endpoints by Deployment and Firewall Security and get the URL under the API Endpoint column. For example:
https://api.eu.sumologic.com/api/
And you can set this optional parameter (do not include spaces and must be less than 20 characters): ALIAS
An example of a configuration file would be:
{
  "SOAR_URL":"API_ENDPOINT_FROM_FIREWALL_DOC_FOR_YOUR_REGION",
  "SOAR_TOKEN":"TOKEN_FROM_ADMINISTRATION_-->_SECURITY_-->_INSTALLATION TOKEN",
  "SIEM_URL":"The HTTPS Source endpoint URL from a Hosted Sumo Logic Collector",
  "ALIAS":"YOUR_ALIAS_NO_SPACES_LESS_THAN_20_CHARACTERS"
}
To create a Hosted Sumo Logic Collector, see Hosted Collectors. To add an HTTPS Source to a Hosted Collector, see HTTP Logs and Metrics Source. By adding this endpoint to SIEM_URL, this will enable the automation bridge logs to be forwarded to Sumo Logic Log Analytics.
Bridge ALIAS
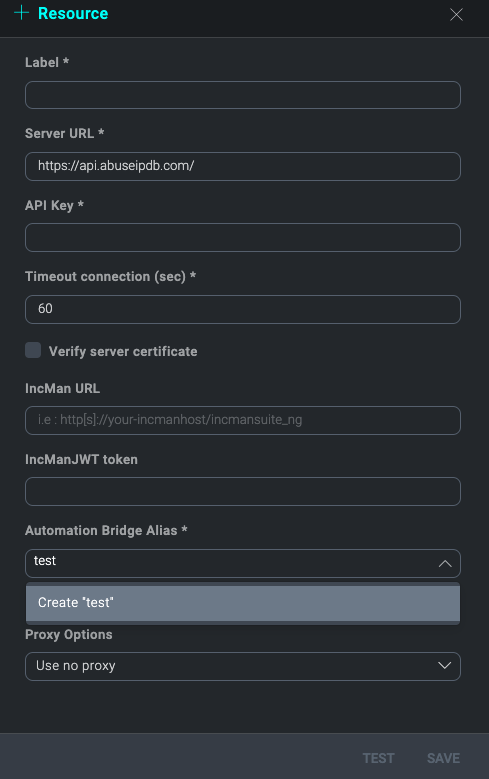
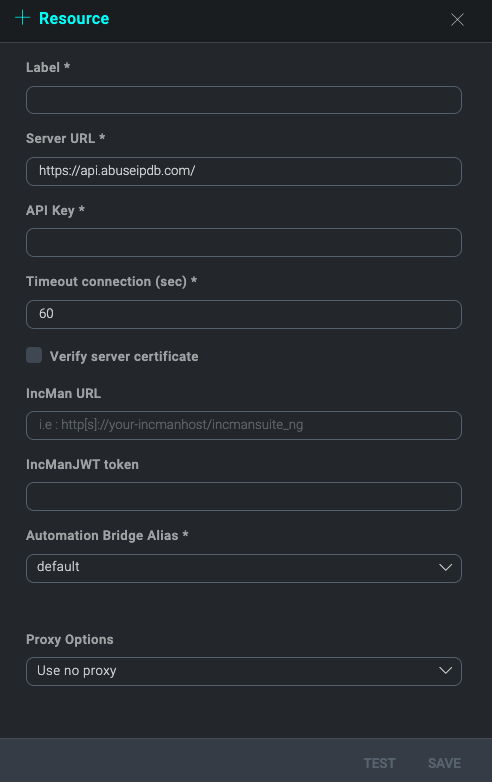
With bridge ALIAS, it is possible to distinguish which integration resources will be executed with this automation bridge. When a new integration resource is created or edited it is possible to select the default ALIAS or to create a new one. So every automatic action configured to use this resource will be performed with the Bridge that has the same ALIAS.


Automation bridge update
For Ubuntu and CentOS/RedHat, the update process works as the installation process. Follow the same steps described in Automation bridge installation above.
If you are not using the SIEM:
- Set
SIEM_URLtoNONE. - Restart the service with:
systemctl restart automation-bridge - If you need to allow automation-bridge communication through a proxy, edit the file
/etc/opt/automation-bridge/automation-bridge.confand set the correct value. Below is an example:HTTP_PROXY="http://proxy.example.com:8080\"
HTTPS_PROXY="http://proxy.example.com:8080\" - Restart the service with:
systemctl restart automation-bridge
Configuring the automation bridge for high availability
You may elect to deploy and register multiple bridges to your tenant for high availability. To cluster automation bridges together logically within the Automation Service and ensure high availability, you must set the same ALIAS for each bridge within the cluster in each respective user-configuration.conf file upon installation.
When multiple bridges are registered with the same ALIAS, they will appear as active. If one or more bridges within the cluster go offline, playbooks will execute via the active nodes utilizing the same ALIAS. So long as there is parity between the nodes and there is at least one active node registered, there will be no disruption in playbook execution.
It is important to note that integration actions within the playbook must have the appropriate bridge ALIAS assigned within the resource configuration and that connectivity can be established with the appropriate resources. Advanced playbooks may elect to utilize multiple bridge clusters leveraging multiple aliases.
Post-installation checks
To check if the bridge is running correctly, run the following command:
ps faux |grep automation-bridge
This is an example of running automation-bridge:
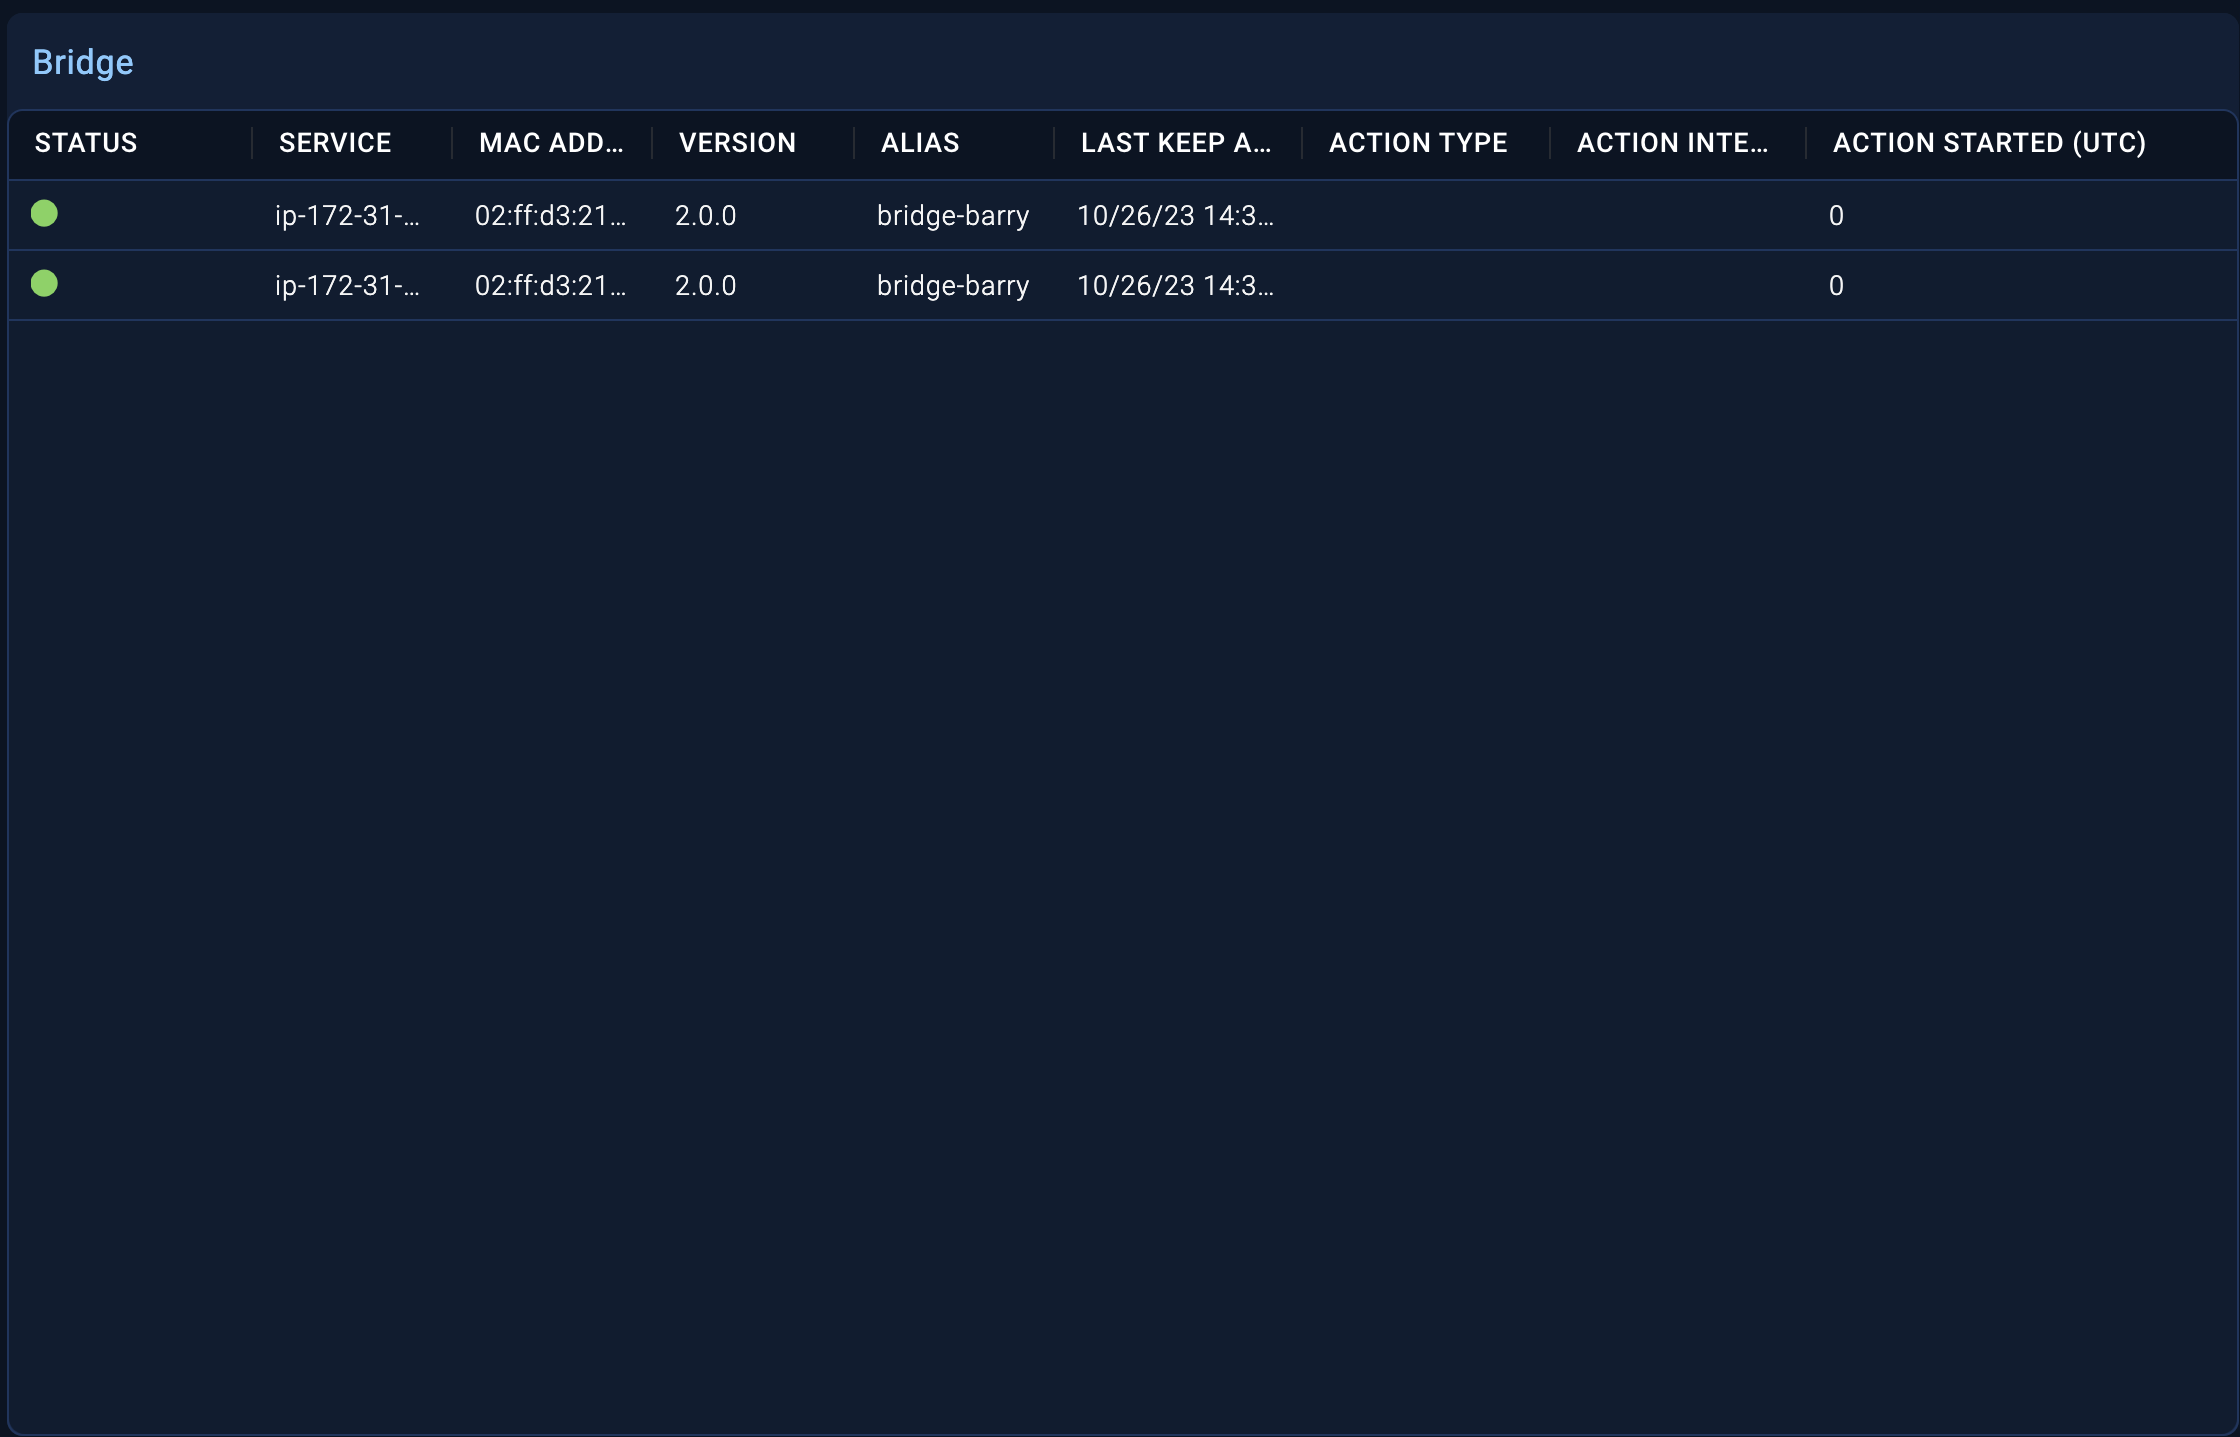
On the Bridge tab in the Automation Service UI, a list of live bridge agents will be displayed along with their status.

Configuring the automation bridge for CyberArk
If you are using CyberArk, you must add the following certificates provided by CyberArk to the /opt/automation-bridge/ directory:
RootCA_new.crtclient_new.crtclient_new.pem
Configuring automation bridge with Podman
Enable Podman socket
- Run the following commands:
systemctl enable podman.socket && systemctl start podman.socket - Create a symbolic link:
ln -s /run/podman/podman.sock /var/run/docker.sock
Change automation bridge configuration
Change the automation bridge configuration file /usr/lib/systemd/system/automation-bridge-worker@.service.
[Unit]
Description=Automation-bridge worker %i

[Service]
User=root
EnvironmentFile=/etc/opt/automation-bridge/automation-bridge.conf
ExecStart=/opt/automation-bridge/bin/automation-bridge -f /opt/automation-bridge/etc/user-configuration.conf -n %H-%i
ExecStop=/bin/kill -s TERM  $MAINPID
Restart=on-failure
TimeoutStartSec=10
RestartSec=10
##
NoNewPrivileges=yes
PrivateTmp=yes
PrivateDevices=yes

[Install]
WantedBy=multi-user.target
This is the current solution and it needs to run service as root.
Automation bridge for Docker
This repository provides Docker images to run the Sumo Logic automation bridge. The images contain an automation bridge able to connect to the Automation Service environment.
Use the Docker automation bridge image
There are images tagged latest and for specific versions to run the automation bridge.
When run, the automation bridge listens on the Docker Unix socket to be able to execute the integration or to run a standalone daemon.
The automation bridge needs to be able to communicate with the Docker API to work.
Prerequisites and configuration
| Environment Variable | Description | Default |
|---|---|---|
API_URL_HERE | To determine which is the correct SOAR_URL, see Sumo Logic Endpoints by Deployment and Firewall Security and get the URL under the API Endpoint column. For example: https://api.eu.sumologic.com/api/ | |
SOAR_TOKEN_HERE | Sign in to Sumo Logic and create a new installation token with the name prefix csoar-bridge-token. | |
SIEM_URL_HERE | The HTTPS Source endpoint URL from a Hosted Sumo Logic Collector. | NONE |
BRIDGE_ALIAS_HERE | Provide the alias name. With bridge ALIAS, it is possible to distinguish which integration resources will be executed with this automation bridge. When a new integration resource is created or edited, it is possible to select the default ALIAS or to create a new one. So every automatic action configured to use this resource will be performed with the bridge that has the same ALIAS. | NONE |
Methodologies
The bridge can run with two methodologies.
With the Docker socket mounted as volume
(Recommended)
docker run -d \
-v /var/run/docker.sock:/var/run/docker.sock \
-e SOAR_URL=API_URL_HERE \
-e SOAR_TOKEN=SOAR_TOKEN_HERE \
-e SIEM_URL=SIEM_URL_HERE \
-e ALIAS=BRIDGE_ALIAS_HERE \
-e DOCKER_TLS_CERTDIR=/certs \
-v docker-certs-ca:/certs/ca -v docker-certs-client:/certs/client \
public.ecr.aws/u5z5f8z6/sumologic/csoar-automation-bridge:latest
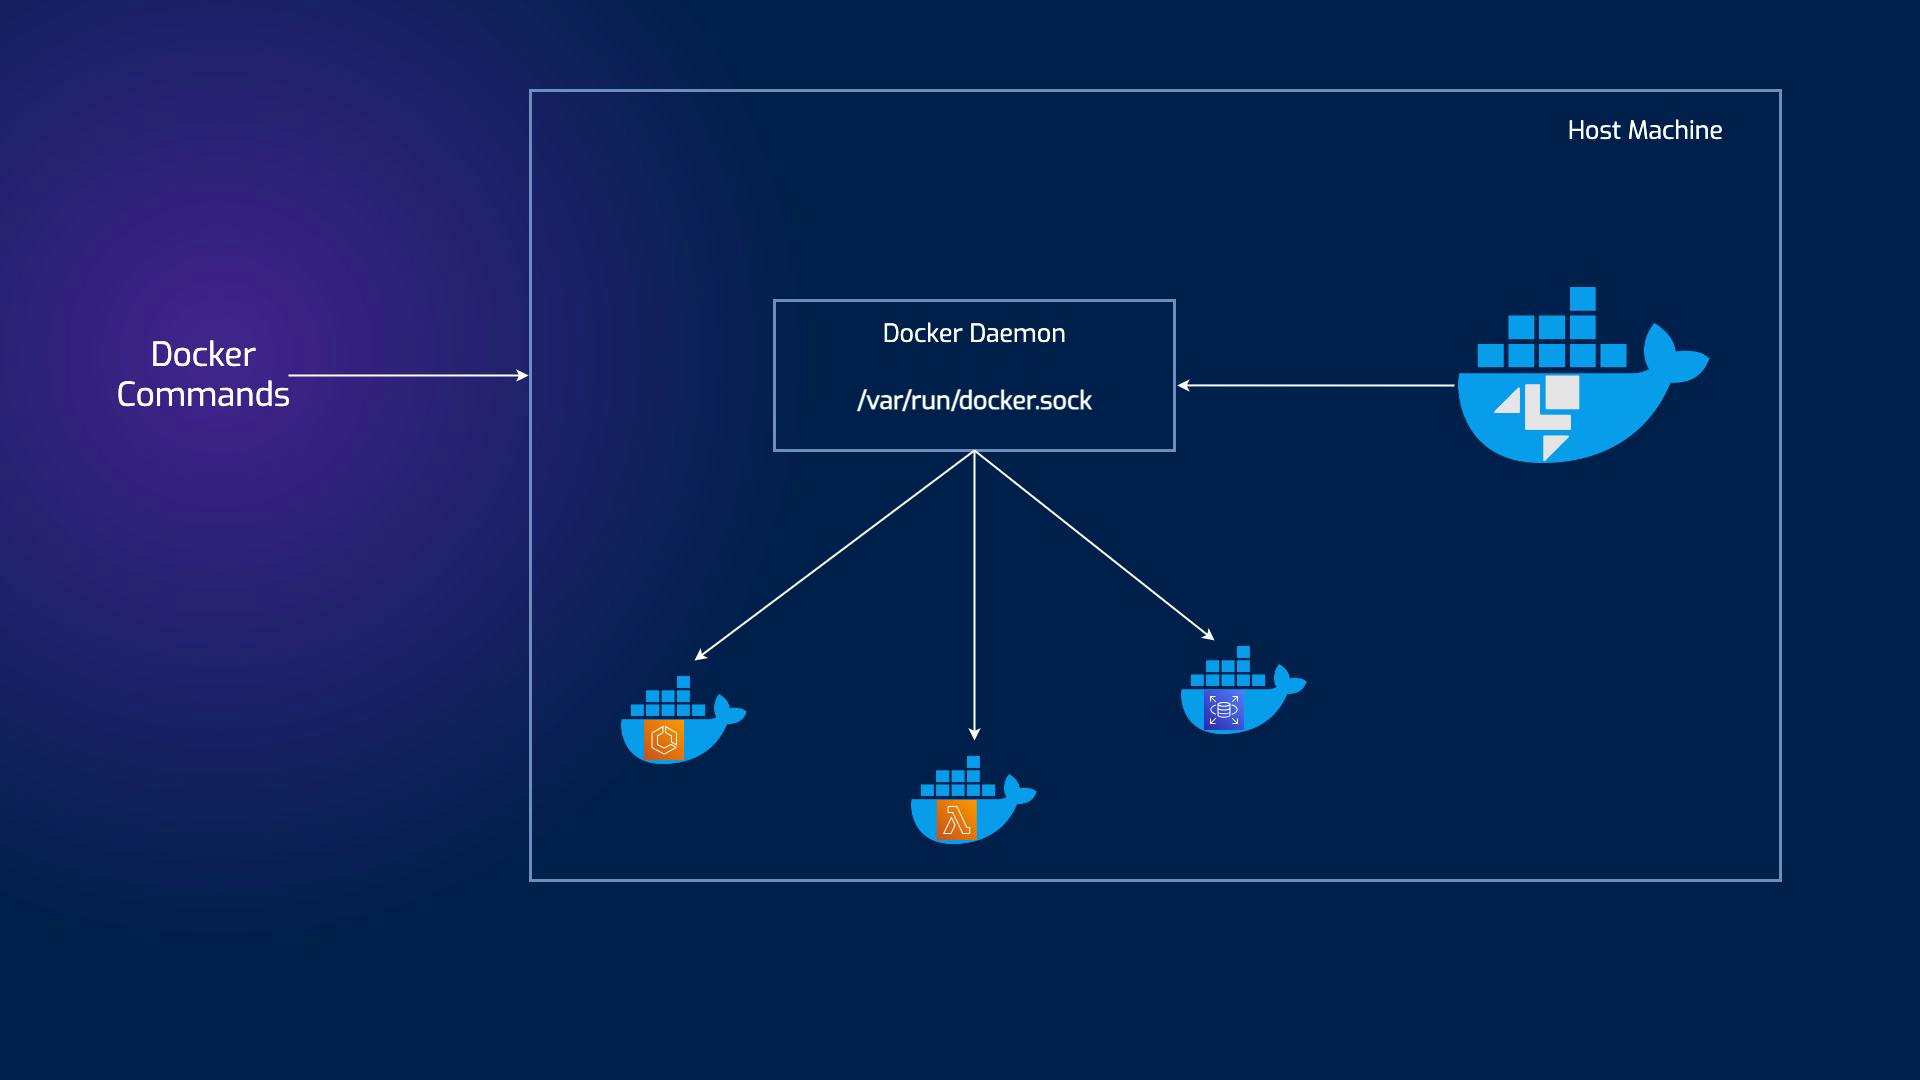
In the DooD approach, you use the Docker daemon from the host system to interact with containers. Containers themselves do not have their own Docker runtime; they communicate with the host's Docker. This offers some distinct advantages, including simplicity in managing the containers and resource efficiency, as containers do not need to run their own Docker daemon.
This way, the main container will have access to the Docker socket and will, therefore, be able to start containers. The only difference is that instead of starting “child” containers, it will start “sibling” containers.

It's useful to sharing pulled image with all bridges running on host machine.
With privileged option
docker run -d \
--privileged \
-e SOAR_URL=API_URL_HERE \
-e SOAR_TOKEN=SOAR_TOKEN_HERE \
-e SIEM_URL=SIEM_URL_HERE \
-e ALIAS=BRIDGE_ALIAS_HERE \
-e DOCKER_TLS_CERTDIR=/certs \
-v docker-certs-ca:/certs/ca -v docker-certs-client:/certs/client \
public.ecr.aws/u5z5f8z6/sumologic/csoar-automation-bridge:latest
Privileged containers are special containers with elevated privileges and direct access to the host system. Unlike their non-privileged counterparts, which are isolated and restricted in their capabilities, privileged containers can perform tasks requiring higher-level access. They achieve this by interacting with the host kernel and accessing sensitive resources, including hardware devices and network interfaces.
One key difference between privileged and non-privileged containers is the level of isolation. Non-privileged containers are meticulously sandboxed and have limited access to the host system, thus providing an extra layer of security. Contrarily, privileged containers operate with fewer restrictions, enabling them to execute advanced operations beyond the reach of non-privileged containers.