Integrations
Integrations are connectors to applications from industry-leading network and security vendors. Playbooks run actions provided by resources in integrations.
Integrations that are already installed to your environment appear in the Integrations menu in the Automation Service (see View Integrations). Integrations that are available for installation appear in App Central (see Integrations in App Central).
Available integrations
For a complete list of integrations that are available to install, see Integrations in App Central.
All automation integrations require authentication to communicate between the vendor and Sumo Logic. For directions, see Configure Authentication for Automation Integrations.
View integrations
The following procedure describes how to view integrations already installed to your environment. You can also install new integrations using App Central.
You can also create a custom integration. For an example for Cloud SIEM, see Advanced example: Configure a custom integration.
- Classic UI. In the main Sumo Logic menu, select Automation and then select Integrations in the left nav bar.
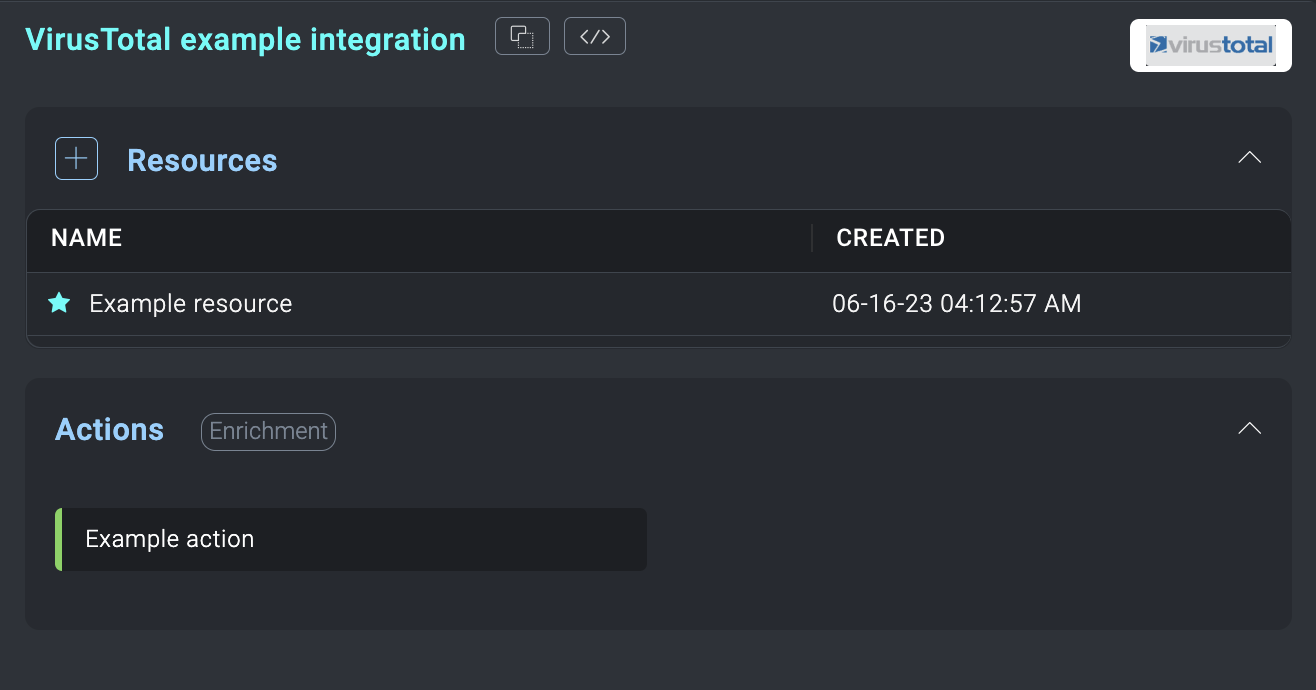
New UI. In the main Sumo Logic menu, select Automation > Integrations. You can also click the Go To... menu at the top of the screen and select Integrations. - Select an integration to see the actions on the resource. You call these actions when you add an action node to a playbook.
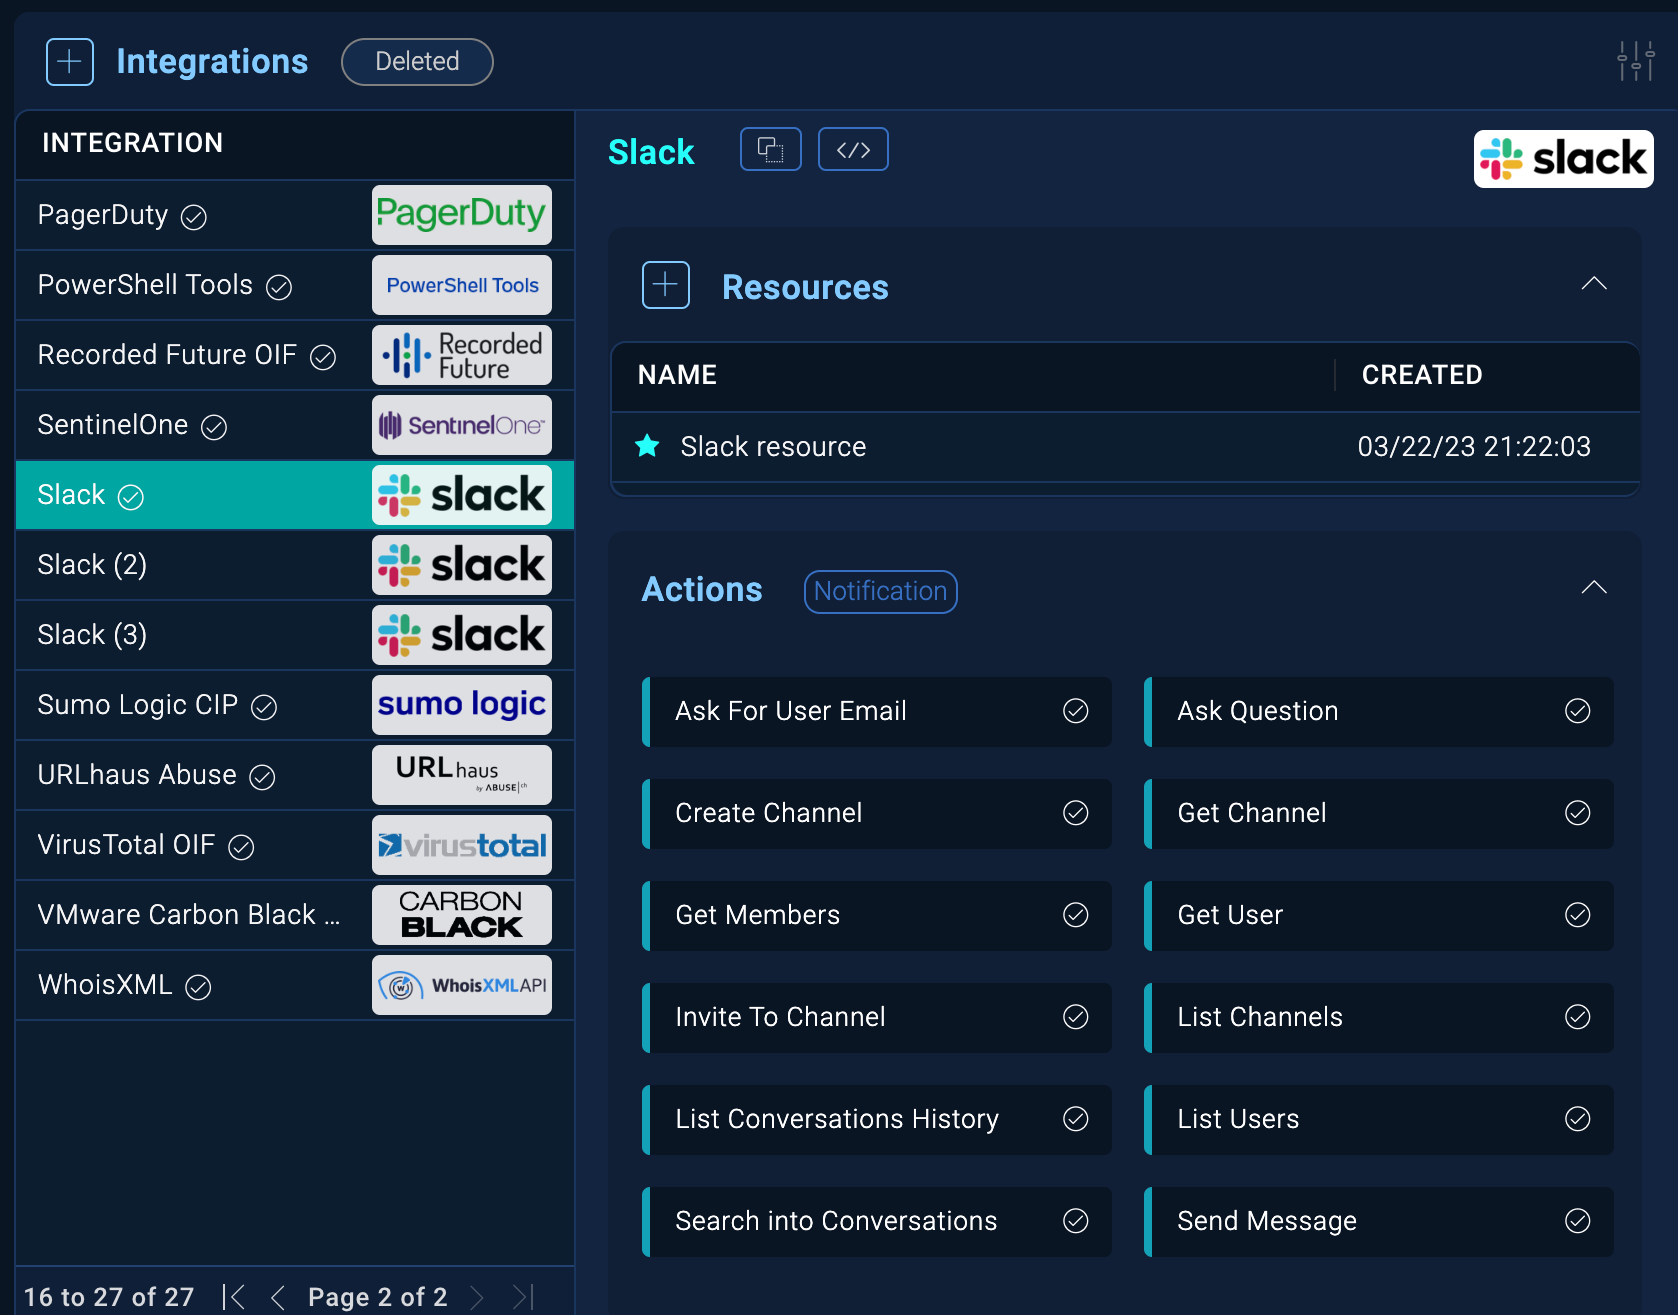
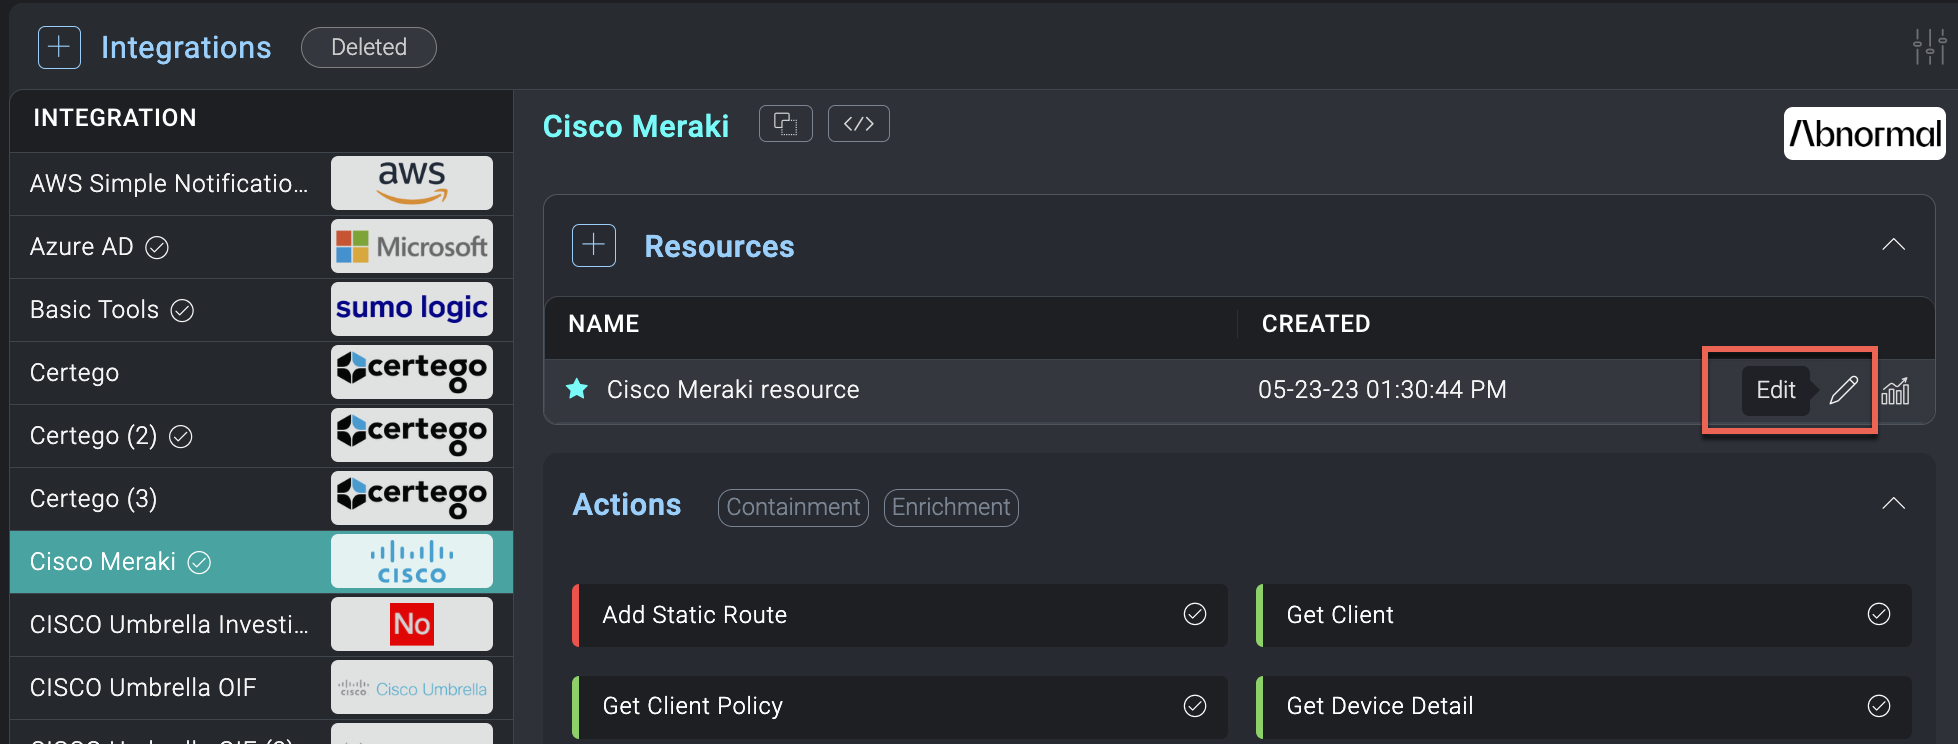
To add a new resource to an integration, click the + button to the left of Resources. This is useful if you have another instance of the vendor application you want to connect to.
Certified integrations
Certified integrations are those that are provided by Sumo Logic. You can install certified integrations using App Central.
Certified integrations are designated by a Certified Integration check mark.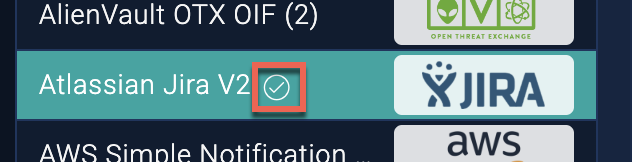
After you select the integration resource and click the View Code button, the certified integration code is set to read-only mode. The certified integrations code can’t be edited using the Automation Service internal IDE. This is also true for the actions available for that integration.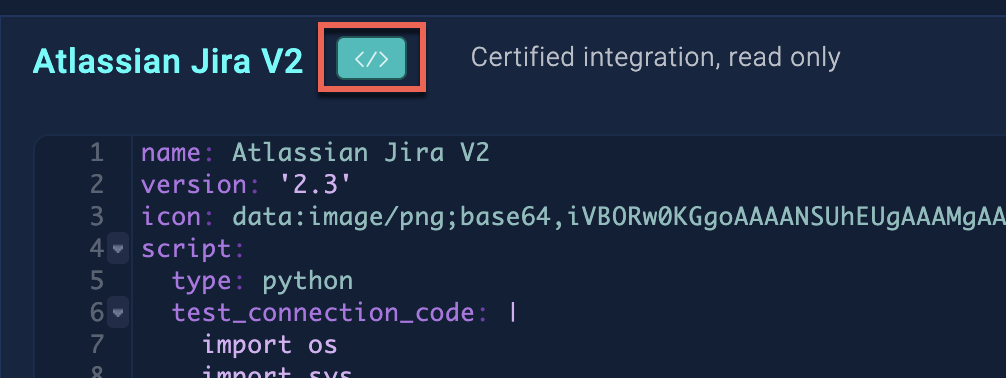
Certified actions are designated by a Certified Action check mark.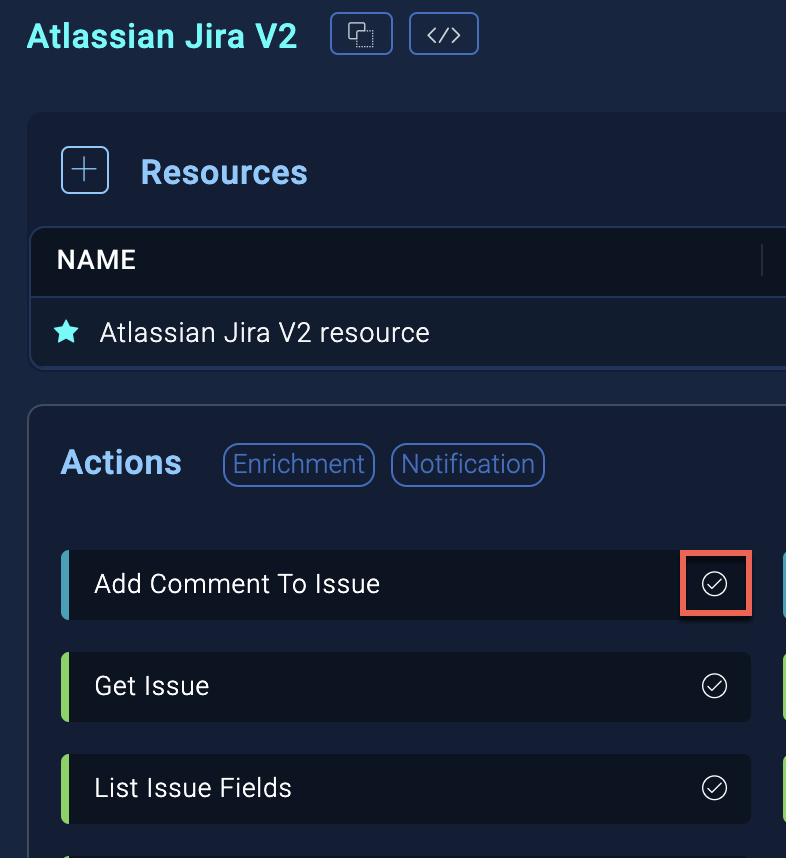
You can add resources to the certified integration by clicking the + button, or you use it as-is.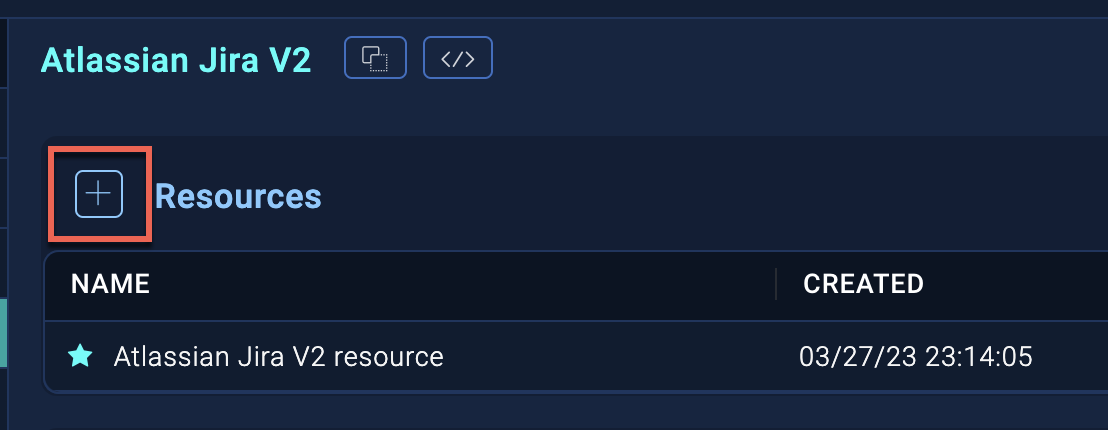
Duplicate an integration
To modify an integration's code, you must first duplicate the integration and make your modifications in the duplicated version. When you click the Duplicate integration button, a new integration will be created in the integrations list with an incremented name. 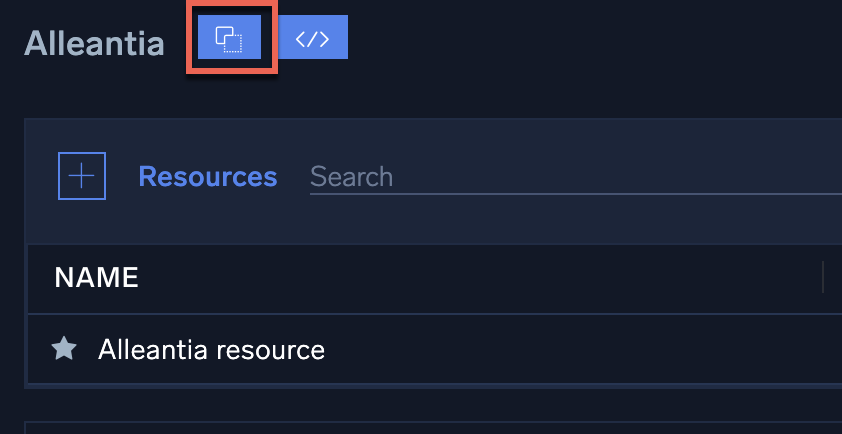
Following is a duplicated integration: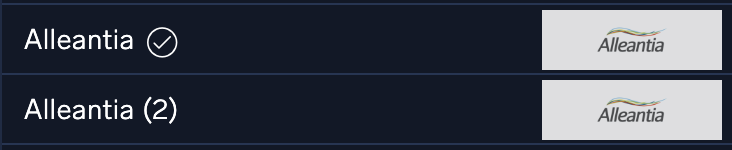
If the certified integration resource was configured before the duplication process, all the settings will be saved and replicated inside the duplicated integration. There is no need to reset the duplicated integration.
Note that in the following example a (2) follows the duplicated integration's name, as well as the resource name. A (3) would follow the name of the next duplicate, (4) the next, and so on. Also note that the actions listed in the integration do not have the Certified Actions check mark, because they exist on a duplicated integration.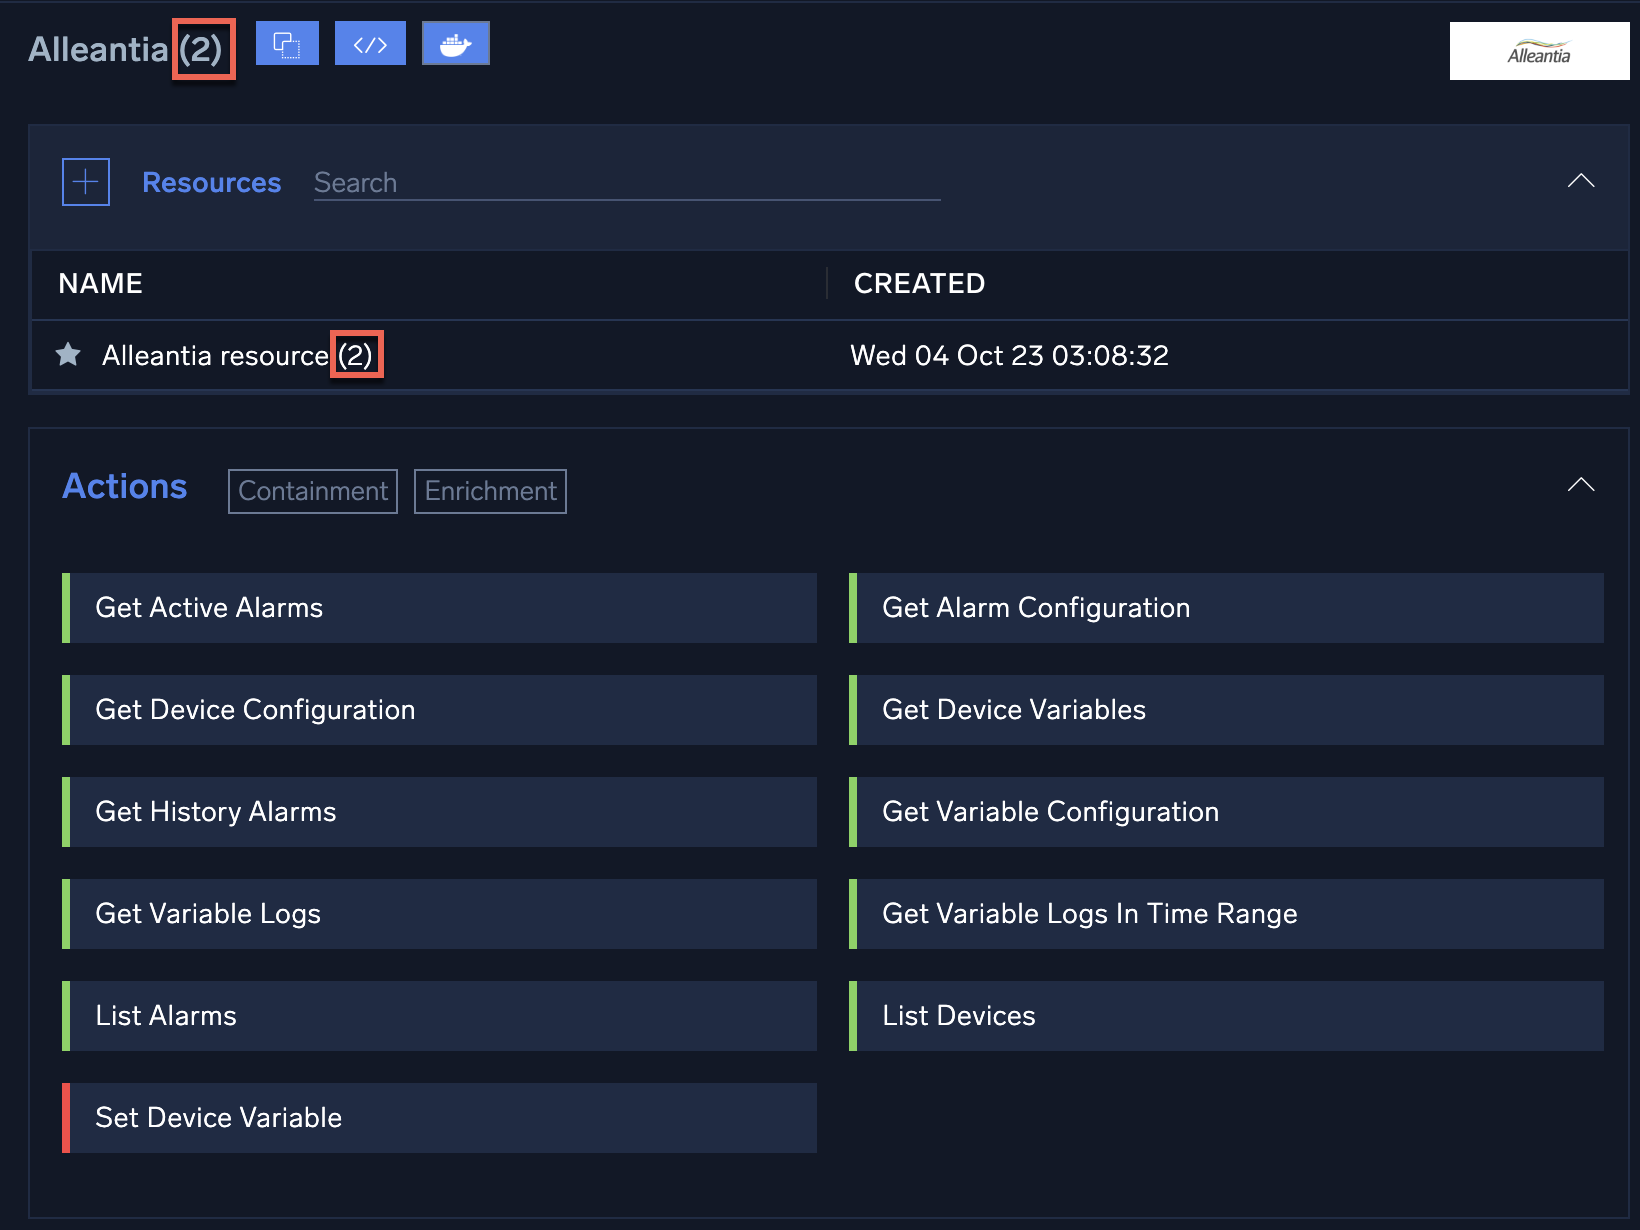
If you choose a duplicated resource when you add an acton node to a playbook, the actions available will be the ones belonging to the duplicated resource. The following example shows selecting an action from a duplicated resource.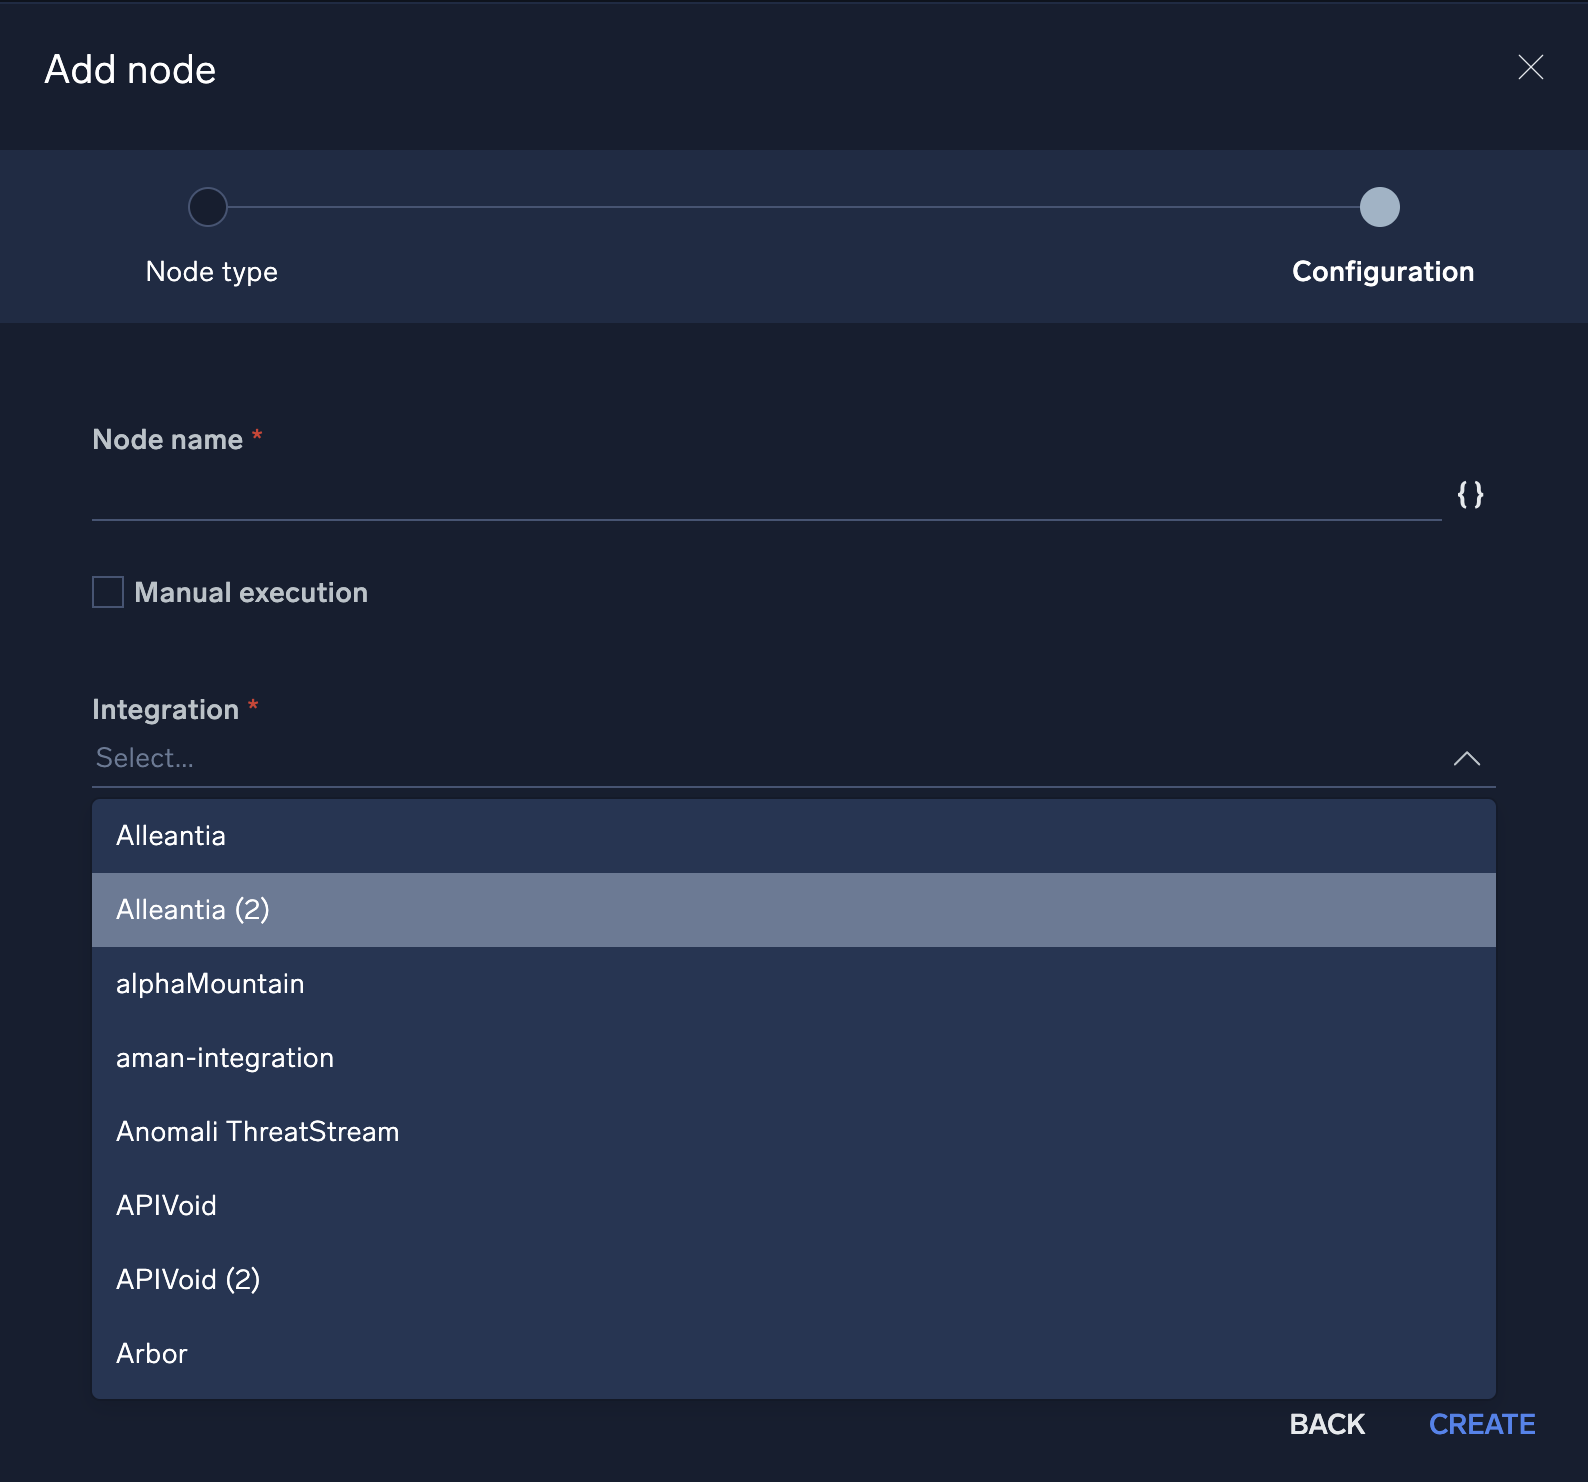
Create a new integration
In the Automation Service
To create a new integration in the Automation Service, you must supply an integration definition YAML file, as well as an action definition YAML file for each of the actions contained in the integration. For an example of creating a new integration by supplying YAML files, see Advanced example: Configure a custom integration. For sample YAML files, see example files. To learn how to build your own YAML files, see Integration framework file formats.
To create a new integration:
- Create an integration definition YAML file, as well as an action definition YAML file for each action in the integration.
- Classic UI. In the main Sumo Logic menu click Automation. Then click the gear icon
 in the top right, select Automation, and then select Integrations in the left nav bar.
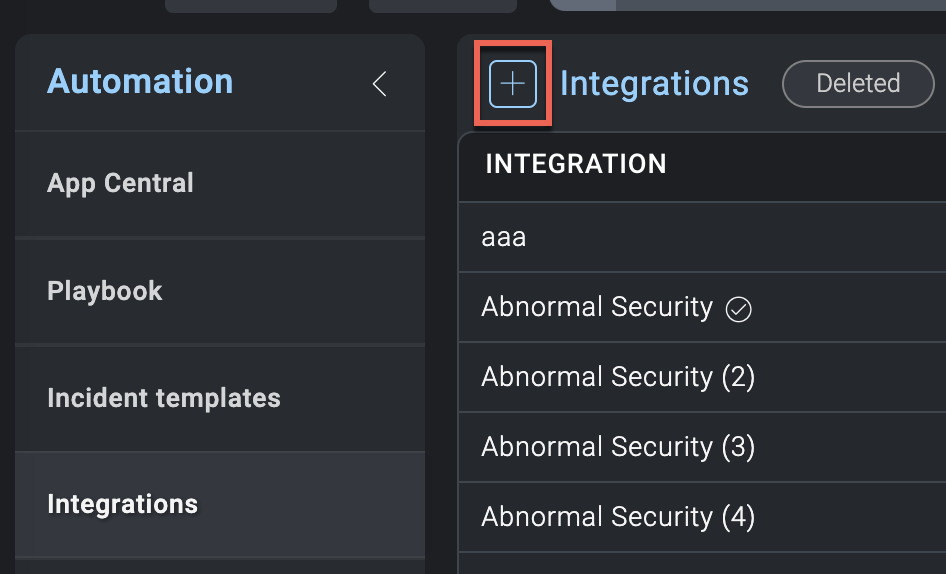
New UI. In the main Sumo Logic menu select Automation > Integrations. You can also click the Go To... menu at the top of the screen and select Integrations. - Select the + icon at the top of the screen to the left of Integrations.
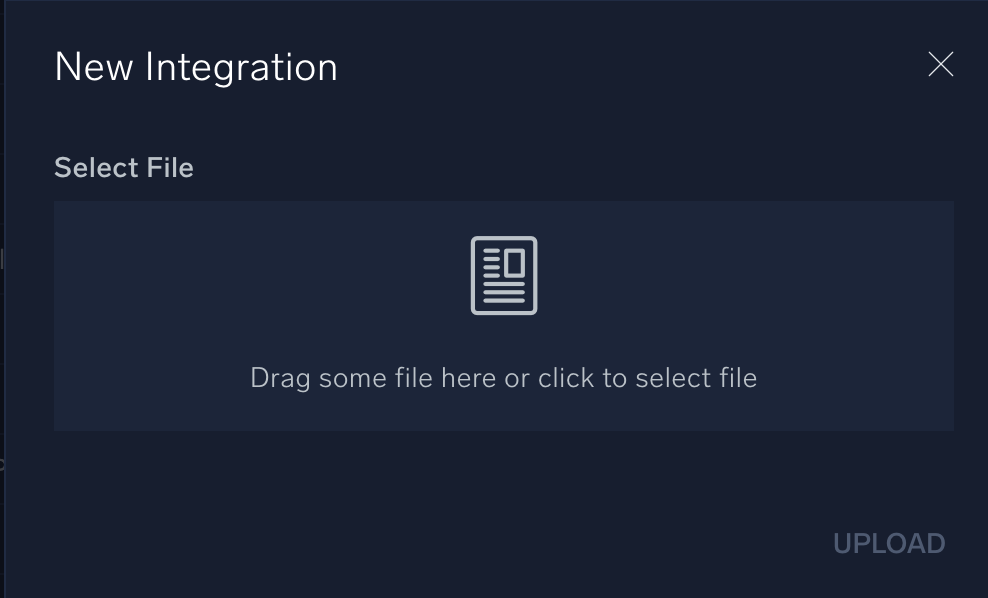
- A New Integration dialog appears. Drag the integration definition YAML file into the New Integration dialog.
- Click Upload. The new integration is listed on the Integrations page.
- Now that you have uploaded the integration file, you need to upload an action file for the integration.
- Hover your mouse over the new integration and click the Upload button that appears.

- In the Upload dialog, notice how Integration File is highlighted. That's because it was uploaded already.
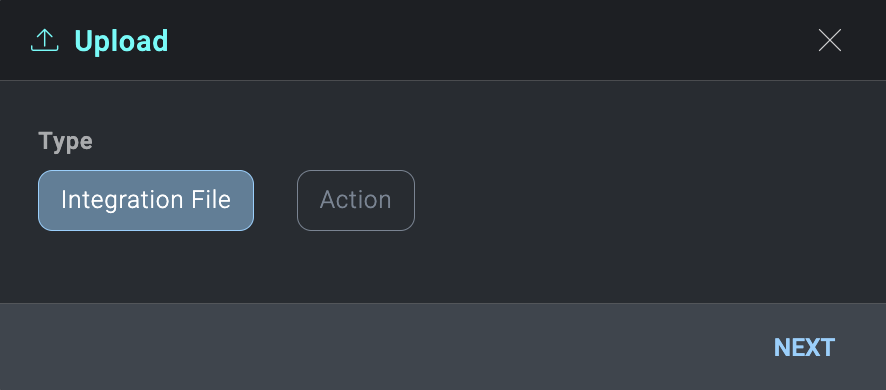
- Click Action and Next.
- Drag the action definition YAML file into the Upload dialog.
- Click Upload. The action is added to the integration.
- Repeat these steps for any other actions you need to add to the integration.
- Hover your mouse over the new integration and click the Upload button that appears.
- Add the resource information:
- Click the + button to the left of Resources.
- Give the resource a Label and enter the connection configuration needed by the resource. What you enter is specific to the integration you're adding the resource for. Each resource's configuration screen may be different, but in most cases, you will need information such as IP addresses, API tokens, usernames, and passwords for the application you're integrating with.
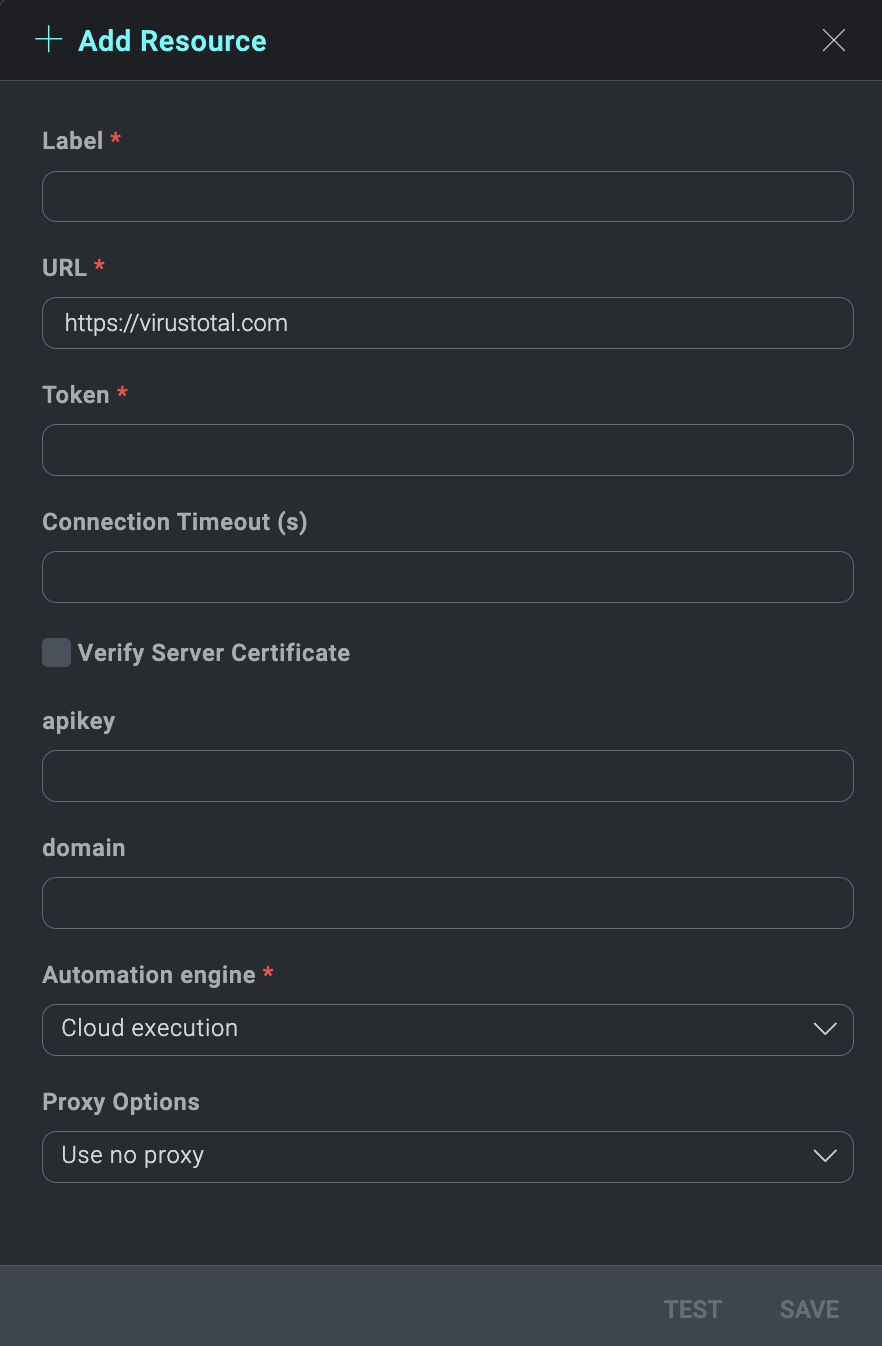
- Click Save. The new integration is complete.
- To test an action, click on the action, then click Test Action in the dialog that displays.
To make your custom integration available for everyone in App Central, see Publish an integration to App Central.
In Cloud SOAR
If you have Cloud SOAR installed, you can build basic integrations without having to provide custom YAML files.
- Classic UI. In the main Sumo Logic menu click Cloud SOAR. Then click the gear icon in the top right of the screen, select Automation, and then select Integrations in the left nav bar.
New UI. In the main Sumo Logic menu select Automation > Integrations. You can also click the Go To... menu at the top of the screen and select Integrations. - Select the + icon at the top of the screen to the left of Integrations.
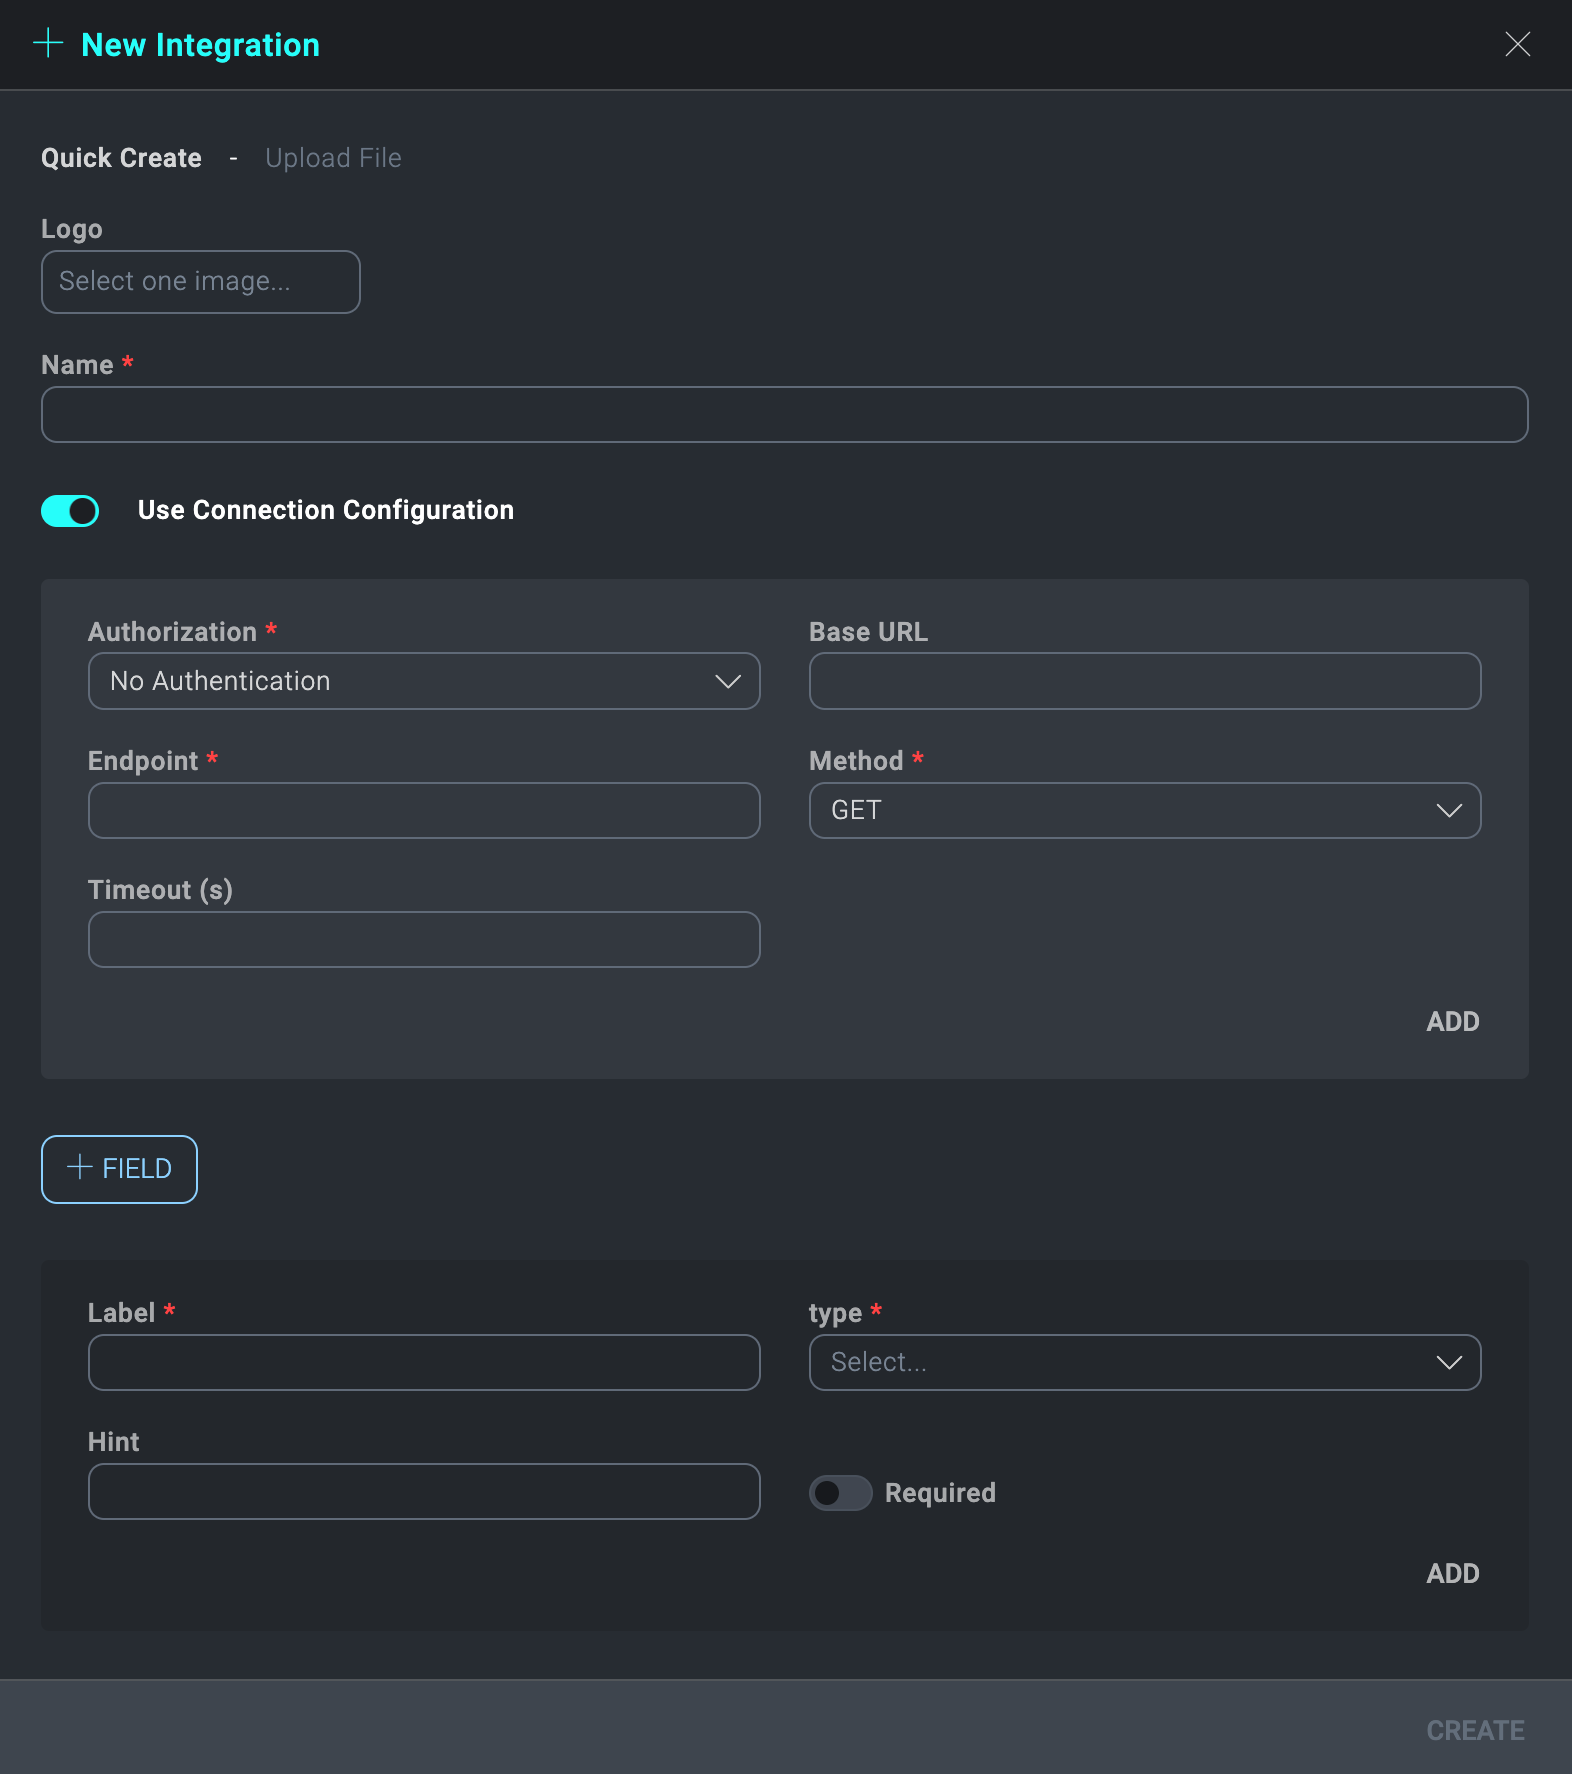
- Fill out the New Integration dialog:
- Upload a Logo for your integration.
- Provide a Name.
- Click Use Connection Configuration and fill out the fields for credentials configuration.
- Click Add to add the connection configuration.
- If other fields are needed at the integration resource level, click + Field to add the fields and their information. For example, for an integration like VirusTotal, you would need to add
apikeyanddomainas required fields. - Click Create. The integration file is created for the integration.
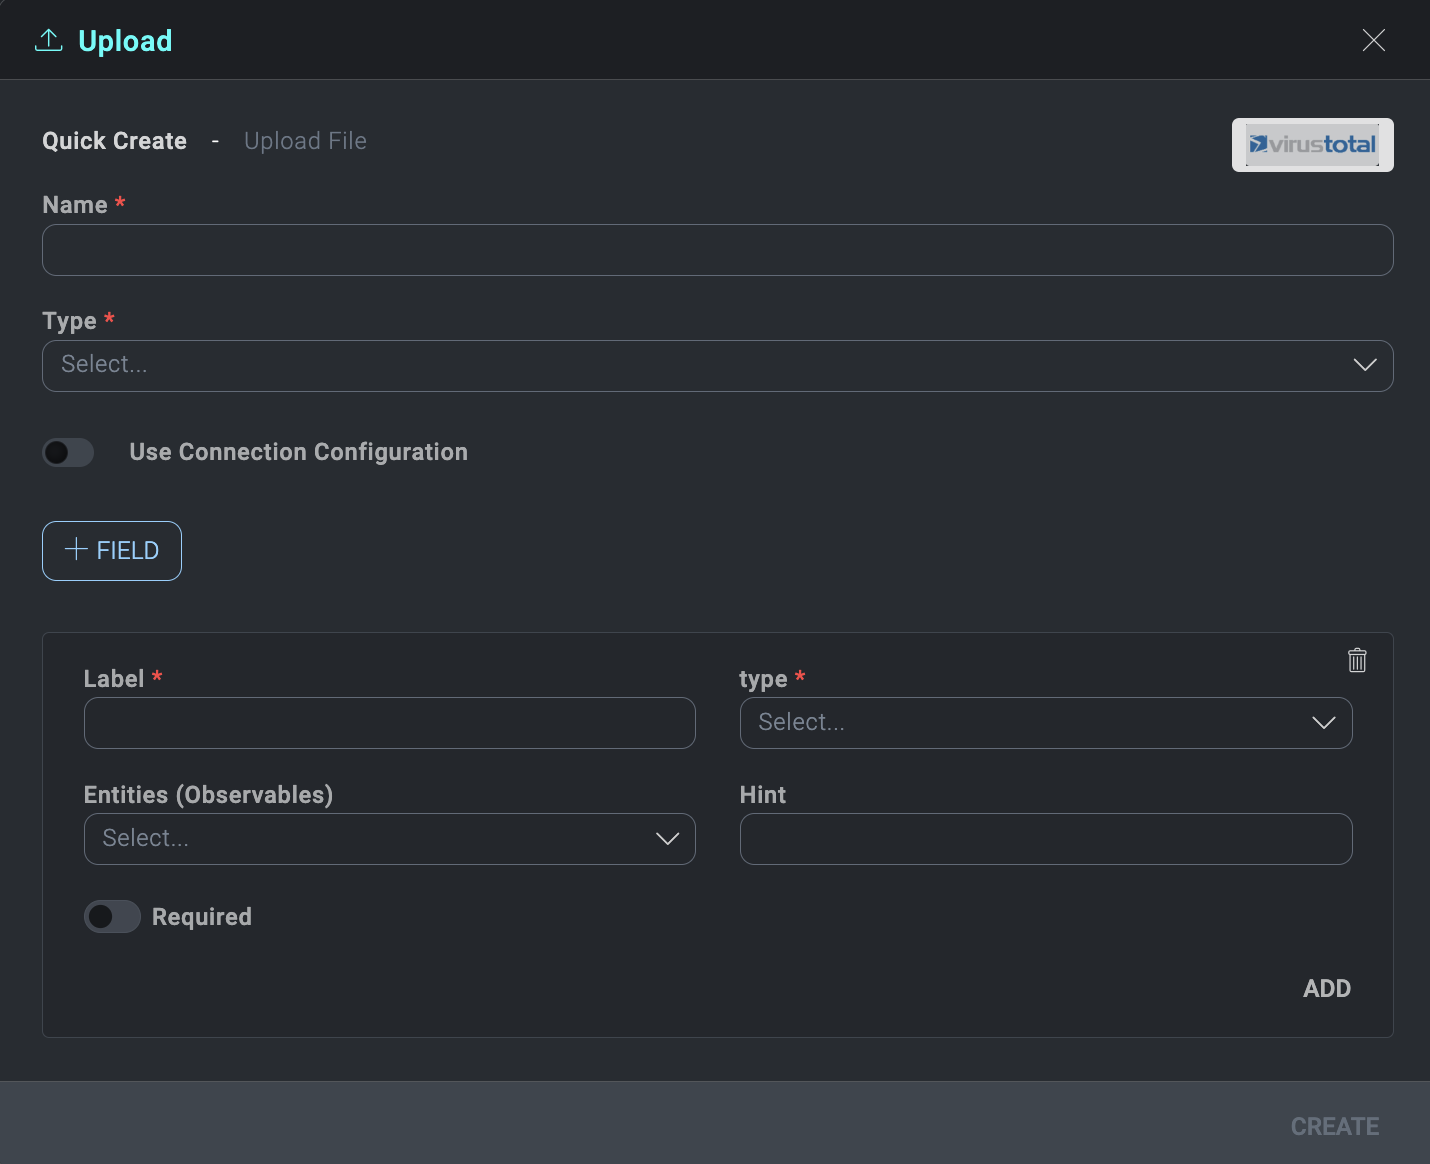
- Now that you have created the integration file, you need to create an action file for the integration.
- Hover your mouse over the new integration and click the Upload button that appears.
- In the Upload dialog, notice how Integration File is highlighted. That's because it was created in the last step.
- Click Action and Next.
- Hover your mouse over the new integration and click the Upload button that appears.
- Fill out the Upload dialog:
- Provide a Name for the action.
- Select a Type for the action, such as enrichment, containment, custom, or notification.
- Click Use Connection Configuration if it is needed for the action, fill out the fields for credentials configuration, and click Add.
- If other fields are needed at the action level, click + Field to add the fields and their information.
- Click Create. The action file is created for the integration.
The new action displays.
- Add the resource information:
- Click the + button to the left of Resources.
- Give the resource a Label and enter the connection configuration needed by the resource. What you enter is specific to the integration you're adding the resource for. Each resource's configuration screen may be different, but in most cases, you will need information such as IP addresses, API tokens, usernames, and passwords for the application you're integrating with.
- Click Save. The new integration is complete.
- To test an action, click on the action, then click Test Action in the dialog that displays.
To make your custom integration available for everyone in App Central, see Publish an integration to App Central.
Test action
You can test an action on an integration to ensure that it is working correctly.
- Open an integration.
- Ensure that authentication is configured for the integration. Testing actions on the integration will fail unless the integration's authentication settings are correctly configured so that the product you're integrating with can communicate with Sumo Logic.
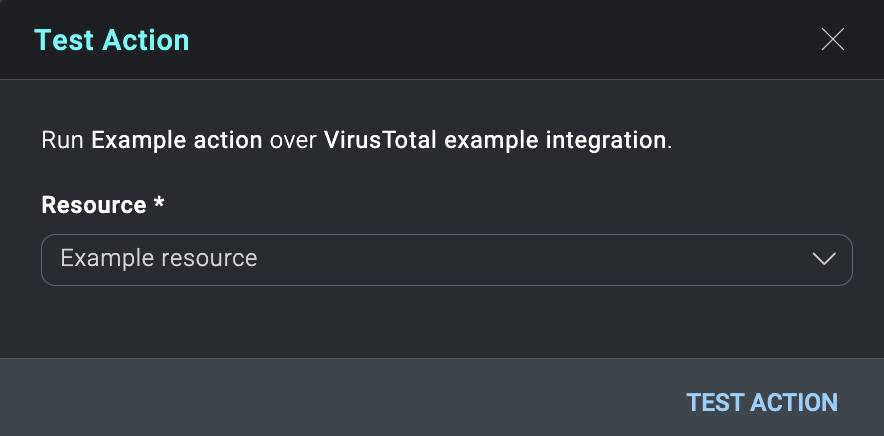
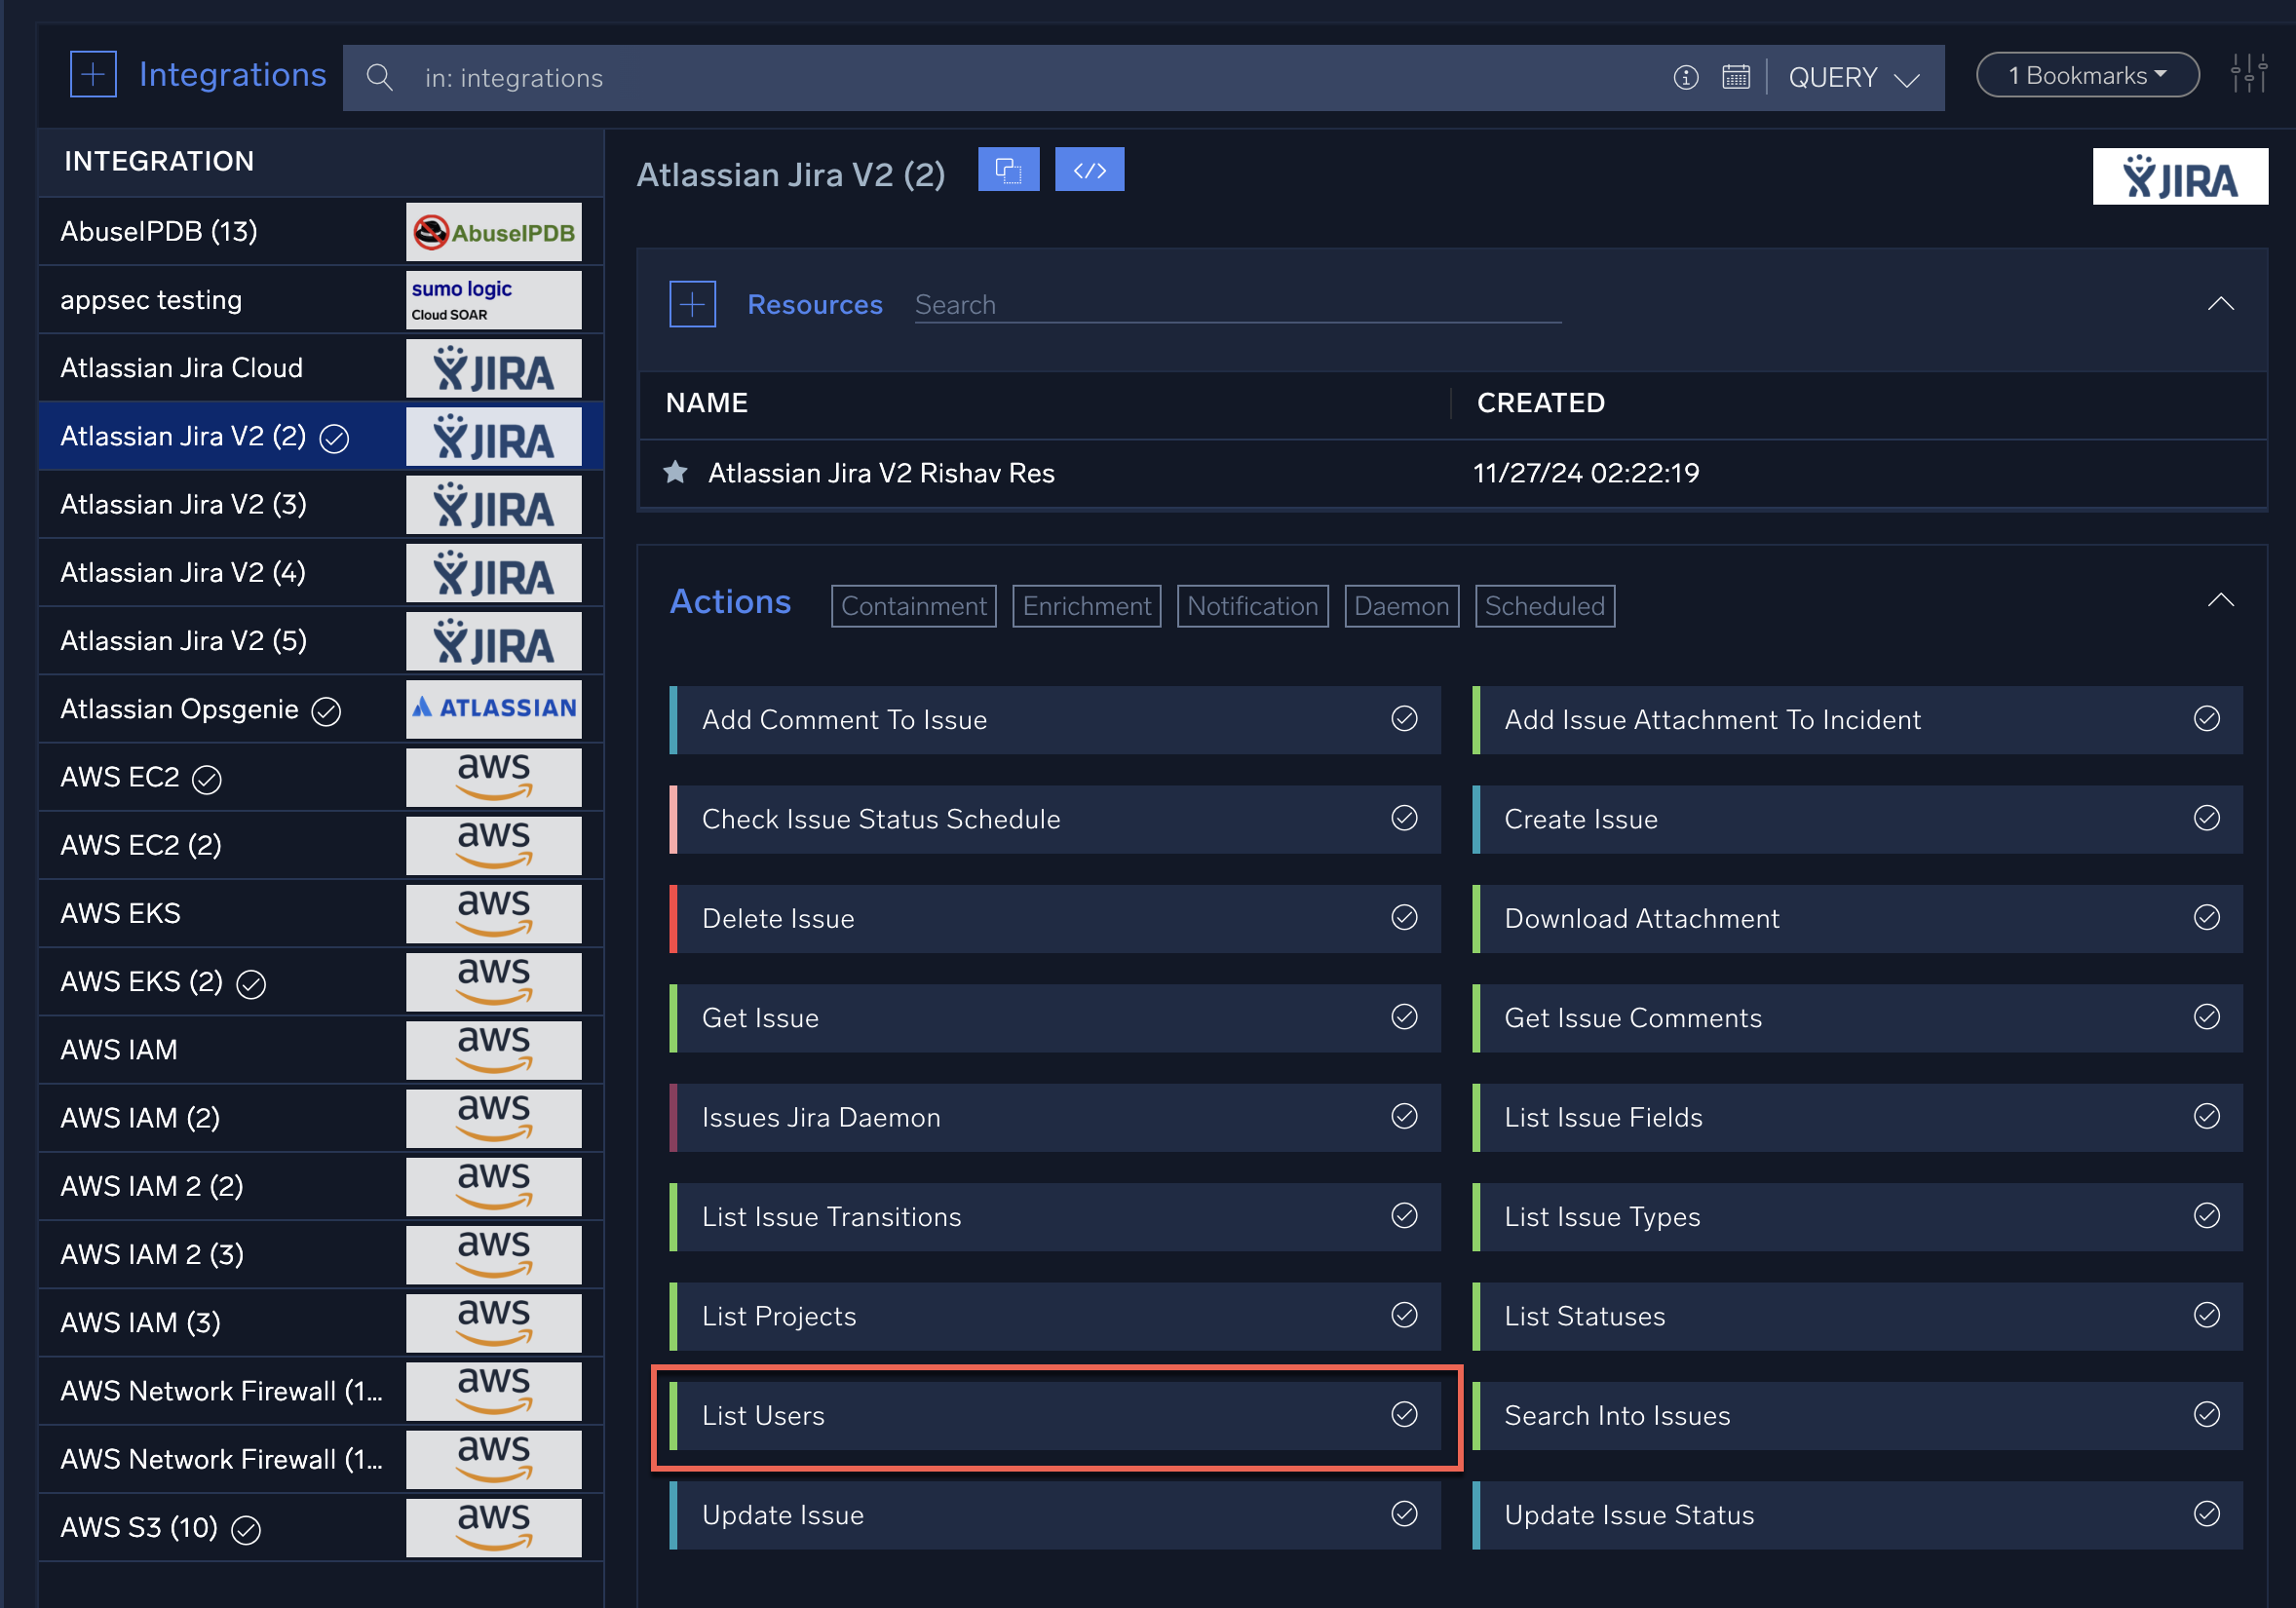
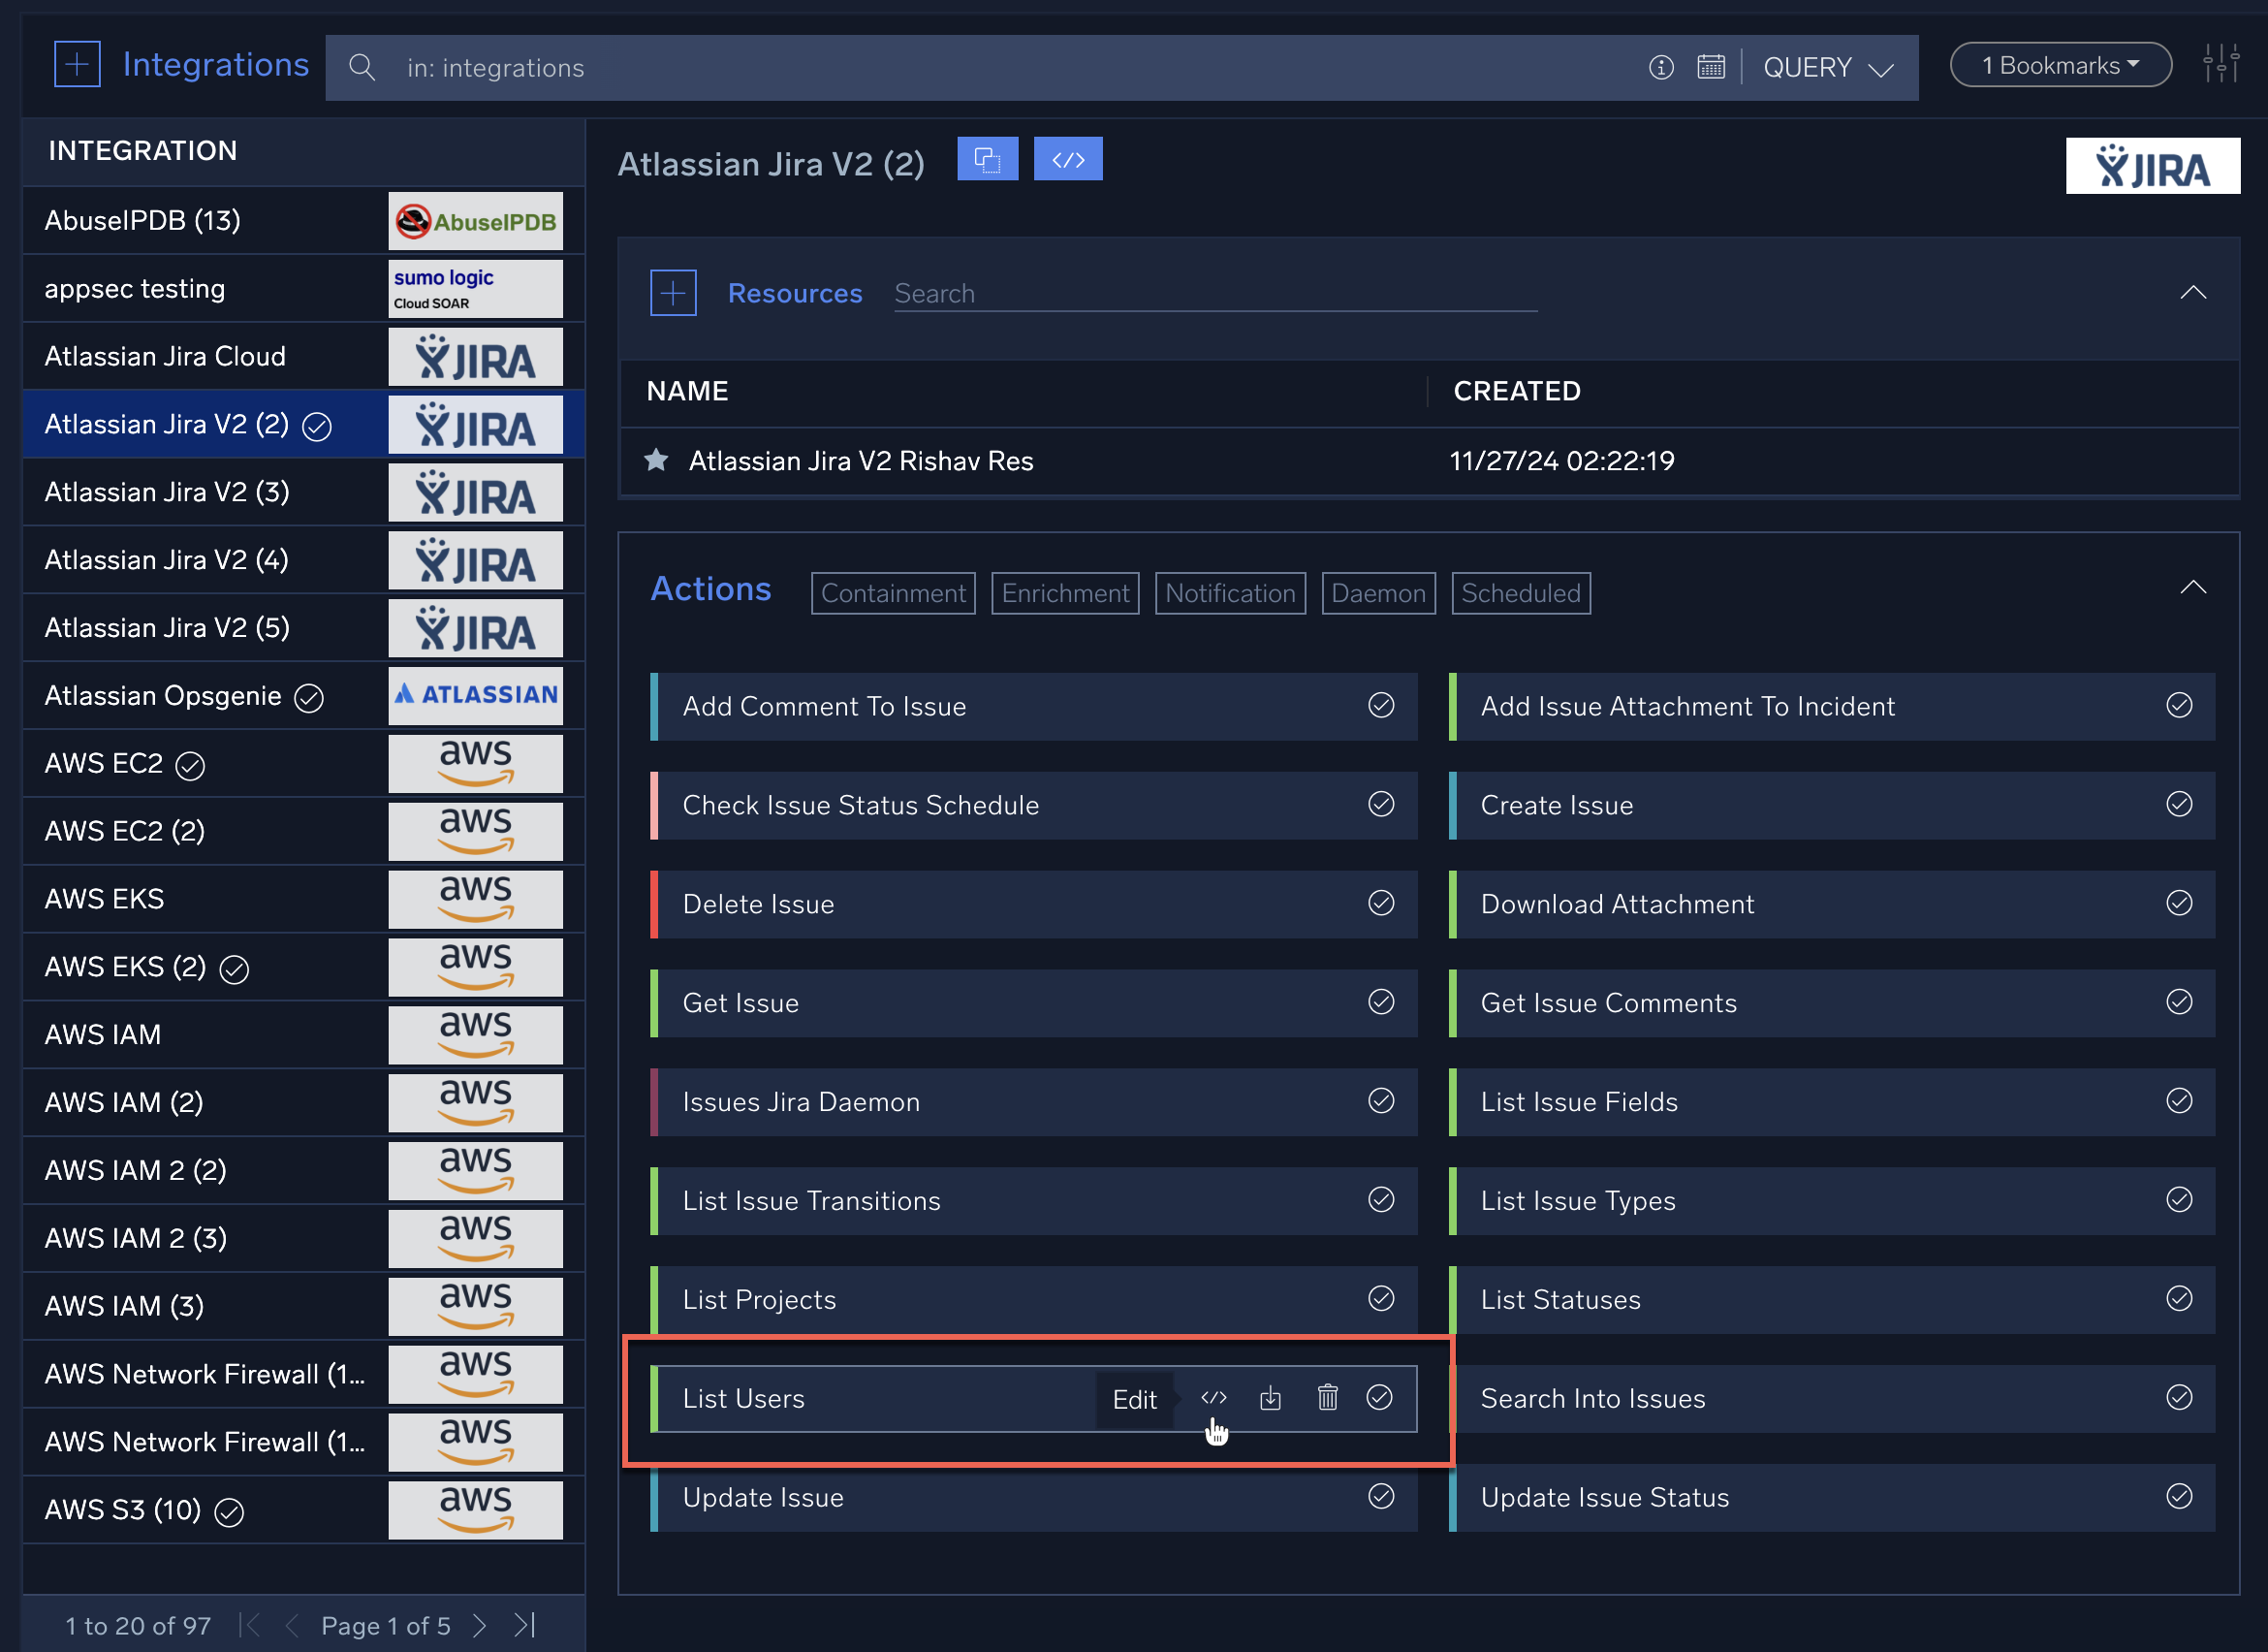
- Select an action on the integration. For our example shown below, we'll select the List Users action on the Atlassian Jira V2 integration.

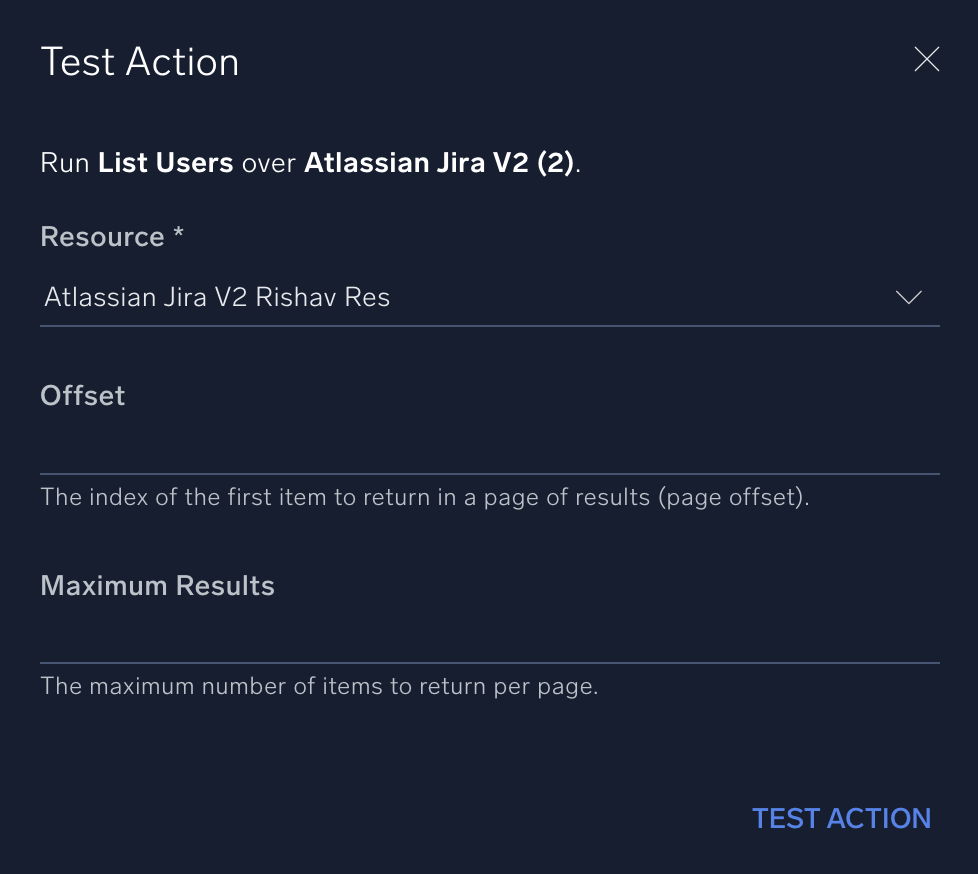
- Enter any values needed for the action to run and click TEST ACTION.
 tip
tipIn some cases, you'll need to provide data for required fields before TEST ACTION is enabled. This is data that normally would be provided by the output of other actions running earlier in a playbook sequence, and so must be provided here to test if the action runs correctly. In the example below, note that you need to provide information for the Issue (ID or Key) field in order to test the action. Also note that under the Issue Type field there is helpful text telling you that you can get the issue type ID and key from the List Issue Types action.

- After you click TEST ACTION, results of the test are displayed:
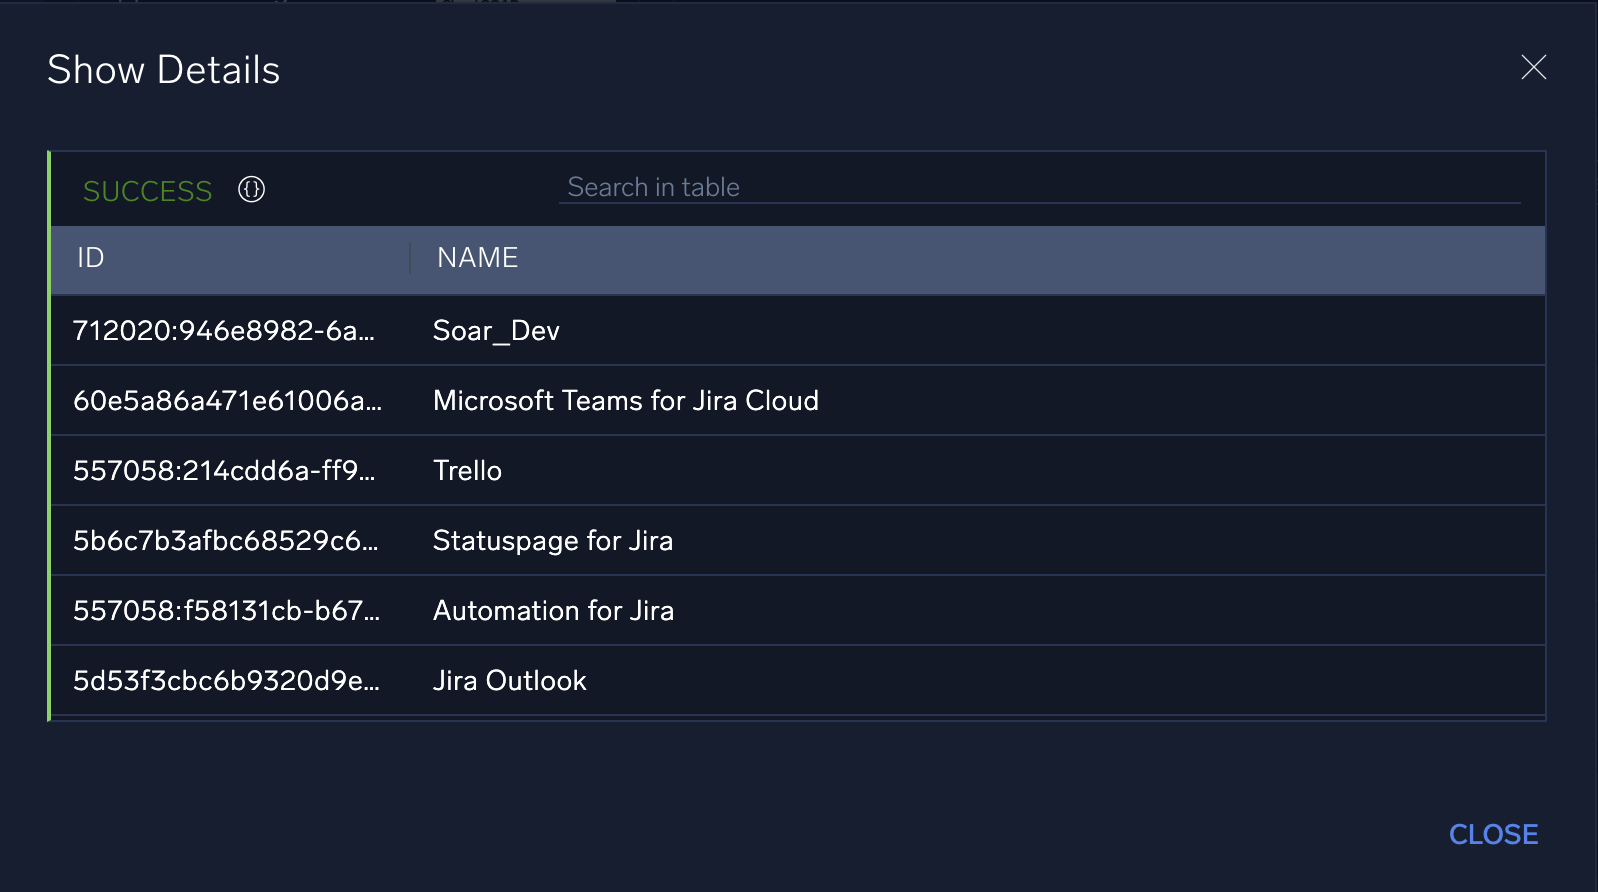
- The table in the Show Details dialog only shows data that is configured to display. To see the complete output in JSON format, including data not configured to display, click the JSON details button:
In this dialog you can click expand arrows to examine the output in JSON format. Click buttons at the top of the dialog to return to the display view, download the JSON, or copy the output: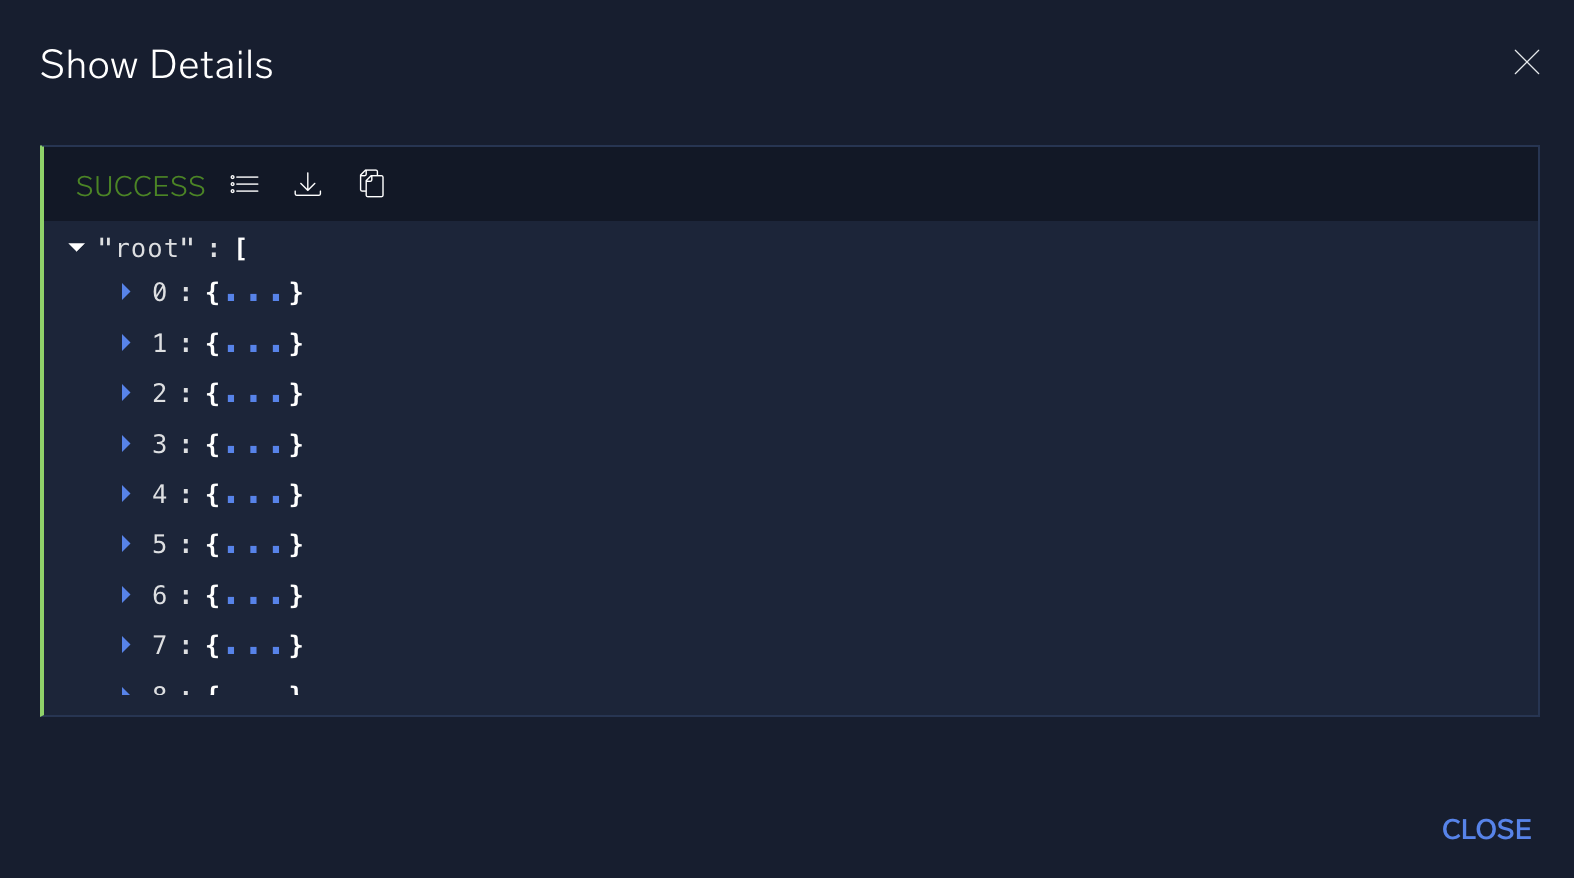
To change the data that is output from an action, see Edit output of an action.
Edit output of an action
When an integration's action runs, it typically generates output that is passed on to the next step in a playbook. For information about the format of this output, see Integration Framework Output.
You may want to change the output of an action to allow playbooks to execute different activities downstream from the action. Perform the following steps to edit the output of an action:
- Open an integration and do the following:
- Ensure that it is a certified integration. Only certified integrations allow you to edit the output of their actions.
- Ensure that authentication is configured for the integration. Testing actions on the integration will fail unless the integration's authentication settings are correctly configured so that the product you're integrating with can communicate with Sumo Logic.
- Select an action on the integration. For our example, we'll edit the output for the List Users action on the Atlassian Jira V2 integration:
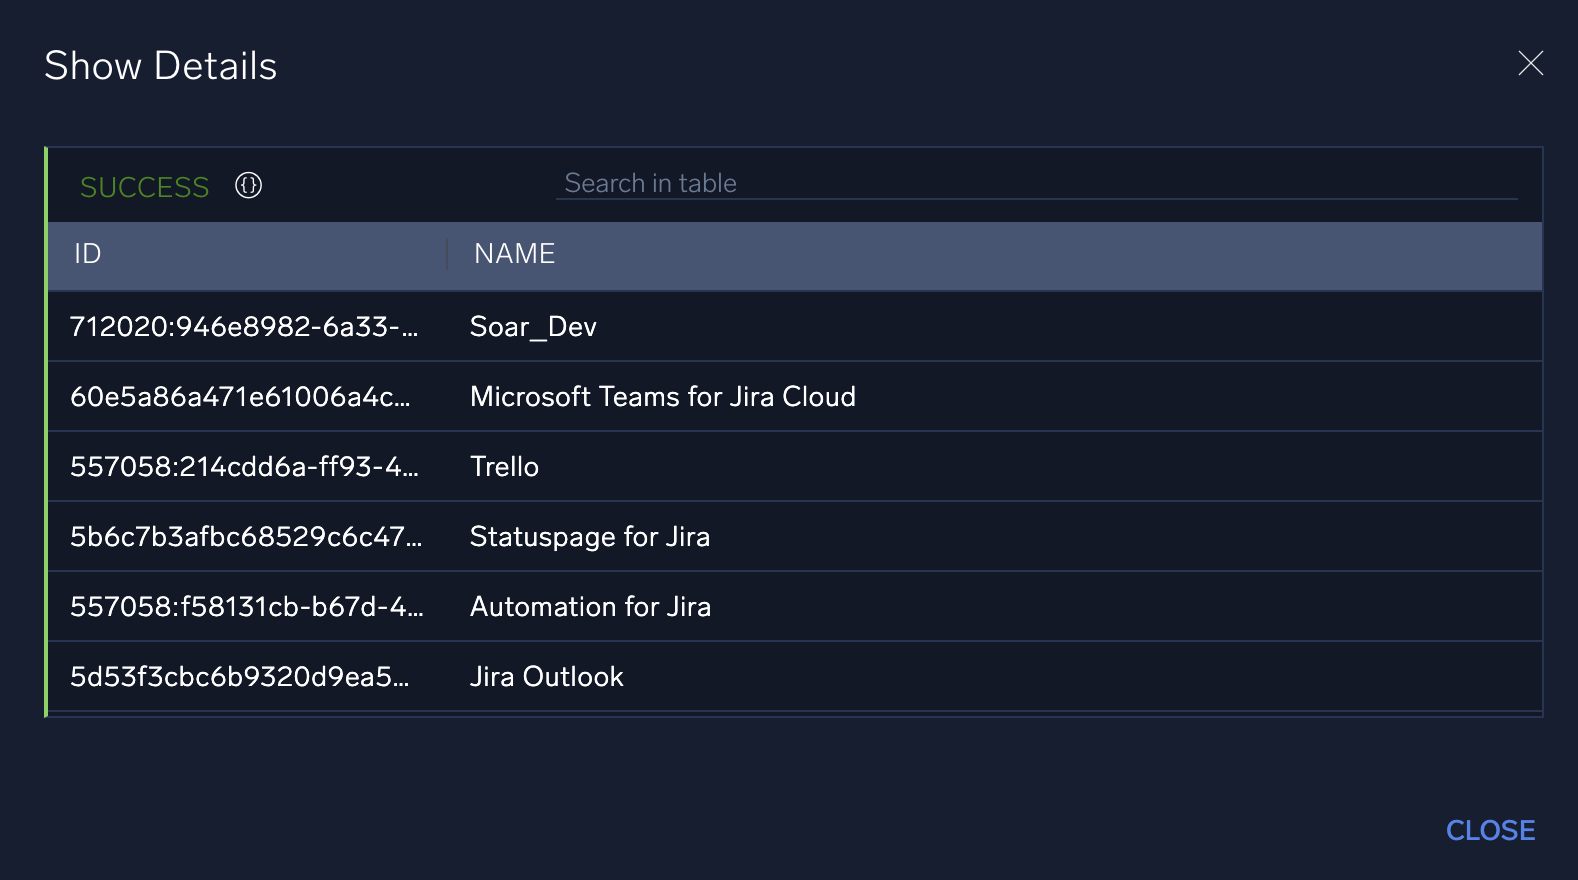
- First, let's test the action to see the output it generates. Enter any values needed for the action to run and click TEST ACTION:
- Output of the action is displayed in the Show Details dialog. Although this dialog shows the user IDs and names, there is much more output that is generated by the action. We'll see that when we edit the action next.
- To edit the output of an action, first click the Edit button on the action:
- On the resulting dialog, select the Edit toggle. The output code of the action is displayed:
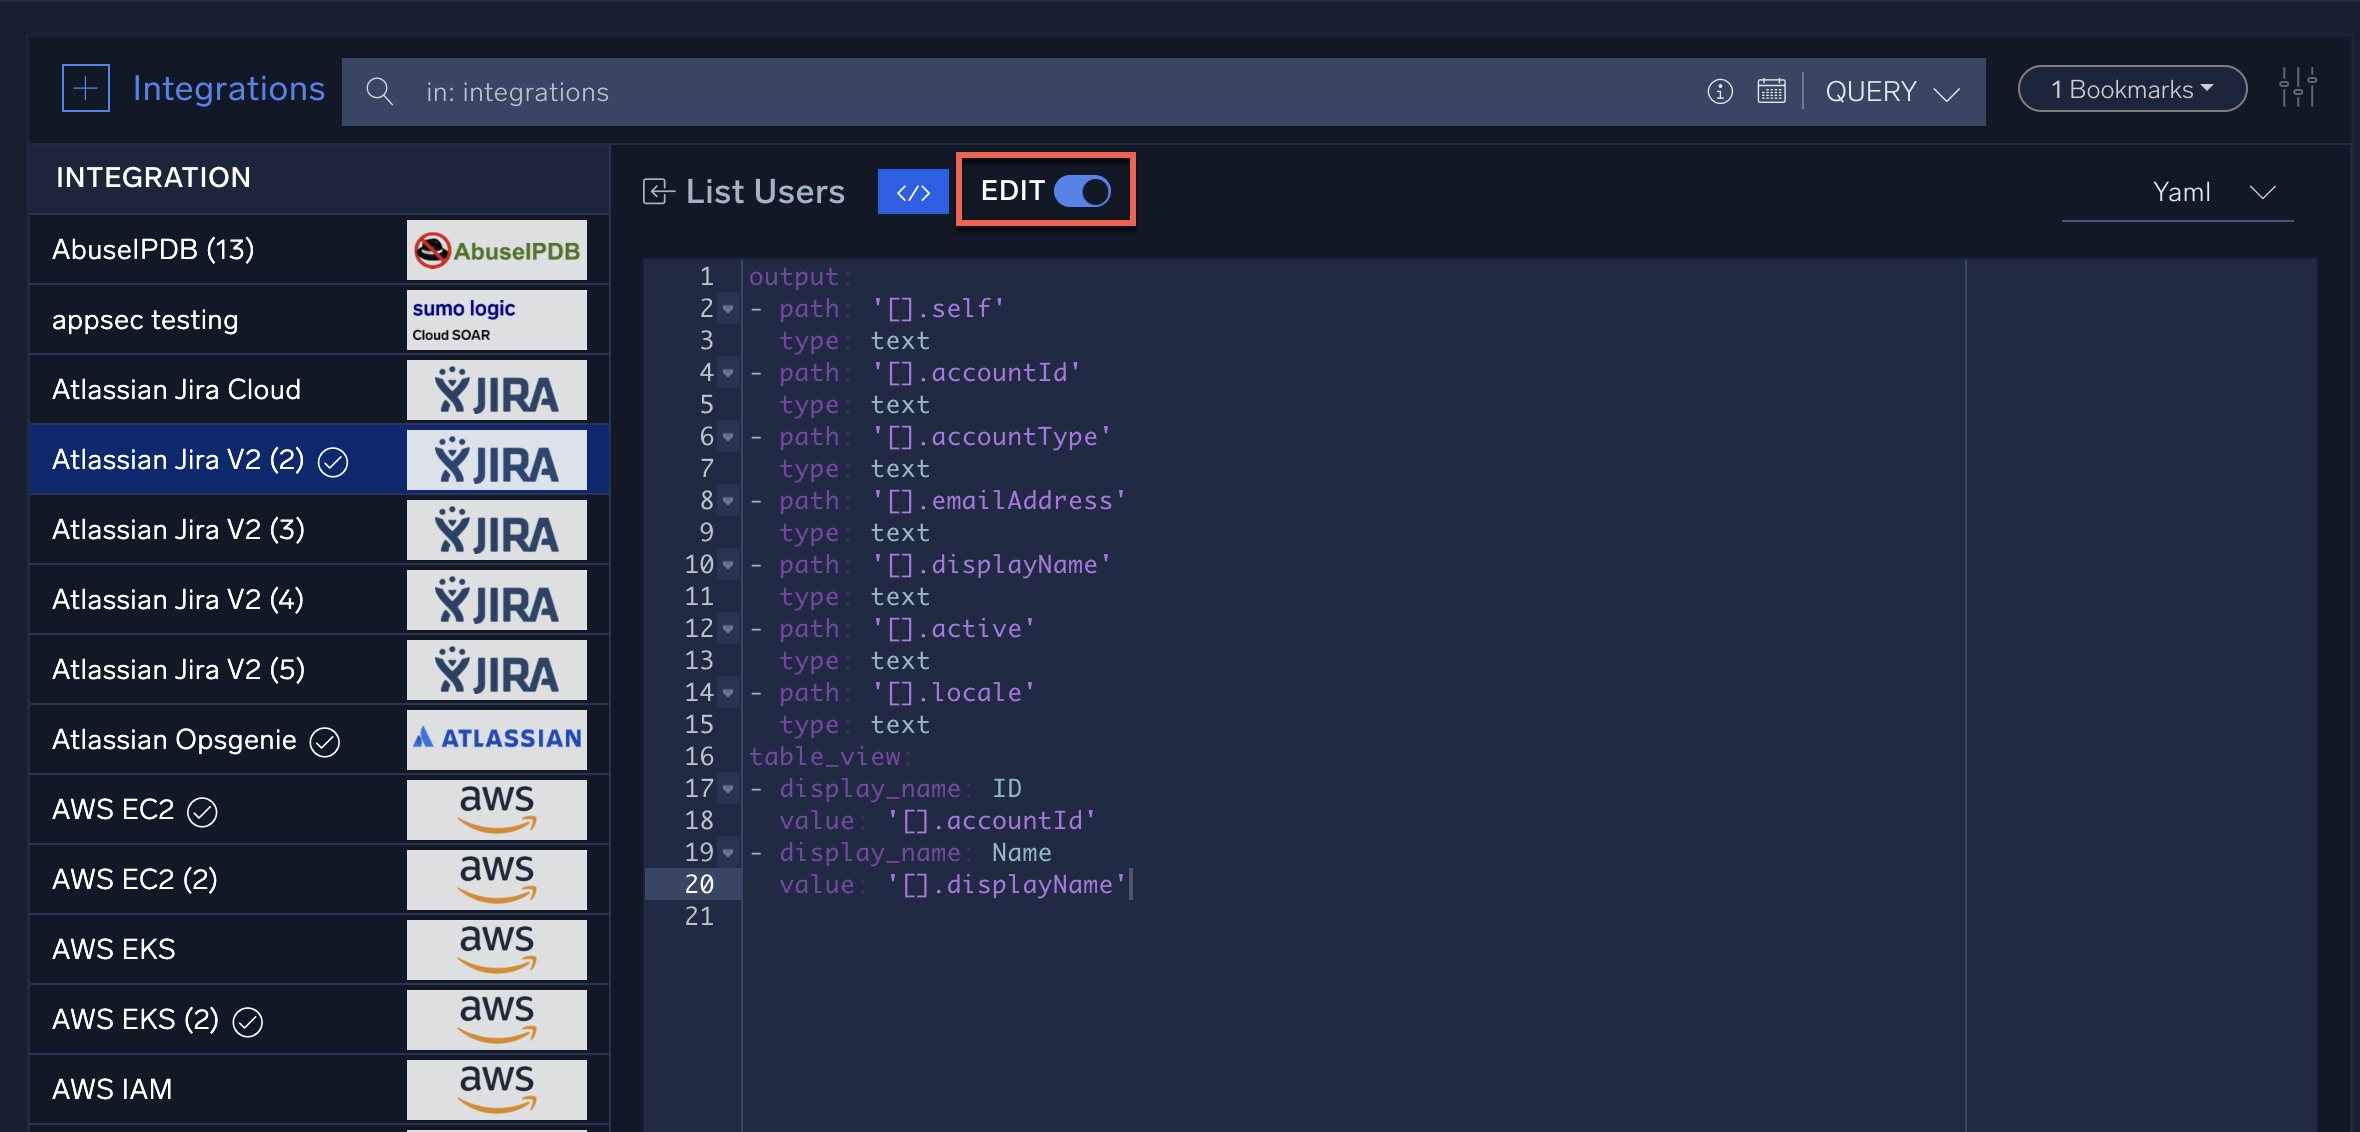
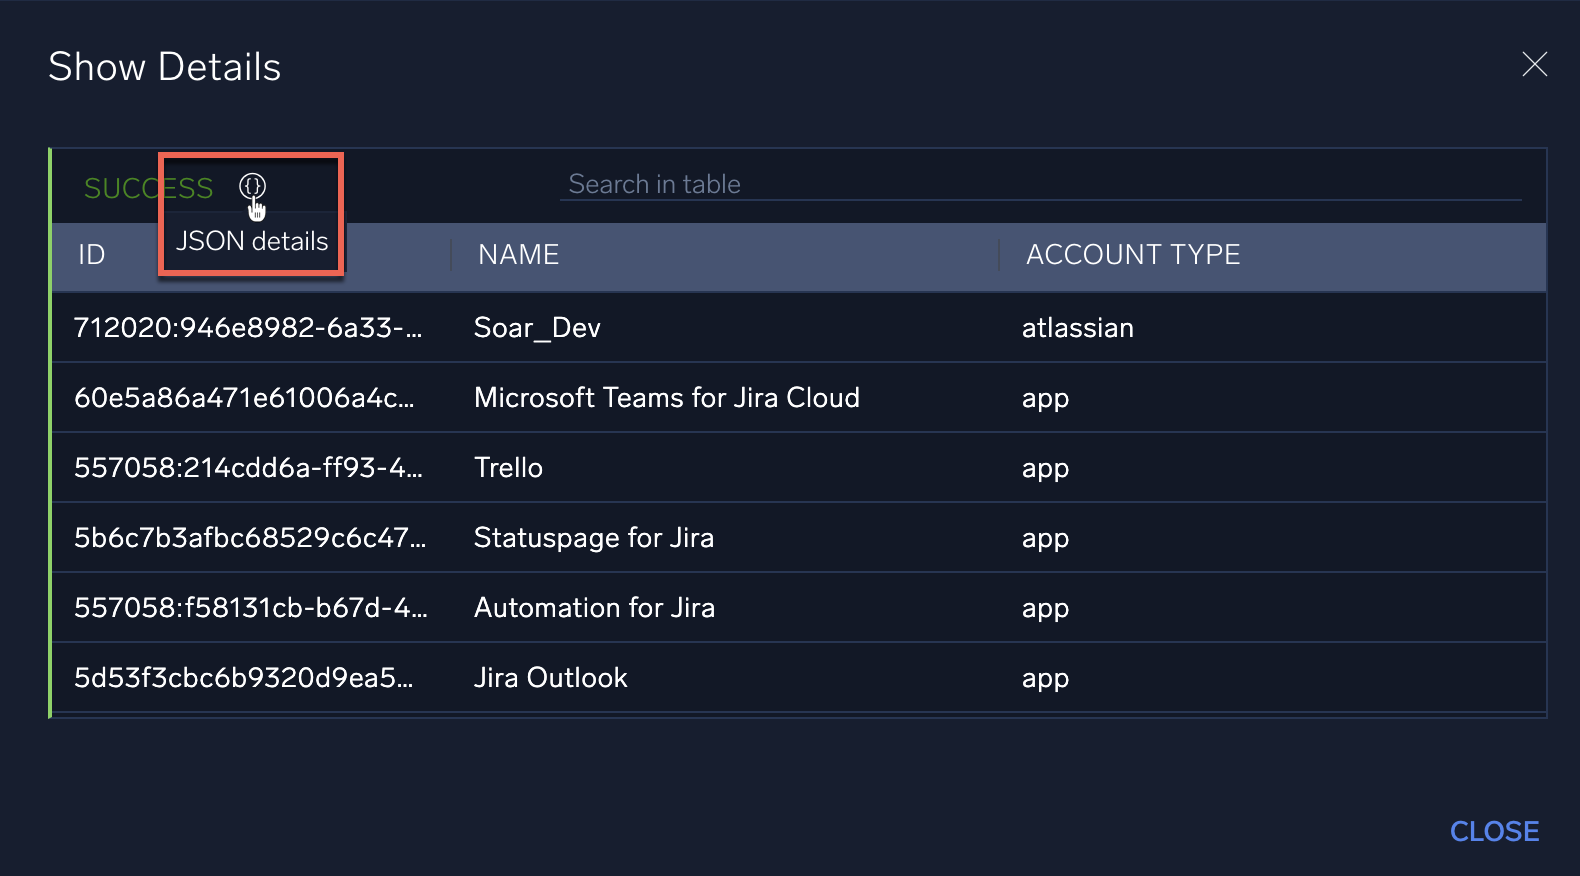
- Edit the output code as desired and click Save. In the example below, we'll add the ability for the output to display account type information:
 note
noteWhen you click Save, the edited code is validated. In order for the edited output to successfully run, it must be formatted correctly and be output that the integration can provide.
- To ensure that the edited output works, test the action like we did earlier.
For our example, after we test the action notice how the account type is now displayed in the Show Details dialog box: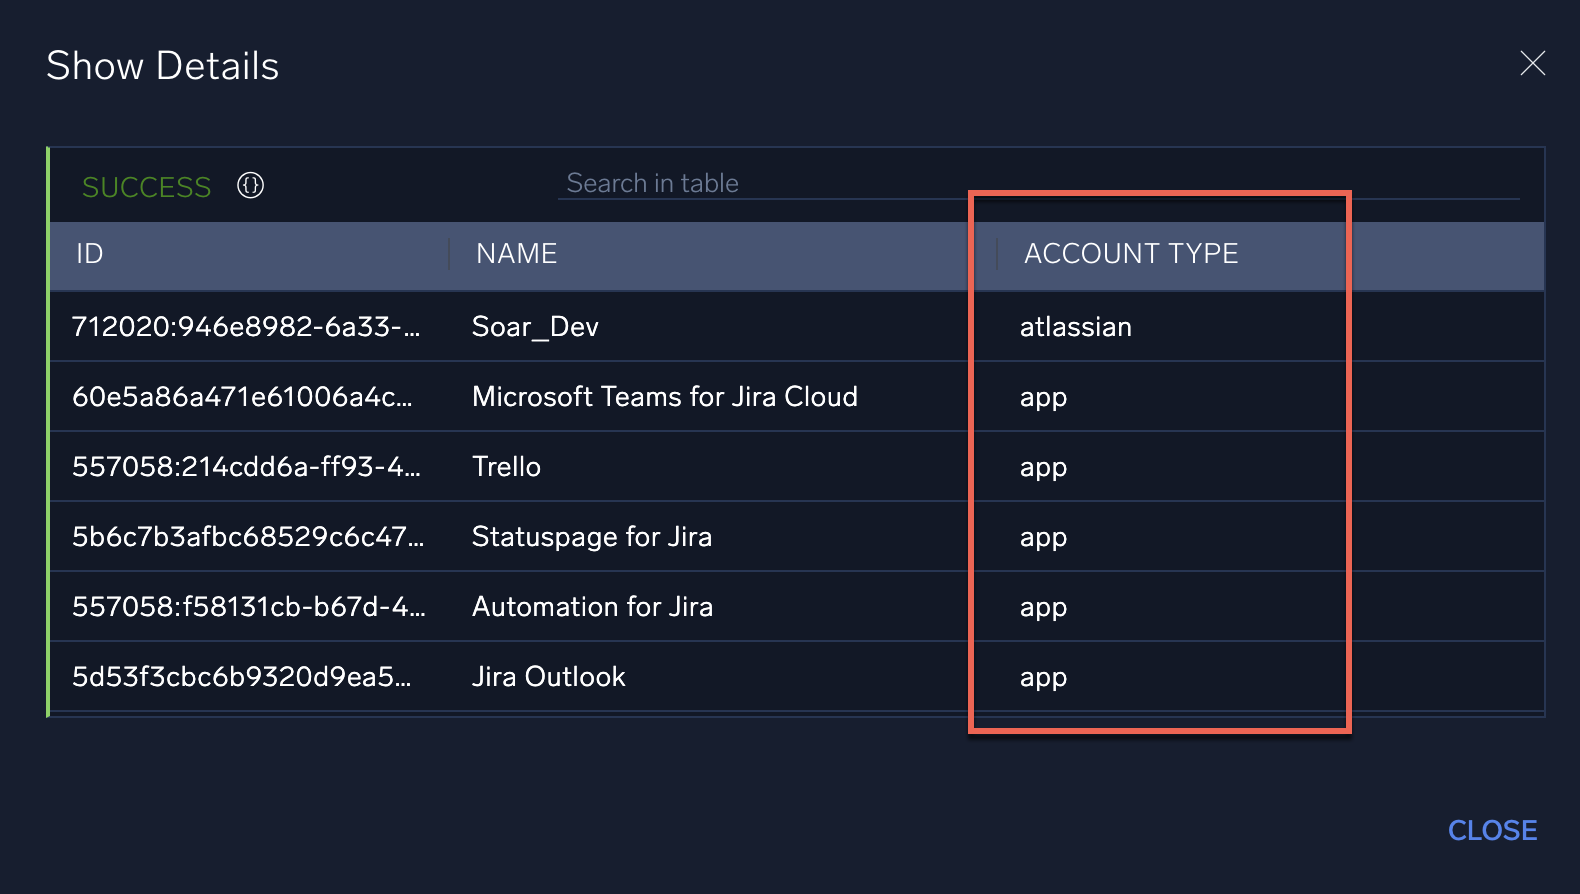
- But there is more output than what was configured to display. To see the complete output, click the JSON details button:
Here you can click expand arrows to examine the output in JSON format. Click buttons at the top of the dialog to return to the display view, download the JSON, or copy the output:
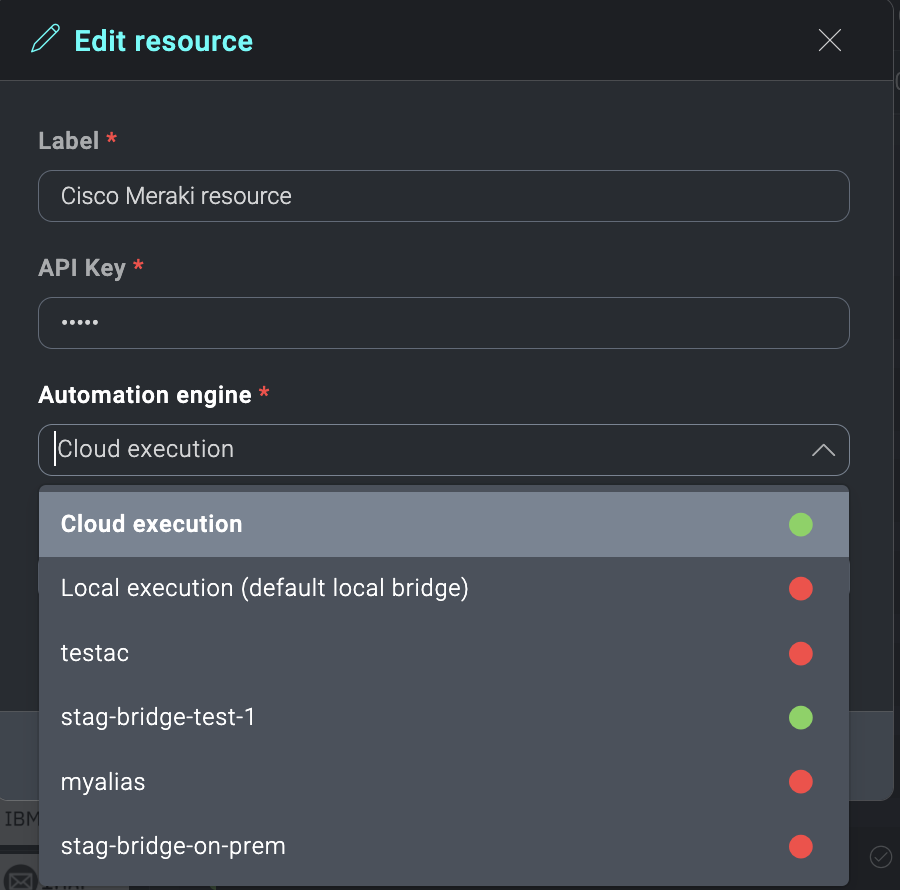
Cloud or Bridge execution
You can set integrations, and their related action execution, to be executed in the cloud or through the Bridge. Only certified integrations can be executed in the cloud, while custom integrations must be executed through the Bridge.
- Classic UI. In the main Sumo Logic menu click Automation. Then click the gear icon in the top right, select Automation, and then select Integrations in the left nav bar.
New UI. In the main Sumo Logic menu select Automation > Integrations. You can also click the Go To... menu at the top of the screen and select Integrations. - Select an integration.
- Hover your mouse over the resource name and click the Edit button that appears.
- In the Edit resource dialog, click the Automation engine field to select Cloud execution (for certified integrations only) or select a Bridge option (for custom integrations).