Use Docker with the Integration Framework for Cloud SOAR
For Cloud SOAR, you can use the integration framework to execute all the actions of an integration in a container built from a custom Docker image. This is particularly useful, for example, if you want to improve actions by taking advantage of third-party libraries. In that case, you can install those third-party libraries in the Docker container where actions will be executed making them available to the interpreter of the action scripts. However, there are many other ways in which using a custom Docker image can allow you to customize your integrations and actions.
Custom Docker image
Steps to create a custom Docker image
- Go to the Integrations page.
- Look for the integration for which you need to create a custom Docker image and click on it.
- Next to the name of the integration, you will see two buttons. Click on the one that is on the far right and has the Docker logo on it.

This will open the custom Docker editor: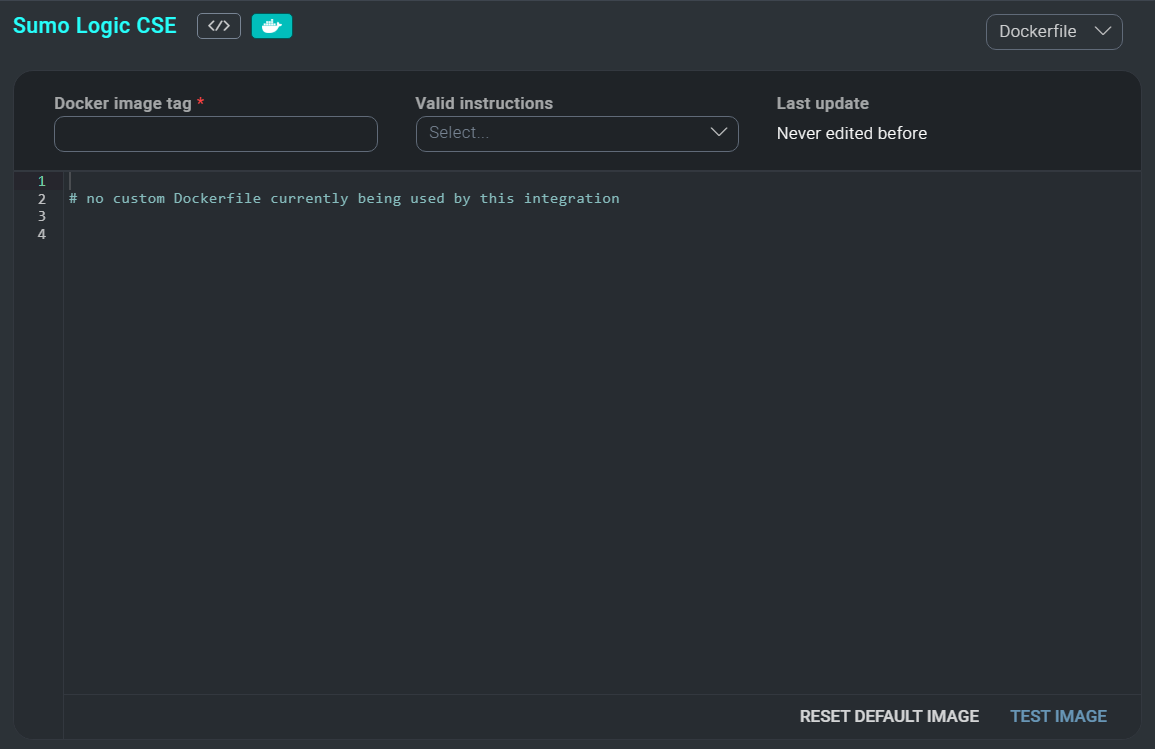
- Type a name for your custom image in the Docker image tag field. This is a required field.
- When you are creating a new custom Docker image, you will see the Last update field is showing Never edited before. The text area below allows you to write a Dockerfile with the instructions to build your custom image:
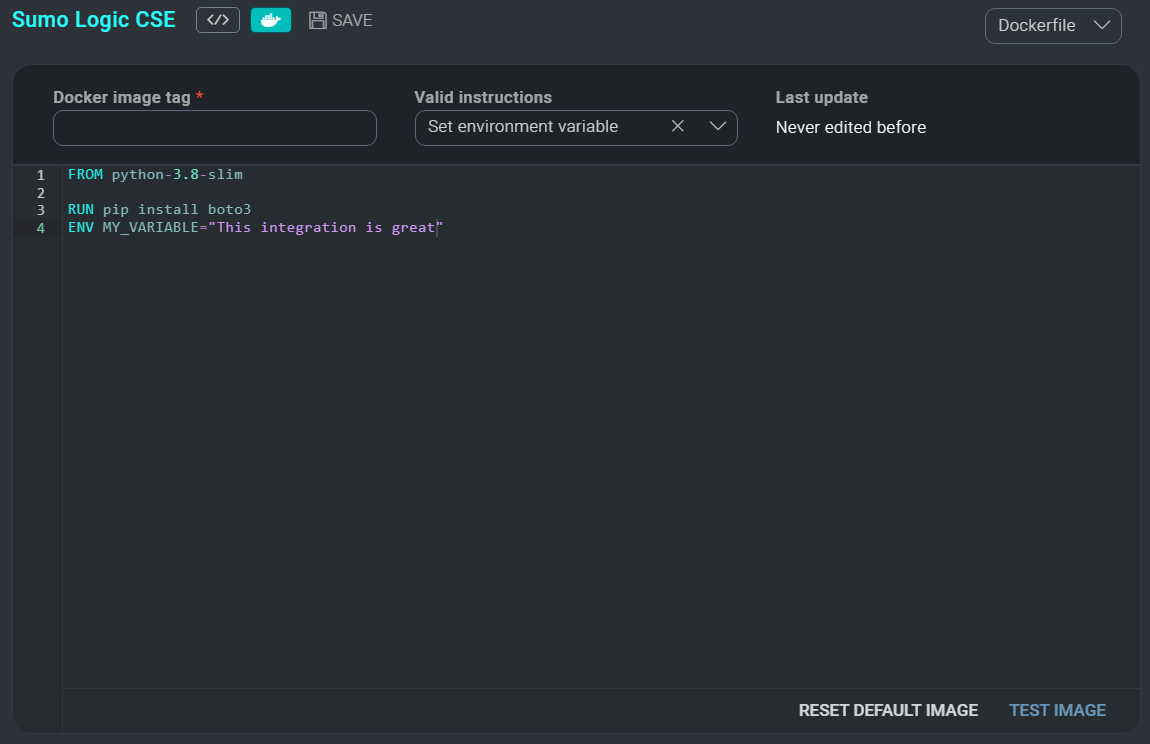
- Proceed to write your custom Dockerfile as you would normally do. If you need tips on how to do this, refer to Useful Docker commands or check the Docker official documentation. Keep in mind that the following statements are not currently available, which means they will be ignored when building the image:
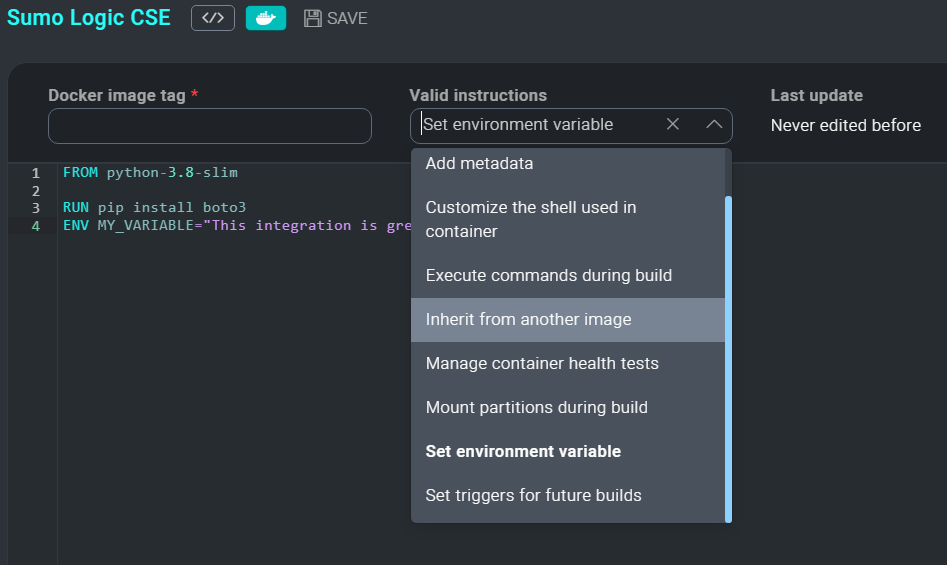
COPY,WORKDIR,EXPOSE,ADD,ENTRYPOINT,USER,ARG, andSTOPSIGNAL. - In the editor you will see there is a dropdown menu above the text area that reads Valid Instructions. This dropdown menu enumerates in a descriptive way a set of instructions that you can use in your Dockerfile. If you choose them from the dropdown menu, a new line will be added to your Dockerfile with the keyword to start the statement, so you can pick up from there. The use of this dropdown menu is completely optional and you can write your Dockerfile directly in the text area.
- As soon as you change something in your Dockerfile, a Save button will appear next to the Docker editor button. Click on it if you are ready to save your custom Dockerfile.
Once you have saved a custom Dockerfile, the integration will be executed on a container built from the relative custom Docker image.
Testing your custom Docker image
We strongly suggest that you test your custom images as soon as you create or modify them. If by any chance you save a faulty custom Dockerfile, when the actions from that integration are triggered, their execution will fail because the Docker image will fail as well.
- To test your custom images, click where it says TEST IMAGE at the bottom right corner of the editor.
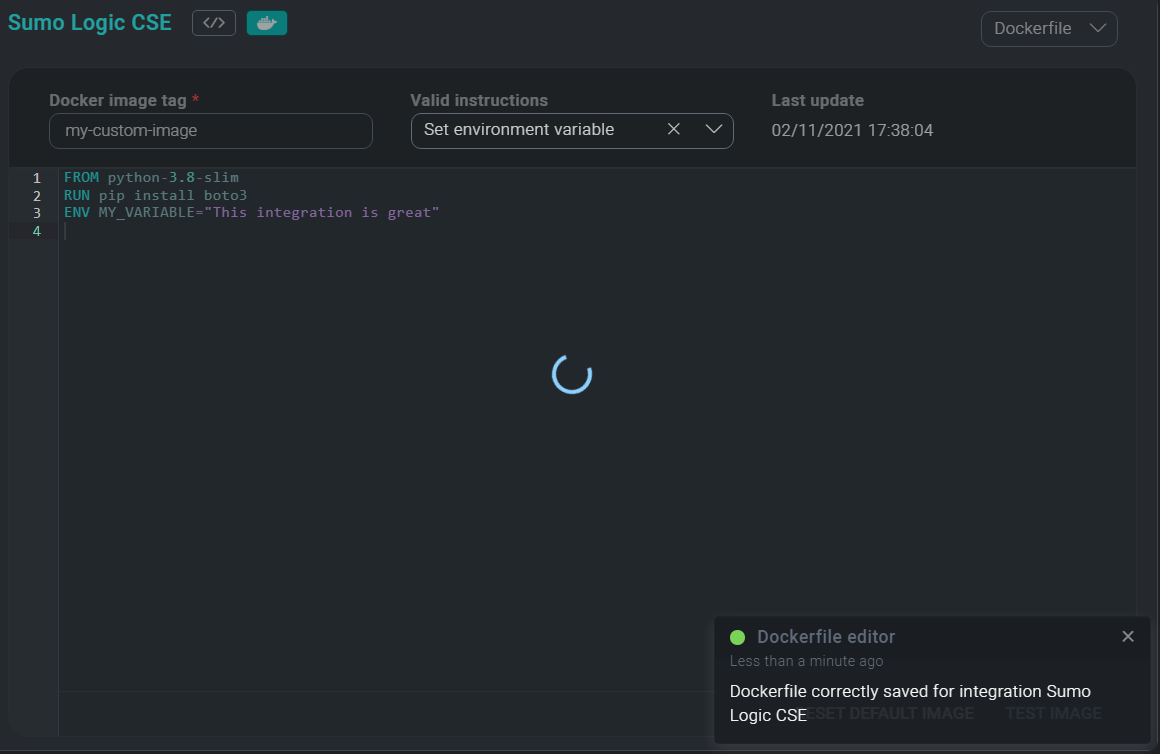
The system will try to build an image from your Dockerfile. While this happens, a spinner will appear in the editor. Consider this may take a few moments, depending on the instructions used in your Dockerfile.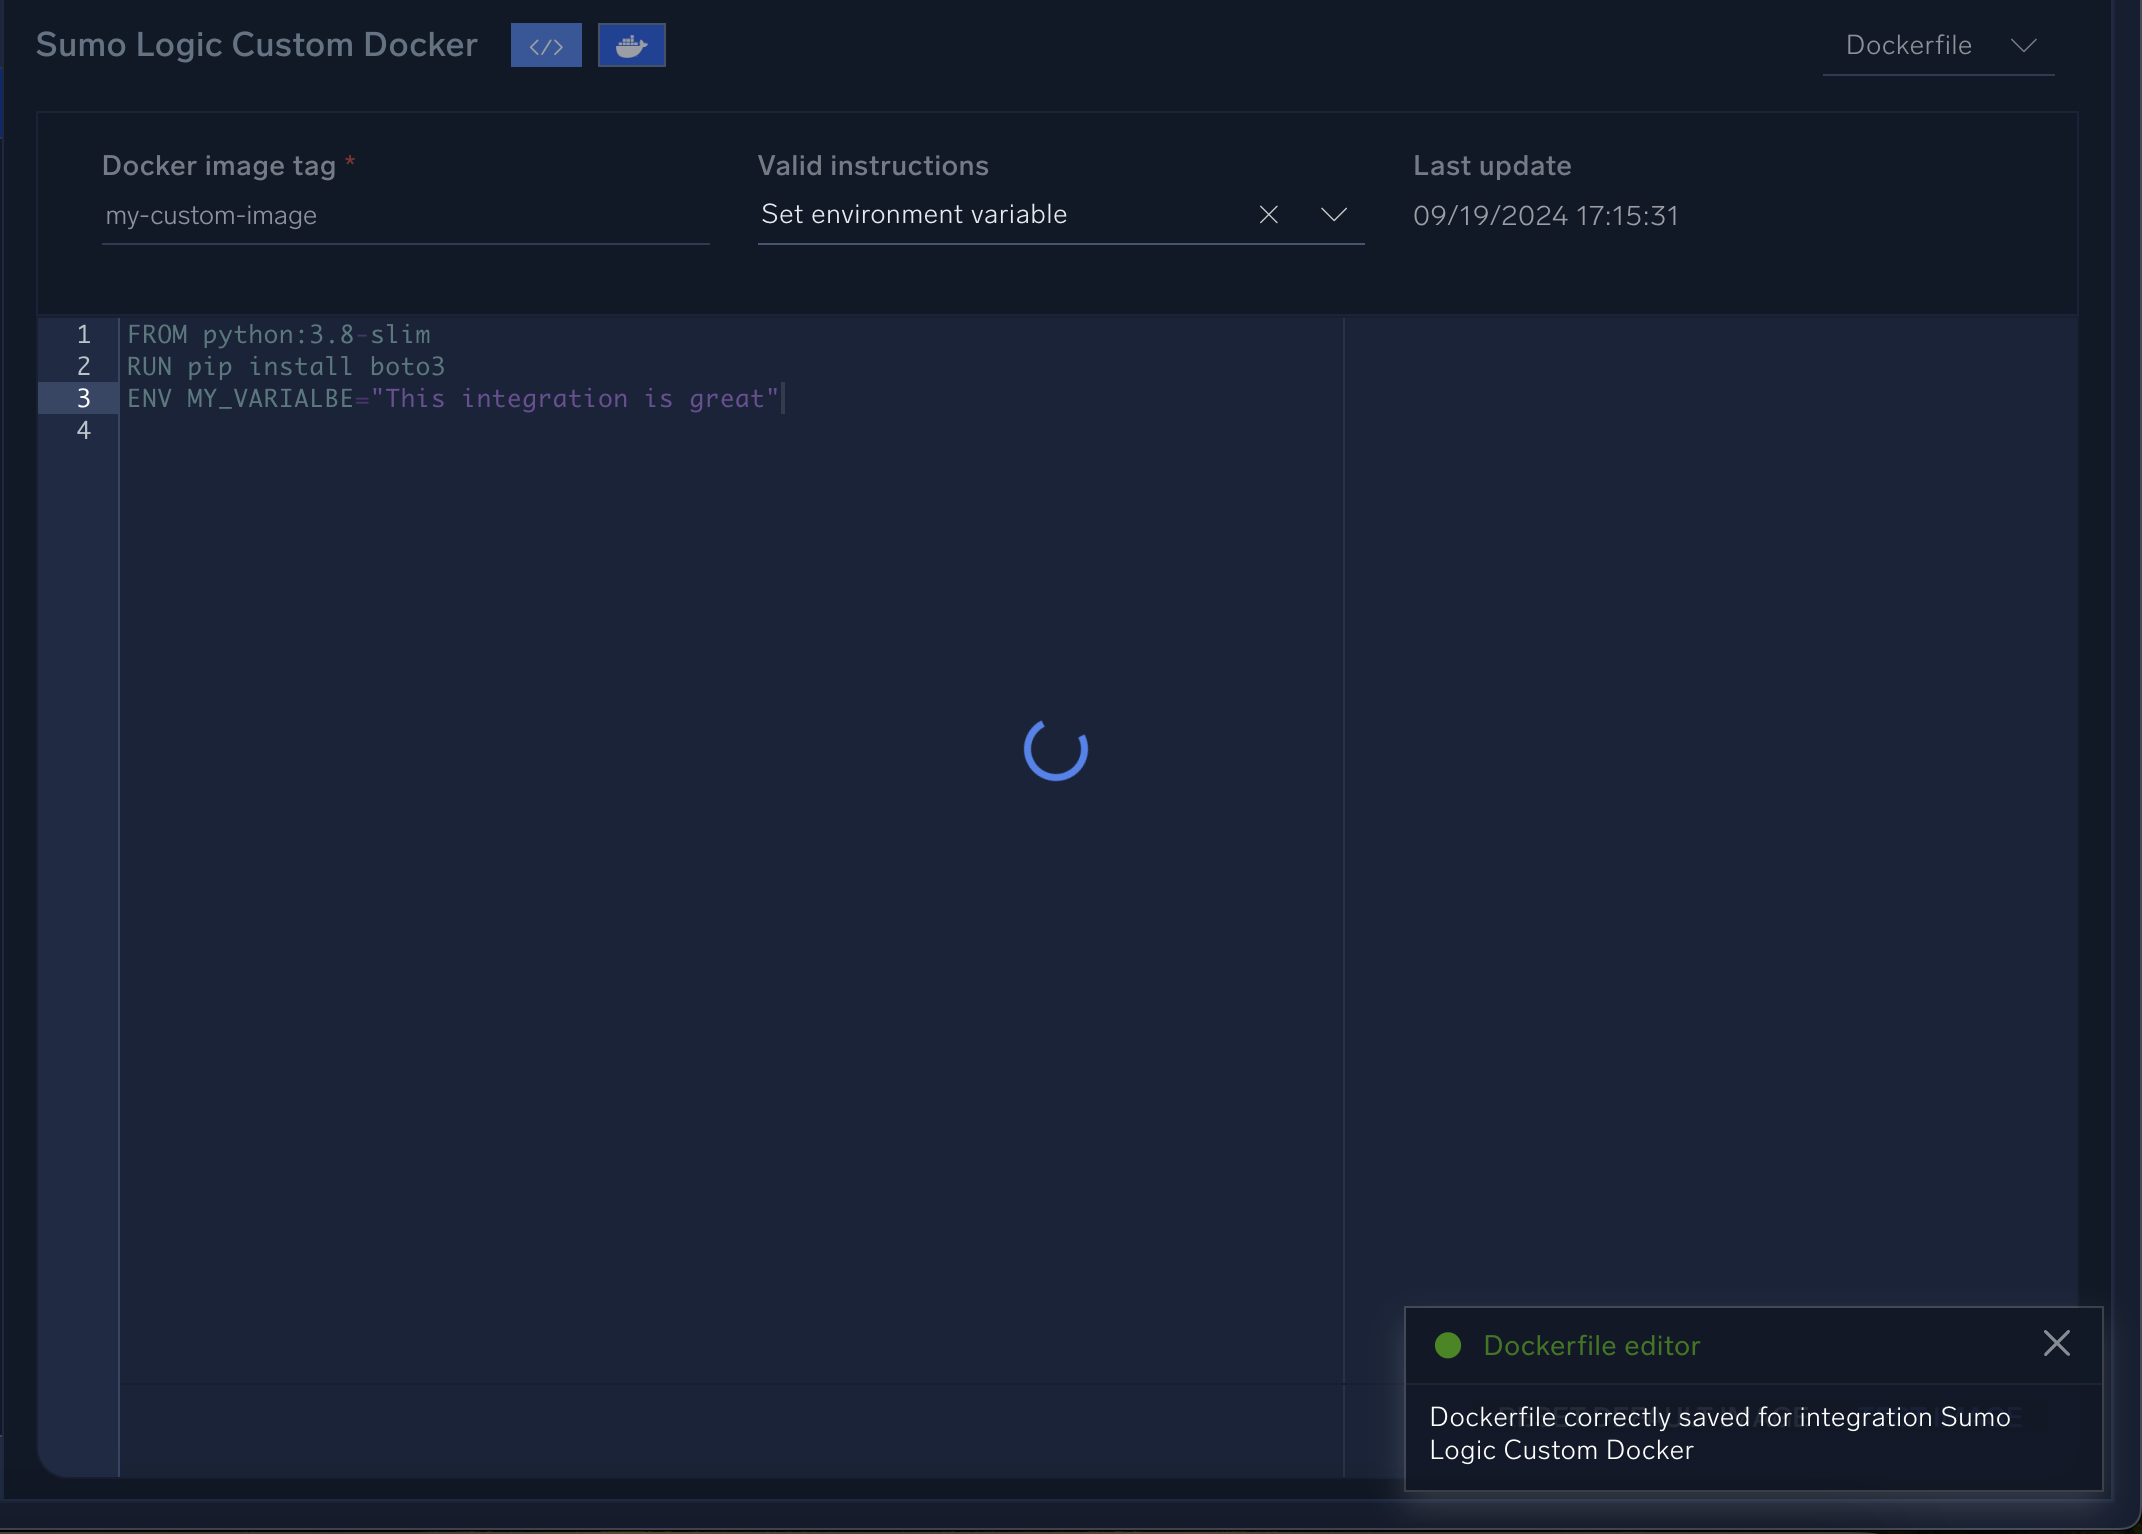
- If your custom Docker image was built without error, a success message will pop up in your screen. Otherwise, if a proper image cannot be built from your custom Dockerfile, an error message will pop up, containing details on what went wrong. In that case, it is very important that you correct your Dockerfile and test it again until an image is built successfully. As an alternative, you can always revert to the original Docker image used by the integration, by clicking on Reset Default Image at the bottom of the editor.
Deleting your custom Docker image and reverting to the original one
The RESET DEFAULT IMAGE button that appears at the bottom of the editor allows you to delete your custom Docker image and revert to the original Docker image used for that integration.
As soon as you click on it, the integration will start being executed again in a container based on the original integration image. Notice that your custom Dockerfile will be lost, so you will have to write it again if you want to revert back to your custom image.
Checking whether an integration is using a custom Docker image
If you have appropriate permissions, you can set up custom Docker images for any integration. There are many ways to check if any of your integrations are being executed in a container from a custom Docker image.
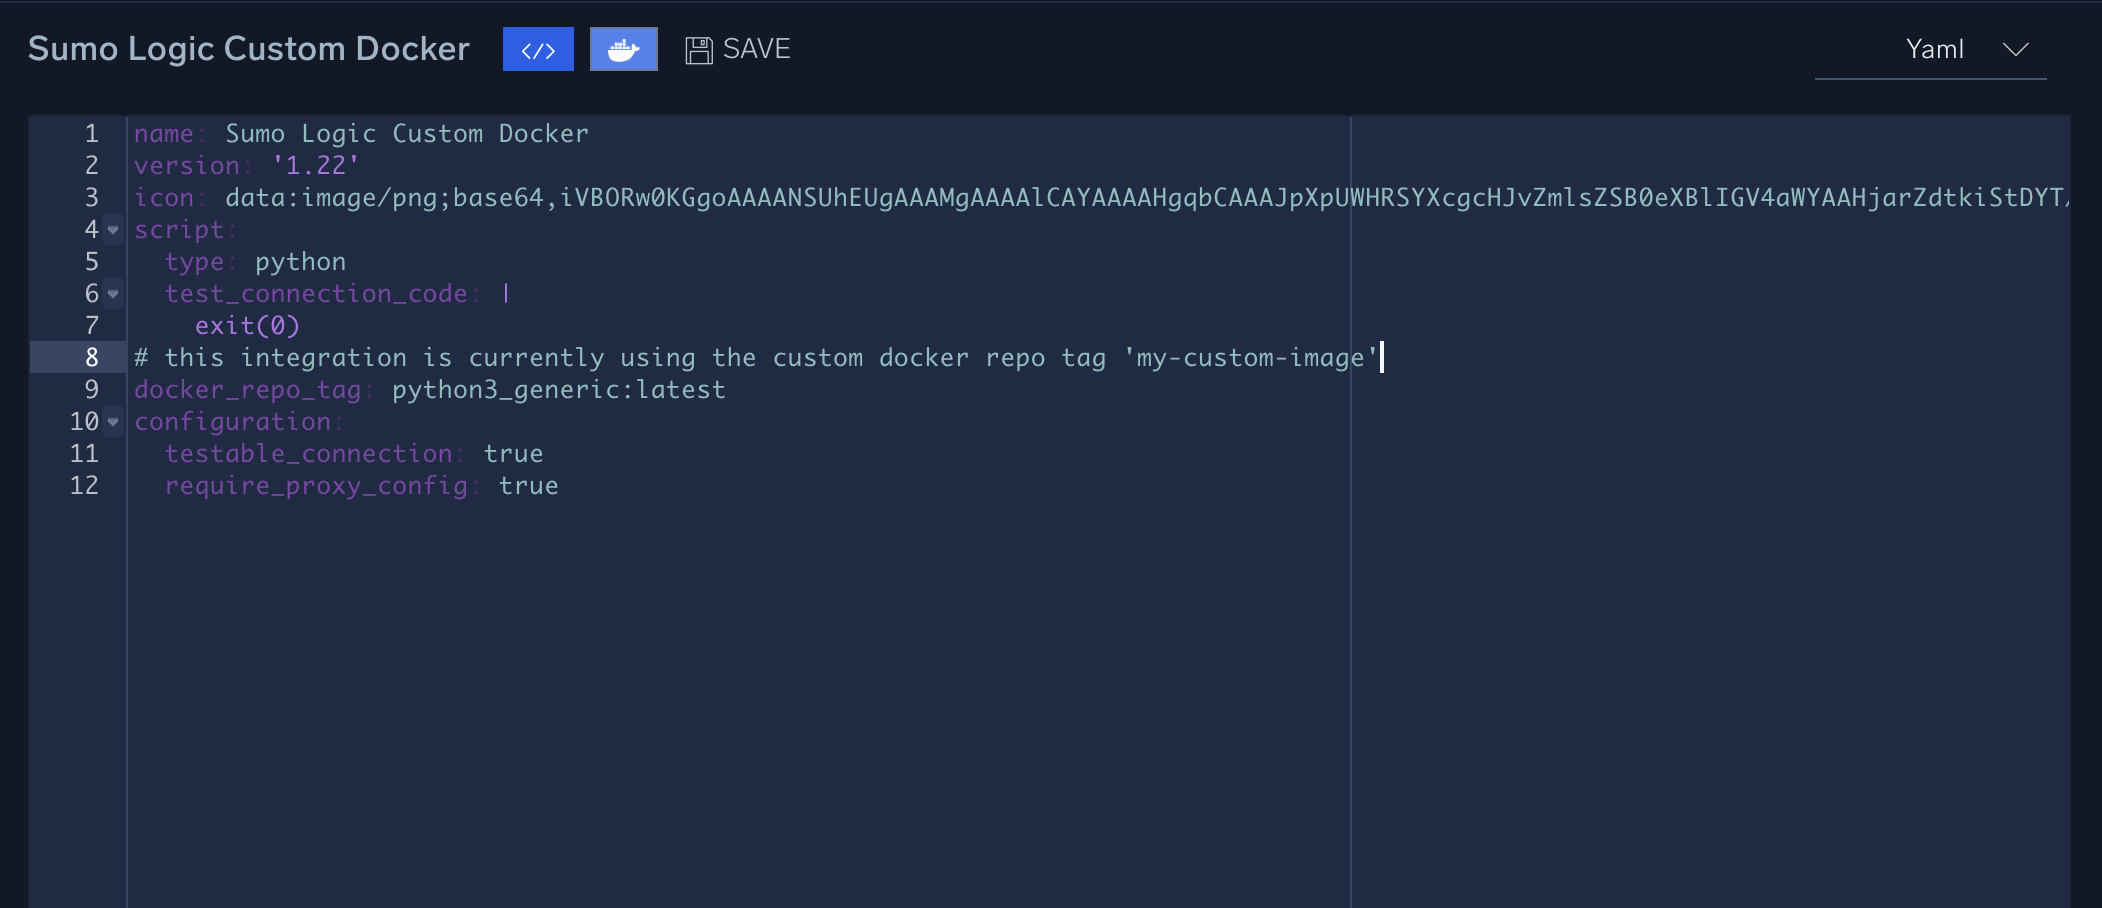
If you go to the Docker YAML editor of the integration, if it is using a custom image, a comment above the docker_repo_tag will tell you so:
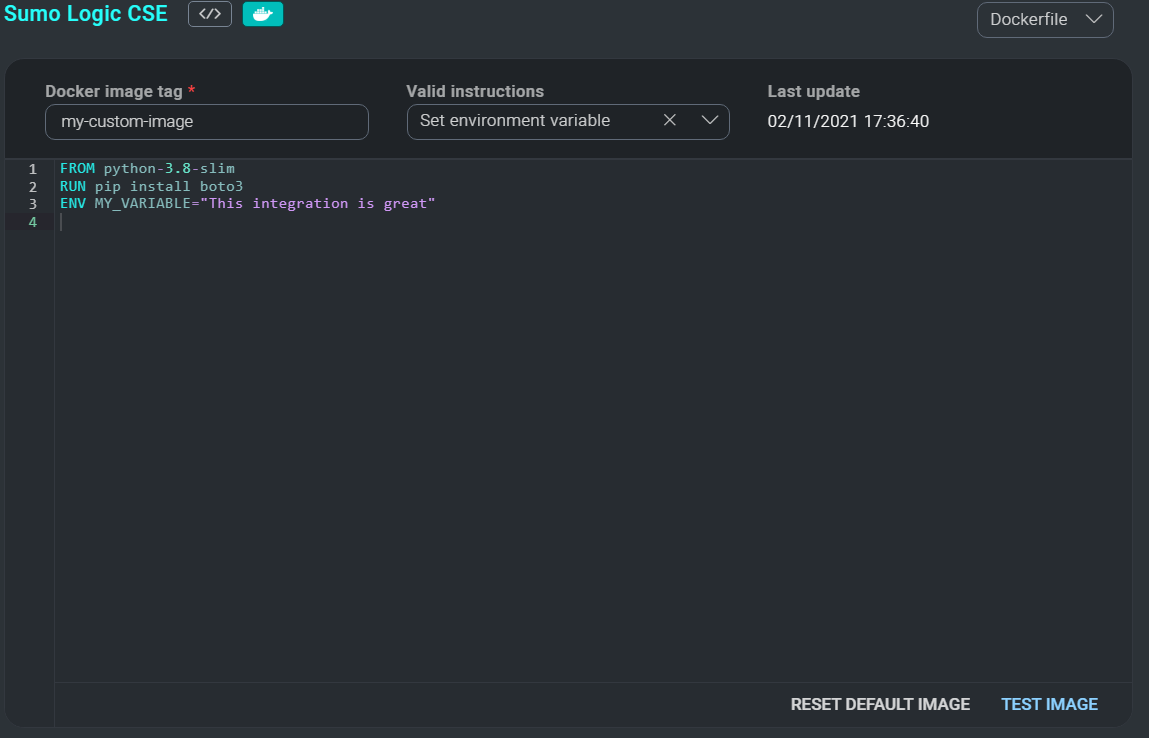
However, the best way to check whether an integration is using a custom image is to open the Docker editor for that integration (by clicking on the button with the Docker logo on it).
Integrations using a custom image will have a Docker image tag, a Last update date, and some Dockerfile content.
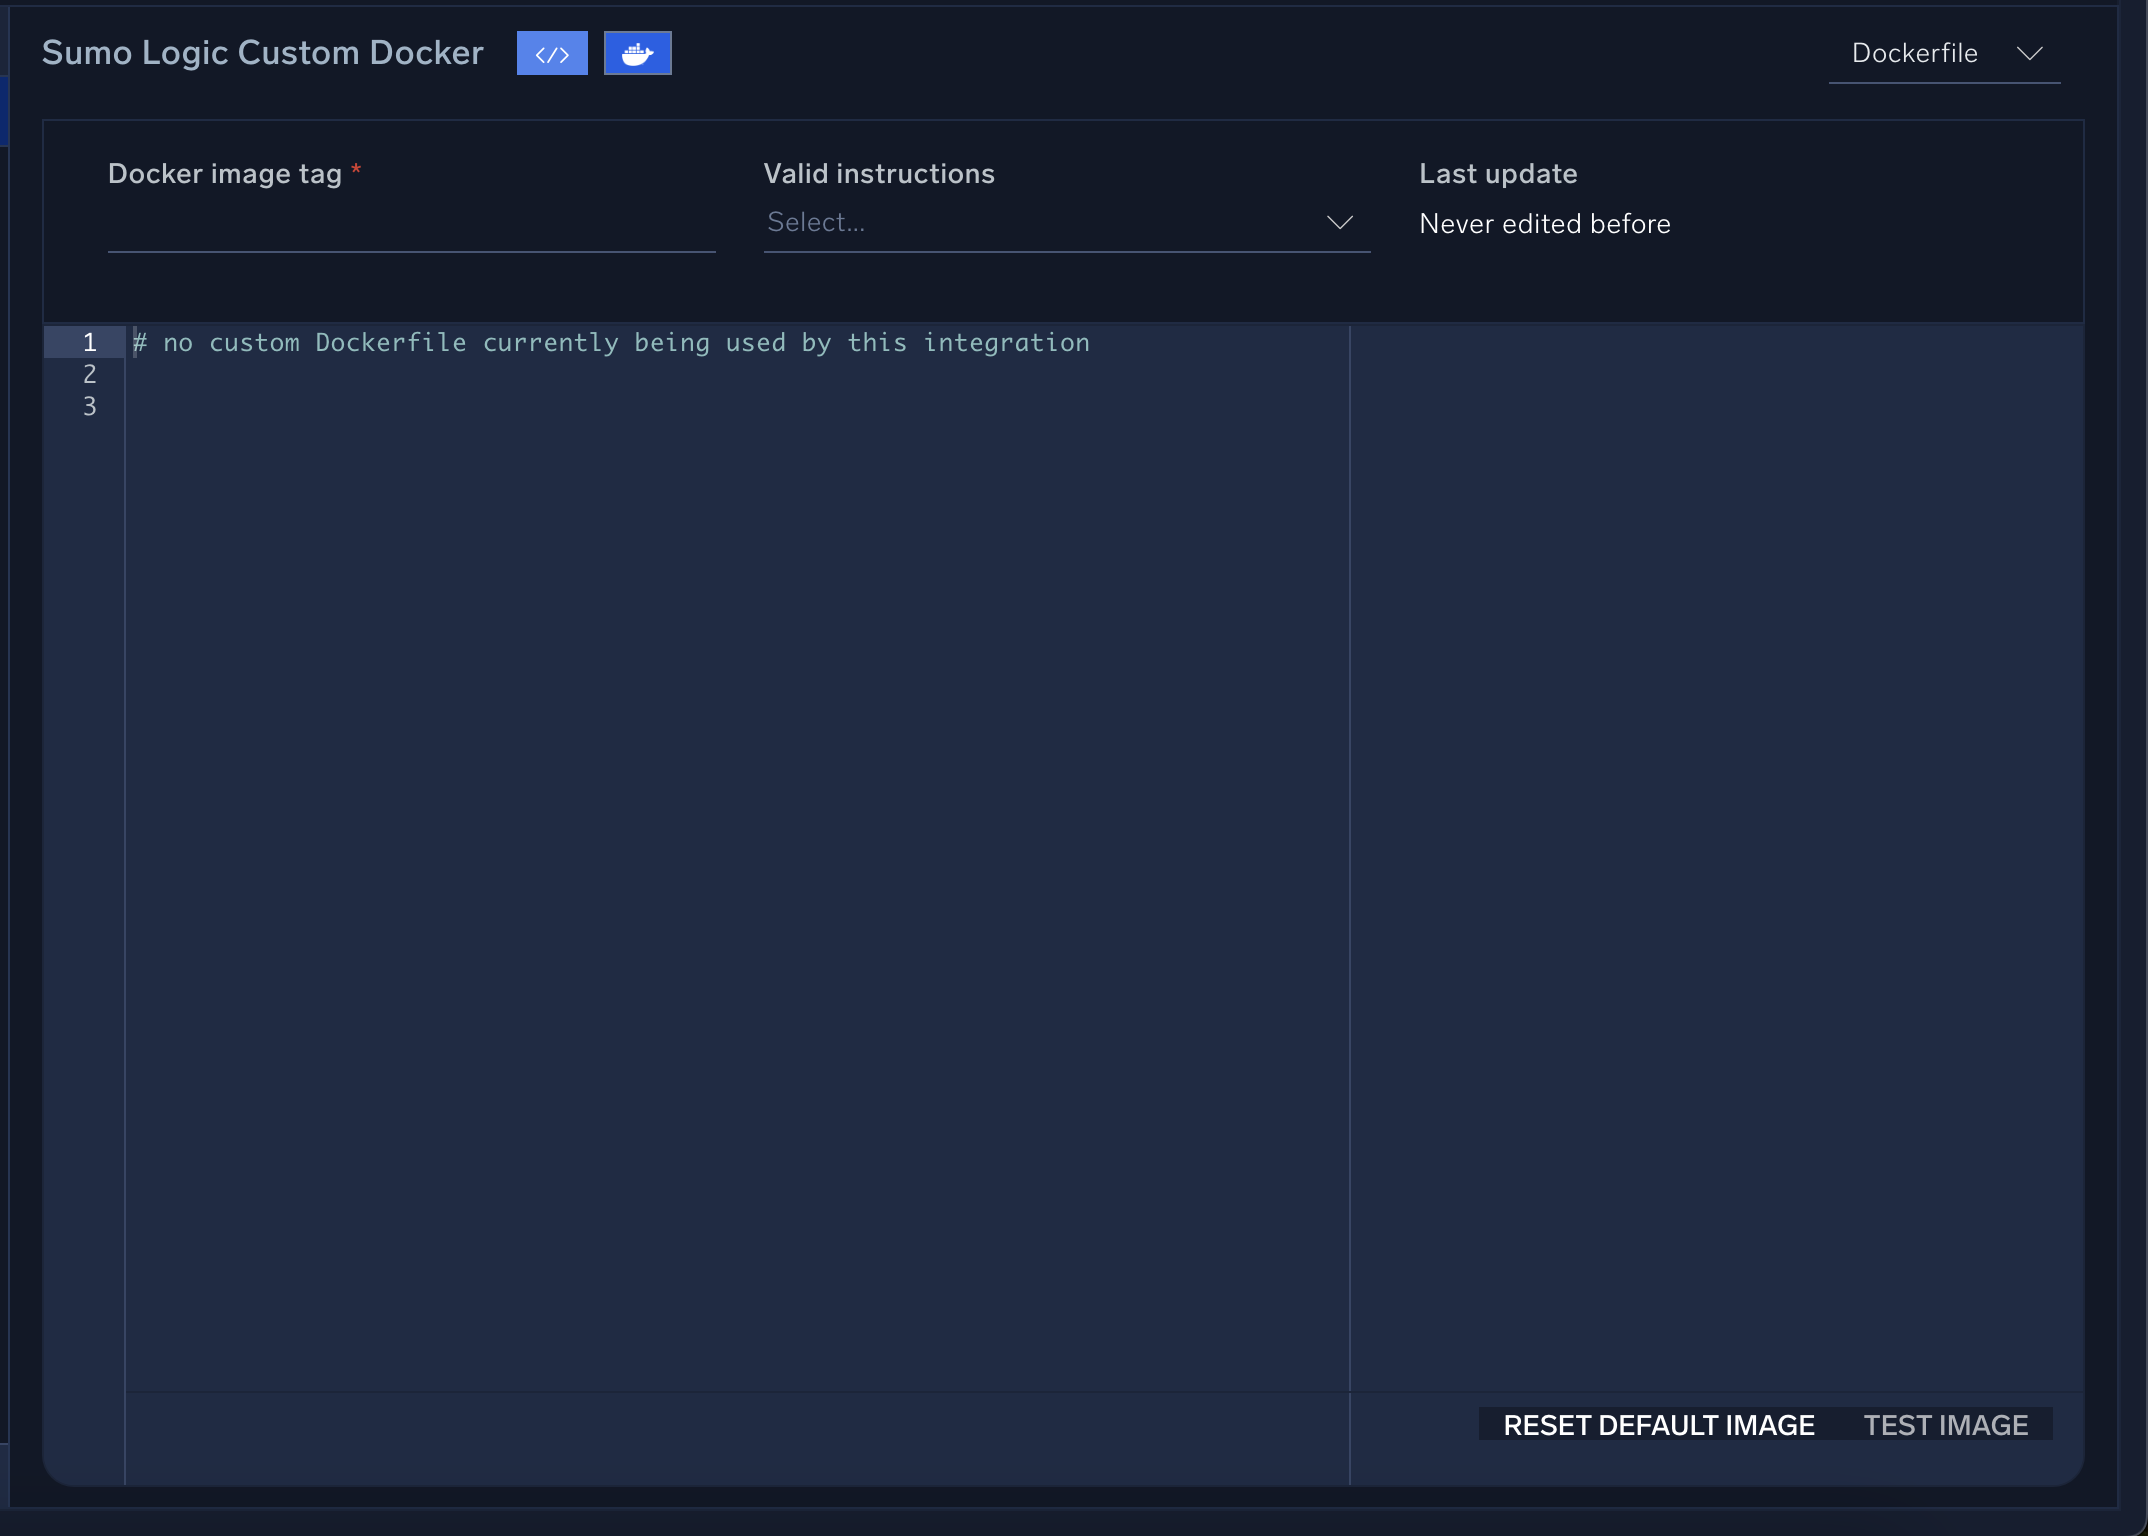
On the other hand, integrations that are not using a custom Docker image will have an empty Docker editor showing Never edited before in the Last update field:
Useful Docker commands
The following commands may be useful in performing some common actions in Docker on your server. See the official Docker documentation at https://docs.docker.com/ for additional information.
Create Docker image (Python example)
- Create a file with name dockerfile inside a dedicated directory:
FROM python:2-slim
RUN pip install --trusted-host pypi.python.org requests suds - Inside this directory run:
docker build -t <my_integration> - If you run Docker image ls you can see your image with tag
<my_integration> - Now you can use this tag in YAML:
docker_repo_tag: '<my_integration>:latest'
Load an image from a tar archive
docker load < docker_image.tar
Add third-party libraries to the Docker image when building
pip install --trusted-host pypi.python.org tenable_io mock==2.0.0 pytest==3.0.4 Sphinx==1.5.1
List all Docker images
docker image ls
Show Docker disk usage
docker system df