Create a Lookup Table
This section has instructions for creating Lookup Tables using the Sumo Logic UI.
For additional articles about lookup tables, see the following:
- To update, export, and share Lookup Tables, see Manage and Update Lookup Tables.
- To configure a Lookup Table for use in Cloud SIEM, see Configure an Entity Lookup Table.
- To populate a Lookup Table with Cloud SIEM inventory data, see Save Inventory Data to a Lookup Table.
New Lookup Tables are available in all deployments except Sumo Logic's Montreal deployment, pending AWS providing a required AWS service in the Montreal region.
You can also use the Lookups API to create and manage Lookup Tables.
Introduction to Lookup Tables
A Lookup Table is a table of data hosted on Sumo Logic that you can use to enrich the log data received by Sumo Logic. For example, in a Sumo Logic log search, you'd refer to a Lookup Table of user account data to map the user ID in an incoming log to a row in the Lookup Table, and return other attributes of that user, for instance, email address or phone number. The fields you look up appear as part of your search results.
Key facts about Lookup Tables
Before you create or update a Lookup table, note the following.
Size limits
- Lookup files can be up to 100 MB in size. Note that if the .csv file contains duplicate rows (rows with the same primary key) the duplicate rows will be included in the file size calculation, and apply towards the 100 MB limit.
- The maximum length for a primary key string field is 1024 characters.
- The total size of any row cannot be larger than 200 KB.
Lookup Table naming
A Lookup Table cannot have a forward slash (/) in its name or be stored in a folder with a forward slash in the name.
Reserved keywords
When you create a Lookup Table schema, note the following requirements:
-
The following strings are reserved (case-insensitive) and should not be used as field names:
"pkv", "tid-cid-s", "mt", "tid-sk-1", "tid-sk-2", "tid-sk-3", "tid-sk-4", "tid-sk-5", "tid-sk-6", "tid-sk-7", "tid-sk-8", "tid-sk-9", "tid-sk-10", "tid-sk-11", "tid-sk-12", "tid-sk-13", "tid-sk-14", "tid-sk-15", "tid-sk-16", "tid-sk-17", "tid-sk-18", "tid-sk-19", "tid-sk-20", "
_messagetime", "_receipttime", "_sourceCategory", "_sourceHost", "_sourceName", "_source", "_sourceid", "_collector", "_collectorId", "_view", "_index" -
Field names cannot contain two tilde characters in a row (
~~). -
Field names are not case-sensitive. For example, you cannot have both "Name" and "name" fields.
Lookup Tables and Search Templates
Currently, the ability to reference a field in a new style Lookup Table in a Search Template is not supported. However, you can refer to classic Lookup Tables in Search Templates.
How many Lookup Tables can you have?
The number of Lookup Tables you can have depends on what type of Sumo Logic account you have, as shown in the table below.
| Account Type | Lookup Tables allowed per org |
|---|---|
| Professional (Cloud Flex) | 10 |
| Enterprise (Cloud Flex) | 100 |
| Essentials (Cloud Flex Credits) | 10 |
| Enterprise Ops (Cloud Flex Credits) | 100 |
| Enterprise Security (Cloud Flex Credits) | 100 |
| Enterprise Suite (Cloud Flex Credits) | 100 |
| Trials | Depends on the account type being trialed |
| Free | None |
Create a Lookup Table
This section has instructions for creating a Lookup Table using the Sumo Logic UI. You can create the Lookup Table schema only, or create and populate the table by uploading a .csv file.
You can also use the Lookups API to create a Lookup Table.
Create a Lookup Table schema
Follow these instructions to create a new Lookup Table and define its schema without populating the table.
- Go to your Library.
- Navigate to the folder where you want to create the Lookup Table.
- Click Add New and then select New Lookup.
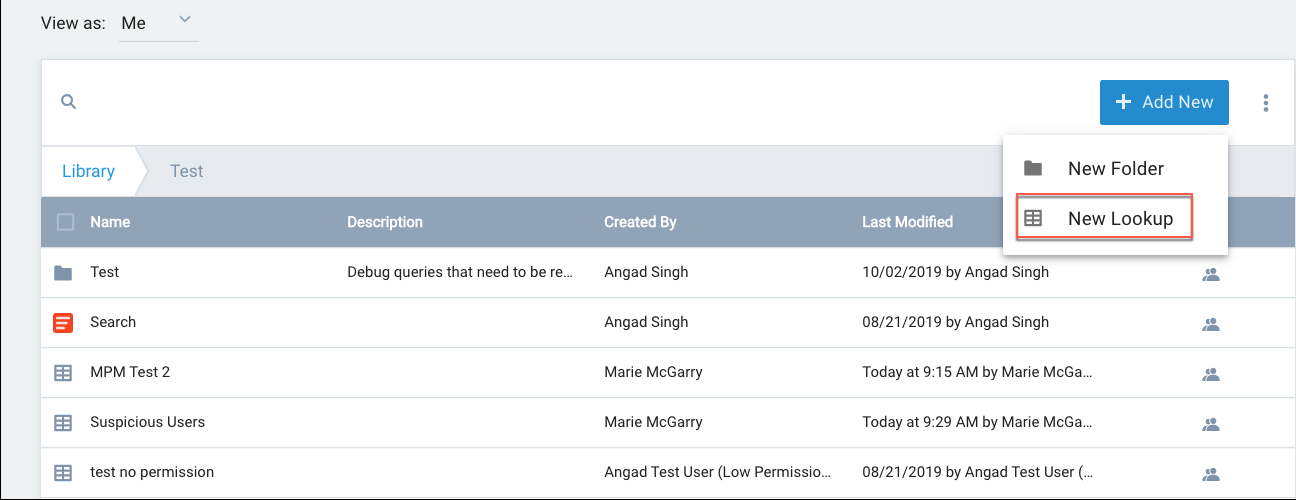
- The Create Lookup Table page appears.
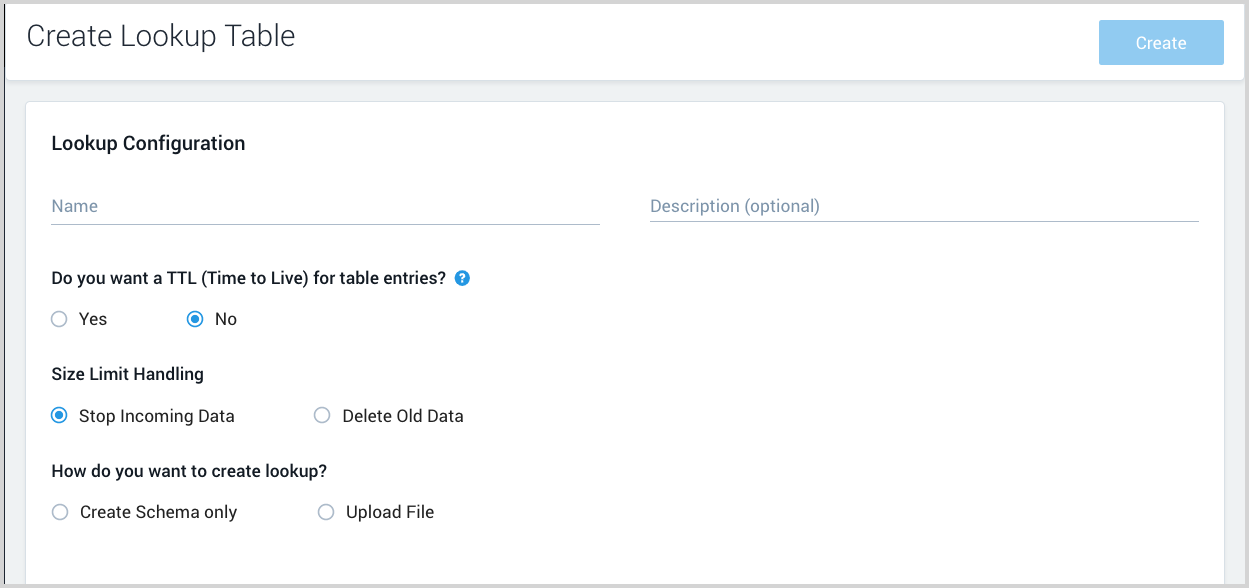
- Lookup Name. Enter a name for the Lookup Table.
- Description (Optional). Enter a description of the Lookup Table.
- Do you want a TTL for table entries? A TTL specifies a time limit beyond which an unchanged row in the table will be unavailable for reads and will be deleted. For example, if you set a TTL of 5 minutes for a lookup table, when 5 minutes pass without a row being updated, that row will no longer be returned by lookups and will be deleted from the lookups table. A TTL is useful for managing the freshness of the data and the size of the table.
- Click Yes if you want to set a TTL.
- Enter an integer value in the Duration field, and select a unit of time from the pulldown: Seconds, Minutes (default), Hours, or Days.
- Size Limit Handling. This option controls how on how additions to the Lookup table will be handled when it reaches its size limit (100 MB)
- Stop Incoming Data. Once the Lookup Table size limit is reached, no new data will be added to the table.
- Delete Old Data. The rows that have been modified or updated least recently will be replaced by new rows.
- How do you want to create lookup? Click Create Schema only.
- The page displays a Schema section.
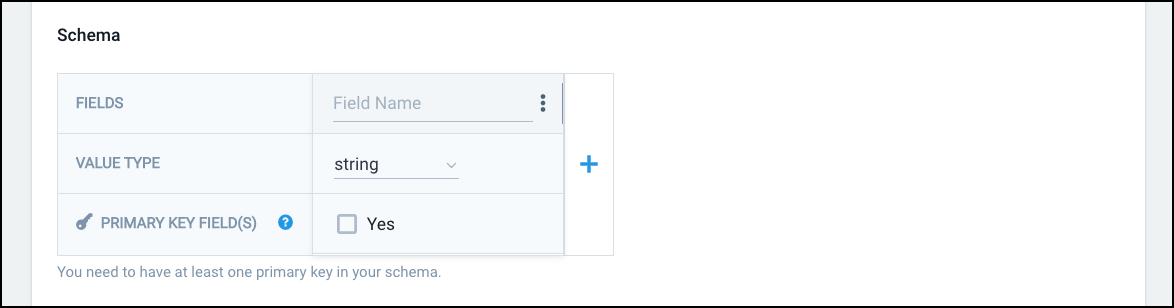
- Schema. For the first column in the table, enter:
- Field. Enter a name for the field. As you name your fields, note reserved keywords listed in Reserved keywords.
- Value Type. Choose the value type: boolean, int, long, double, or string (default).
- Primary Key. Click the Yes checkbox if the field is part of the primary key for the table. If your table's primary key is a composite key, you will check this checkbox for each field that is part of the key. You must define a primary key for your Lookup Table.
- To add another column to the table, click the plus sign to the right of the first column and repeat the previous step.
- To remove a column from the table, select Delete Column from the three-dot kebab menu.
- When you are done adding columns, click Create.
Create a Lookup Table from a .csv file
Follow these instructions to create and populate a Lookup Table with the contents of a .csv file.
Before you start, create a .csv file containing the rows you want to put in the new Lookup Table. The file should have a .csv extension, and not be larger than 100 MB. The first row of the table should contain the names of the fields in the table.
For example: username,IPAddress,region
No spaces are allowed between quotes and values for field names. For example, "name" is allowed, but " name" is not.
As you name your fields, note the information in Reserved keywords.
- Go to your Library.
- Click Add New and then select New Lookup.
- Enter the following on the Create Lookup Table page:
- Lookup Name. Enter a name for the Lookup Table.
- Description (Optional). Enter a description of the Lookup Table.
- Do you want a TTL for table entries? A TTL specifies a time limit beyond which an unchanged row in the table will be unavailable for reads and will be deleted. For example, if you set a TTL of 5 minutes for a lookup table, when 5 minutes pass without a row being updated, that row will no longer be returned by lookups and will be deleted from the lookups table. A TTL is useful for managing the freshness of the data and the size of the table.
- Click Yes if you want to set a TTL.
- Enter an integer value in the Duration field, and select a unit of time from the pulldown: Seconds, Minutes (default), Hours, or Days.
- How do you want to create lookup? Click Upload File.
- The Upload File section appears.

- Advanced Upload Settings (Optional). If your .csv file is encoded in a format other than UTF-8, select the format from the pull-down.
- Click Upload.
- Navigate to the file you want to upload and click Open.
- The Schema section of the page refreshes, and displays up to 10 rows from the .csv file you uploaded.
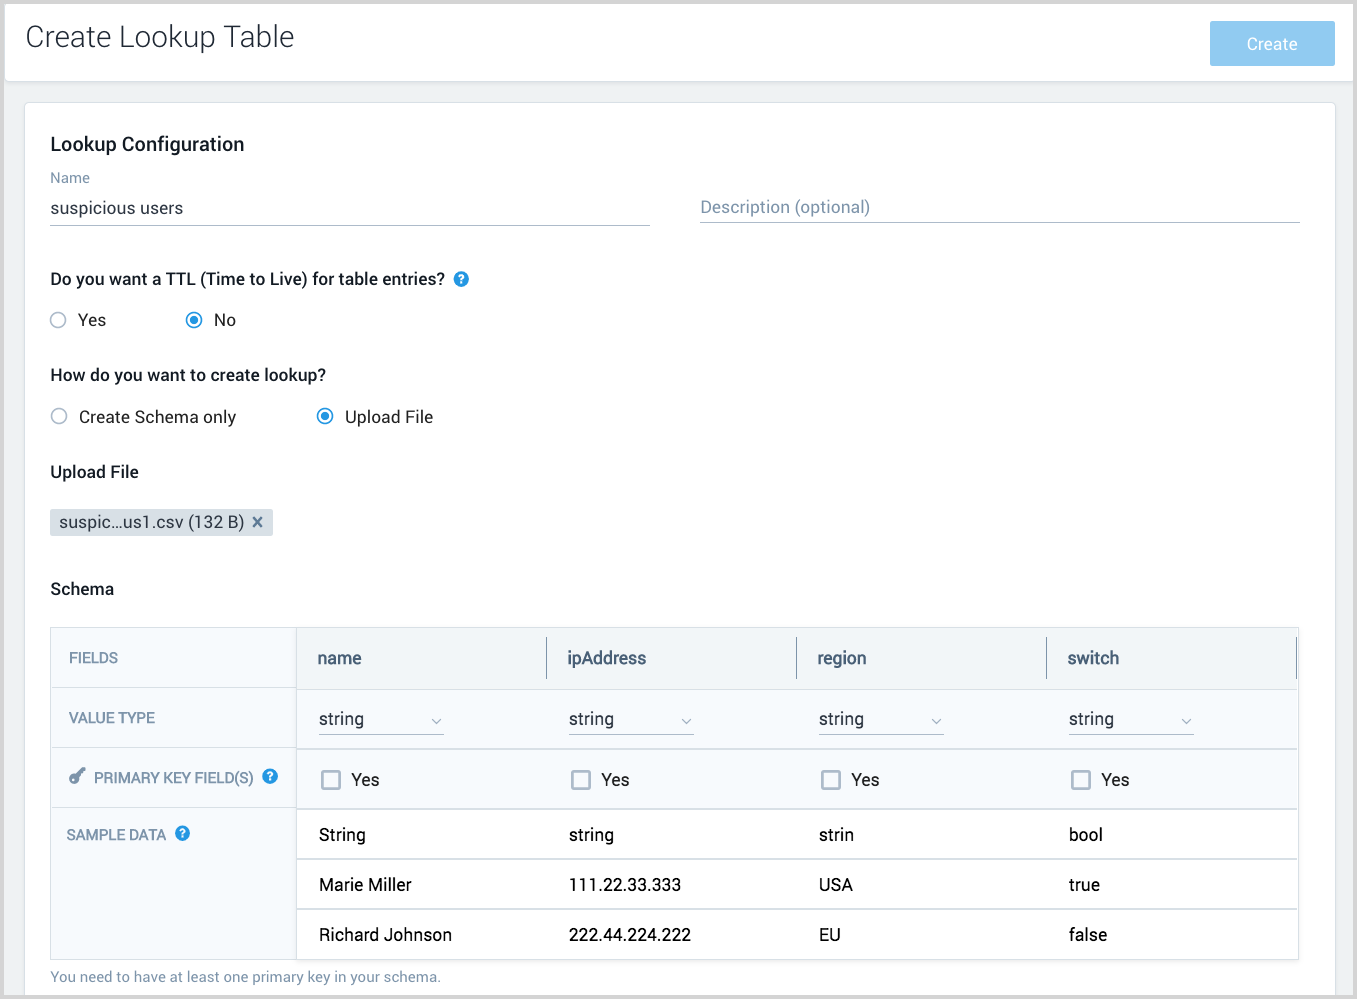
- For each column in the table:
- Value Type. Choose the value type: boolean, int, long, double, or string (default).
- Primary Key. Click the Yes checkbox if the field is part of the primary key for the table. Defining a primary key for your Lookup Table is required.
- Click Create in the upper right of the page.
View Lookup Tables content
View the contents of a single Lookup Table
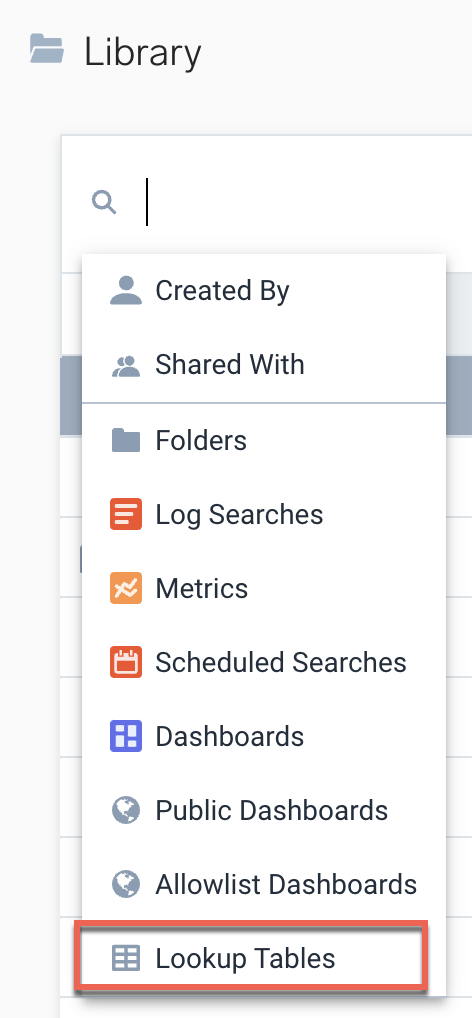
- Go to your Library.
- Click in the search bar, and select Lookup Tables from the dropdown.
- Hover over the Lookup Table you want to view, and select Open from the three-dot kebab menu.
- The view page for the Lookup Table appears. It displays a preview of the contents of the Lookup Table, up to 10 rows.
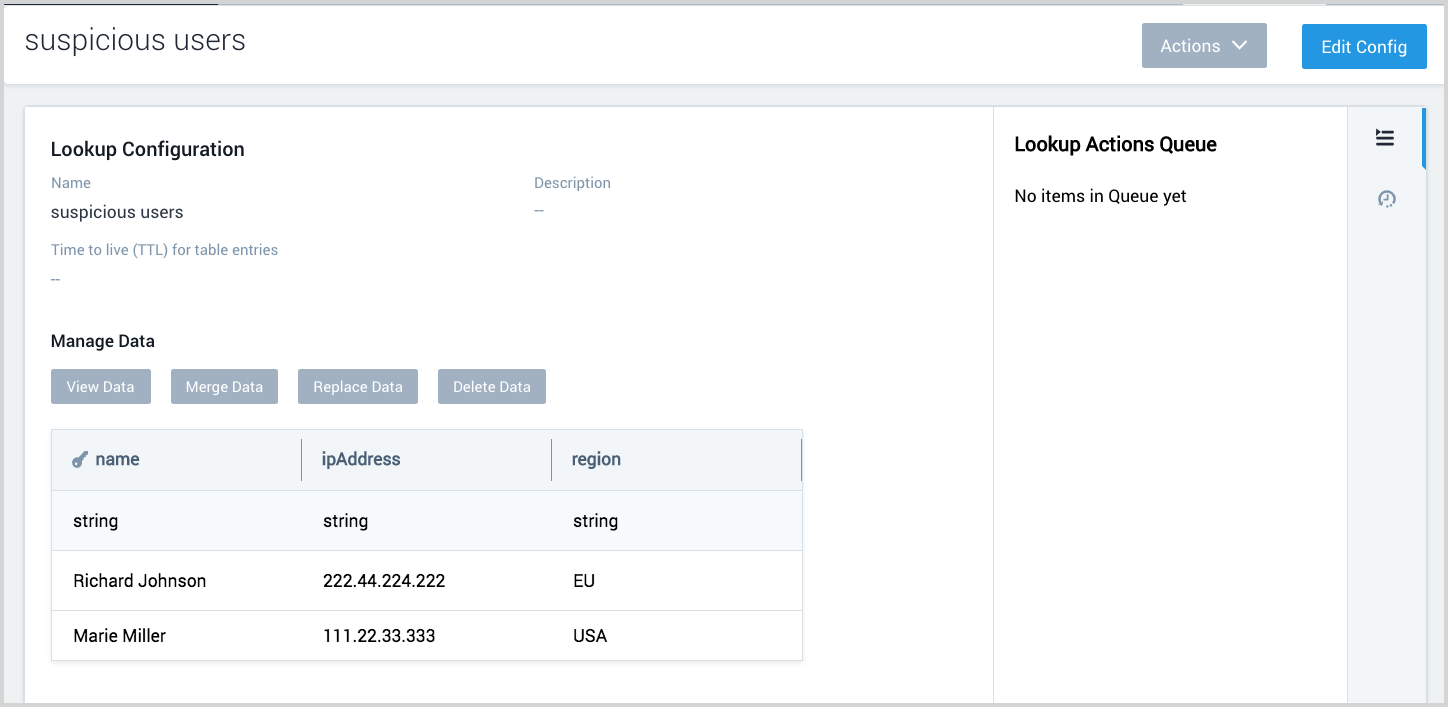
- To view the complete contents of the Lookup Table, click View Data.
- A Sumo Logic search tab opens and a
catcommand is run on your table.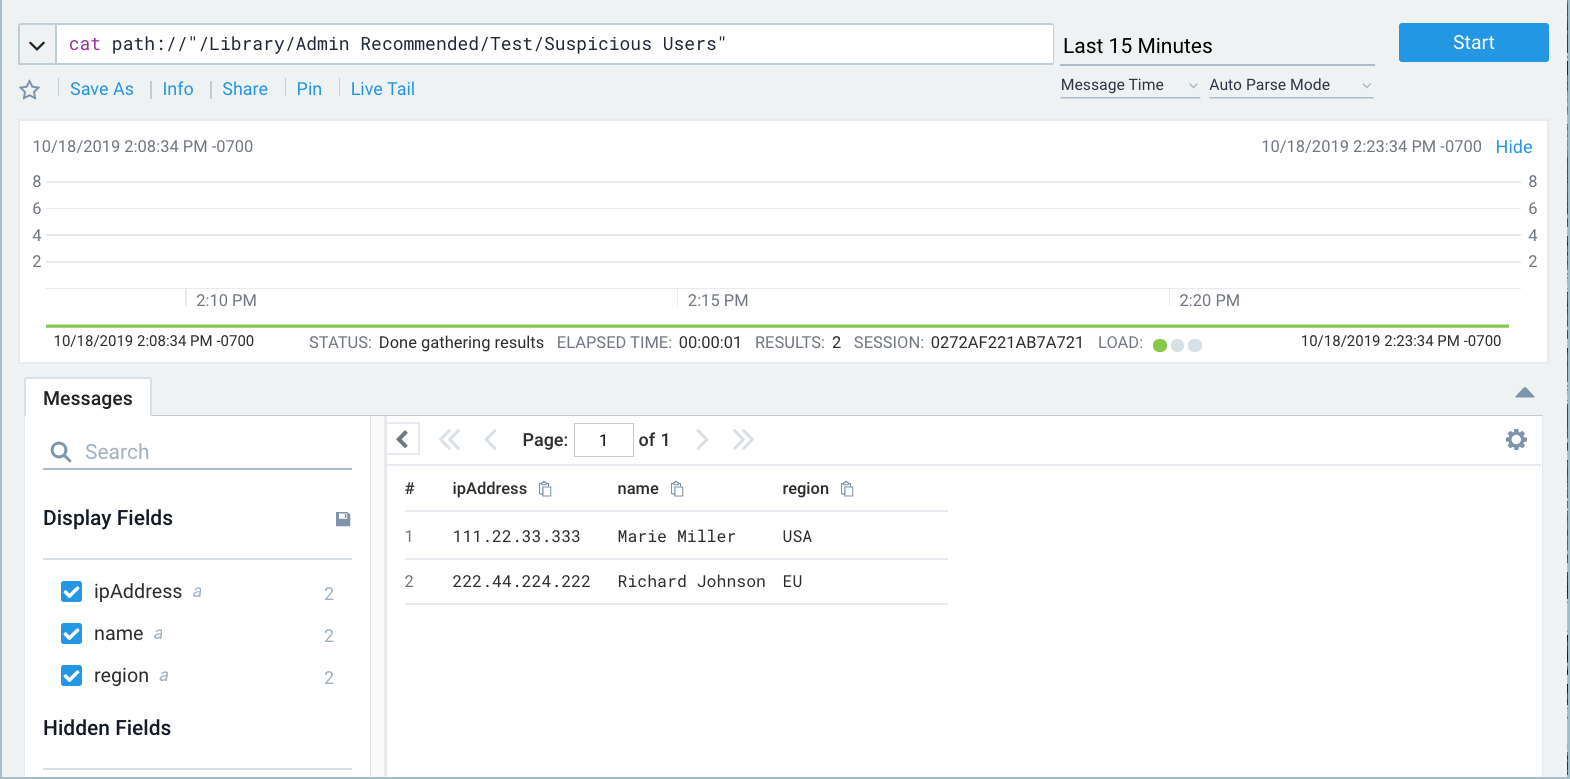
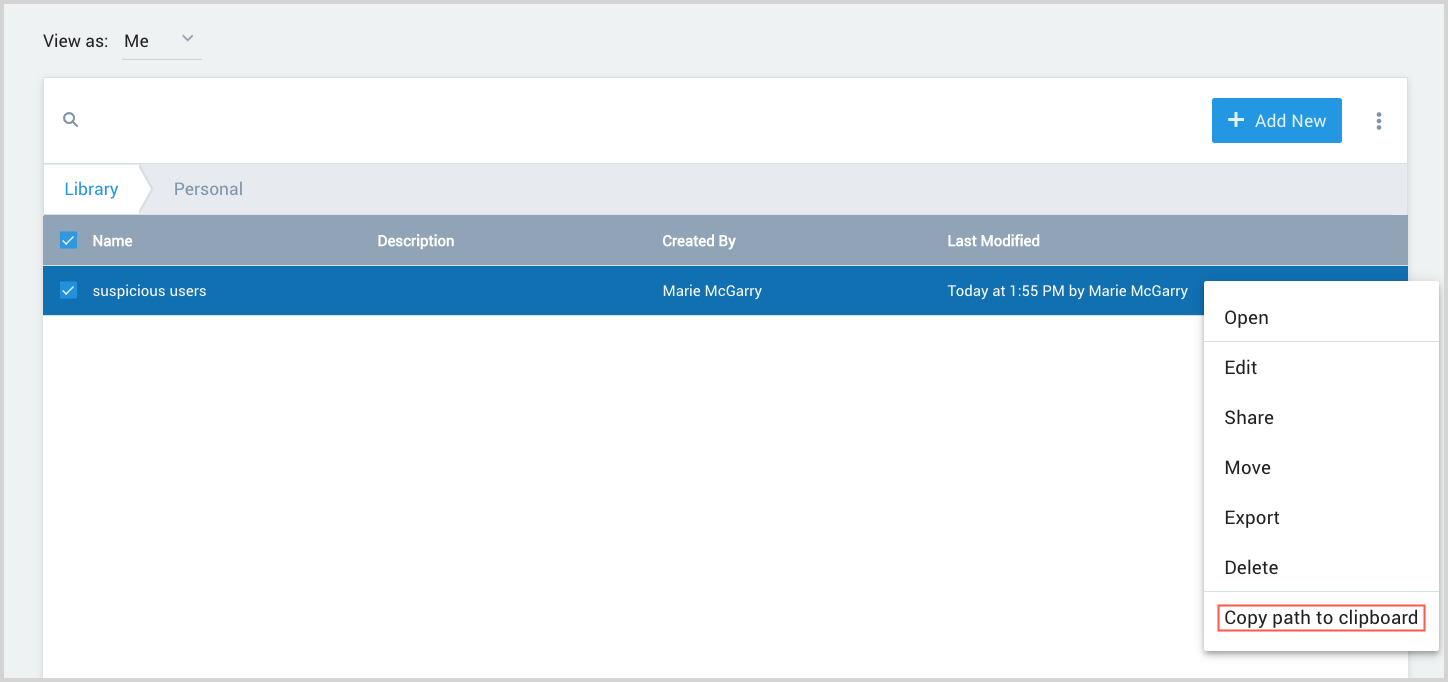
Find a lookup table path
When you run search operators that work with Lookup Tables (described in the following section), you need to know the path to the Lookup Table in the Sumo Logic Library. The path can be determined in a couple of ways:
- From the Actions menu on the Lookup Table page.
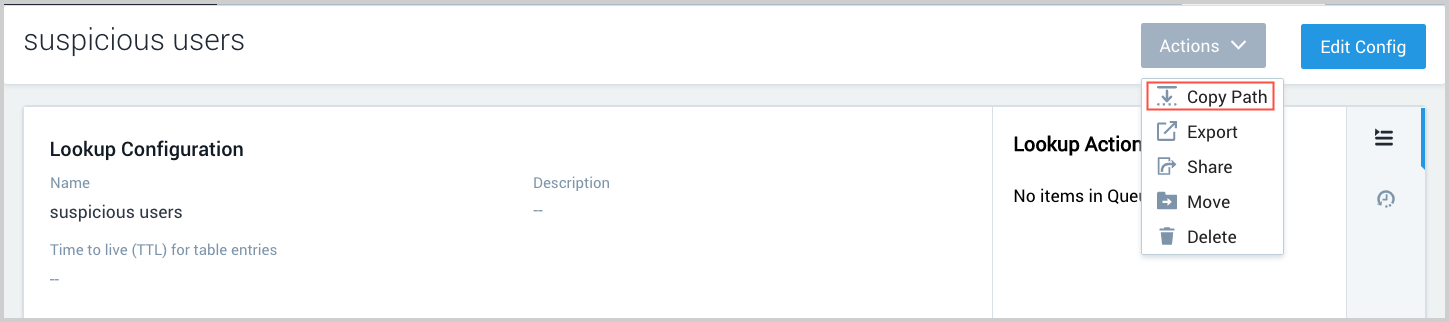
- From the three-dot kebab menu for a Lookup Table in the Sumo Logic Library.
Find Lookup Tables content with search operators
You can use the following operators with Lookup Tables in Sumo Logic log searches and in Cloud SIEM rules:
cat. You can view the contents of a Lookup Table using thecatoperator in a Sumo Logic log search tab. For more information, see cat.lookup. You can use thelookupoperator to return one or more fields from a Lookup Table. For more information, see lookup.lookupContains. You can use thelookupContainsoperator to see whether a key exists in a Lookup Table. For more information, see lookupContains.save. You can use thesaveoperator to save the results of a Sumo log query to a Lookup Table you created using the Lookup UI or API. For more information, see save.