Collect Logs from Azure Blob Storage (append blobs)
This section has instructions for configuring a pipeline for shipping logs available from Azure Blob Storage to an Event Hub, on to an Azure Function, and finally to an HTTP source on a hosted collector in Sumo Logic.
Requirements
- Only General-purpose v2 (GPv2) and Blob storage accounts are supported. This integration does not support General-purpose v1 (GPv1) accounts.
- Configure your storage account in the same location as your Azure Service.
- This solution supports only log files from Blob storage that have file extensions of .csv, .json, .blob, or .log.
- You also need to have Microsoft Authorization/role Assignments/write permissions, so they should be a "User Access Administrator" or "Owner".
Functional overview
- You configure the Azure service to export logs to a container in a storage account created for that purpose.
- The ARM template creates an Event Grid subscription with the storage container as publisher and the event hub (created by the Sumo Logic-provided ARM) as subscriber. Event Grid routes append blob creation events to the event hub.
- Event Hub streams the events to the AppendBlobFileTracker Azure function, to create an entry in the FileOffSetMap table.
- Periodically an Azure function named AppendBlobTaskProducer, fetches a list of blobs from the FileOffSetMap table and creates a task with metadata. (This is a JSON object that includes the start of the append blob, file path, container name, and storage name). These tasks are then pushed to the Azure Service Bus Queue.
- The TaskConsumer Azure function, which is triggered when the service bus receives a new task, reads the append blob, from the start byte, and sends that data to Sumo Logic.
- For more information about the solution strategy, see Azure Blob Storage(append blob).
Step 1. Configure Azure storage account
In this step, you configure a storage account to which you will export monitoring data for your Azure service. The storage account must be a General-purpose v2 (GPv2) storage account.
If you have a storage account with a container you want to use for this purpose, make a note of its resource group, storage account name, and container name, and proceed to Step 2.
To configure an Azure storage account, do the following:
- Create a new storage account General-purpose v2 (GPv2) storage account. For instructions, see Create a storage account in Azure help.
- Create a container (optional). All services in Azure create containers automatically. This step is needed only when you are exporting custom logs in some container.
- In the Azure portal, navigate to the storage account you just created (in the previous step).
- Select Blobs under Blob Service.
- Select + Container.
- Enter the Name.
- Select Private for the Public Access Level.
- Click OK.
Make a note of the container name, as you will need to supply it later.
Step 2. Configure an HTTP source
In this step, you configure an HTTP source to receive logs from the Azure function.
- Select a hosted collector where you want to configure the HTTP source. If desired, create a new hosted collector, as described on Configure a Hosted Collector and Source.
note
Make sure the hosted collector is tagged with the tenant_name field for the out-of-the-box Azure apps to work. You can get the tenant name using the instructions here.
- Configure an HTTP source as described in HTTP Logs and Metrics Source. Make a note of the URL for the source because you will need it in the next step.
Step 3. Configure Azure resources using ARM template
In this step, you use a Sumo Logic-provided Azure Resource Manager (ARM) template to create an Event Hub, three Azure functions, a Service Bus Queue, and a Storage Account.
- Download the appendblobreaderdeploy.json ARM template.
- Click Create a Resource, search for Template deployment in the Azure Portal, and then click Create.
- On the Custom deployment blade, click Build your own template in the editor.
- Copy the contents of the template and paste it into the editor window.
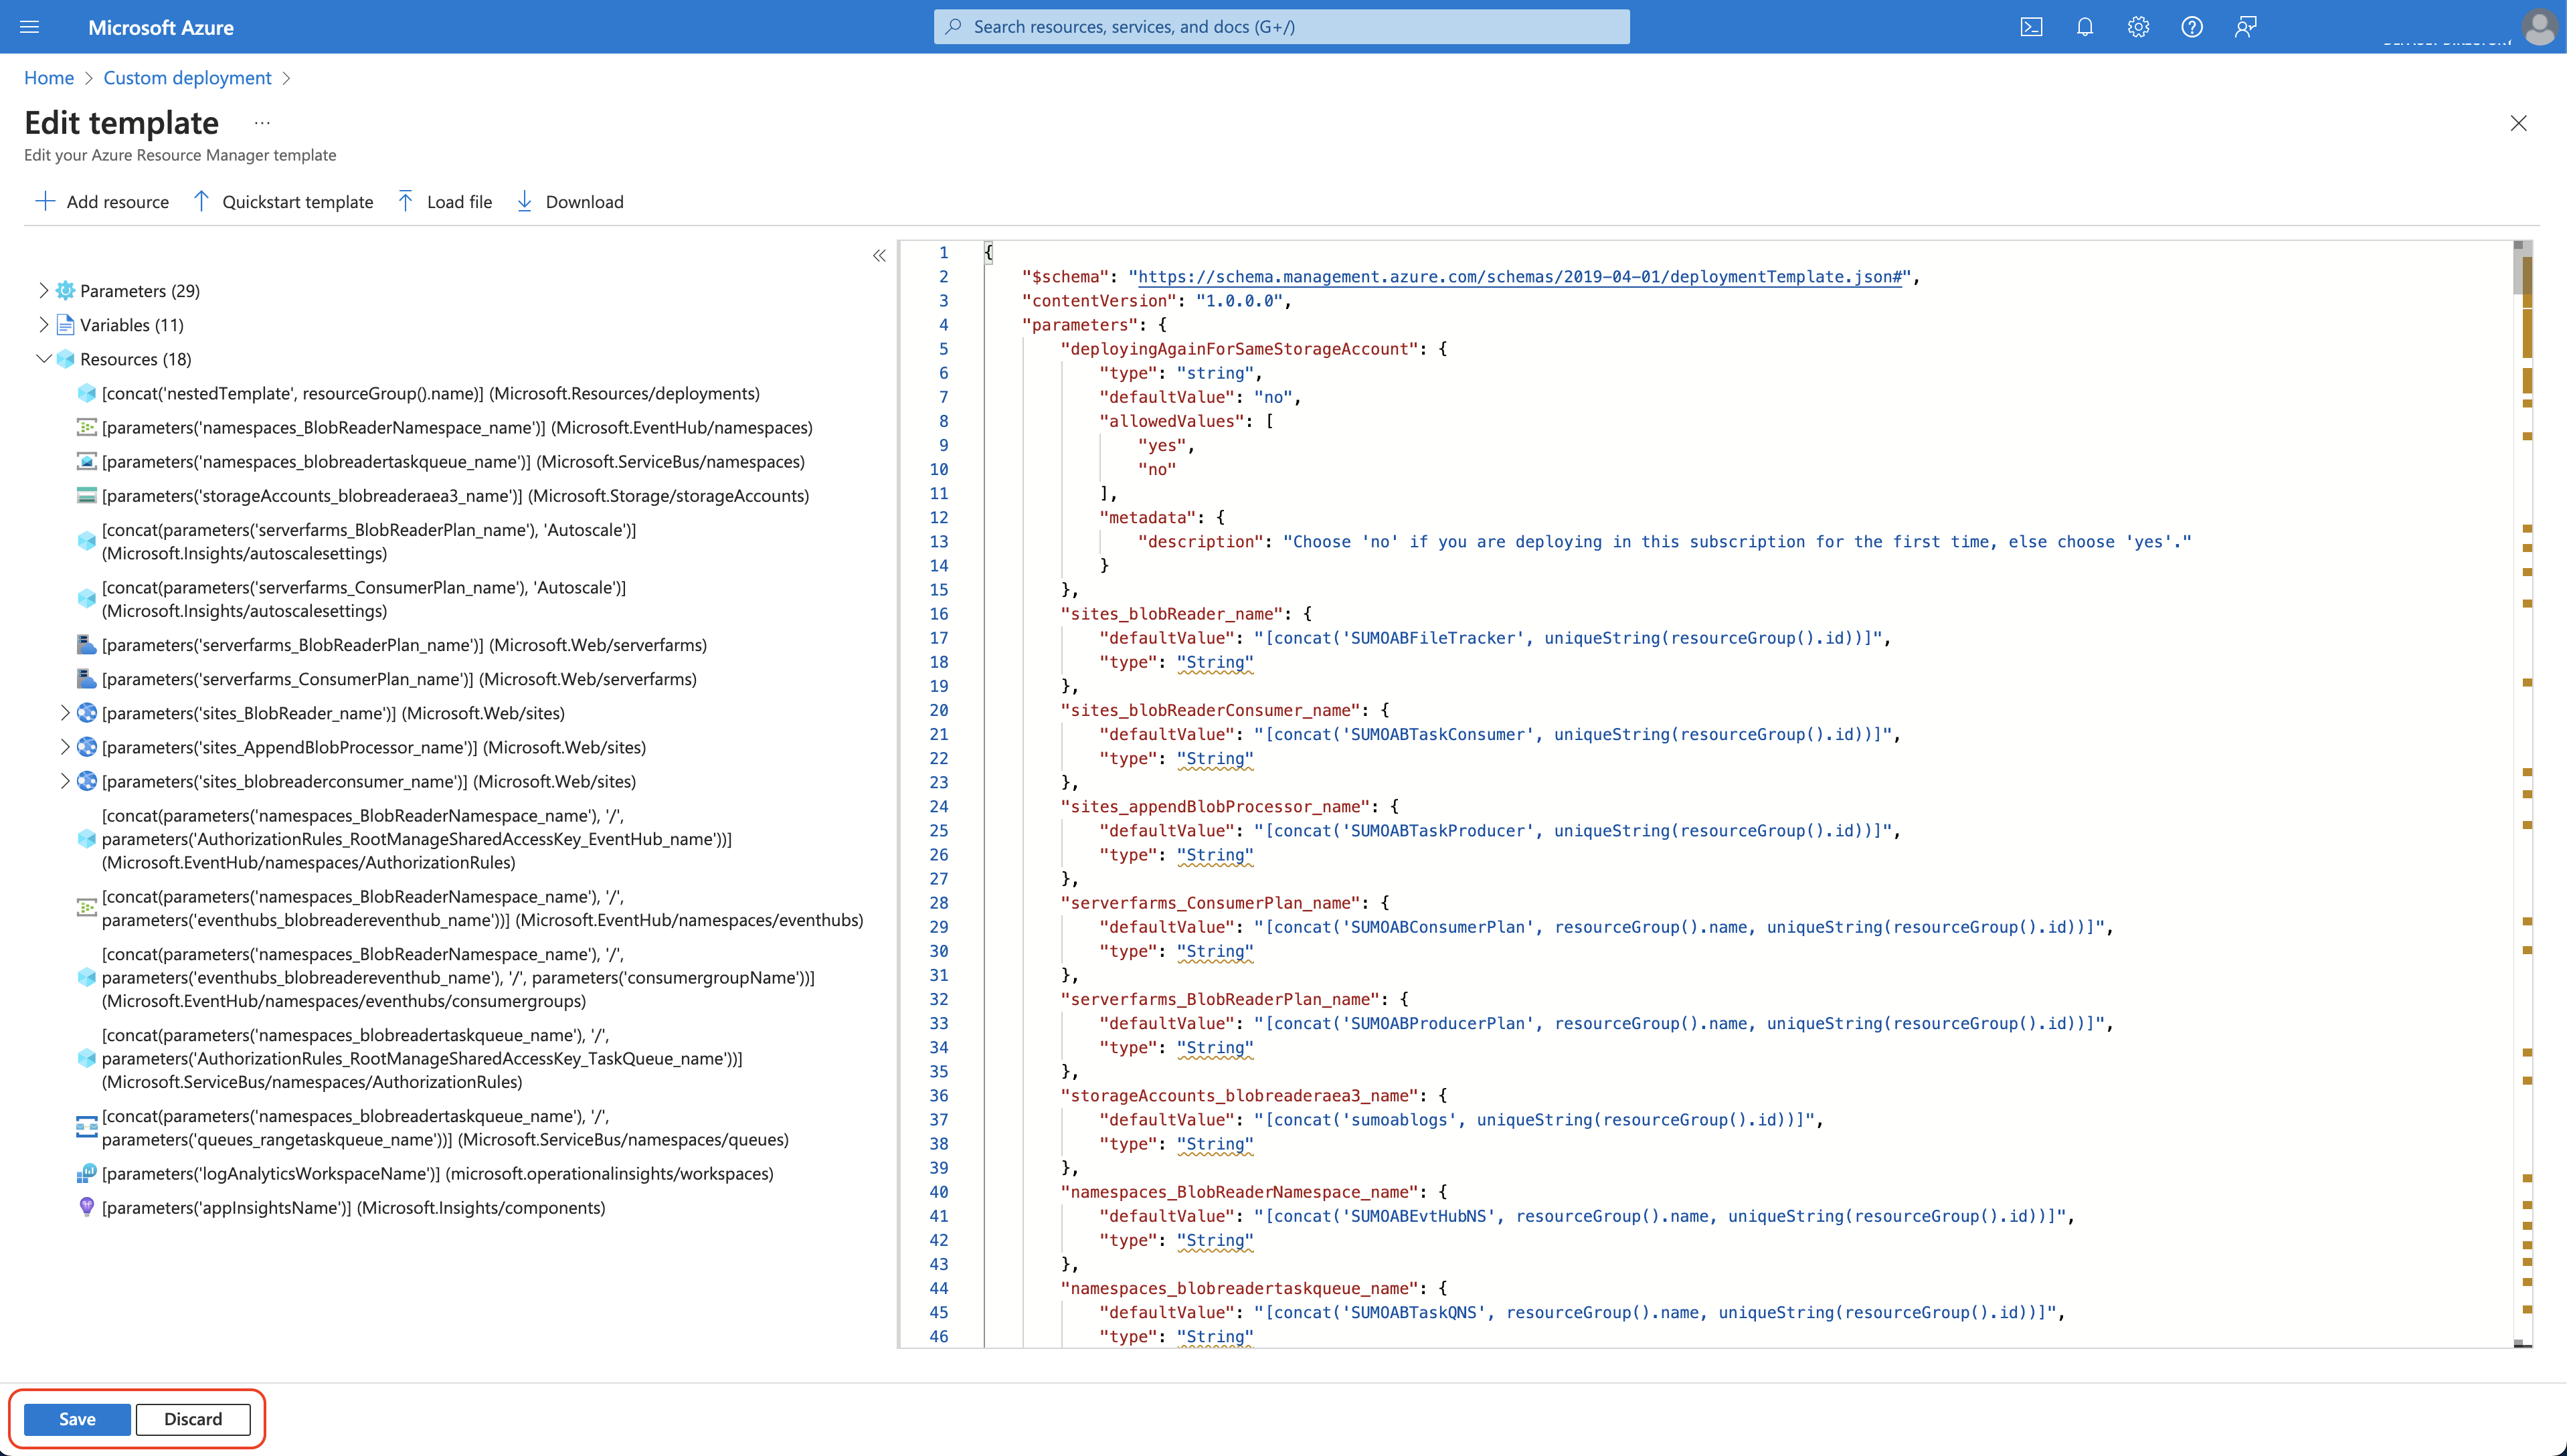
- Click Save.
- On the Custom deployment blade, do the following:
- Create a new Resource Group (recommended) or select an existing one.
- Choose Location.
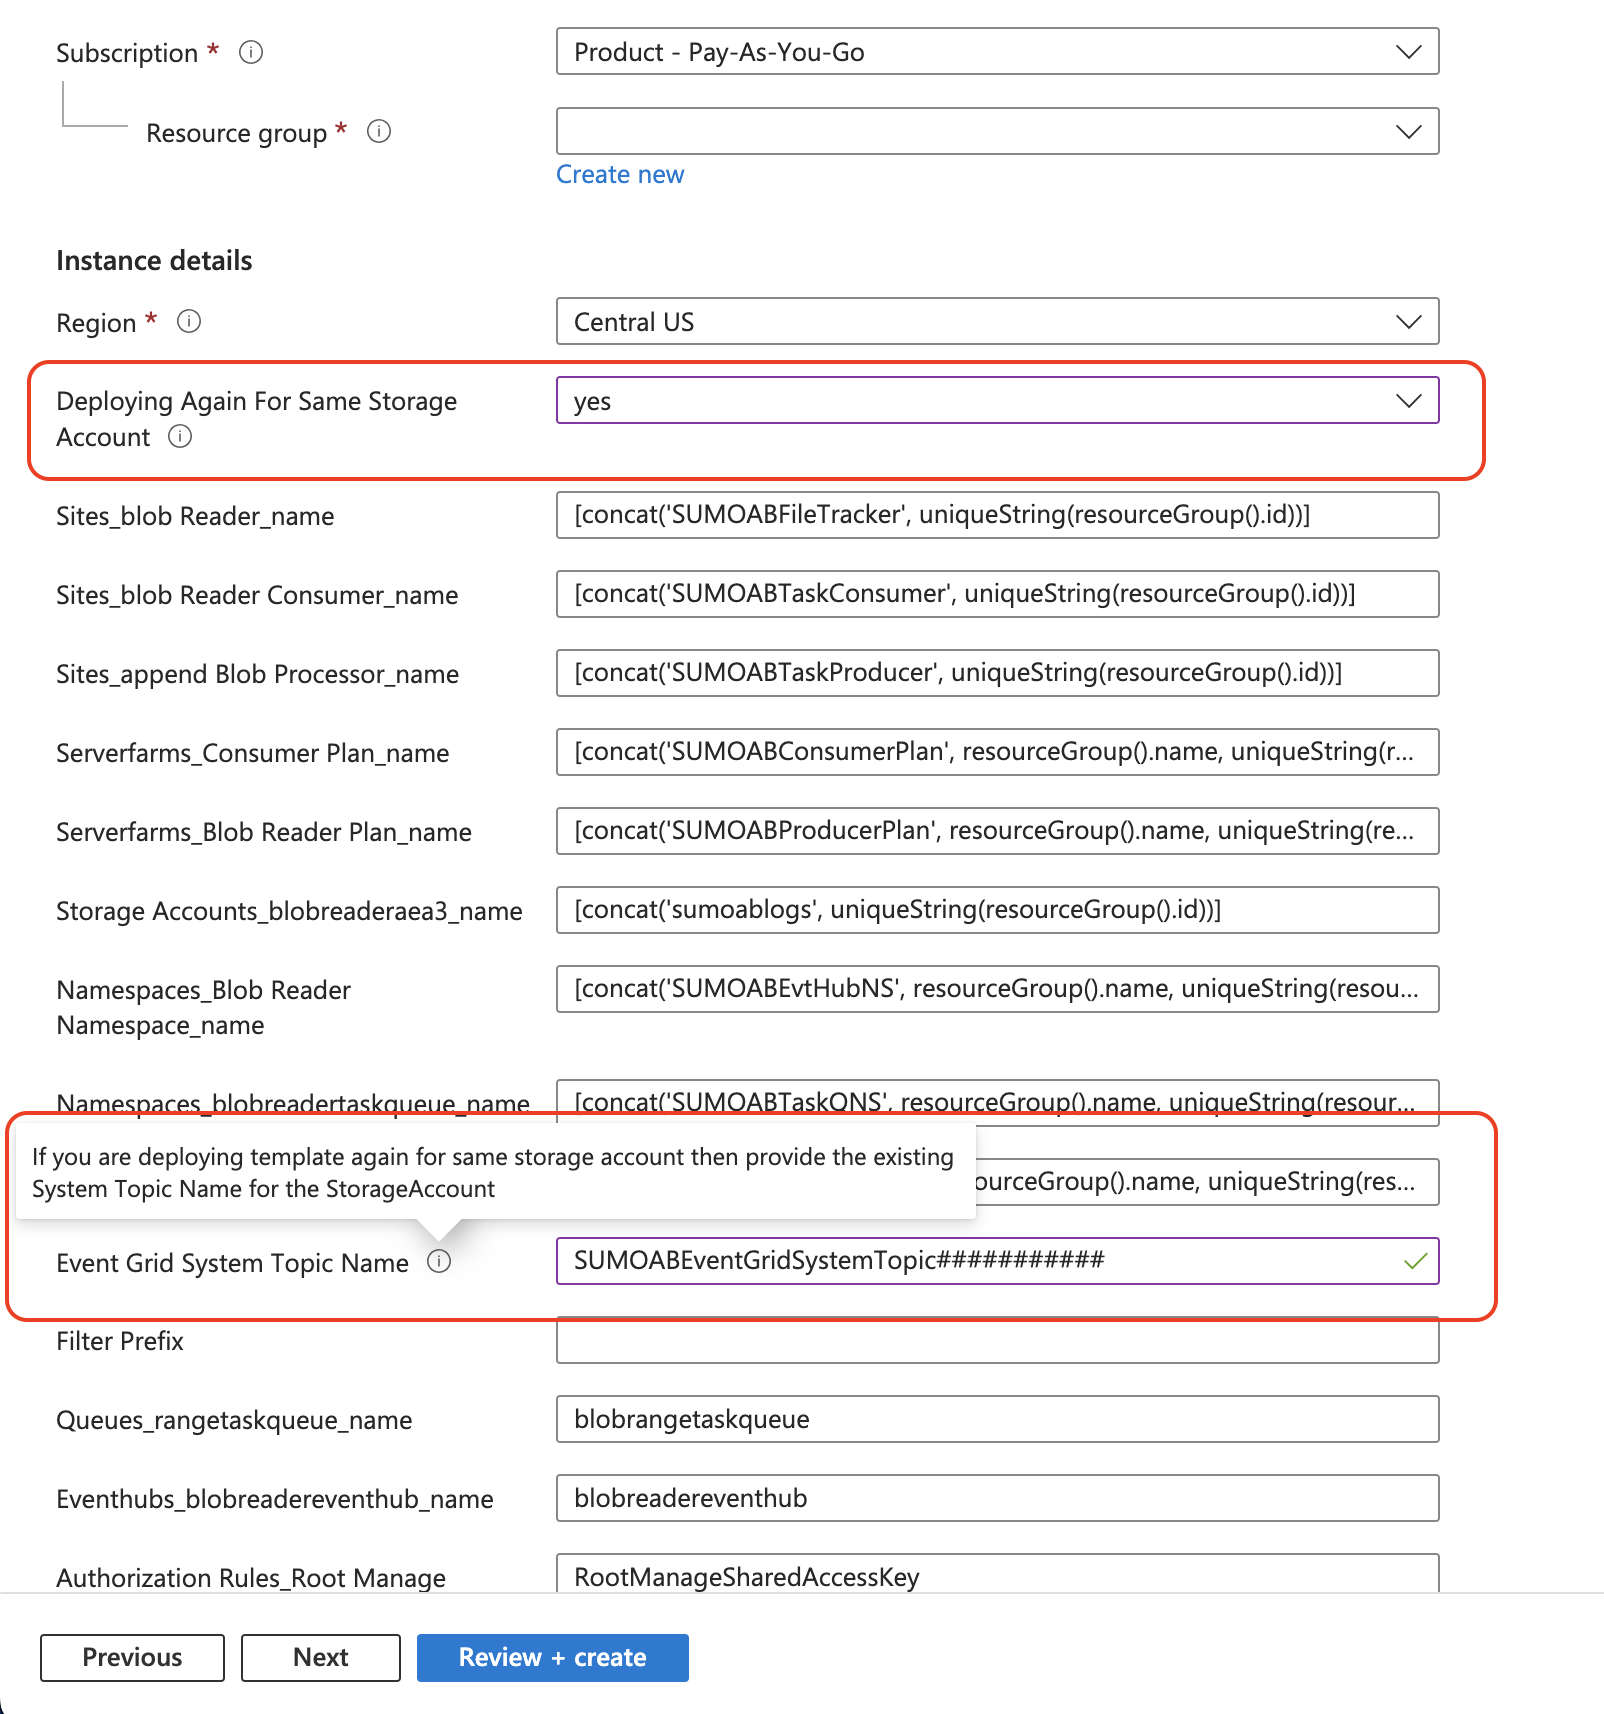
- Set the values of the following parameters:
- DeployingAgainForSameStorageAccount. Choose 'yes' if you are deploying the ARM template again for the same storage account, else choose 'no'.
- EventGridSystemTopicName. If you are deploying the ARM template again for the same storage account, then provide the existing System Topic Name for the StorageAccount, else it will be created automatically.
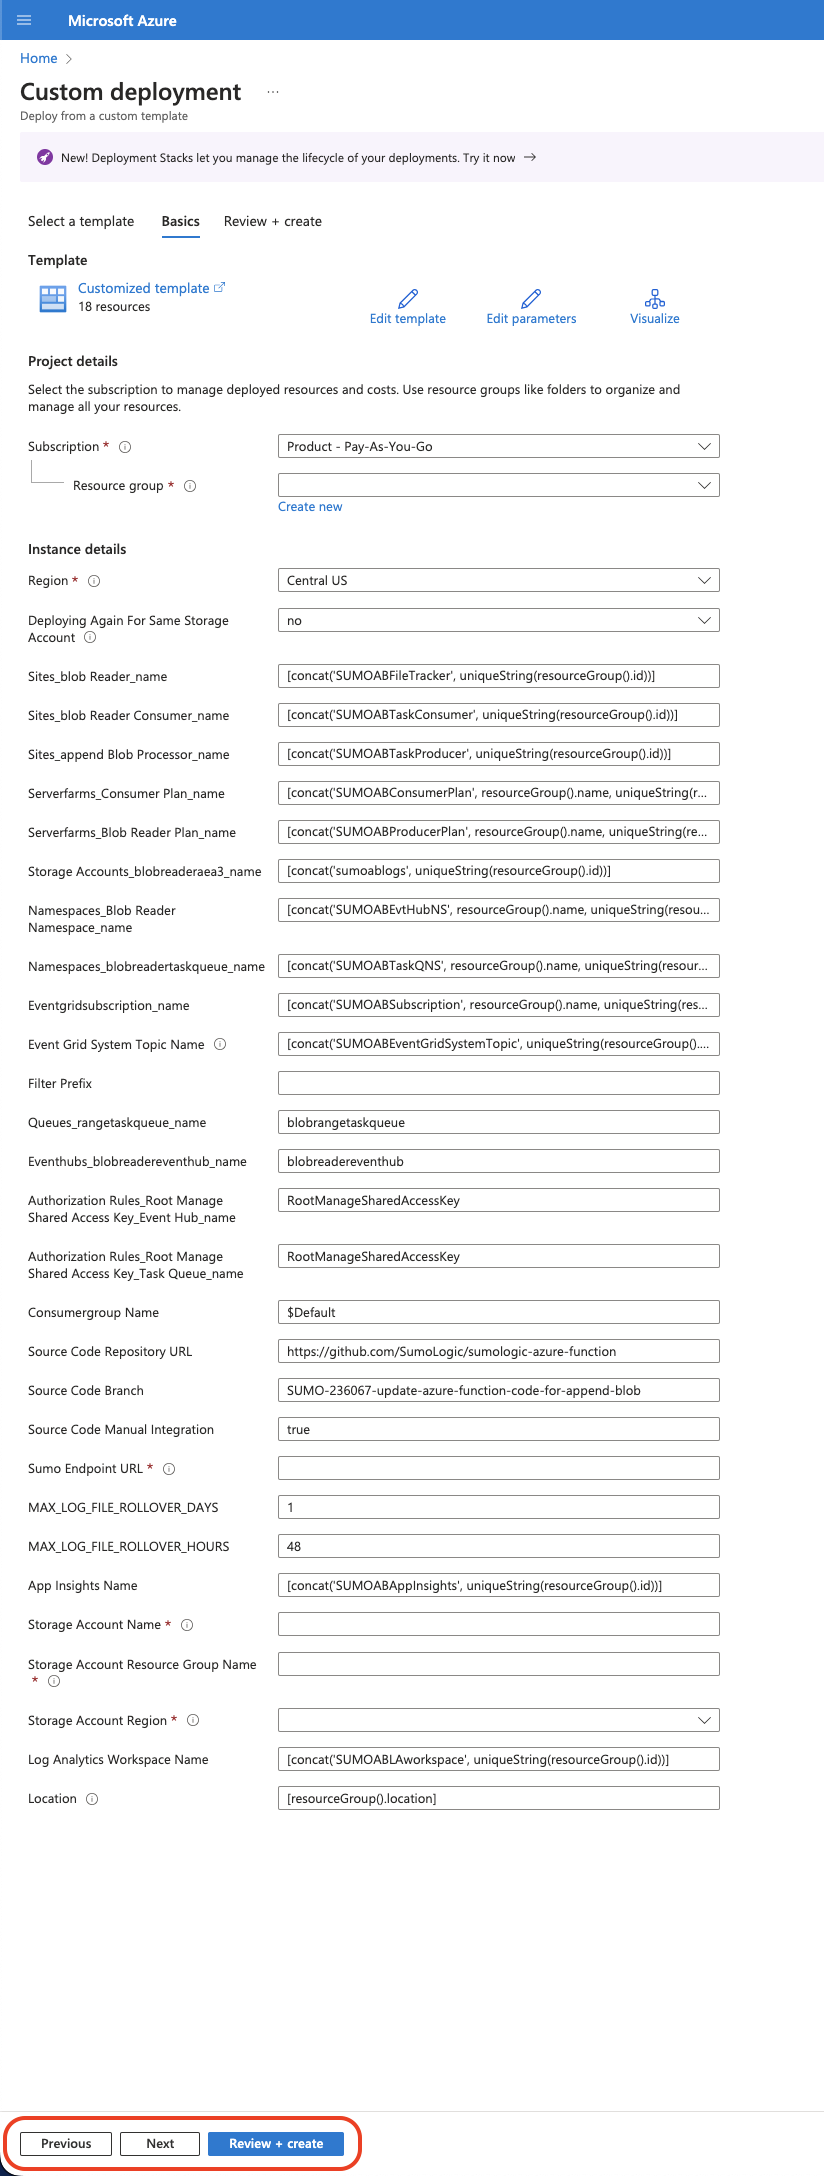
- SumoEndpointURL. URL for the HTTP source you configured in Step 2 above.
- StorageAccountName. Name of the storage account where you are storing logs from the Azure Service that you configured in Step 1 above.
- StorageAccountResourceGroupName. Name of the resource group of the storage account you configured in Step 1 above.
- StorageAccountRegion. Name of the region of the storage account you configured in Step 1 above.
- Filter Prefix (Optional). If you want to filter logs from a specific container, enter the following by replacing the variable with your container name:
/blobServices/default/containers/<container_name>/
noteResource group names should not consist of an underscore.
- Go to the Review + create tab, and then click Create.
- Verify that the deployment was successful by looking at Notifications at the top right corner of the Azure Portal.
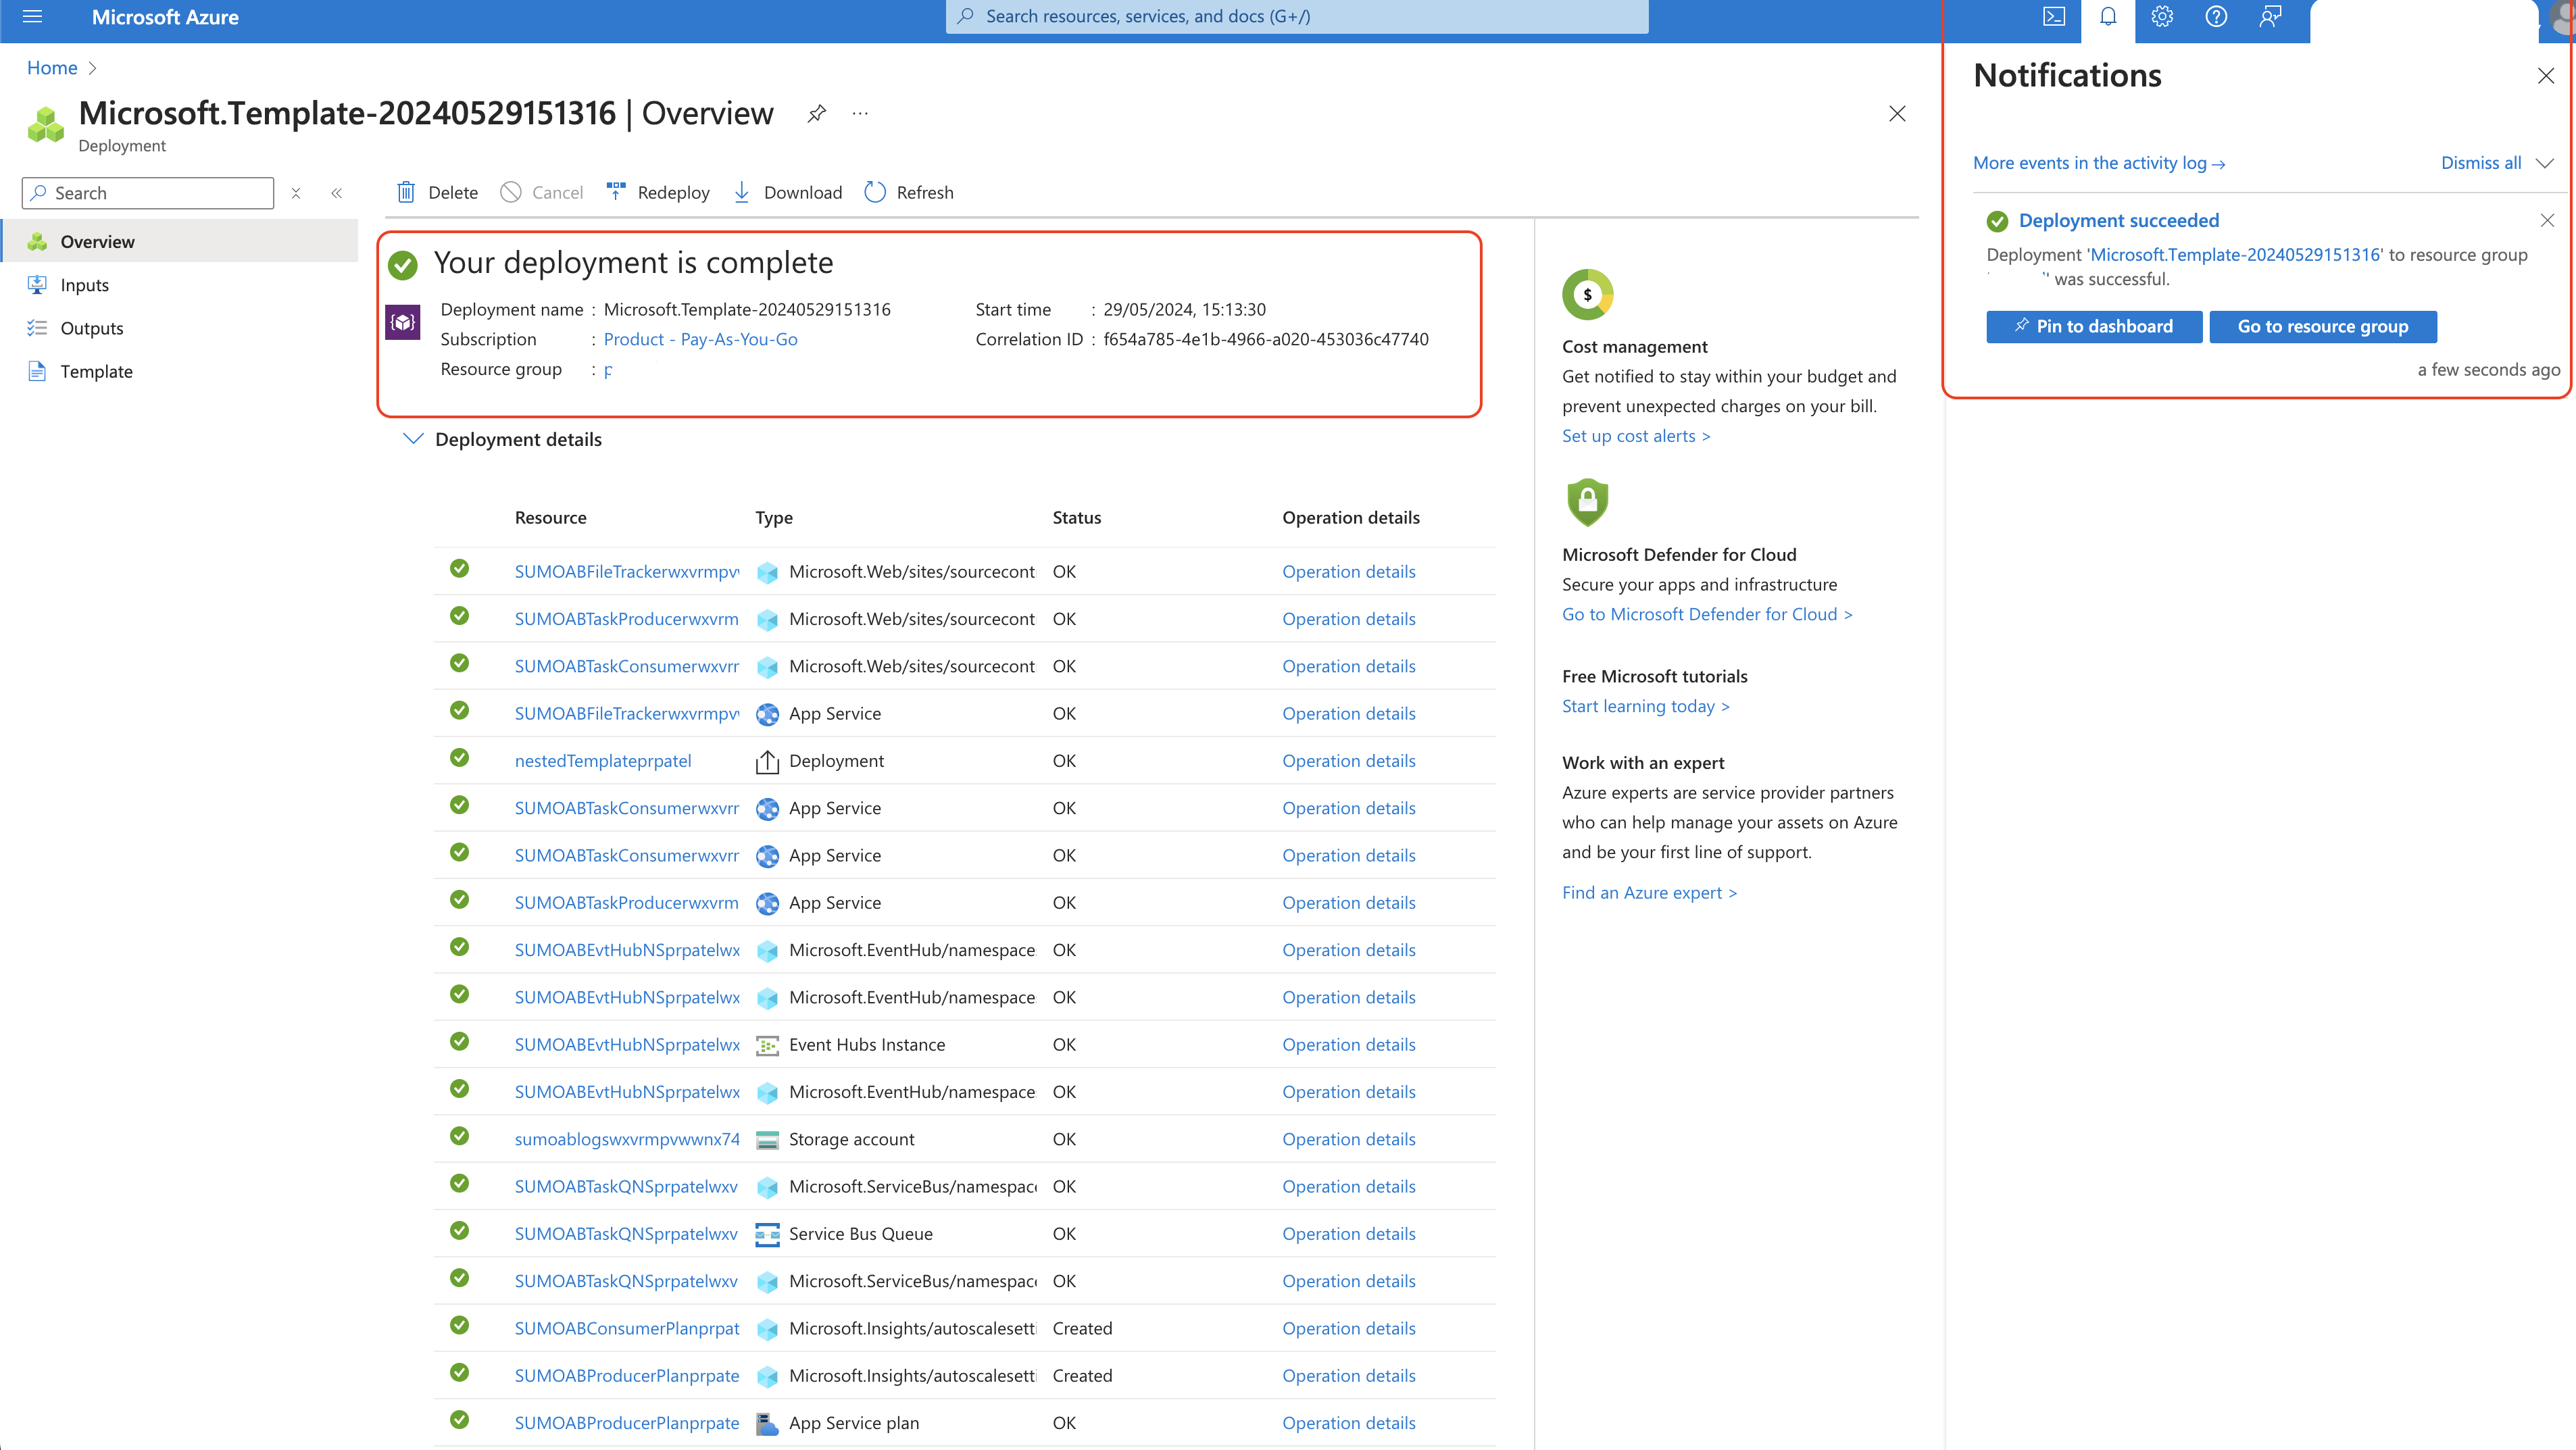
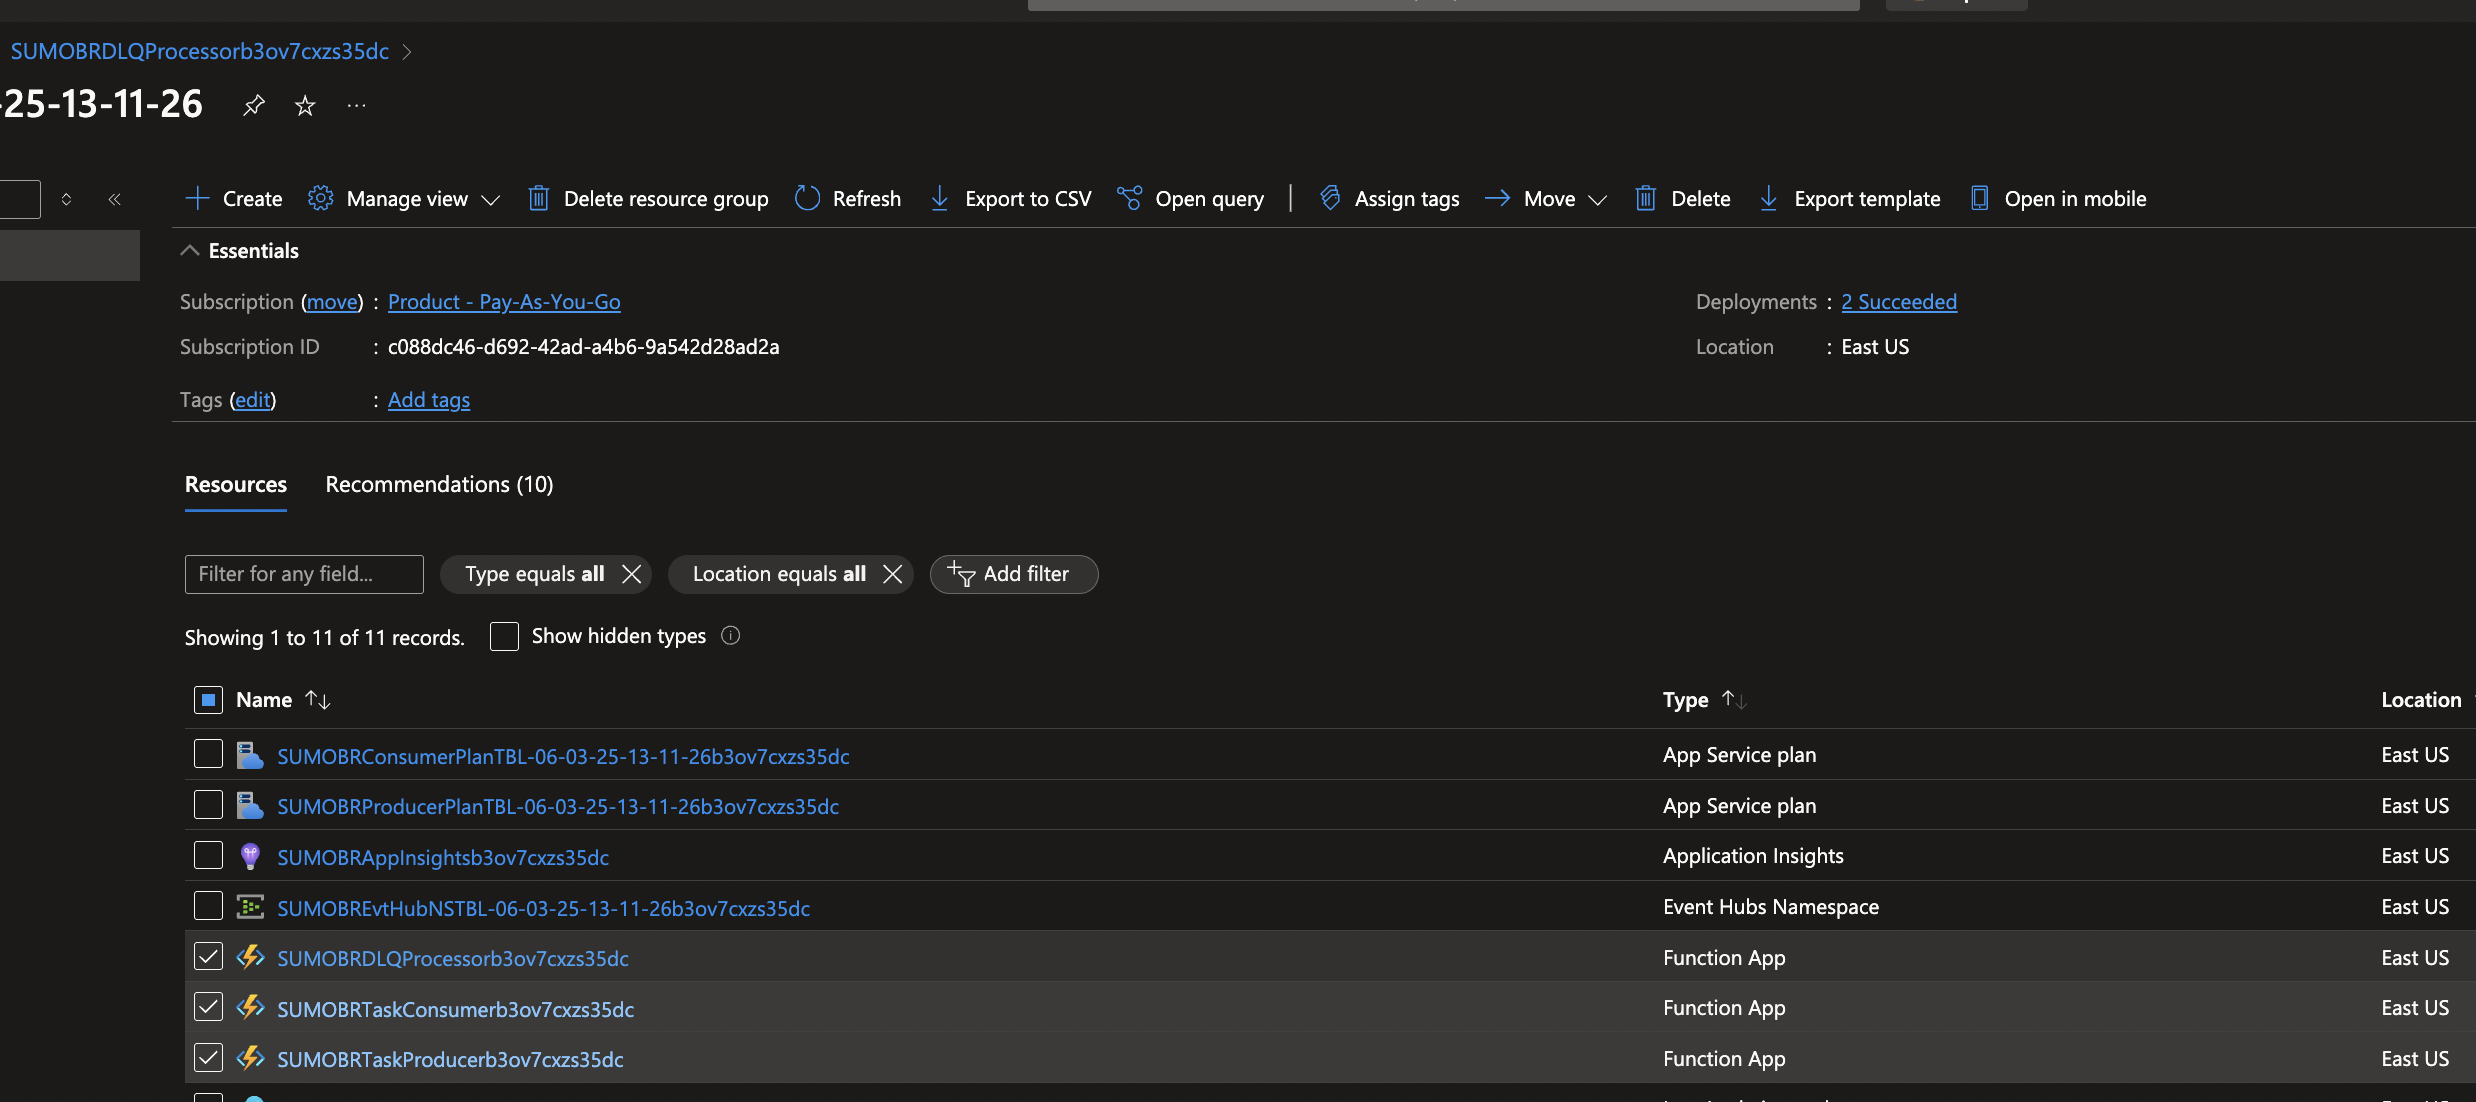
- (Optional) In the same window, click Go to resource group to verify that all resources were successfully created, such as shown in the following example:
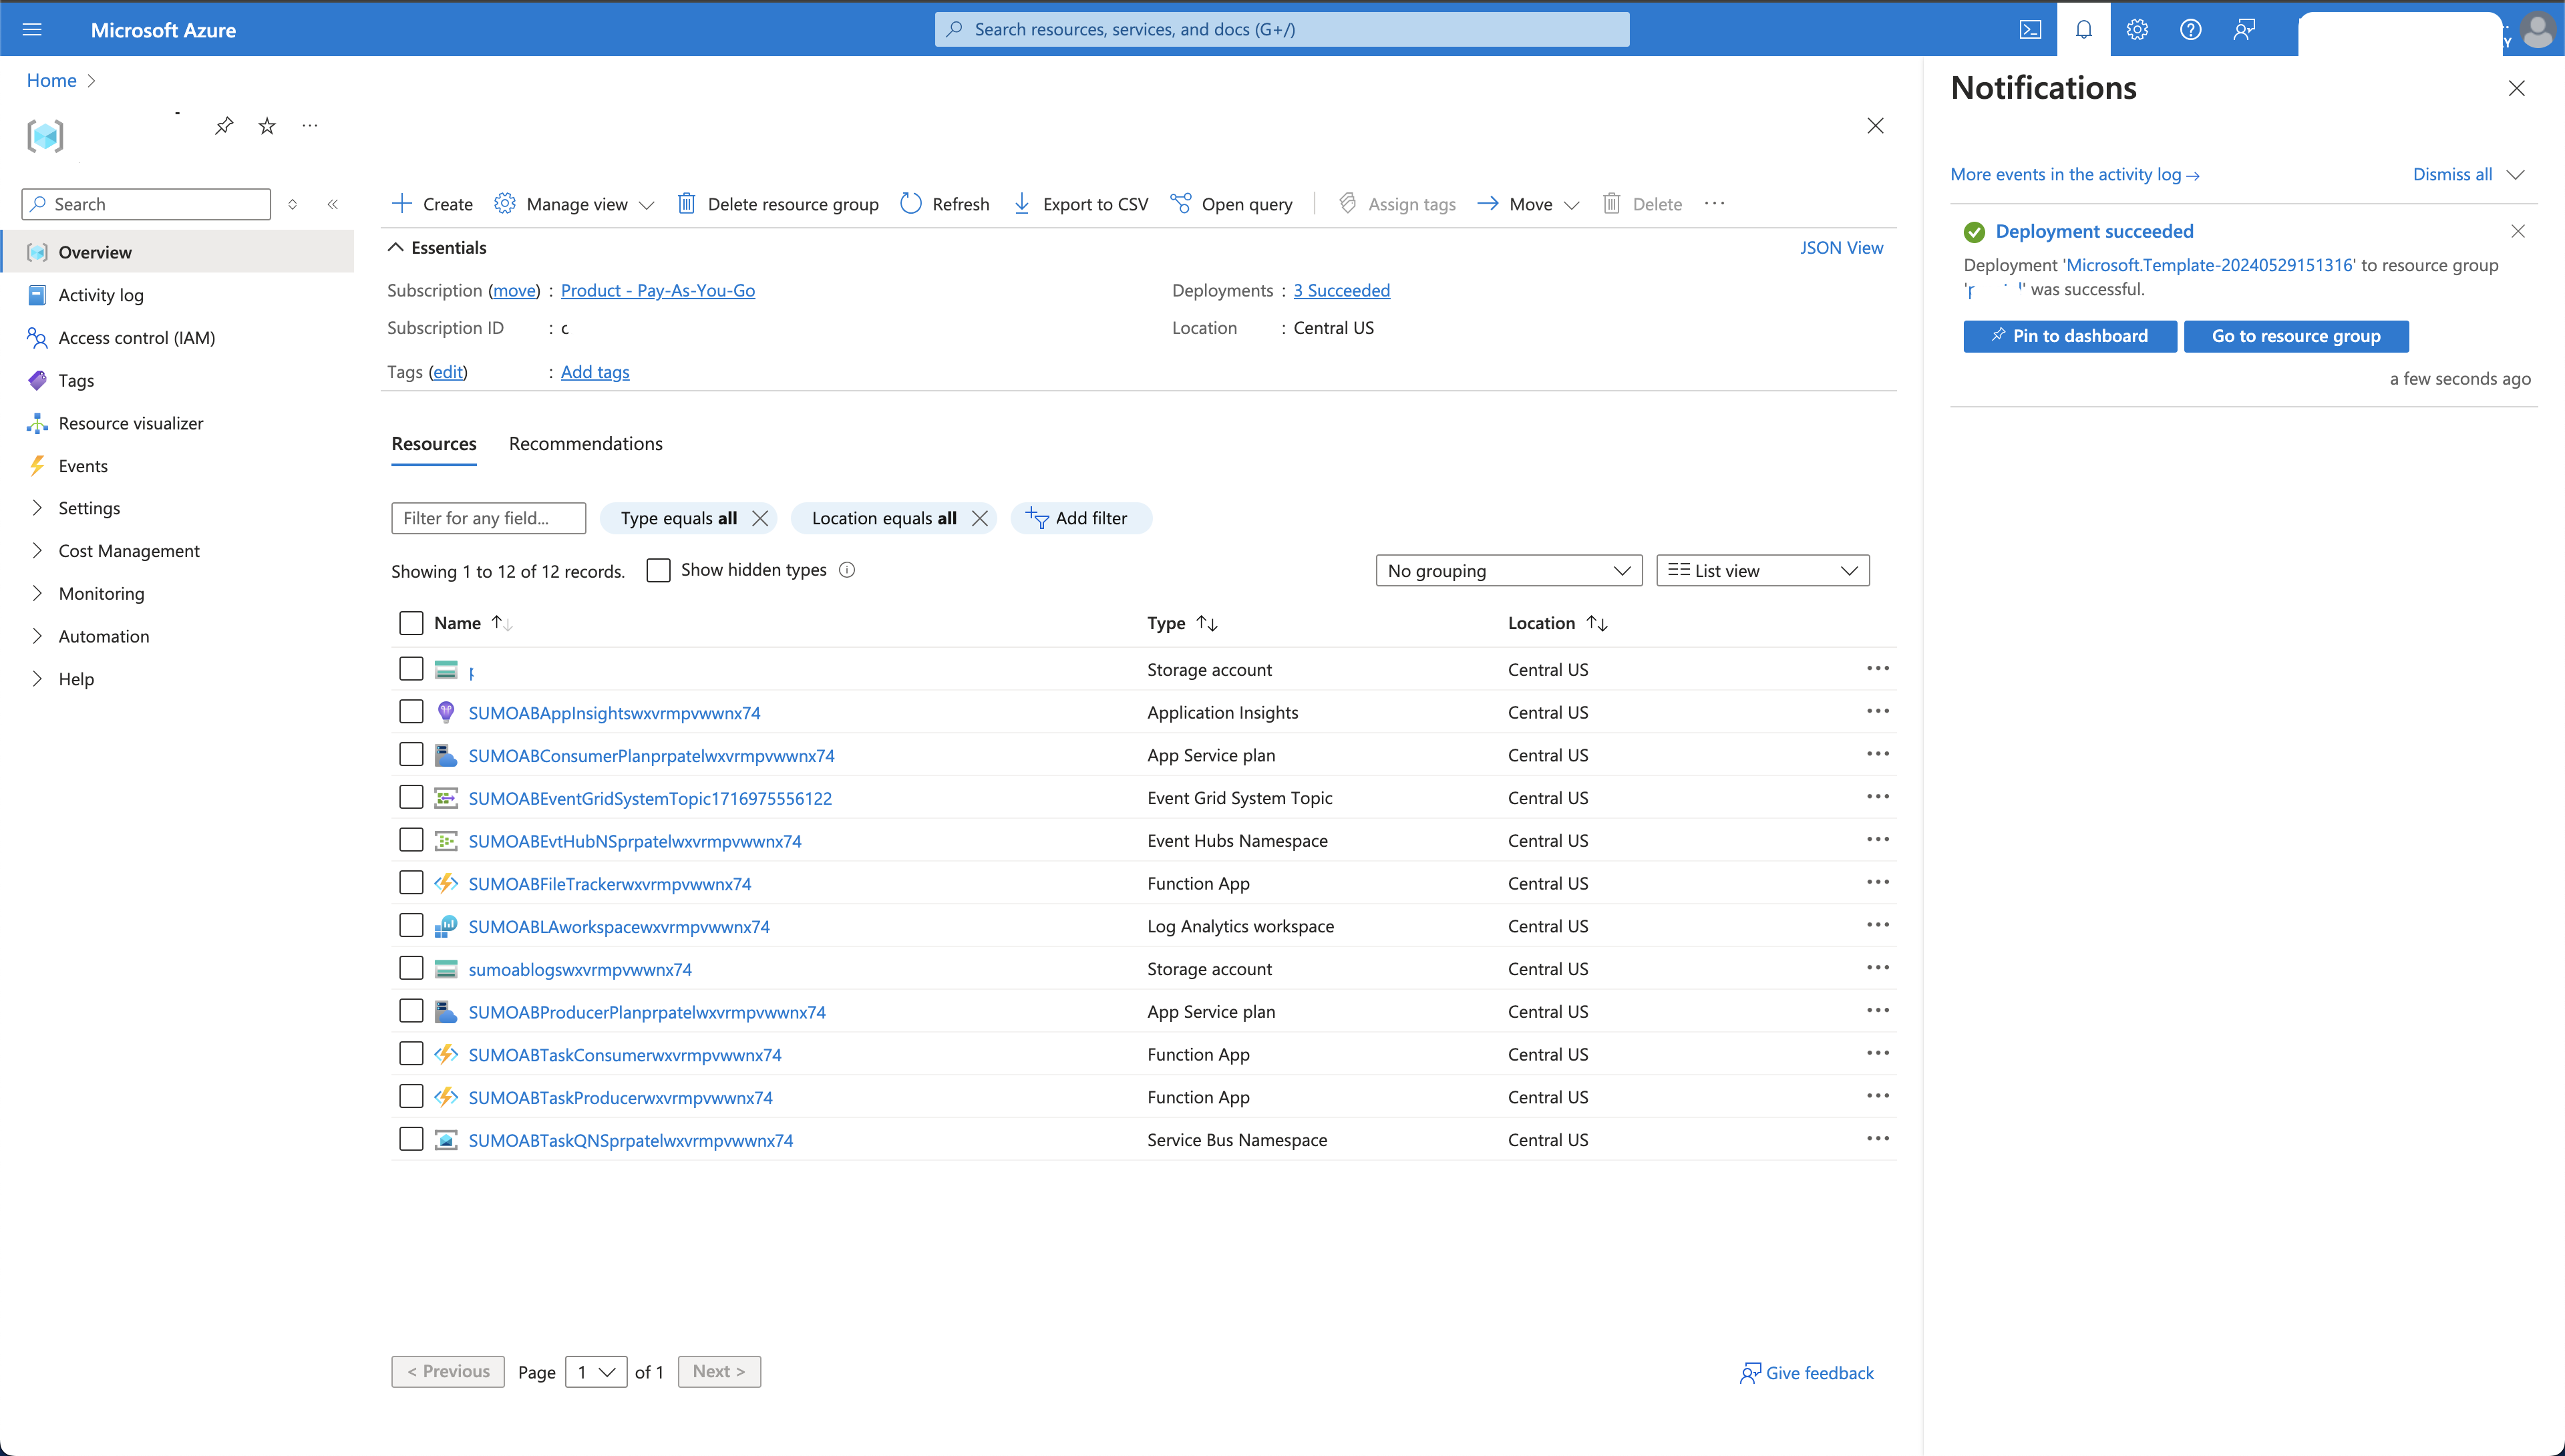
If logs from Azure Blob Storage do not start to flow into Sumo Logic, see Troubleshoot Azure Blob Storage Log Collection.
Ingesting from multiple storage accounts (optional)
If you want to ingest data into Sumo Logic from multiple storage accounts, perform the following tasks for each storage account separately.
The following steps assume you have noted down the resource group name, storage account name, and container name where the blobs will be ingested from.
- Step 1: Authorize App Service read from storage account - Enables the Azure functions to read from the storage account.
- Step 2: Create an Event Grid Subscription - Subscribes all blob creation events to the Event Hub created by ARM template in Step 3 above.
- Step 3. Enabling Vnet Integration(Optional)
Step 1: Authorize App Service to read from storage account
This section provides instructions on authorizing the App Service to list the storage account key. This enables the Azure function to read from the storage account.
To authorize the App Service to list the storage account key, do the following:
-
Go to Storage accounts and click Access control (IAM).

-
Click the Add + at the top of the page.

-
Select Add role assignment from dropdown.
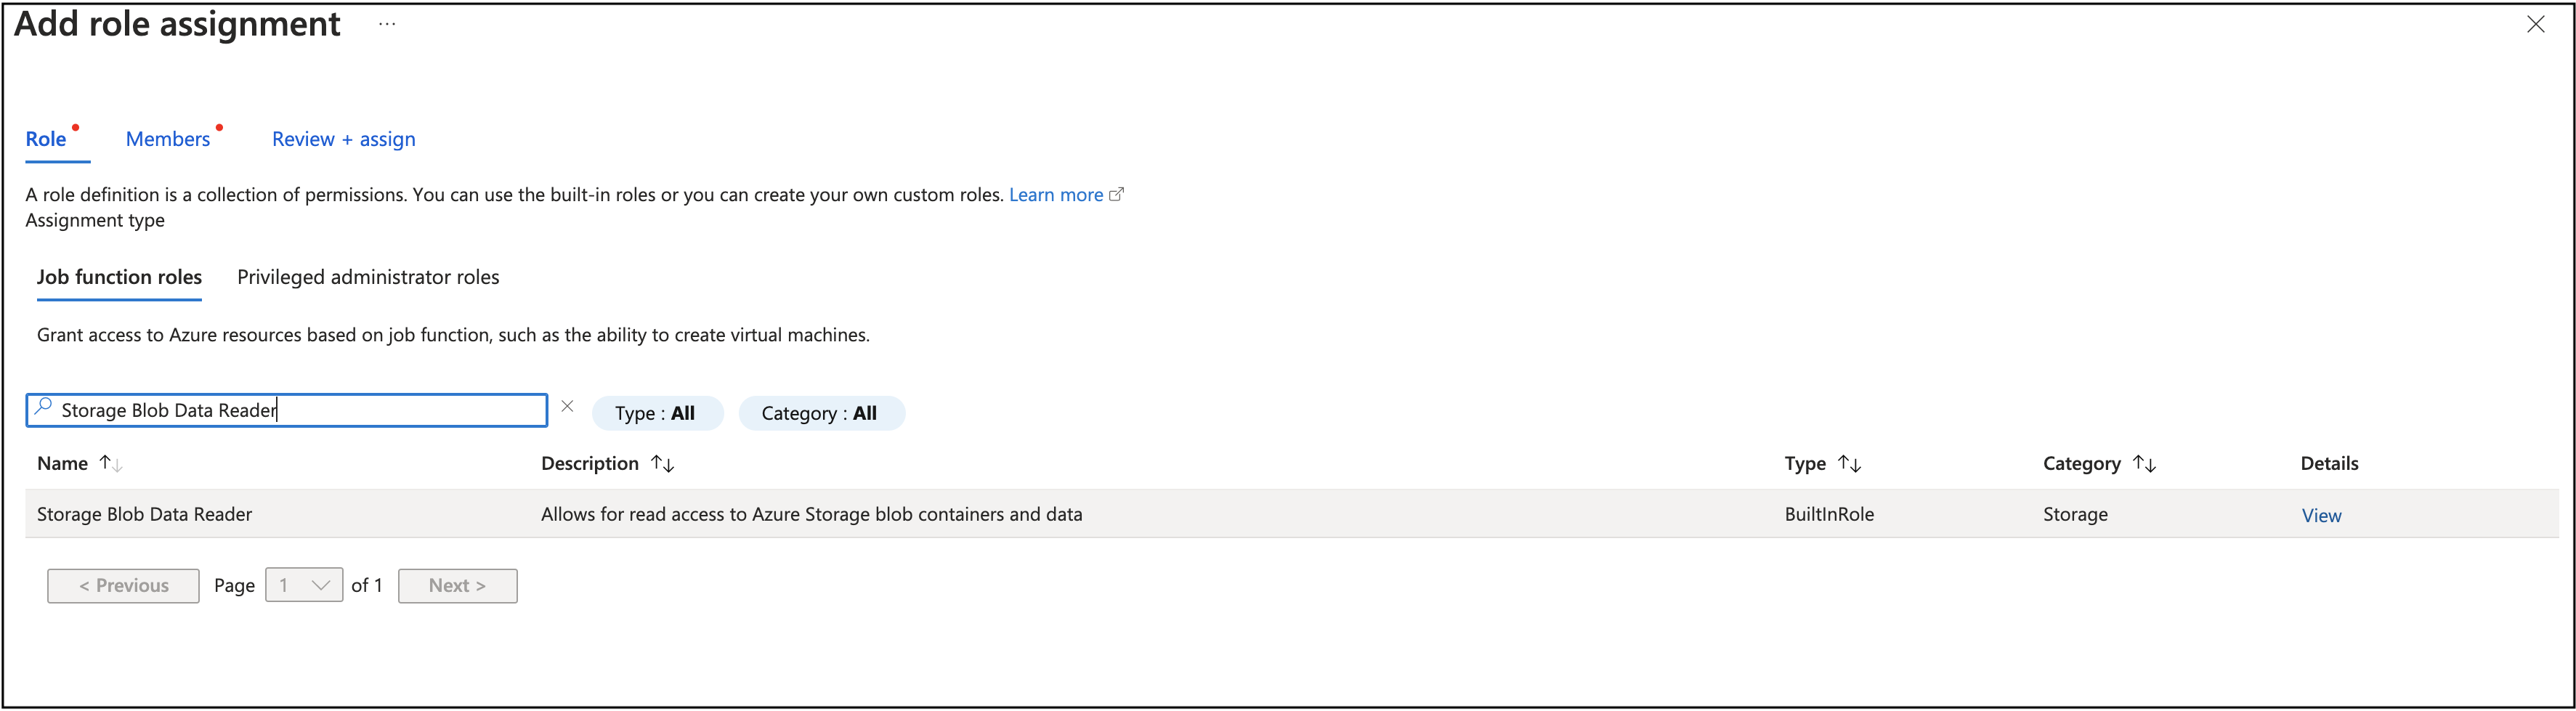
-
In the Add role assignment window, go to Role tab and choose Storage Blob Data Reader. Click Next.
-
In Members tab, select Managed Identity.
-
In the Select Managed identities window:
- Subscription: Choose Pay as you Go.
- Managed Identity: Choose Function App.
- Select: SUMOABTaskConsumer<unique_prefix> app services which are created by the ARM template. Click Select.
-
Click Review + assign.
-
Click Save.
Step 2: Create an event grid subscription
This section provides instructions for creating an event grid subscription that subscribes all blob creation events to the Event Hub created by the ARM template in Step 3 above.
To create an event grid subscription, do the following:
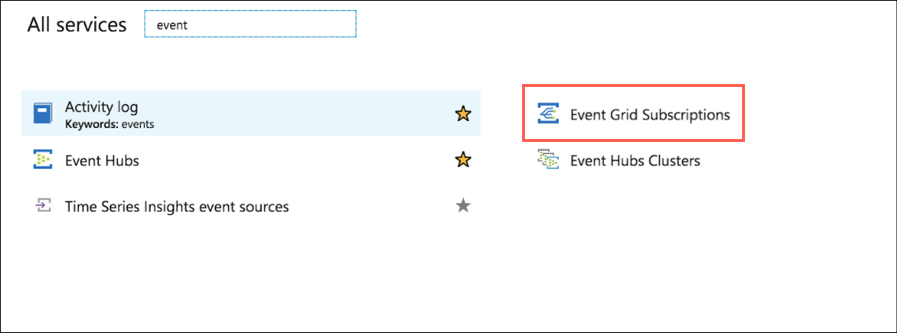
-
In the left pane of the Azure portal click All Services, then search for and click Event Grid Subscriptions.
-
At the top of the Event Subscriptions page, click +Event Subscription.
The Create Event Subscription dialog appears.
-
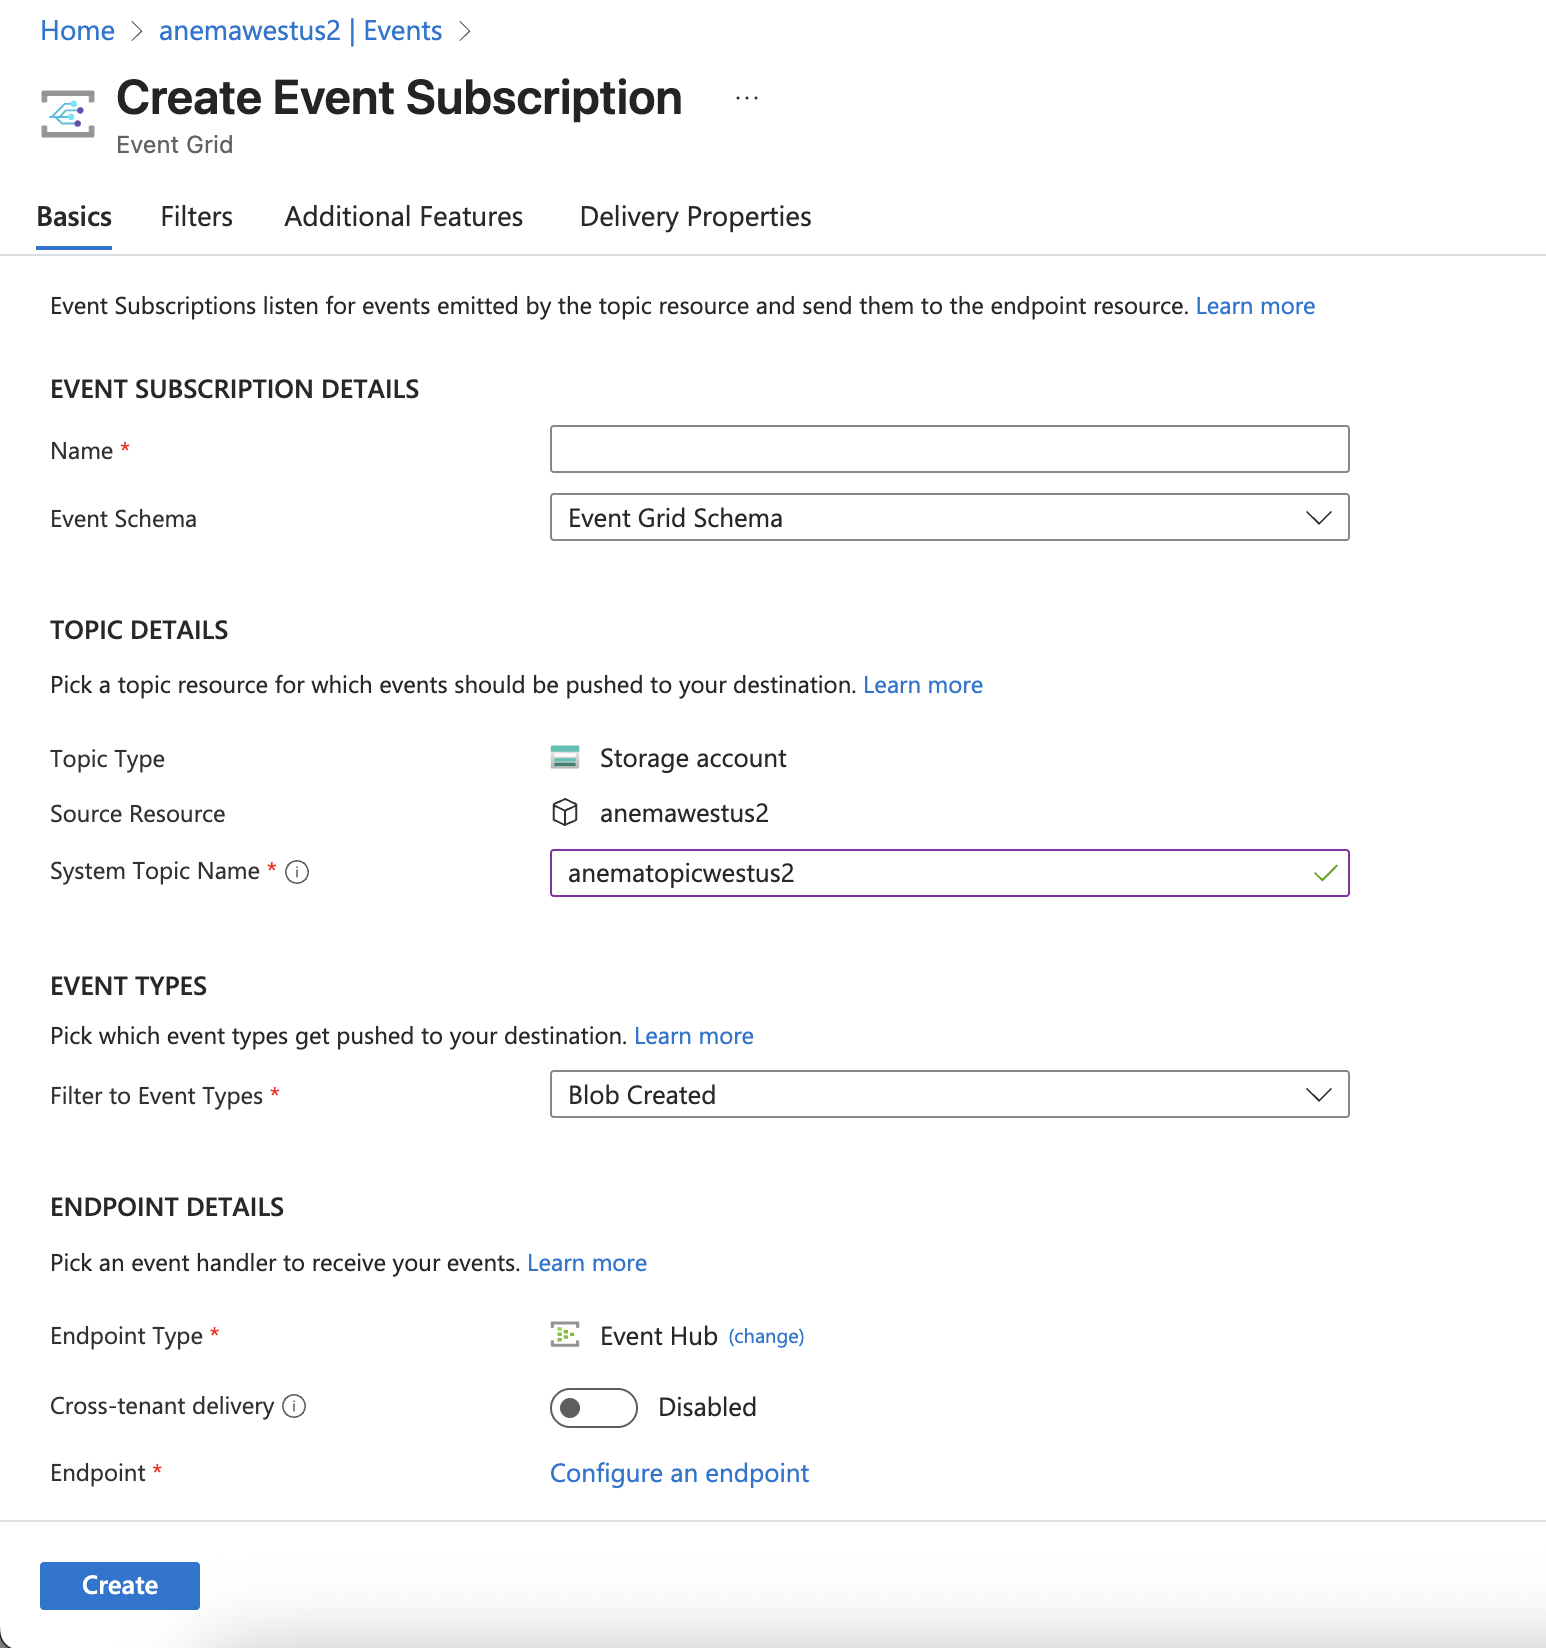
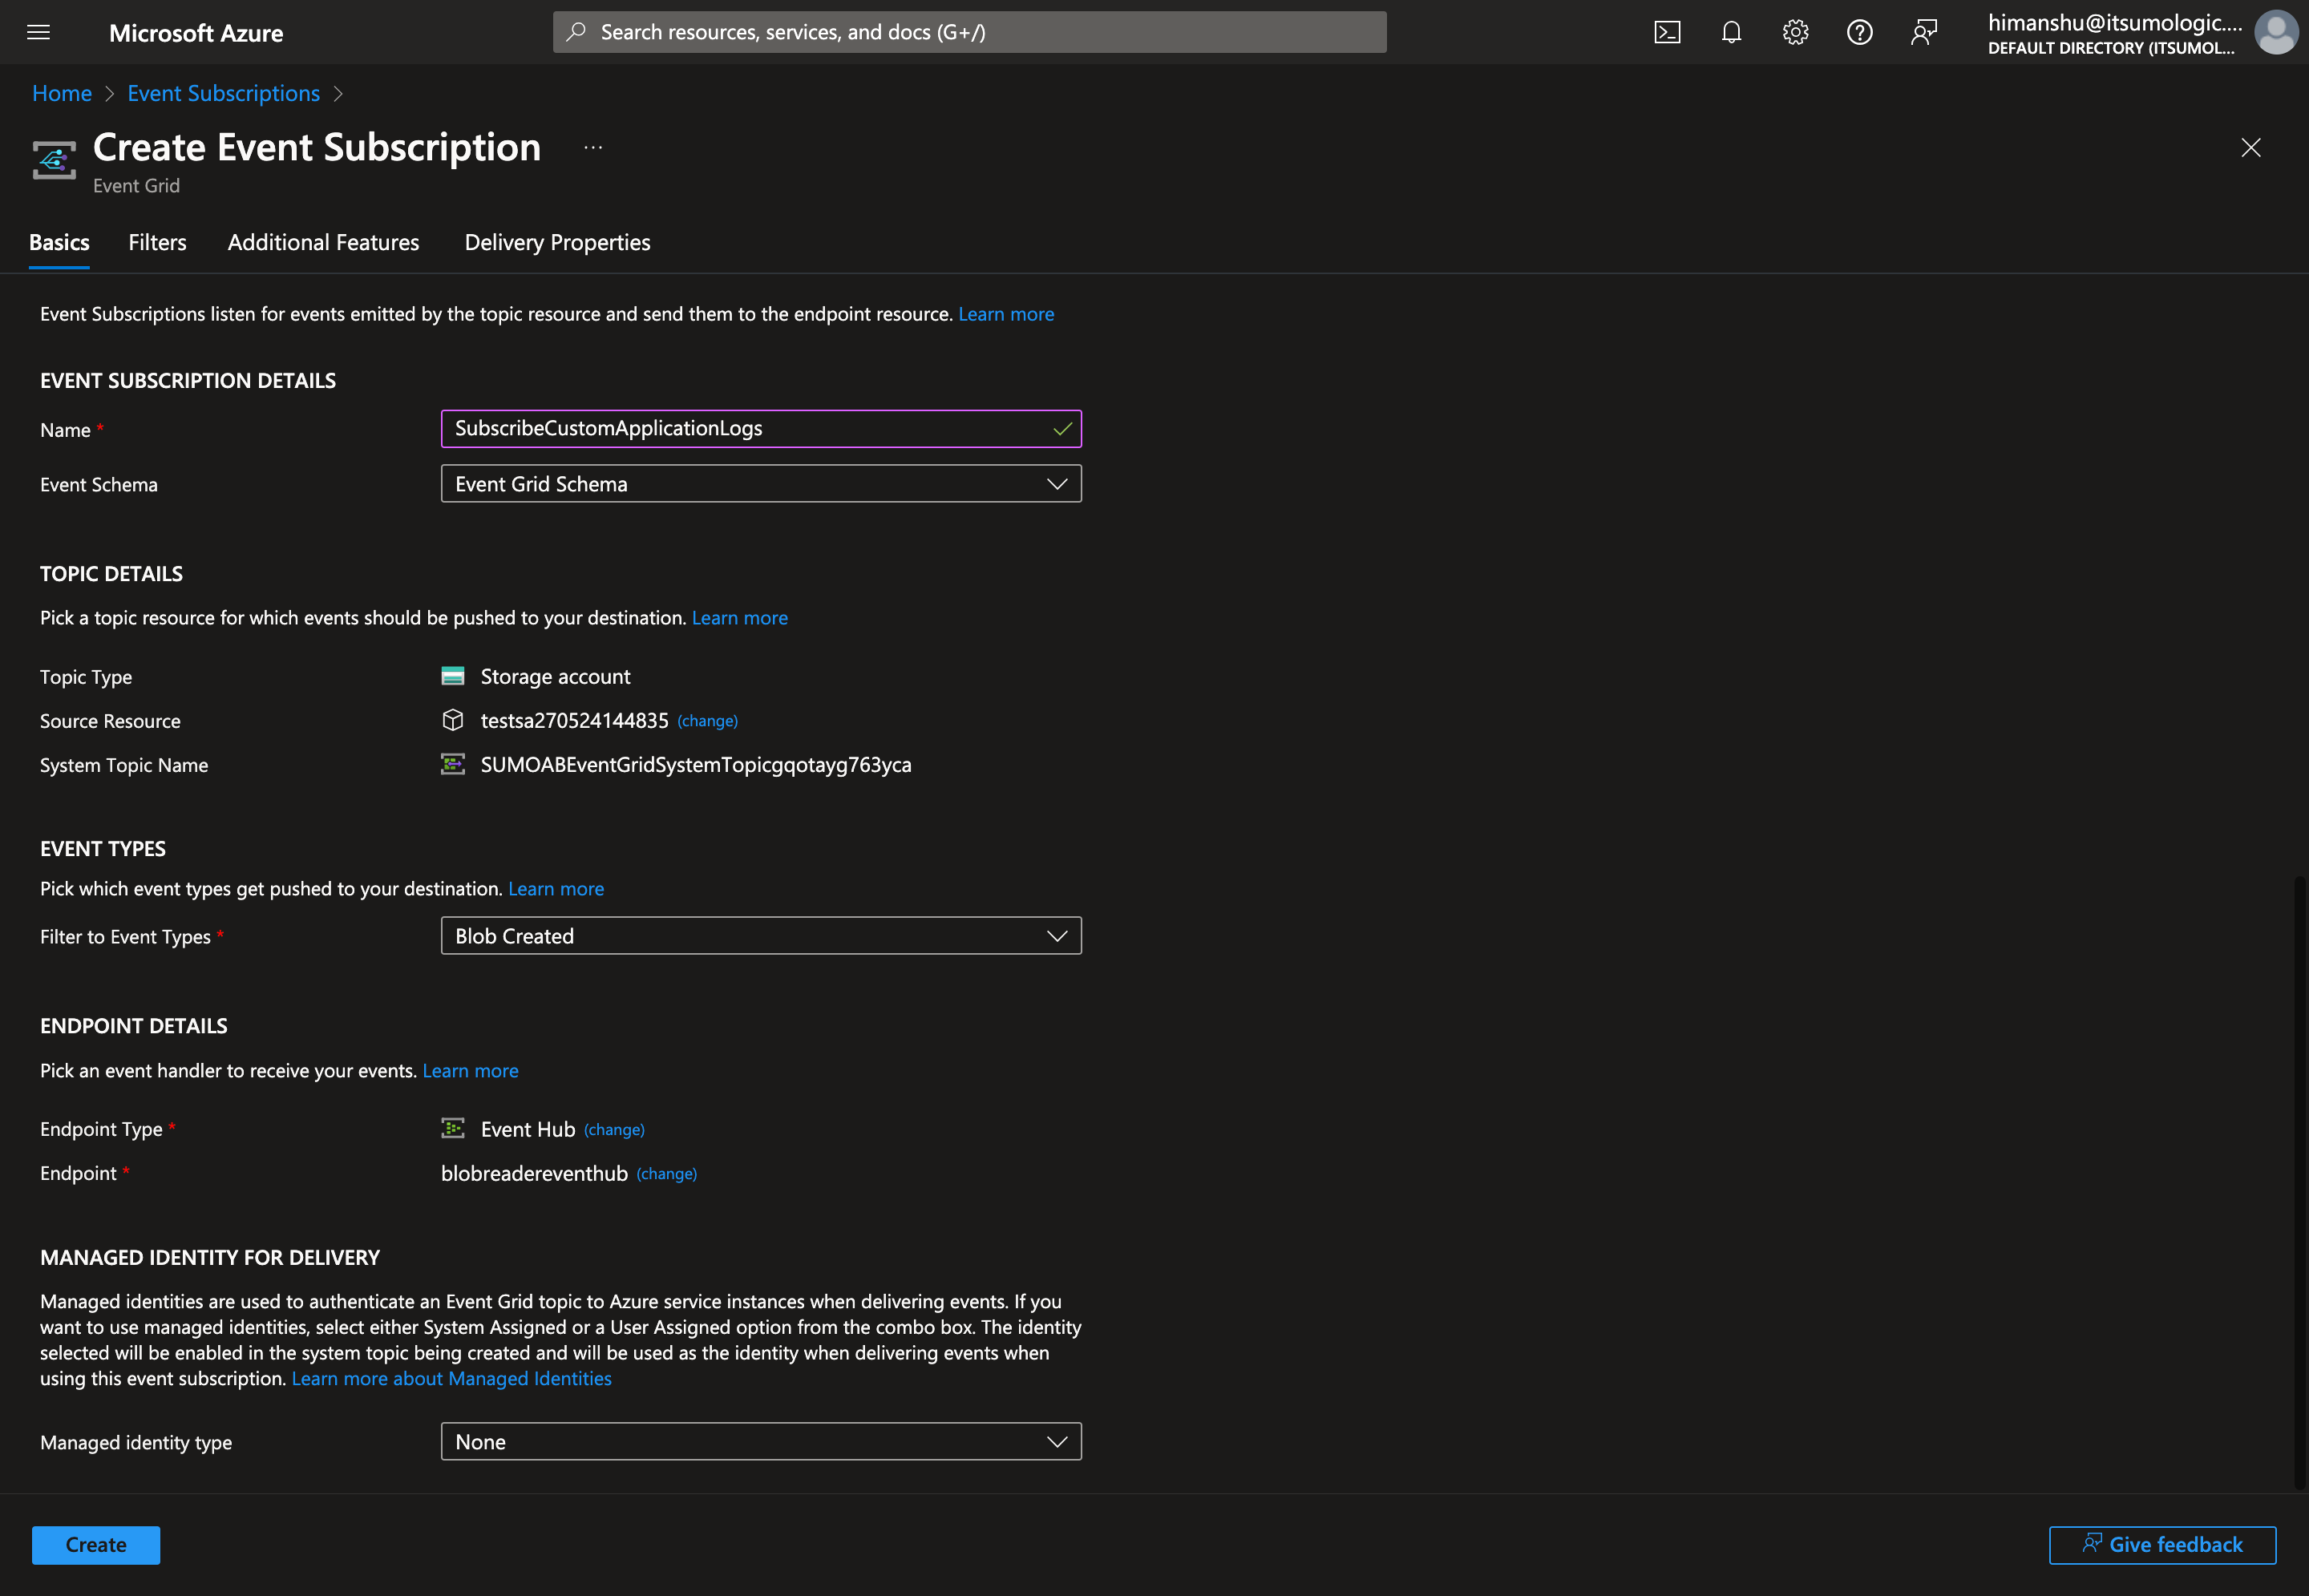
Specify the following values for Event Subscription Details:
- Name: Fill the event subscription name.
- Event Schema: Select Event Grid Schema.
-
Specify the following values for Topic Details:
- Topic Type. Select Storage Accounts.
- Subscription. Select Pay As You Go.
- Resource Group. Select the Resource Group for the Storage Account to which your Azure service will export logs, from where you want to ingest logs.
- Resource. Select the Storage Account you configured, from where you want to ingest logs.
- System Topic Name. Provide the topic name, if the system topic already exists then it will automatically select the existing topic.
noteIf you do not see your configured Storage Account in the dropdown menu, make sure you meet the requirements in Requirements section.
-
Specify the following details for Event Types:
- Uncheck the Subscribe to all event types box.
- Select Blob Created from the Define Event Types dropdown.
-
Specify the following details for Endpoint Types:
- Endpoint Type. Select Event Hubs from the dropdown.
- Endpoint. Click on Select an endpoint.
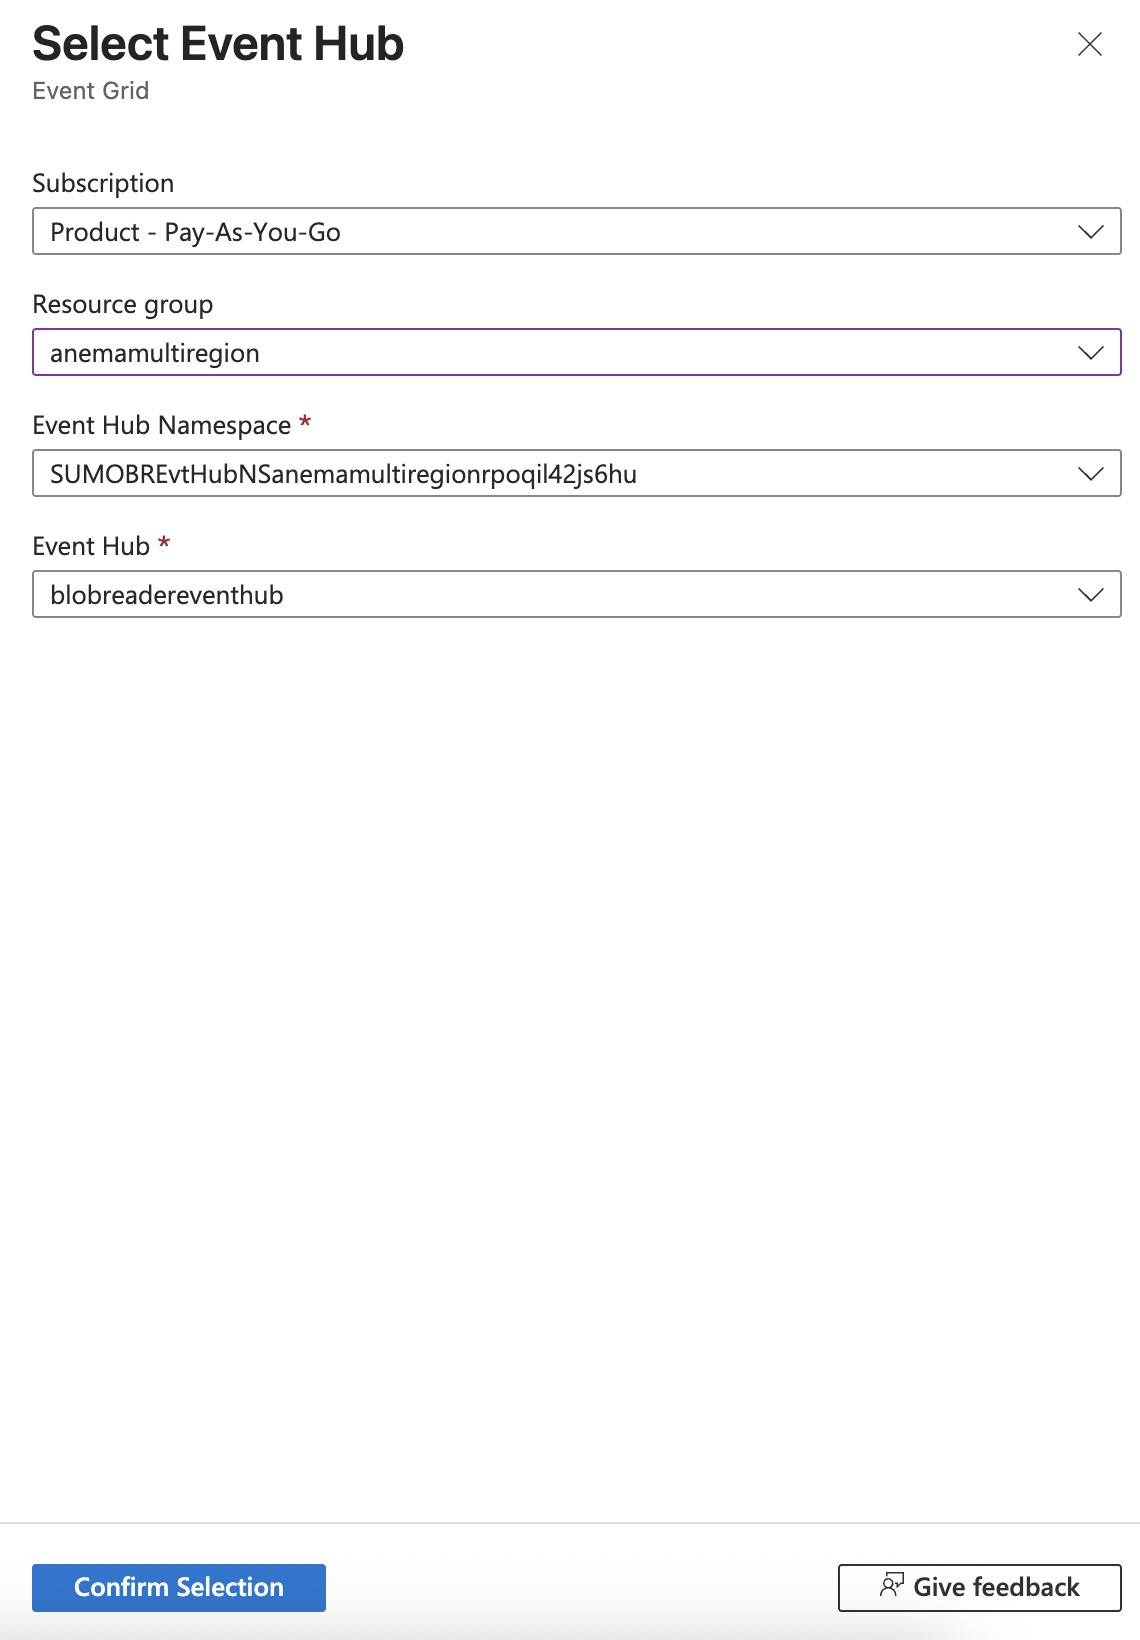
The Select Event Hub dialog appears.
-
Specify the following Select Event Hub parameters, then click Confirm Selection.
- Resource Group. Select the resource group you created Step 3 in which all the resources created by ARM template are present.
- Event Hub Namespace. Select SUMOABEvtHubNS<unique string\>.
- Event Hub. Select blobreadereventhub from the dropdown.
-
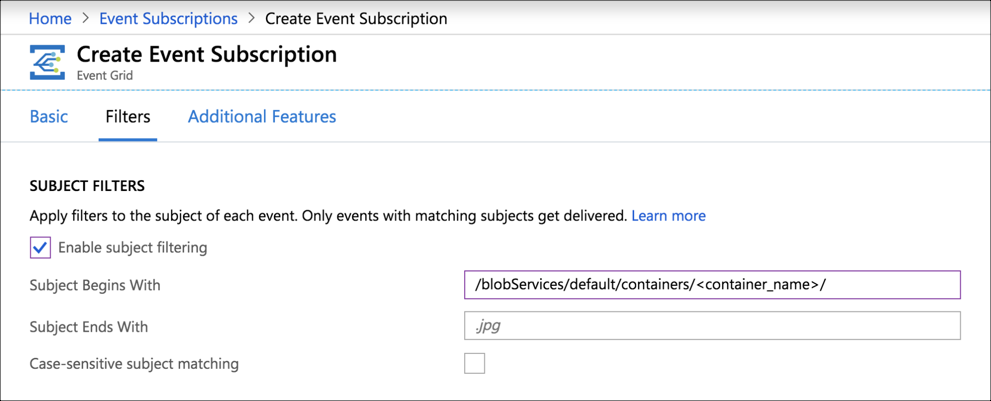
Specify the following Filters tab options(Optional):
- Check Enable subject filtering.
- To filter events by a container name, enter the following in the Subject Begins With field, replacing
<container_name>with the name of the container from where you want to export logs:/blobServices/default/containers/<container_name>/
-
Click Create.
-
Verify the deployment was successful by checking Notifications in the top right corner of the Azure Portal.
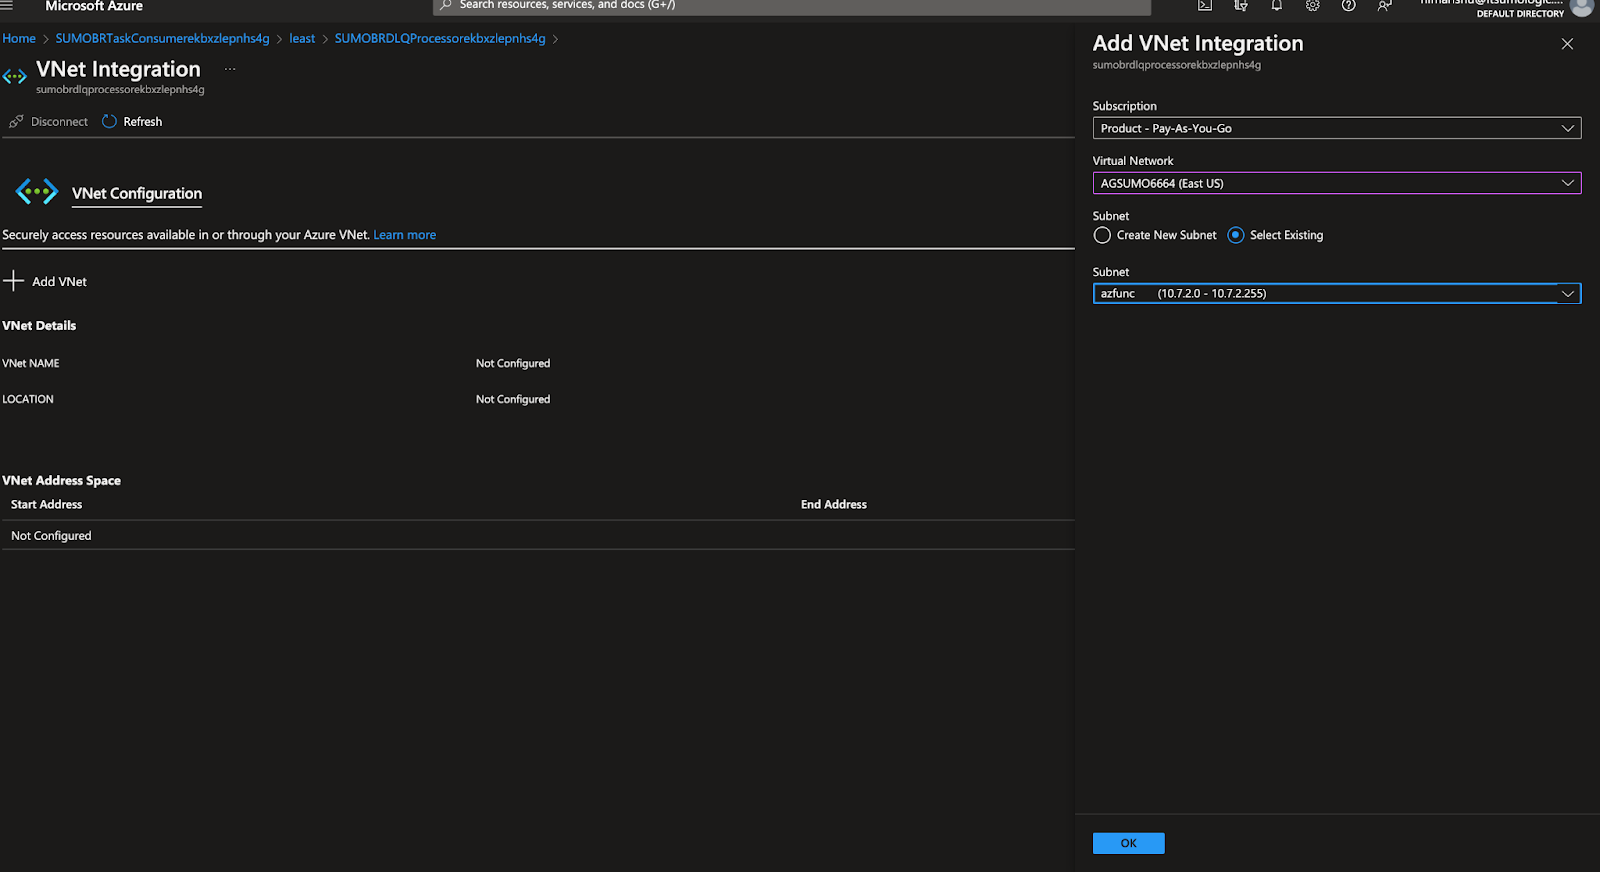
Step 3: Enabling VNet Integration (Optional)
This assumes that your storage account access is enabled for selected networks.
- Create a subnet in a virtual network using the instructions in the Azure documentation. If you have multiple accounts in the same region, you can skip step 2 given below and use the same subnet and add it to the storage account as mentioned in step 3.
- Perform the steps below for BlobTaskConsumer function app:
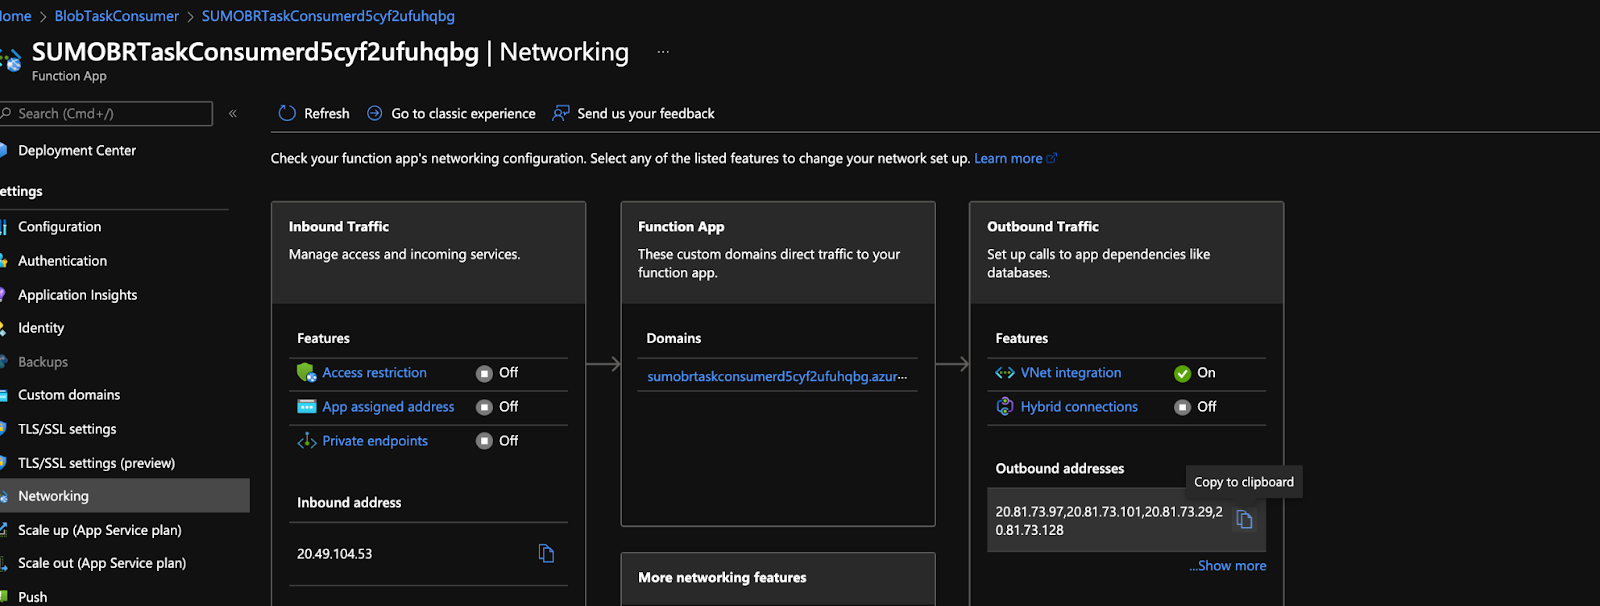
- Go to Function App > Settings > Networking.
- Under Outbound traffic, click on Vnet Integration.
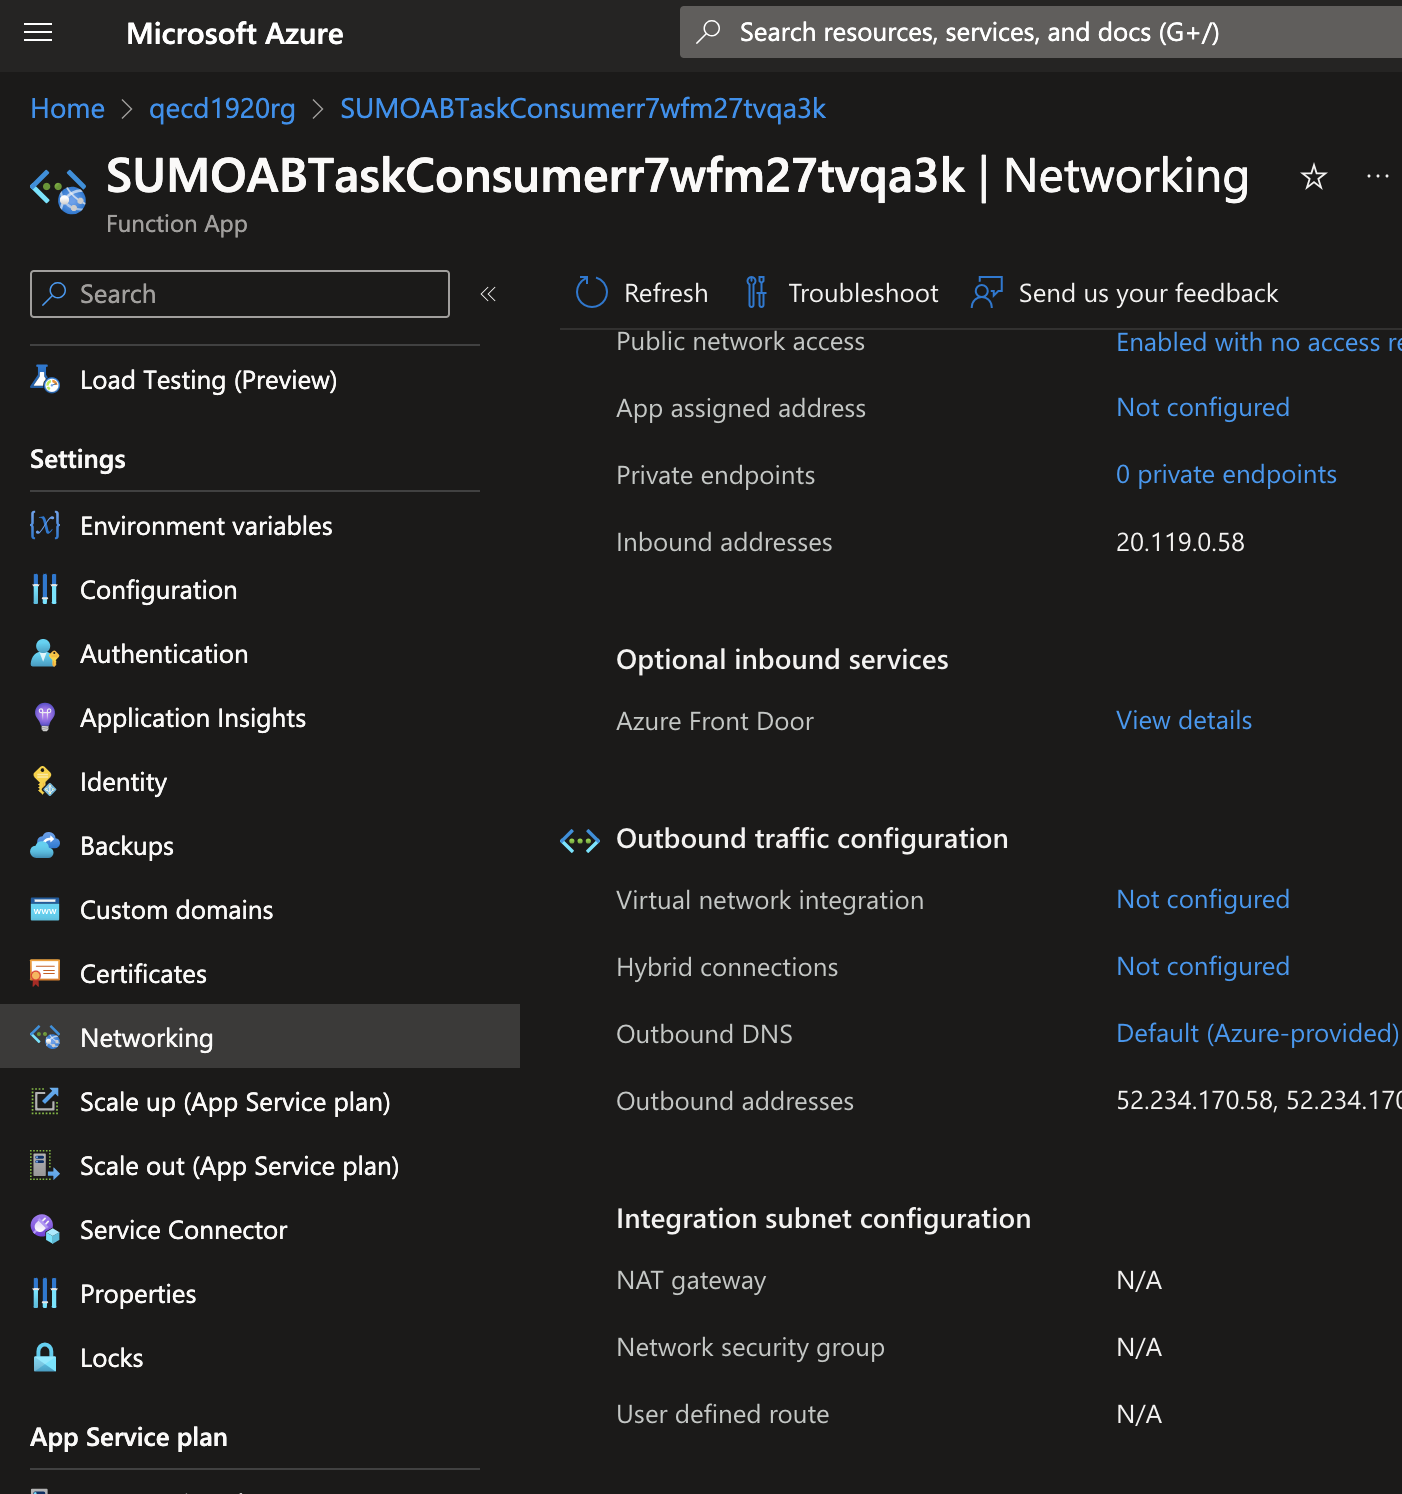
- Add the Vnet and subnet created in Step 1.
- Also copy the outbound IP addresses you’ll need to add in the firewall configuration of your storage account.
- Go to your storage account from where you want to collect logs from. Go to Networking and add the same Vnet and subnet.

- Add the outbound IP addresses (copied in step 2.iv) from both BlobTaskConsumer functions under Firewall with each IP in a single row of Address range column.
- Verify by going to the subnet. You should see Subnet delegation and service endpoints as shown in the screenshot below.

Upgrading Azure Functions
- Go to the resource group where the ARM template was deployed and go to each of the function apps.
- Go to
Deployment -> Deployment Centerand click onSync.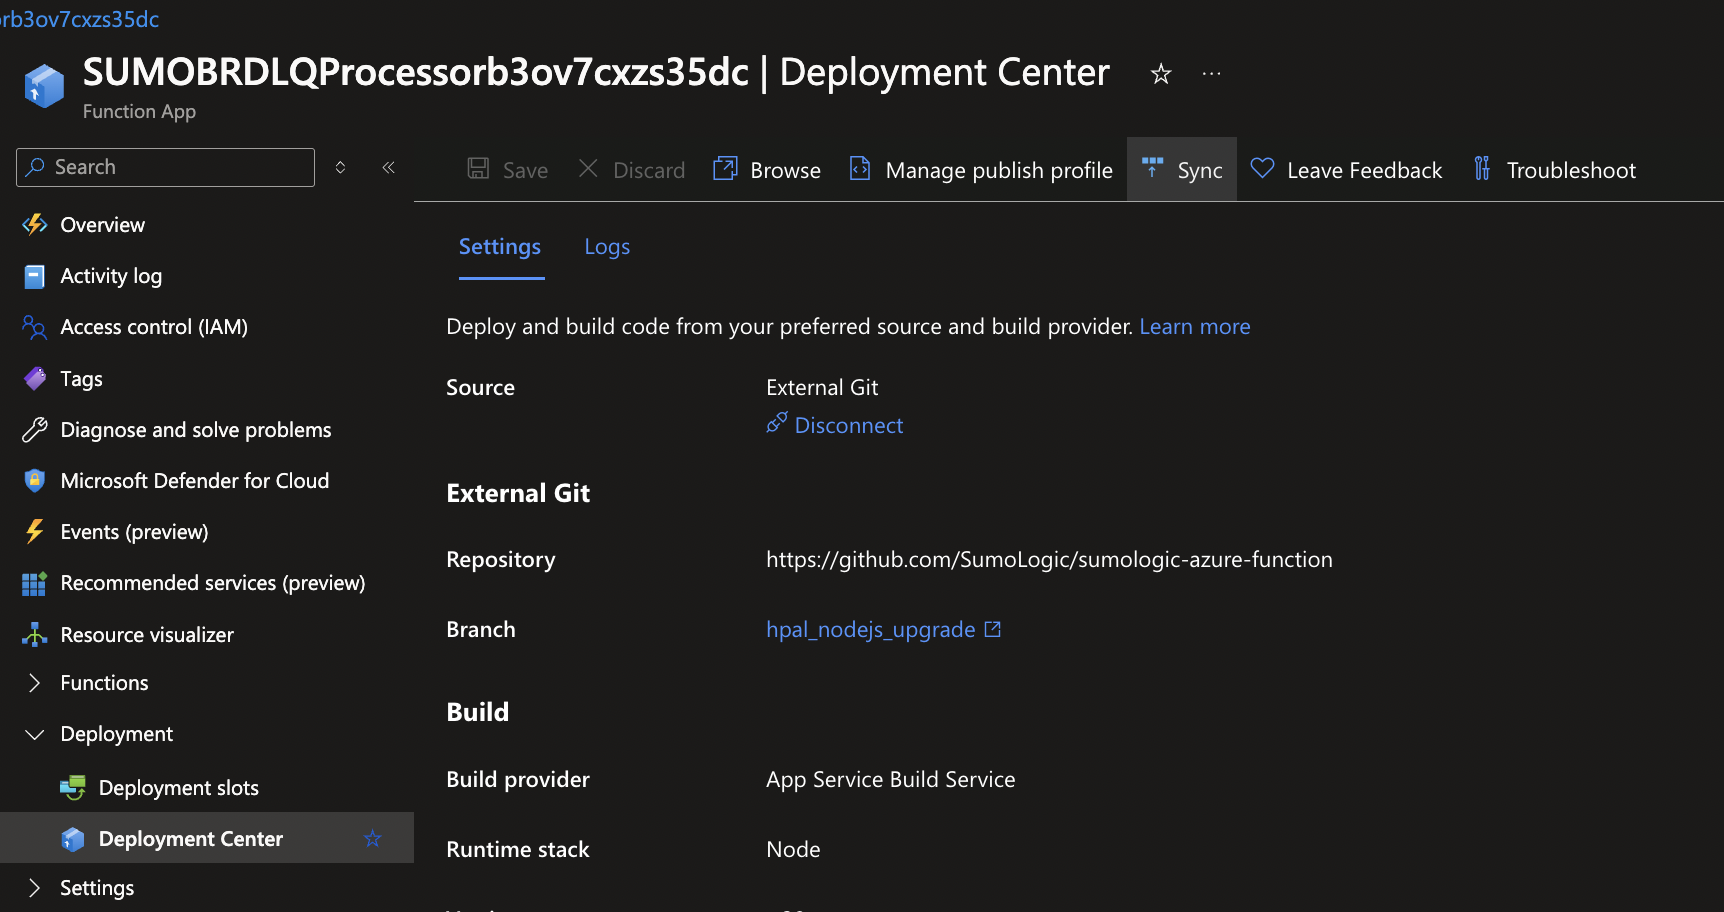
- Go to
Logstab and check theStatuscolumn, it should showSuccess.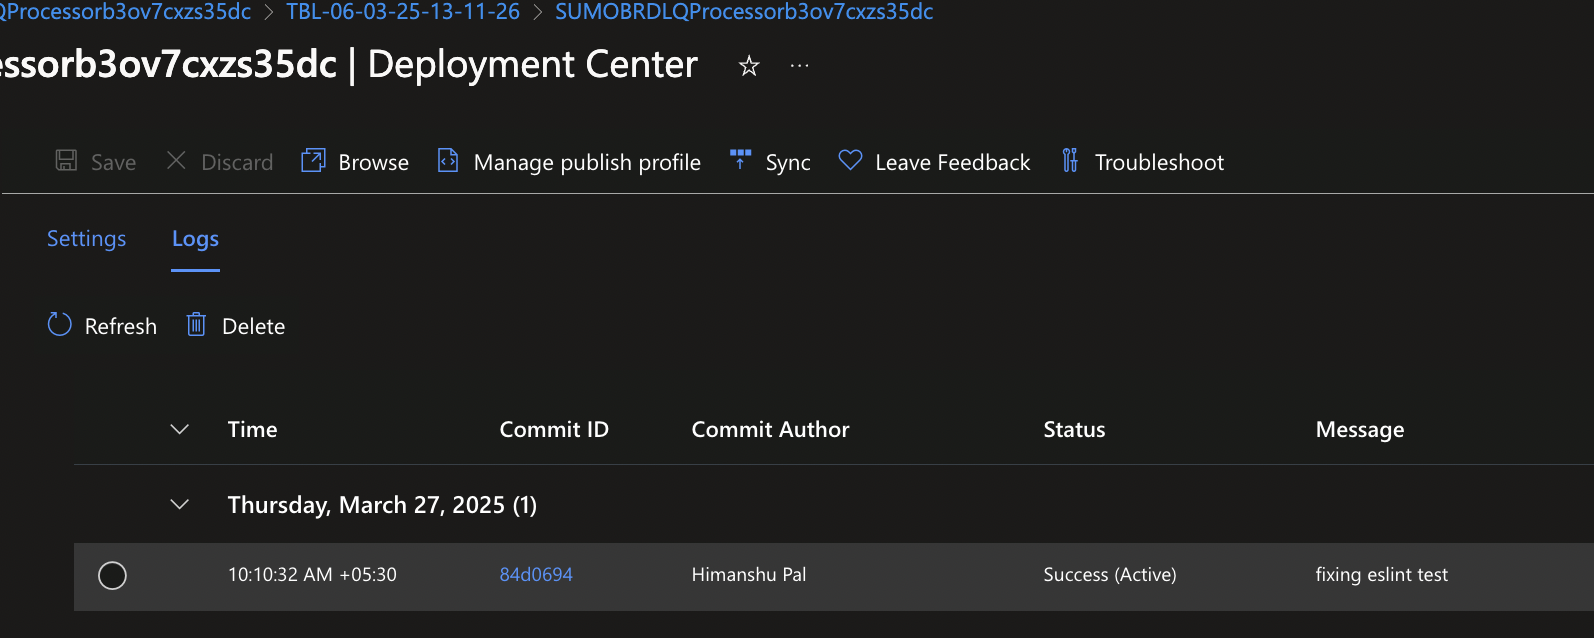
Azure Append Blob Limitations
- By default the boundary regex used for JSON and log files are defined below. You can override it by updating
getBoundaryRegexmethod ofAzureBlobTaskConsumerfunction.- log:
'\\d{4}-\\d{2}-\\d{2}\\s+\\d{2}:\\d{2}:\\d{2}' - json:
'\{\\s*\"'
- log:
- By default, it's assumed that after 48 hours the log file won't be updated. You can override it by setting
MAX_LOG_FILE_ROLLOVER_HOURSsetting inAppendBlobTaskProducerfunction. - By default batch size is automatically calculated based on the number of files present in the storage account and the maximum batch size can be 200MB.
AppendBlobTaskProducerfunction sets the lock (for max 30min) and creates the task (in service bus) for the file, and then automatically releases it ifAppendBlobTaskConsumerfails to process it if you are seeing queueing delay of more than 30min you can increasemaxlockThresholdMiningetLockedEntitiesExceedingThresholdmethod ofAppendBlobTaskProducerfunction.- Log files have a file extension of .json (JSONLines), .blob(JSONLines), .csv, .txt or .log.
- If the file is .json or .blob, the JSON objects are extracted and sent to Sumo Logic.
- If the file is .log, .txt, or .csv, log lines are sent to Sumo Logic as-is.
- By default all the data is ingested to a single HTTP source if you want to send data to multiple sources (recommended in case of different log formats) you can override the
getSumoEndpointfunction inAppendBlobTaskConsumerfunction. - Blob file name present in
_sourceNamemetadata will be truncated if it exceeds 128 chars.
Collection testing performance numbers
| File creation time in a single storage account | Number of files | Size of each file X Number of files | Sumo Logic Incoming Bytes Rate (MB/sec) | Sumo Logic Incoming Messages Rate (loglines/sec) | Sumo Logic total time taken for full ingestion | Sumo Logic Ingestion (GB) | Sumo Logic log count | Max Latency |
|---|---|---|---|---|---|---|---|---|
| ~15min | 8000 | 8000 x 5.36 MB | 23 MB/sec | 11378.49/sec | ~ 27 min | 41.8GB | 81,925,120 | 12.74 min |
| ~29min | 16000 | 16000 x 5.36 MB | 45.07 MB/sec | 74415.97/sec | ~ 41 min | 79.3GB | 133,948,750 | 11.98 min |