Collect logs from Azure Blob Storage with full Virtual Network (VNet) Integration
The current solution for ingesting block blob data from an Azure Storage Account into Sumo Logic sets up a pipeline that assumes public access is enabled on the storage account being monitored. If you prefer to restrict access and keep your storage account behind a firewall, refer to the instructions here. However, if your security requirements demand that all Azure resources deployed via the ARM template, including the Storage Account, Event Hub, Azure Functions, and Service Bus, are fully integrated with a Virtual Network, follow the steps outlined below.
- Download the ARM template https://github.com/SumoLogic/sumologic-azure-function/blob/azure_premium_template_vnet_integration/BlockBlobReader/src/blobreaderdeploywithPremiumPlan.json that provisions the required resources, including a premium-tier Service Bus.
- Create the following networking resources:
- Virtual Network. For example,
brvnet.noteOnly the Storage service endpoint associated with the functions and storage accounts is needed for the subnet.

- Subnet. For example,
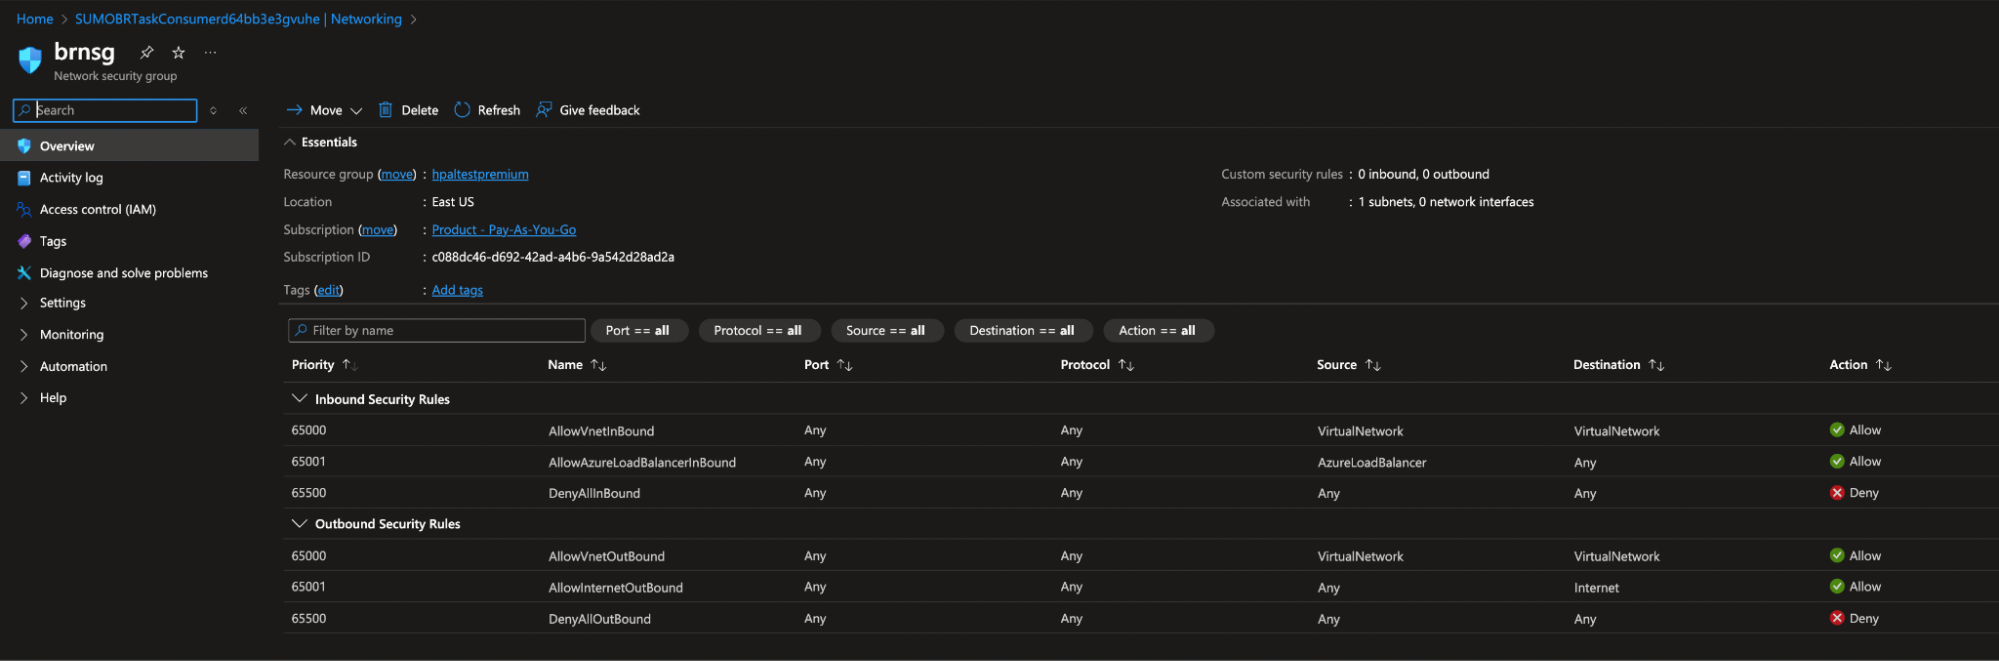
brsubnet. - Network Security Group (NSG). For example,
brnsg.noteNSG rules remain as default; no changes required.
- Virtual Network. For example,
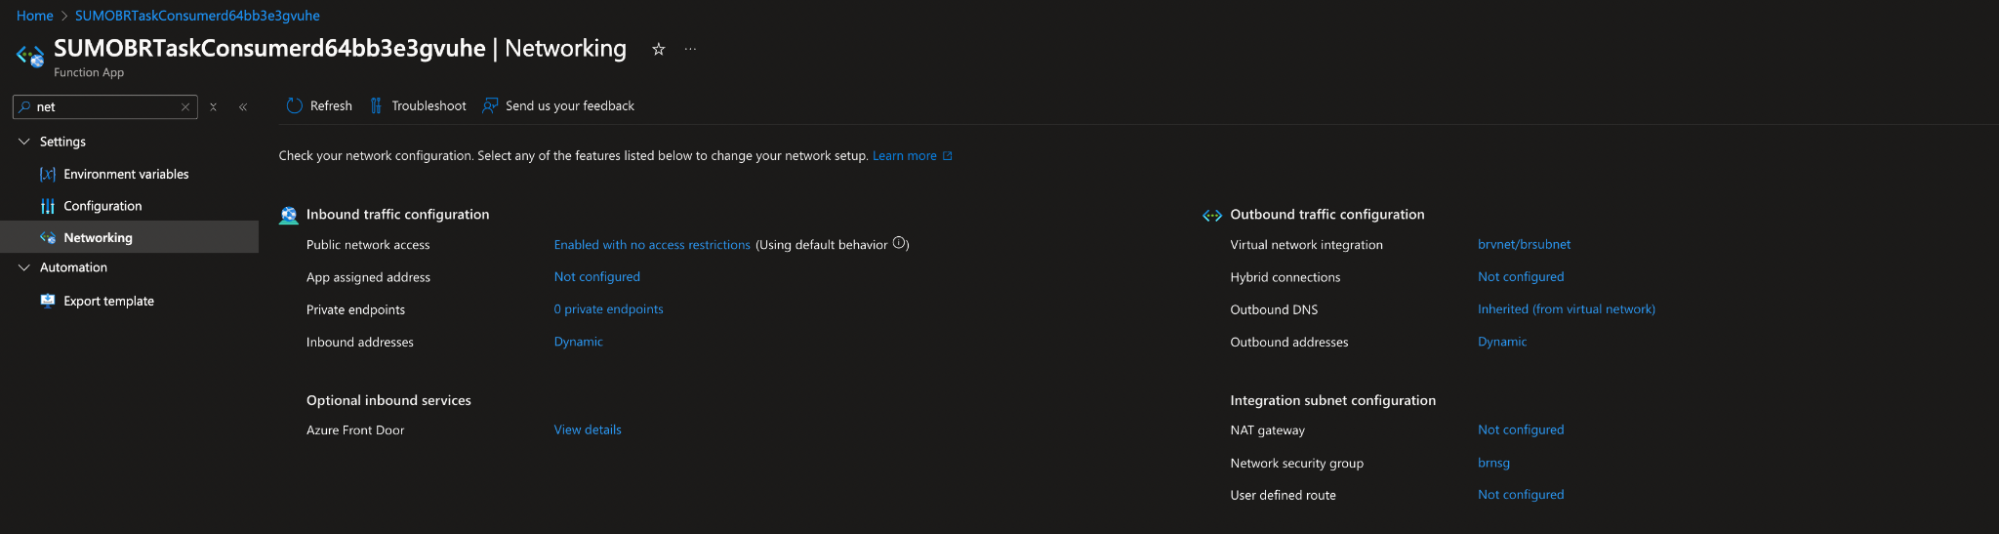
- Enable the Virtual Network integration on each function app by navigating to Function App > Networking > Outbound Traffic Configuration.
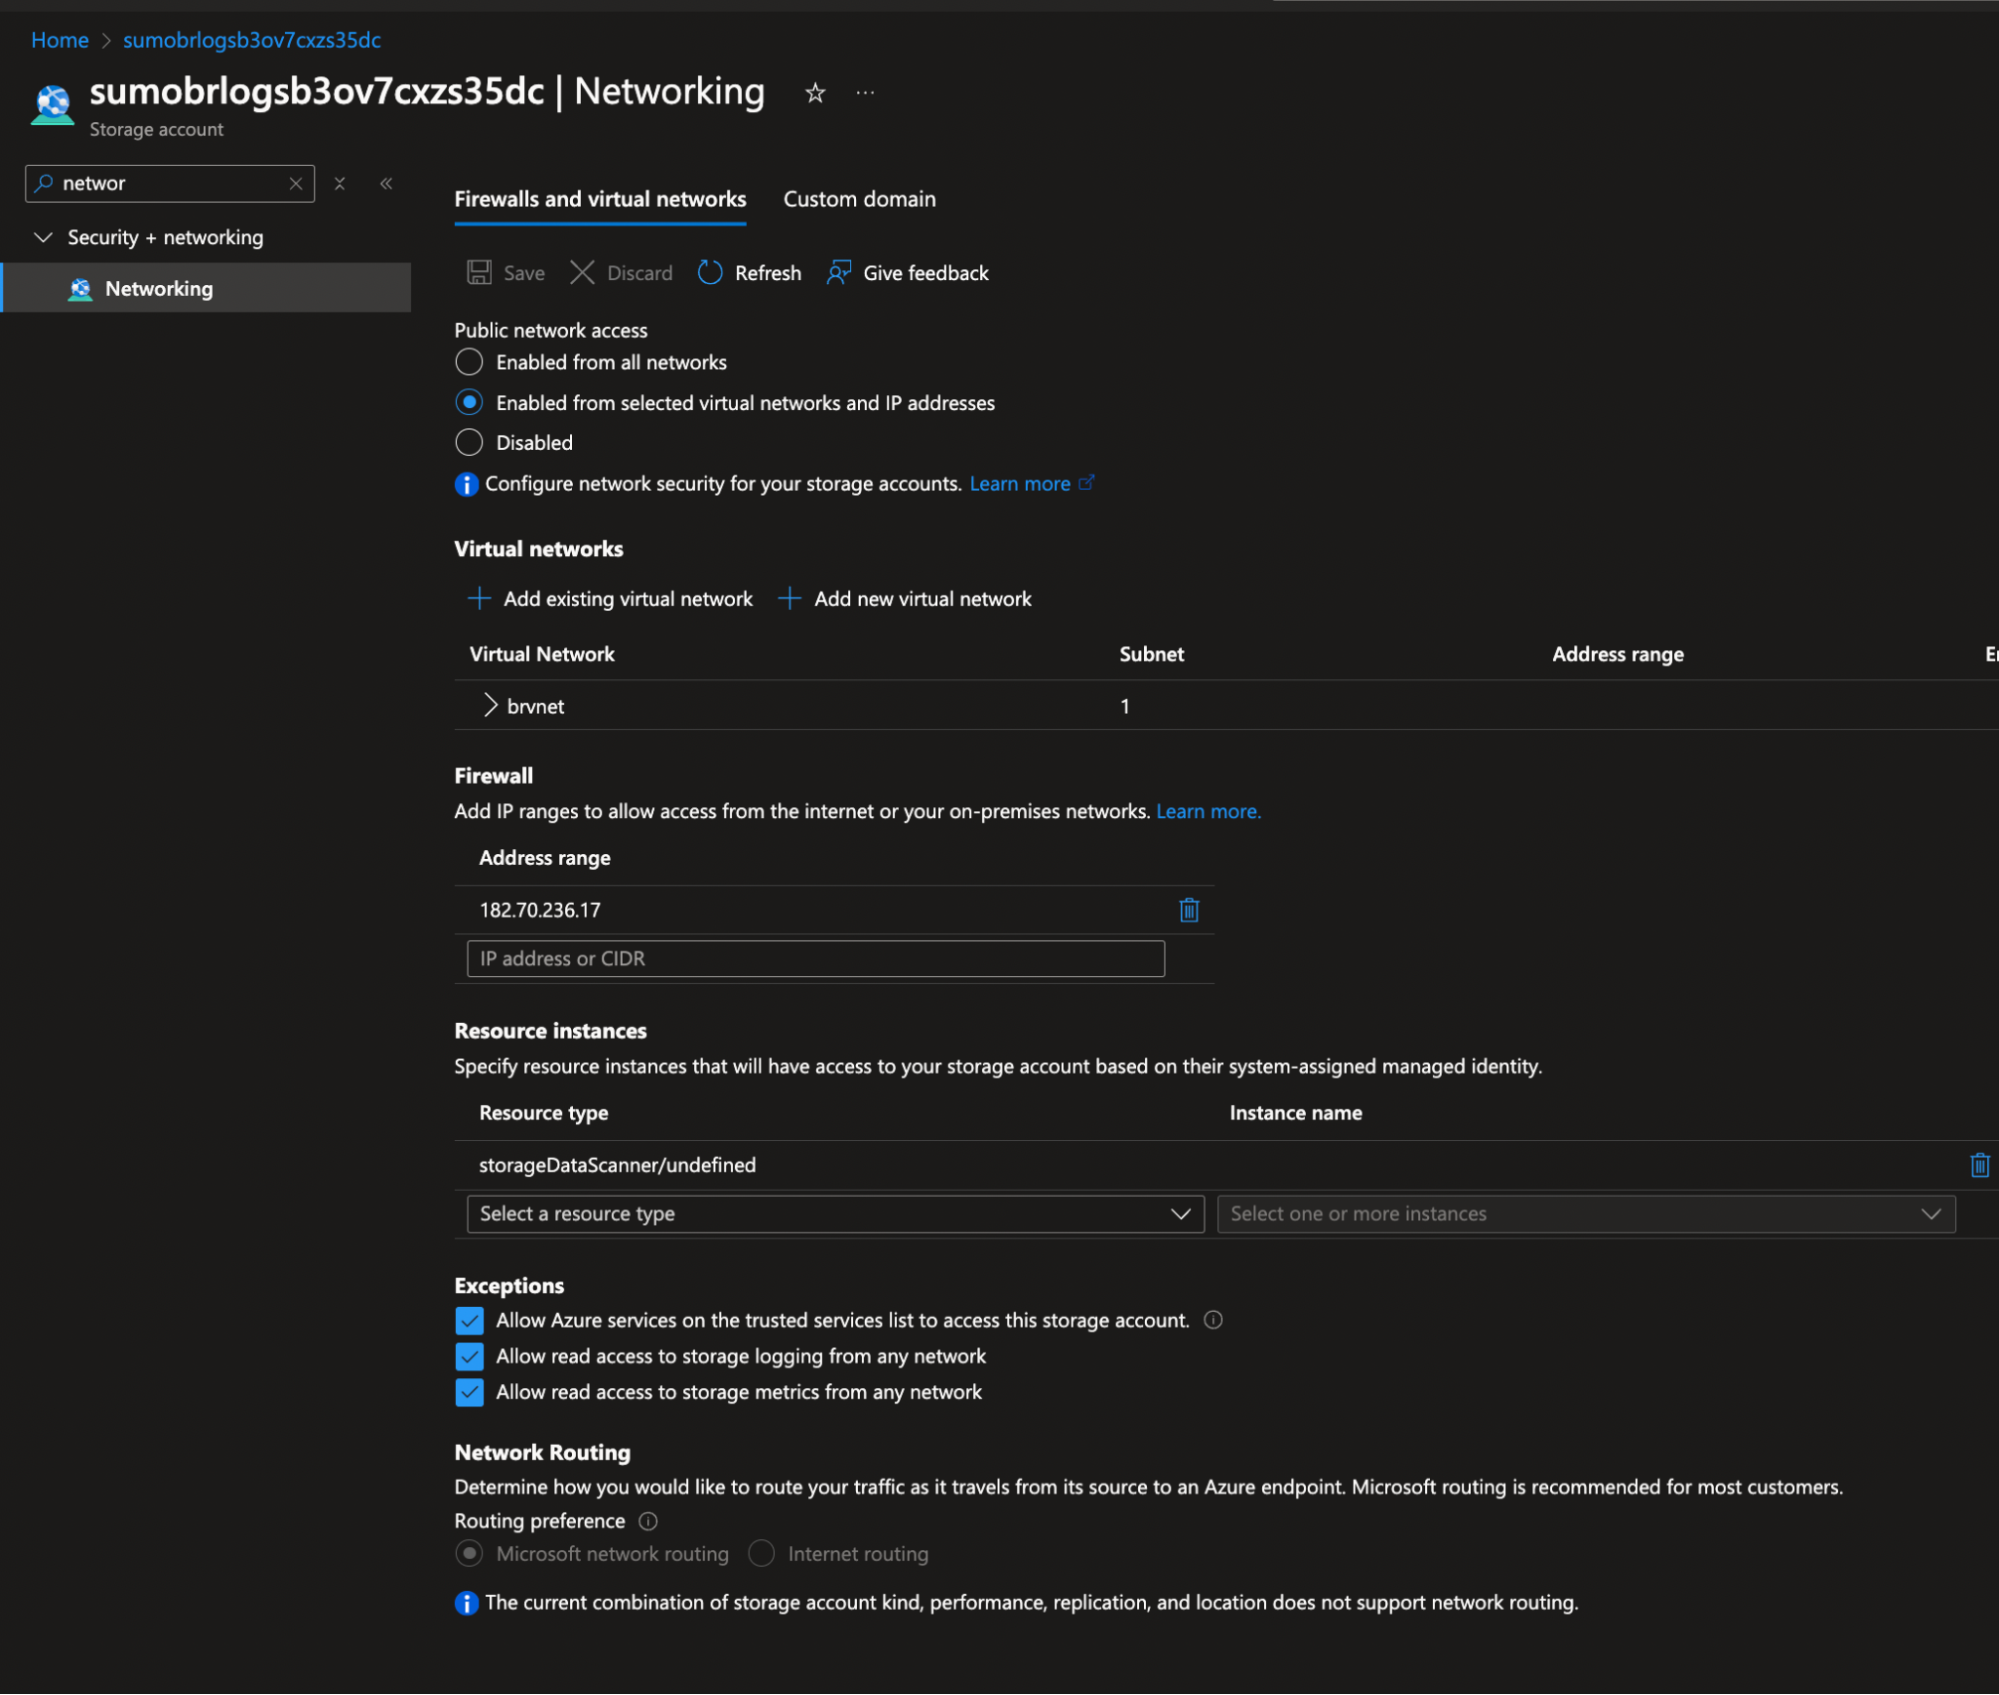
- Follow the steps below to restrict access to the Storage Account storing NSG flow logs, so that only certain networks can access it:
- Navigate to Storage Account > Networking > Firewalls and virtual networks.
- Choose the selected networks.
- Select the same subnet that was configured for SUMOBRTaskConsumer and SUMOBRDLQProcessor during Virtual Networ integration.
note
No IP address whitelisting is needed.
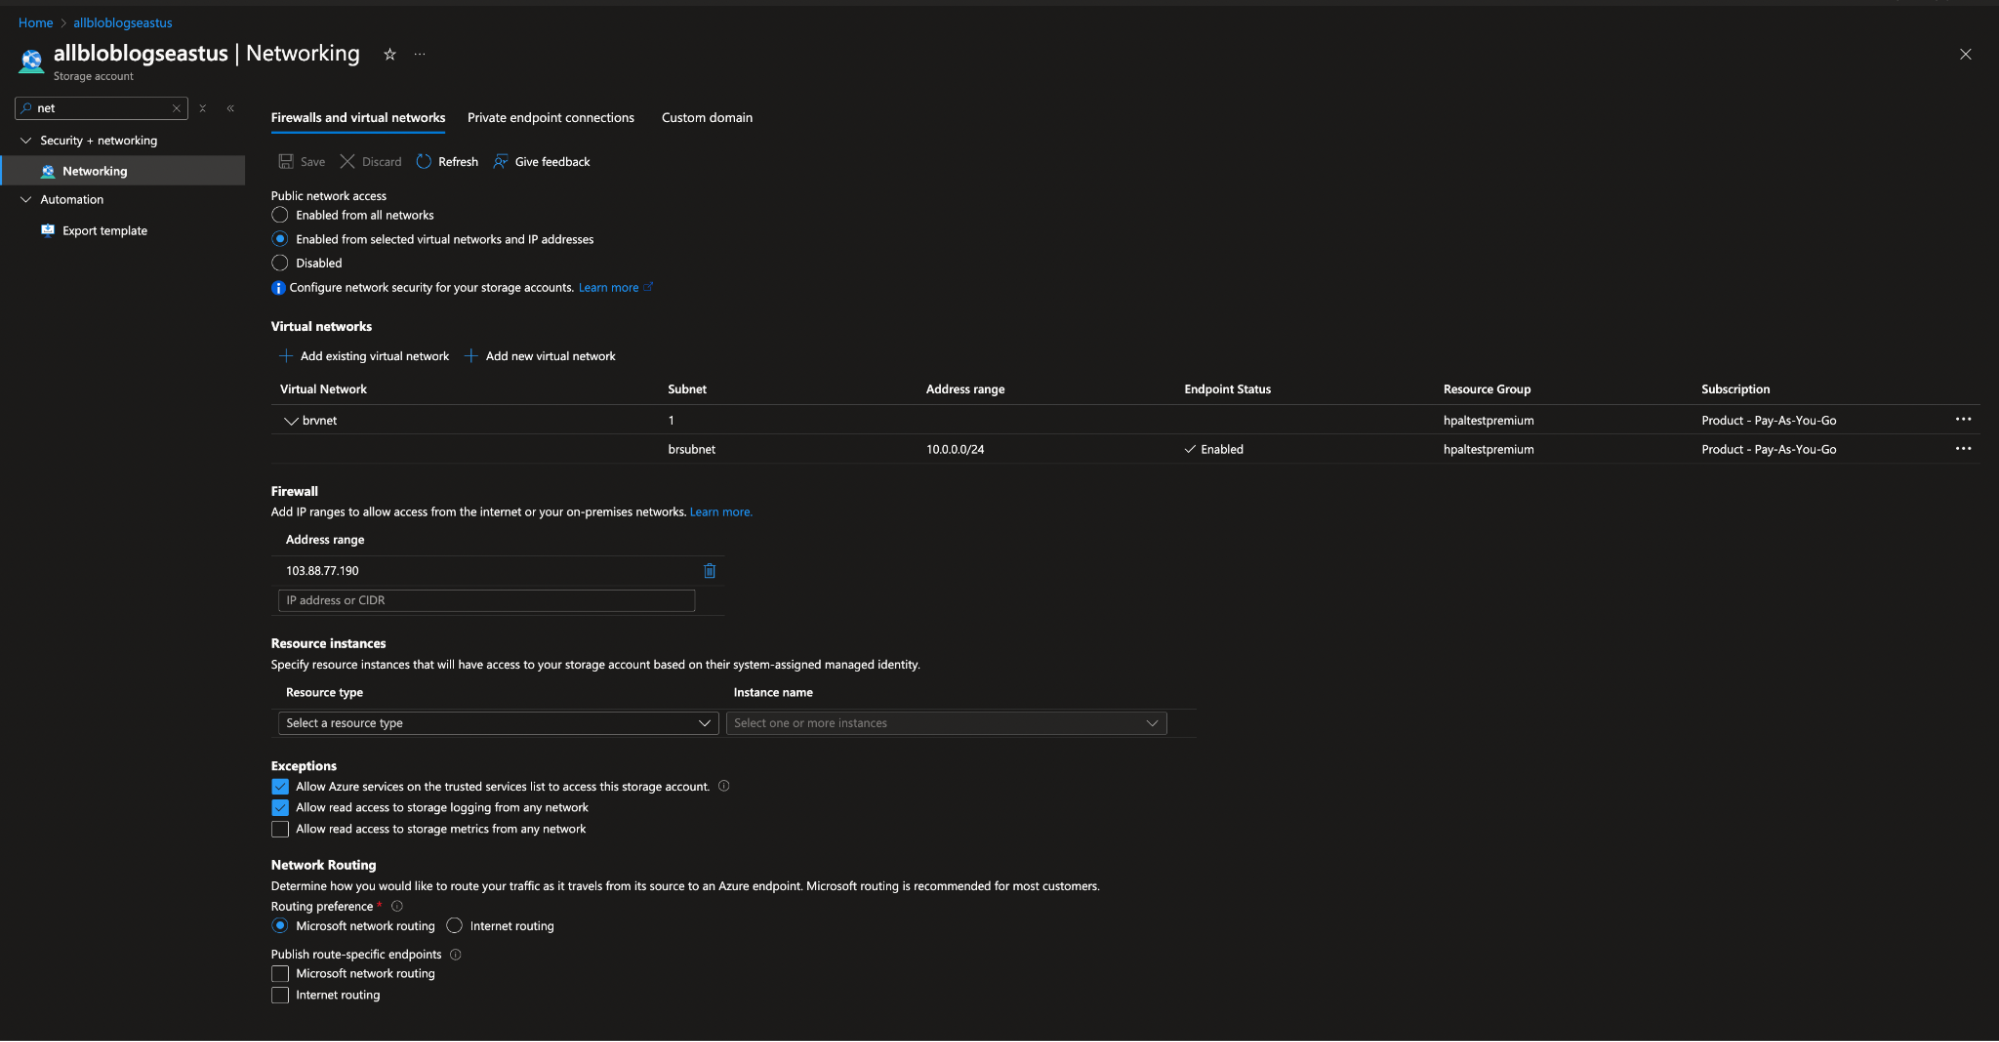
- Follow the steps below to restrict access to the ARM-created storage account, so that only certain networks can access it:
- Navigate to Storage Account > Networking.
- Choose the selected networks and allow access from your subnet.
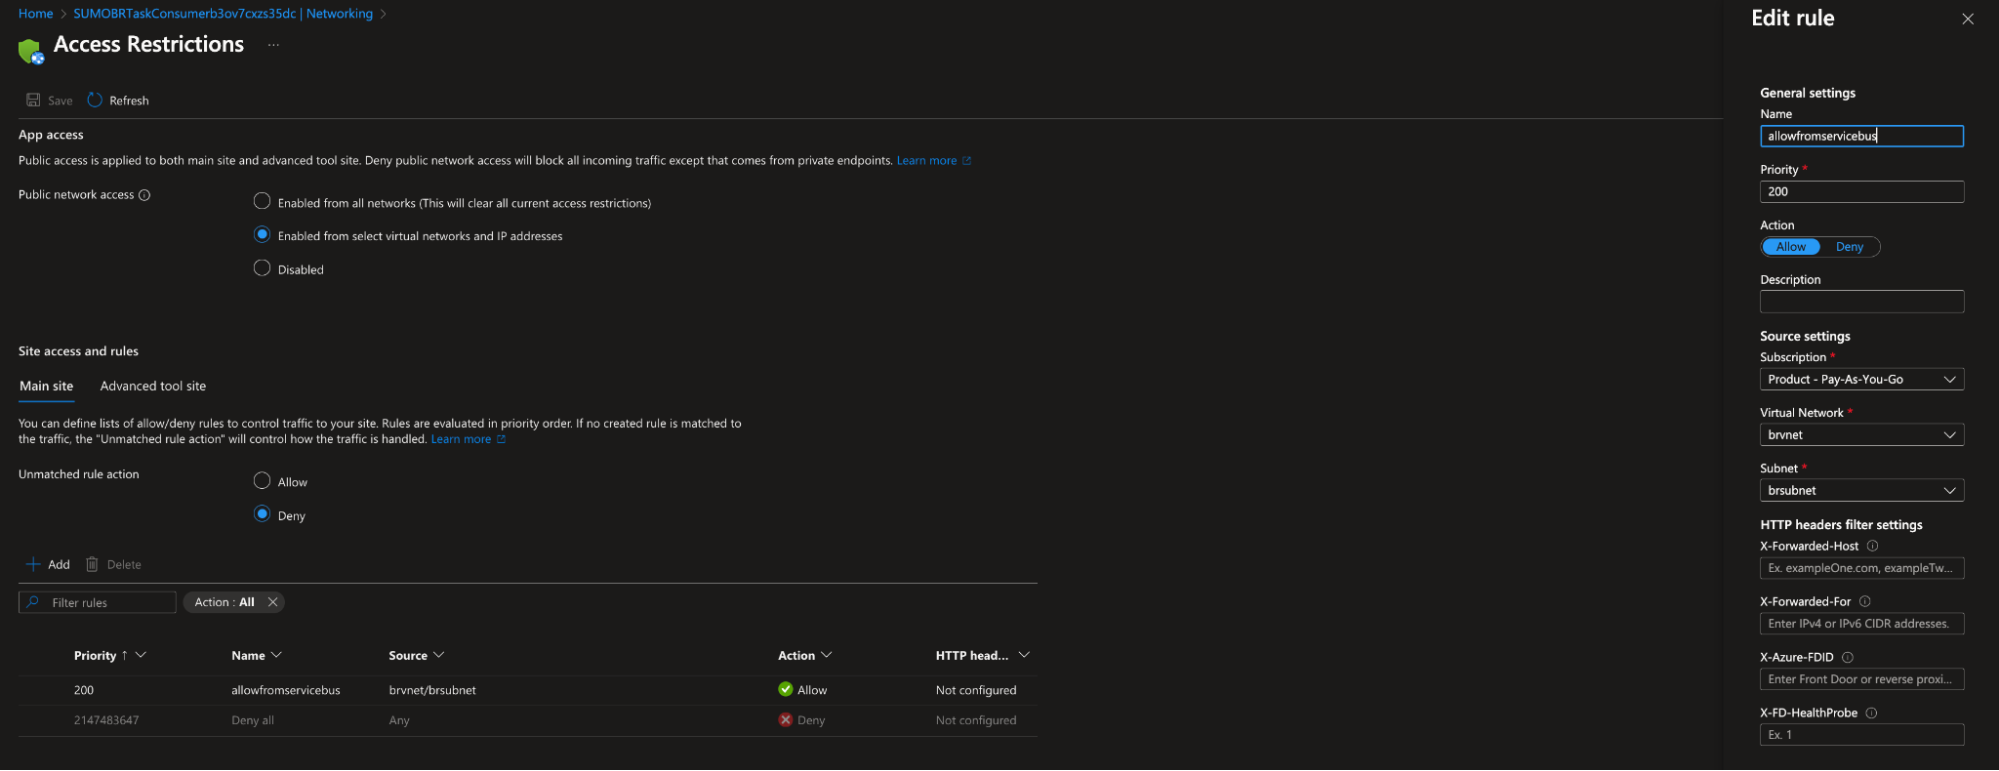
- Configure the inbound restrictions on all three Azure Functions:
- Navigate to Function App > Networking > Inbound Traffic Configuration > Access Restrictions.
- Allow only the subnet you created in Step 2.
- For each function app, enable the function access to the Storage Account created by the ARM template by following the steps below:
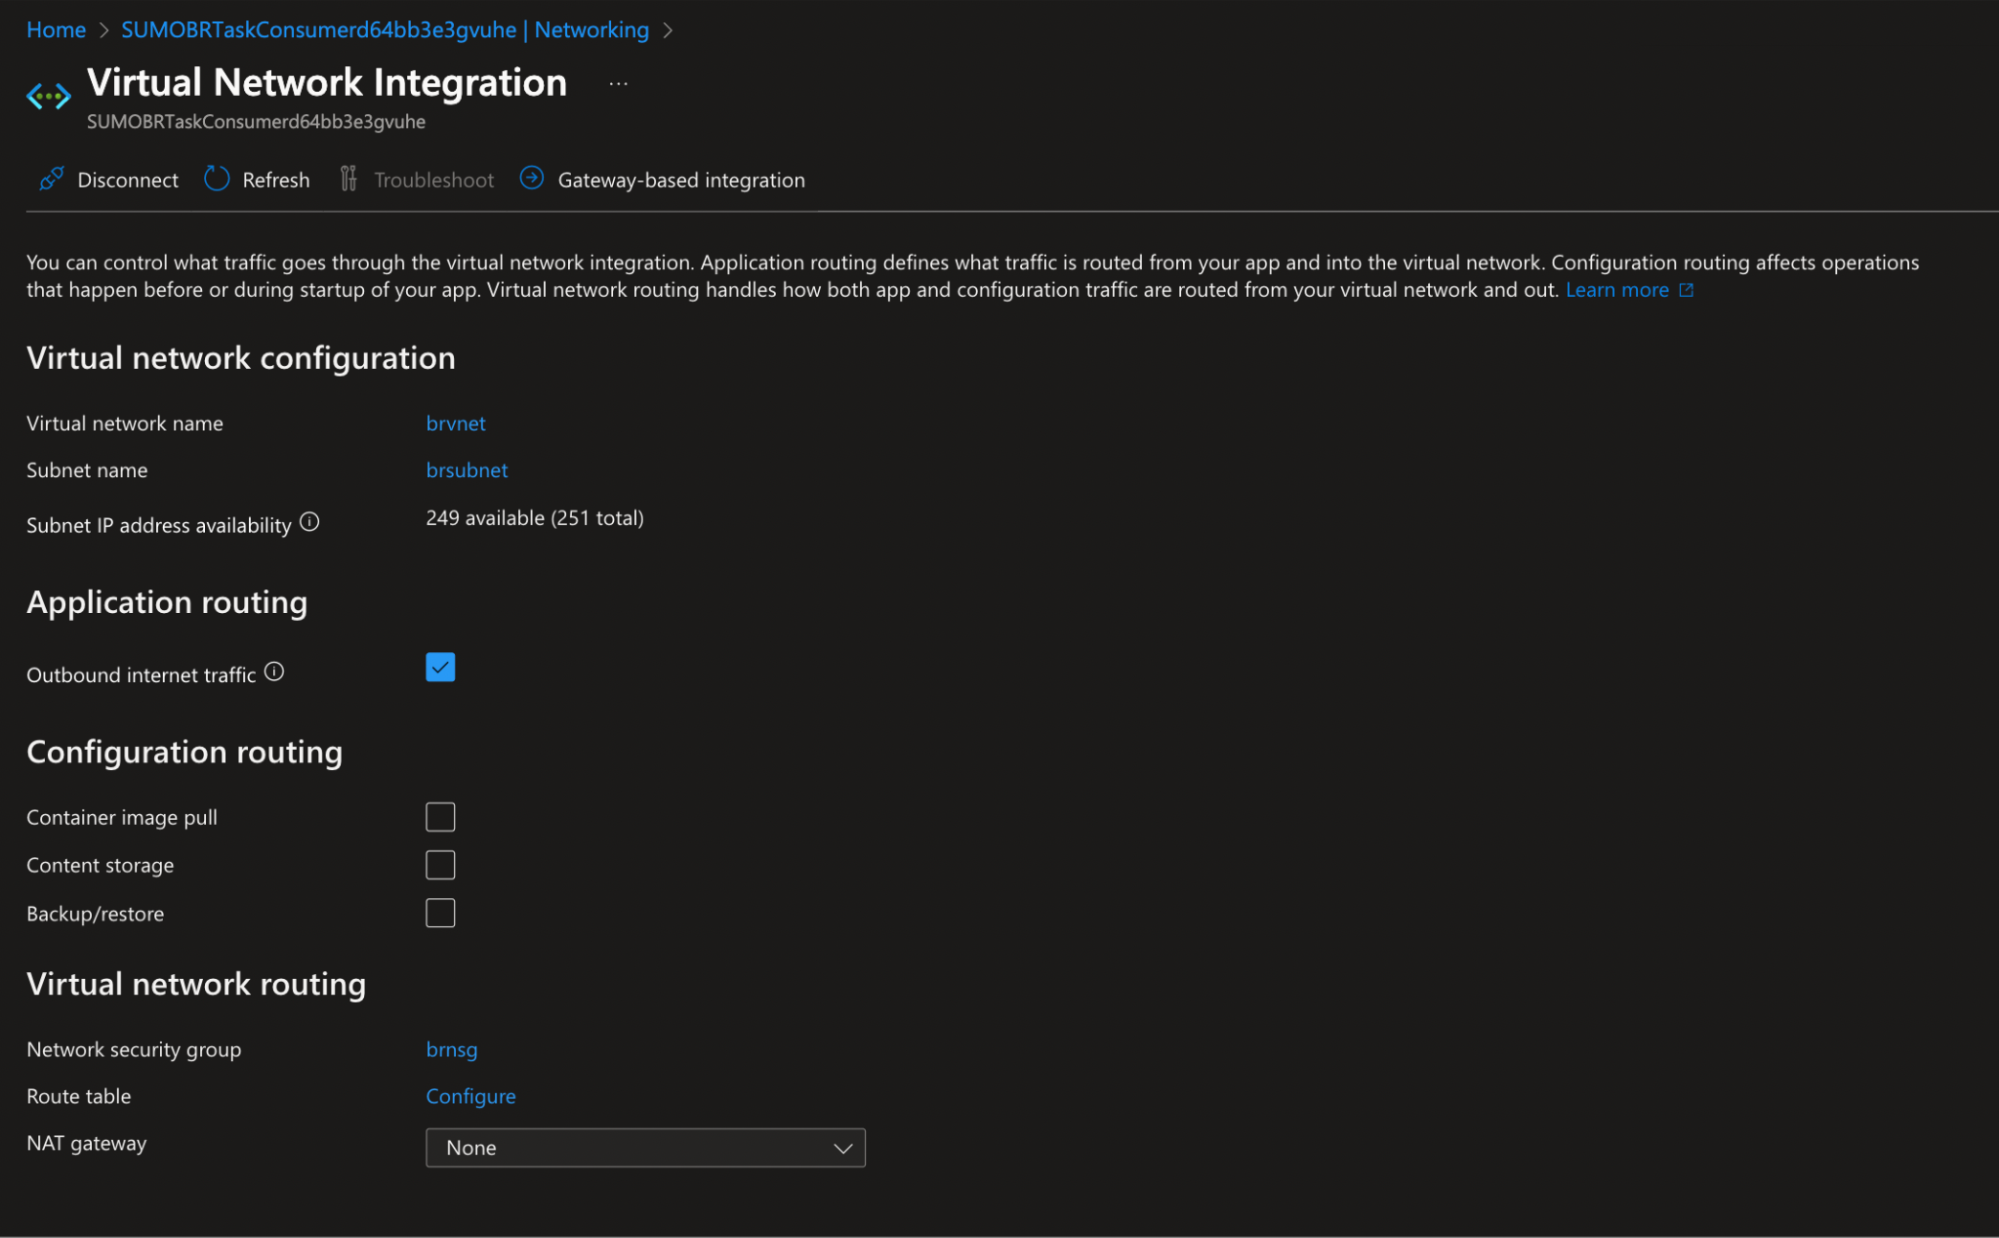
- Navigate to Function App > Networking > VNet Integration > Configuration Routing.
- Select Content storage.
- Select Outbound internet traffic under Application routing.
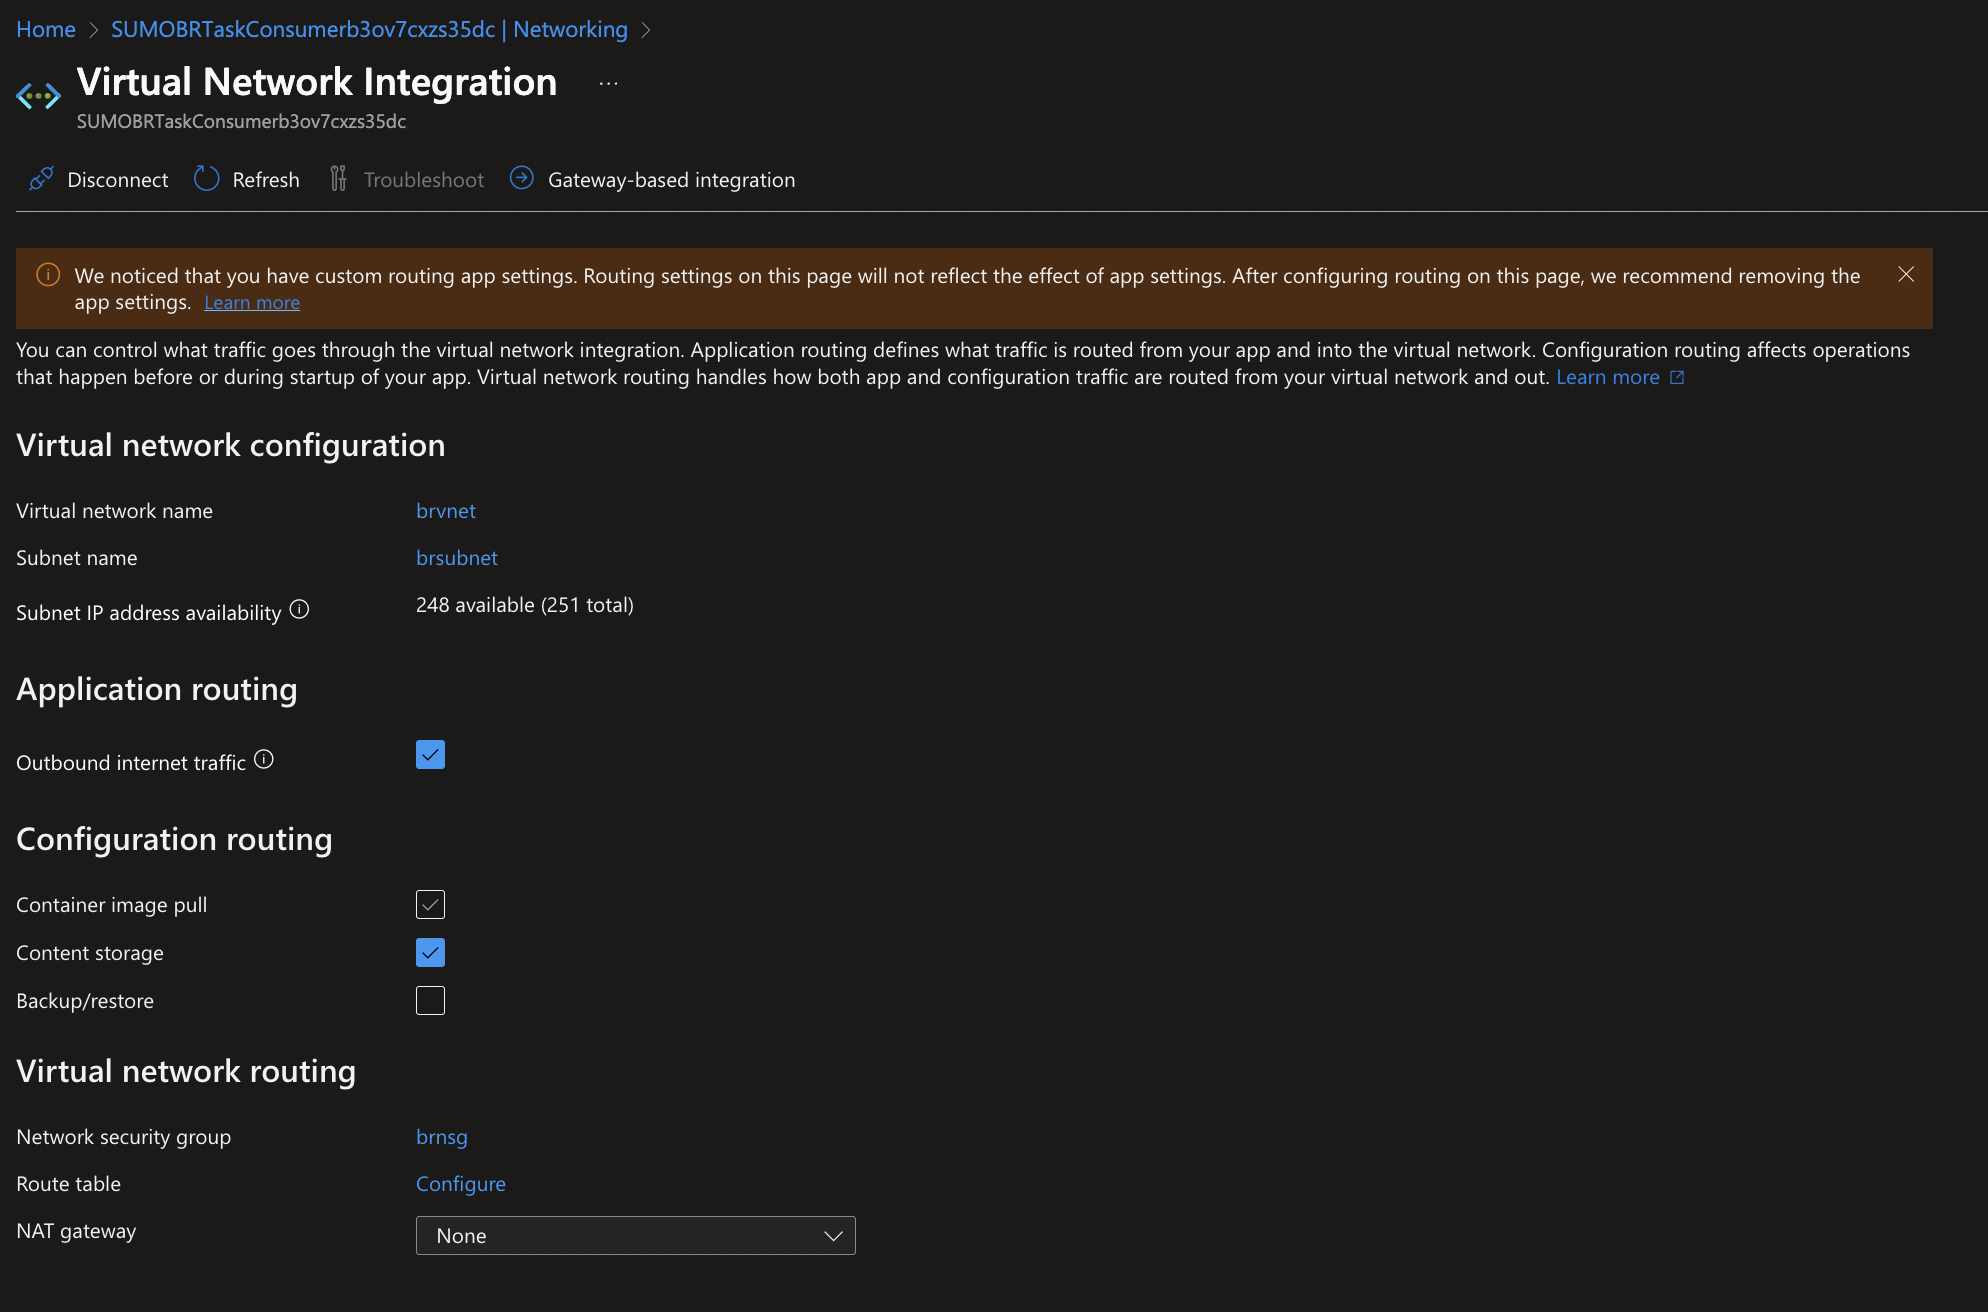
- Set
WEBSITE_CONTENTOVERVNETto1in environment variables for each function.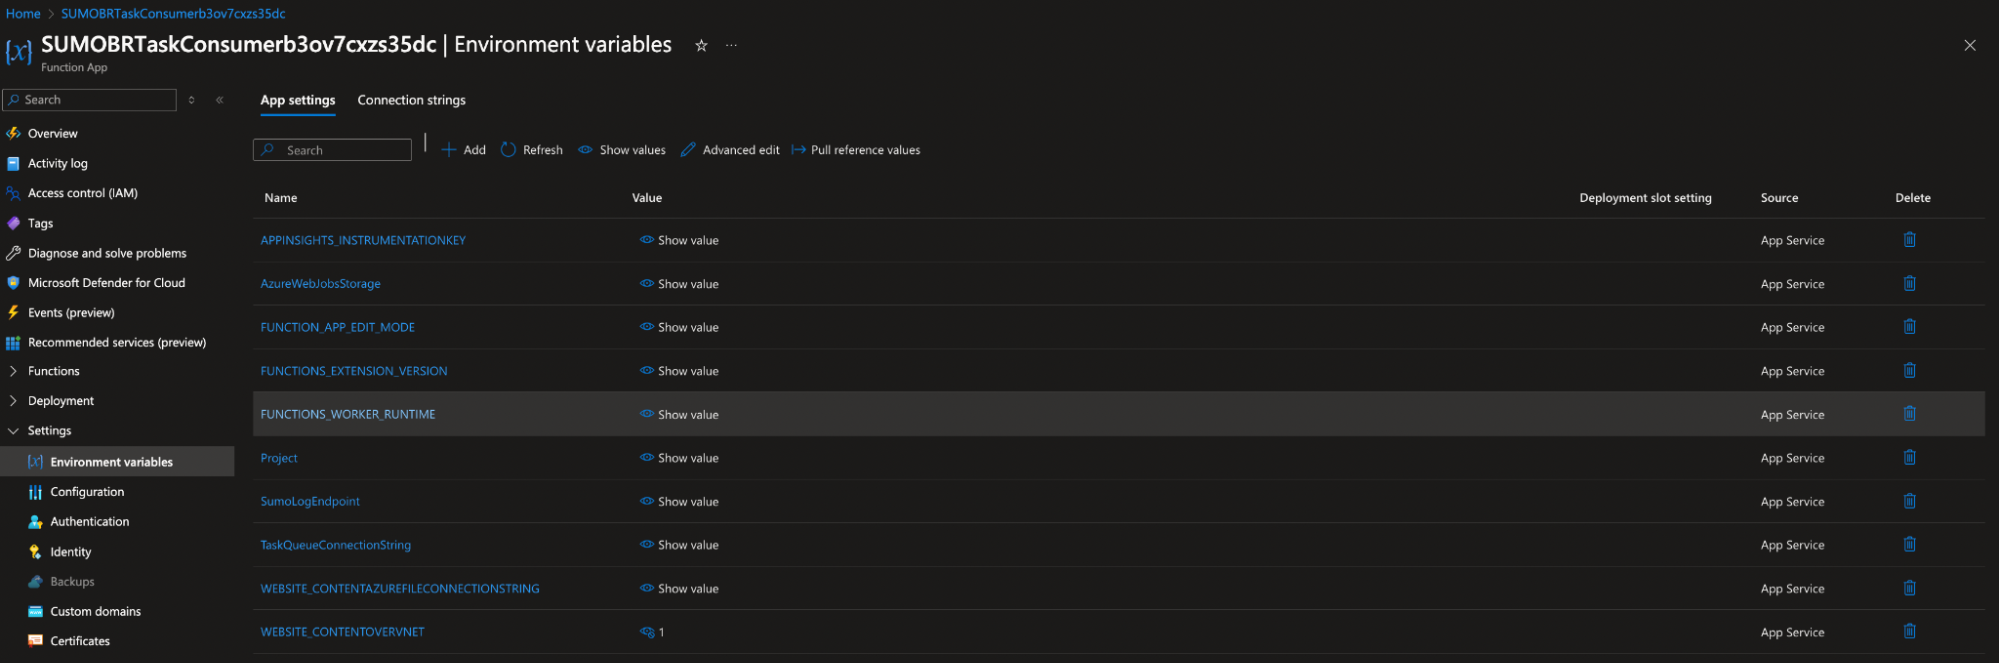
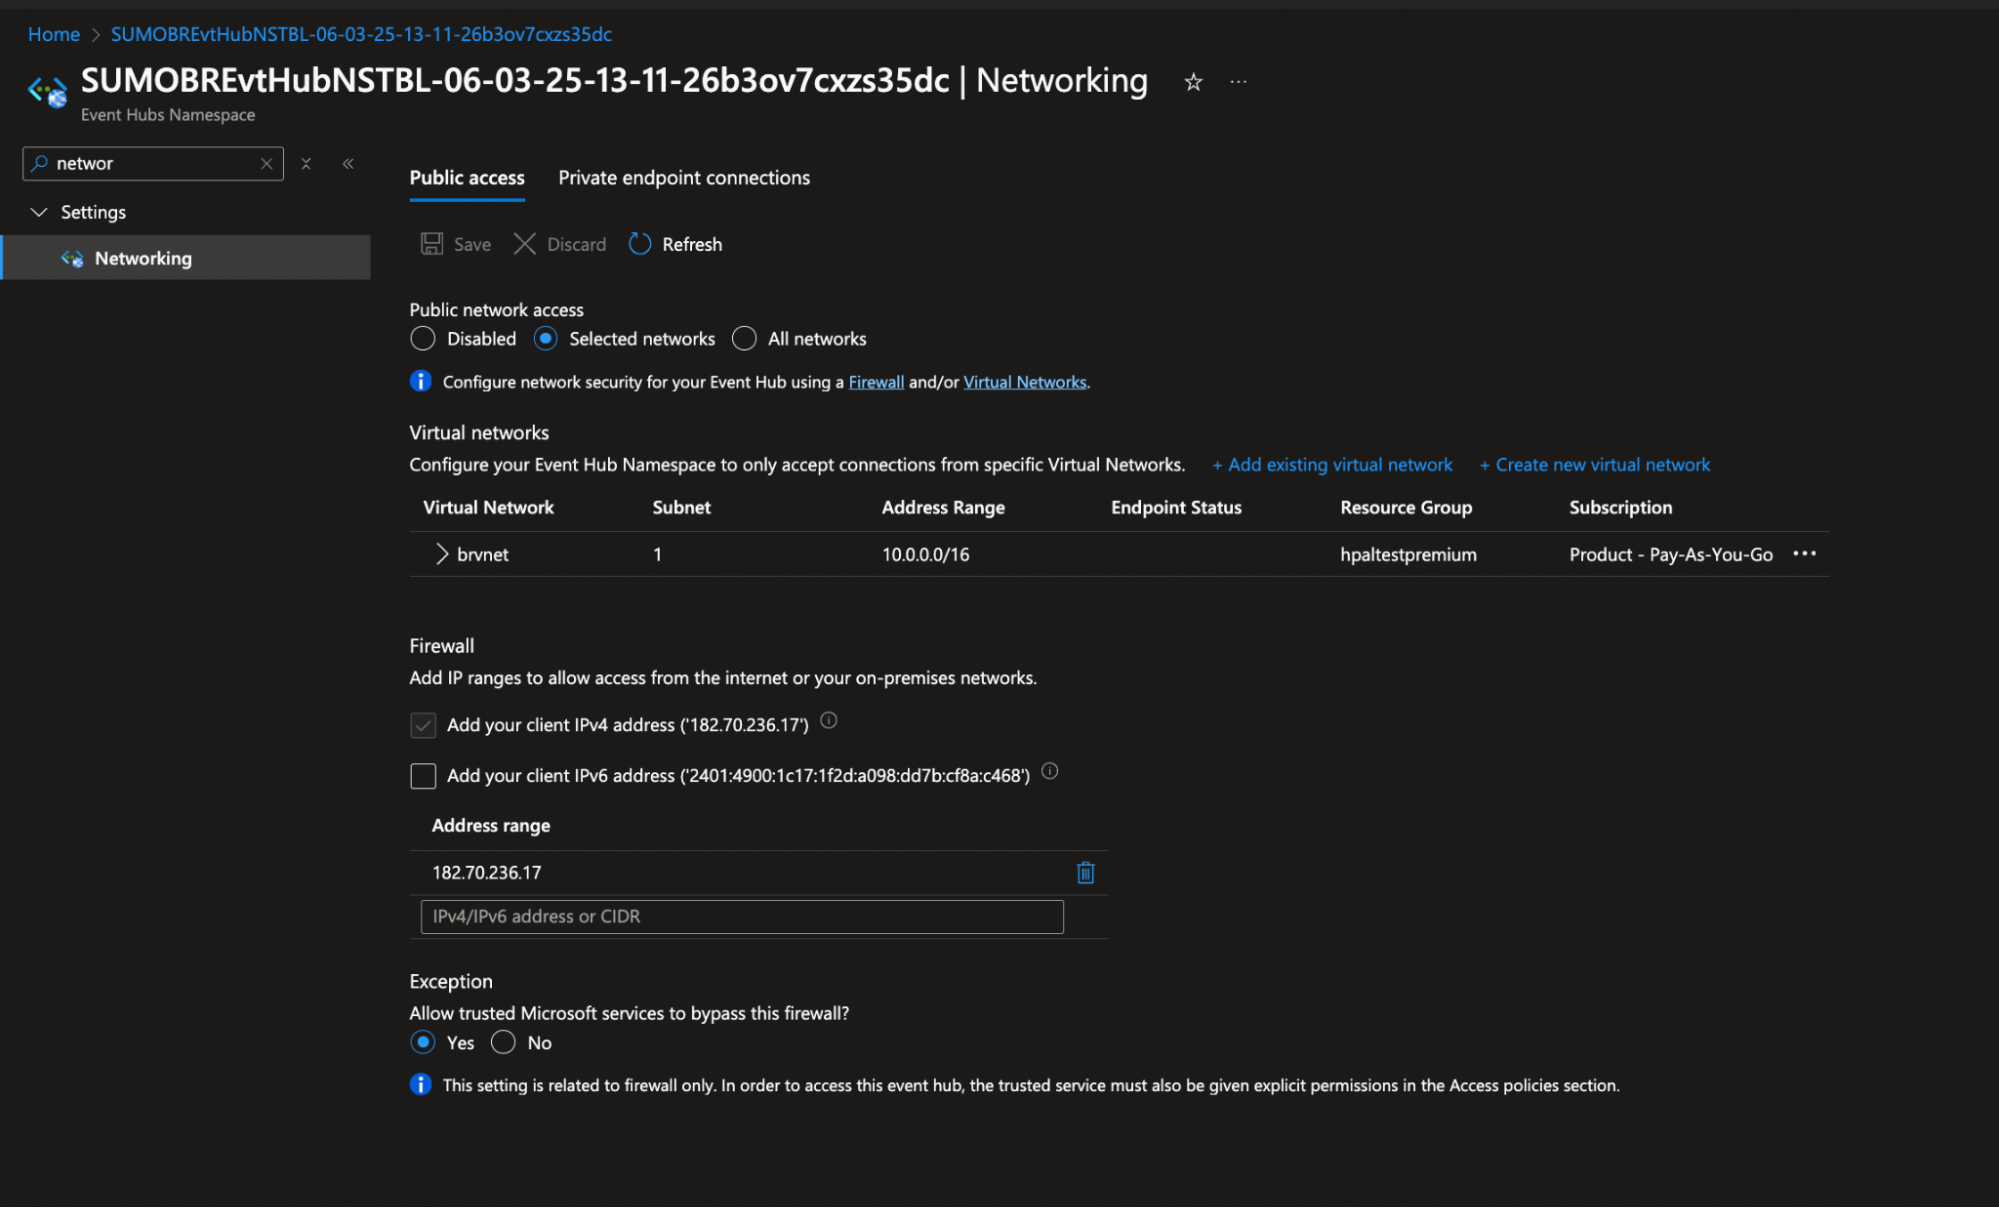
- Restrict access to Service Bus and Event Hub by following the steps below, so that only certain networks can access them:
- Navigate to Service > Networking.
- Set access to Selected networks, and select the previously created subnet in step 1.
- Set Allow trusted Microsoft services to bypass this firewall to Yes.
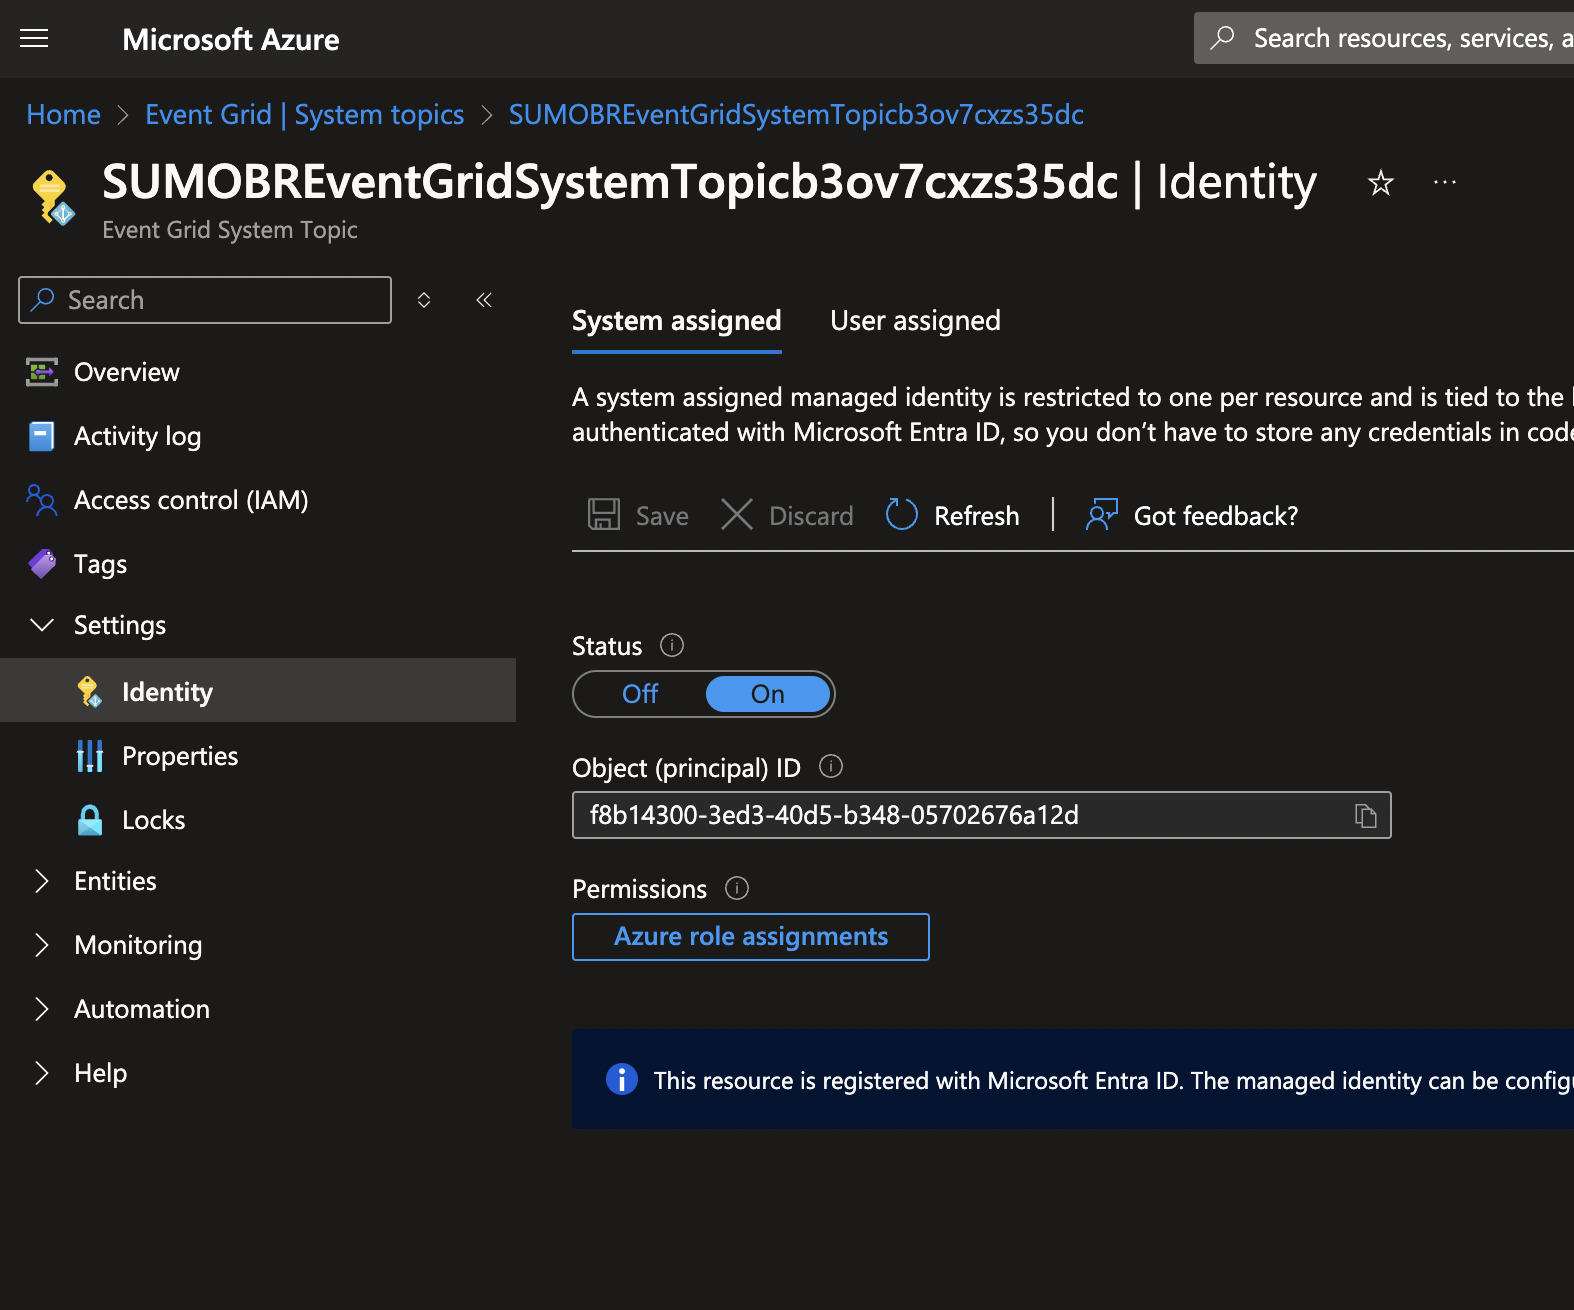
- Secure the Event Grid with managed identity to allow Event Grid to publish to Event Hub:
- Enable System assigned identity on the Event Grid Topic.
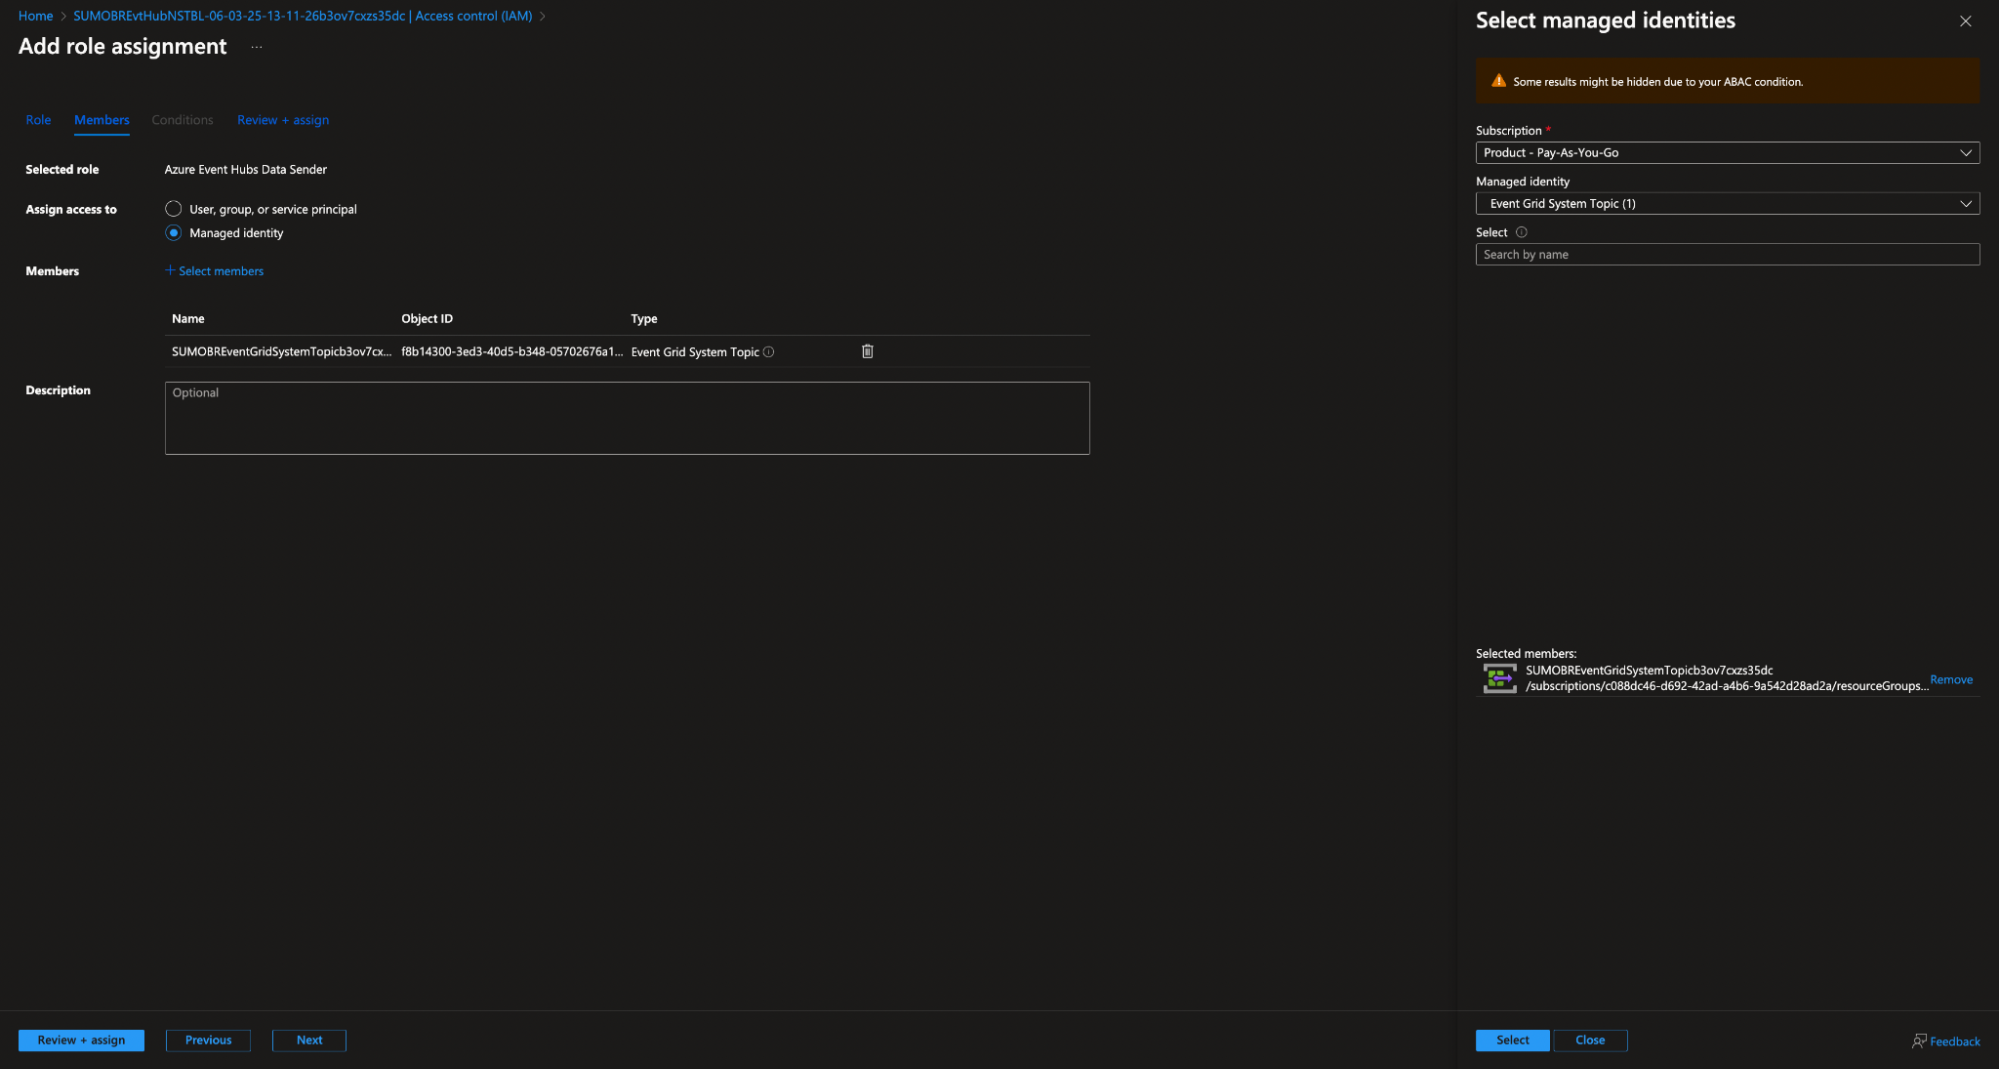
- Assign the identity to the Azure Event Hubs Data Sender role on the Event Hub namespace under Access Control (IAM) > Role Assignments.
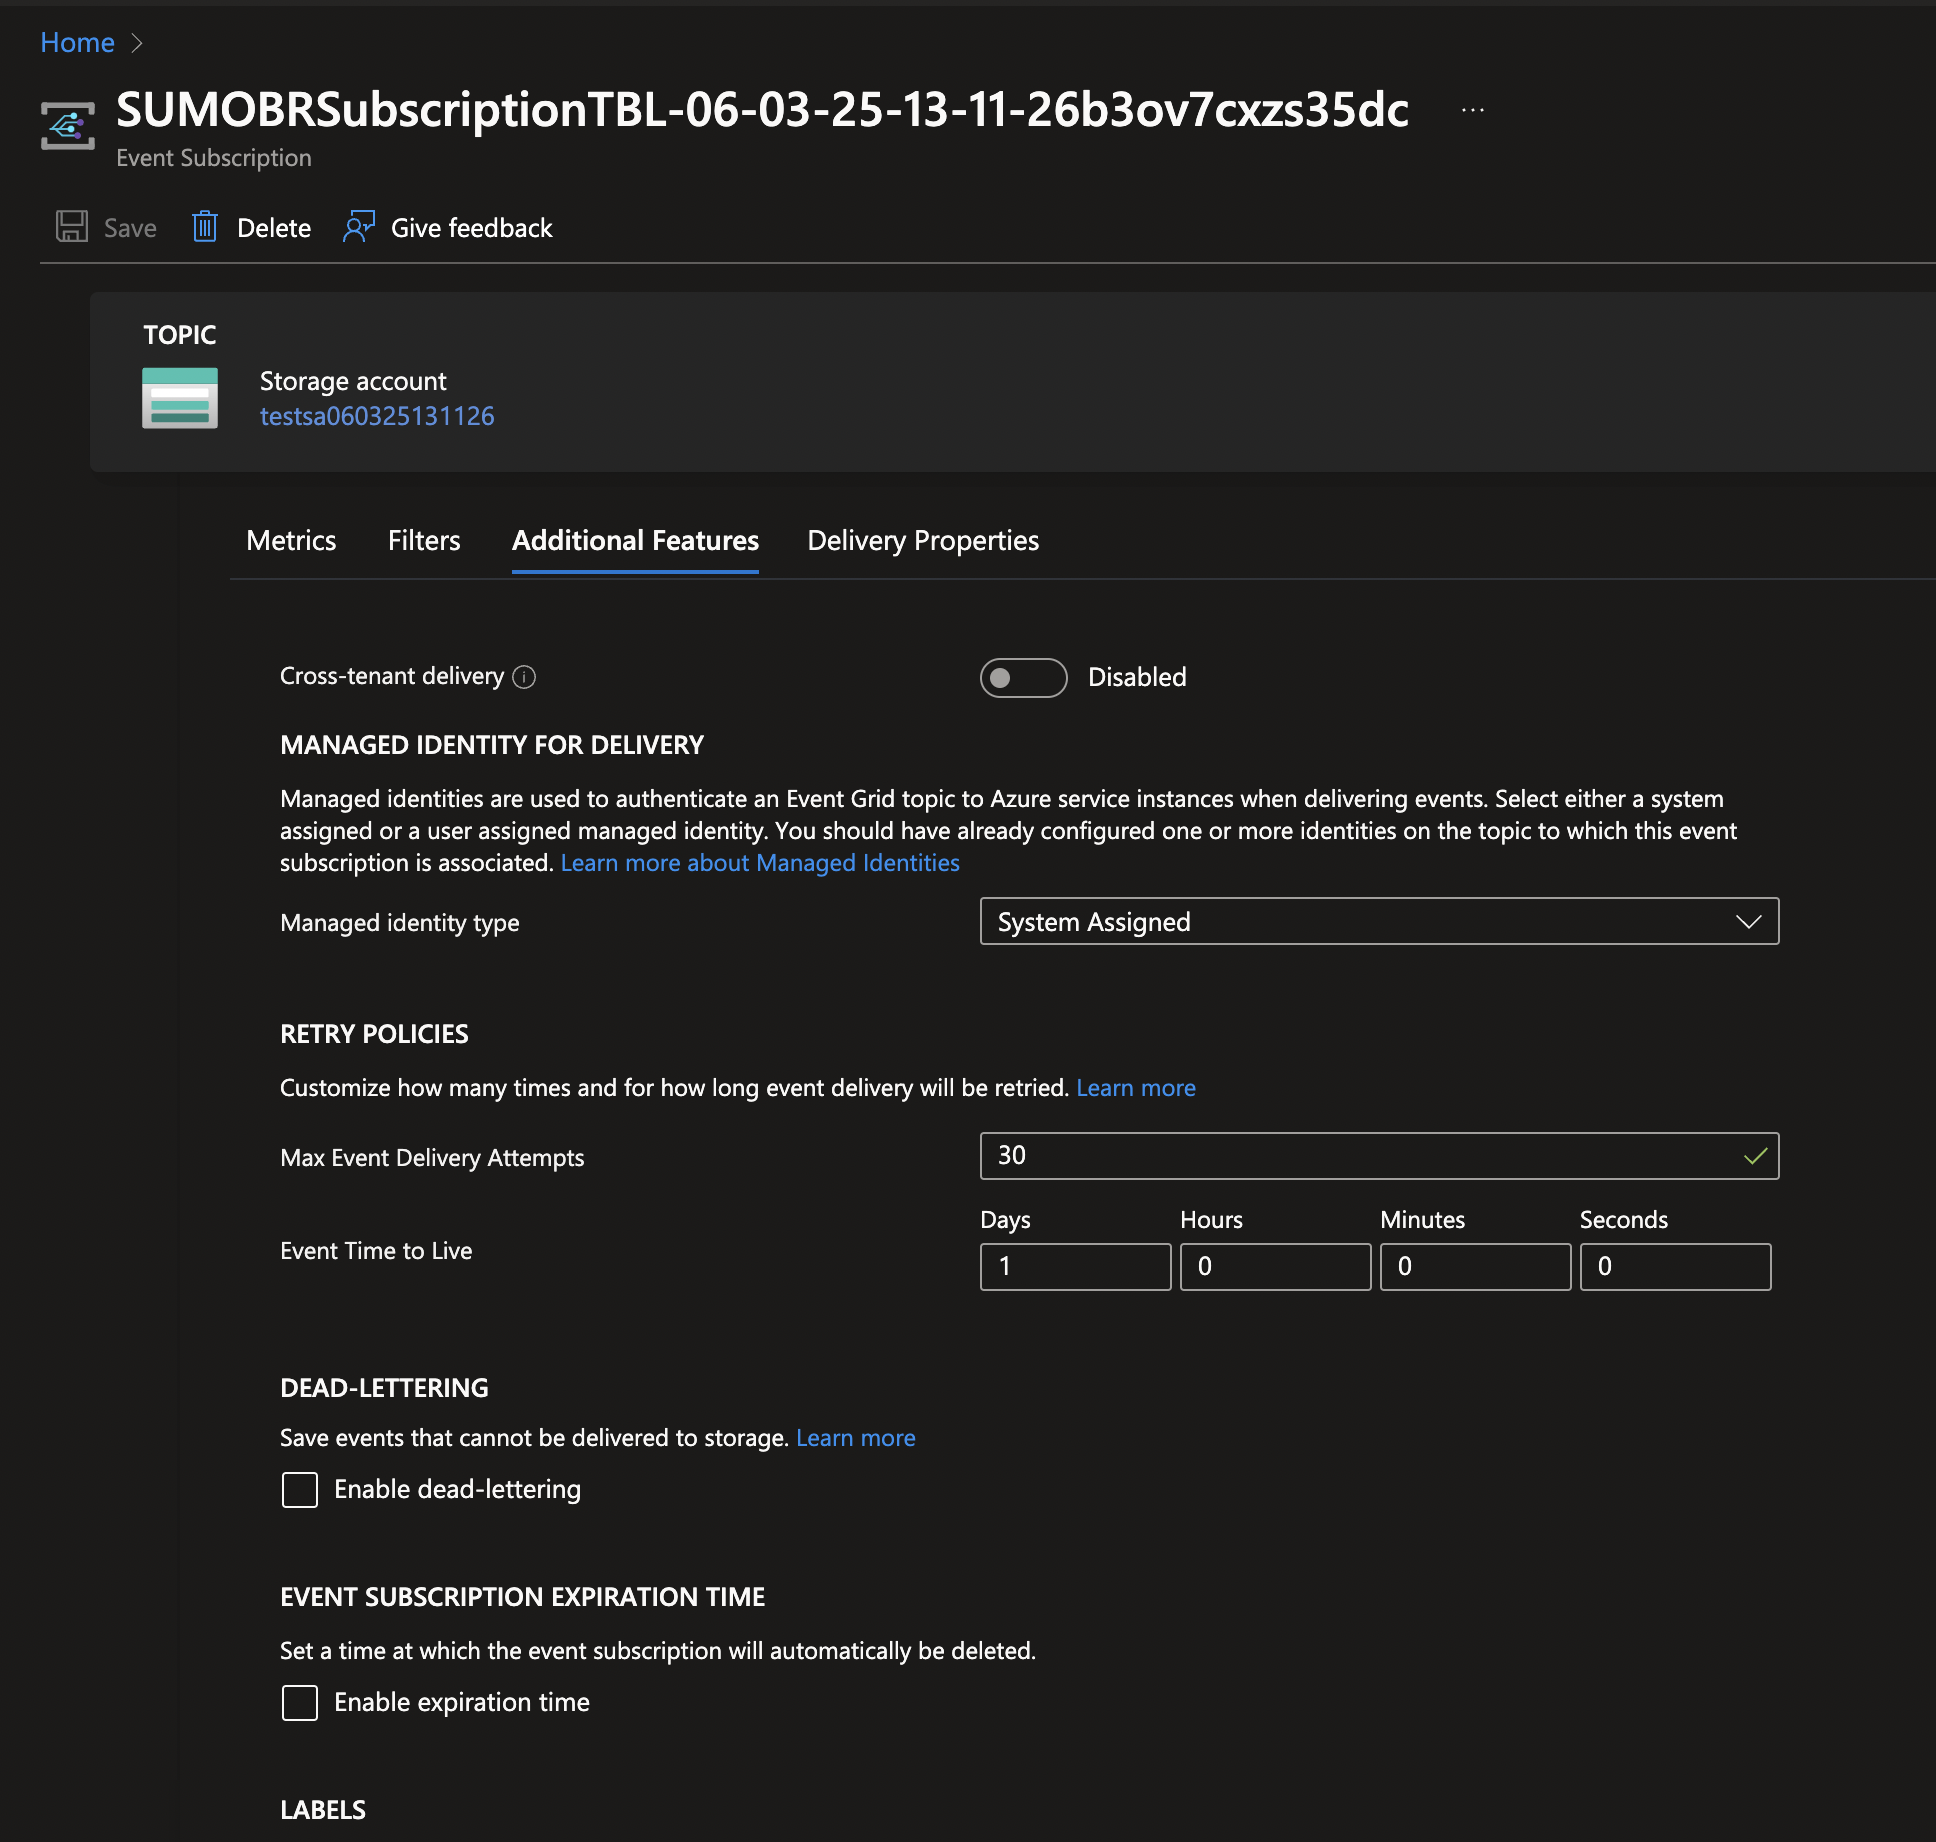
- Configure the Event Grid subscription that uses an Event Hub as an endpoint and choose System Assigned identity for authentication.
- Enable System assigned identity on the Event Grid Topic.
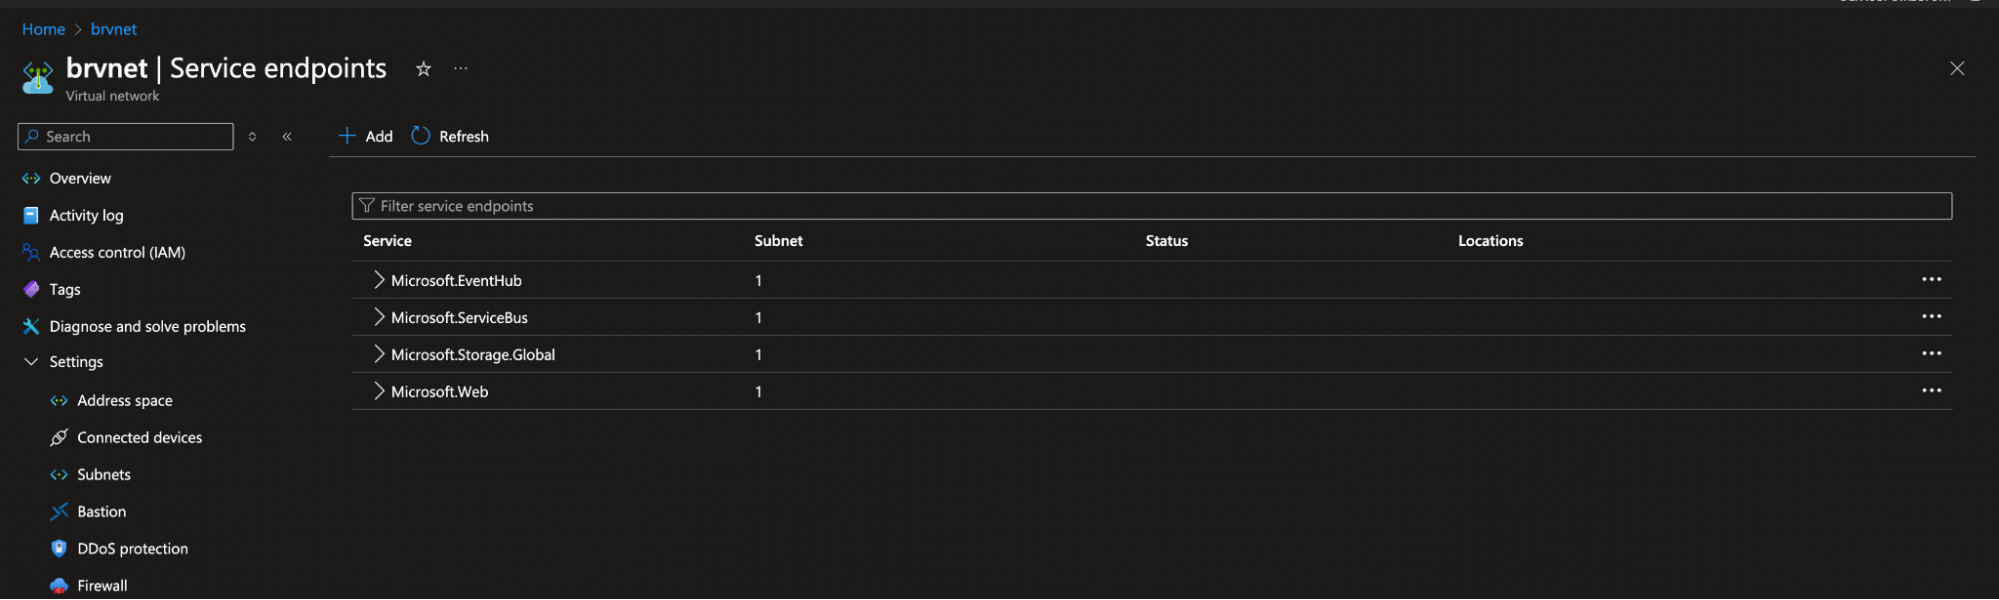
- Ensure your Virtual Network has service endpoints enabled for:
- Storage
- Service Bus
- Event Hub
- To validate the function execution, navigate to Function App > BlobTaskConsumer > Monitoring > Invocations.
note
You should see the invocation logs if everything is correctly configured.

- Replace the standard Service Bus with a premium tier.
Follow the steps below to create a new Service Bus on the premium tier:note
The Service Bus provisioned via the current ARM template is configured with the standard tier, which does not support Virtual Network integration. To enable Virtual Network integration, it is recommended to create a new Service Bus with the premium tier.
- Create a new premium Service Bus namespace:
- Use the same resource group and location as the old Service Bus.
- Enable partitioning.
- Initially allow public access (can restrict later).
- Create a new queue named
blobrangetaskqueuewith the following parameters:- Maximum queue size: 40 GB
- Maximum message size: 1024 KB
- Maximum delivery count: 3
- Time to live: 14 days
- Message lock duration: 5 minutes
- Enable the dead letter queue.
- Update the connection strings in all three functions (Producer, Consumer, DLQ):
Under Shared access policies, select the RootManageSharedAccessKey and copy the primary key from the newly created Service Bus on the premium tier as the value of
shared_access_key_value:
Endpoint=sb://<servicebus_namespace_name>.servicebus.windows.net/;SharedAccessKeyName=RootManageSharedAccessKey;SharedAccessKey=<shared_access_key_value> - Restrict Public Access:
- Navigate to Service Bus > Networking.
- Set Public network access to Selected networks.
- Choose the subnet created earlier.
- Create a new premium Service Bus namespace:
References
- https://learn.microsoft.com/en-us/azure/event-hubs/event-hubs-service-endpoints
- https://learn.microsoft.com/en-us/azure/azure-functions/configure-networking-how-to?tabs=portal#3-enable-application-and-configuration-routing
- https://learn.microsoft.com/en-us/azure/app-service/configure-vnet-integration-routing#content-share
- https://learn.microsoft.com/en-us/azure/azure-functions/functions-app-settings#website_contentovervnet