Configuring Your AWS Source with CloudFormation
You can use AWS CloudFormation to leverage AWS products without creating or configuring any AWS infrastructure. With AWS CloudFormation, you declare all of your resources and dependencies in a template file. The template defines a collection of resources as a single unit called a stack. AWS CloudFormation creates and deletes all member resources of the stack together and manages all dependencies between the resources for you.
For more information about AWS CloudFormation, see the AWS CloudFormation Product Page.
Set up an SNS Subscription Endpoint
You can use either the AWS Command Line Interface (CLI) or create a stack on the AWS CloudFormation console to set up the SNS subscription.
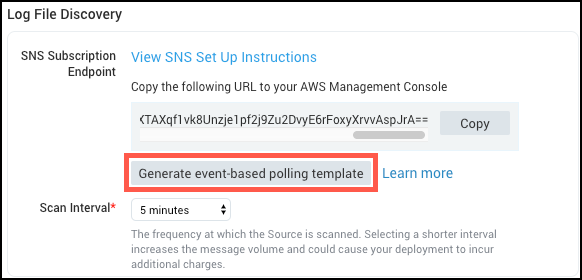
Both methods require a YAML file with the template. You can create a file with the provided YAML template or download the template from the Sumo interface. When creating the Source click Create URL and a Generate event-based polling template button becomes available.
Create a Stack on the AWS CloudFormation console
-
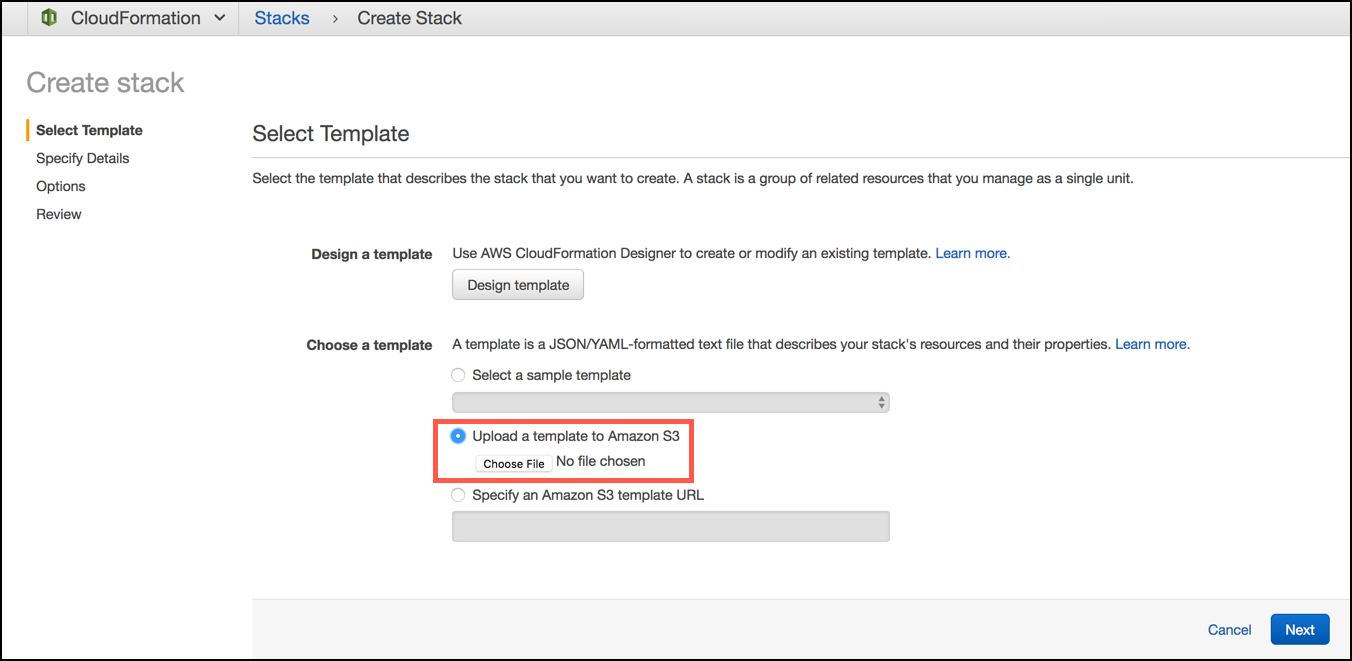
Visit Services > Cloudformation > Create Stack > Upload a template to Amazon S3 and upload the file with the CloudFormation template and click Next. See Selecting a Stack Template for details.
 note
noteMake sure that the AWS region is the same as the S3 bucket when uploading the template.
-
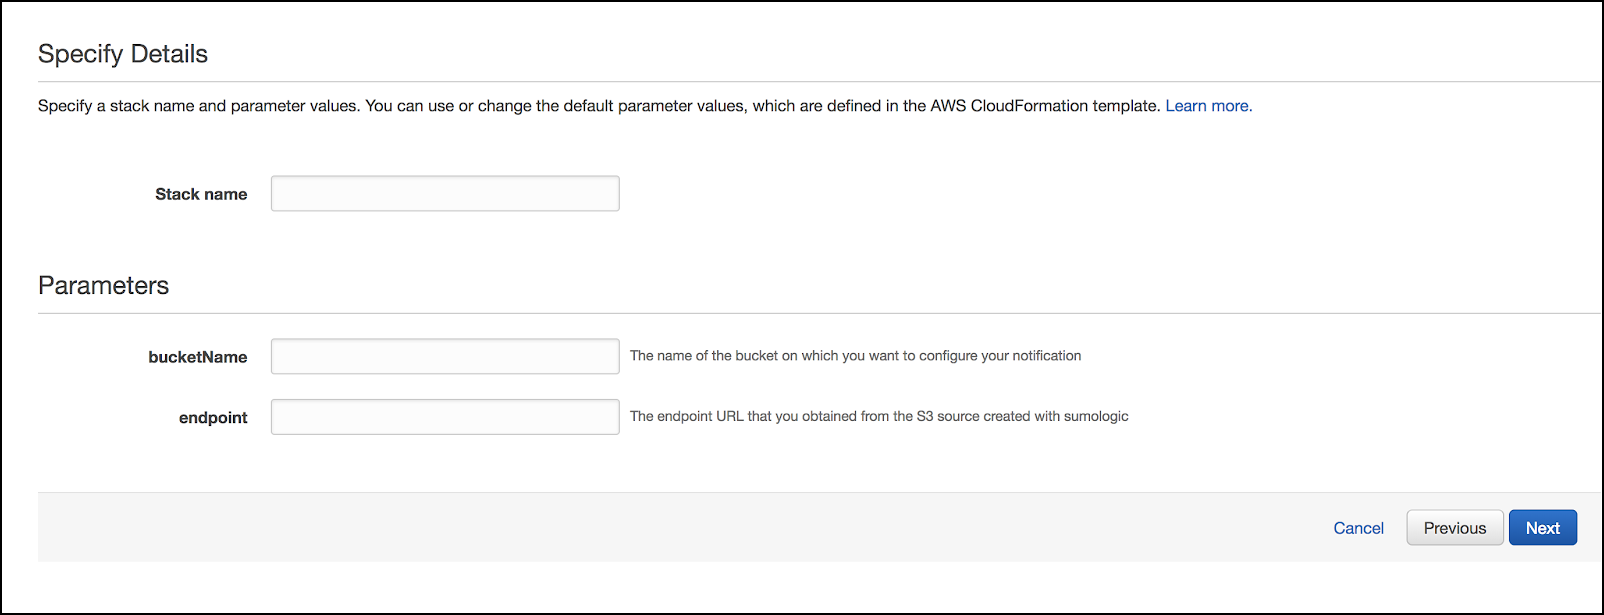
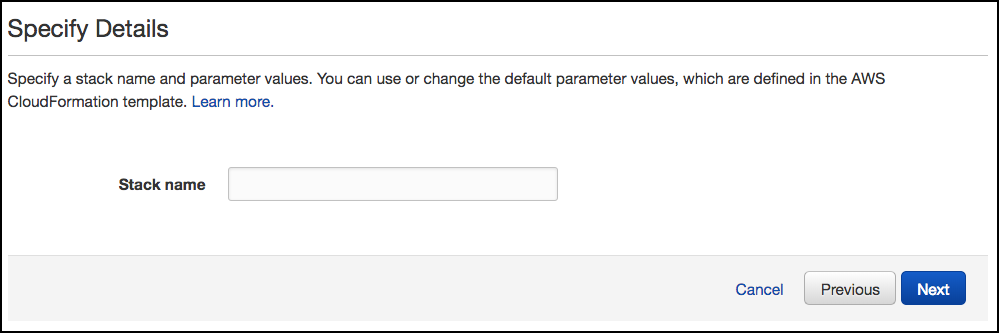
Specify Details. Provide an appropriate Stack Name, the S3 bucket-name and endpoint URL you obtained when creating the Source in Sumo and click Next. See Specifying Stack Name and Parameters for details.
noteIf you downloaded and used the template from the Sumo interface AWS will not prompt you for Parameters.
-
Options can remain the default, click Next again. Review for mistakes then click Create.
-
Go to Services > S3 and select the bucket to which you want to attach the notifications. Navigate to Properties > Events > Add Notification. Enter a Name for the event notification. In the Events section select, All object create events. In the Send to section (notification destination) select SNS Topic. An SNS section becomes available, select the name of the topic that AWS created in step 5 from the dropdown. The name format is
SumoSNSTopic-<AWS::StackName>. Click Save.
Use AWS Command Line Interface (CLI)
-
Execute the following AWS CLI command to create a stack, see AWS Command Line Reference for create-stack for details. Replace the ParameterValue placeholders for each parameter,
bucketNameandsumoLogicSourceUrl:$ aws cloudformation create-stack --stack-name sumo-sns --template-body file://./sumo-sns-cf.txt --parameter ParameterKey="bucketName",ParameterValue="bucketName" ParameterKey="sumoLogicSourceUrl",ParameterValue="sumoLogicSourceUrl" -
The topic is created by AWS and named based on the following format:
SumoSNSTopic-<AWS::StackName>
YAML Template to Create Topic and SNS Subscription
AWSTemplateFormatVersion: "2010-09-09"
Description: "A template to create a topic and a subscription with the endpoint of the Sumo Logic source"
Parameters:
 bucketName:
   Description: "The name of the bucket on which you want to configure your notification eg. myBucket"
   Type: String
 sumoLogicSourceUrl:
   Description: "The endpoint URL that you obtained from the S3 source created with Sumo Logic eg. https://sumo-endpoint-events.sumolog...r/v1/event/xyz"
   Type: String
Resources:
 sumoSNSTopic:
   Properties:
     TopicName: !Sub "SumoSNSTopic-${AWS::StackName}"
   Type: "AWS::SNS::Topic"

 sumoSNSSubcscription:
   Properties:
     TopicArn:
       Ref: sumoSNSTopic
     Endpoint:
       Ref: sumoLogicSourceUrl
     Protocol: https
     DeliveryPolicy:
       healthyRetryPolicy:
         numRetries: 40
         minDelayTarget: 10
         maxDelayTarget: 300
         numMinDelayRetries: 3
         numMaxDelayRetries: 5
         numNoDelayRetries: 0
         backoffFunction: exponential
   Type: "AWS::SNS::Subscription"

 sumoSNSpolicy:
   Properties:
     PolicyDocument:
       Id: SumoTopicPolicy
       Statement:
         -
           Action: "sns:Publish"
           Condition:
             StringEquals:
               aws:SourceAccount: !Ref "AWS::AccountId"
             ArnLike:
               aws:SourceArn: !Join ['', ['arn:aws:s3:*:*:', Ref: bucketName]]
           Effect: Allow
           Principal:
             AWS: "*"
           Resource:
             Ref: sumoSNSTopic
     Topics:
       -
         Ref: sumoSNSTopic
   Type: "AWS::SNS::TopicPolicy"
Set up an IAM Role
You can grant Sumo Logic access to your AWS Product with an IAM Role using CloudFormation. You can use the AWS Command Line Interface (CLI) or create a stack on the AWS CloudFormation console.
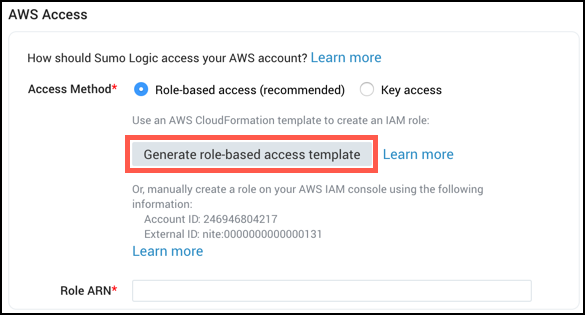
- Both methods require a YAML file with the CloudFormation template. You can create a file with the provided YAML template or download a generated template from the Sumo interface when creating your Source by clicking the Generate role-based access template button. The button will only become available after you input the bucket name.
Use AWS Command Line Interface (CLI)
-
Execute the following AWS CLI command to create a stack, see AWS Command Line Reference for create-stack for details.
$ aws cloudformation create-stack --stack-name sumo-role --template-body file://./role-s3bucket --capabilities CAPABILITY_IAM -
The role will be created by AWS and named based on the following format:
<stack_name>-SumoRole-<random_characters>infoNow that you have completed these steps and have created an IAM Role you need to wait two to five minutes before using it for an AWS Source's authentication. This is to account for AWS's eventual consistency.
-
Copy the Role ARN back to Sumo.
Create a Stack on the AWS CloudFormation console
-
Visit Services > Cloudformation > Create Stack > Upload a template to Amazon S3 and upload the file with the CloudFormation template and click Next. See Selecting a Stack Template for details.
-
Specify Details. Provide an appropriate Stack Name. Then click Next. See Specifying Stack Name and Parameters for details.
-
Options can remain default, click Next again. Review and check the box, “I acknowledge that AWS CloudFormation might create IAM resources.” and then click Create.
-
The role will be created by AWS and named based on the following format:
<stack_name>-SumoRole-<random_characters>infoNow that you have completed these steps and have created an IAM Role you need to wait two to five minutes before using it for an AWS Source's authentication. This is to account for AWS's eventual consistency.
-
Copy the Role ARN back to Sumo.
YAML Template to set up an IAM Role
AWSTemplateFormatVersion: '2010-09-09'
Description: A CloudFormation template that creates a role for authenticating with
  Sumo’s AWS integrations.
Parameters:
  ExternalID:
    Type: String
    Description: An ID used in the trust policy to designate who can assume the role, formatted as deployment:accountId. Eg. us1:0000000000000131
  Actions:
    Type: CommaDelimitedList
    Description: Comma separated list of permissive AWS actions granted to the role. Eg. s3:GetObject,s3:GetObjectVersion,s3:ListBucketVersions,s3:ListBucket
  Resources:
    Type: CommaDelimitedList
    Description: Comma separated ARNs of the AWS resources that the role will have access to. Eg. arn:aws:s3:::mybucket
Resources:
  SumoRole:
    Type: AWS::IAM::Role
    Properties:
      AssumeRolePolicyDocument:
        Version: '2012-10-17'
        Statement:
        - Effect: Allow
          Principal:
            AWS: arn:aws:iam::926226587429:root
          Action: sts:AssumeRole
          Condition:
            StringEquals:
              sts:ExternalId:
                Ref: ExternalID
      Path: "/"
      Policies:
      - PolicyName: SumoPolicy
        PolicyDocument:
          Version: '2012-10-17'
          Statement:
          - Effect: Allow
            Action:
              Ref: Actions
            Resource:
              Ref: Resources