DocuSign
DocuSign pioneered the development of e-signature technology, and today DocuSign helps organizations connect and automate how they prepare, sign, act on, and manage agreements. As part of the DocuSign Agreement Cloud, DocuSign offers eSignature, allowing you to sign documents electronically from most devices.
The DocuSign provides a secure endpoint to receive customer event data from the DocuSign Monitor API. DocuSign Monitor helps organizations protect their agreements with round-the-clock activity tracking. The Monitor API delivers this activity tracking information directly to existing security stacks or data visualization tools—enabling teams to detect unauthorized activity, investigate incidents, and quickly respond to verified threats.
Data collected
| Polling Interval | Data |
|---|---|
| 5 min | Customer event data |
Setup
Vendor configuration
Prerequisites
To collect event data from the DocuSign Monitor, you must meet the following criteria:
- Administrator access to an organization. To call the DocuSign Monitor endpoint, you must impersonate a user with administrator access to your organization.
- Enable DocuSign Monitor. Enable DocuSign Monitor for your organization to call the endpoint.
- Integration Key. An integration key identifies your integration and links to its configuration values. Create an integration key
- Redirect Uri. The redirect URI is the URI (URL) to which DocuSign will redirect the browser after authentication. Set a redirect URI
- RSA Key Pair. Add the RSA key pair
- Application Consent. Refer Step-1 of Get an access token with JWT Grant In this configuration, you will set up the DocuSign account and configure it to be authorized and authenticated to use customer event data from DocuSign Monitor API. To obtain the DocuSign auth token and customer event data, you will need the following parameters:
User ID
To get the User ID, follow the steps below:
- Log in to DocuSign account.
- Go to the My Apps & Keys page.

- Locate and copy the User ID available under My Account Information.

You'll need to provide your DocuSign User ID while creating the DocuSign Cloud-to-Cloud Source.
App
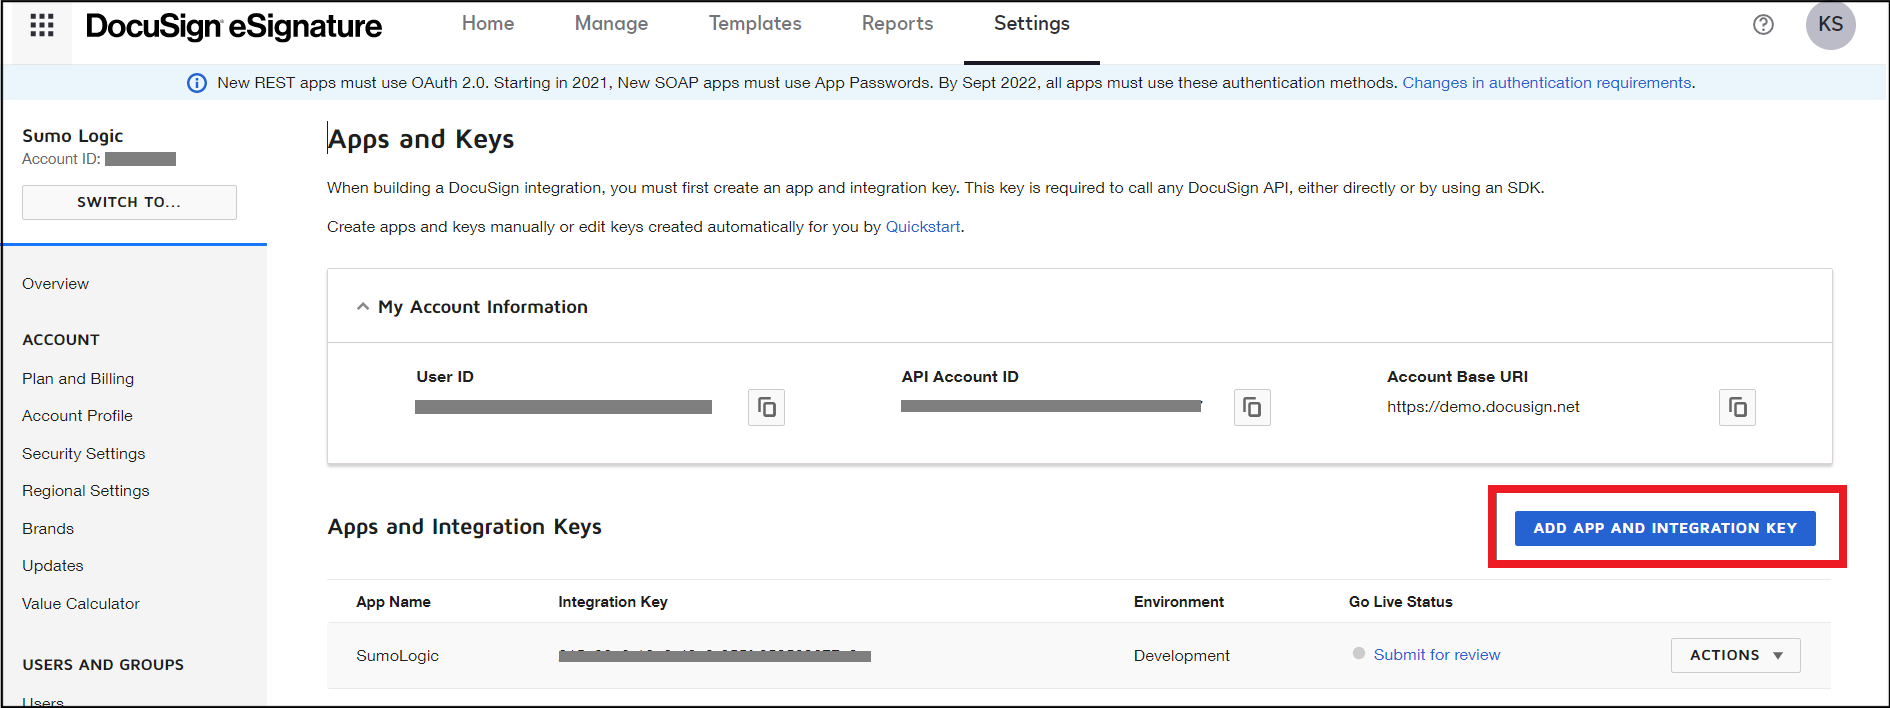
You must first create an app to get integration key and configure RSA Key Pair and Redirect URI. This key is required to get access token which will be used to authenticate DocuSign API. To create an app follow the steps below:
- Sign in to your DocuSign account.
- Go to the My Apps & Keys page.

- Navigate to ADD APP AND INTEGRATION KEY.
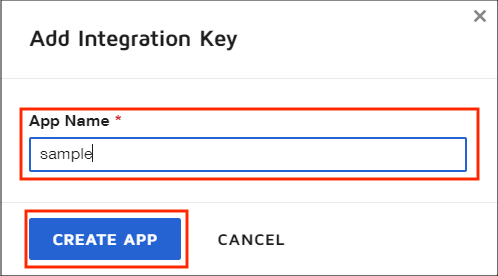
- Enter value for App Name in a dialog box, and click on CREATE APP.
- After creating your app, you'll be redirected to the app configuration page. Copy Integration Key.
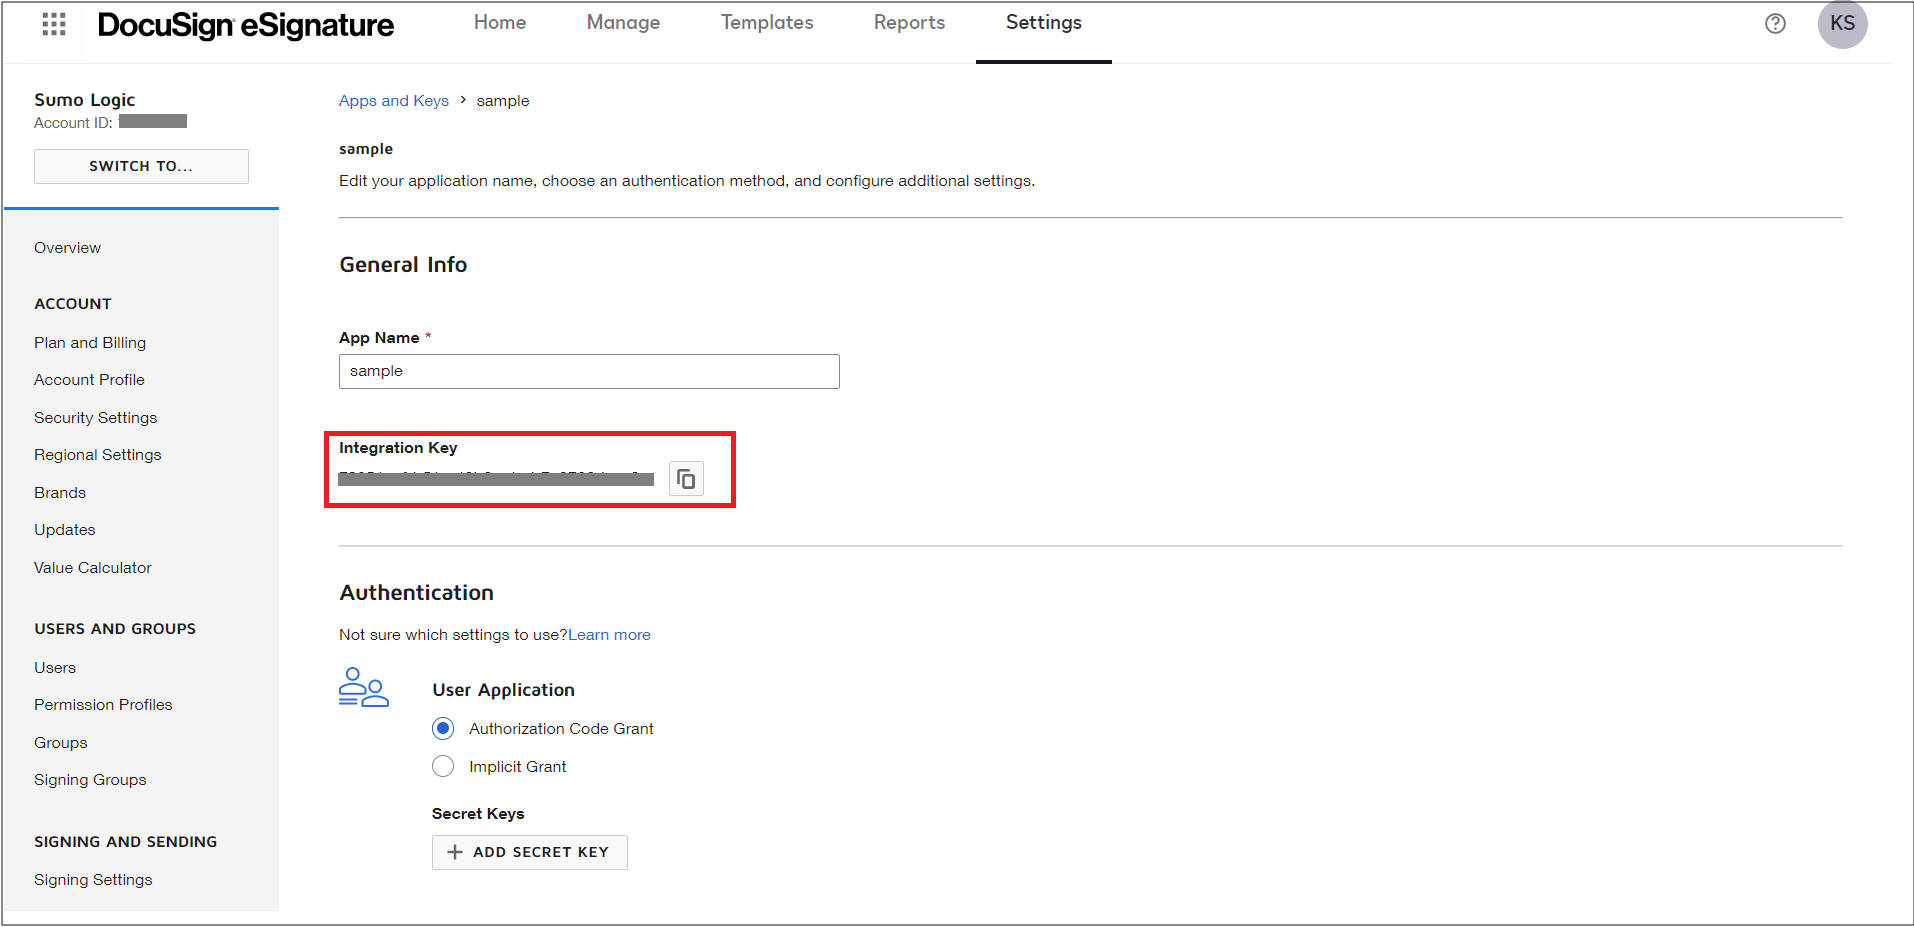
You'll need to provide your integration key while requesting application consent and creating the DocuSign Cloud-to-Cloud Source.
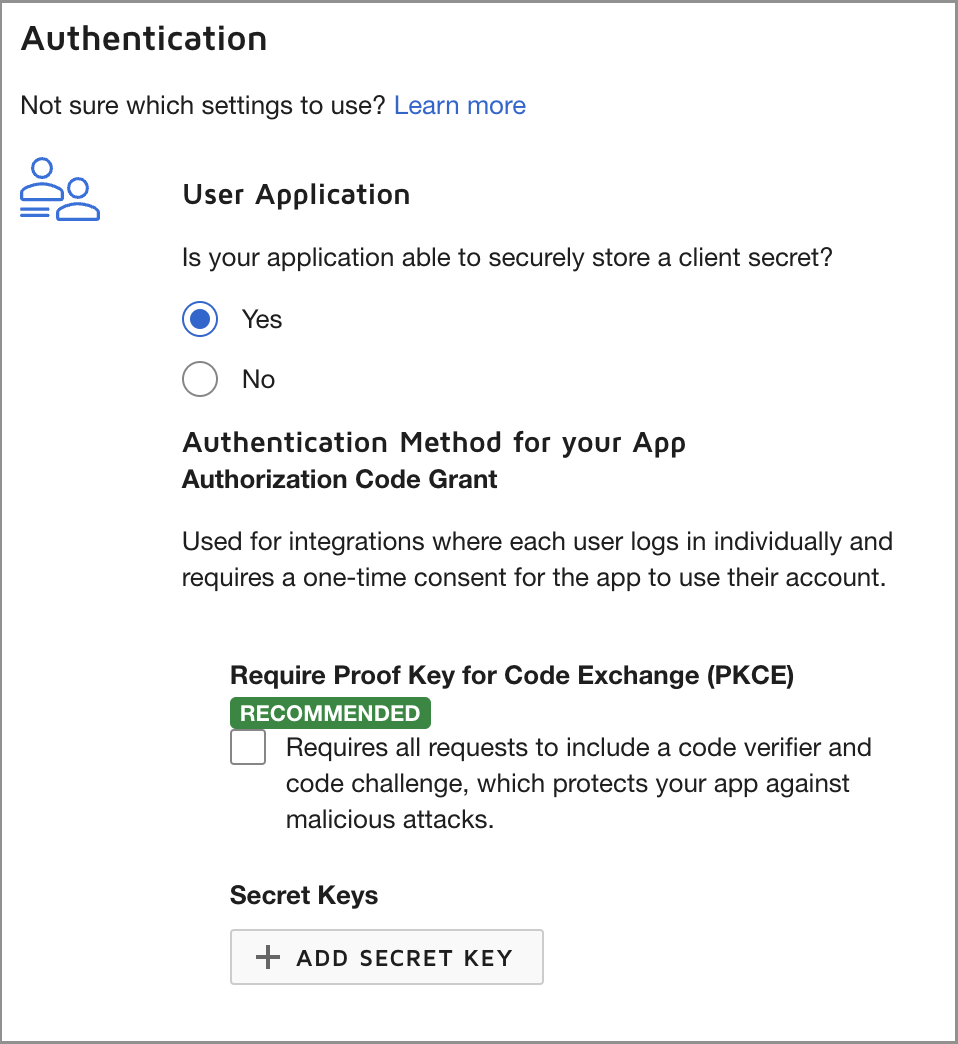
- Leave Authentication settings as default as shown in below image.
- Click on GENERATE RSA under Service Integration to create new private and public key pair.
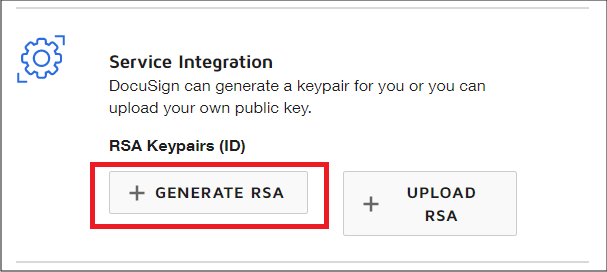
- Copy Private Key from dialog and close the dialog.
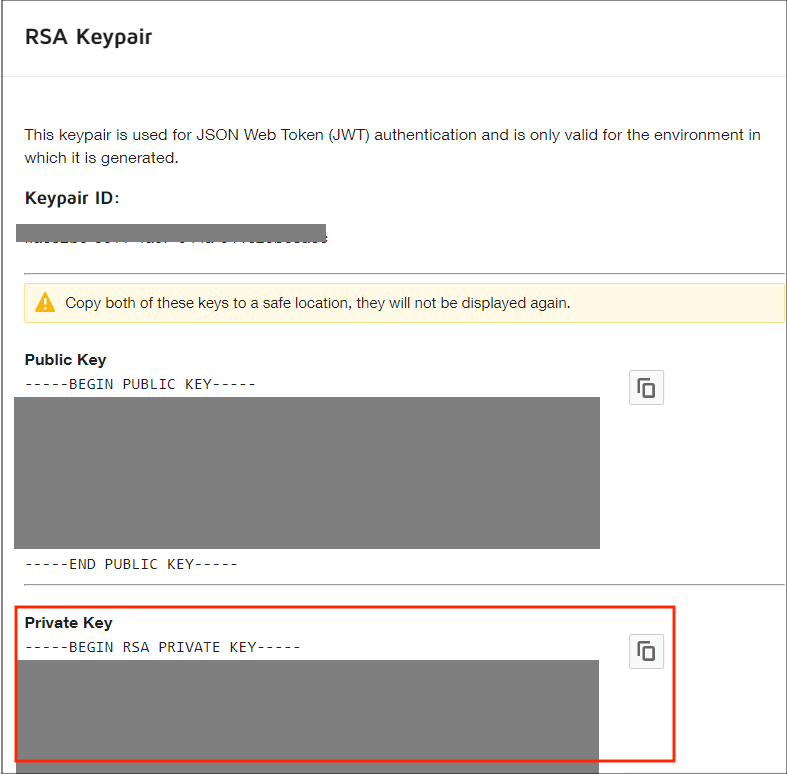
You'll need to provide RSA private key while creating the DocuSign Cloud-to-Cloud Source.
- Under Redirect URIs, click ADD URI, then enter
http://localhostas your new redirect URI.

You'll need a redirect URI while requesting application consent.
- Click SAVE to finish new app configuration.
App Consent
Once your app is created, you need consent to make API calls. To request application consent, follow the steps below:
- Copy the below URL based on your account environment in the browser and press enter. Replace INTEGRATION_KEY and REDIRECT_URI with the values you copied in steps 5 and 9 of the App section, respectively.
- For the development (demo) environment, use
https://account-d.docusign.com/oauth/auth?response_type=code&scope=signature%20impersonation&client_id=INTEGRATION_KEY&redirect_uri=REDIRECT_URI - For the production environment, use
https://account.docusign.com/oauth/auth?response_type=code&scope=signature%20impersonation&client_id=INTEGRATION_KEY&redirect_uri=REDIRECT_URI
- For the development (demo) environment, use
- Click ALLOW ACCESS to provide your consent. This should redirect you to REDIRECT_URI.
Source configuration
When you create a DocuSign Source, you add it to a Hosted Collector. Before creating the Source, identify the Hosted Collector you want to use or create a new Hosted Collector. For instructions, see Configure a Hosted Collector.
To configure the DocuSign source:
- New UI. In the Sumo Logic main menu select Data Management, and then under Data Collection select Collection. You can also click the Go To... menu at the top of the screen and select Collection.
Classic UI. In the main Sumo Logic menu, select Manage Data > Collection > Collection. - On the Collectors page, click Add Source next to a Hosted Collector.
- Search for and select DocuSign.
- Enter a Name to display for the Source in the Sumo Logic web application. The description is optional.
- (Optional) For Source Category, enter any string to tag the output collected from the Source. Category metadata is stored in a searchable field called
_sourceCategory. - (Optional) Fields. Click the +Add Field link to define the fields you want to associate. Each field needs a name (key) and value.
 A green circle with a check mark is shown when the field exists and is enabled in the Fields table schema.
 An orange triangle with an exclamation point is shown when the field doesn't exist in the Fields table schema. In this case, you'll see an option to automatically add or enable the nonexistent fields to the Fields table schema. If a field is sent to Sumo Logic that does not exist in the Fields schema it is ignored, known as dropped.
- In DocuSign Environment, choose the environment of your DocuSign account.
- In User ID, enter the User ID of your account. See User ID section to help find your User ID.
- In Integration Key, enter the integration key you generated. See step 5 of App section.
- In RSA Private Key, enter the rsa private key you generated. See step 8 of App section.
- When you are finished configuring the Source, click Save.
Metadata fields
If the integration is configured with the SIEM forward option, set the Metadata field _siemparser to /Parsers/System/DocuSign/DocuSign Monitor.
JSON schema
Sources can be configured using UTF-8 encoded JSON files with the Collector Management API. See how to use JSON to configure Sources for details.
| Parameter | Type | Value | Required | Description |
|---|---|---|---|---|
| schemaRef | JSON Object | {"type":"DocuSign"} | Yes | Define the specific schema type. |
| sourceType | String | "Universal" | Yes | Type of source. |
| config | JSON Object | Configuration object | Yes | Source type specific values. |
Configuration Object
| Parameter | Type | Required | Default | Description | Example |
|---|---|---|---|---|---|
| name | String | Yes | null | Type a desired name of the source. The name must be unique per Collector. This value is assigned to the metadata field _source. | "mySource" |
| description | String | No | null | Type a description of the source. | "Testing source" |
| category | String | No | null | Type a category of the source. This value is assigned to the metadata field _sourceCategory. See best practices for details. | "mySource/test" |
| fields | JSON Object | No | null | JSON map of key-value fields (metadata) to apply to the Collector or Source. Use the boolean field _siemForward to enable forwarding to SIEM. | {"_siemForward": false, "fieldA": "valueA"} |
| env | String | Yes | null | Environment of the DocuSign application. | |
| userId | String | Yes | null | User ID of the DocuSign account. | |
| integrationKey | String | Yes | null | Integration Key of the app. | |
| rsaPrivateKey | String | Yes | null | RSA Private Key for the app. |
JSON example
loading...
Terraform example
loading...
FAQ
Click here for more information about Cloud-to-Cloud sources.