Configure a Hosted Collector and Source
note
The maximum number of Collectors allowed per organization is 10,000.
Step 1: Configure Hosted Collector
Steps to configure a Hosted Collector:
- New UI. In the Sumo Logic main menu select Data Management, and then under Data Collection select Collection. You can also click the Go To... menu at the top of the screen and select Collection.
Classic UI. In the main Sumo Logic menu, select Manage Data > Collection > Collection. - Click Add Collector.
- Click Hosted Collector.
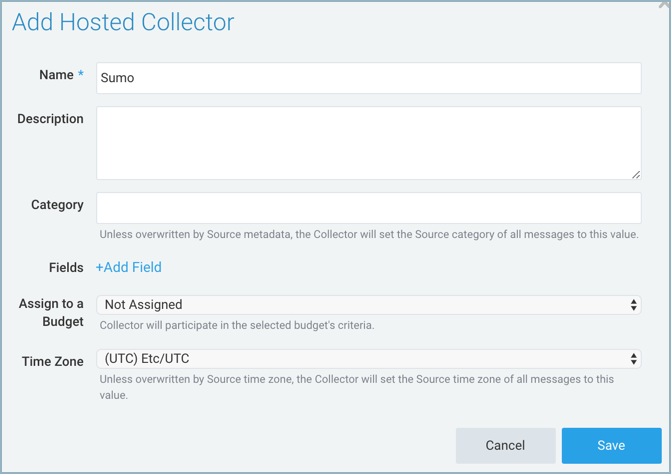
- Provide a Name for the Collector. Description is optional.
- Category. Enter any string to tag the logs collected from this Collector. This Source Category value is stored in a searchable metadata field called
_sourceCategory. See our Best Practices: Good and Bad Source Categories. - Click the +Add Field link in the Fields section. Define the fields you want to associate, each field needs a name (key) and value.
 A green circle with a check mark is shown when the field exists and is enabled in the Fields table schema.
 An orange triangle with an exclamation point is shown when the field doesn't exist in the Fields table schema. In this case, you'll see an option to automatically add or enable the nonexistent fields to the Fields table schema. If a field is sent to Sumo Logic but isn’t present or enabled in the schema, it’s ignored and marked as Dropped.
- Assign to a Budget allows you to assign an ingest budget to the Collector. The dropdown displays your ingest budgets in the following format:
<budget name> (<field value>) (<allocated capacity>) - Time Zone. Set the default time zone when it is not extracted from the log timestamp. Time zone settings on Sources override a Collector time zone setting.
- Review your input and when finished click Save.

- After the Collector has been set up, it appears on the Collection page as a Hosted Collector.
Step 2: Configure a Source
Once you've configured your Hosted Collector, the next step is to configure a Source(s).
Cloud-to-Cloud Integration Framework Sources
Collect logs and events directly from your SaaS and Cloud platforms.

HTTP Sources
Receive logs, metrics, traces, and OTLP data uploaded to a unique URL generated for the Source.


