Cloud SOAR Automation
The Automation section contains configuration tools for Cloud SOAR's automation and orchestration features.
Classic UI. To access Automation, click the gear icon ![]() in the top right and select Automation.
in the top right and select Automation.
New UI. To access Automation, in the main Sumo Logic menu select Automation.
Because Cloud SOAR provides automation functionality to the Automation Service, many features are identical between Cloud SOAR and the Automation Service. Therefore, for information about the following Cloud SOAR features, see the Automation Service articles:
The following sections describe automation features only used in Cloud SOAR.
Incident templates
Incident templates define the way in which incidents will be created for a specific alert, incident type or event. They allow you to define a certain number of incident attributes (for example, incident type, severity, assignment, and any other default or custom incident parameters) that will automatically be set each time an incident is generated, based on the template. This may include type, classification, incident assignment, playbooks, knowledge base articles, or any other incident attribute. Since rules are created for generating incidents based on syslog messages, email, SIEM integrations, or other data sources, it is the incident templates that will define how the initial incident will be created.
Create a new incident template
- Classic UI. Click the gear icon
 in the top right, select Automation, and then select Incident templates in the left nav bar.
New UI. In the main Sumo Logic menu select Automation > Template. You can also click the Go To... menu at the top of the screen and select Template. - Click + to the left of Template.
- Define the template:
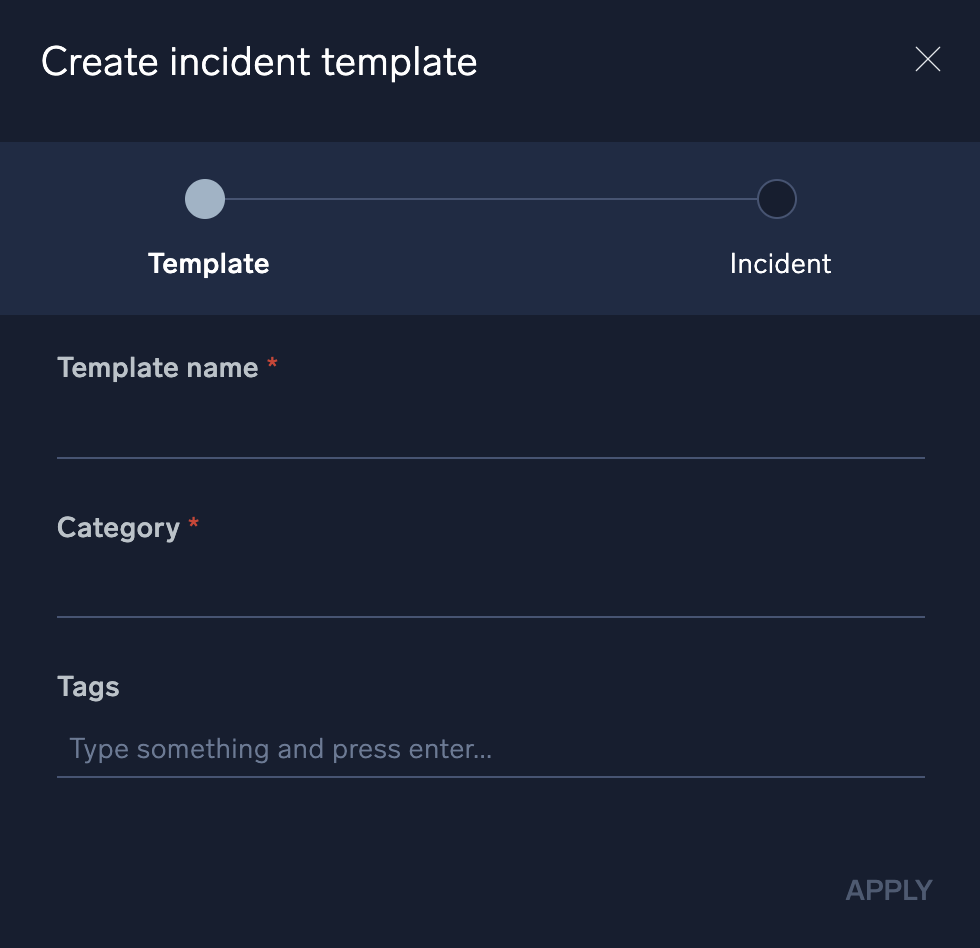
- Template name. Enter a name that is easily identifiable and related to the activity it is developed for.
- Category. Enter a category for this template. For example, suppose we're building a template for a DLP incident. We might enter a category named Data Theft, but we can enter anything we want that will help us group incident templates in the future. You can customize this field to fit your environment, as well as all other fields in Cloud SOAR (see Custom fields).
- Tags. Enter any tags to further categorize or define the incident. You can use these tags later when searching for or correlating events.
- Click Incident at the top of the dialog.
- Define any incident parameters you want to set by default when an incident is creating using the template:
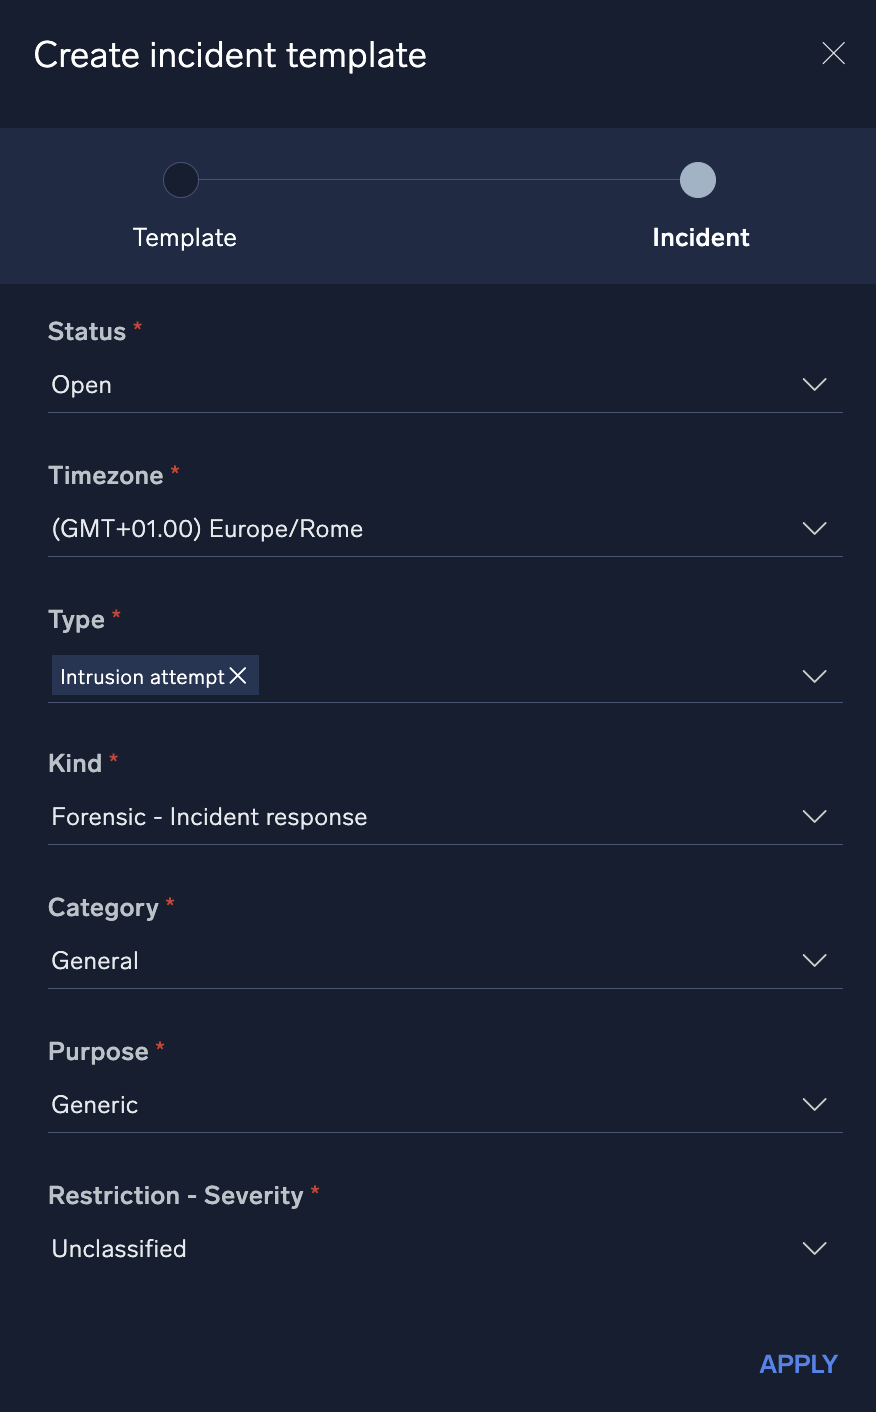
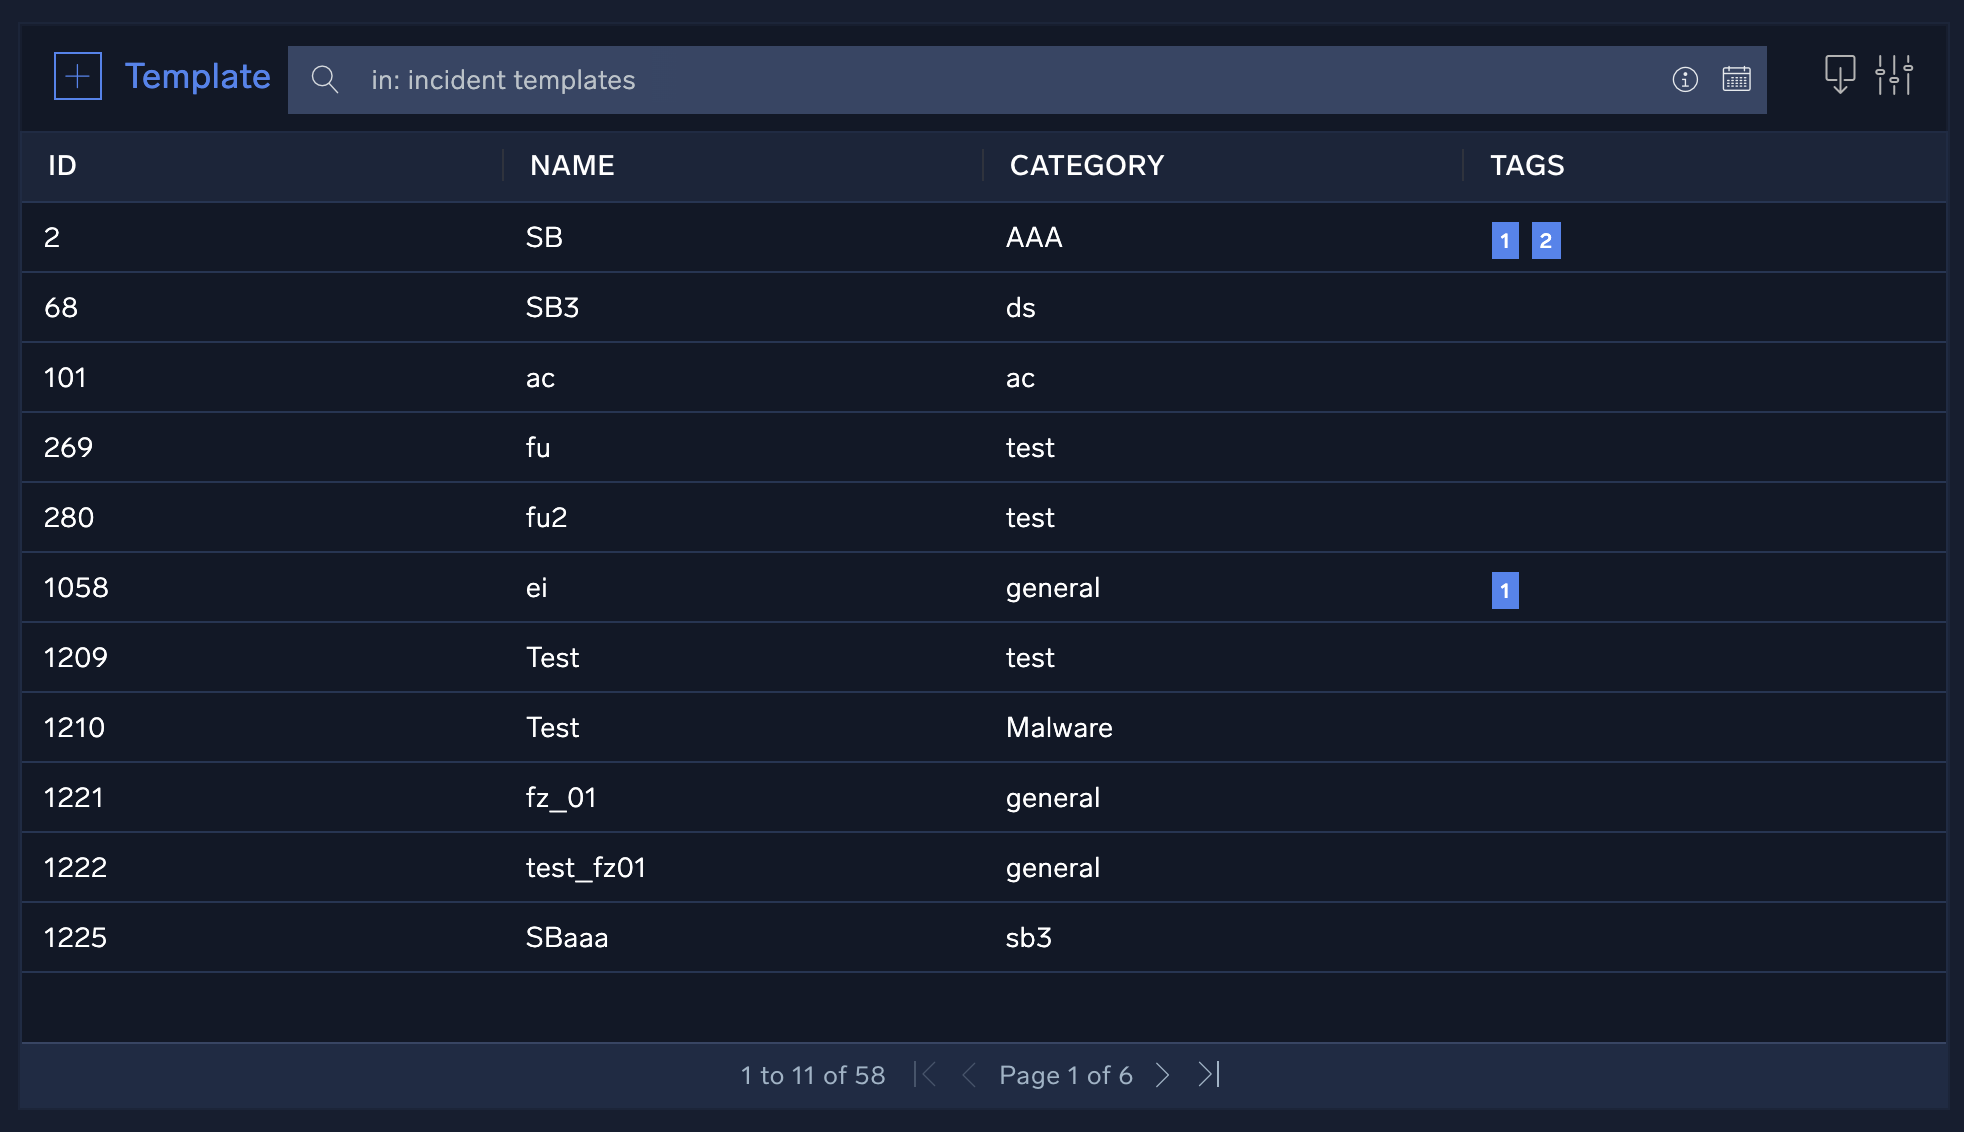
- Click Apply. The new template is displayed.
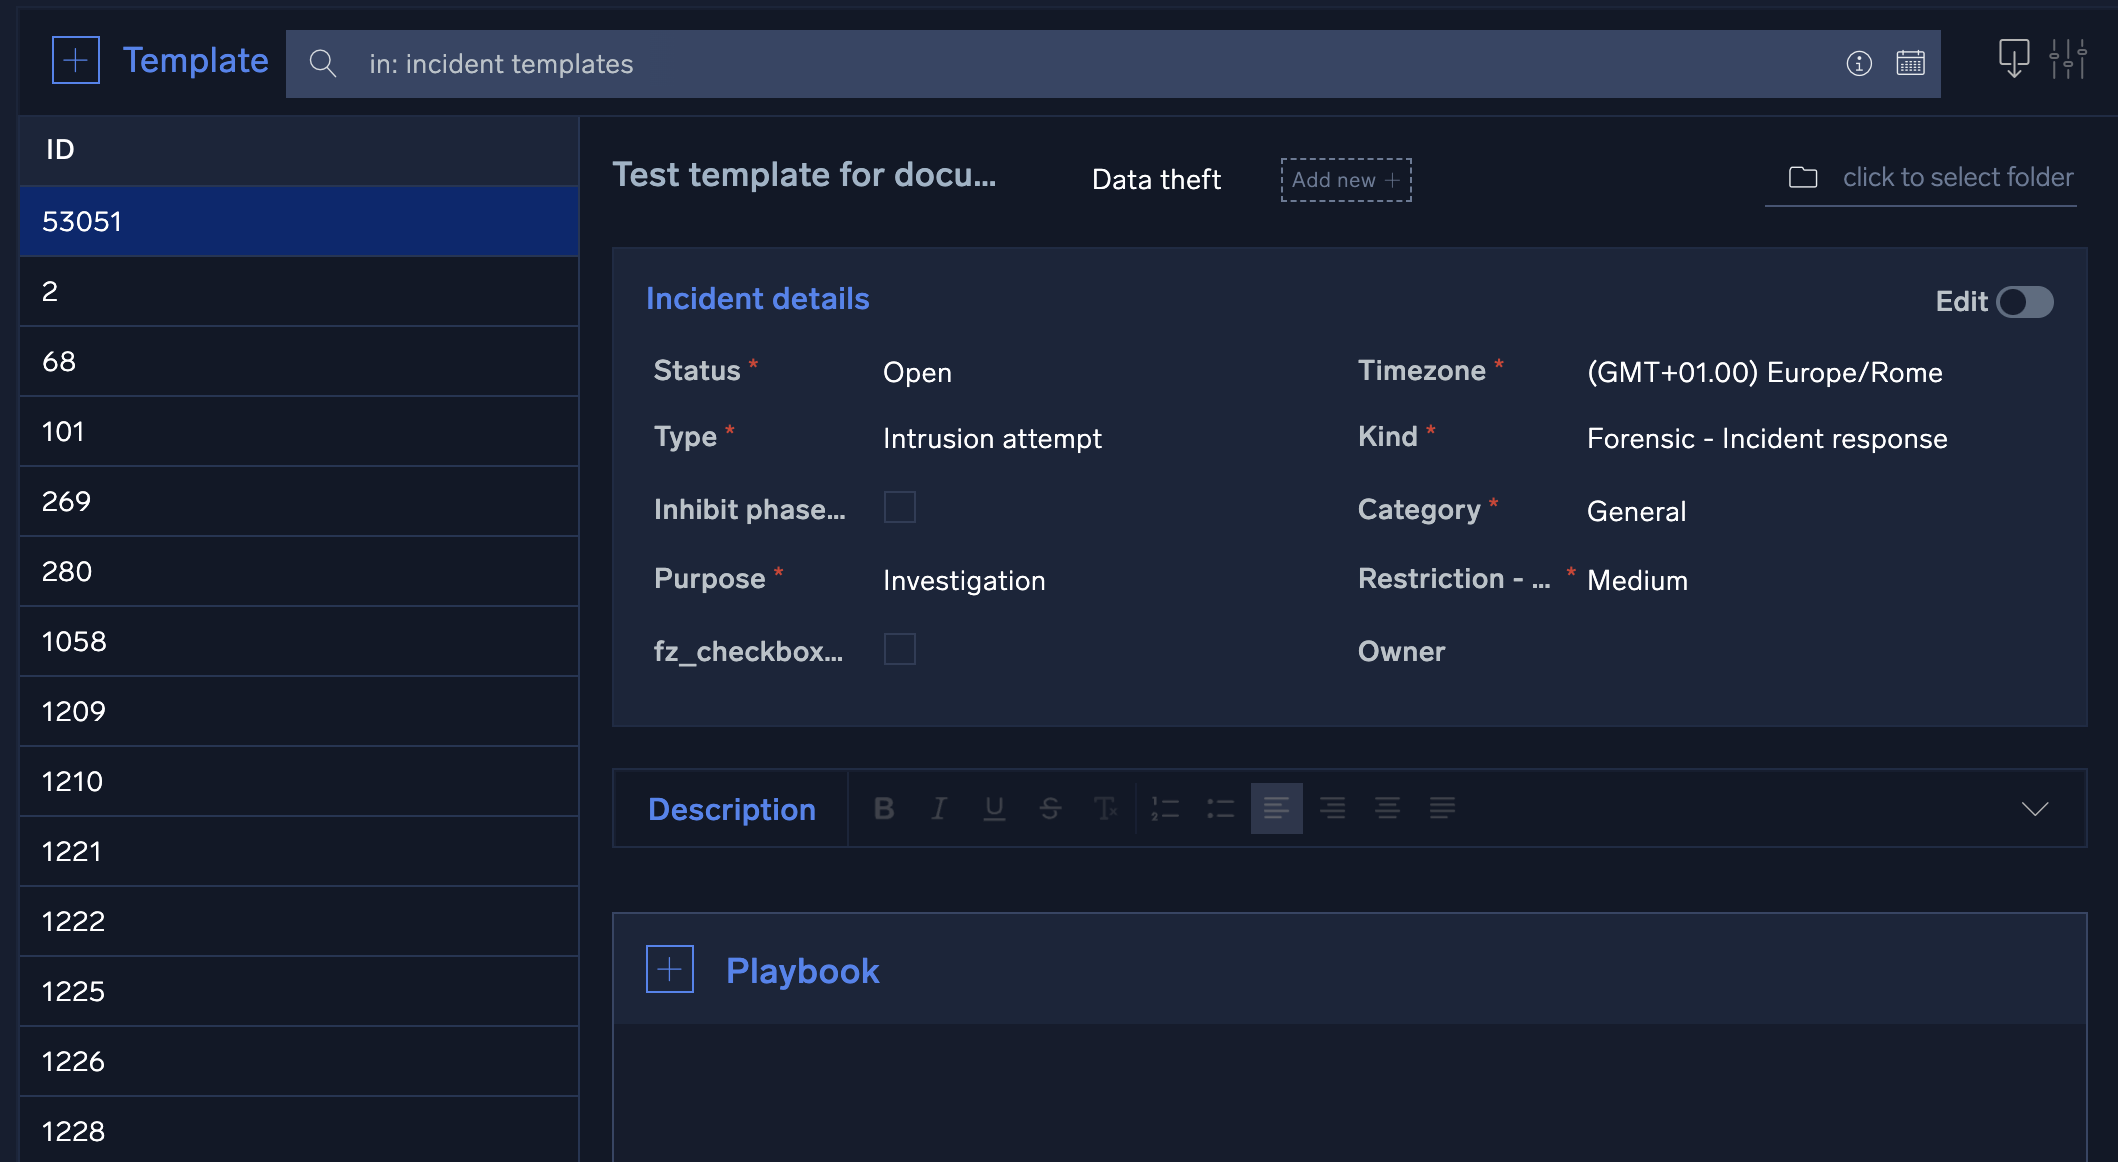
- Scroll down and enter the following:
- Incident details. Click the Edit toggle to set up details for a specific incident type.
- Description. Describe details of the template.
- Playbook. Select the playbooks that should be automatically assigned to an incident. For each playbook, you can choose to have the playbook automatically execute immediately upon incident creation, or assigned and wait for manual execution.
- Investigators. Select the investigators who should be automatically assigned to the incident.
- Notes. Enter notes which should be created for the incident.
- Mapping. Select the daemon field mapping for the template.
Configure a webhook for Cloud SOAR
You can configure a webhook connection to allow you to send an alert from a scheduled search to Sumo Logic Cloud SOAR using an incident template.
-
Classic UI. In the main Sumo Logic menu, select Manage Data > Monitoring > Connections.
New UI. In the top menu select Configuration, and then under Monitoring select Connections. You can also click the Go To... menu at the top of the screen and select Connections. -
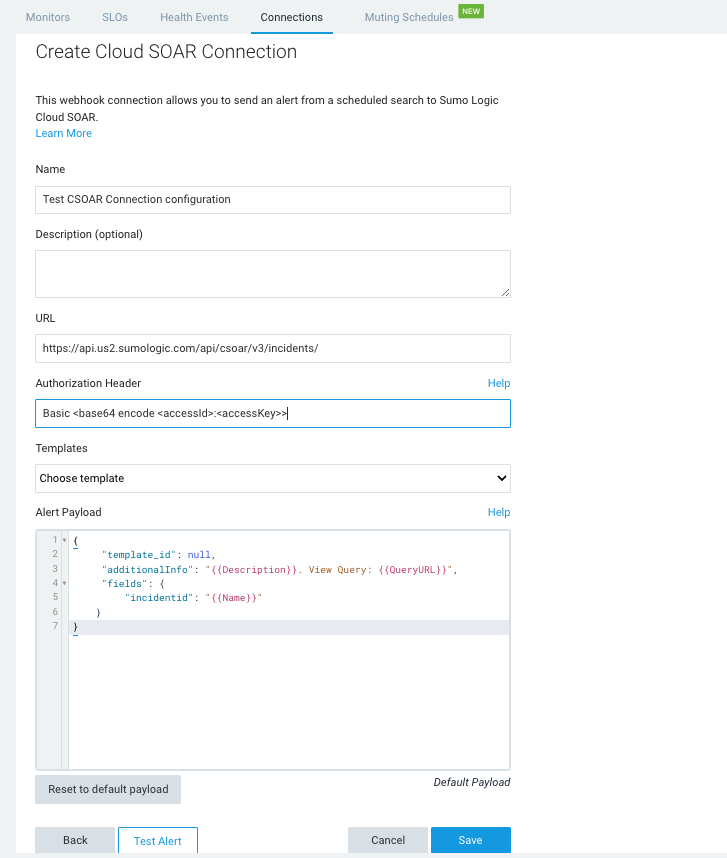
Click + and choose Cloud SOAR as the connection type. The Create Cloud SOAR Connection dialog is displayed.
-
Enter a Name and give an optional Description to the connection.
-
The URL field shows your Sumo Logic API endpoint followed by
/csoar/v3/incidents/. For example,https://api.us2.sumologic.com/api/csoar/v3/incidents/ -
In Authorization Header, enter your basic authentication access information for the header. For example,
Basic <base64 encode <accessId>:<accessKey>>. For more information, see Basic Access (Base64 encoded). -
Click Save. After save, the Templates dropdown shows a list of all incident templates by name configured in your Cloud SOAR environment.
-
Select a Template.
-
The default payload synchronizes with the selected template, and the Alert Payload field shows the associated
template_idfield automatically defined in the default payload. Atemplate_idis required in the payload in order to configure the connection:{
"template_id": <Template ID>,
"fields": {
"incidentid": "Incident Id"
}
}You can add additional variables. For example:
{
  "fields": {
    "description": "string",
    "additional_info": "string",
    "starttime": "ISO-8601 datetime string",
    "incident_kind": <ID incident kind>,
    "incident_category": <ID incident category>,
    "status": <ID incident status>,
    "restriction": <ID incident restriction>
  }
}note- For details on variables you can use as parameters within your JSON object, see Configure Webhook Payload Variables.
- For information on additional fields, please refer to the Cloud SOAR APIs documentation.
- The preceding example shows an
ISO-8601 datetime string. For information about how to configure it, see parser documentation.
-
Click Save.
Automation rules
Cloud SOAR can ingest, parse, and process incident data from email, syslog and bidirectional integrations. For Cloud SOAR to begin processing incident data from these sources, automation rules need to be configured.
Automation rules allow specific data to be parsed from the incoming data sources and then acted upon automatically or through manual actions. You can establish any daemonized integration rules to define what occurs when data is received from each of these sources.
Create an automation rule
- Classic UI. Click the gear icon in the top right, select Automation, and then select Rules in the left nav bar.
New UI. In the main Sumo Logic menu select Automation > Rules. You can also click the Go To... menu at the top of the screen and select Rules. - Click + to the left of Rules.
- Select a name for the rule, then select the daemon to use with this new rule, the resource, and fill in all the remaining parameters.
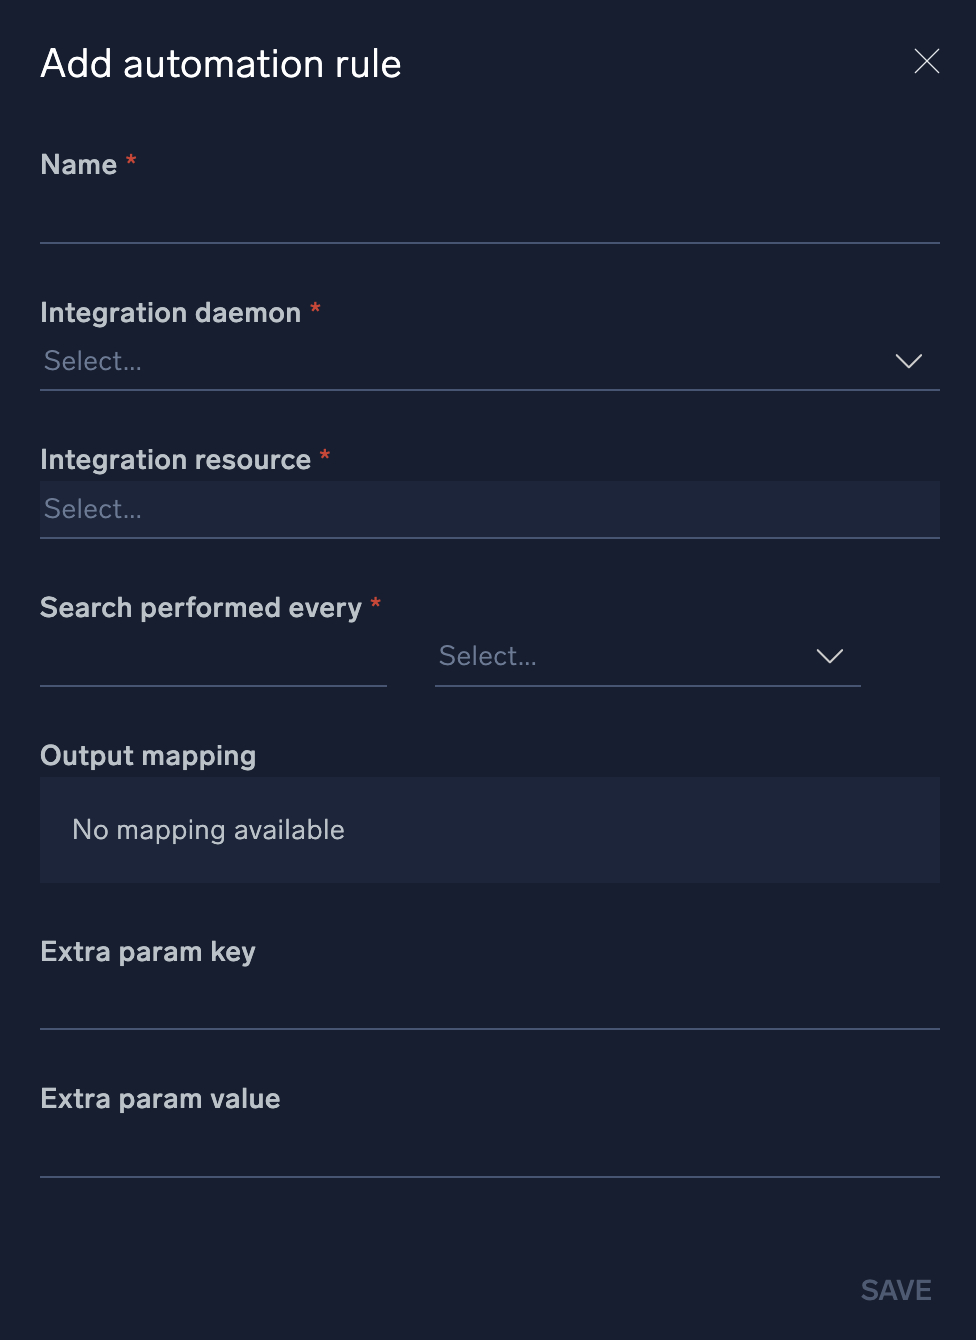
- Click Save. The new rule is displayed.
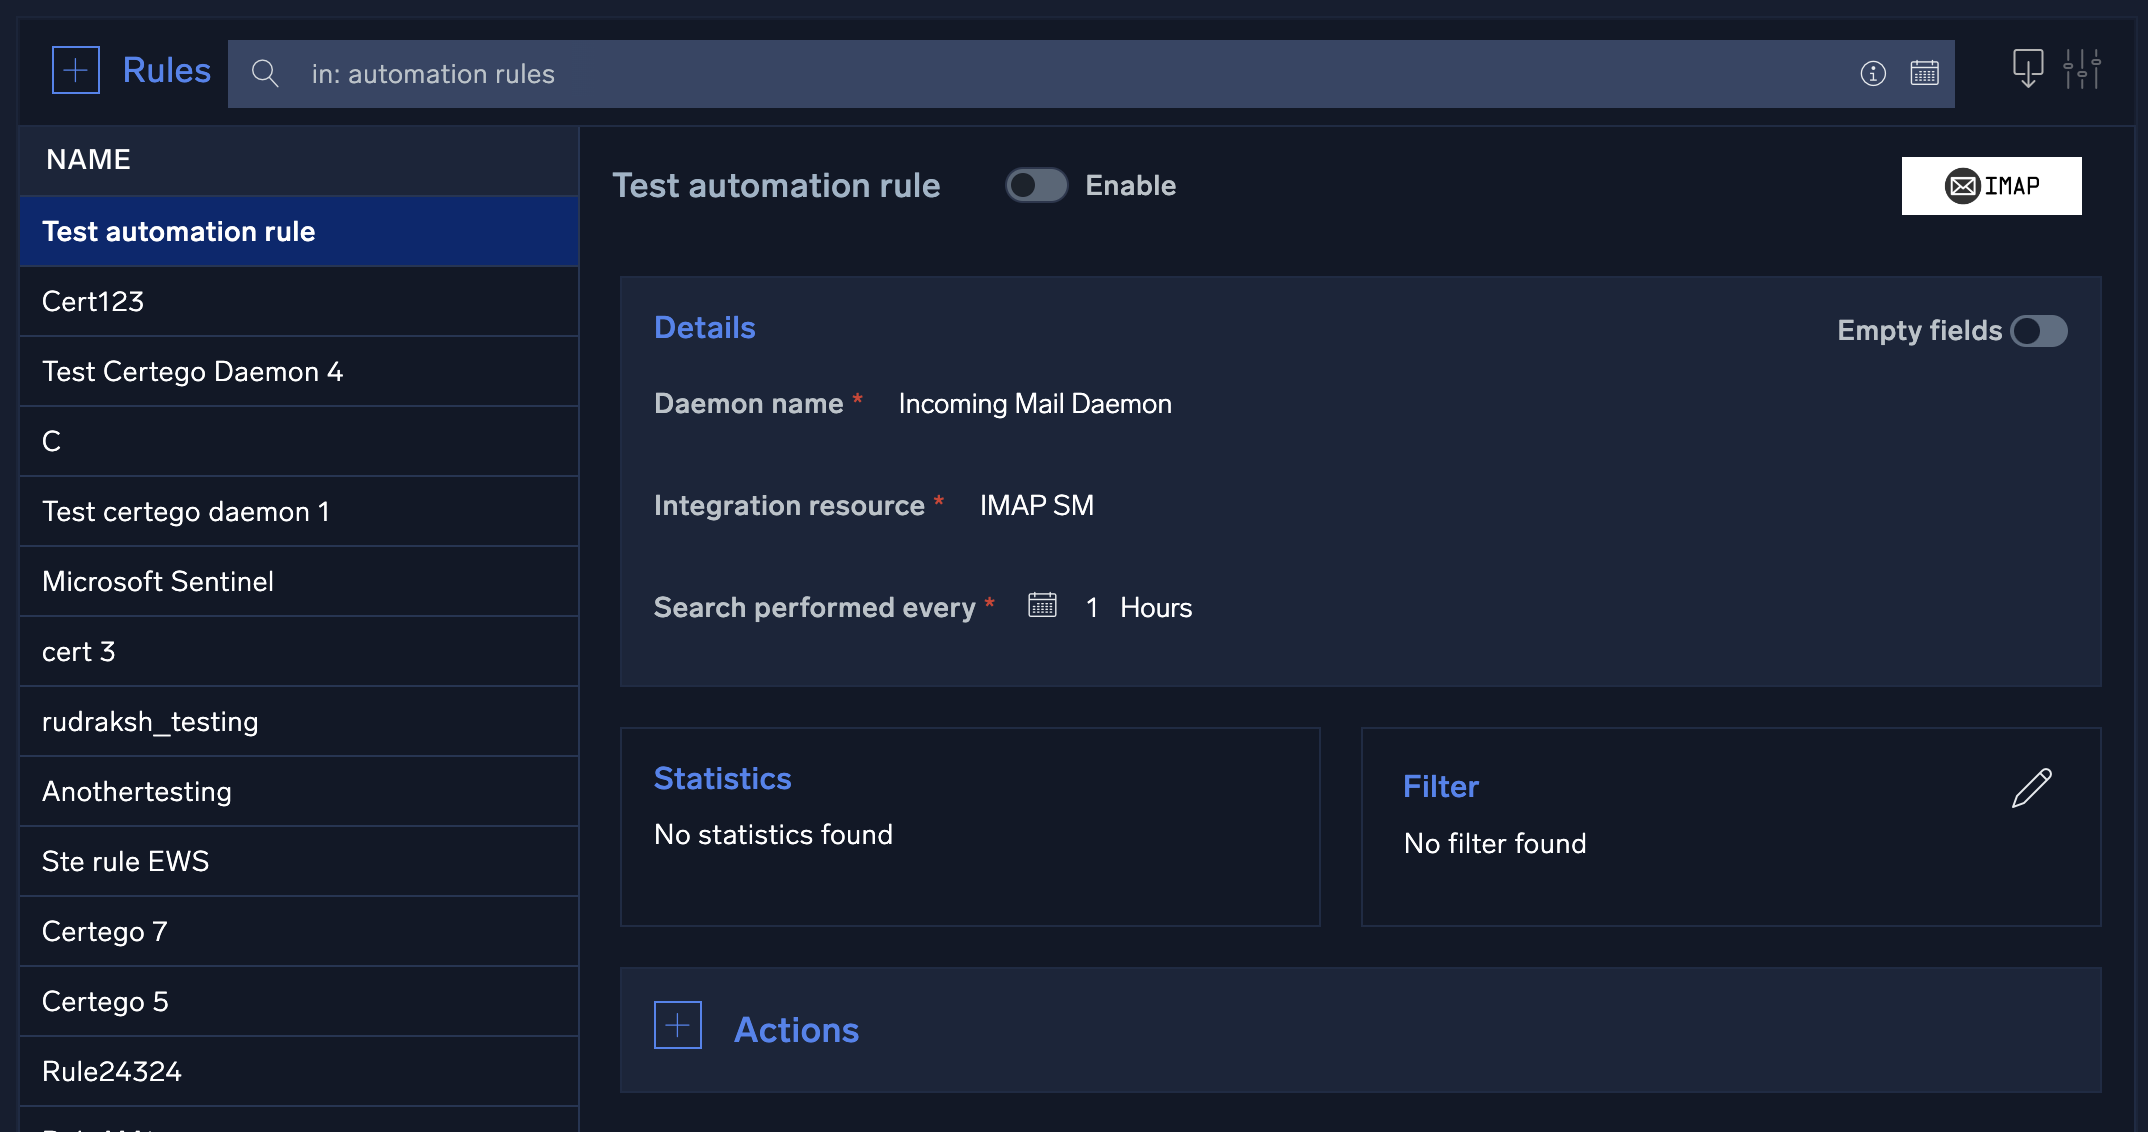
- Add a Filter if desired.
- Click + to the left of Actions.
- Click Action type.
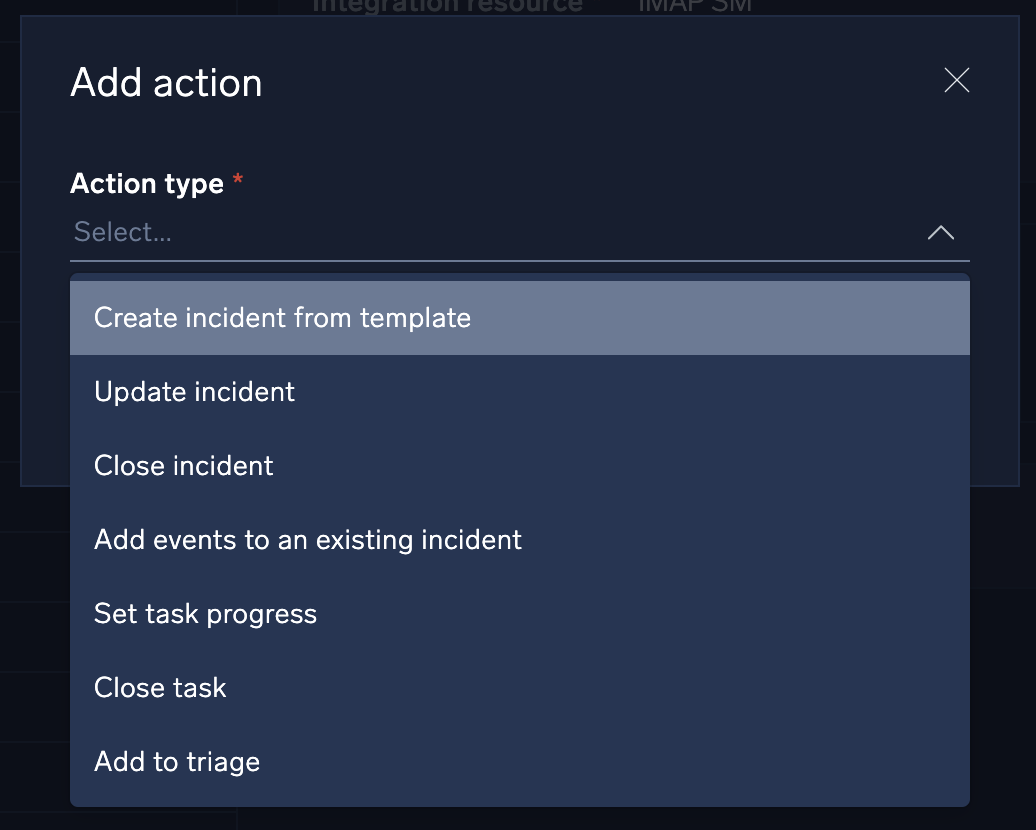
- Select the action Cloud SOAR will can take when the specified activity is observed:
- Create incident from template. Specify what incident template to use, the incident owner, and incident ID format. This is the most common action.
- Update incident. Update a field in an existing incident based on parameters from the parsed message.
- Close incident. Automatically close a known false positive incident.
- Add events to an existing incident. Add events based on parameters from the parsed message.
- Set task progress. Set task progress based on parameters from the parsed message.
- Close task. Close a task based on parameters from the parsed message.
- Add to Triage. Create a new triage event based on parameters from the parsed message.
- Fill out the rest of the fields for the action.
- Click + to the left of Mapping and select the daemon field mapping for the rule.
Configure Slack for Cloud SOAR
With the Cloud SOAR Slack integration, teams can remain connected, organize conversations, and quickly find what is needed to get the work done.
With the Cloud SOAR Slack integration, you can directly manage user choice actions within the playbooks from your Slack workspace. Furthermore, for each new incident, a related conversation channel will be created within your Slack workspace, where users will correspond to investigators. Changing a user within the incident will also result in a change to the user within the conversation channel.
To configure Slack for use inside Cloud SOAR, you must first create a public or private channel so you can send messages or files to channels or users directly.
Step 1: Create a Slack app
Before you can use the Slack integration in Cloud SOAR, you need to create a Slack app on the user or company workspace.
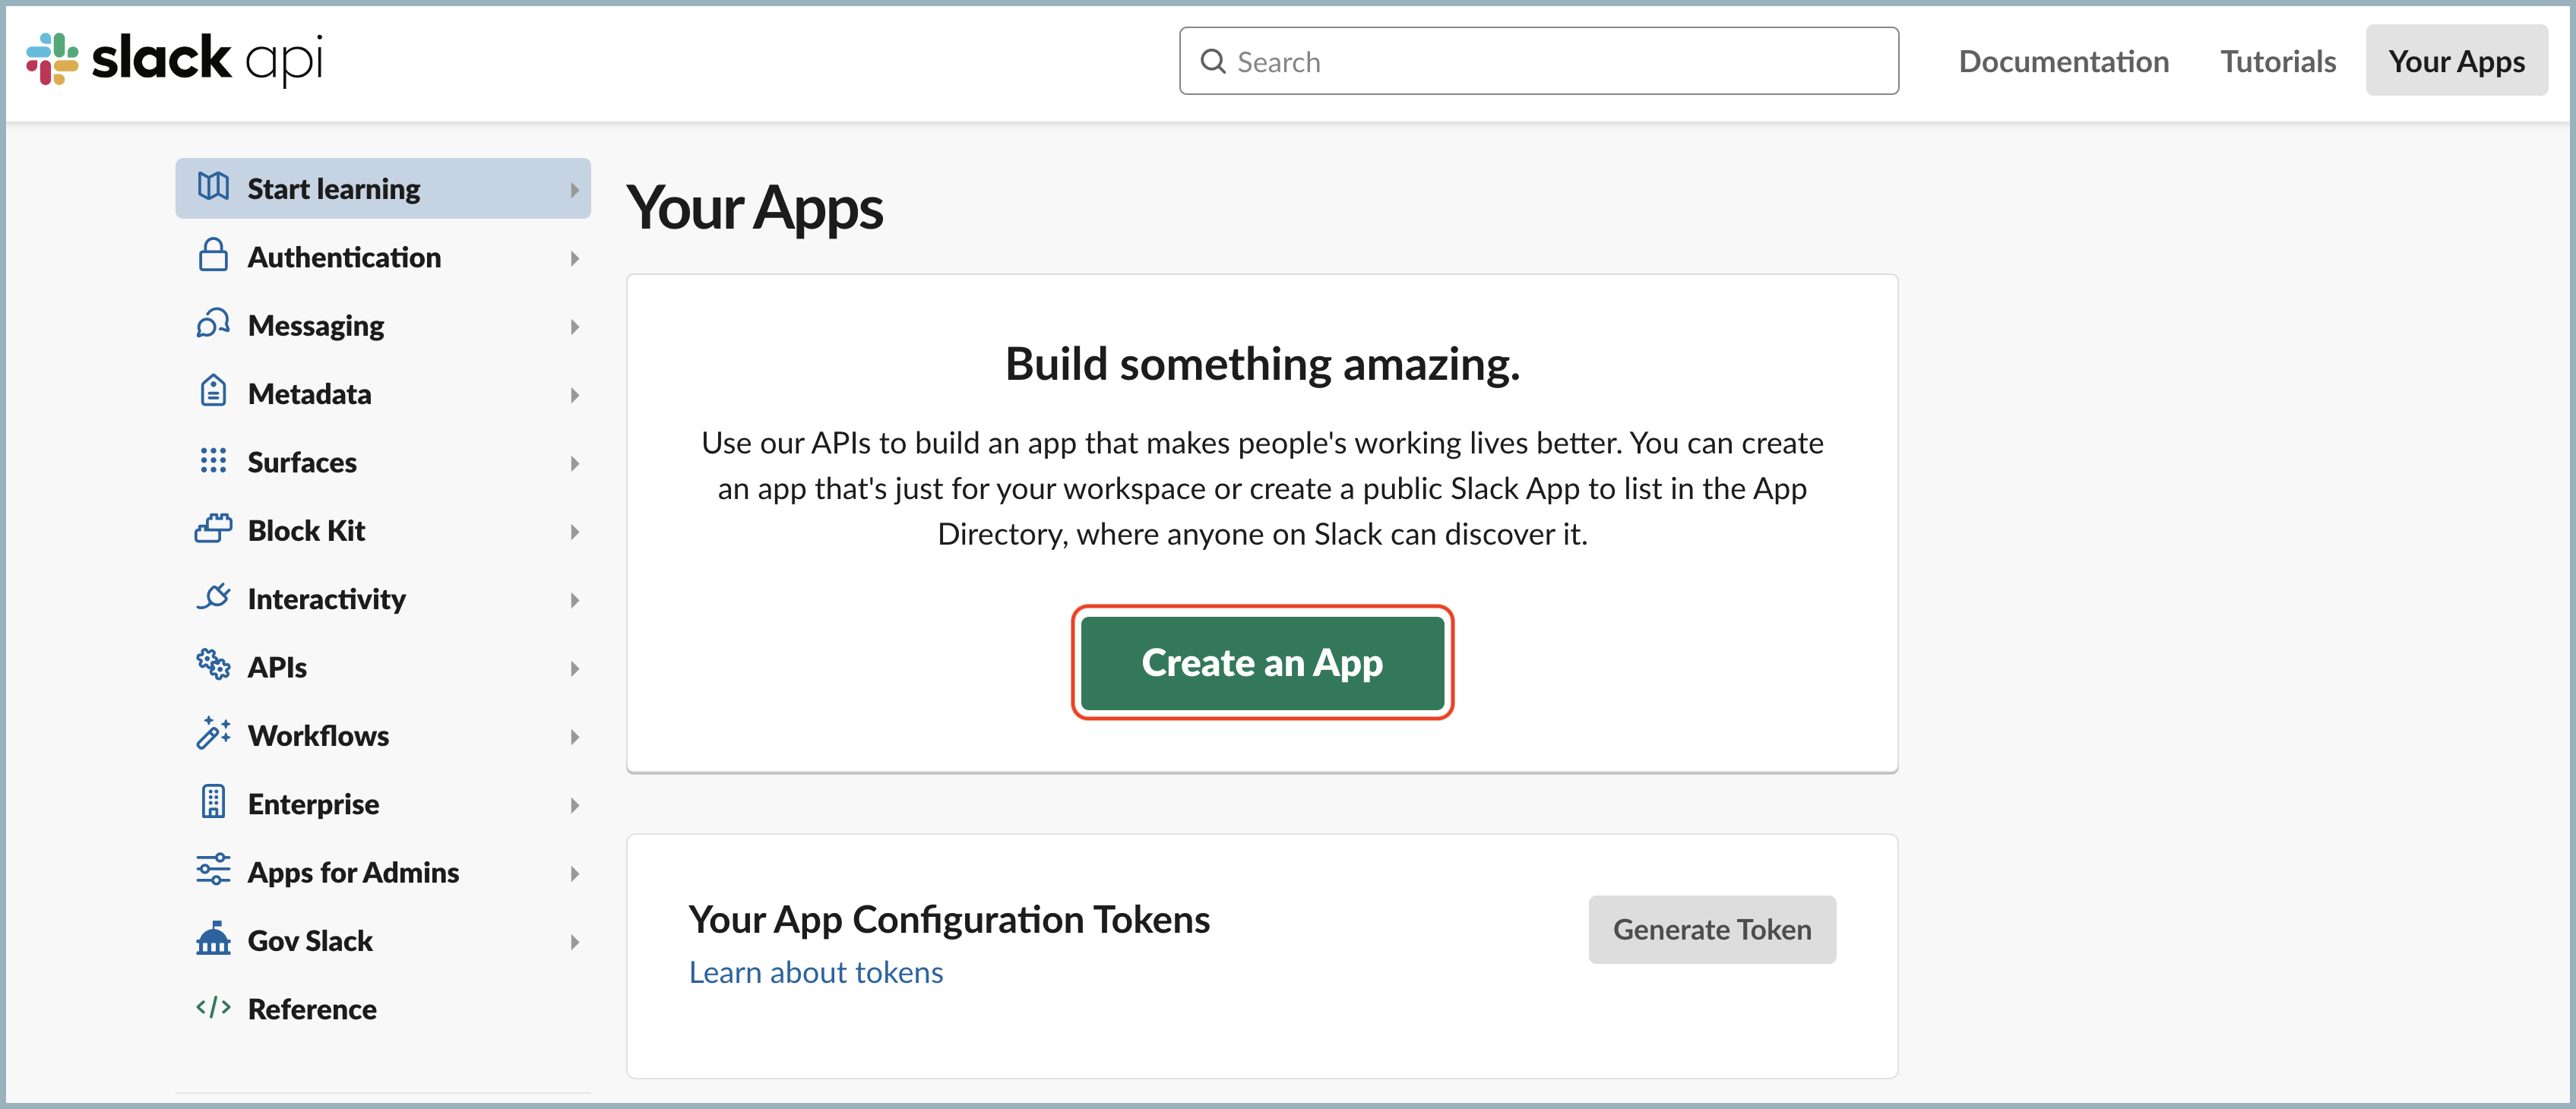
- Navigate to the Slack API page.
- Click Create an App.
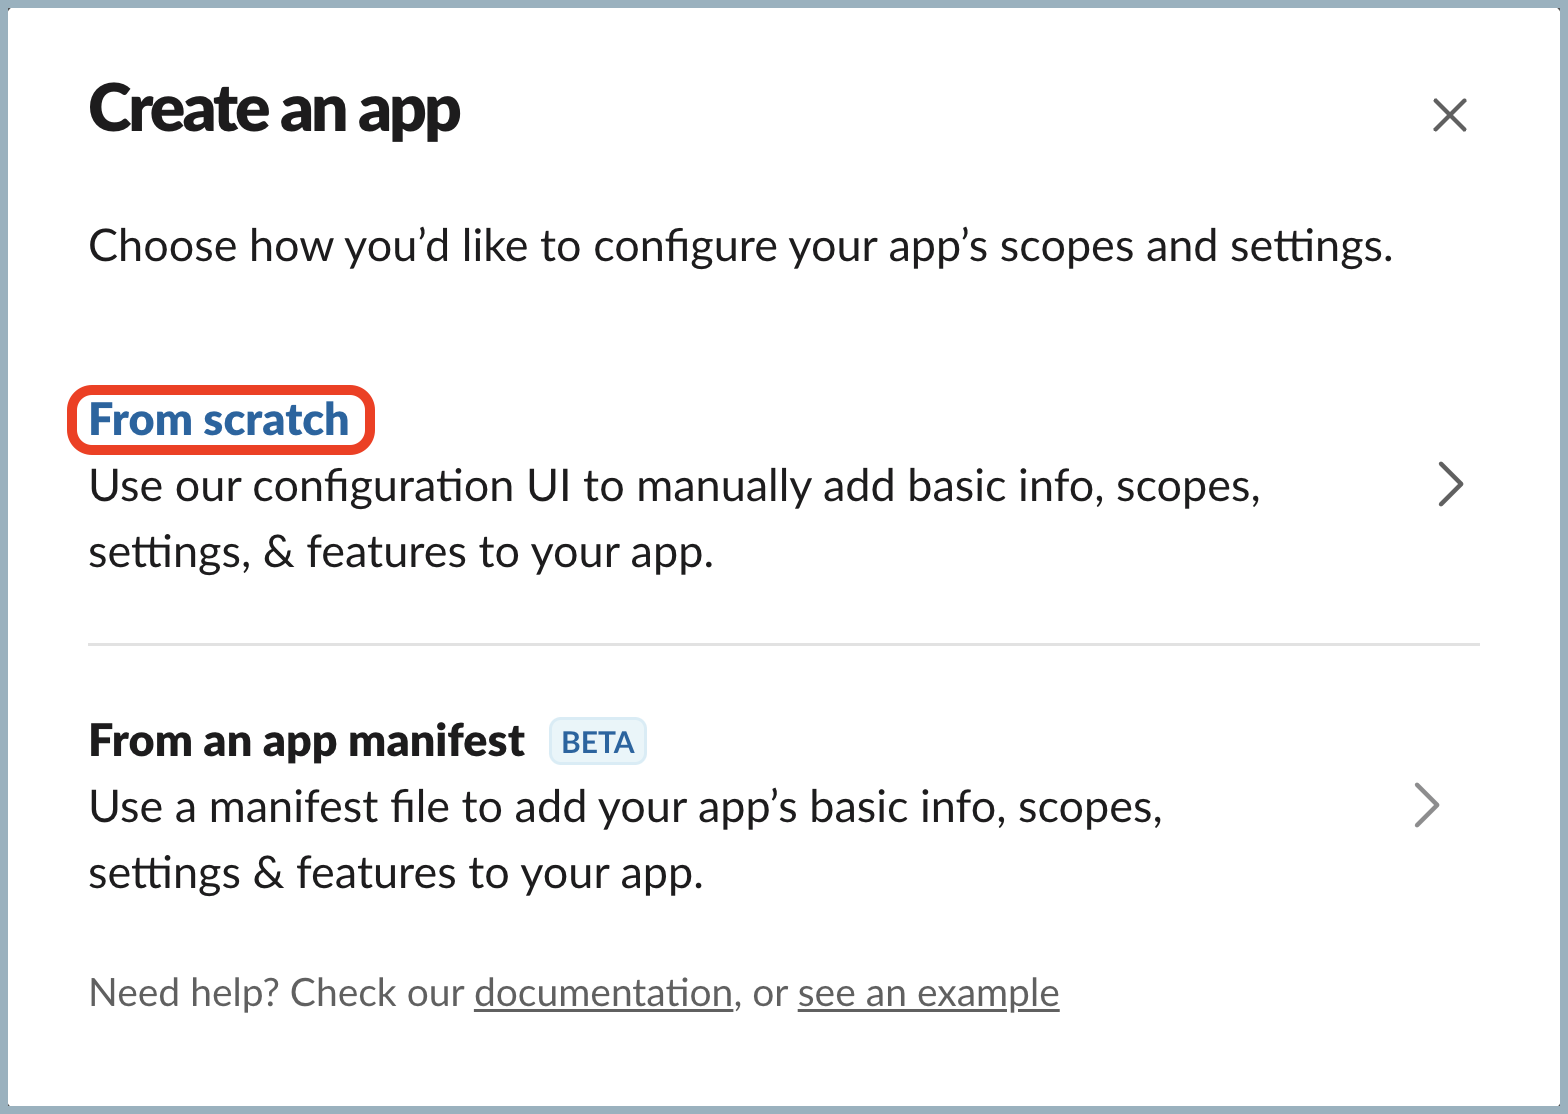
- Select From scratch.
- Enter "CSOAR Bot" as the app name and select the workspace where you wish to install it.
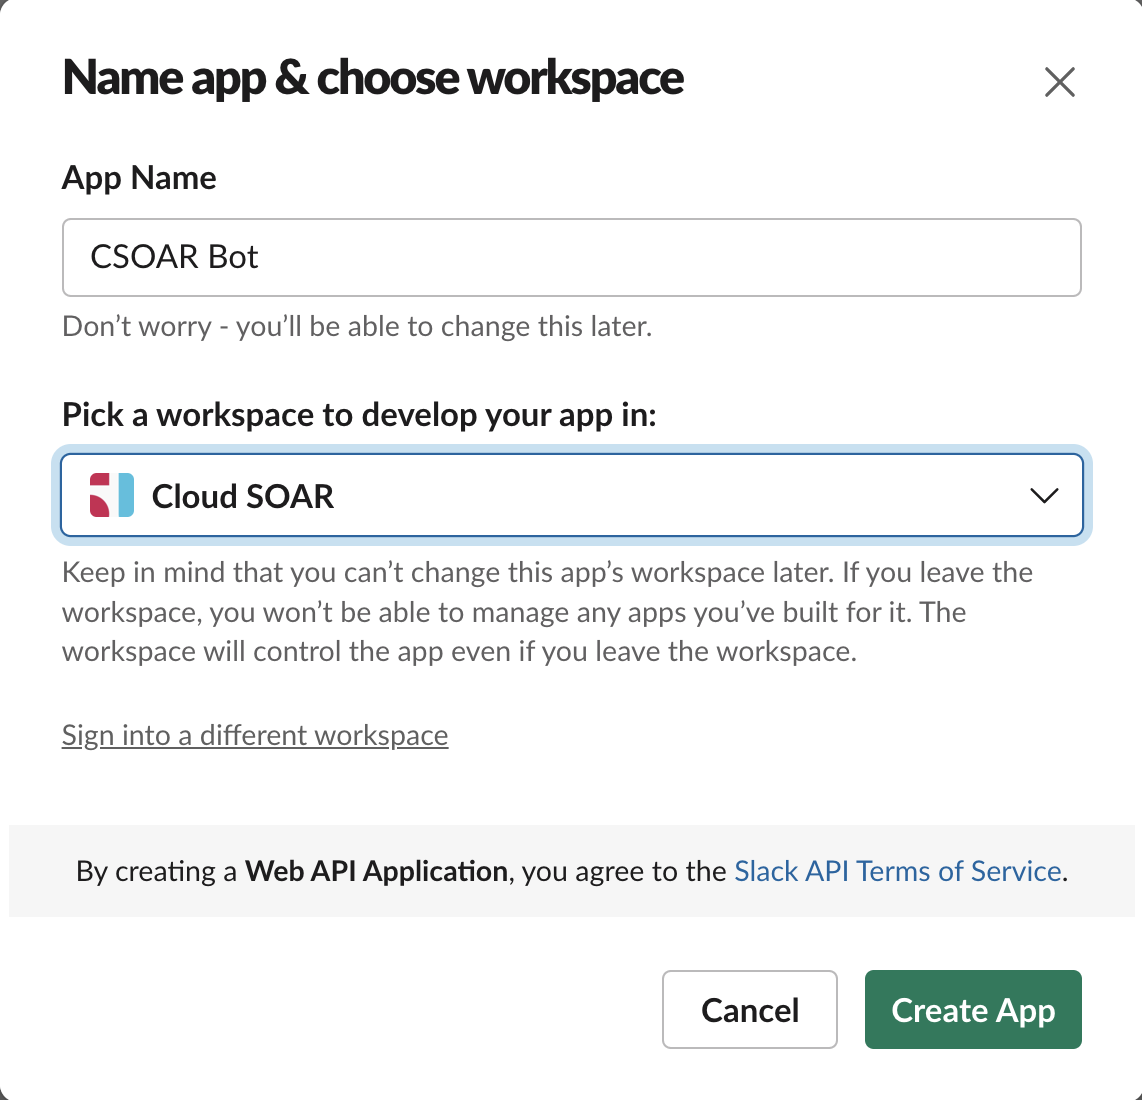
- Click Create App.
Step 2: Add permissions to the Slack app
After you create a Slack app, you must add the appropriate permissions for use with Cloud SOAR.
- Click Permissions, or from the left nav bar, click OAuth & Permissions.
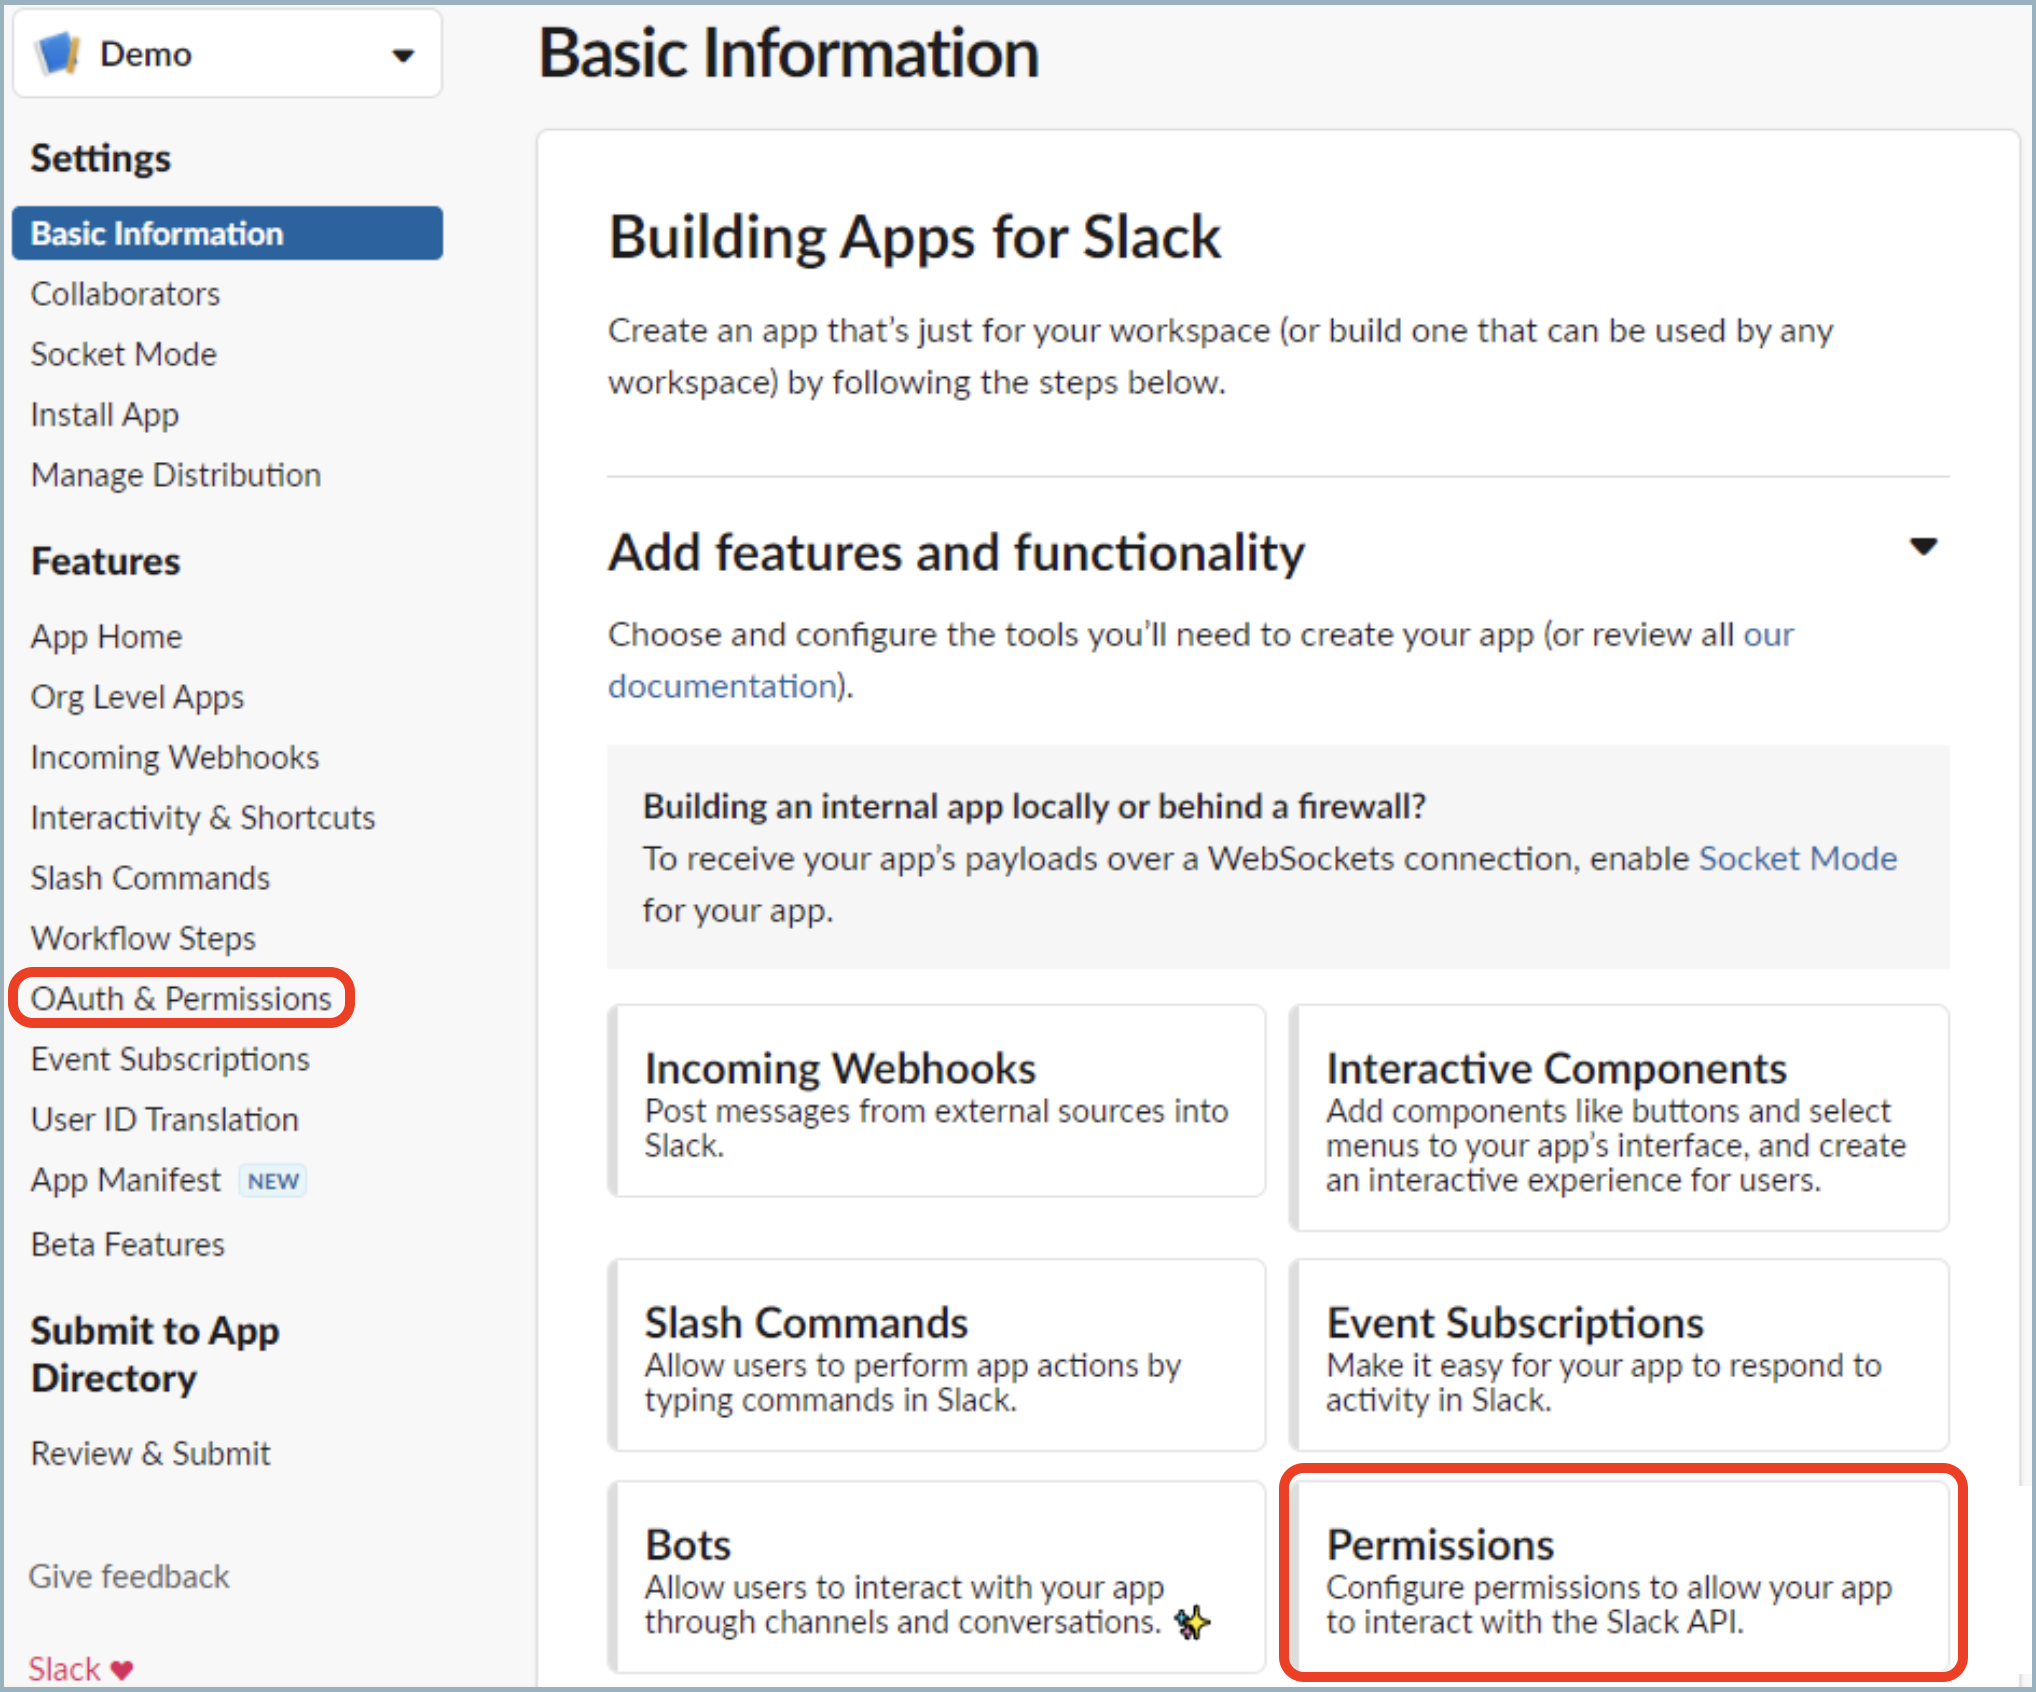
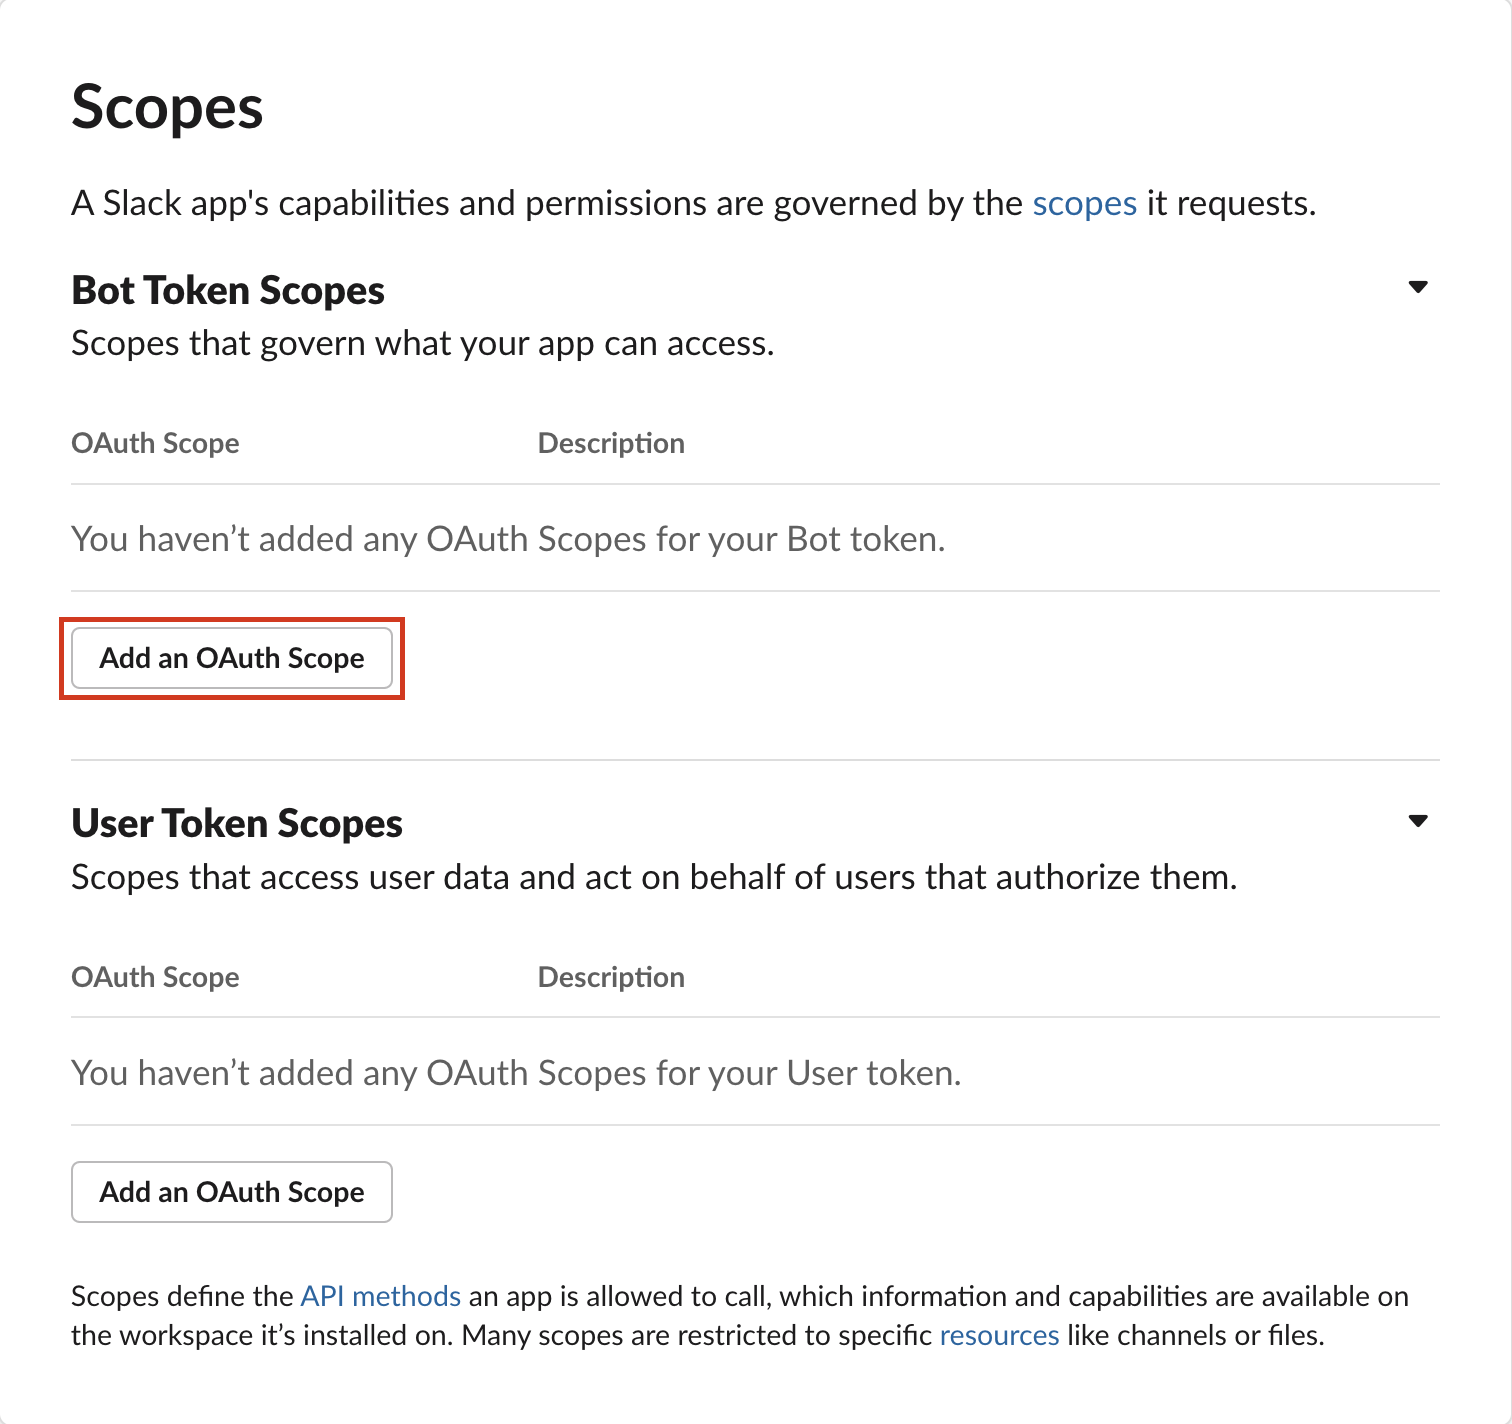
- Scroll down to the Scopes section.
You must add permissions for the Bot Token. Bot tokens let your app act independently. - Click Add an OAuth Scope under Bot Token Scopes.
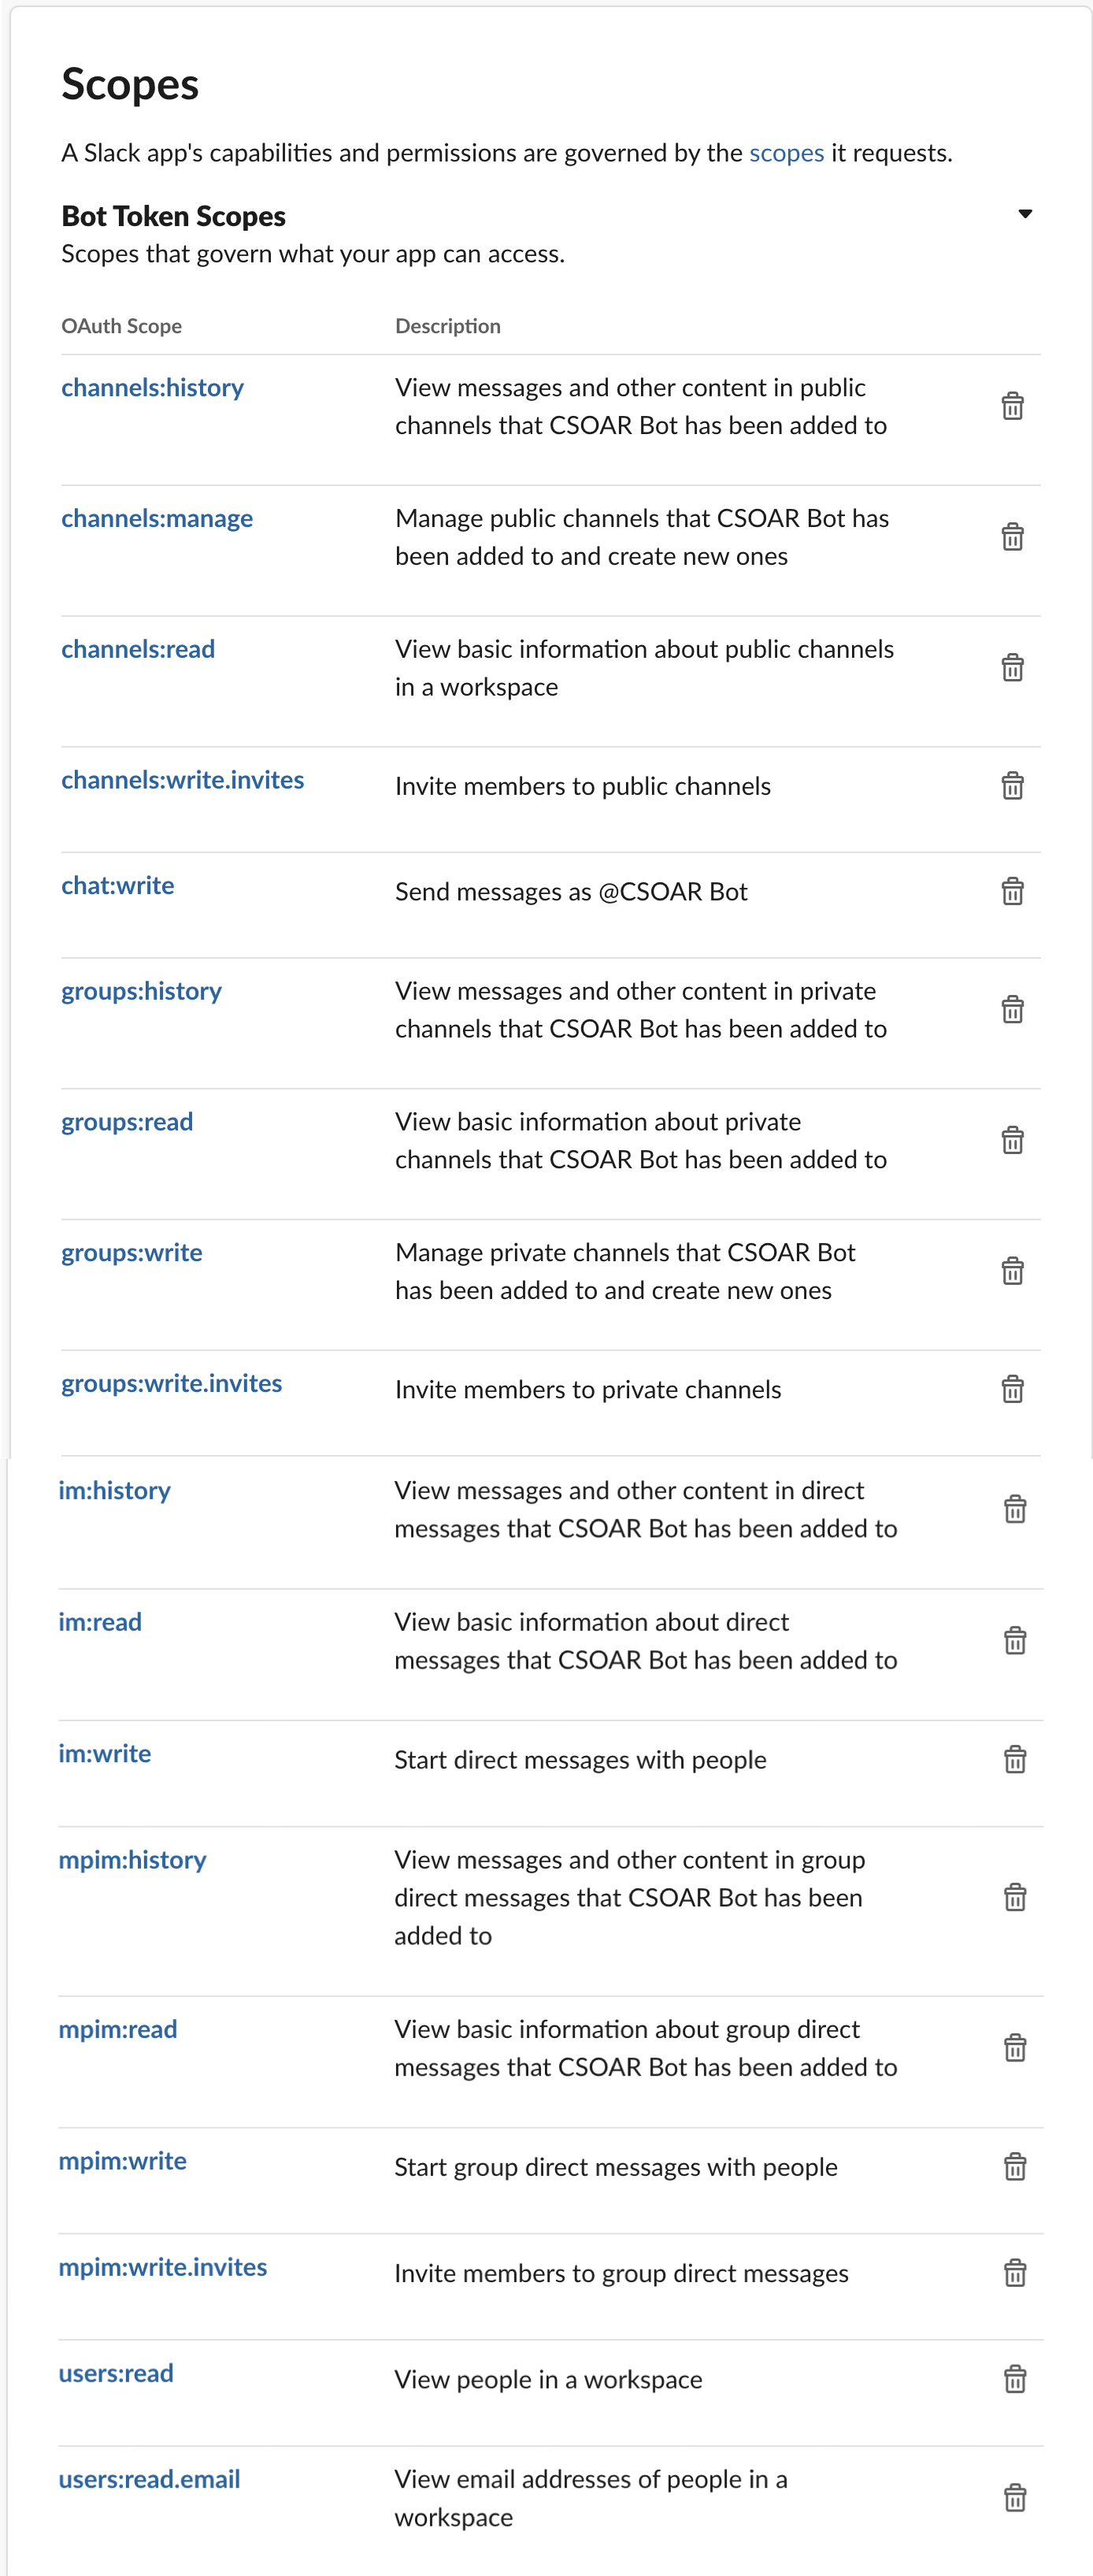
- Enter the following permissions.
- Actions: List Channels / Get Channel / Get Members
channels:read. View basic information about public channels in a workspace.groups:read. View basic information about private channels that your Slack app has been added to.im:read. View basic information about direct messages that your Slack app has been added to.mpim:read. View basic information about group direct messages that your Slack app has been added to.
- Actions: Create channel / Invite To Channel / Remove User From Channel / Archive Channel
channels:manage. Manage public channels that your Slack app has been added to and create new ones.channels:write.invites. Invite members to public channels.groups:write. Manage private channels that your Slack app has been added to and create new ones.groups:write.invites. Invite members to private channels.im:write. Start direct messages with people.mpim:write. Start group direct messages with people.mpim:write.invites. Invite members to group direct messages.
- Actions: List Users / Get User
users:read. View people in a workspace.users:read.email. View email addresses of people in a workspace.
- Actions: List Conversations History
channels:history. View messages and other content in public channels that your Slack app has been added to.groups:history. View messages and other content in private channels that your Slack app has been added to.im:history. View messages and other content in direct messages that your Slack app has been added to.mpim:history. View messages and other content in group direct messages that your Slack app has been added to.
- Actions: Send Message / Delete Message
chat:write. Post messages in approved channels and conversations.
- Actions: List Channels / Get Channel / Get Members
- Verify that scopes are set up correctly:
- Here are the Bot Token scopes after configuration:
- Here are the Bot Token scopes after configuration:
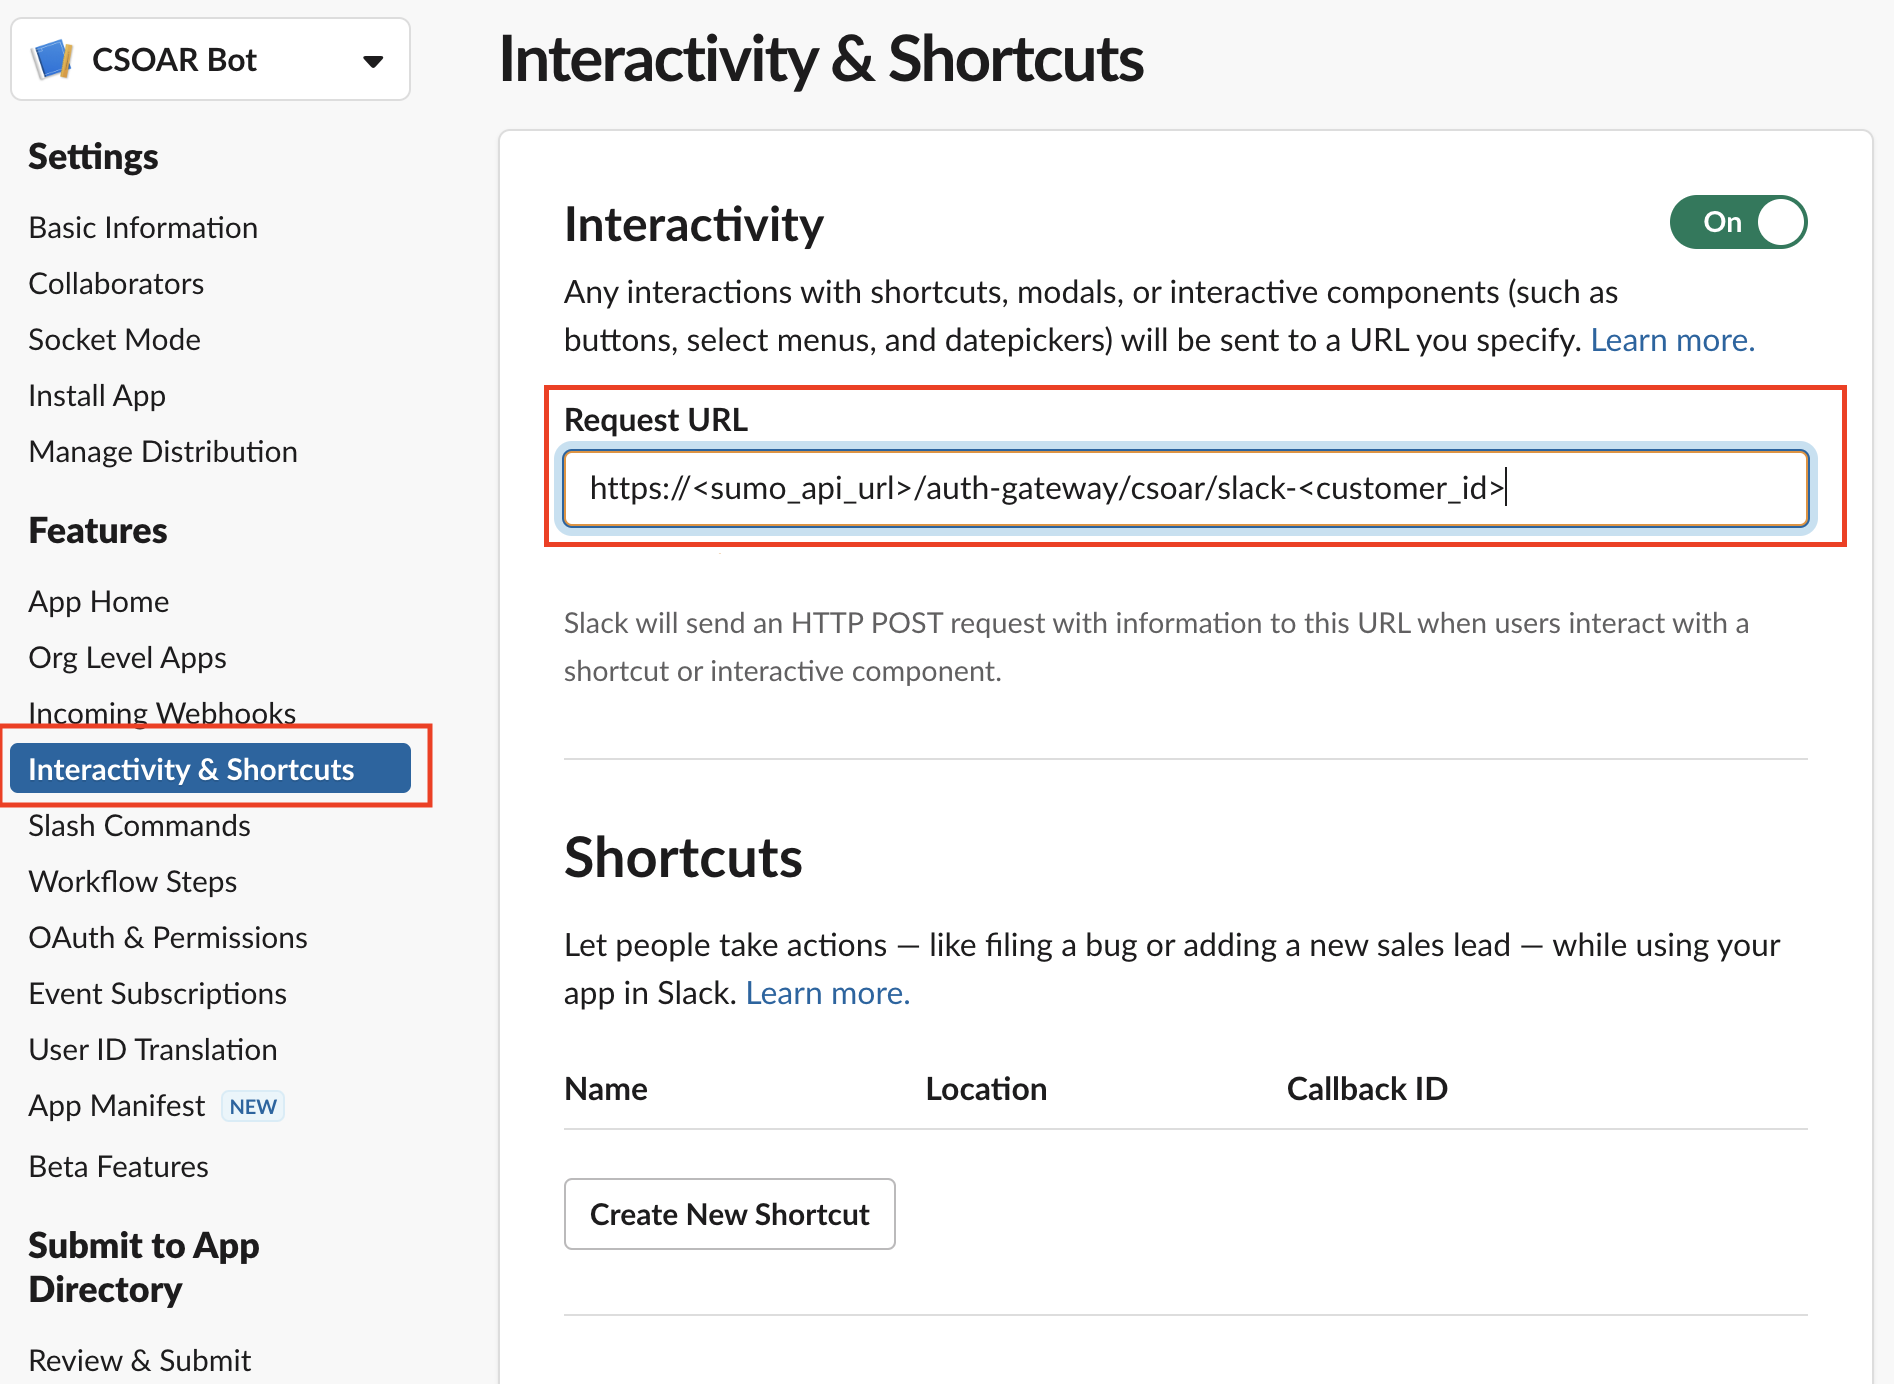
- Place your instance URL in the Interactivity & Shortcuts page.
- Click Install to Workspace to make the app available for use.
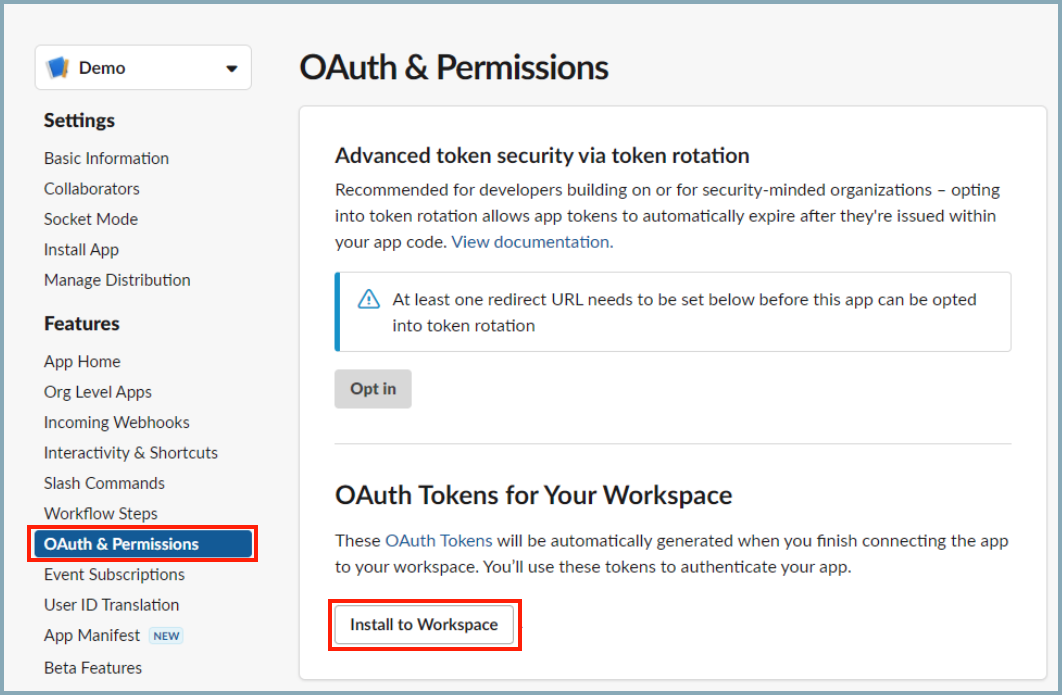
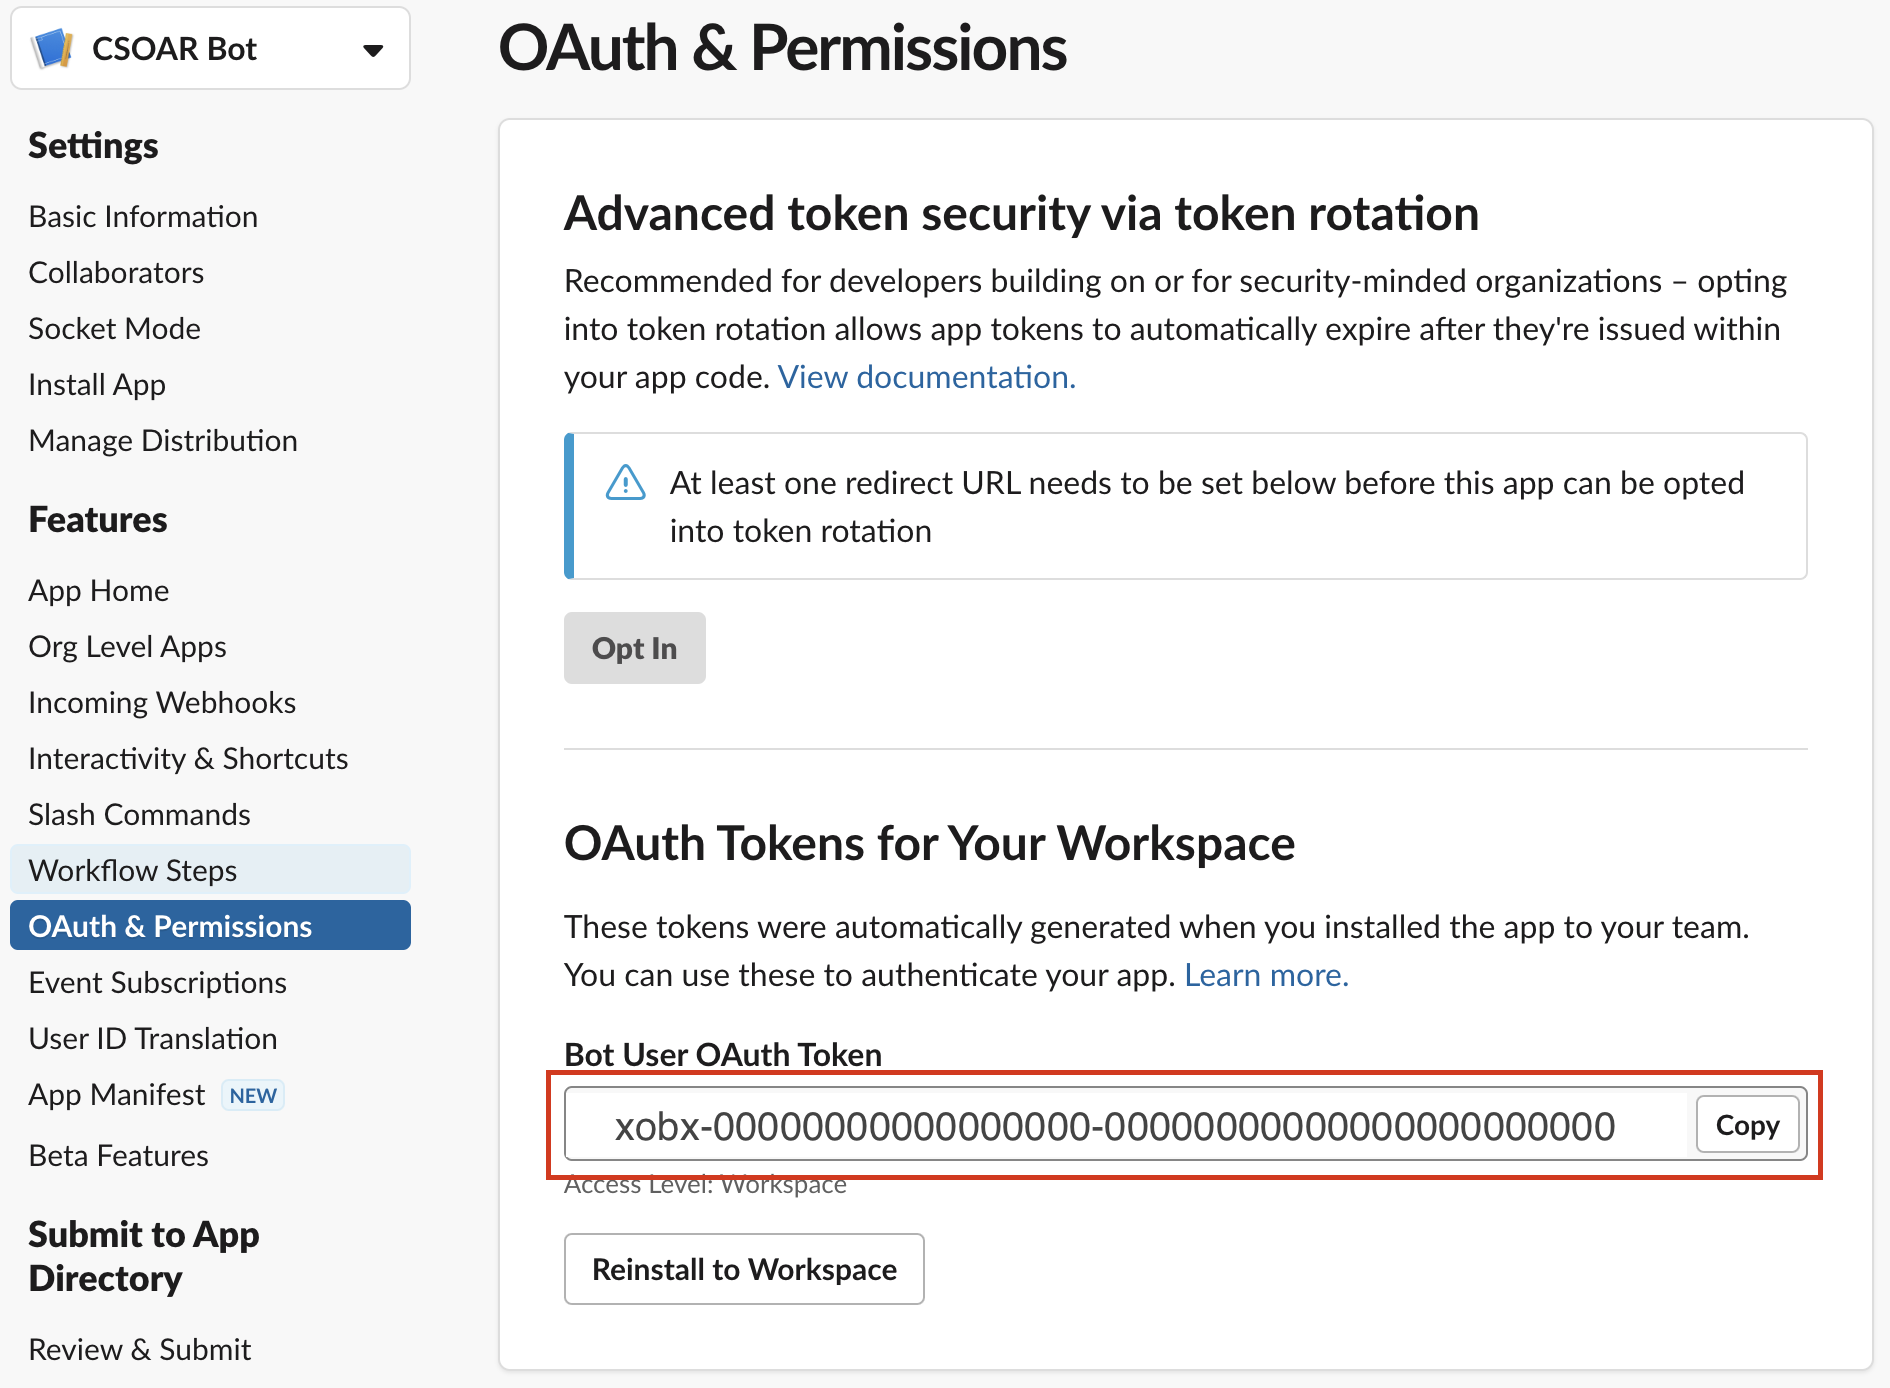
- Installation generates a Bot User OAuth Token and a Signing Secret. Copy the tokens and keep them in a secure location for use in the next step.

Step 3: Configure the Slack integration in Cloud SOAR
Now you must configure the Slack integration in Cloud SOAR to use the Bot OAuth Token and Signing Secret you saved in the previous step. These tokens will give the Slack integration the permissions it needs to perform the tasks in the scopes you set up.
-
Add resources for the tokens:
- Classic UI. Click the gear icon in the top right, select Automation, and then select Integrations in the left nav bar.
New UI. In the main Sumo Logic menu select Automation > Integrations. You can also click the Go To... menu at the top of the screen and select Integrations. - Select the Slack integration. The integration's resources appear.

- Click + to add a new Resource.
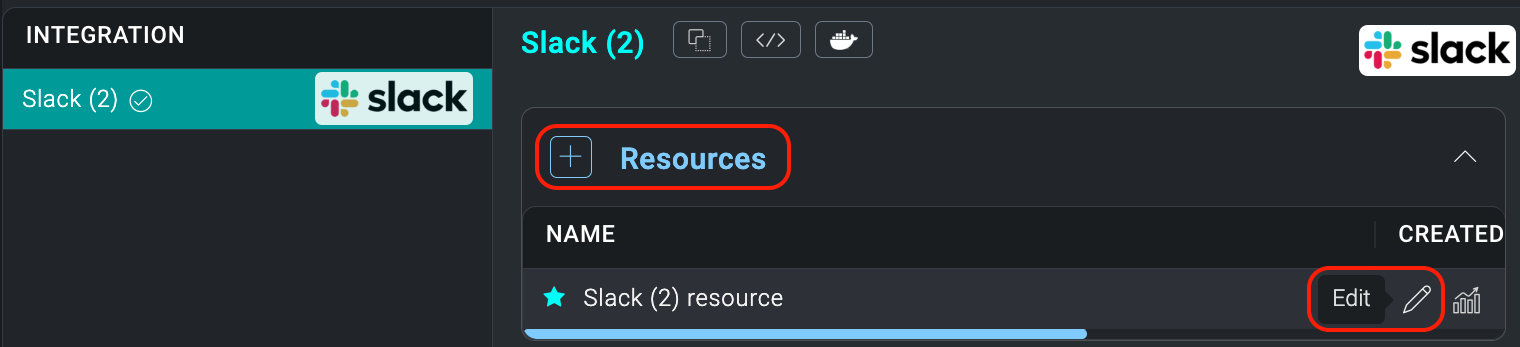
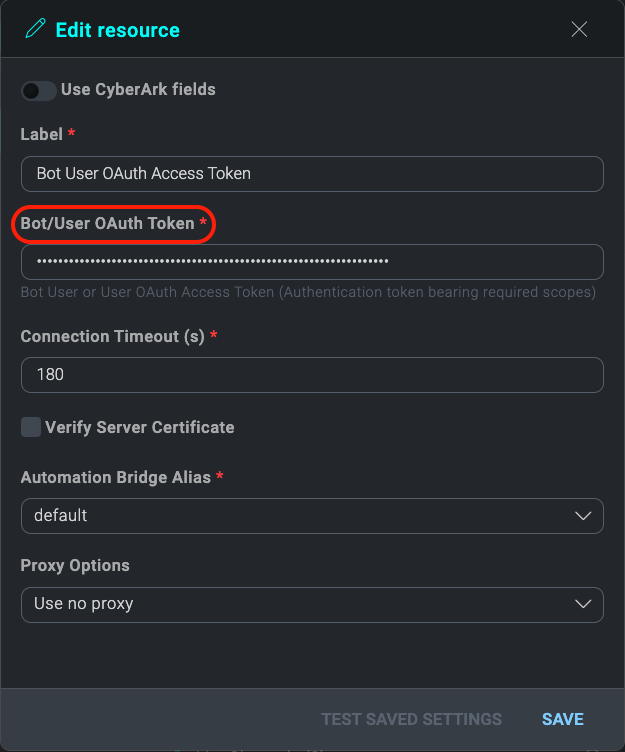
- Name the resource "Bot User OAuth Access Token".
- Copy the Bot Oauth Token you saved from the Slack API setup and paste it Into the Bot/User OAuth Token field.
- Click TEST to verify configuration.
- Once you have filled in all the required fields, click SAVE.
- Classic UI. Click the gear icon
-
Configure instant messaging:
- Classic UI. Click the gear icon in the top right and select Settings.
New UI. In the top menu select Administration, and then under Cloud SOAR Settings select General Settings. You can also click the Go To... menu at the top of the screen and select General. - Scroll down and open Instant Messaging.
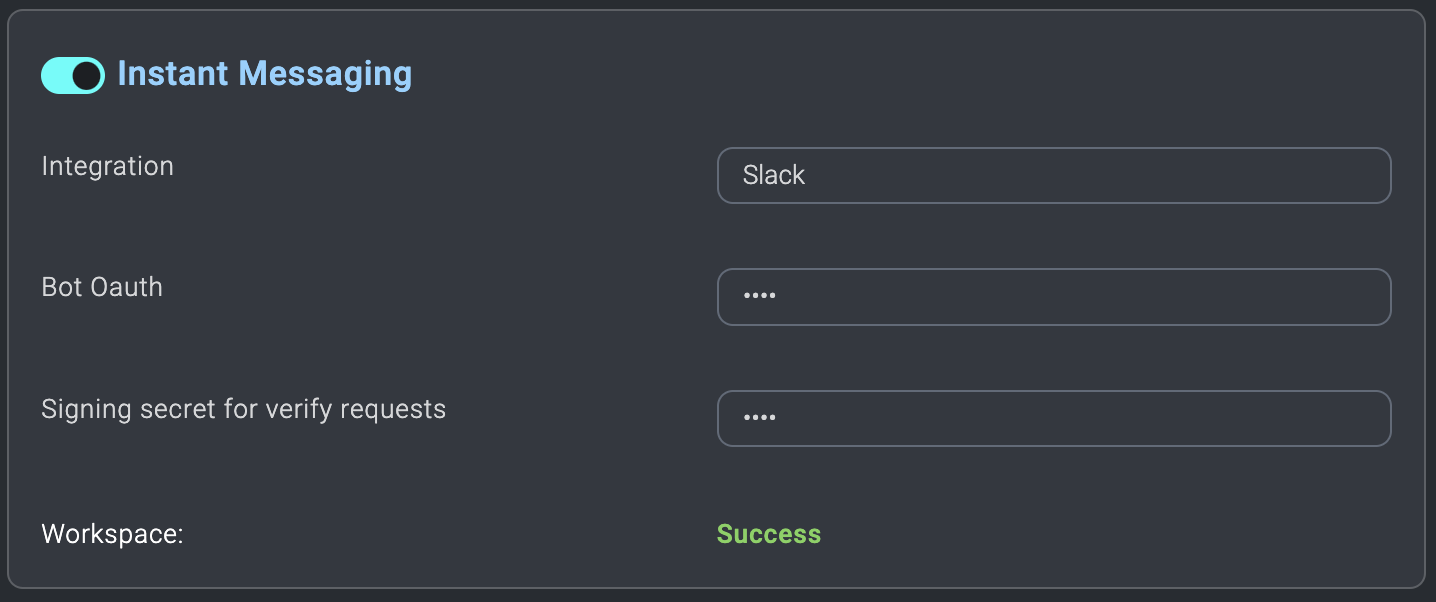
- For Integration select Slack.
- Paste your previously saved Bot User OAuth Access Token to the Bot OAuth field.
- Paste your previously saved Signing Secret to the Signing Secret for verify requests field. If configuration is successful, Workspace displays "Success".
If your new resources are configured correctly, and Instant Messaging displays a "Success" message for the configured workspace, you can Use the Slack app in User Choice.
- Classic UI. Click the gear icon
Use the Slack app in User Choice
If you have configured Slack as described in Configure Slack for Cloud SOAR, you can set a playbook’s user choice to be answered by Slack.
- Run a playbook with a User Choice action. The following example shows a simple playbook with two available answers: Close Incident and Investigate. Notice that the option Answer By Slack is enabled.
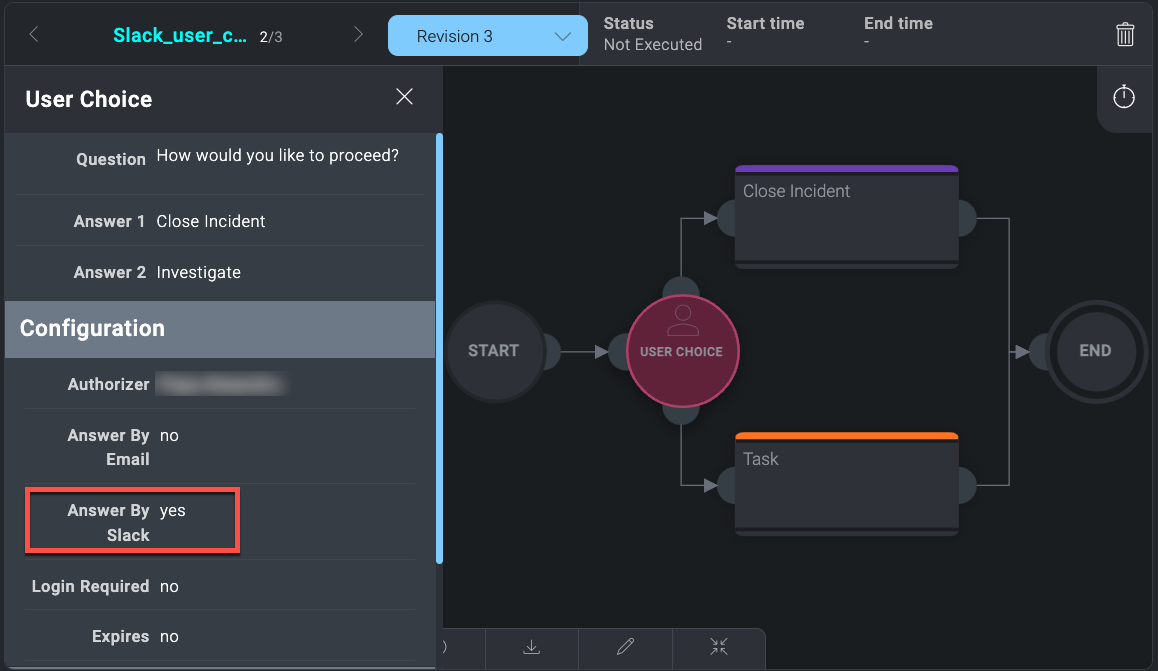
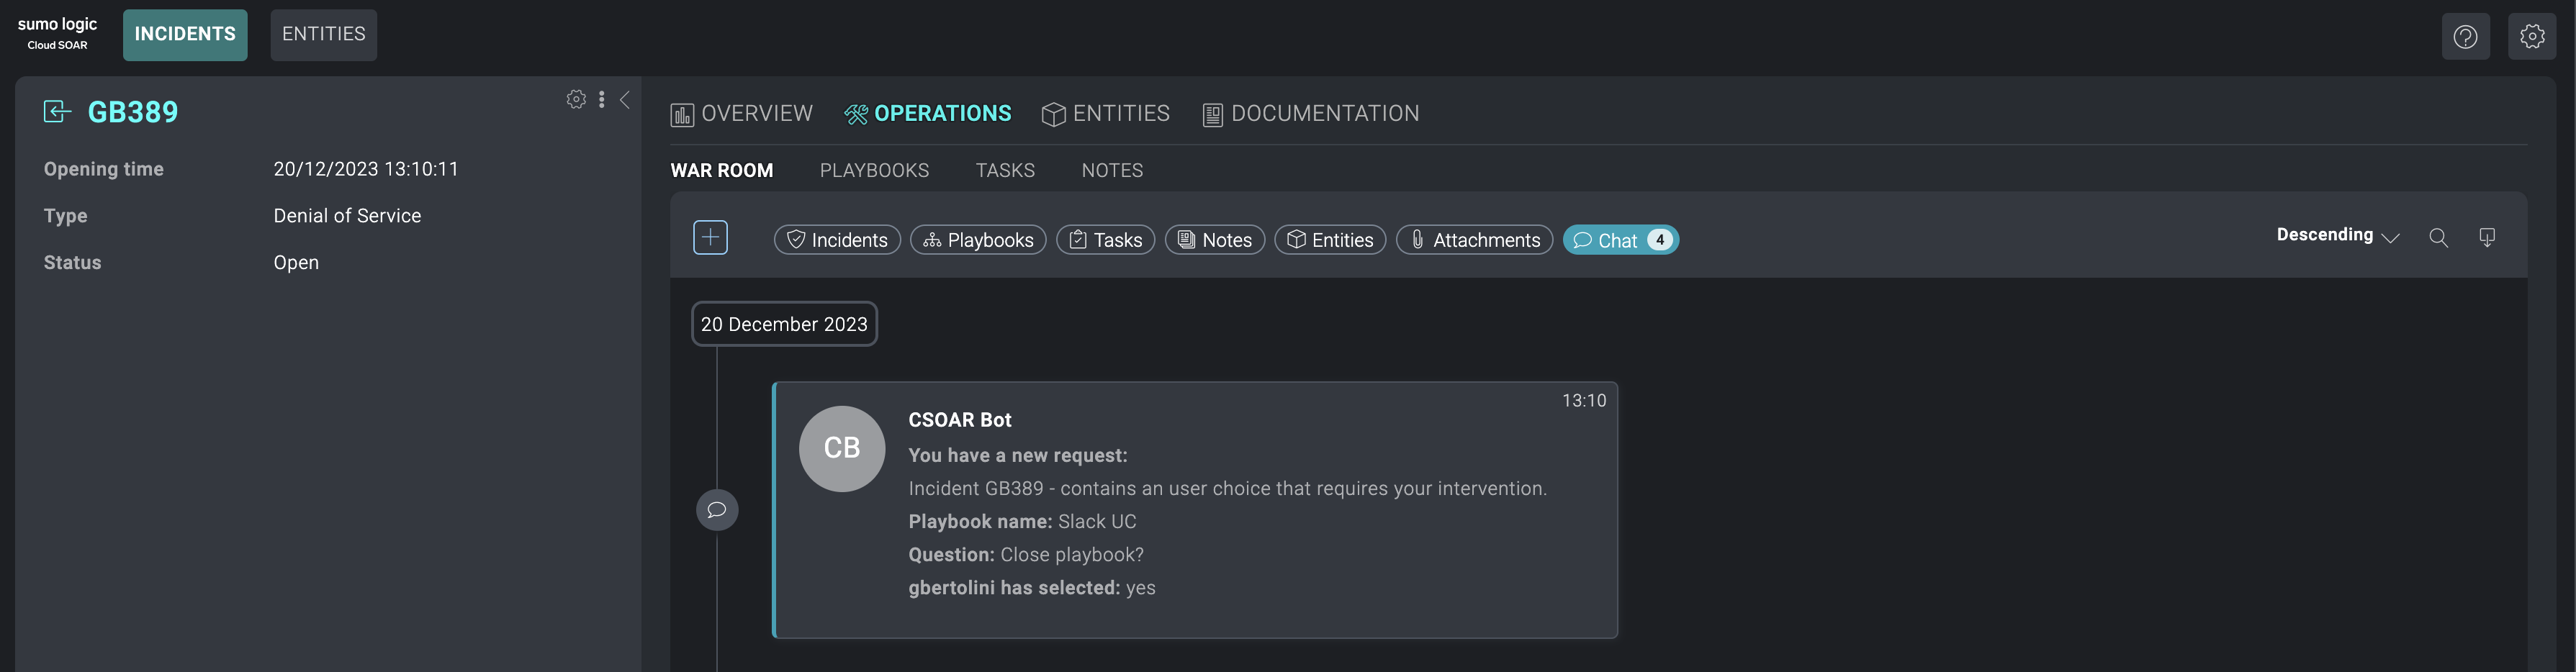
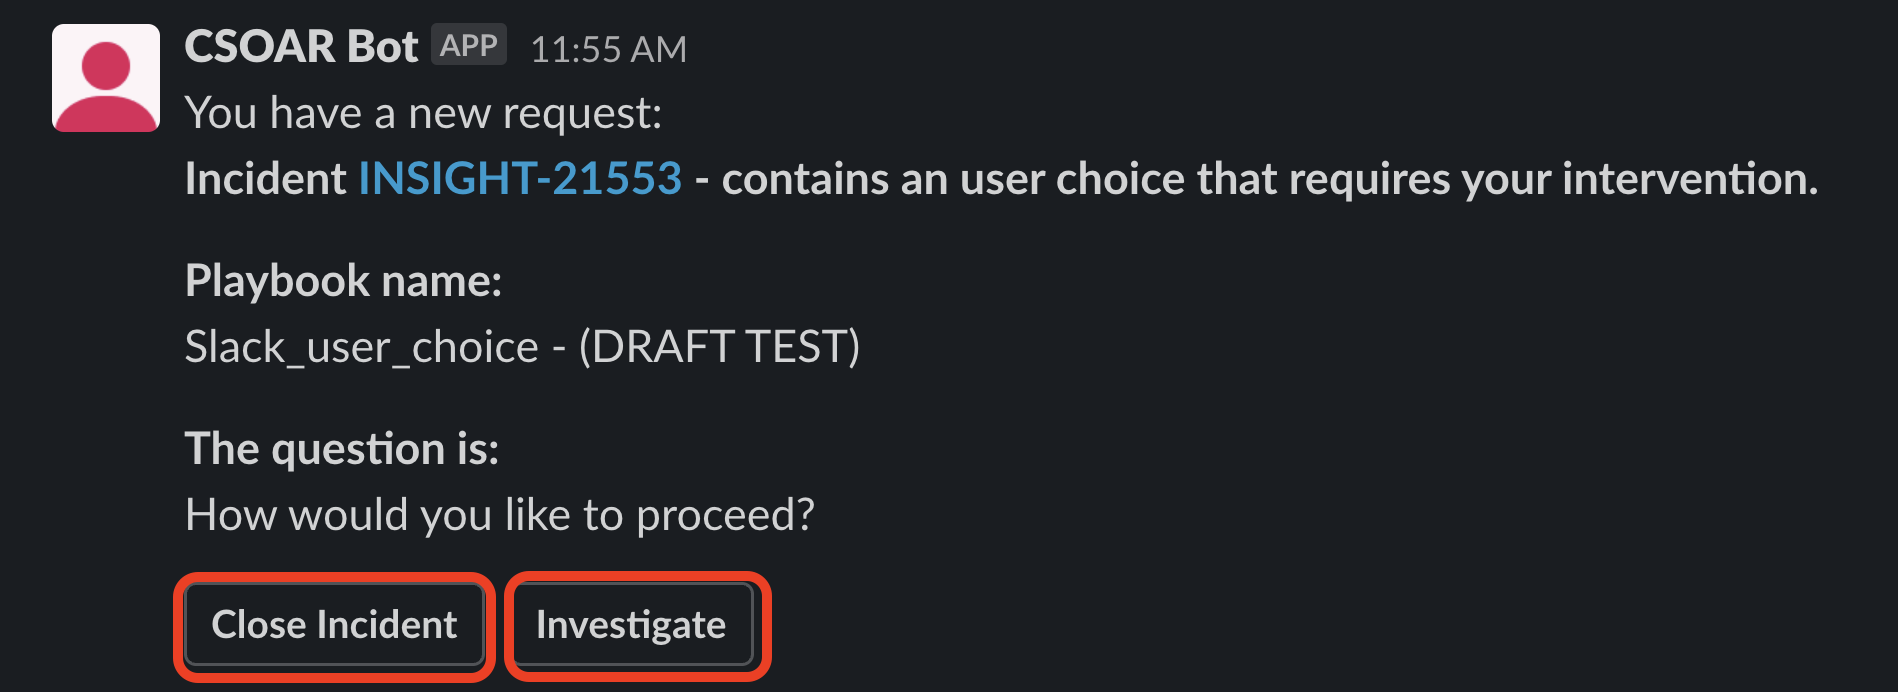
In this case, the Authorizer set is just a user. If a group is chosen, a message will be sent directly from the CSOAR Bot to every available user. If a user is not selected, and the playbook is inside an incident, the message will be sent within the relevant channel in the Slack workspace, and all the users within it will be authorized to choose one of the User Choice available options. - When the playbook flow reaches the User Choice, the user will receive a message containing the reference to the incident, the playbook name, and the question set for the User Choice.
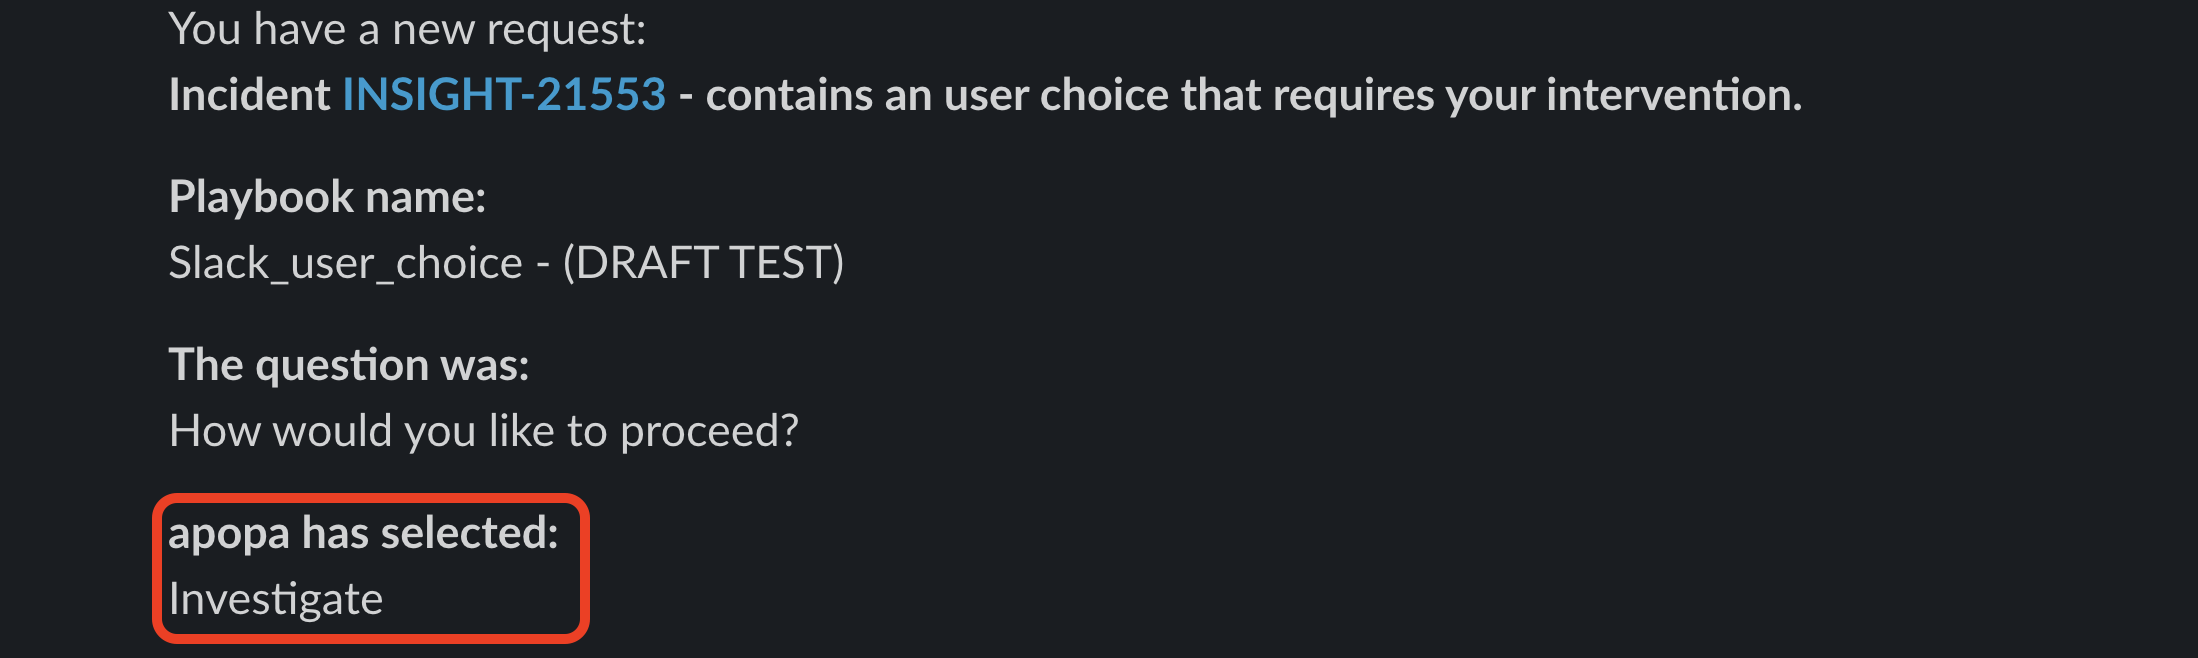
- After a recipient chooses one of the available options, the playbook flow will continue and a message will inform the user or the group about the choice made.
Bidirectional use cases between Slack and incident management
You can manage Slack communication channels directly by creating/editing various incidents within Cloud SOAR. Here are some use cases:
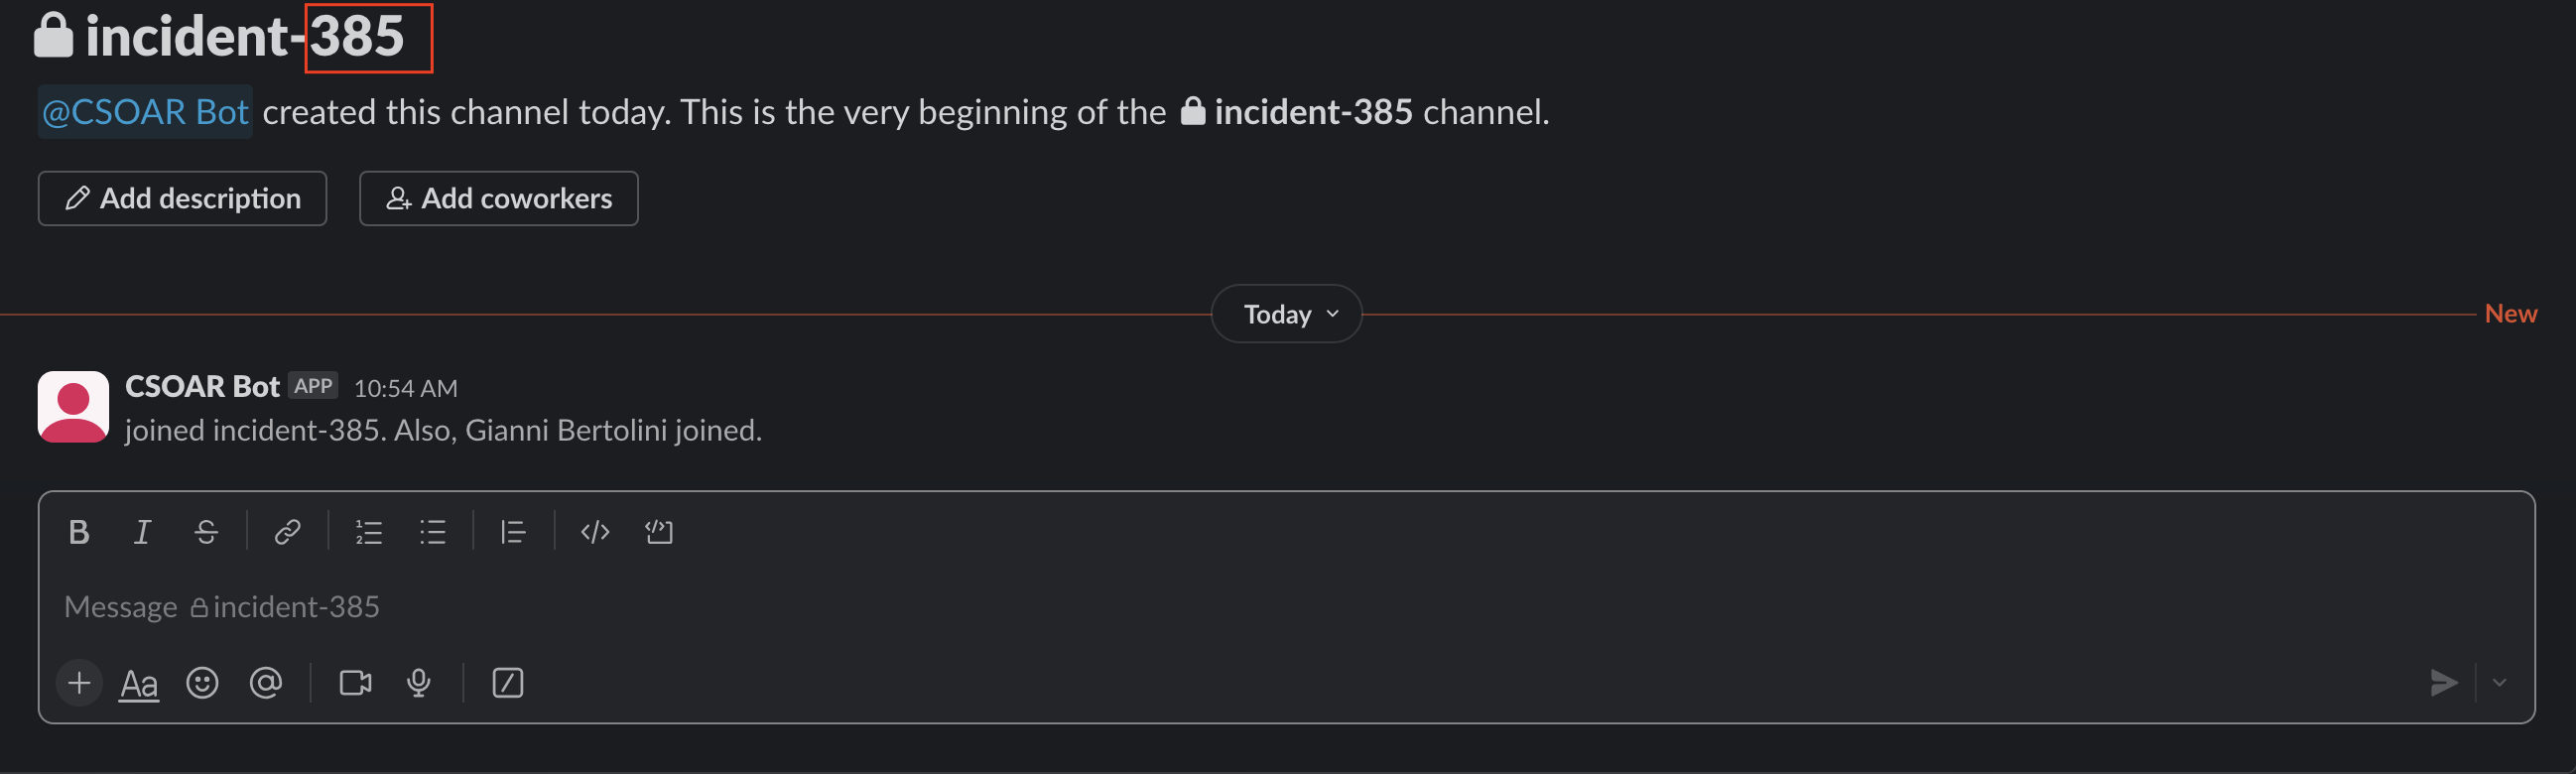
- Creating an incident
When an incident is created, a conversation channel will automatically be created within your Slack workspace, where the channel name will be formed like this: incident-incident_id. Furthermore, all users (owners, investigators, groups) who are part of the workspace will be added to the channel.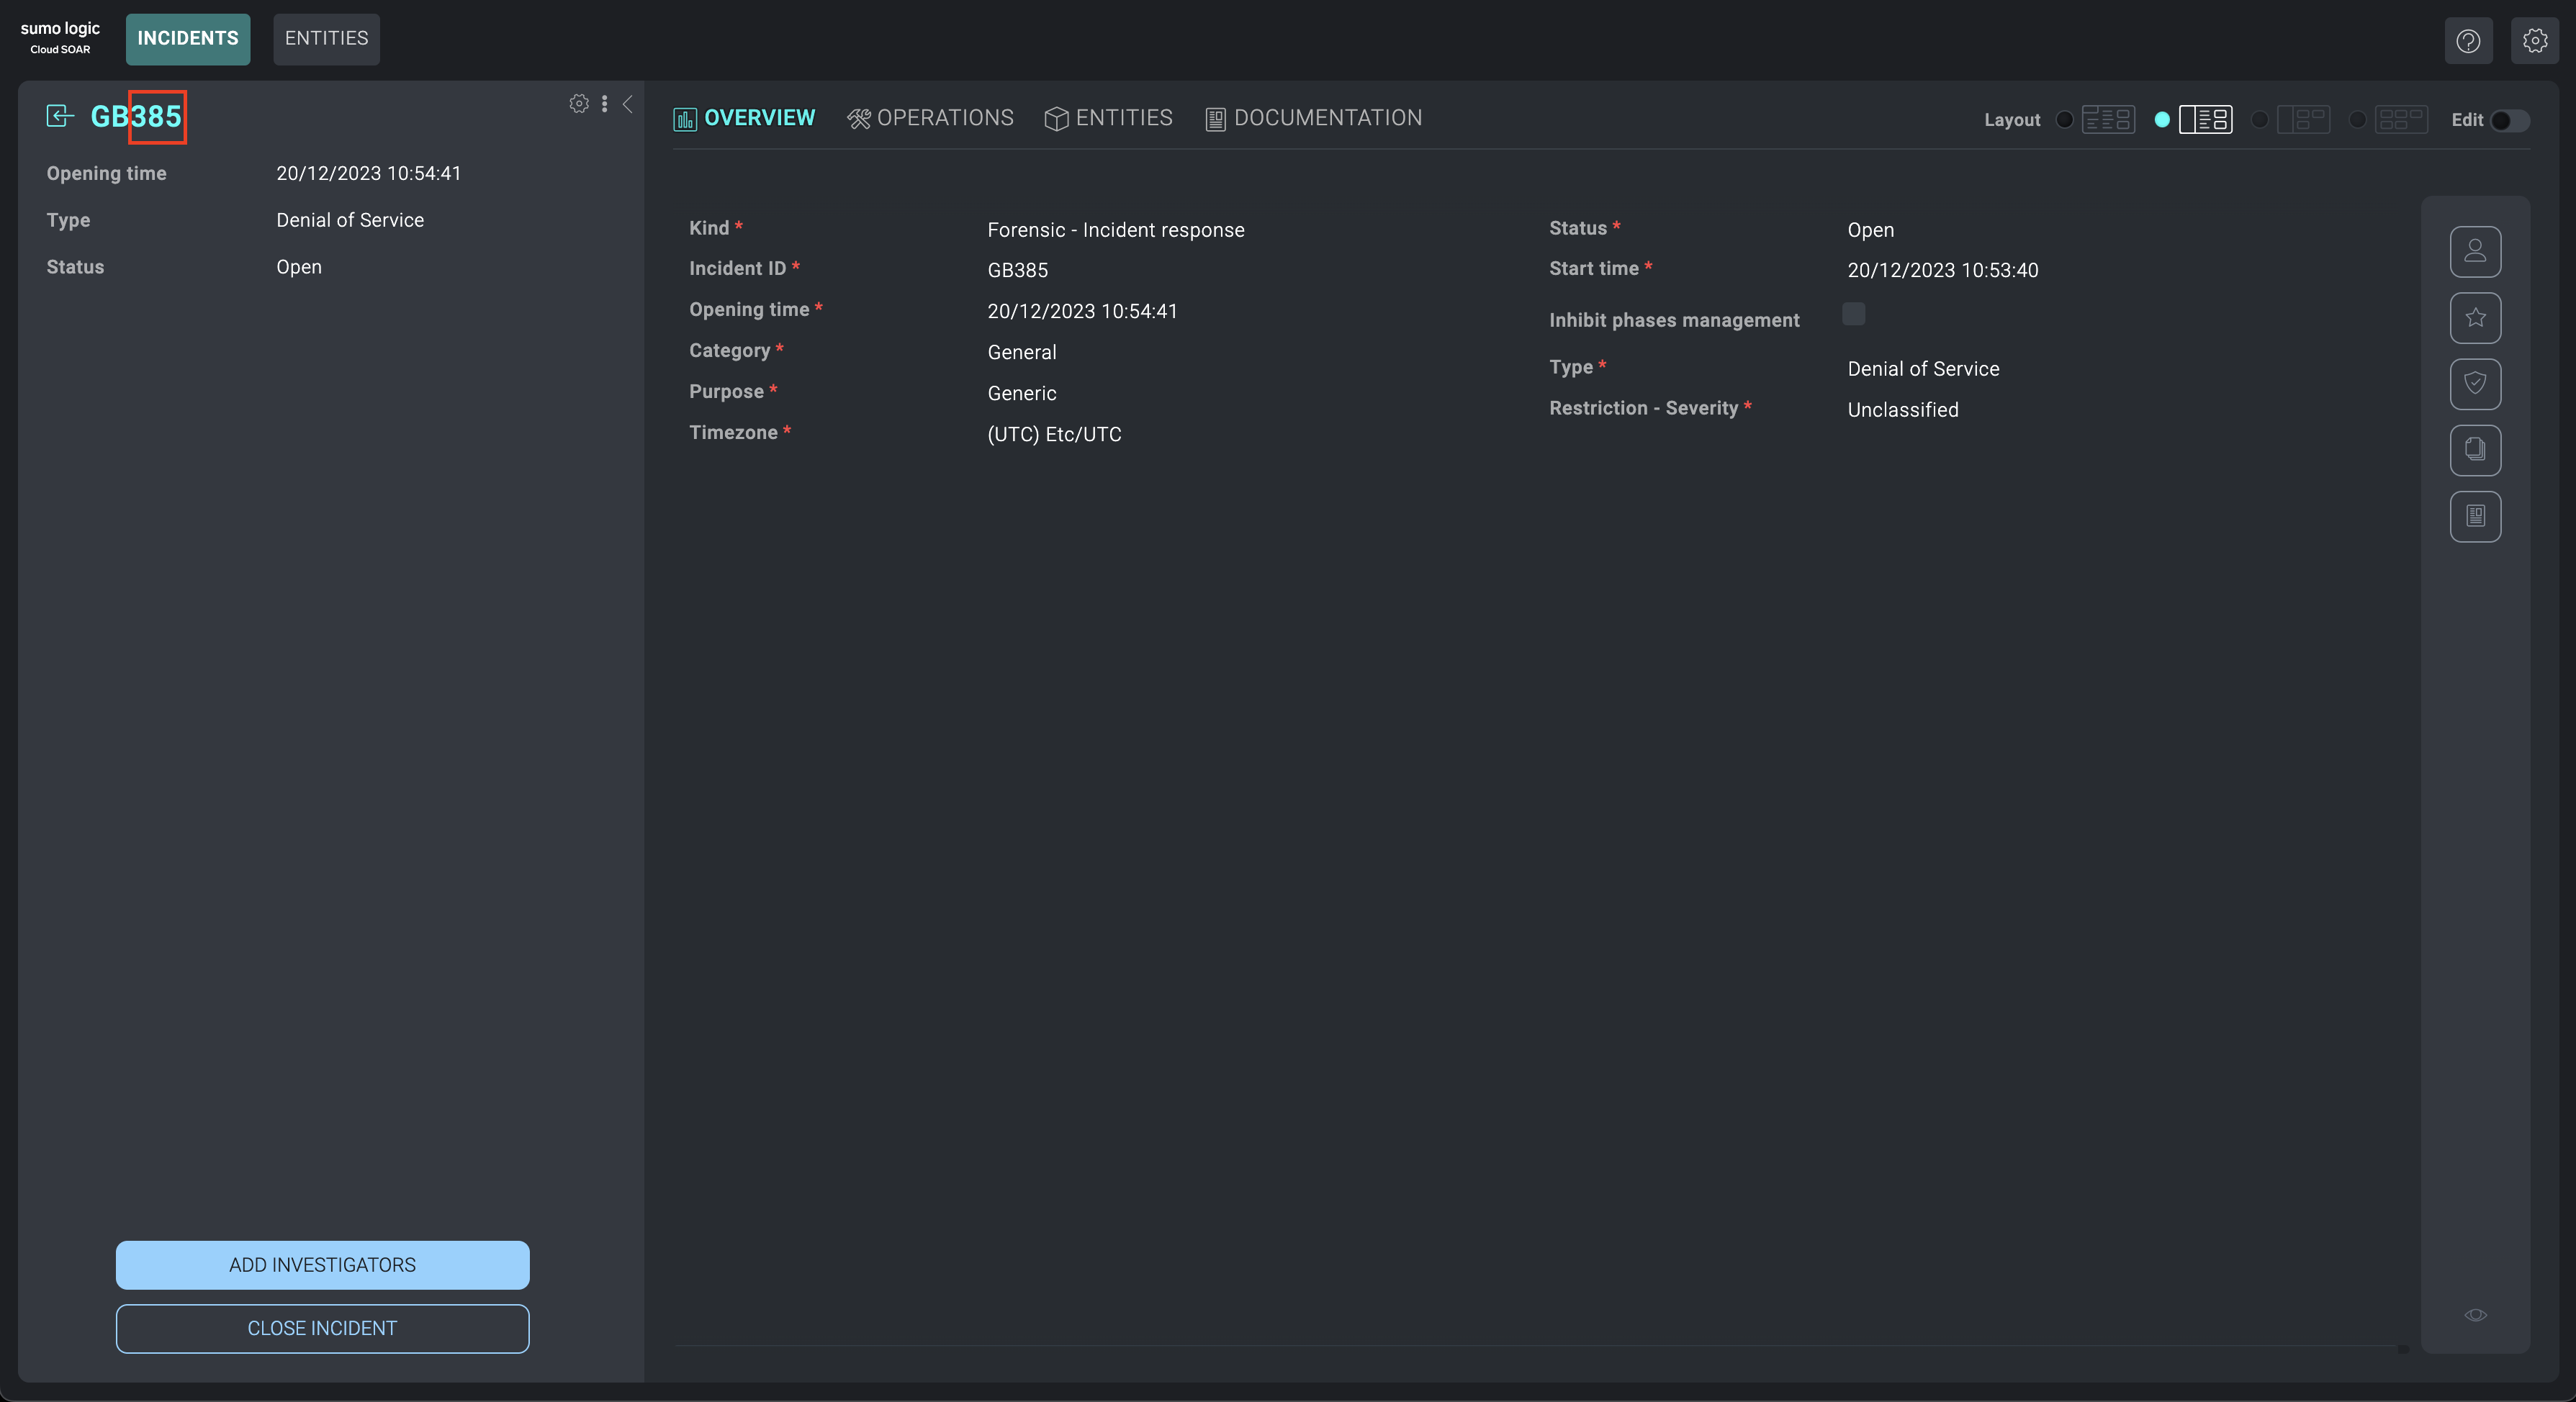
- Adding / removing users from the incident
When users (owners, investigators, groups) are added or removed from the incident, they will be managed in the same way within the channel in the workspace. - Close / delete an incident
When an incident is closed / deleted, the related channel in the workspace will automatically be archived as well.
- Viewing channel history from the War room section
Within the war room section of an incident, it will be possible to view the history of a Slack channel.