Legacy Cloud SOAR Automation
This article only applies to organizations having a legacy Cloud SOAR instance URL matching the pattern *.soar.sumologic.com. If it doesn't, refer to Cloud SOAR Automation for documentation of our latest Cloud SOAR SaaS version.
Report template
Report Templates allow users to build their own reports by selecting various components of an incident they wish to include in the report. These components can include incident details, evidence, hosts, observables and many others.
Credential Manager - CyberArk Configuration
You can use CyberArk Credential Manager to manage data that will be used in integration resources.

Using the cogwheel icon on the right in the integrations section, the main section of the CyberArk configuration opens.
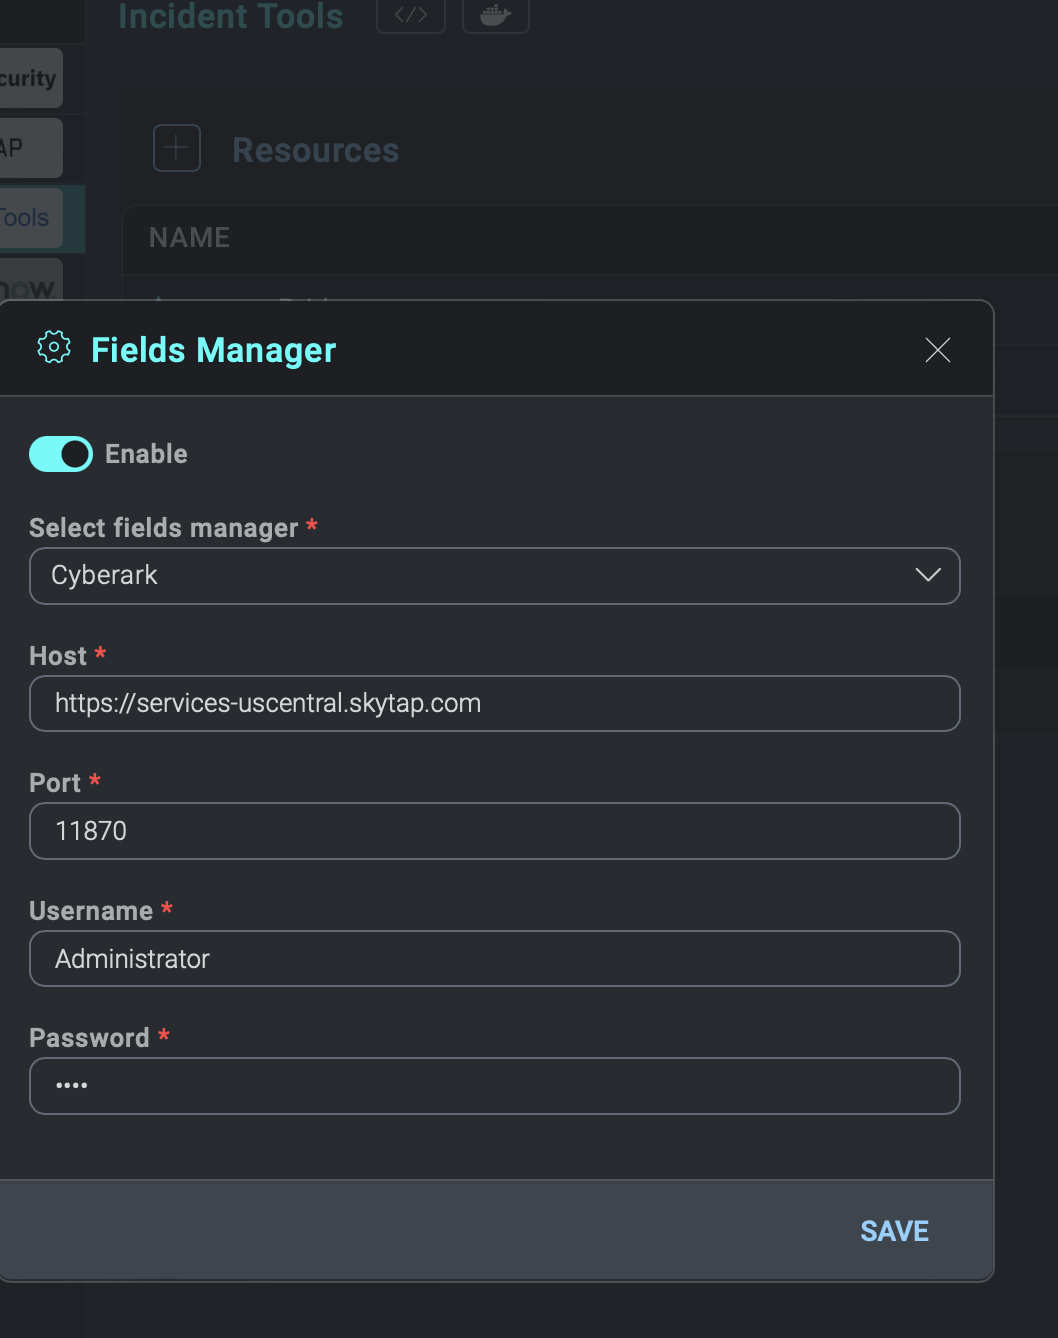
Here you can set URL and port of the Components server, and the credentials needed to connect to CyberArk. The Enable checkbox can be enabled or disabled later.
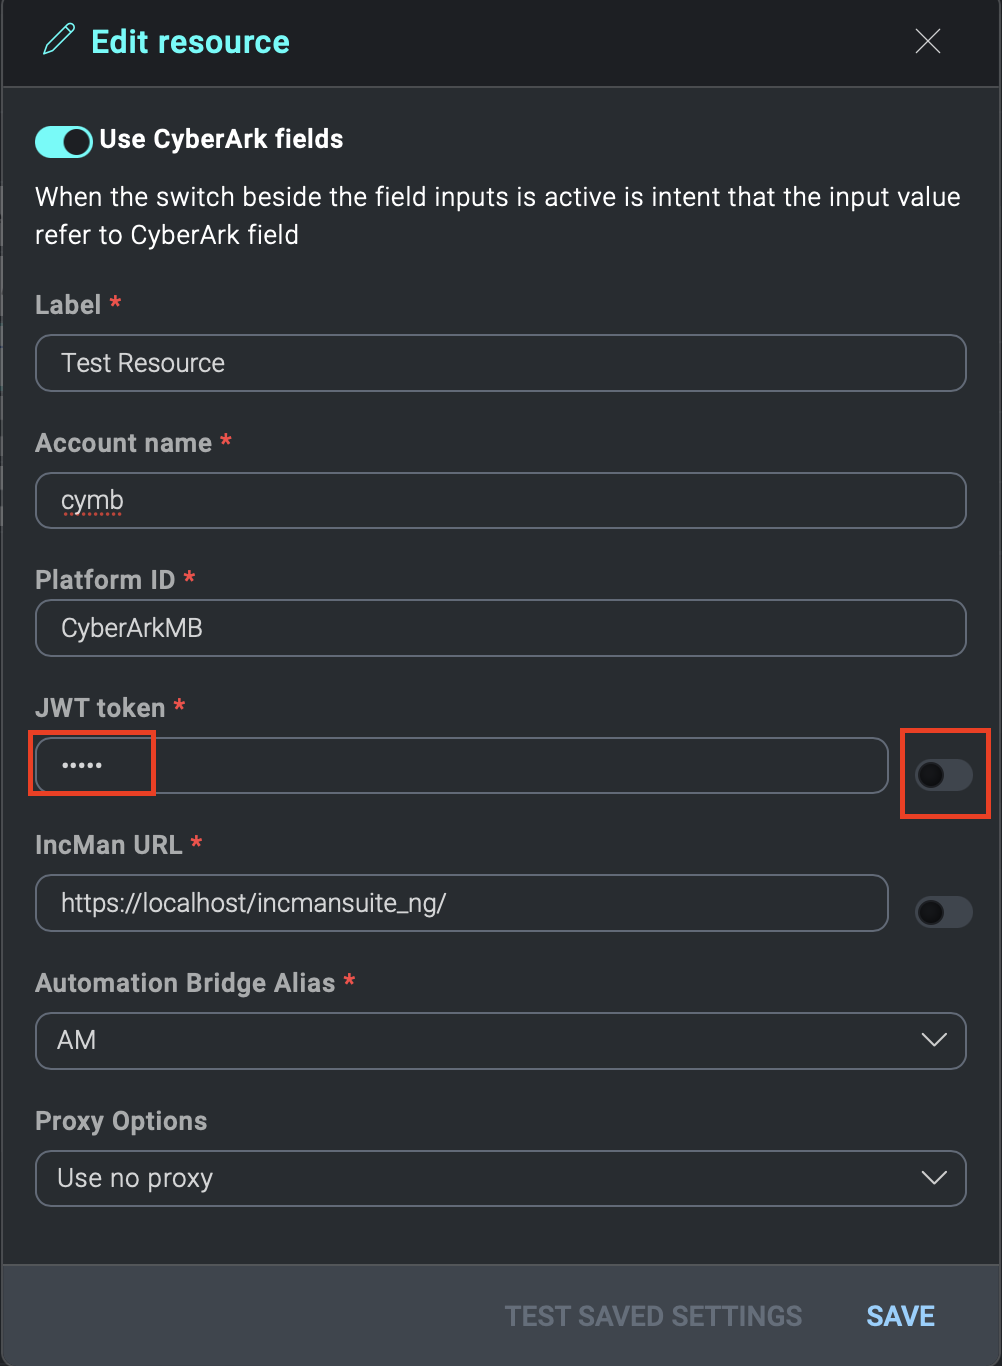
If enabled, when you go to open the detail of a integration resource you'll find a new checkbox (Use CyberArk fields) at the top already active. If the checkbox on above window is disabled, the checkbox in the resource window will be disabled by default, and it will not be possible to activate it.
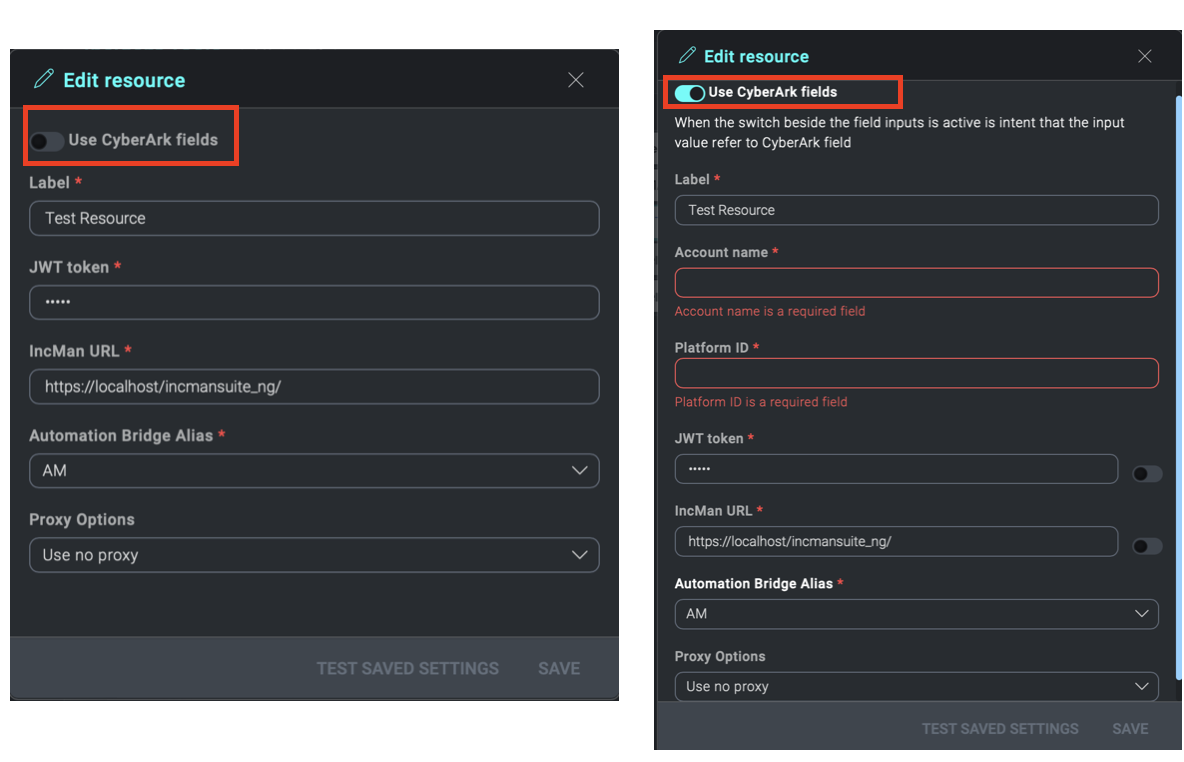
If the checkbox Use CyberArk fields is enabled, two new mandatory fields will appear:
- Account Name > userName in CyberArk
- Platform ID > platformId in CyberArk
Near these fields, there will be the relative toggle that will enable the related field for use on CyberArk.
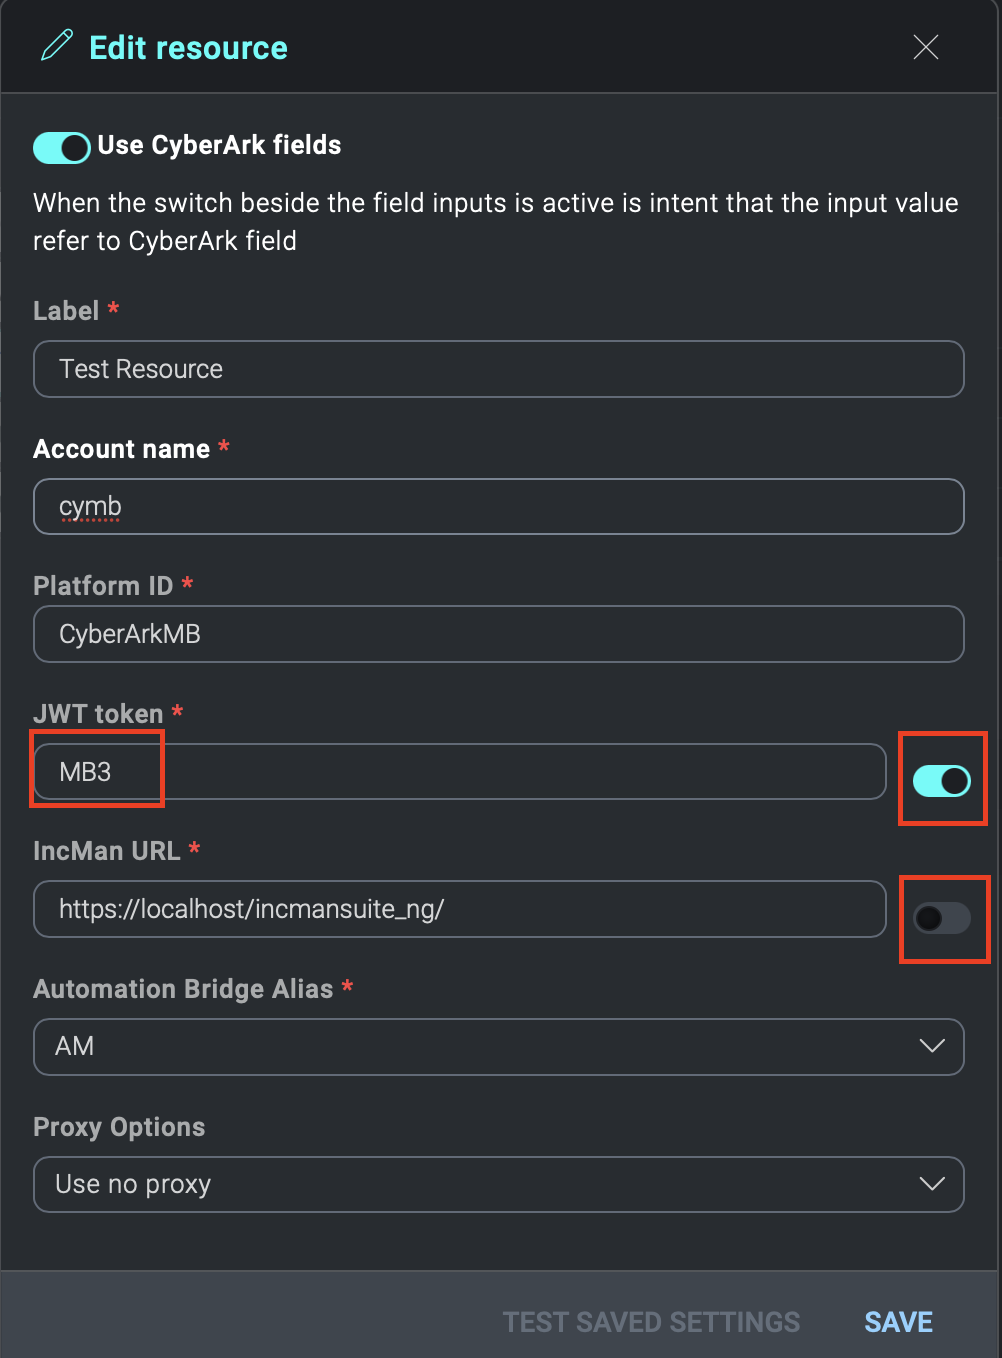
In the image above, you can see two custom fields of the resource with their toggles. The first field has been enabled to use CyberArk, while the second one hasn't.
Within the CyberArk fields you need to enter the name of the Properties present in the corresponding Platform ID on CyberArk.
Pay attention to uppercase and lowercase letters.
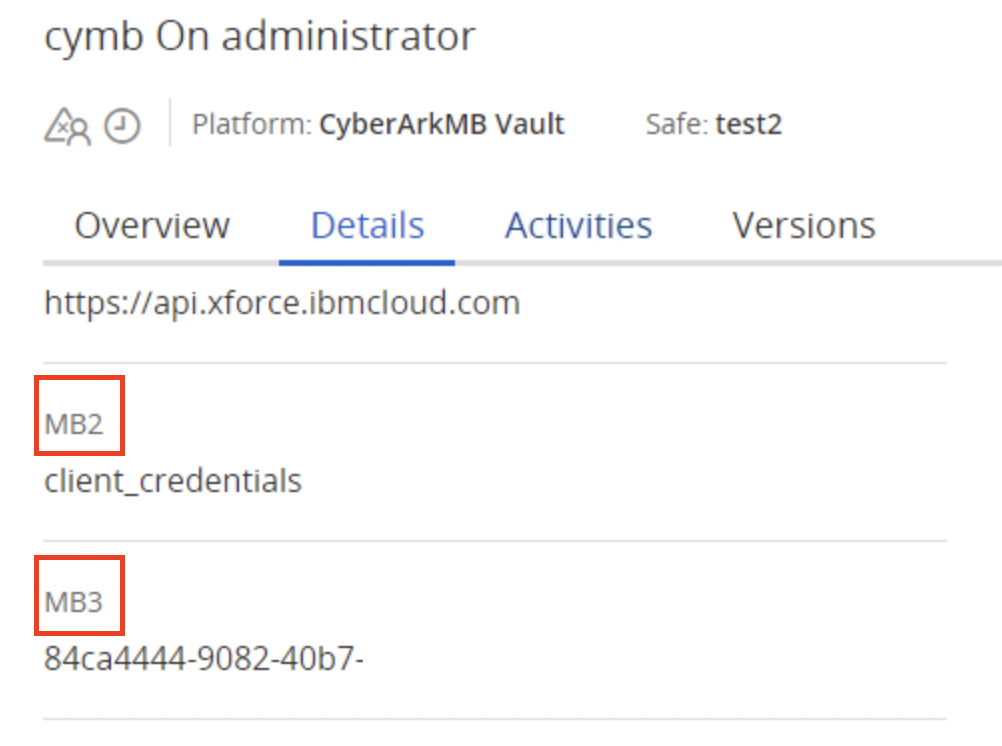
Through the name of the Properties, (in the above case MB3) during the execution of the resource, it will be replaced with the value present on CyberArk for that resource, in our case 84ca4444-9082-40b7-.
In the fields enabled for CyberArk, in addition to the account properties, you can also recall the value of the CyberArk Account password, to do this, write the word Password in the field.
If the checkbox for CyberArk is enabled for a resource field, the data type allowed for that field will be string only, even if the same field was configured to accept lists, checkboxes, numbers, and more.
The only property that will be retained is the mandatory nature of the field.
Values entered in the field not enabled for CyberArk, if previously entered and saved, will be retained if the field becomes enabled for CyberArk. The same is not true otherwise.
If the CyberArk switch is enabled and one switch on the field line is disabled, that CyberArk field value will be saved empty.
Configuring the automation bridge for CyberArk
If you are using CyberArk, you will need to add the following certificates given by CyberArk:
**RootCA**new.crt**
**client**new.crt**
**client**new.pem**
to the /opt/automation-bridge/ directory.
The names must be exactly the same.
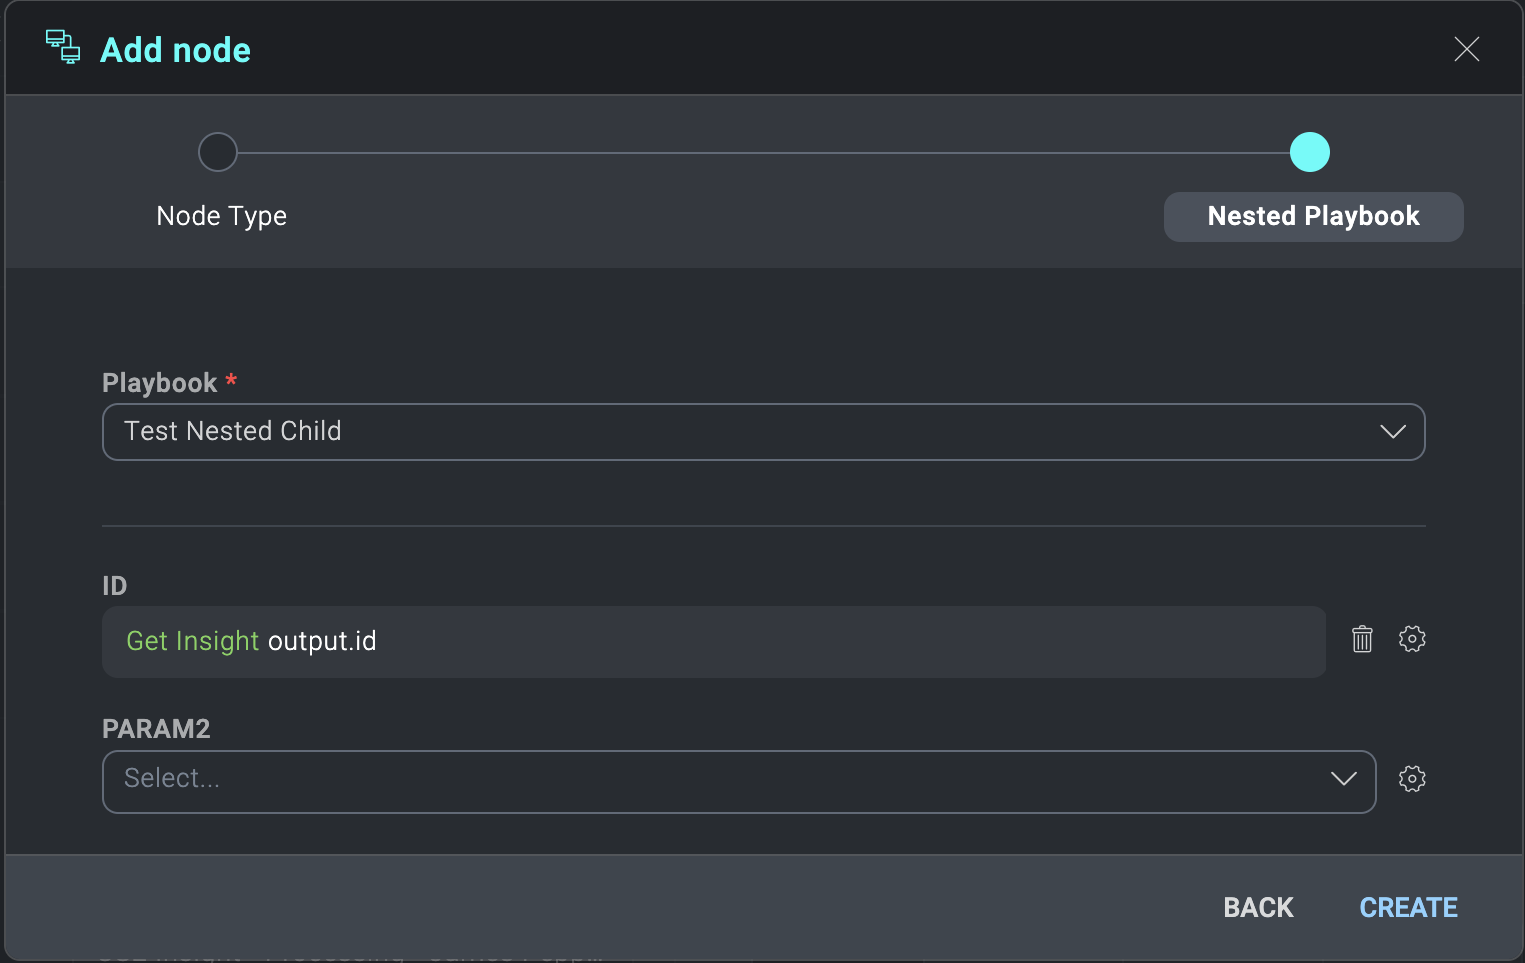
Pass attributes to a nested playbook
When you nest a child playbook within a parent playbook, you must pass parameters from the parent to the child to be utilized within the child playbook actions.
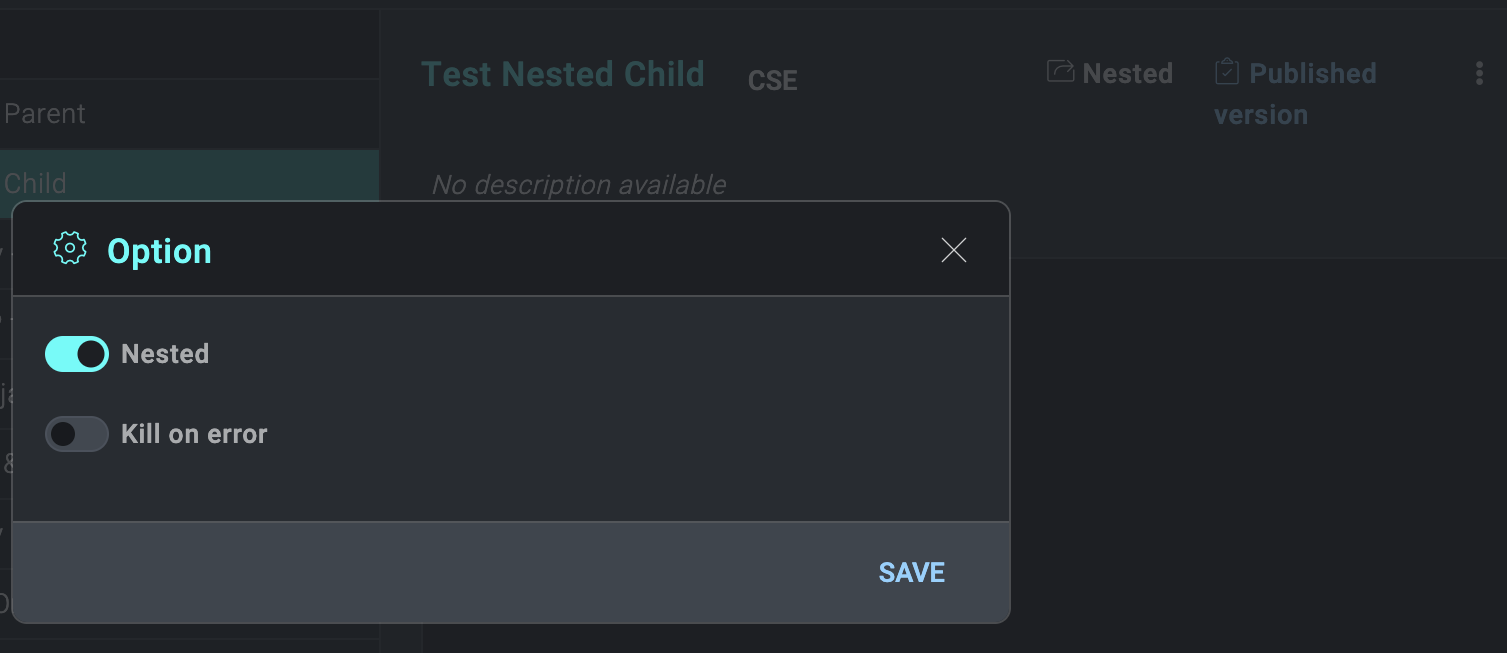
- Select the playbook (the child) you want to nest within another playbook.
- Click the three-dot kebab menu icon in the upper-right corner of the child playbook, select the Nested option, and click Save. This tags the playbook as a child and prevents adhoc testing against the child, since it will rely upon the parent to provide it inputs.
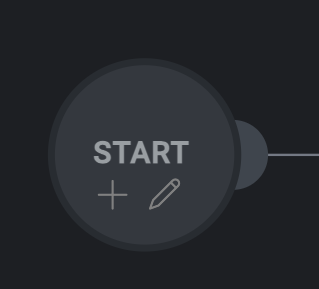
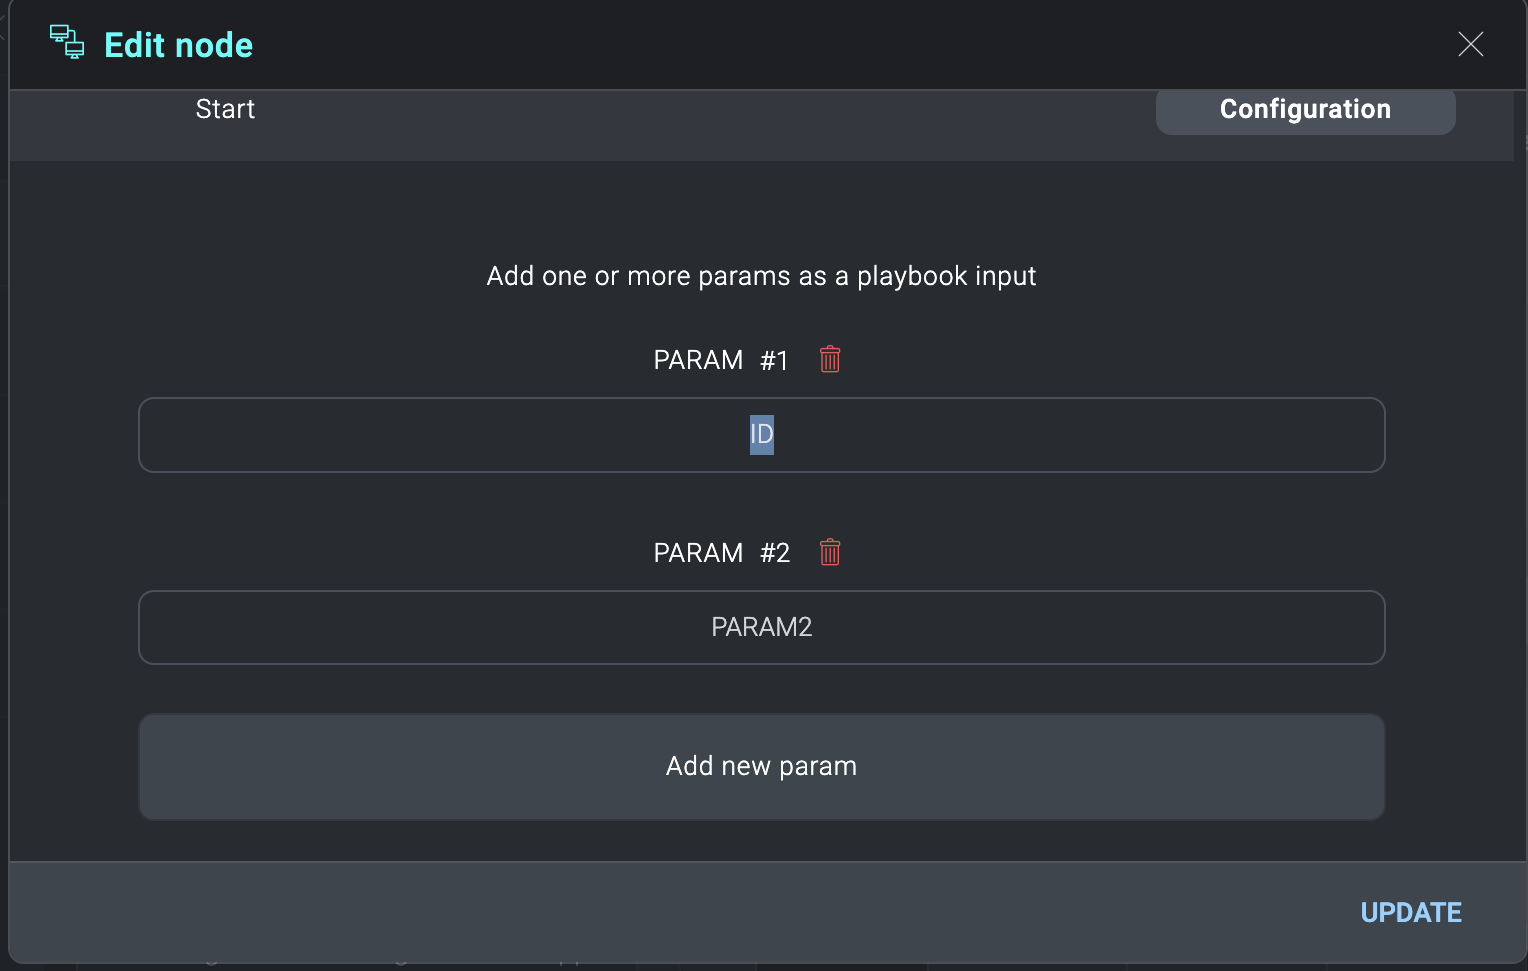
- Click the Edit button at the bottom of the screen, then the Edit button on the Start node.
- Add the parameters you would like your child playbook to receive from the parent. These can be arbitrary names and do not need to be aligned to any field schema. They will be mapped from the parent nodes.
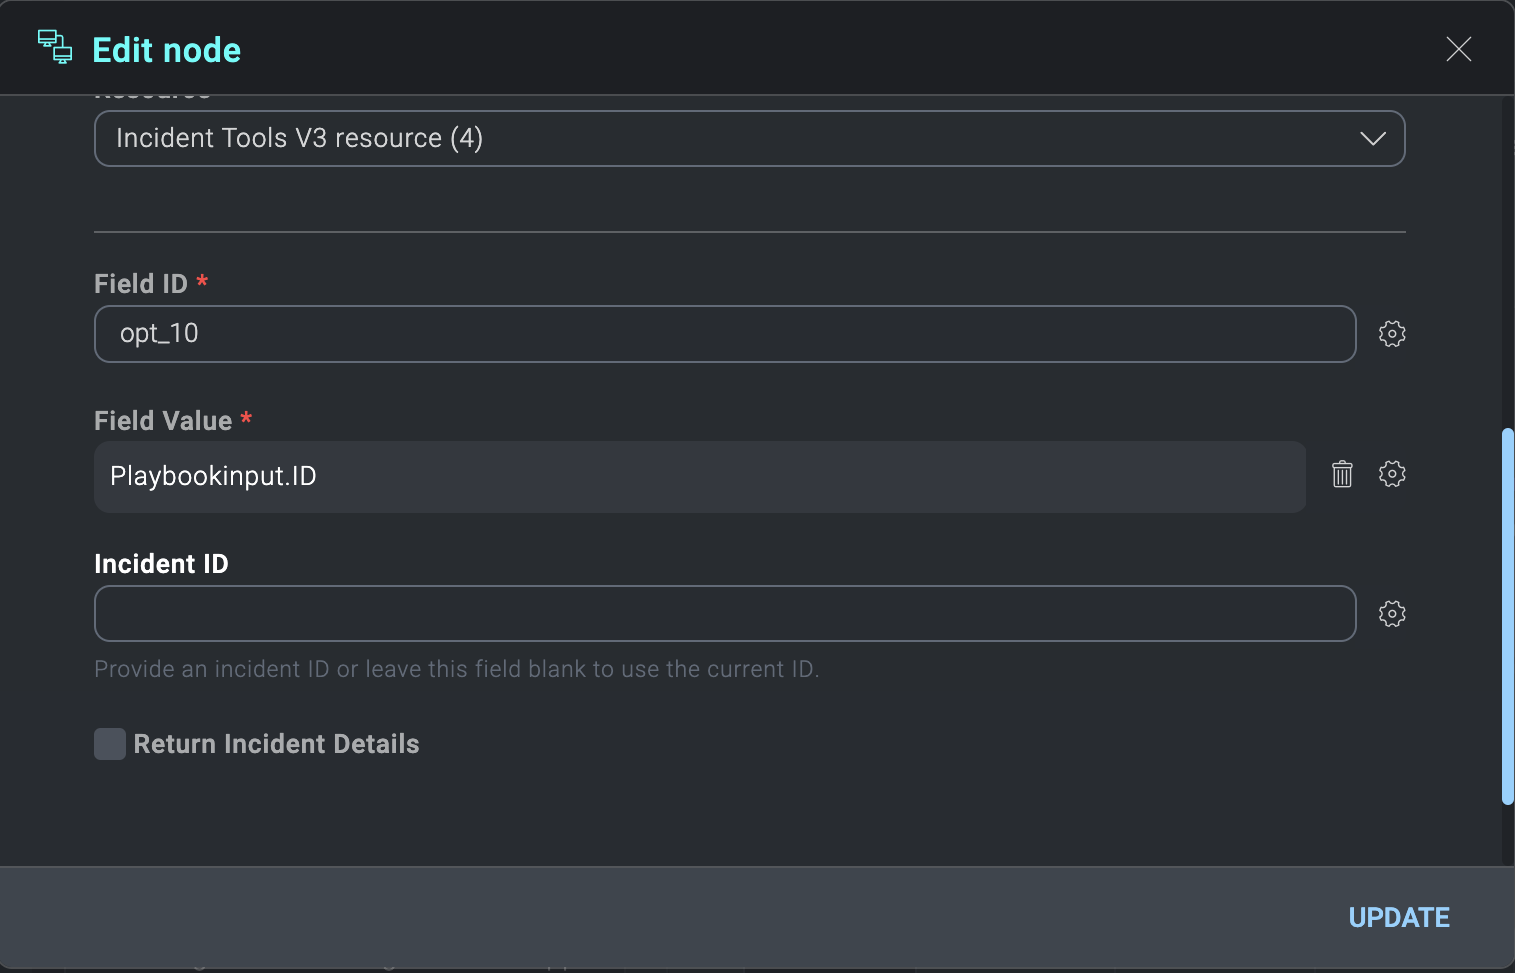
- It’s important that your child nodes make use of these parameters. These will be accessible by editing your relevant child nodes, selecting the cog wheel, and selecting the relevant playbook input. In the example below, we use the playbook ID input parameter that will come from the parent.
- Save and publish your child playbook.
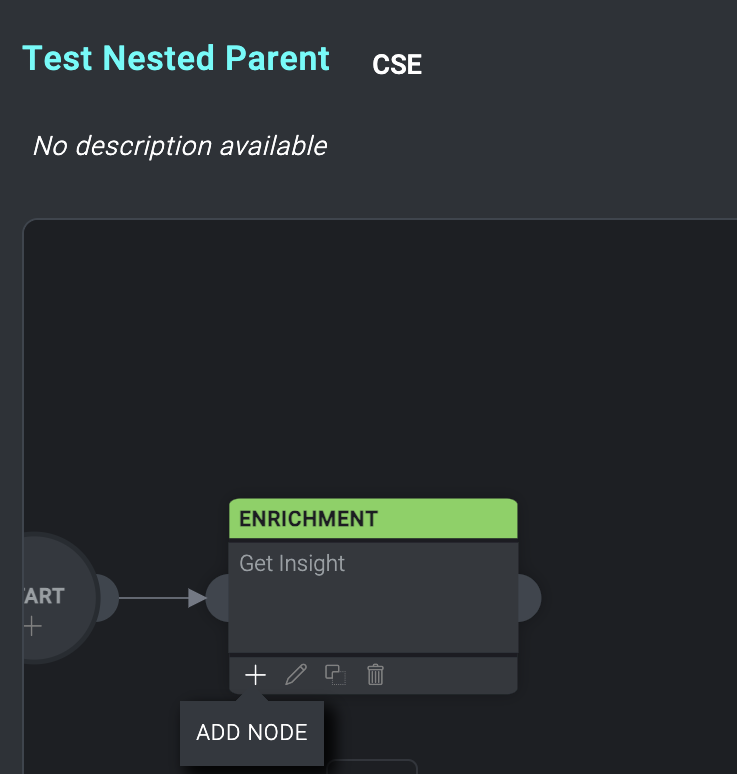
- Navigate to your parent playbook. Add a new node.
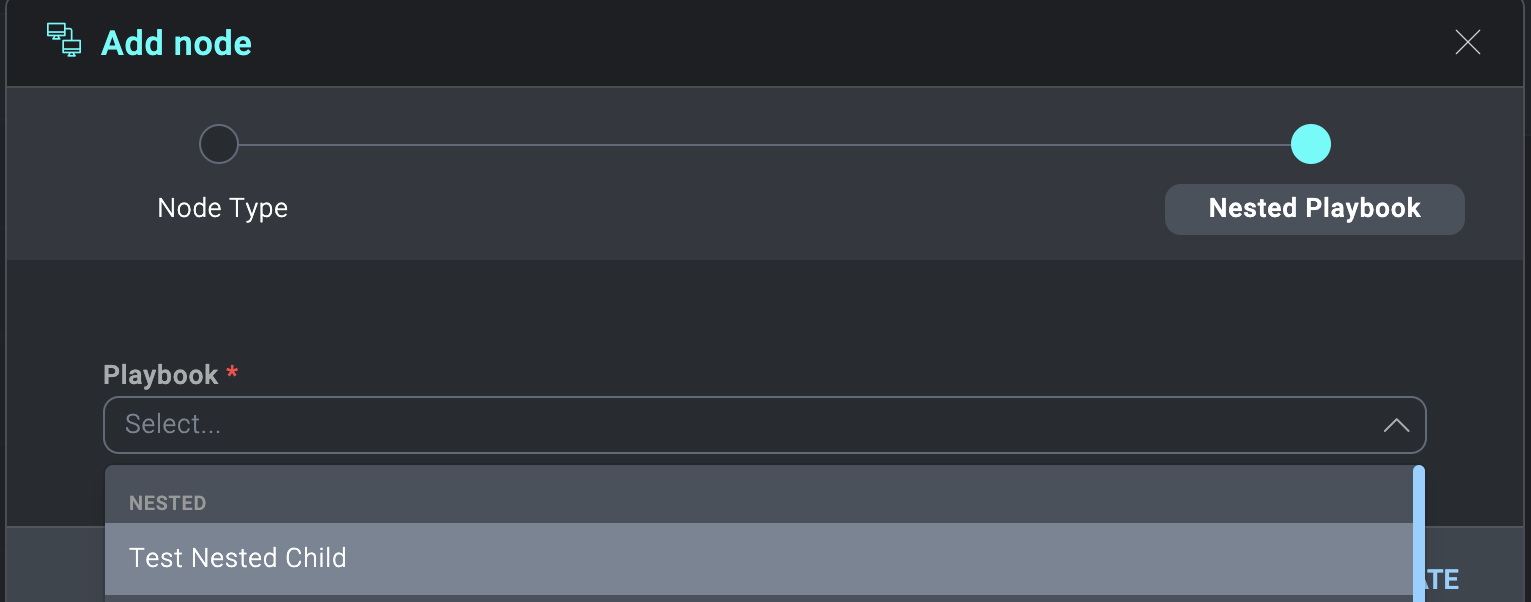
- Select Playbook.
- Select your child playbook.
- You will see the parameters that you had set from your child playbook. Use the cog wheel to set these parameters based on your parent action nodes.
- Save and publish your parent playbook.
You will now be able to perform tests against your parent playbook, and your child playbook will receive the parameters from the parent.